Package Geometry
Package Geometry is a tool that visually simulates the optimal arrangement of goods inside the boxes before packing them. The feature is powered by Zia: Zoho’s in-house AI.
Benefits of using Package Geometry:
- It helps you decide what item goes into which box and in what arrangement.
- Picks the right boxes for a compact arrangement. Thus, minimizes wastage of space within the boxes.
- Package slips can be generated for each box.
Set Measurement Units
Goods support dimensions and weight. To compute package geometry for an order, you need to set the measurement units for your goods.
To set the measurement units:
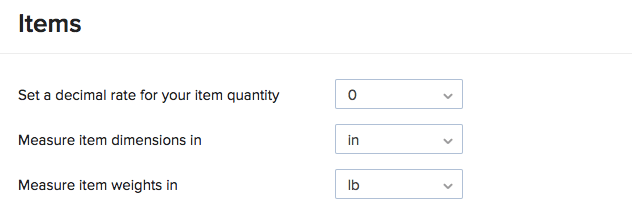
- Go to Settings > Preferences > Items.
- Choose how you want to measure the dimensions (inches or centimeters) and weight (pounds or kilograms) of your items.
- Click Save at the bottom of the page to apply the changes.
Enter Item Dimensions
It is recommended that you enter the dimensions of all your items in advance. If not, you can skip this step and enter them at the time of computing package geometry.
To enter the dimensions for the existing items:
- Go to the Items module in the sidebar.
- Click an item name to open the details.
- Click the
 icon to edit the item details.
 - Enter the dimensions and weight of the item.
- Click Save at the bottom of the page.

Likewise, you can also enter the dimensions of the item at the time of creation.
Compute Package Geometry
To compute package geometry for the items in a sales order:
- Go to the Sales Orders module.
- Click to open a Draft or Confirmed sales order.
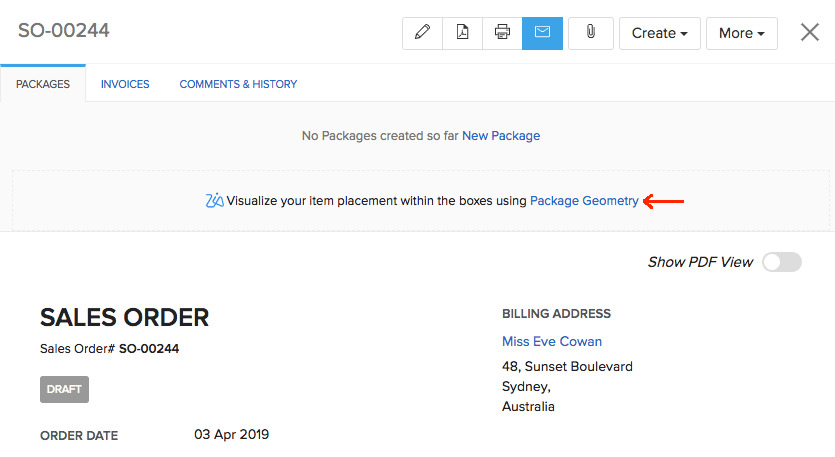
- Go to the Packages tab on the sales order page.
- Click the Package Geometry option.
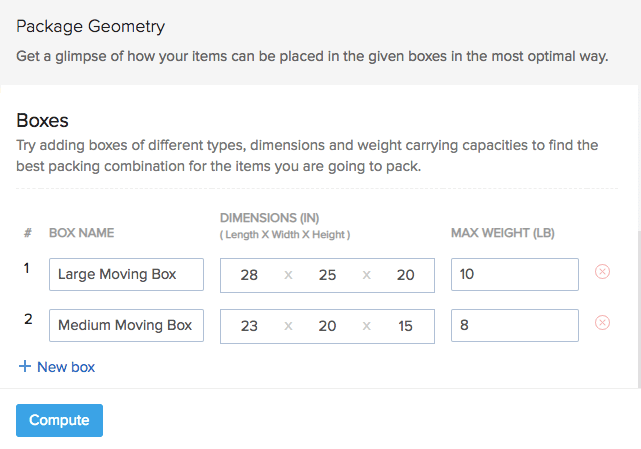
Here, you will provide box details such as the types of boxes you possess along with its dimensions and weight capacity.
- Enter the box name/type. For example: Large Cardboard Box.
- Enter the dimensions of the box and the maximum weight it can hold. Make sure that the dimensions and weight holding capacity of the box is greater than the items.
- Likewise, you can add more box types by clicking the + New Box option.
Note: Each box type should be entered only once. The system generates as many boxes required from each given type to pack all the items compactly.
- Click the Compute button.
The boxes and its contents will be projected in 3D.
Click the Add option to place the items into the box.
Click the box number at the top to navigate to the next box and add the desired contents to it.
Pro Tip: You can also hold and drag the 3D image in any direction to view its contents in different perspectives.
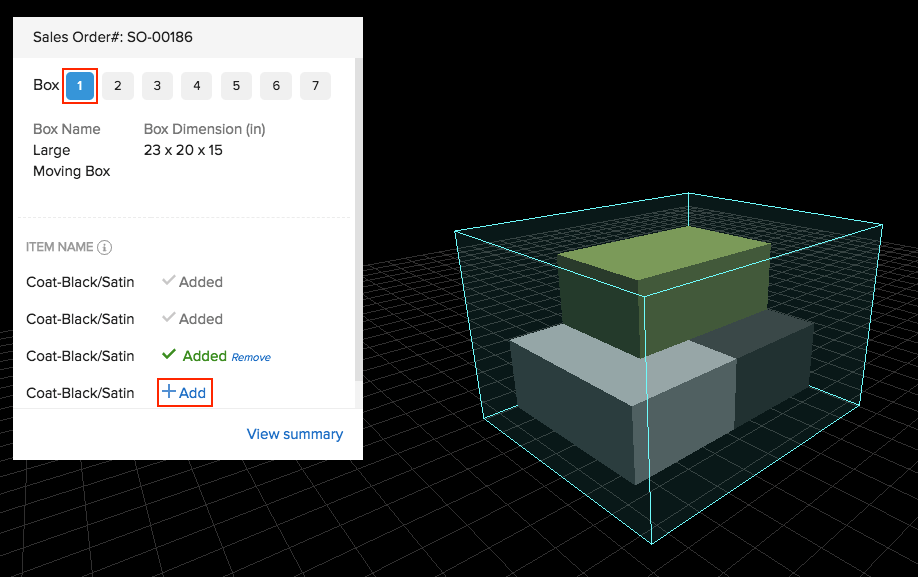
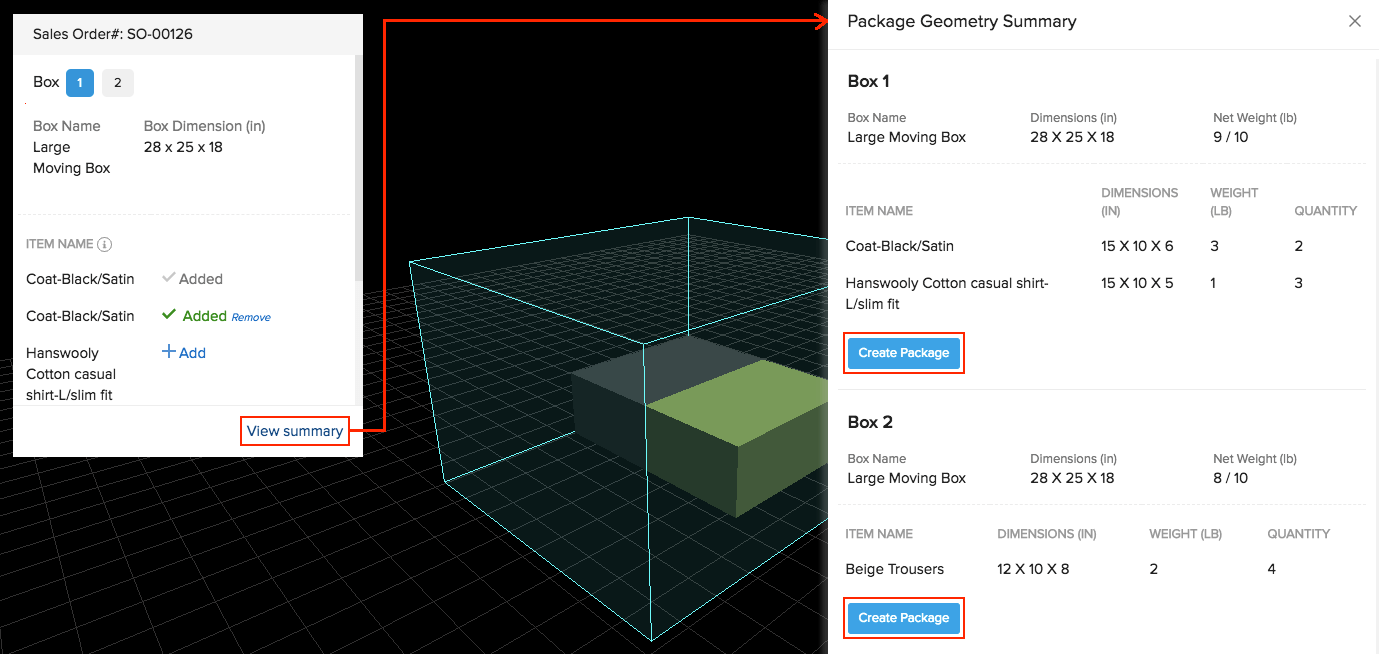
- When you’re done adding the items, click View Summary.
Package Geometry Summary
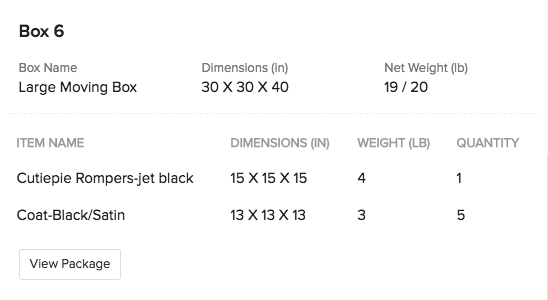
The summary section displays the details of the contents added in each box.
- Click the Create Package button to generate package slips for the respective box.
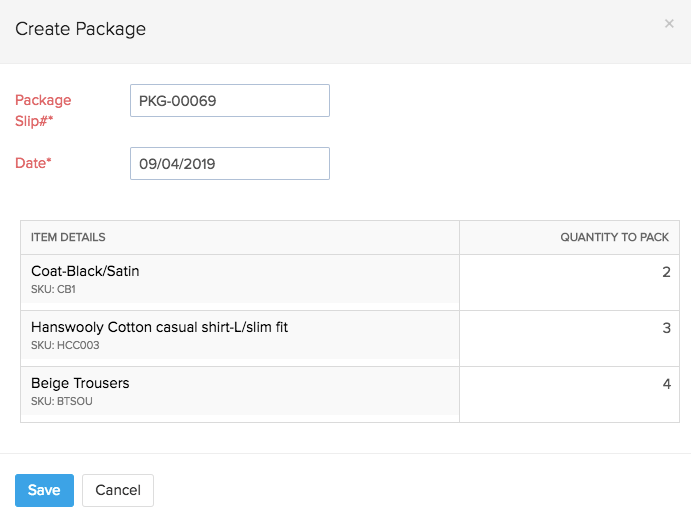
- Make changes to the package slip# and date if needed.
- Click Save to create a package slip for the box.
- From the summary section, click the View Package button to navigate to the respective package slip details page. You can then ship this package to your customer.
