
Managing Reports
Configure User’s Level of Access to a Report
If you want to limit certain user’s access to a report, you can configure the permissions for those roles specifying whether they can view, export, schedule, and share the report. You can edit these permissions for existing roles or configure them when creating new roles.
Scenario: John runs a digital showroom and is the admin of the Zoho Inventory organization which he uses to manage online and offline orders. He has dedicated teams for sales and purchases of goods. So, he configures the report permissions in Zoho Inventory in such a way that each team can only access the reports which pertain to their job. He also limits the access to each report based on role.
To configure permission for a role:
- Go to Settings, then Users & Roles.
- Edit a role or create a role. Note: You will not be able to edit predefined roles.
- Scroll down to the Reports section.
- Click the checkbox next to Enable full access for all reports option if you want to provide complete access to all the reports for this role.
- You can also expand each report group and configure the access level for the reports under the group.
- Click Save at the bottom of the page.
Schedule Reports
You can schedule your reports to be sent to your email address or other users in the organization. These reports will be sent at different time intervals at a specific time chosen by you.
Zoho Inventory allows you to schedule a report to be generated on a weekly, monthly, quarterly or yearly basis as per your preference. The generated report will then be sent to the email addresses of your choice.
The Schedule Report option is not available in the following reports:
- Sales Return History
- Customer Balances
- Vendor Balances
- Committed Stock Details
- ABC Classification Summary
- API Usage
Note: Only admins and the users who have permission to schedule reports can schedule reports.
To schedule a report:
- Go to the Reports module from the left sidebar.
- Select the report that you want to generate based on a schedule.
- Click the Schedule Report option at the top right corner.
- Select the criteria based on which you wish to schedule the report.
- Click Save.
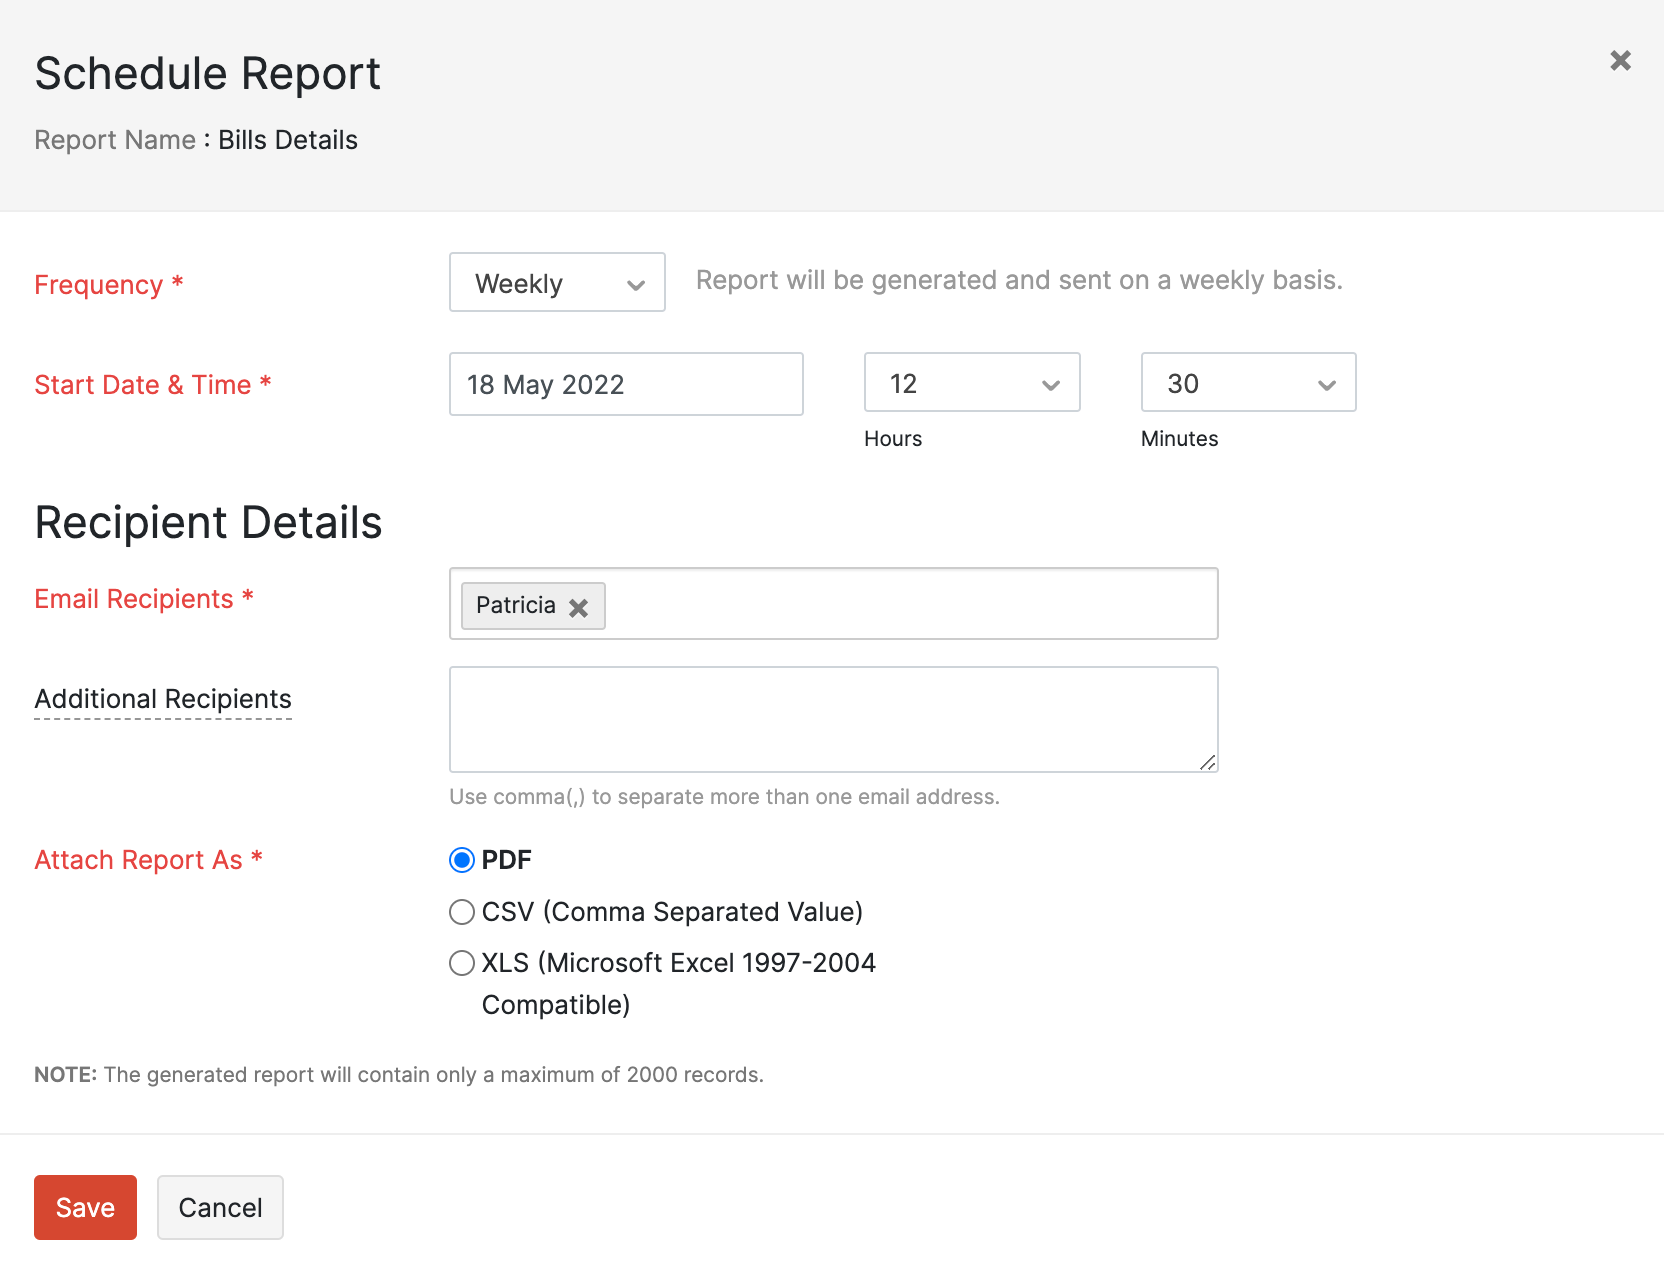
The report will be automatically sent to your email at the specified time and interval.
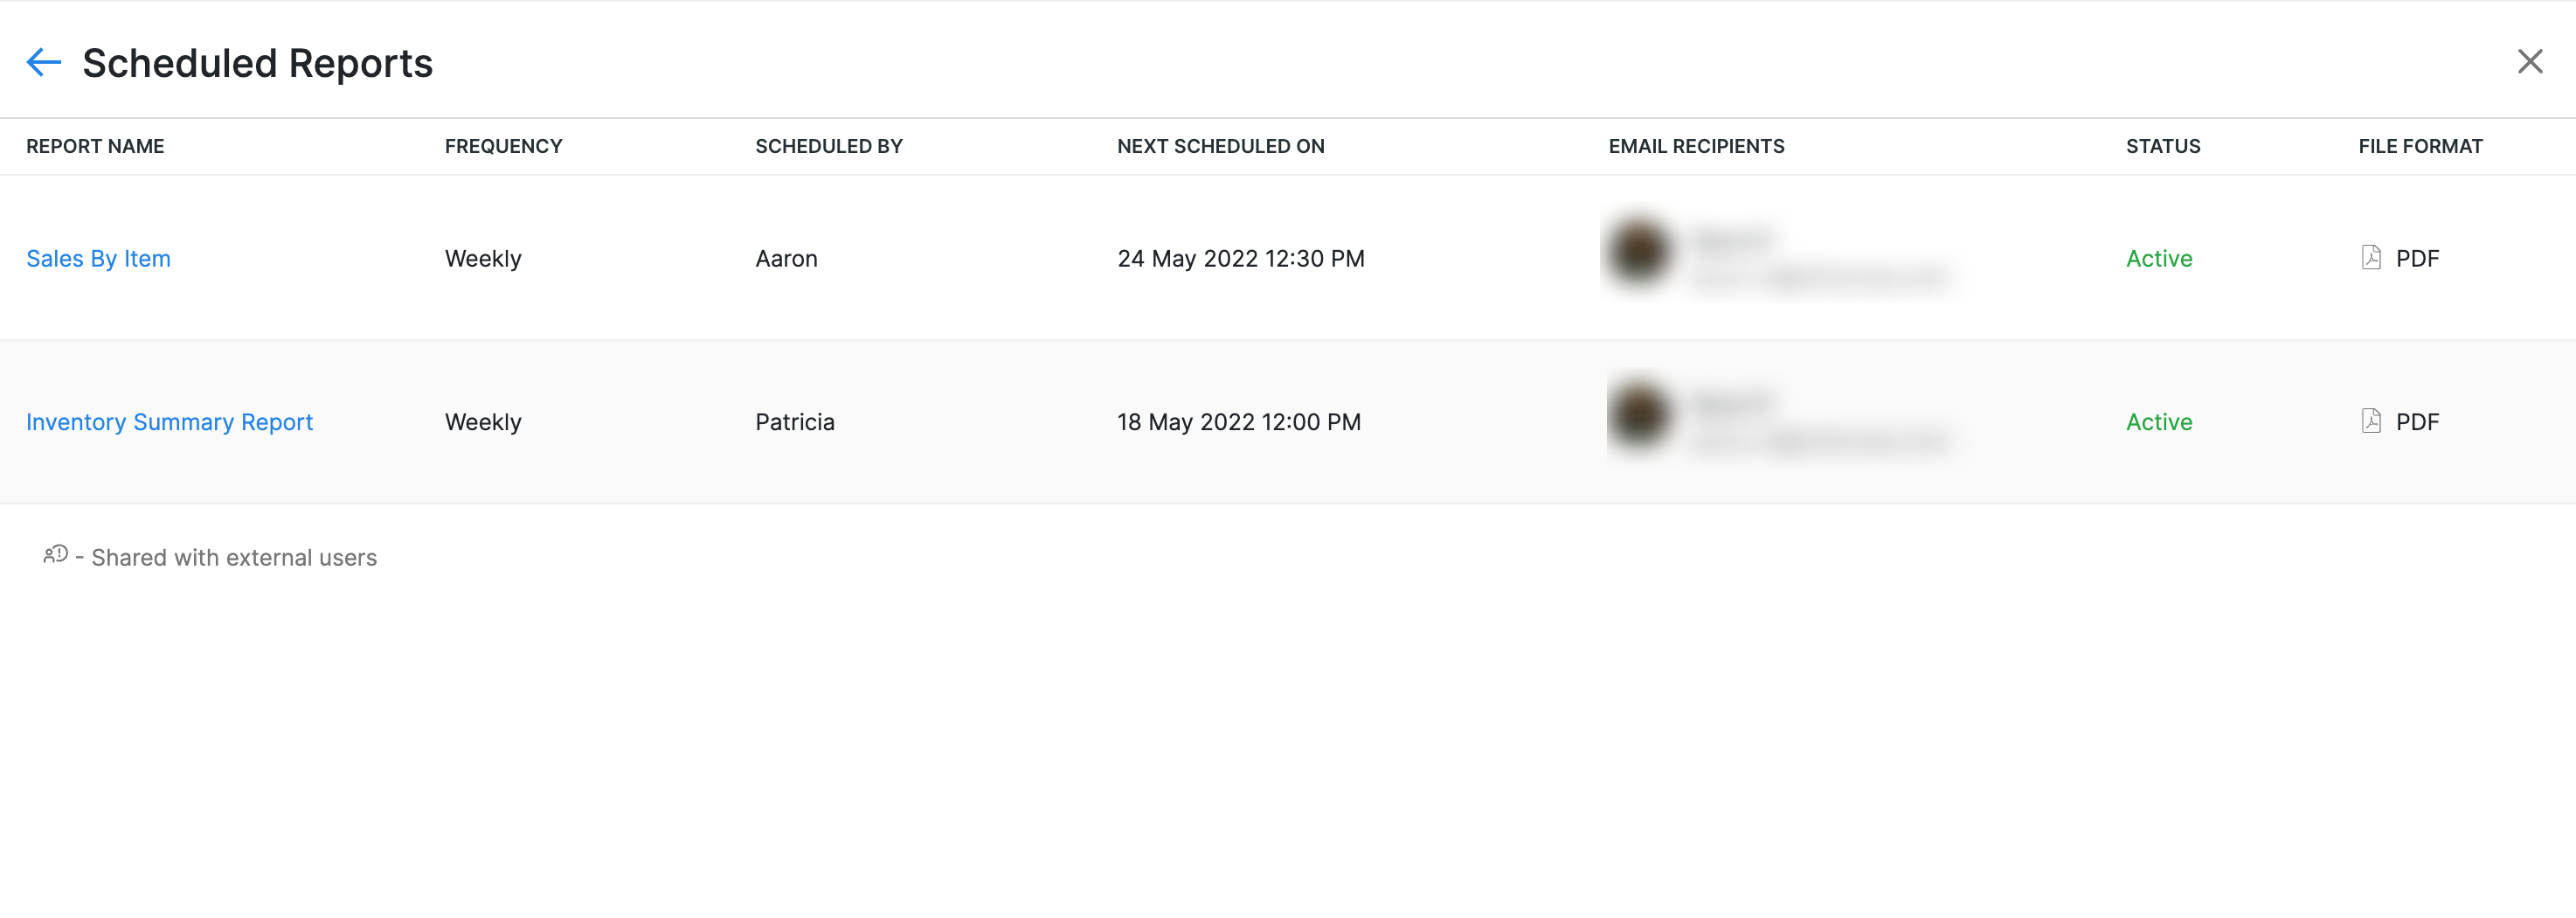
View Scheduled Reports
Zoho Inventory lists all the reports you’ve scheduled, for your reference. You can keep track and view the details of them in our dedicated Scheduled Reports page.
It details the frequency of your scheduled report, the user who scheduled the report, the email recipients, the status of your report, the date when your next report is due, and the file format chosen.
Prerequisite: Only admins and the users who have permission to schedule reports can schedule reports.
To view your scheduled reports:
- Go to the Reports module from the left sidebar
- Click Scheduled Reports in the top right corner.
Mark Scheduled Reports As Inactive
To mark a scheduled report as inactive:
- Go to the Reports module from the left sidebar.
- Click Scheduled Reports in the top right corner.
- Select the report that you want to mark as inactive.
- In the popup, click Mark As Inactive next to Status.

- Click Save for the changes to take effect.
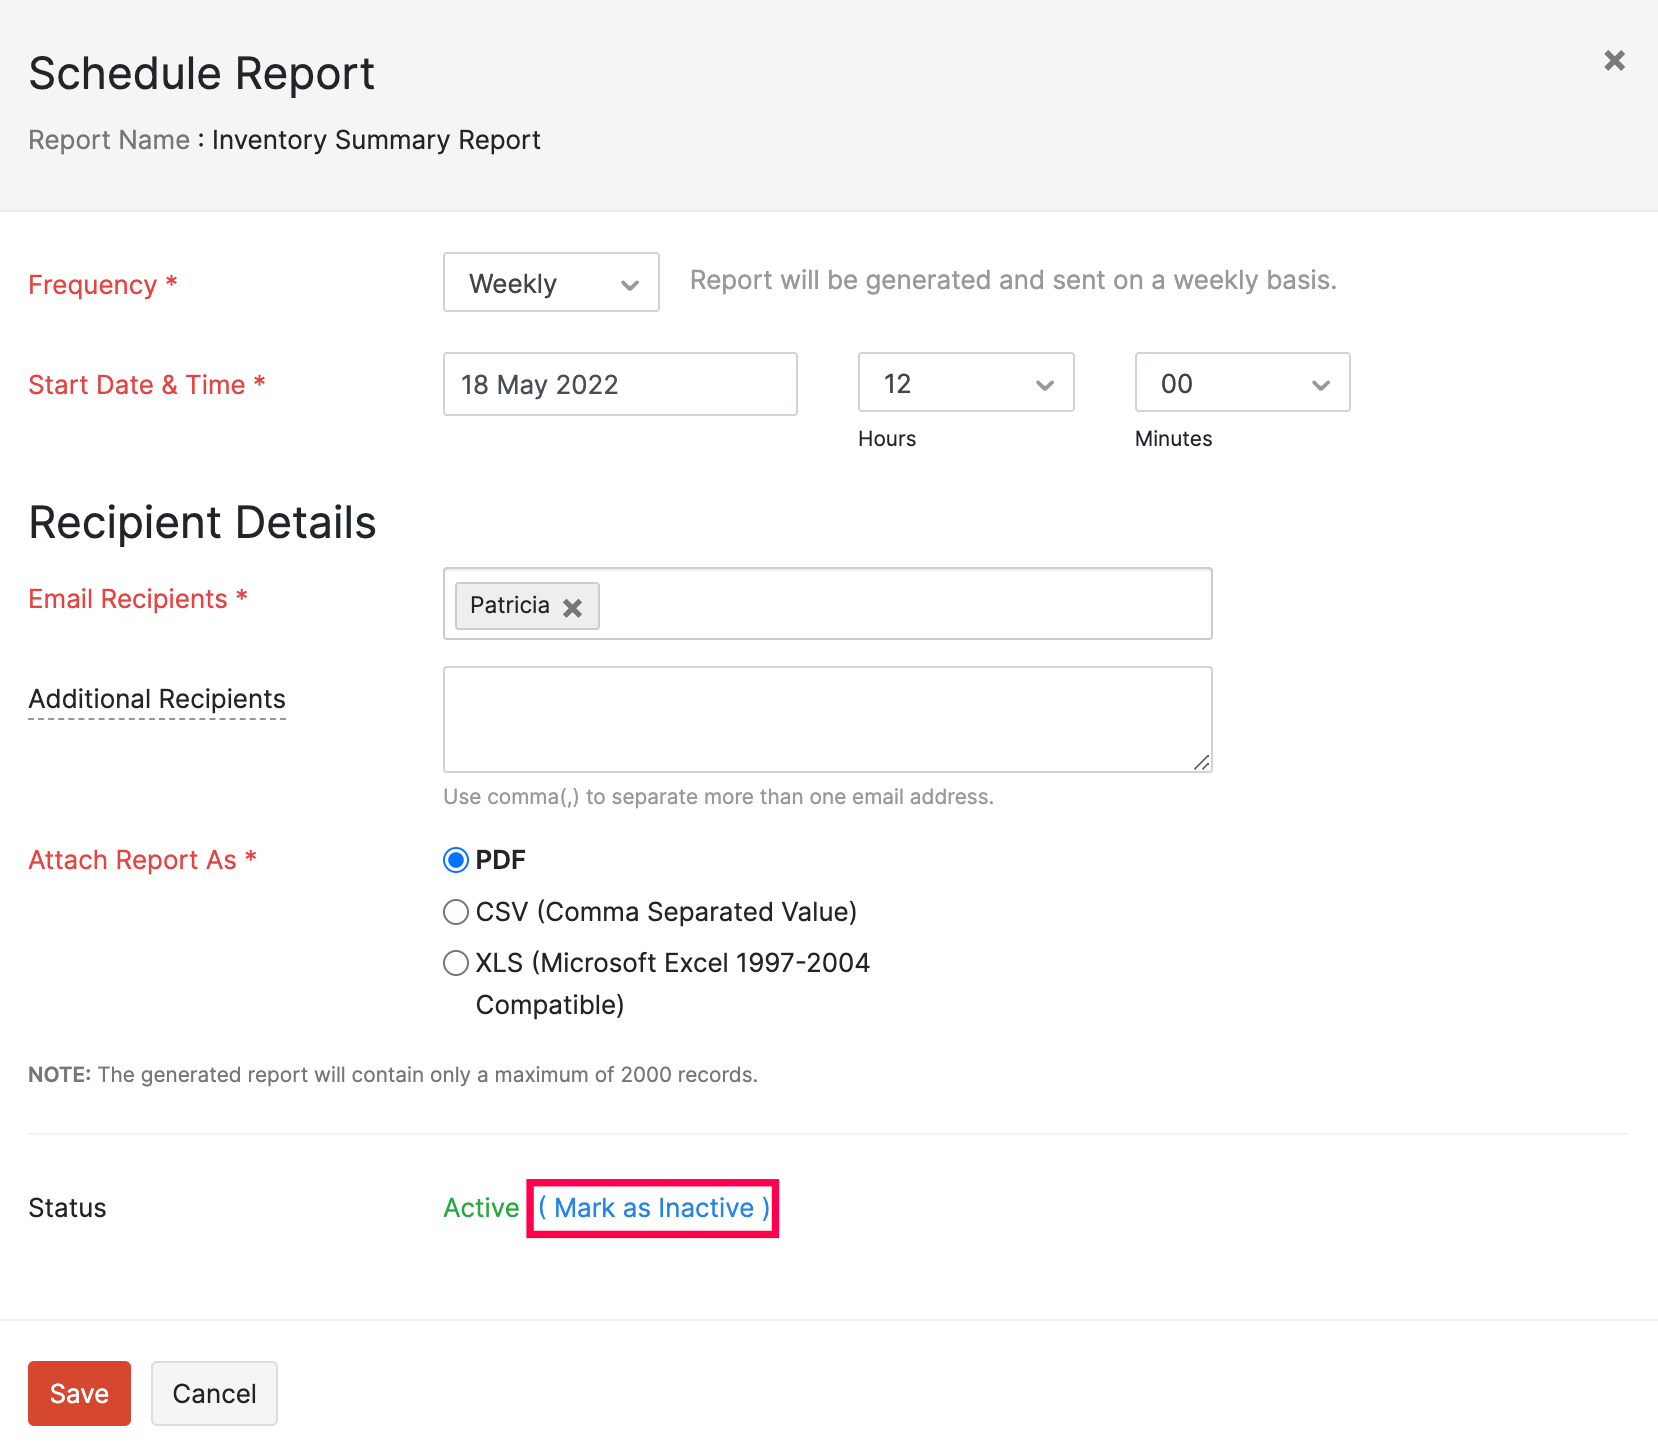
If you wish to mark the scheduled report as active, click the Mark As Active option next to Status.
Share Reports
In Zoho Inventory, admins have access to all the reports. Based on the permissions granted for a role, a user’s access to reports might be limited. In such cases, when the user needs access to a report, you can share the report with them.
To share a report with another user:
- Go to Reports in the left sidebar.
- Select the report you want to share with another user.
- Click the Share icon at the top right corner.
- Select the user with whom you want to share the report and the level of access they can have.
- Click Share.
Scenario: John is the Sales lead in his organisation, however, he doesn’t have access to the reports module. So, he approaches the admin of his Zoho Inventory organisation to give him access to the Sales by Customer report. Now, using the Share Report option, the admin shares the report with John so that he can view, export, and schedule the report.
Note: Only Admin and the users with Share permission in their role can share the report with other users.
Add Temporary Notes
You can add brief notes to your report and print or export them to your device. These notes will however disappear from the app once you refresh the page.
To add a temporary note on a report:
- Go to Reports in the left sidebar.
- Open the report you want to add a note on.
- Click the Add Temporary Note option.
- Enter a note or a brief description of the report.
- Click Update.
The note will be displayed on the footer of your report.
Print Reports
Navigate to the Reports module.
Select your preferred report.
Specify a date range and click on the Run Report button.

Any report can be printed by clicking on the Print button available on the top header.
Clicking on the Print button will take you to a standard printer interface from which you can proceed.
Export Reports
To export a report from Zoho Inventory to your device:
Go to Reports in the left sidebar.
Select the preferred report.
Click the Export As button on the top right corner.
Choose the desired format from the dropdown. You can export your reports in PDF, CSV, XLS and XLSX formats. Additionally, Export to Zoho Sheet option will open the data in a spreadsheet page.
If the report contains sensitive information, check the I want to protect this file with a password option and enter a password.
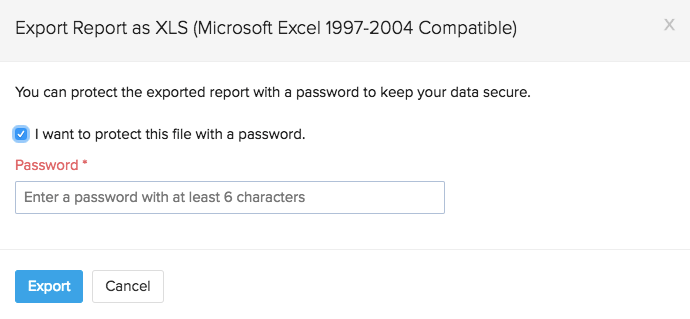
Click Export to download the report securely in the desired format.