
Purchase Receives
A purchase receive in Zoho Inventory is a document that is used to record the items that are delivered or yet to be delivered by your vendor to your warehouses. Creating purchase receives has the following advantages:
- Helps you keep track of the items you receive from your vendors.
- Convert receives to bills and thereby raise bills only for the items that you have received.
- Calculate the stock on hand of an item based on purchase receives.
How To Video
Creating a Purchase Receive
To create a purchase receive:
- Go to the Purchase Orders module under Purchases from the left sidebar.
- Select a purchase order for which you want to create a purchase receive.
- In the purchase order’s details page, click Receive.
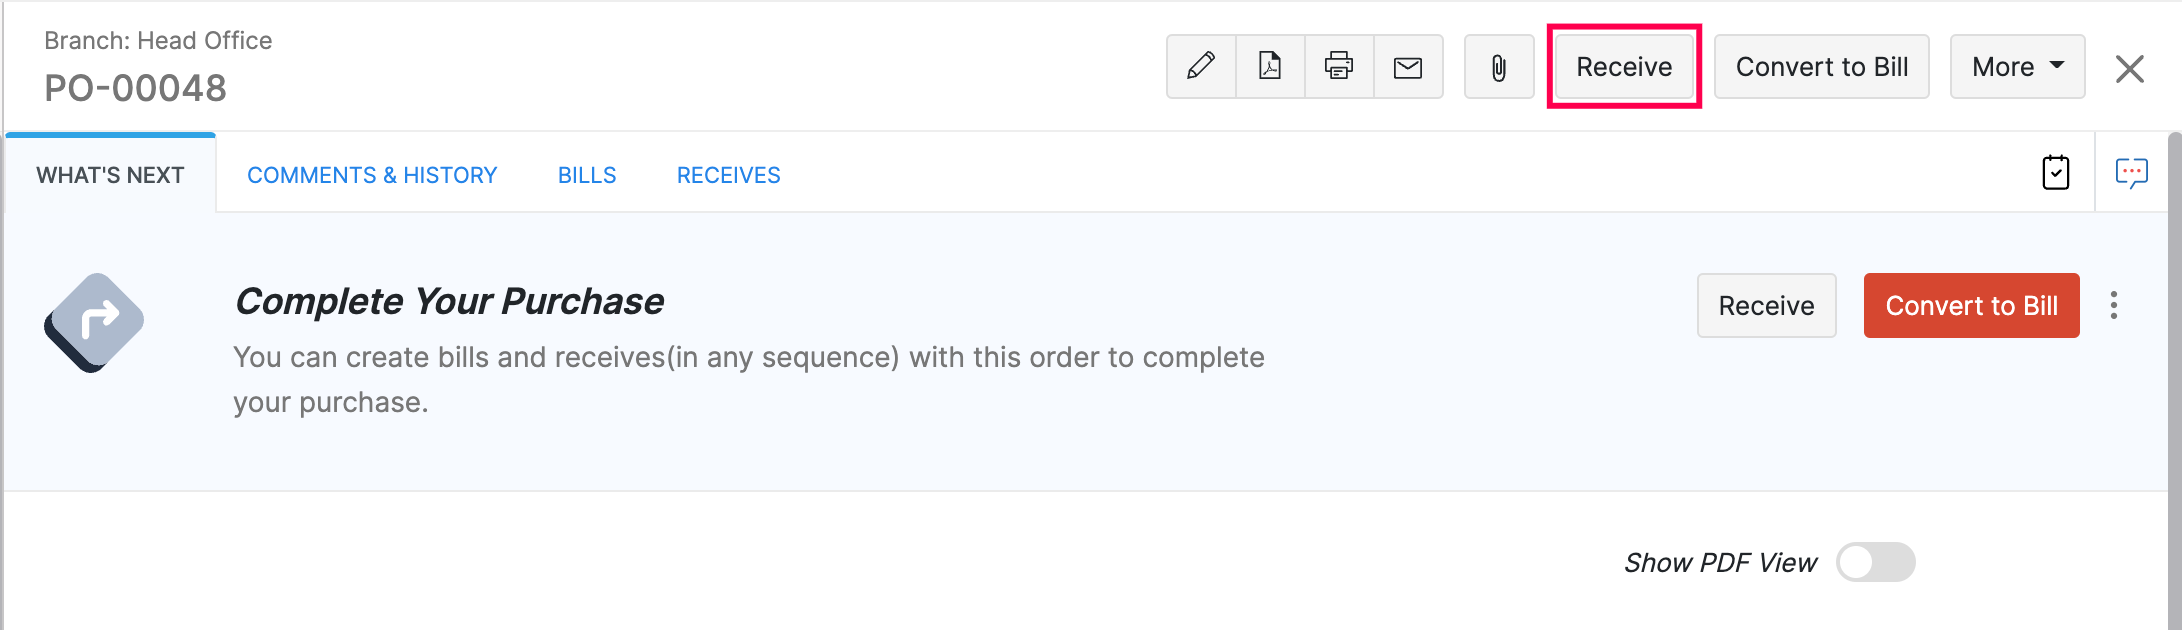
- In the purchase receive creation screen, fill in the necessary details like the Purchase Receive# and the Receive Date.
Pro Tip: You can auto-generate the purchase receive number by clicking on the gear icon next to the Purchase Receive# field.
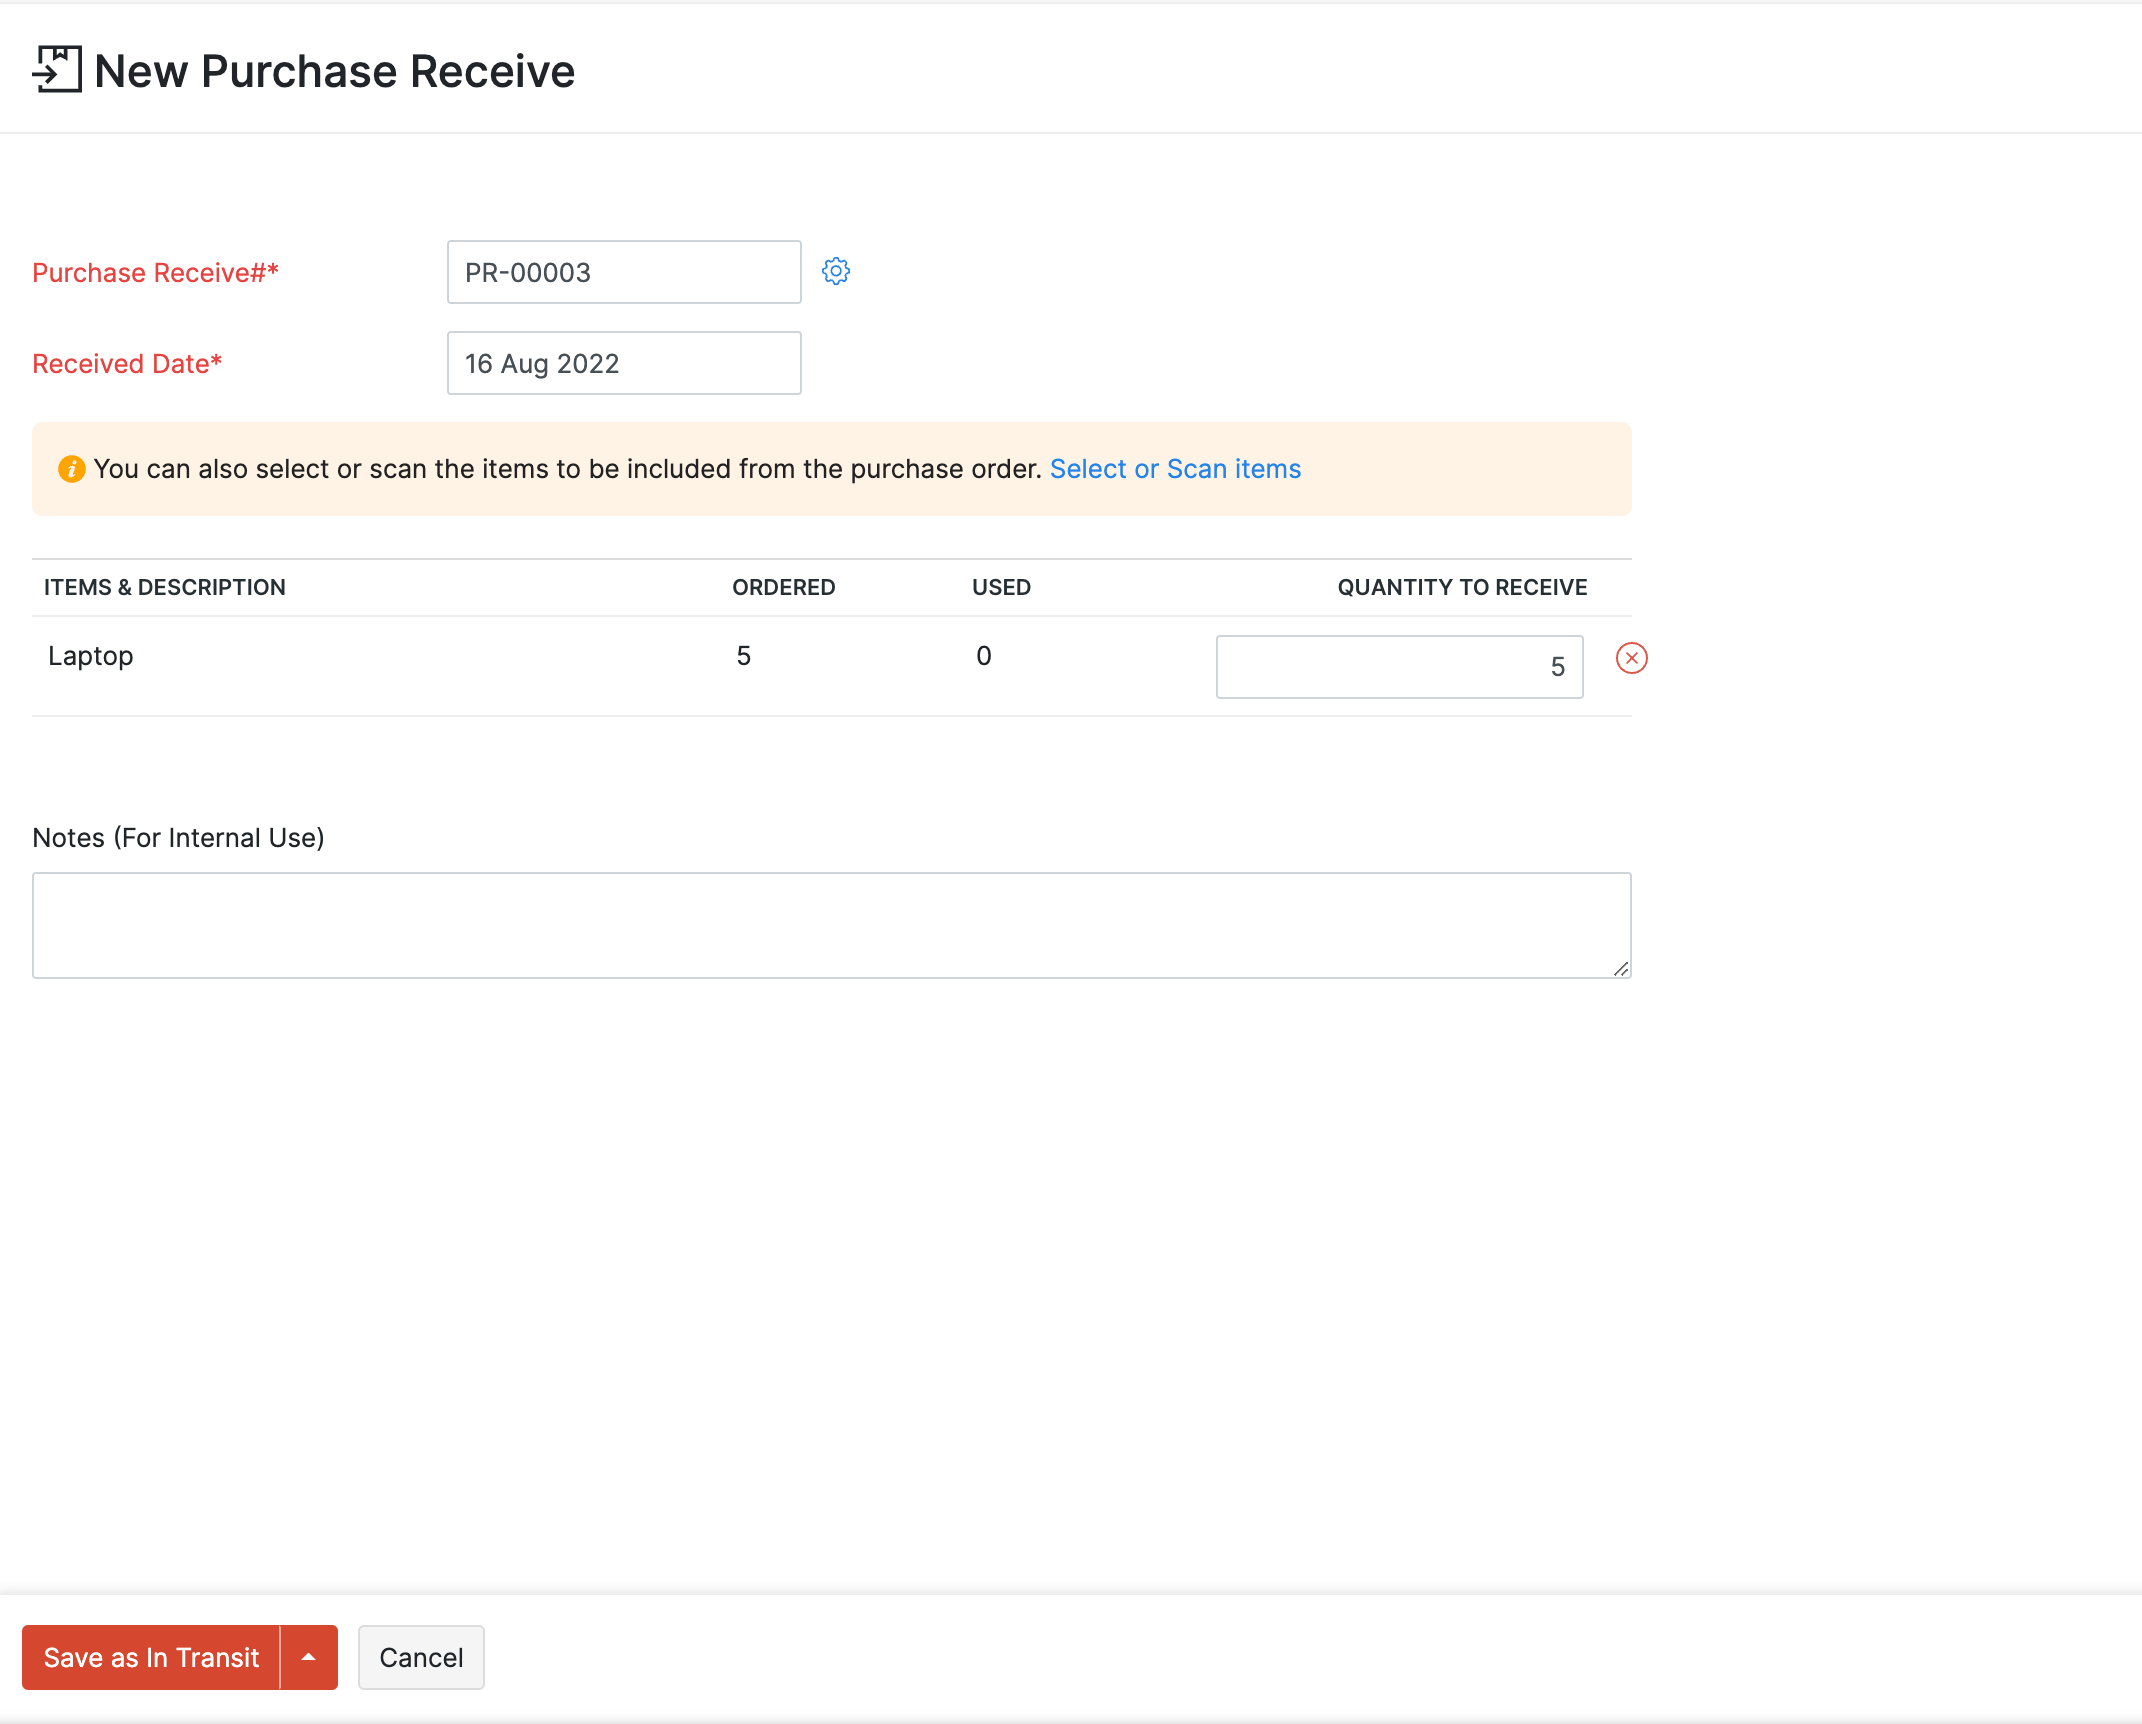
- Enter the quantity of items you want to receive.
Pro Tip: Enable the Select or Scan items option to scan the barcodes or manually add the items from the dropdown.
- If you choose to select or scan items from the purchase order, the quantity to receive will increase accordingly.
- If you have enabled advanced inventory tracking in purchase receives, you can add the serial numbers or batch numbers for the items here. Click the Add Serial Number or Add Batch Number option below the quantity. Enter the serial or batch details of the received item and click Save.
- For orders that you haven’t received yet, click Save as In Transit.
- If you’ve already received the items, click the arrow next to Save as In Transit, and select Save as Received.
Insight: To track serial number or batch details in purchase receives, go to Settings > Preferences > Items. Under Advanced Inventory Tracking, click Configure and choose Packages, Purchase Receives, Return Receipts from the drop down.
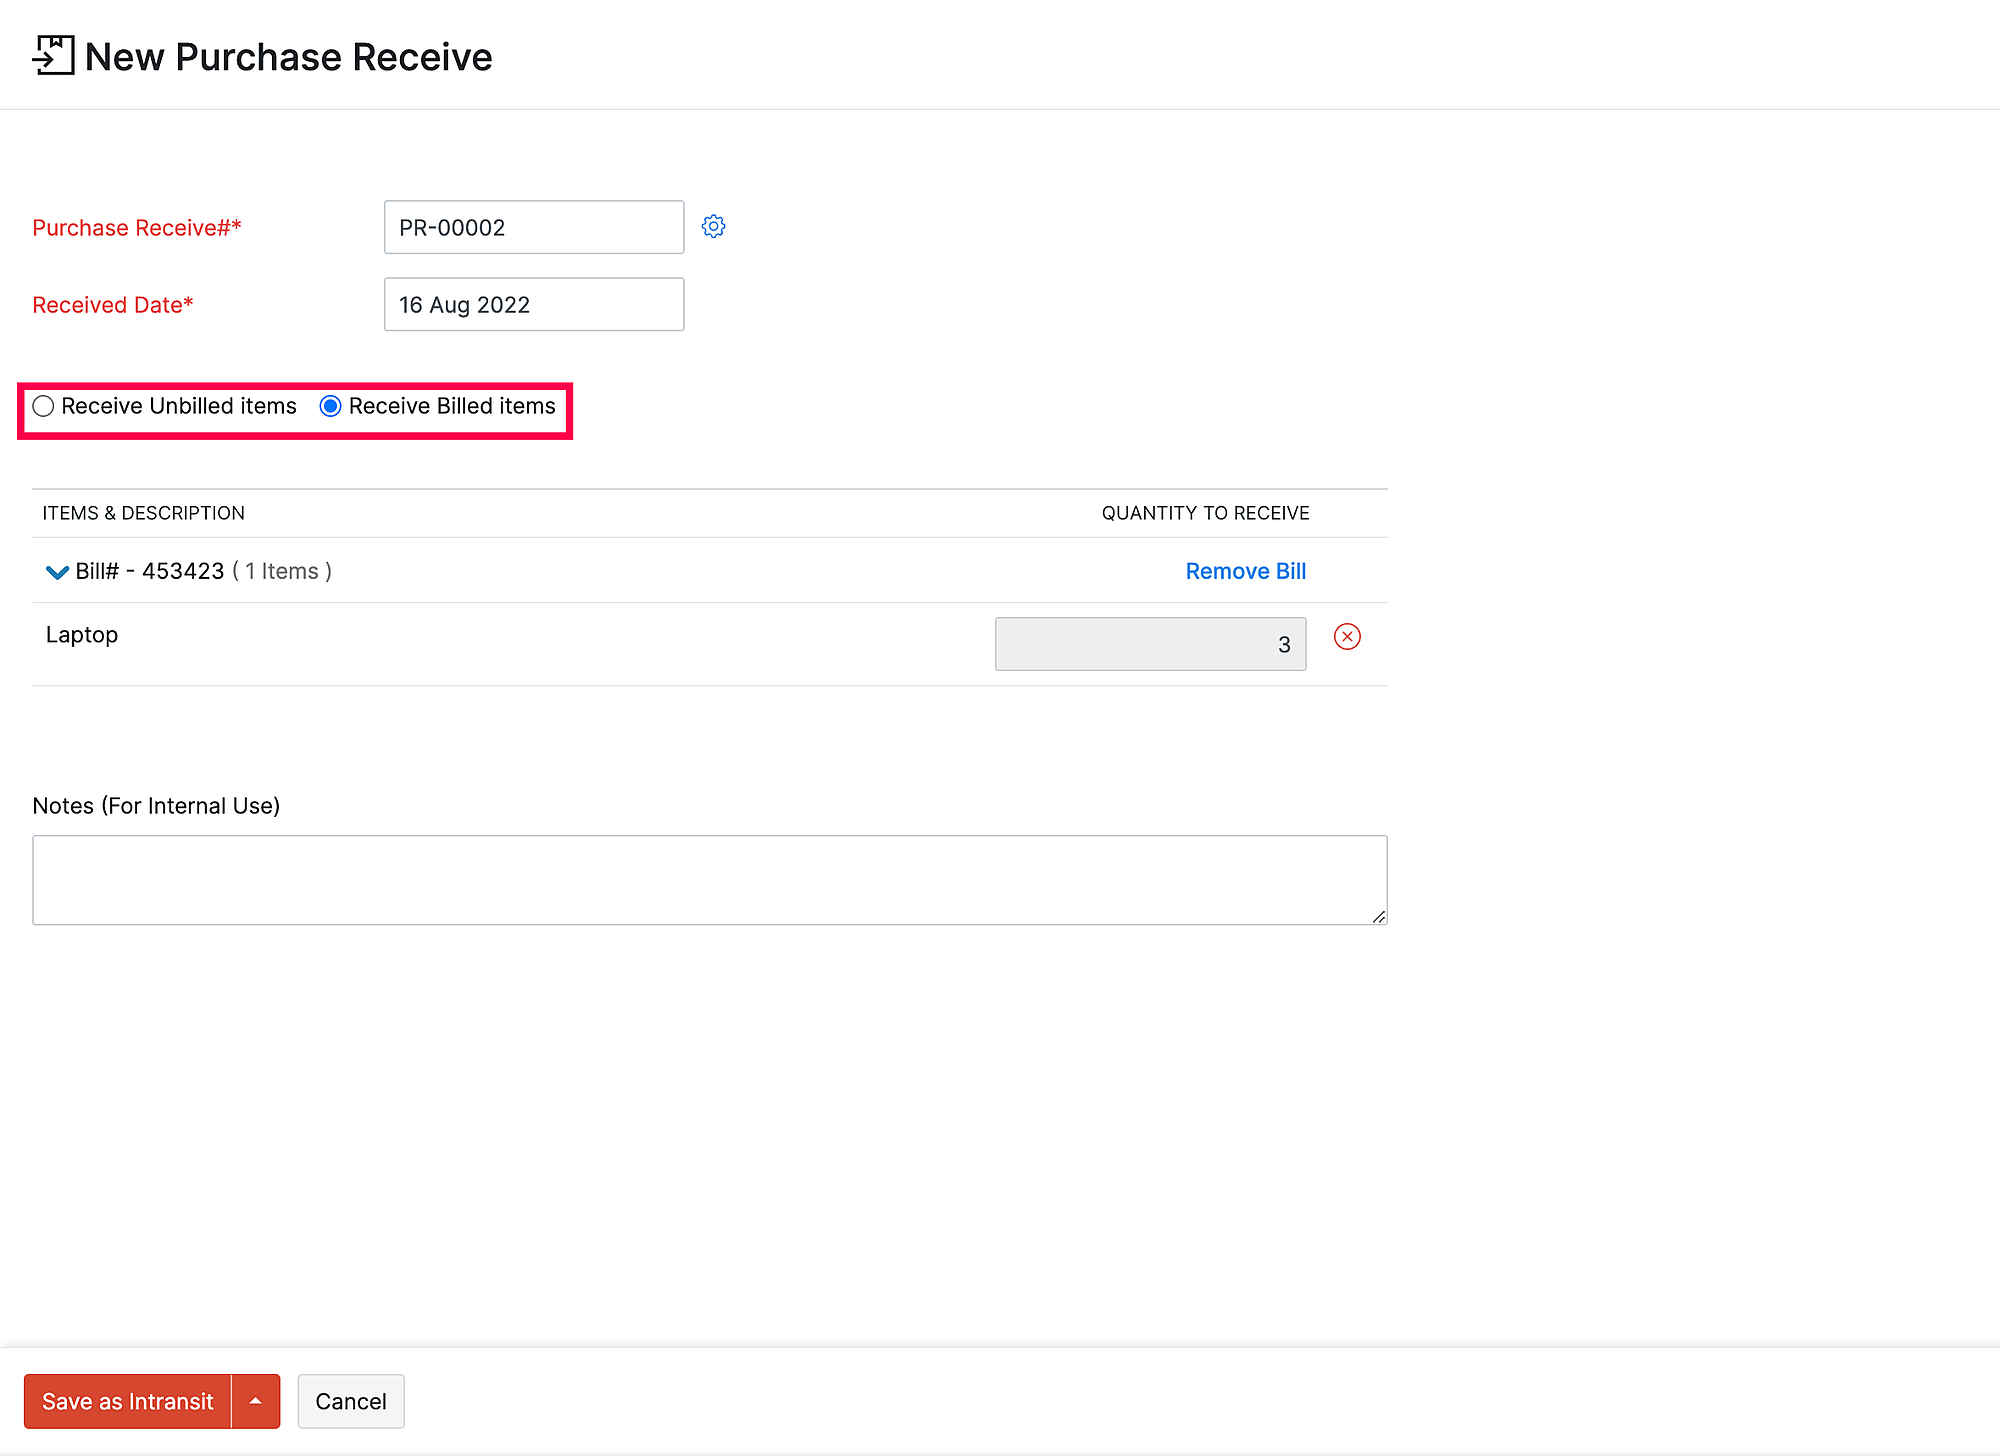
Insight: If you have partially billed the purchase order, you can choose to receive either the billed or unbilled items from it.
Converting Purchase Receive Into a Bill
To convert a receive into a bill:
- Go to the Purchase Orders module under Purchases from the left sidebar.
- Select the preferred purchase order.
- In the purchase order’s details page, go to the Receives section.
- Click Convert to Bill on the right corner of a receive.

- A new page will open along with all the details automatically fetched from the receive.
- Enter the necessary details and click Save.
Your purchase receive is now converted into a bill.
Editing a Purchase Receive
To edit a purchase receive:
- Go to the Purchase Receives module under Purchases from the left side bar.
- Select the preferred purchase receive.
- In the purchase receive’s details page, click the edit icon from the top right corner.

- Enter the necessary changes and click Save. The purchase receive will be modifed with the new information.
Exporting Purchase Receives
To export purchase receives:
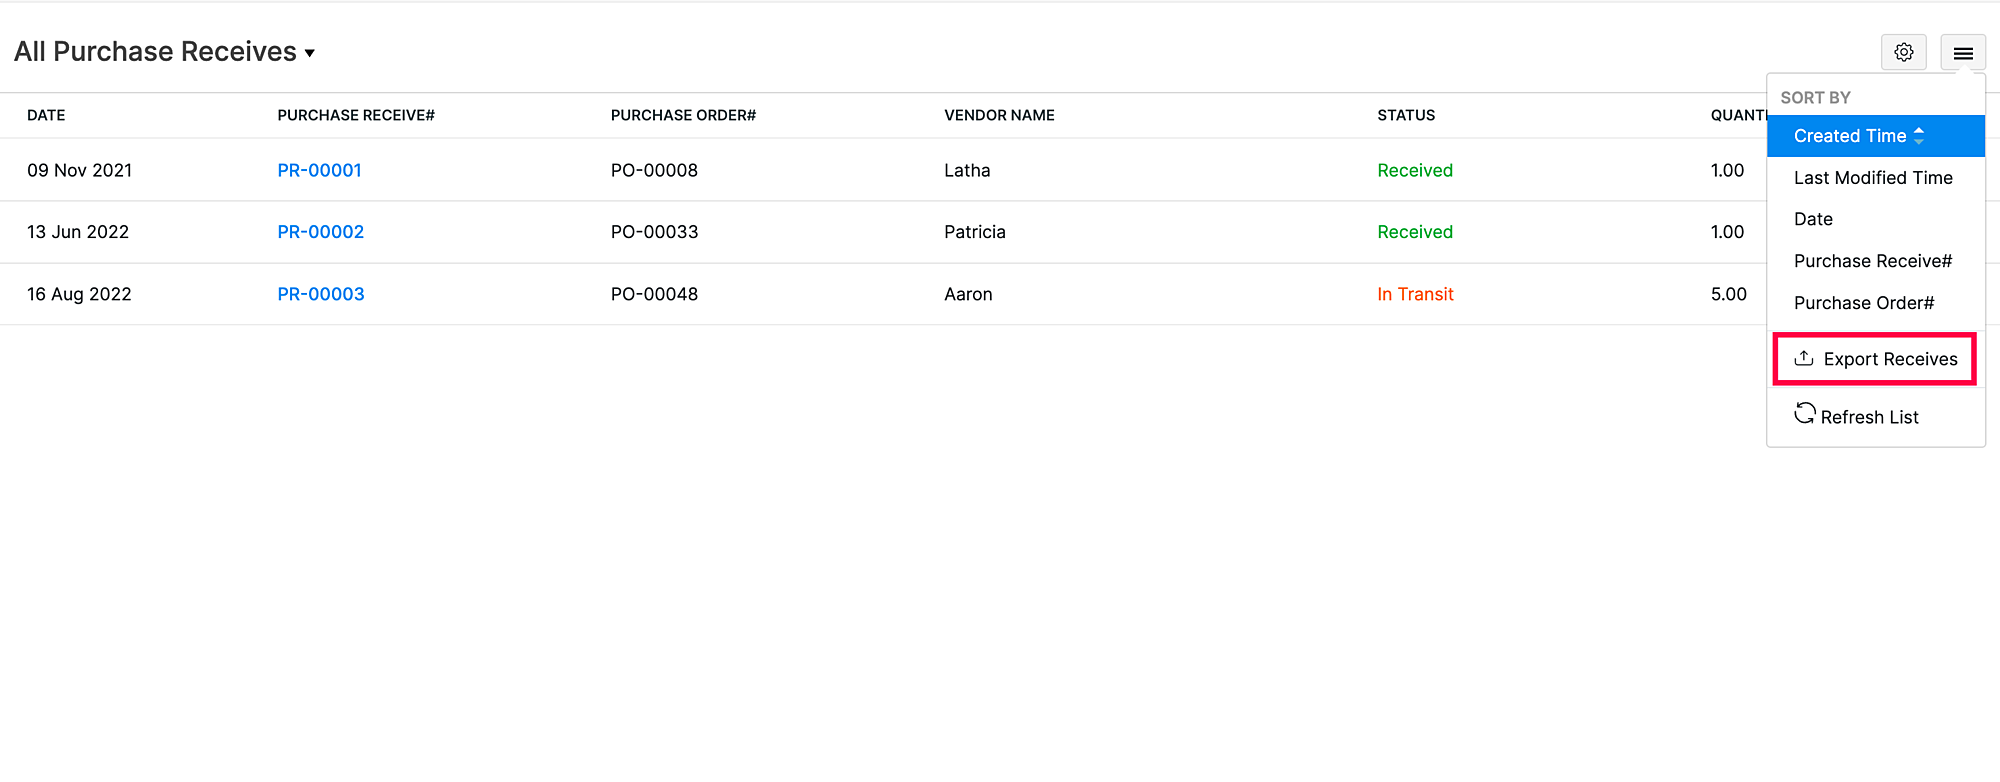
Go to the Purchase Receives module under Purchases from the left side bar.
Click the More icon and select Export Receives to export the purchase receives in your preferred format.
Deleting a Purchase Receive
To delete a purchase receive:
- Go to the Purchase Receives module under Purchases from the left side bar.
- Select the purchase receive that you want to delete.
- In the purchase receive’s details page, click the Bin icon from the top right corner.
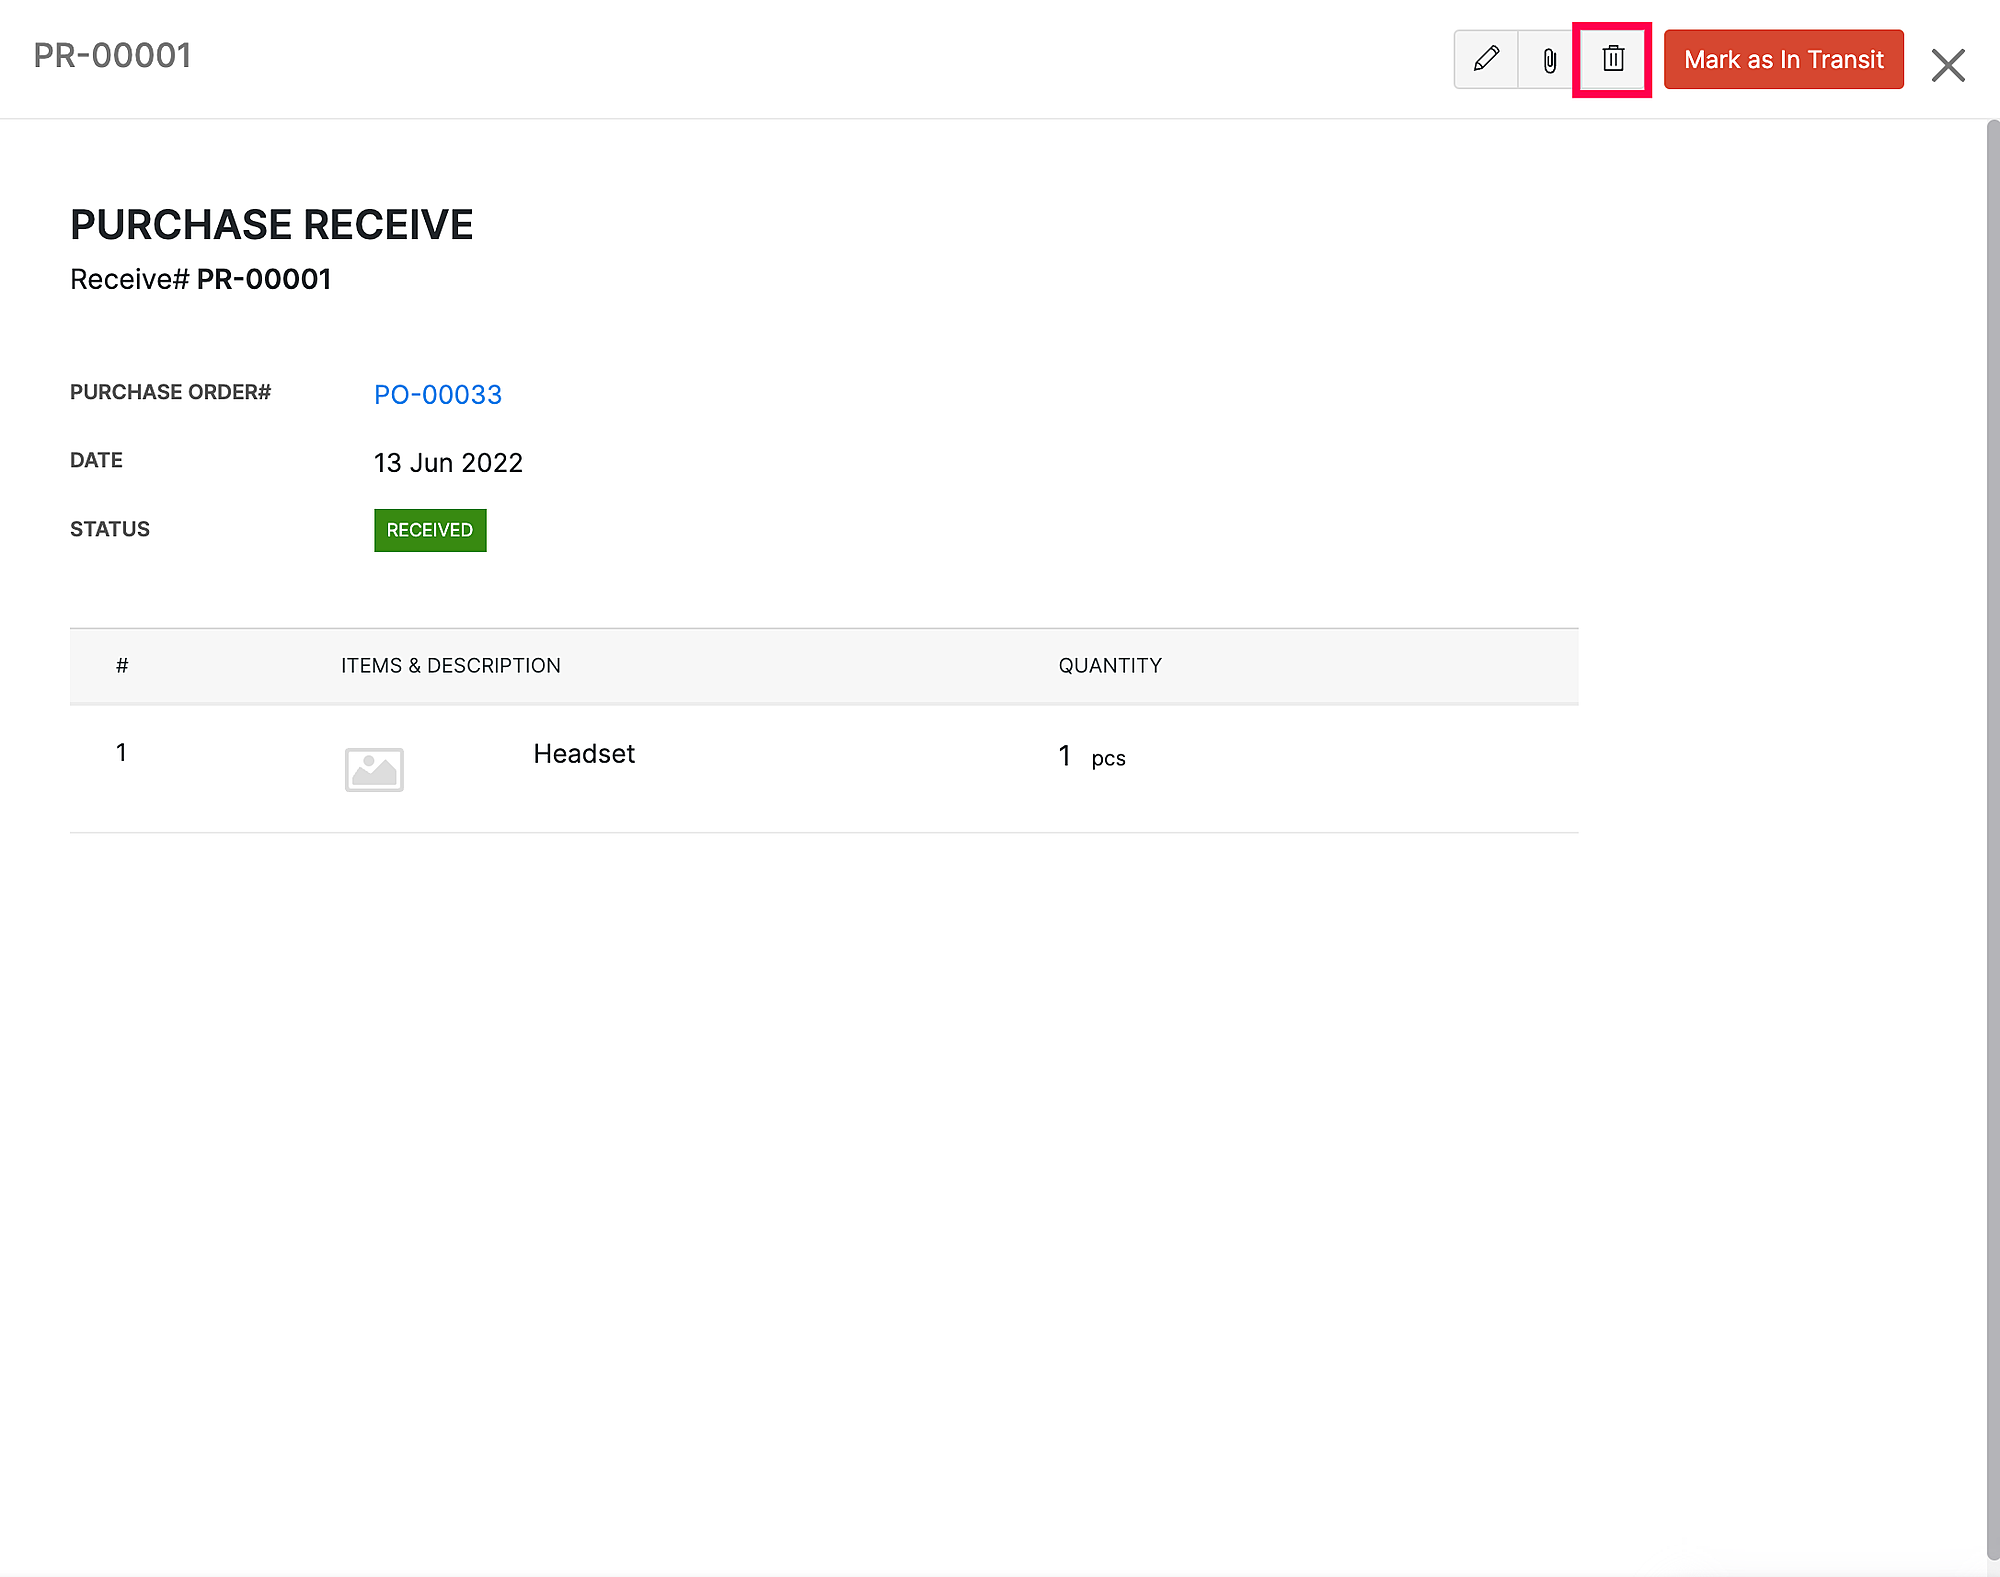
- In the popup that appear, click Delete. The purchase receive will be deleted.