
Integrate Zoho Inventory With Google Ads
Note: This integration is applicable only for the US and IN edition organizations.
Google Merchant Center
Google Merchant Center (GMC) is a service which collects your product details from Zoho Inventory and features them across all Google platforms. With the right keyword hits, millions of online shoppers will be able to discover your eCommerce store and make purchases from it.
Scenario: Mark runs a localized handicraft store for which he uses Zoho Inventory to manage stock. On noticing a surge in interest from tourists, he decides to expand his market reach. He creates an account on Google Merchant Center and uploads his product details from Zoho Inventory. Now his product details will surface on Google Shopping whenever online shoppers search with the relevant keyword. He can also run ad campaigns with a suitable budget to secure a prominent spot on the Google web pages and attract potential buyers to his website.
Connect Account
To connect your Zoho Inventory organization with a GMC account:
Go to Settings > Integrations > Sales & Marketing.
Click Sign in with Google.

Choose a Google account to connect with Zoho Inventory and grant the necessary permissions.
Make sure your website meets all the Google Shopping requirements and click Continue.
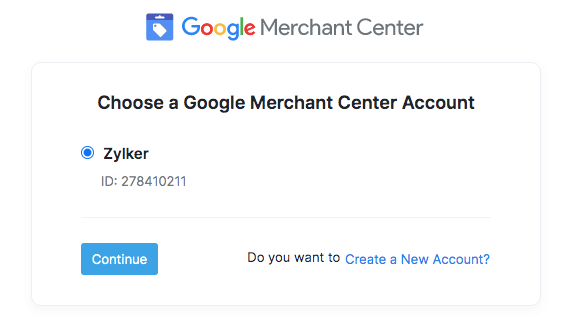
If your google account is already connected with Merchant Center accounts, choose one and click Continue to proceed, or, create a Merchant Center Account.
If you choose to create a Merchant Center account, you will be redirected to the setup page where you need to provide your Business Name and Business Website.
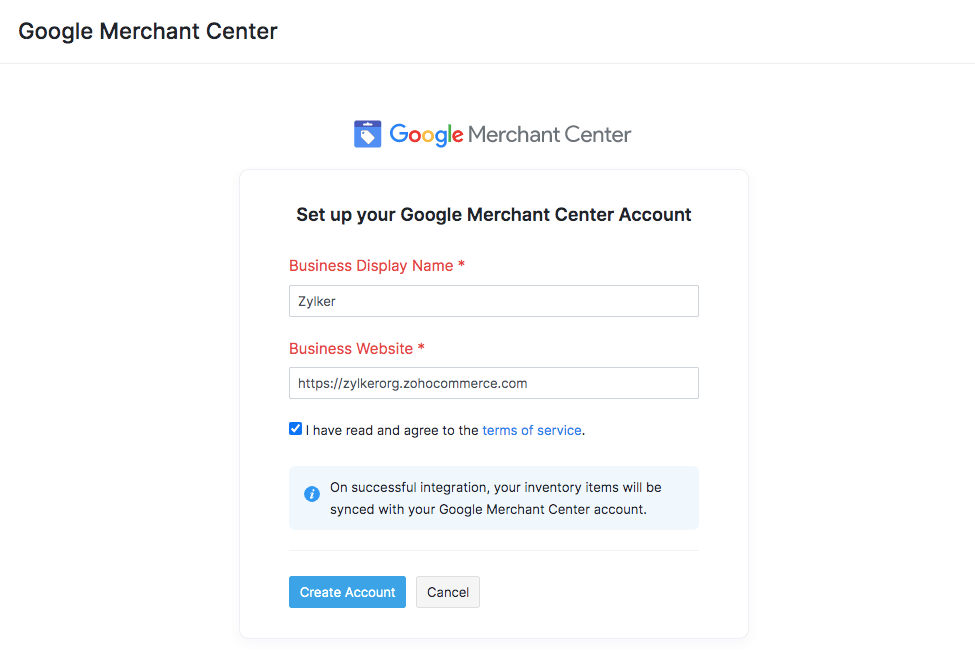
Click Create Account to continue.
Select the details which you want to push to your GMC account and click Continue to set up your GMC integration.
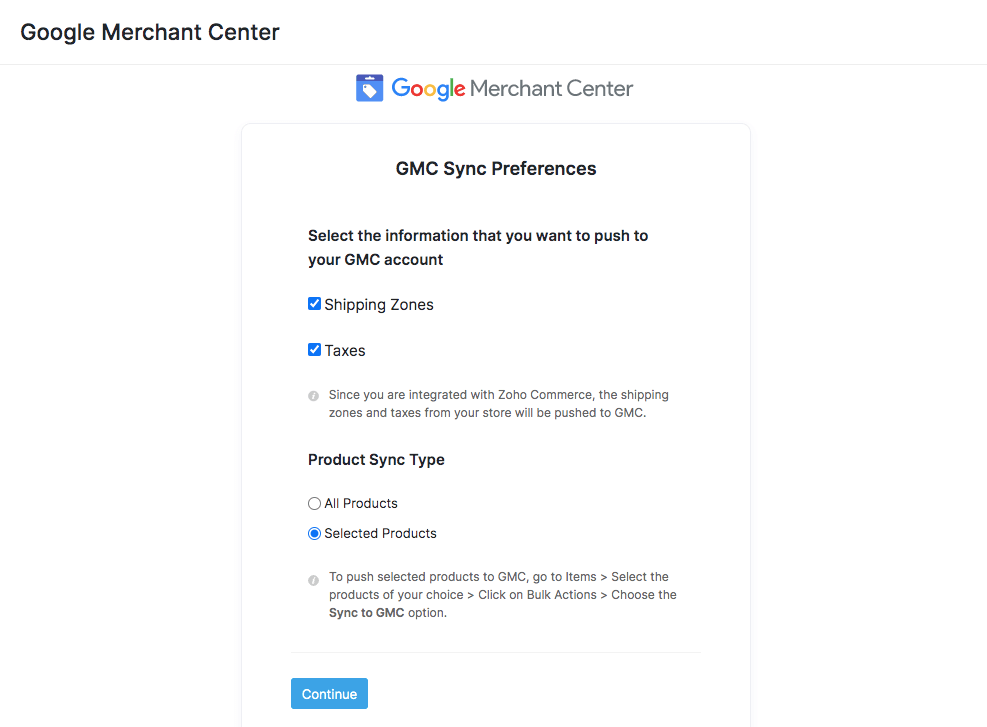
Insight: If you have an integrated Zoho Commerce store, the shipping zones and tax information of your store gets pushed to GMC automatically.
On successful integration, your inventory items will be synced with your Google Merchant Center account.
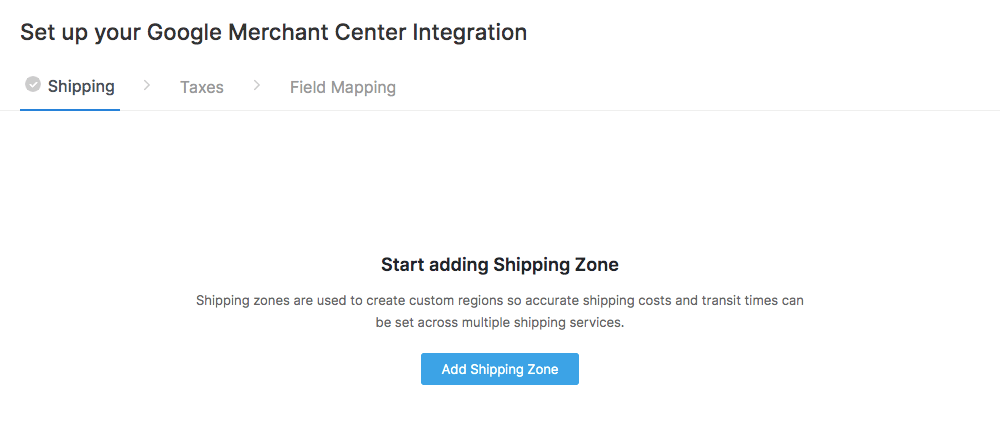
Set up your GMC Integration
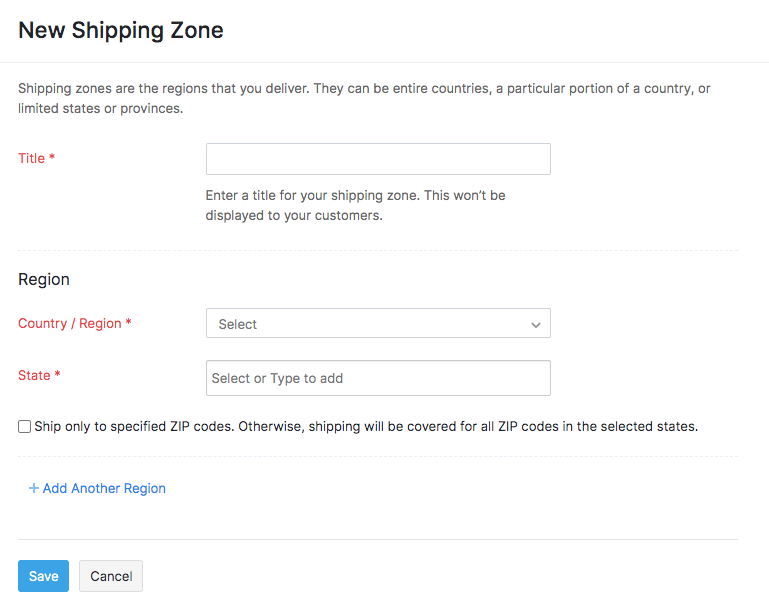
Add Shipping Zones
After choosing your merchant account you can add shipping zones and shipping rates.
Click Add Shipping Zone.
Enter an appropriate zone title. For instance, the title could be the name of a country, a particular portion of a country, states or provinces.
Choose a country/region and select the states for which you provide shipping services.
To add another region, click the Add Another Region option.
Click Save and proceed to add shipping rates.
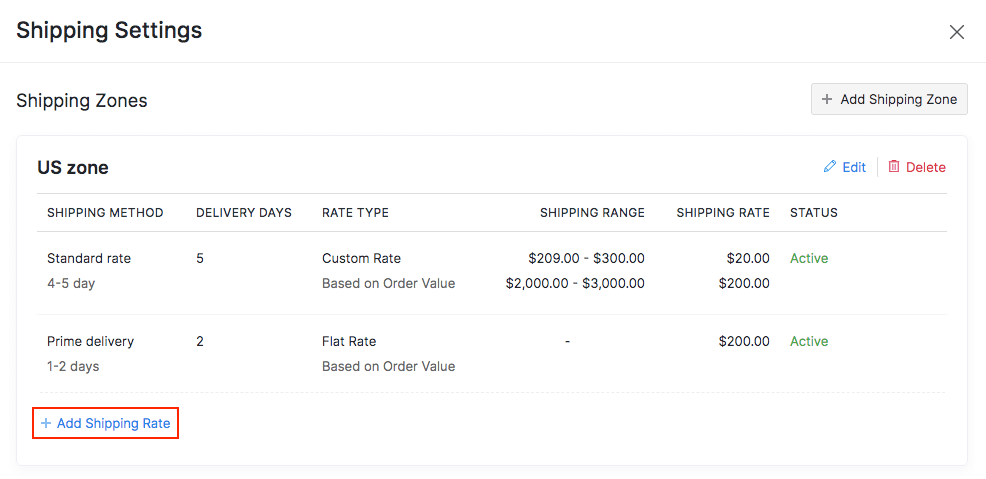
Add Shipping Rates
Once you’ve added the shipping zones, you add shipping rates for each zone.
Click Add Shipping Rate under the desired shipping zone.
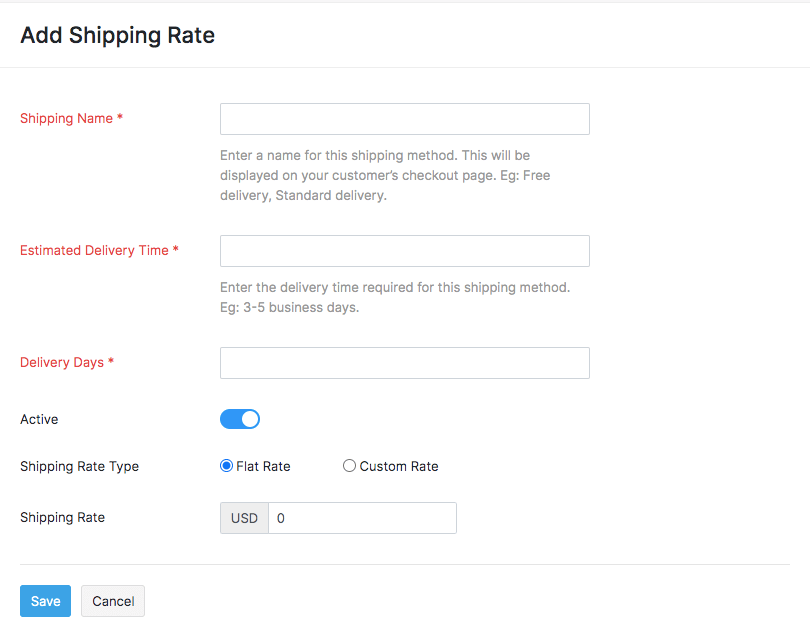
Enter the name of the shipping service, estimated delivery time and mark its status as Active if you are currently availing this service.
Choose your Rate Type.
If you choose Flat Rate, enter the fixed rate and click Save.
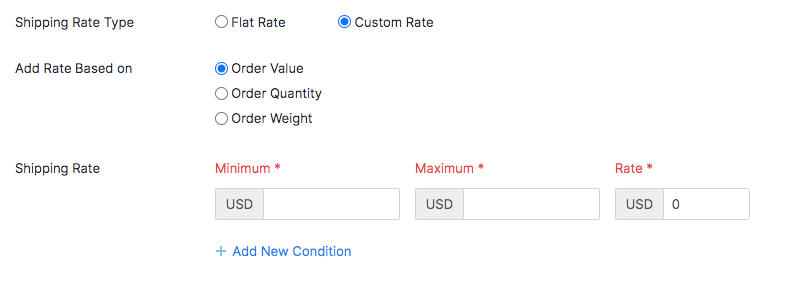
For Custom Rate, choose the attribute based on which the shipping rate should be calculated.
Enter the minimum and maximum range and set a rate. Whenever an order value, quantity or weight falls under a given range, then the corresponding shipping rate gets applied.
To add another range, click + Add New Condition.
To add more shipping rates to the zone, click the Add Shipping Rate option.
Click Continue to Tax Settings button at the bottom to proceed.
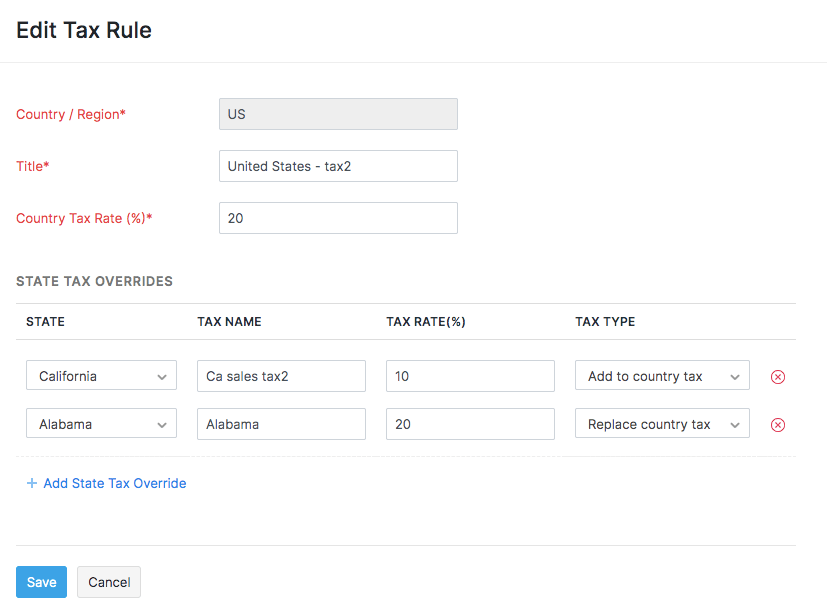
Add Tax Rules
Click the Add Tax Rule button under Taxes.
In the Edit Tax Rule page, you can update the title and country tax rate.
You can also choose the states for which you would like to override the tax rate.
Click Save and Continue to update the changes.
Click the Continue to Field Mapping button at the bottom to proceed.
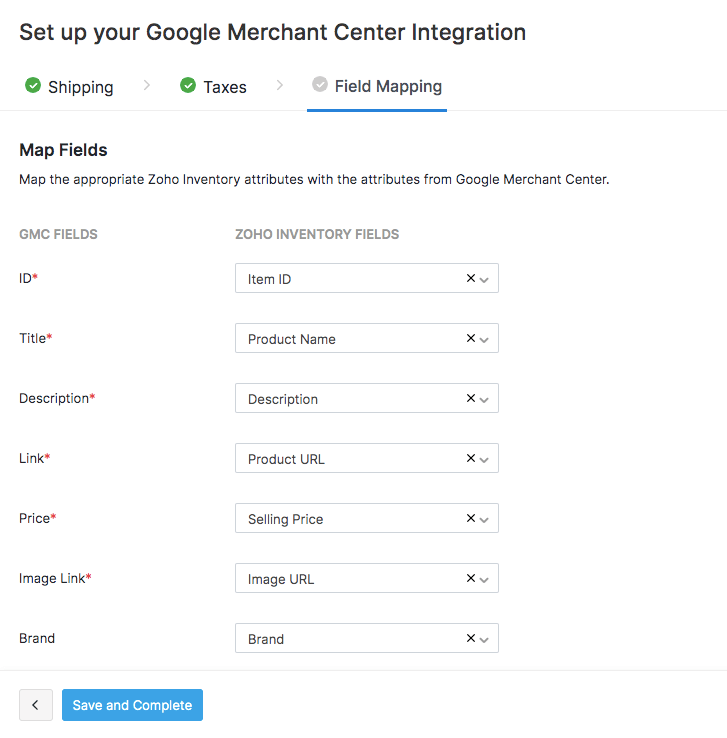
Field Mapping
Choose the Zoho Inventory field to map with the corresponding GMC field.
If a particular field is not present in Zoho Inventory, select the Add Identical GMC Field option from the field dropdown. A new field with an identical name will be created in the back end of Zoho Inventory and be mapped to the corresponding GMC field.
Click Save and Complete to successfully integrate your Zoho Inventory account with GMC.
Sync Products to GMC
At the beginning of the setup, you’ll be asked to choose whether you want to sync all your inventory items into your GMC account automatically, or whether you’d want to select the items manually. If you had chosen the ‘All Items’ option, the sync will take place automatically, and the item verification details will be fetched from GMC and displayed in the summary page.
If you have chosen the ‘Selected Items’ option, you must select the items from your item details page and push them manually to GMC to get them verified. To add products to your GMC listing:
Go to the Items module in Zoho Inventory.
Click an item to open its details.
Click the More button and select Sync to GMC option from the dropdown.
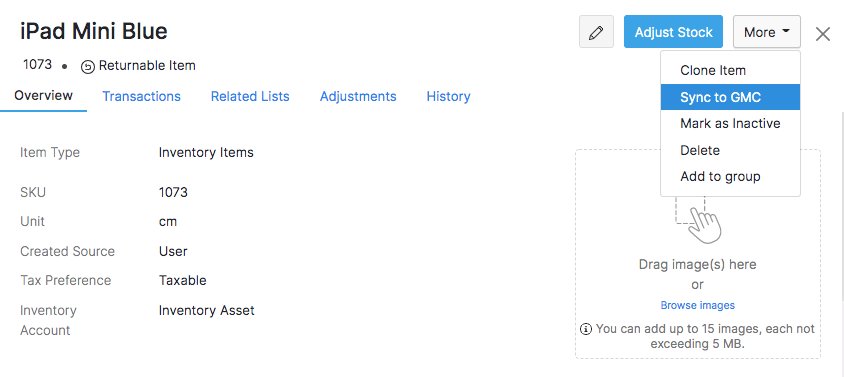
Again, click More > Update GMC Fields to add values for the missing GMC fields.
Click Save and Sync.
Note: To disable sync, click More, then select the Disable Sync to GMC option from the dropdown.
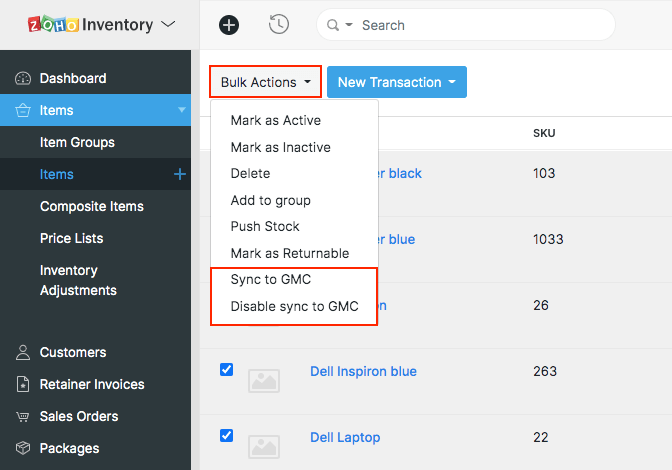
To sync multiple items at once:
Go to the Items module in Zoho Inventory.
In the items list page, select the items that you’d like to sync to Google Shopping.
Click the More Actions dropdown and select Sync to GMC.
To undo this action, select the items once again and click More Actions > Disable Sync to GMC.
Based on the relevance and keyword hits, your product will rank higher on the search results.
Update Preferences
To update your sync preferences, shipping zones and other details:
Go to Settings > Integrations > Sales & Marketing.
Click View GMC Details under Google Shopping.
Click the More dropdown in the top right corner.
Click the option you want to update.

Make the necessary changes and click Save.
Google Ad Campaigns
Create ad campaigns for your products on a suitable budget and feature them across all Google platforms.
Note: To launch ad campaigns, you must have your GMC integration set up first.
To create a Google ad campaign:
Go to Settings > Integrations > Sales & Marketing.
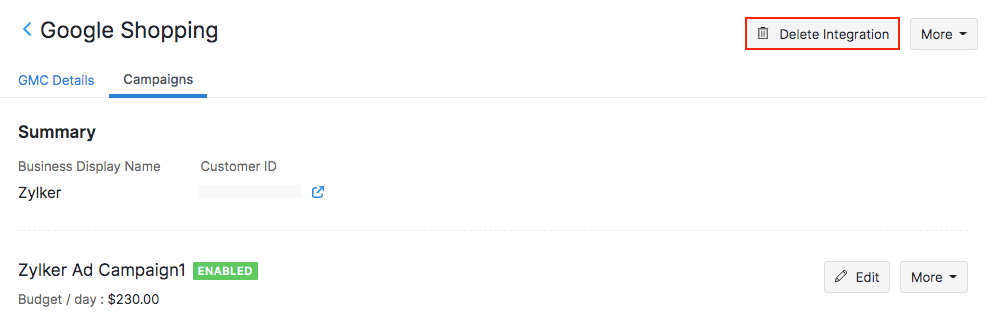
Click the Campaigns tab.
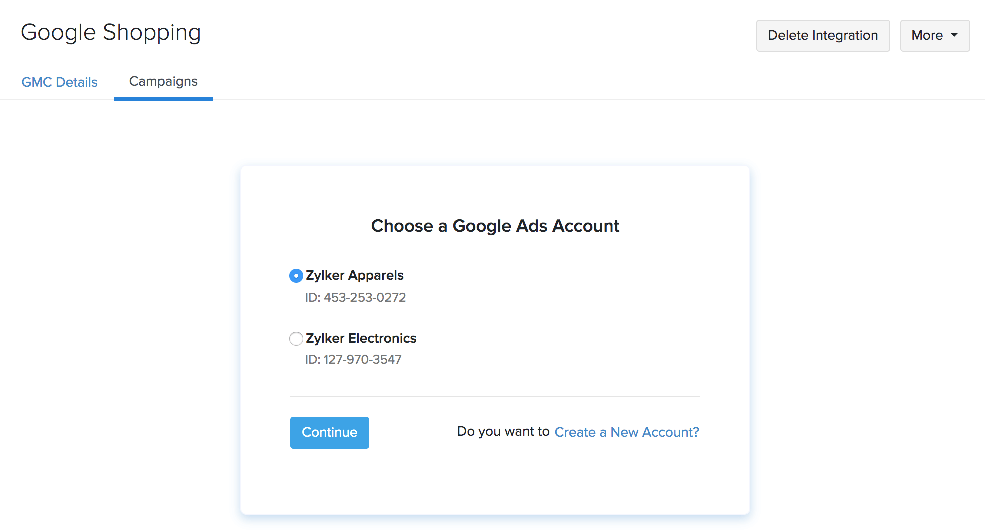
Choose a Google Ads account and click Continue or create an account.
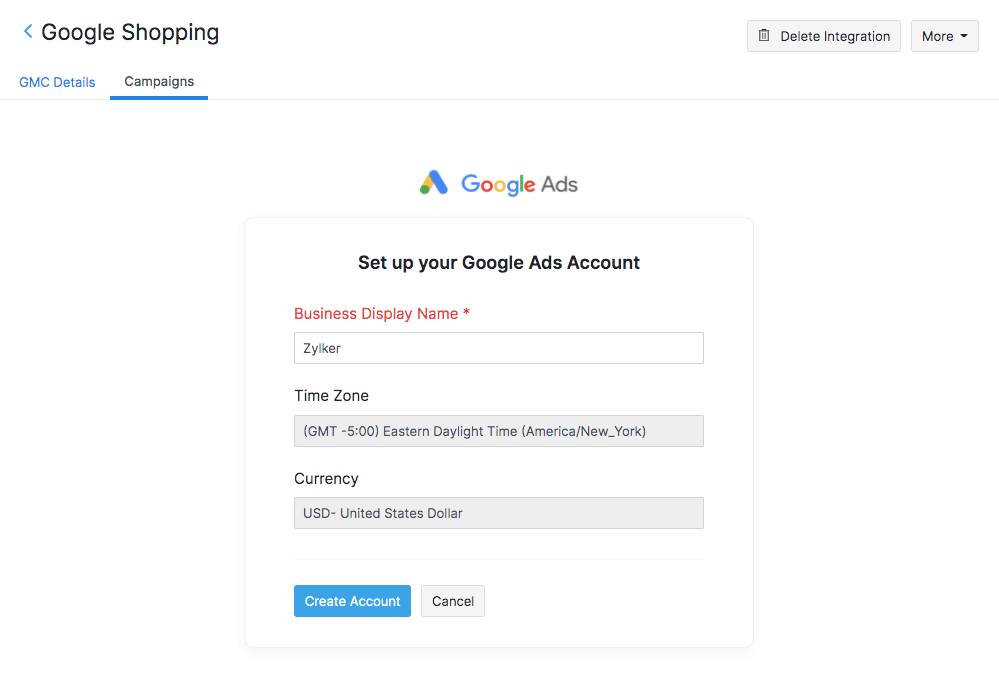
To add a new Google Ads account, enter the Business Display Name and click Create Account.
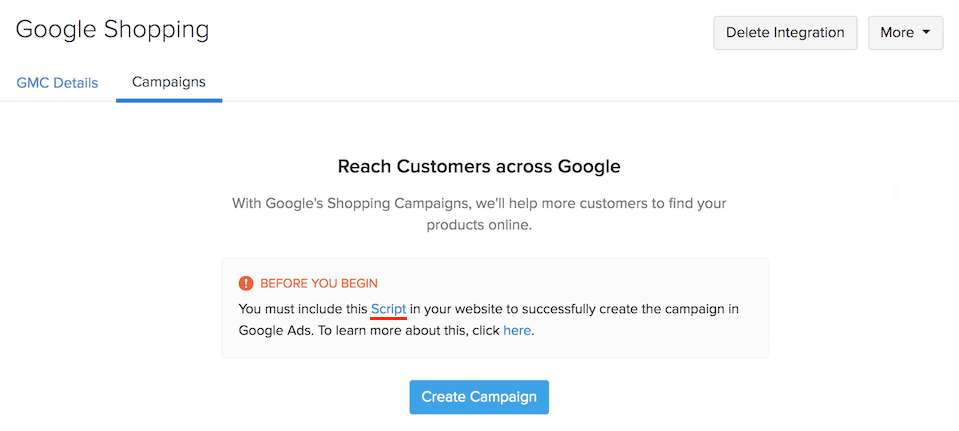
Copy the conversion script and embed it on your store website to be able to monitor the number of clicks and impressions you get from the campaign.
Insight: If the Admin of a Zoho Commerce store sets up the integration, GMC injects the script into the store website automatically during setup. Non-admins and other site owners setting up the integration must embed the script manually.
- 6. Now, click the **Create Campaign** button to start.
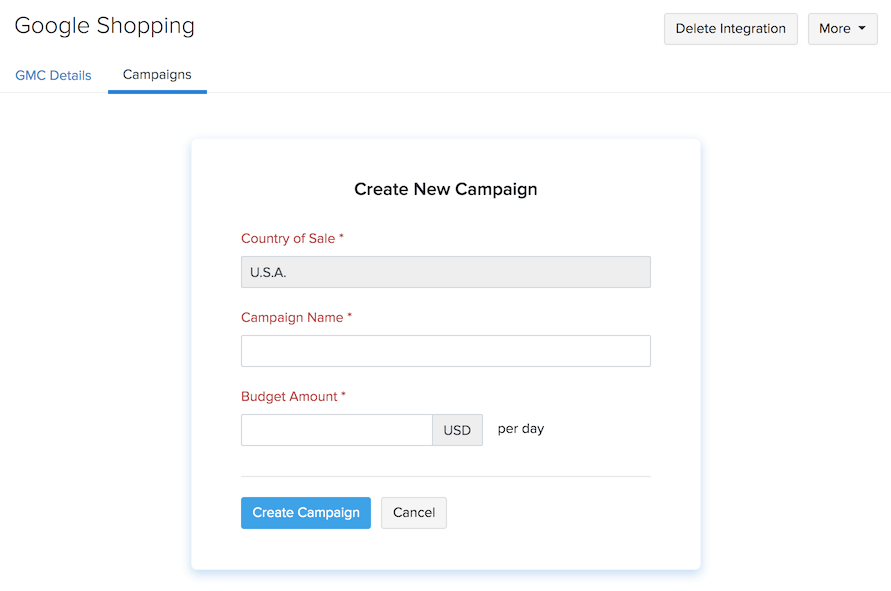
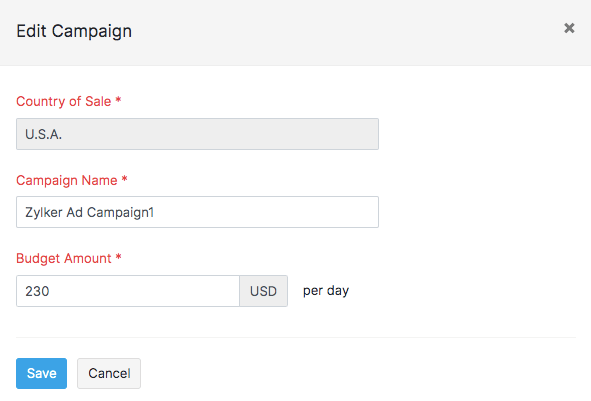
Enter the Campaign Name and Budget Amount to set.
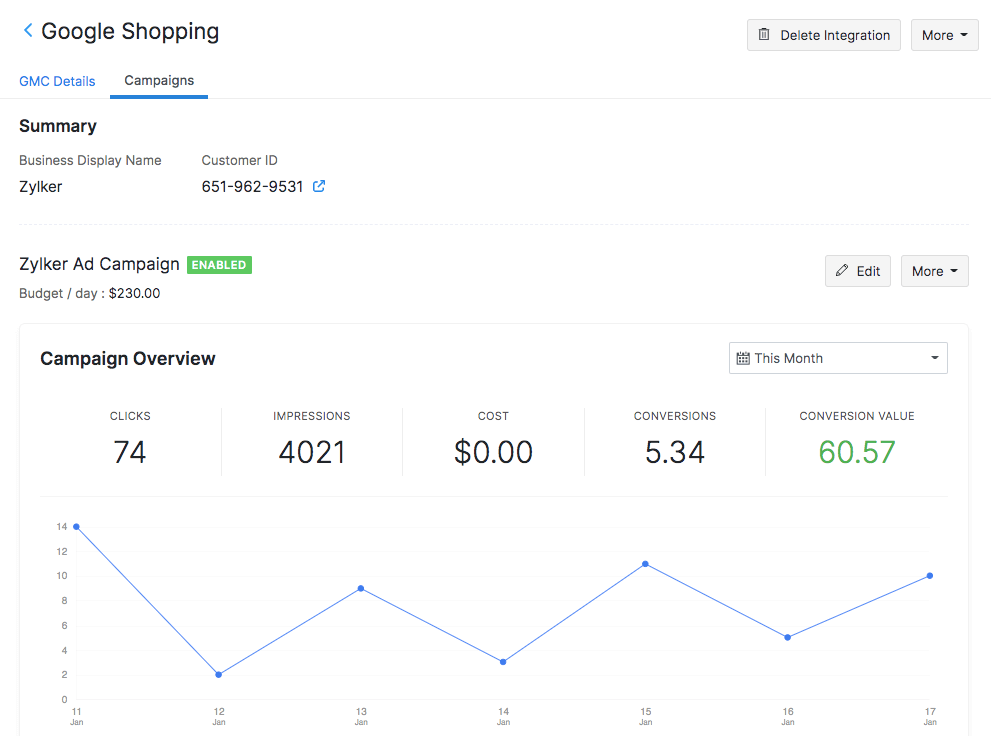
Once the setup is complete, you can view the overall as well as product-wise Clicks, Impressions, Average Cost per Clicks and Cost on the campaign summary page.
Insight:
- The Google Ads account that you’ve selected or created will be linked to your GMC account. While creating ad campaigns, Google Ads will access the products from your GMC account.
- If the Admin of a Zoho Commerce store sets up the integration, GMC claims the website automatically for them. Non-admins and other site owners setting up the integration must claim the site manually.
Edit Campaign
You can edit the campaign at anytime to change the budget amount or the campaign name. To do so:
Go to Settings > Integrations > Sales & Marketing.
Click the Campaigns tab.
Click the Edit button near the campaign name.
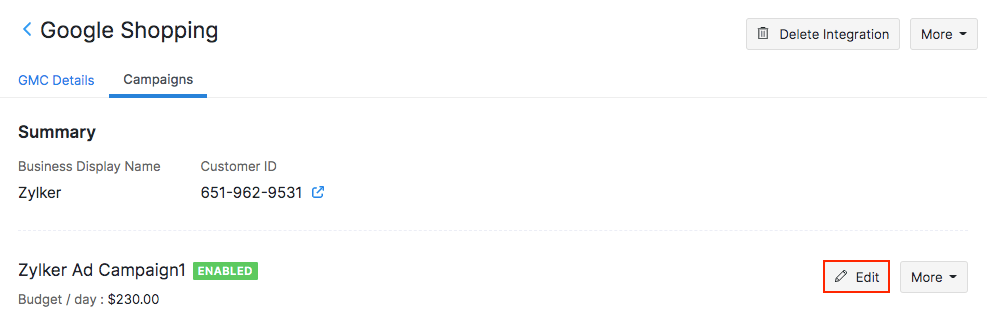
Modify the Campaign Name or the budget amount per day and click Save.
Pause/Delete Campaign
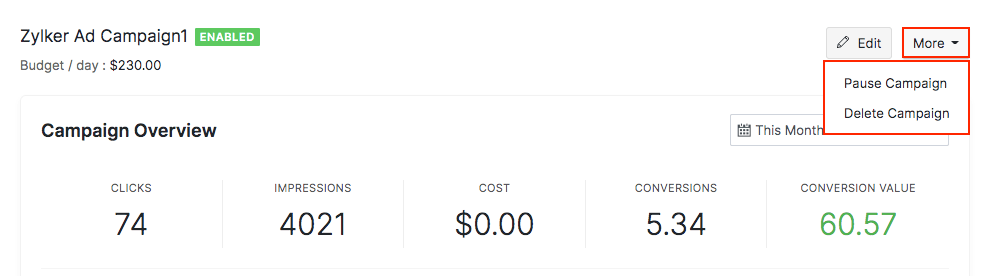
To stop the campaign temporarily or to delete the campaign:
Go to Settings > Integrations > Sales & Marketing.
Click the Campaigns tab.
Click the More button near the campaign name.
Select Pause Campaign or Delete Campaign from the dropdown.
Delete GMC Integration
To delete your GMC integration:
Go to Settings > Integrations > Sales & Marketing.
Click View GMC Details under Google Shopping.
Click the Delete Integration button on the top right corner of the page.
In the confirmation pop-up, click Delete to complete the action.
On deleting the integration with Google Merchant Center, you will no longer be able to:
- Sync your product details into GMC.
- Create ad campaigns on Google Ads.