Functions in Vendor Credits
Apply Credits to Bills
Vendor credits can be applied to other bills that are created for the same vendor. Doing so will reduce the bill amount accordingly. To do this:
Go to the Vendor Credits module on the sidebar.
Open the vendor credit you want to apply to bills.
Click the Apply to Bills button in the top right corner.
Enter the amount to apply to each bill from the balance.
Click Save.

Alternatively,
- Go to the Bills module on the sidebar.
- Open the bill for which you want to apply credits to.
- Click the Use Credits option in the bill.
- Enter the amount to apply to the bill from the available credit balance.
- Click Save.
If you have used up a vendor credit completely, it is marked as Closed.
Refund Credits
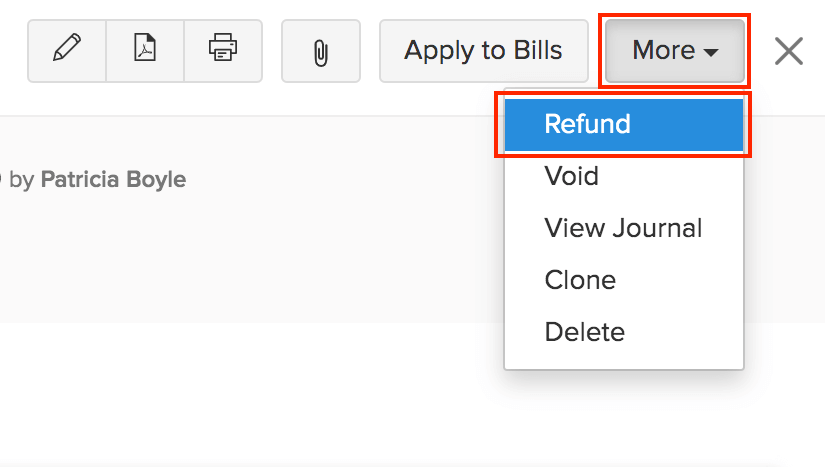
To refund a vendor credit:
Go to the Vendor Credits module on the sidebar.
Select the vendor credit you want to refund.
Click the More button, then select Refund from the dropdown.
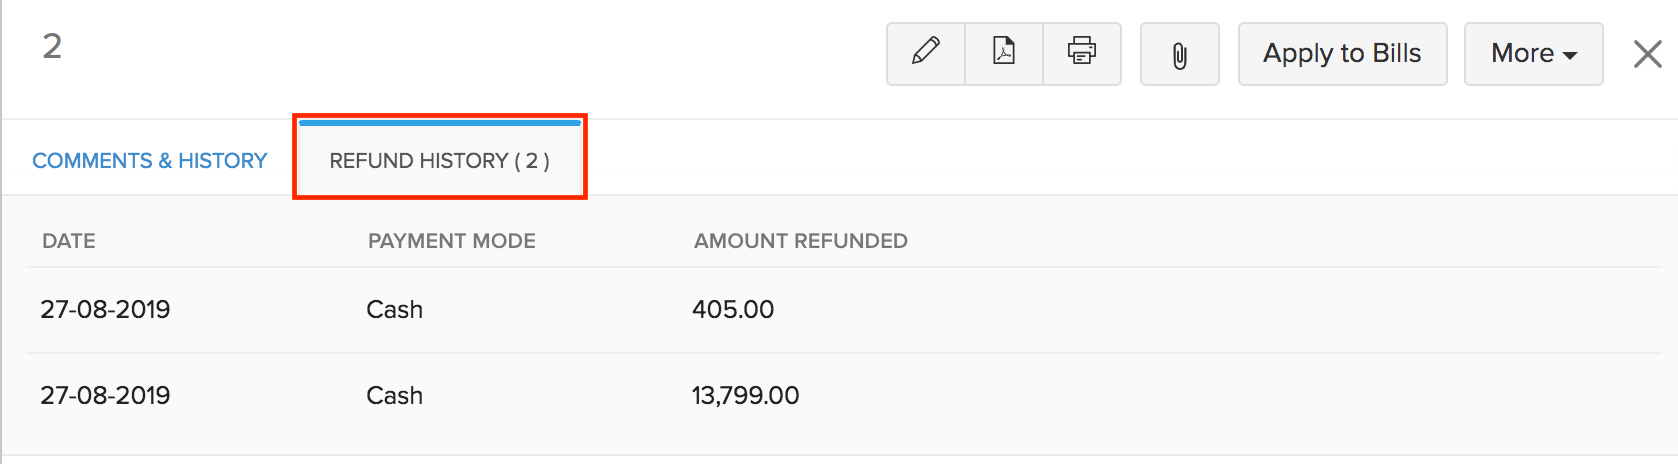
Enter the amount that your vendor has refunded to you and select the account which tracks the refund.
Click Save. You can view the refunds recorded in the Refunds History tab on your vendor credits page.
Import Refunds
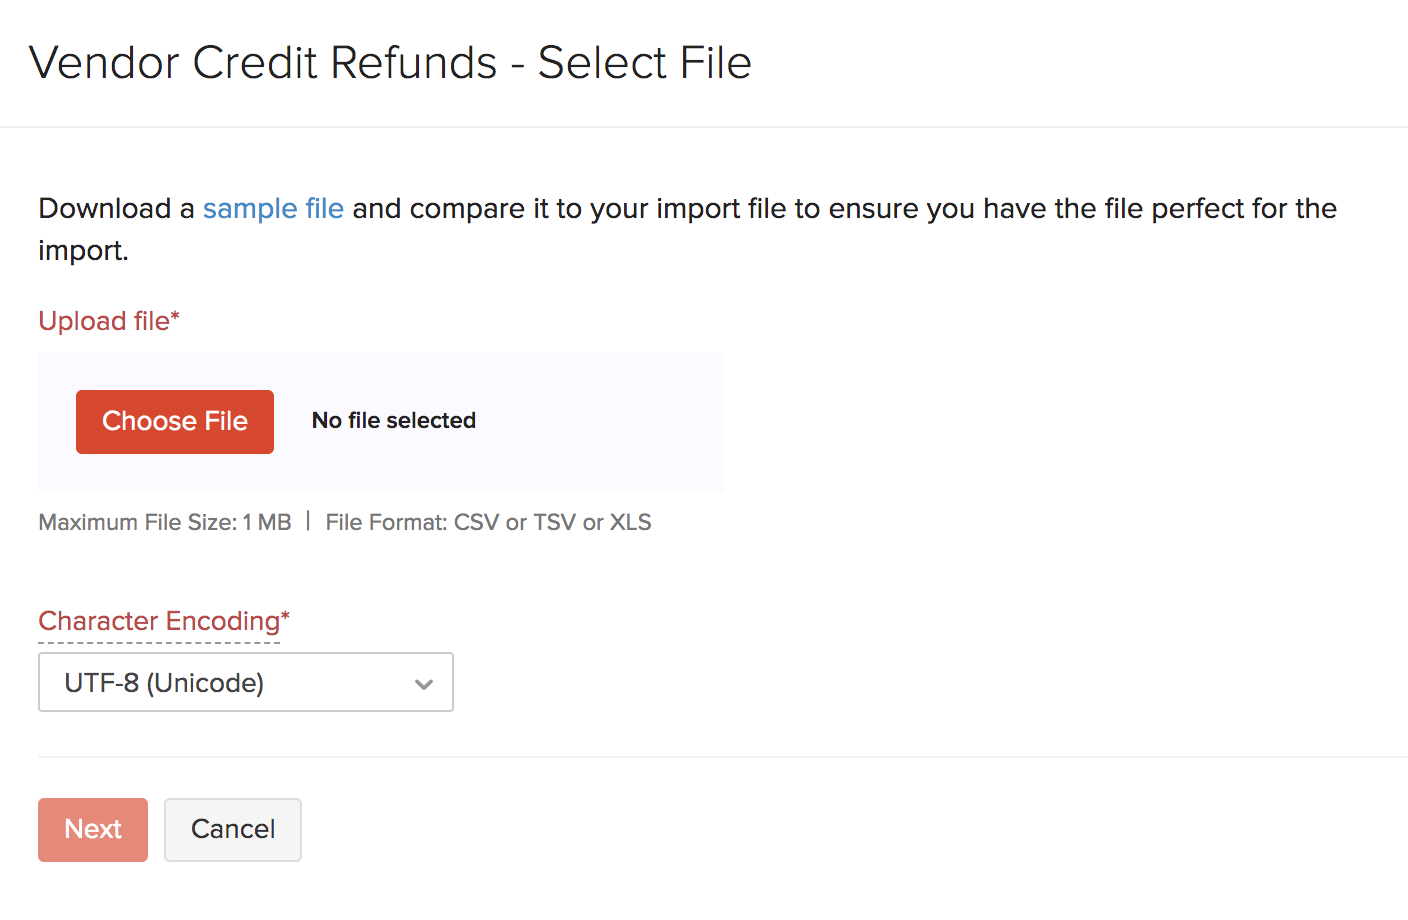
If you already have a list of credits from your vendors, you can import them into Zoho Inventory in CSV, TSV or XLS format.
To know the format of the import, i.e. the columns and data to be included in the import file, you can download the sample import file which we’ll be looking at in the steps below.
Go to the Vendor Credits module on the left sidebar.
Click the
 icon.
icon.Click the Import Refunds option.

Click the Choose File button to browse and upload your import file. You can download the sample CSV or XLS file for your reference.
Click Next to proceed to the field mapping page.
Map the columns in Zoho Inventory with the appropriate column in your import file.
Click Next to proceed to the preview section.
Preview the summary of the records that can be imported.
Click Import if you’re ready, or else, click Previous if you need to make any changes.
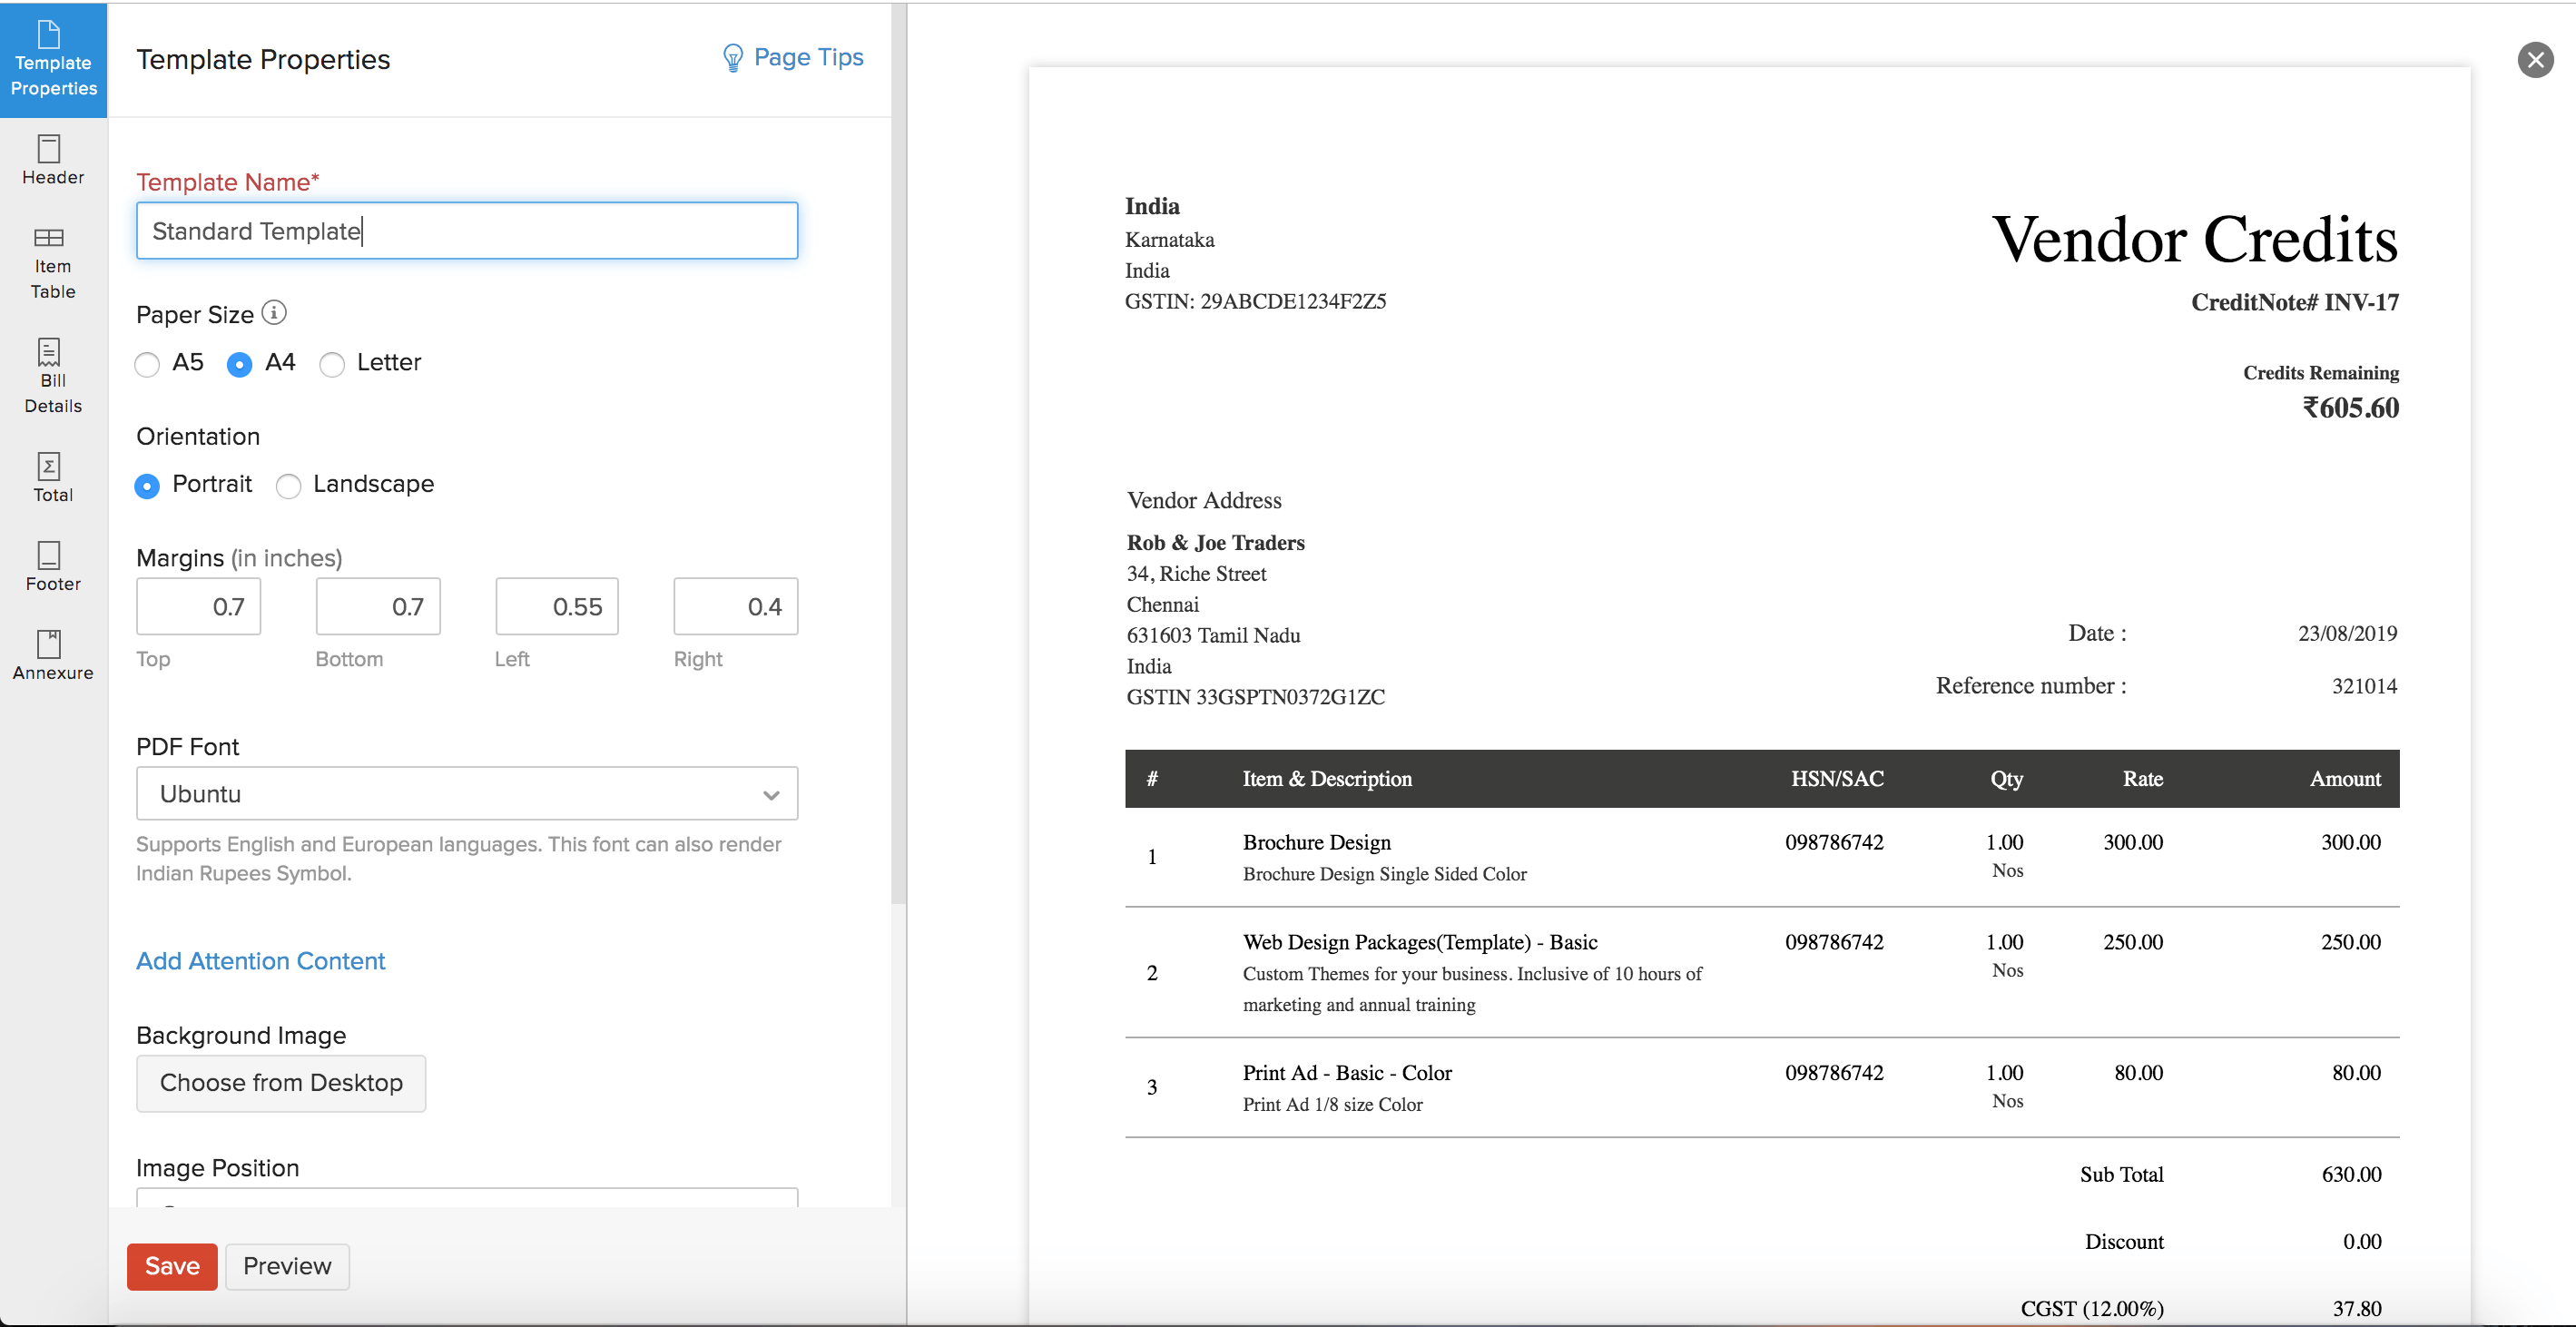
Customize Template
You can change the overall look and feel, such as the font, background, orientation and size of your templates. Here’s how:
Go to Settings, then Templates.
Click Vendor Credits from the templates list.
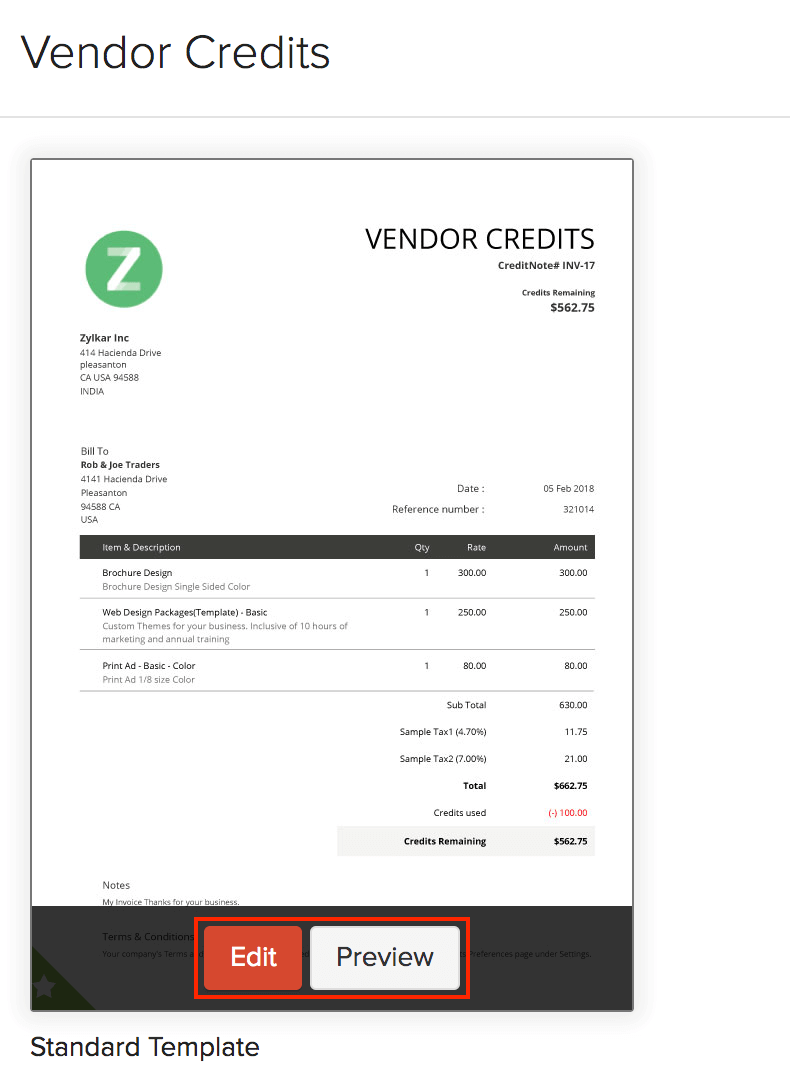
Hover over a template and click Edit.
Make the necessary customizations to the template.
Click Save.