Automation
Automation allows you to create a set of rules for modules of Zoho Inventory based on which appropriate actions would be performed. A good example would be the case where a congratulatory e-mail is sent automatically to the team members when a Sales Order is made for over 1000 USD.
Note: When you setup webhooks and connect it to external web service providers, your contacts’ details (name, phone number, address and email address) will be shared with the URL you want to notify. For example, if you setup a webhook connecting to an SMS service provider, your contacts’ phone number will be shared with them.
Workflow Rules
You can automate tasks such as sending emails, updating fields, and triggering webhooks or custom functions by creating workflow rules in Zoho Inventory. The workflow rule executes automatically once the conditions are met.
Scenario: John wants to automatically send a thank-you email with discount coupons to customers after they make a purchase. For this, he sets up a workflow rule in Zoho Inventory so that whenever a customer completes their payment, the rule triggers the email alert, and an email is sent automatically, saving time and effort for John.
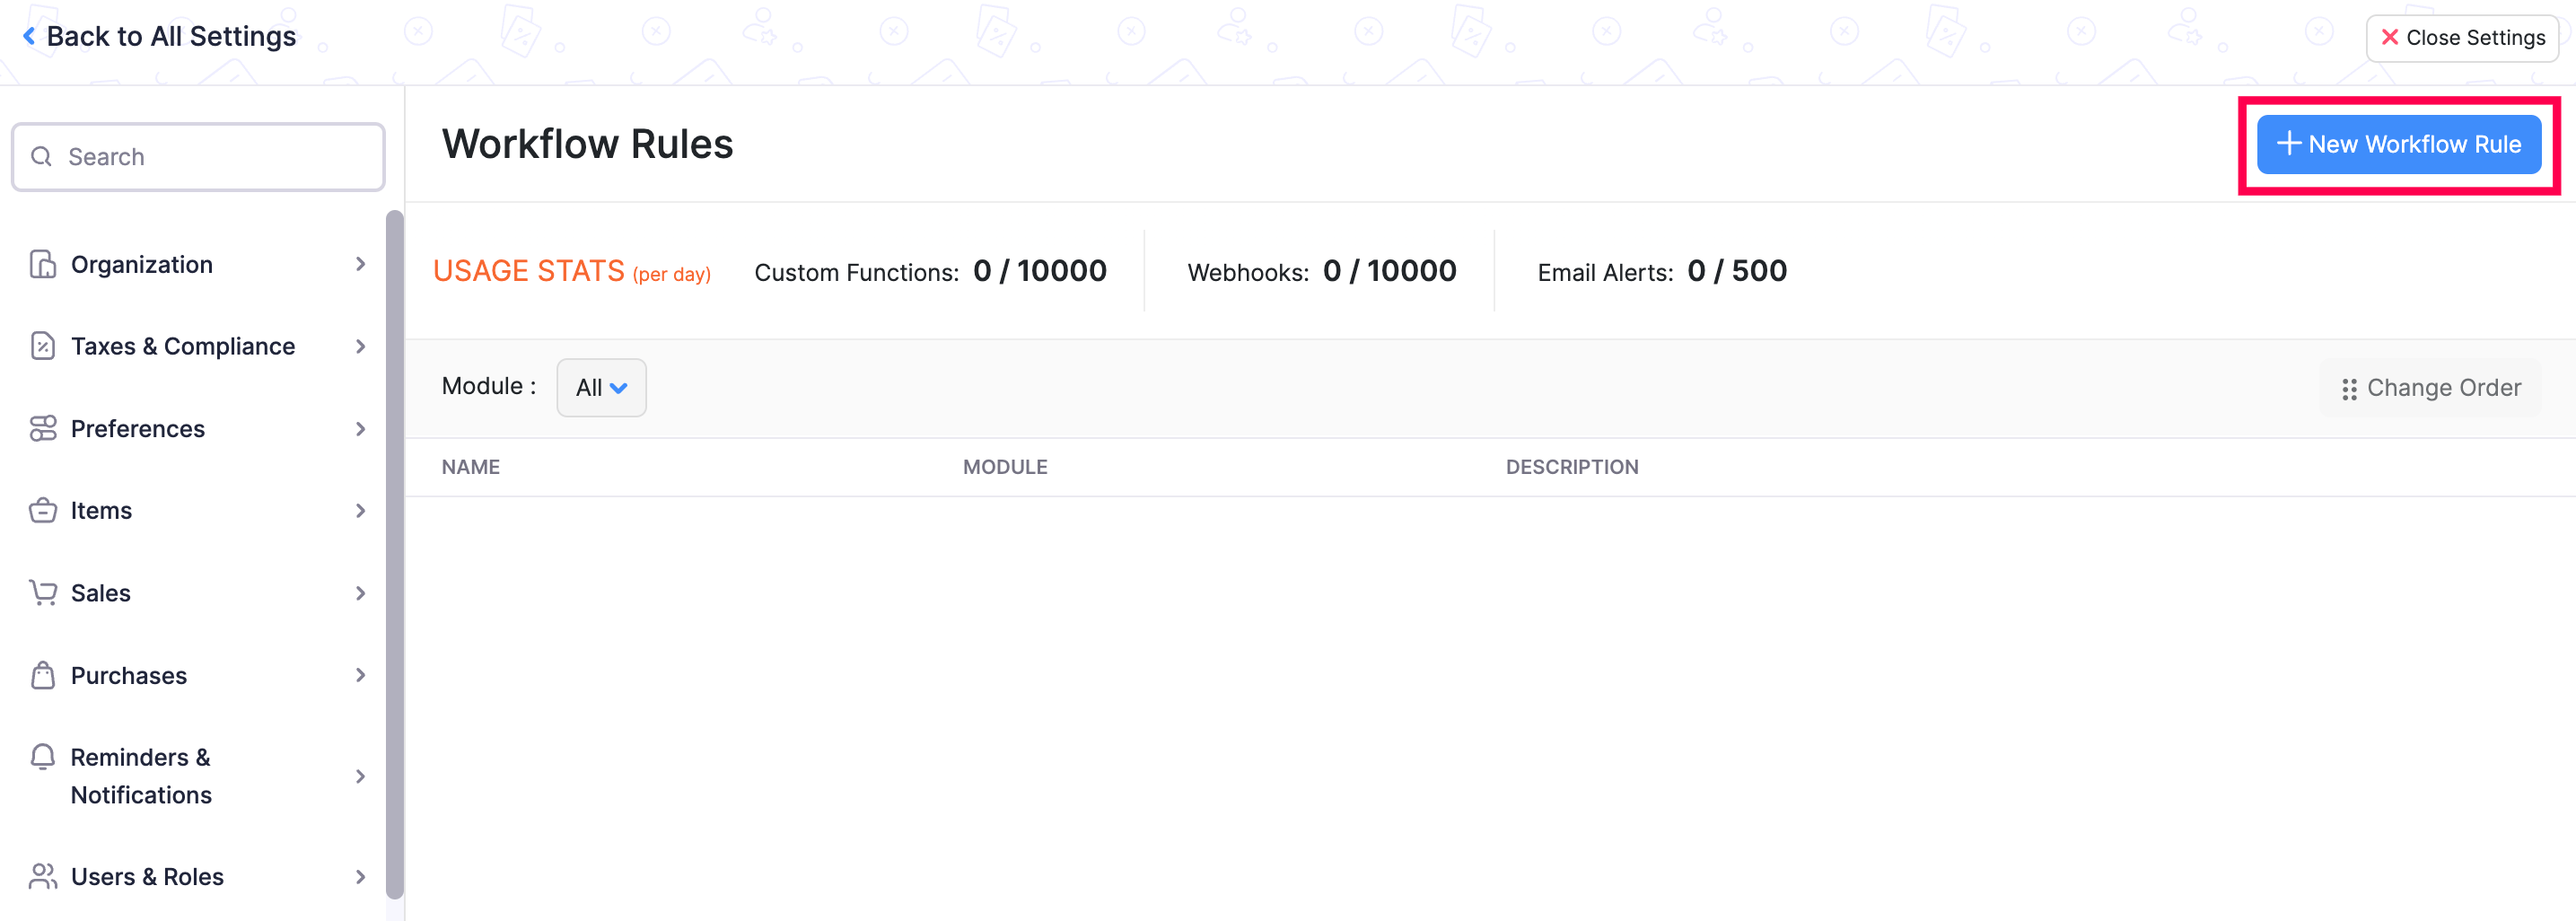
Create a New Workflow Rule
To create a new workflow rule:
- Go to Settings in the top right corner.
- Navigate to Organization Settings.
- Click Workflow Rules under Automation.
- Click + New Workflow Rule in the top right corner.
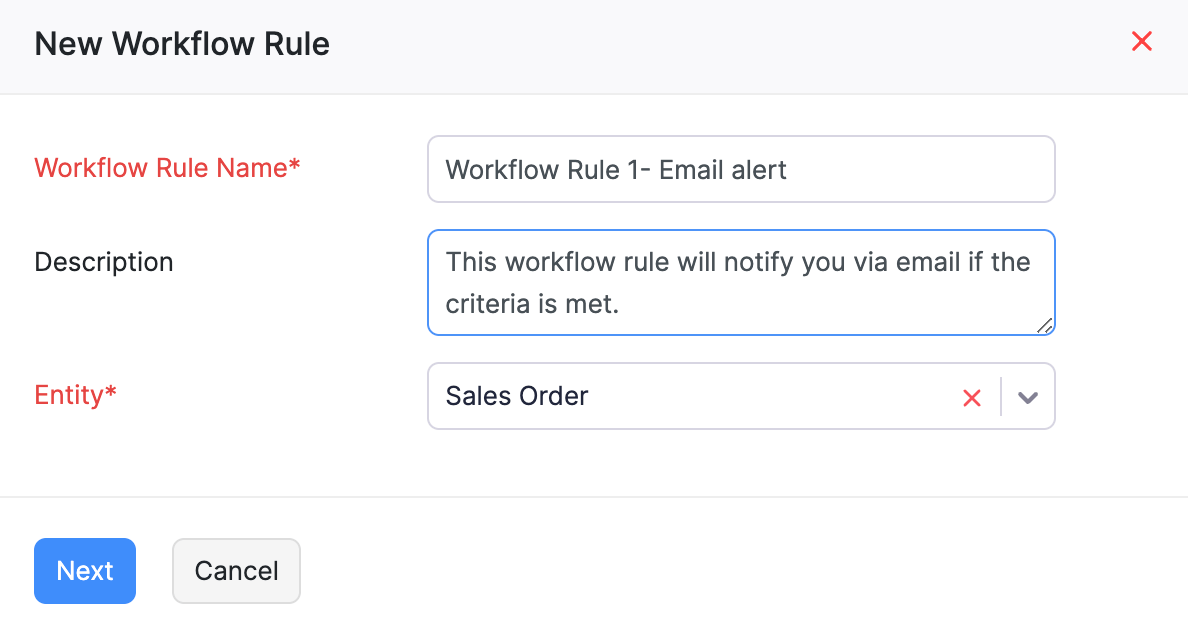
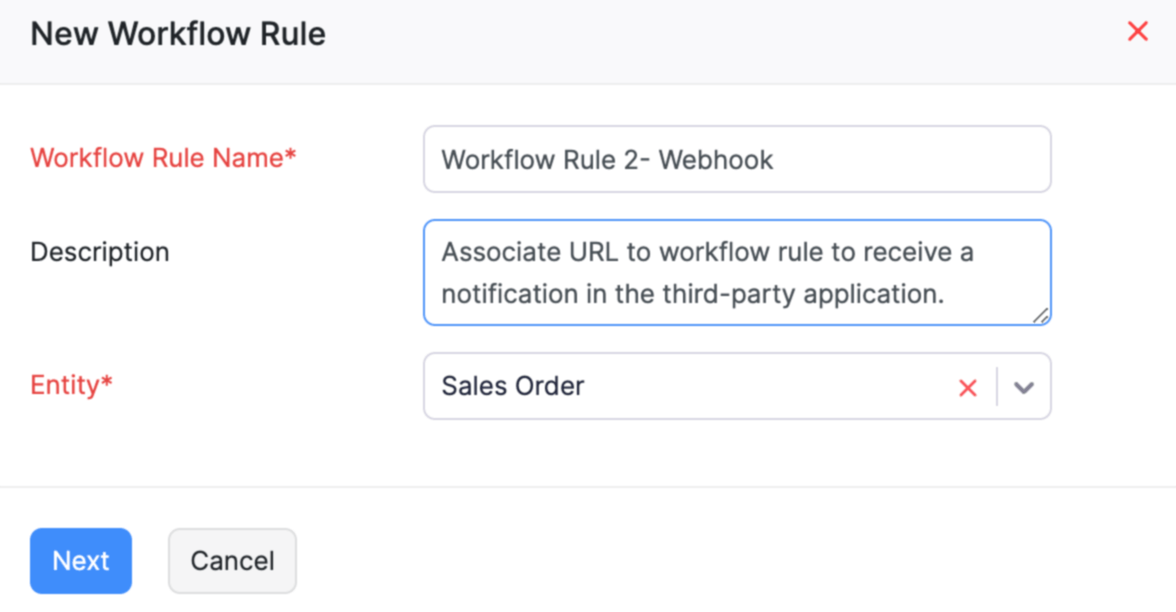
- In the New Workflow Rule pop-up, fill in the following fields:
- Workflow Rule Name: Enter a name for the workflow rule.
- Description: Add a description if necessary.
- Module: Select the module for the workflow rule from the dropdown menu.
- Click Next.
- Under WORKFLOW RULE EXECUTION CONDITION, fill in the following fields:
- Workflow Type: Choose either Event Based or Date Based.
- Action Type: Select the action type that triggers the workflow.
- Execute the workflow when: Choose the actions that trigger the workflow (edit, edited, or created).
- Execute when the record is: Select either Edited for the first time or Edited each time.
Note: Execute the workflow when and Execute when the record is fields will only appear when the Action Type is set to Edited or Edited or Created.
- Click Next.
- Click + New Criteria to create a new criteria for the workflow rule:
- In the right sidebar, click Yes to add criteria or No to skip.
- Select a field, the comparator, and enter the necessary value.
- Click + Add Criterion or + to create additional criteria if necessary.
- If you add multiple criteria, select either AND or OR from the dropdown based on how you want the criteria to work. You can also edit the criteria pattern by manually entering the criteria in the CRITERIA PATTERN field.
- Once you’ve added the necessary criteria, click Done.
- Add actions by selecting from the options below:
- + Immediate Actions: Triggers actions immediately when the criteria are met.
- In the right sidebar, select the type of workflow action you want to associate with the workflow rule from the Type dropdown. Next, from the Name dropdown, choose the workflow action you created and configured, or click + New %Workflow Action% from the dropdown to add a new workflow action.
- Click + Add New Action to add more actions if necessary.
- Click Associate to finish associating actions with the criteria.
- + Immediate Actions: Triggers actions immediately when the criteria are met.
- + Time Based Actions: Triggers actions based on the scheduled time.
- In the right sidebar, In the EXECUTION TIME field, set the time for when the action will be executed.
- Select the type of workflow action you want to associate with the workflow rule from the Type dropdown. Then, from the Name dropdown, choose the workflow action you created and configured, or click + New %Workflow Action% from the dropdown to add a new workflow action.
- Click + Add New Action to add more actions if necessary.
- Click Associate to finish associating actions with the criteria.
- Click Save to finalize and save the workflow.
Now, once you’ve created the workflow rule, whenever an action occurs that matches the trigger you set in the workflow rule, the rule will execute, and the specified action will take place.
Note: You can create up to 10 criteria for one workflow, and within each criterion, you can add up to 10 criteria.
Other Actions in Workflow Rules
Change the Order of Workflow Rules
If you want to view specific workflow rules at the top of the List View page or in a specific order, you can reorder them. Here’s how:
- Go to Settings in the top right corner.
- Navigate to Organization Settings.
- Click Workflow Rules under Automation.
- Select the module where you want to change the order of workflow rules by clicking the Module dropdown.
- Click Change Order in the right corner.
- Now, pick and reorder the rules based on your preference.
- After making the necessary reorder, click Save Reorder.
Edit a Workflow Rule
- Go to Settings. Navigate to Organization Settings.
- Click Workflow Rules under Automation.
- Hover over and select the workflow rule you want to edit, and click Edit.
- Make your changes, and click Save.
Clone a Workflow Rule
If you need a new workflow rule with the same details present in an existing workflow rule, you can clone the existing rule. Here’s how:
- Go to Settings in the top right corner.
- Navigate to Organization Settings.
- Click Workflow Rules under Automation.
- Hover over the workflow rule you want to clone, click the dropdown to the right, and select Clone.
- In the New Workflow Rule page, review the cloned details.
- Verify the WORKFLOW RULE EXECUTION CONDITIONS, and click Update.
- Click Save.
Mark a Workflow Rule As Inactive
If you won’t be using a workflow rule for a while but want to keep it for future use, you can mark it as inactive instead of deleting it. To mark it as inactive:
- Go to Settings in the top right corner.
- Navigate to Organization Settings.
- Click Workflow Rules under Automation.
- Hover over the workflow rule you want to mark as inactive, click the dropdown to the right, and select Mark as Inactive.
Configure Notification Preferences for Workflow Rules
Insight:
- You can trigger a workflow alert up to 500 times per day.
- Admins will also receive in-app notifications when any workflow action crosses the specified threshold.
You can set daily limits for workflow alert triggers and add email recipients to get notified when the daily threshold is reached. You can also configure how you receive failure log notifications when a workflow rule fails. To configure:
- Go to Settings in the top right corner.
- Navigate to Organization Settings.
- Click Workflow Rules under Automation.
- Click Configure Notification Preferences in the top right corner.
- In the Configure Notification Preferences popup, fill in the following fields:
- Usage Limit Notifications: Choose a threshold for sending notifications for workflow actions like email alerts, webhooks, and custom functions.
- Failure Log Notifications: Select the frequency and time for notifications, and specify the email recipients who will receive the failure log updates if needed.
- Click Save.
Delete a Workflow Rule
- Go to Settings in the top right corner.
- Navigate to Organization Settings.
- Click Workflow Rules under Automation.
- Hover over the workflow rule you want to delete, click the dropdown to the right, and select Delete Workflow Rule.
In the popup, click Yes to confirm.
Workflow Actions
Setting up a new email alert
A workflow rule consists of actions that comprises of Email Alerts, Field Updates and Webhooks that play an essential role in executing a task. To set up an email alert in Zoho Inventory,
- Go to Settings in the top right corner.
- Navigate to Organization Settings.
- Click Workflow Actions under Automation.
- Navigate to the Email Alerts in the left-sidebar.
Note: This feature is available only for selective pricing plans.
- Name your workflow
- Choose when to trigger the email
- Workflow types
- Advanced Filters
- Setting up the Email Template
Name Your Workflow
| Field | Description |
|---|---|
| Workflow Rule Name | Give a unique name for the workflow rule. |
| Module | Select the module for which you wish to create a workflow. |
| Description | Give a small description for your workflow rule. |
Choose When to Trigger The Email
You can choose when to trigger the workflow based on the parameters you select in the following fields.
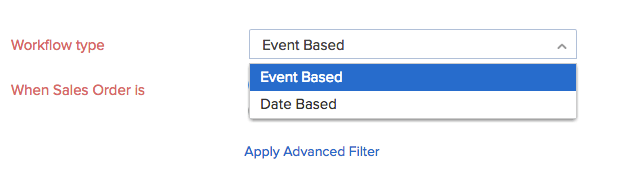
Workflow Type
There are two types of workflows:
- Event Based
- Date Based
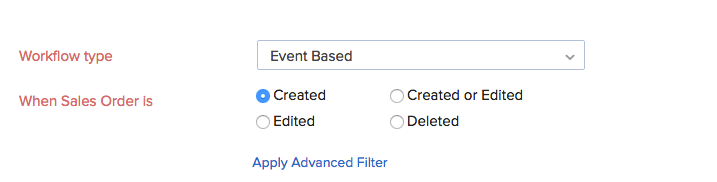
Event Based: If the workflow is Event Based, then the workflow is triggered when a module is:
- Created
- Edited
- Created or Edited
- Deleted
When a module is Edited or Created or Edited, additional fields appear.

| Field | Description |
|---|---|
| Execute the workflow when | There are 3 options to choose from -When any field is updated. -When any selected field is updated. -When all selected field are updated. If you select When any selected field is updated or When all selected fields are updated in the drop down, an additional box will appear where you can select any 3 fields of the module. |
| Just Once or Everytime? | Just Once- The workflow would be executed when the criteria is met for the first time. Everytime- The workflow would be executed everytime the criteria is met. |
Date Based: If the workflow is Date Based, additional fields appear.
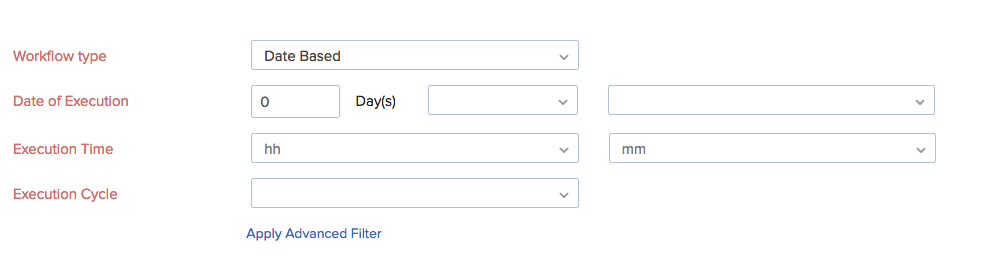
| Field | Description |
|---|---|
| Date of Execution | Select the workflow to be triggered on any number of days before or after Order Date, Shipment Date or Created Time from the drop down.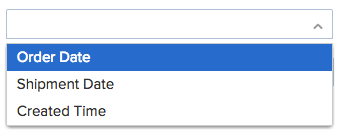 |
| Execution Time | You may choose the exact time of execution by selecting the corresponding hh or mm . |
| Execution Cycle | You may choose the frequency of triggering a workflow by choosing Once, Monthly or Yearly from the drop down.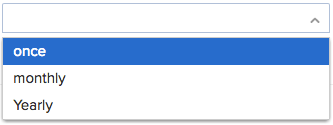 |
Advanced Filters
Clicking on Apply advanced filters allows you to set one or more conditions based on which the action will be executed.

| Field | Description |
|---|---|
| Condition | The filter will be triggered based on the criteria you set. You can also add multiple criteria by clicking on + Add Criteria based on which the workflow rule will be executed.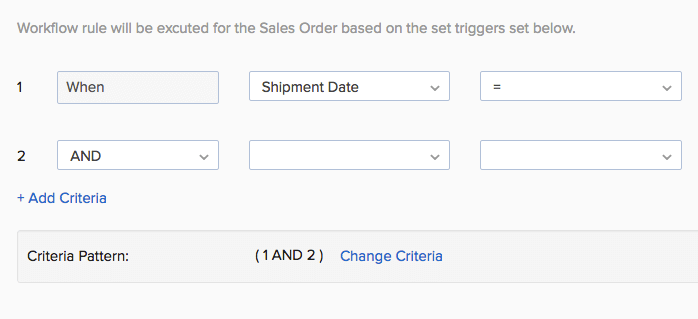 The condition for the next criteria may be AND or OR depending on whether you wish to include both or either one of the criteria. Also, you can change the criteria pattern as you want by selecting Change Criteria. |
| Field Attributes | The field is used to select an attribute from the list that broadly covers the terms that are related to the module.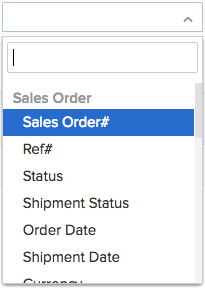 |
| Rules | Select the rules based on which the system should filter the trigger. If the field has alphanumeric values, the rules are,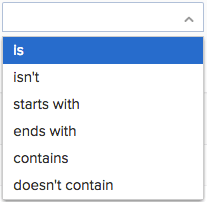 If the field has only numerical values, then the rules are,  |
| Value Field | Enter the value of the attribute for which the filter must be applied. |
Editing Criteria Pattern:
You can edit the criteria pattern to suit your requirements by selecting Change Criteria. The editor allows you to define a pattern of your choice using simple AND/OR logic. For example, if you wish to trigger the workflow rule When Sales Order date is 20th July 2016 AND Reference Number is 54321 OR Status isn’t Confirmed,
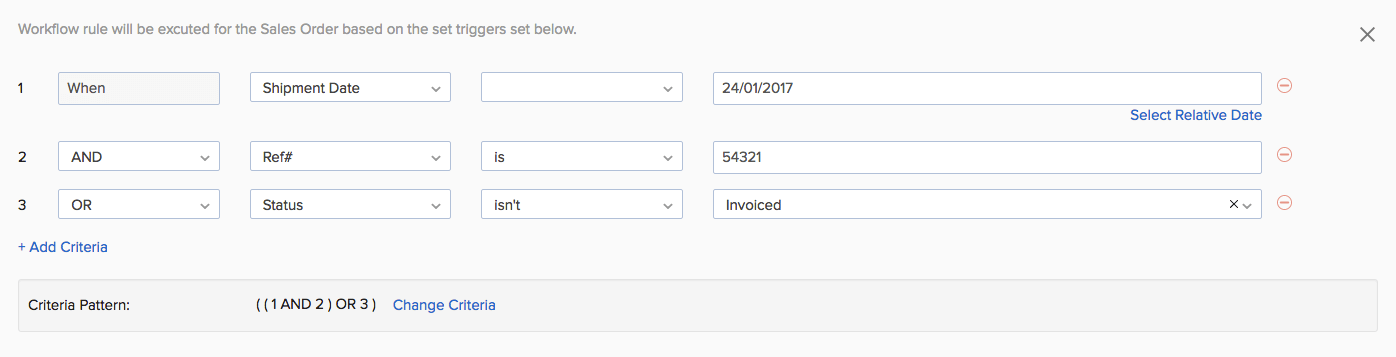
The pattern is ((1 AND 2) OR 3). If you feel the criteria pattern does not match your requirement, you can edit it to be (1 AND (2 OR 3)).

Click Save to continue.
Note: You can have a maximum of 10 criteria for each Workflow Rule.
Setting up the Email Template
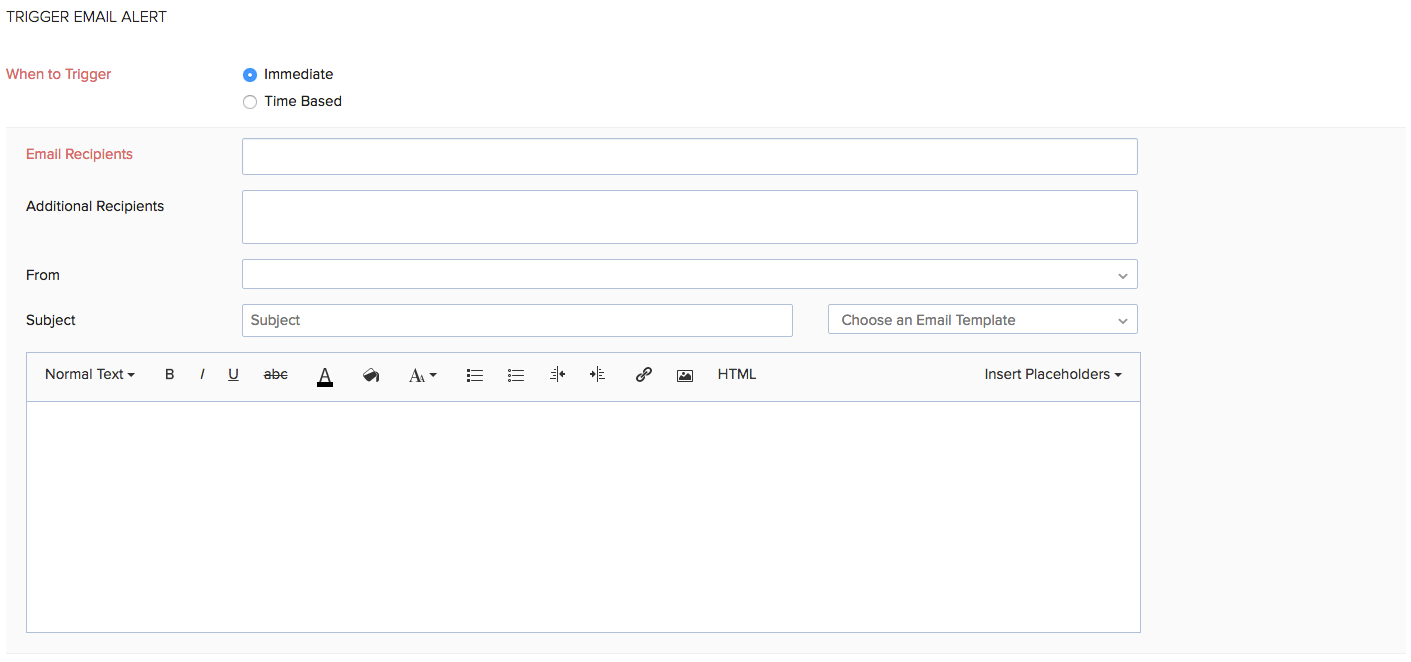
Once the rules have been set, the email alert can be set up. You can customize the alert to suit your business needs and program it to act immediately or at a particular time.
| Field | Description |
|---|---|
| Email Recipients | Enter the email address of the person who is meant to receive the email alert. |
| Additional Recipients | Additional email addresses, if any, can be mentioned here. |
| From | The email address from where this email is sent can be defined here. |
| Subject | The subject of the email alert. |
Immediate Trigger:

If the When to Trigger option is set as Immediate, then the email alert is sent immediately after the conditions defined in the workflow are met.
Time Based Trigger: If you wish to schedule the email for a particular time, set When to Trigger option as Time Based.

| Field | Description |
|---|---|
| Execution Time | Enter the desired number of Days/Hours before or after, -Rule Trigger Date -Order Date -Shipment Date -Created Time -Modified Time |
Finally, click Save to create the Email Alert workflow to implement it for the modules in Zoho Inventory.
Setting Up a New Field Update
A workflow rule consists of actions that comprises of Email Alerts, Field Updates and Webhooks that play an essential role in executing a task. To set up a field update in Zoho Inventory,
- Go to Settings in the top right corner.
- Navigate to Organization Settings.
- Click Workflow Action under Automation.
- Navigate to the Field Updates in the left-sidebar.
Note: This feature is available only for selective pricing plans.
- Name your workflow
- Choose when to trigger the field update
- Workflow types
- Advanced Filters
- Setting up the Field Update
Name your workflow
| Field | Description |
|---|---|
| Workflow Rule Name | Give a unique name for the workflow rule. |
| Module | Select the module for which you wish to create a workflow. |
| Description | Give a small description for your workflow rule. |
Choose When to Trigger The Field Update
You can choose when to trigger the workflow based on the parameters you select in the following fields.
Workflow Type
There are two types of workflows:
- Event Based
- Date Based
Event Based: If the workflow is Event Based, then the workflow is triggered when a module is:
- Created
- Edited
- Created or Edited
- Deleted
When a module is Edited or Created or Edited, additional fields appear.
| Field | Description |
|---|---|
| Execute the workflow when | There are 3 options to choose from -When any field is updated. -When any selected field is updated. -When all selected field are updated. If you select When any selected field is updated or When all selected fields are updated in the drop down, an additional box will appear where you can select any 3 fields of the module. |
| Just Once or Everytime? | Just Once- The workflow would be executed when the criteria is met for the first time. Everytime- The workflow would be executed everytime the criteria is met. |
Date Based: If the workflow is Date Based, additional fields appear.
| Field | Description |
|---|---|
| Date of Execution | Select the workflow to be triggered on any number of days before or after Order Date, Shipment Date or Created Time from the drop down. |
| Execution Time | You may choose the exact time of execution by selecting the corresponding hh or mm . |
| Execution Cycle | You may choose the frequency of triggering a workflow by choosing Once, Monthly or Yearly from the drop down. |
Advanced Filters
Clicking on Apply advanced filters allows you to set one or more conditions based on which the action will be executed.
| Field | Description |
|---|---|
| Condition | The filter will be triggered based on the criteria you set. You can also add multiple criteria by clicking on + Add Criteria based on which the workflow rule will be executed. The condition for the next criteria may be AND or OR depending on whether you wish to include both or either one of the criteria. Also, you can change the criteria pattern as you want by selecting Change Criteria. |
| Field Attributes | The field is used to select an attribute from the list that broadly covers the terms that are related to the module. |
| Rules | Select the rules based on which the system should filter the trigger. If the field has alphanumeric values, the rules are, If the field has only numerical values, then the rules are, |
| Value Field | Enter the value of the attribute for which the filter must be applied. |
Editing Criteria Pattern:
You can edit the criteria pattern to suit your requirements by selecting Change Criteria. The editor allows you to define a pattern of your choice using simple AND/OR logic. For example, if you wish to trigger the workflow rule When Sales Order date is 20th July 2016 AND Reference Number is 54321 OR Status isn’t Confirmed,
The pattern is ((1 AND 2) OR 3). If you feel the criteria pattern does not match your requirement, you can edit it to be (1 AND (2 OR 3)).
Click Save to continue.
Note: You can have a maximum of 10 criteria for each Workflow Rule.
Setting Up the Field Update
Once the rules have been set, the field update can be set up. You can customize the update to suit your business needs and program it to act immediately or at a particular time.
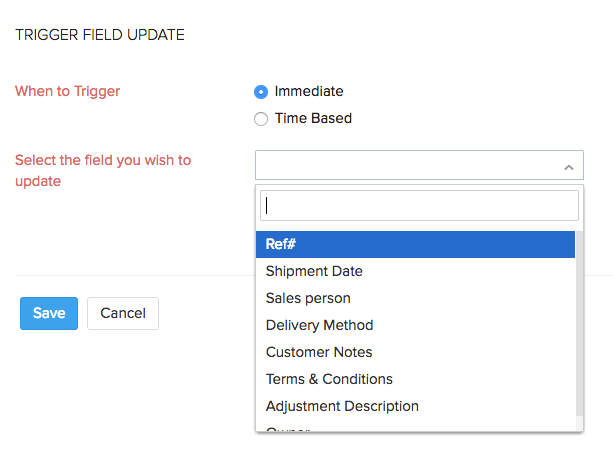
Select the field which you wish to update from the dropdown list.
Immediate Trigger:
If the When to Trigger option is set as Immediate, then the email alert is sent immediately after the conditions defined in the workflow are met.
Time Based Trigger: If you wish to schedule the email for a particular time, set When to Trigger option as Time Based.
| Field | Description |
|---|---|
| Execution Time | Enter the desired number of Days/Hours before or after, -Rule Trigger Date -Order Date -Shipment Date -Created Time -Modified Time |
Finally, click Save to create the Field Update workflow and implement it for the modules in Zoho Inventory.
Webhooks
Webhooks facilitate communication with third-party applications by sending instant web notifications every time an event occurs in Zoho Inventory. With Webhooks, you can configure both HTTP & HTTPS URLs and associate them in workflow rules to automate the entire notification process.
For example, you can associate your Zoho Inventory account with an SMS provider with a webhook to thank your customer by sending a message automatically if the total amount paid exceeds $1000. For general information about webhooks, please refer to webhooks.org.
Go to Settings in the top right corner.
Navigate to Organization Settings.
Click Workflow Actions under Automation.
Navigate to the Webhooks in the left sidebar.
Note: This feature is available only for selective pricing plans.
Name your workflow
| Field | Description |
|---|---|
| Workflow Rule Name | Give a unique name for the workflow rule. |
| Module | Select the module for which you wish to create a workflow. |
| Description | Give a small description for your workflow rule. |
Choose when to trigger the webhook
You can choose when to trigger the workflow based on the parameters you select in the following fields.
Workflow types
There are two types of workflows:
- Event Based
- Date Based
Event Based: If the workflow is Event Based, then the workflow is triggered when a module is:
- Created
- Edited
- Created or Edited
- Deleted
When a module is Edited or Created or Edited, additional fields appear.
| Field | Description |
|---|---|
| Execute the workflow when | There are 3 options to choose from -When any field is updated. -When any selected field is updated. -When all selected field are updated. If you select When any selected field is updated or When all selected fields are updated in the drop down, an additional box will appear where you can select any 3 fields of the module. |
| Just Once or Everytime? | Just Once- The workflow would be executed when the criteria is met for the first time. Everytime- The workflow would be executed everytime the criteria is met. |
Date Based: If the workflow is Date Based, additional fields appear.
| Field | Description |
|---|---|
| Date of Execution | Select the workflow to be triggered on any number of days before or after Order Date, Shipment Date or Created Time from the drop down. |
| Execution Time | You may choose the exact time of execution by selecting the corresponding hh or mm . |
| Execution Cycle | You may choose the frequency of triggering a workflow by choosing Once, Monthly or Yearly from the drop down. |
Advanced Filters
Clicking on Apply advanced filters allows you to set one or more conditions based on which the action will be executed.
| Field | Description |
|---|---|
| Condition | The filter will be triggered based on the criteria you set. You can also add multiple criteria by clicking on + Add Criteria based on which the workflow rule will be executed. The condition for the next criteria may be AND or OR depending on whether you wish to include both or either one of the criteria. Also, you can change the criteria pattern as you want by selecting Change Criteria. |
| Field Attributes | The field is used to select an attribute from the list that broadly covers the terms that are related to the module. |
| Rules | Select the rules based on which the system should filter the trigger. If the field has alphanumeric values, the rules are, If the field has only numerical values, then the rules are, |
| Value Field | Enter the value of the attribute for which the filter must be applied. |
Editing Criteria Pattern:
You can edit the criteria pattern to suit your requirements by selecting Change Criteria. The editor allows you to define a pattern of your choice using simple AND/OR logic. For example, if you wish to trigger the workflow rule When Sales Order date is 20th July 2016 AND Reference Number is 54321 OR Status isn’t Confirmed,
The pattern is ((1 AND 2) OR 3). If you feel the criteria pattern does not match your requirement, you can edit it to be (1 AND (2 OR 3)).
Click Save to continue.
Note: You can have a maximum of 10 criteria for each Workflow Rule.
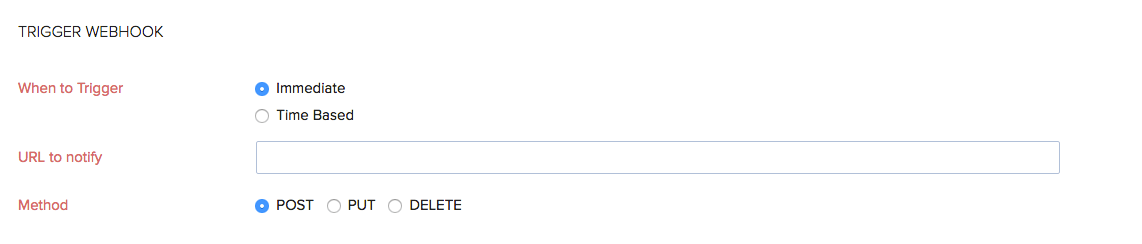
Setting Up the Webhook trigger
Once the rules have been set, the webhook can be set up. You can customize the update to suit your business needs and program it to act immediately or at a particular time.
| Field | Description |
|---|---|
| URL to notify | Enter the URL of the external service provider’s API. For example, if you want Zoho Inventory to add or change data in Zoho CRM, the URL would be https://crm.zoho.com/crm. |
| Method | Specify the function you want to call at the external service: POST: Requests that data sent must be considered as new. PUT: Requests that data sent should be considered as a modified version of the one already present. DELETE: Requests that the data must be deleted. |
| Custom Parameters | You can add custom parameters. in the webhook such as Auth Token, Security Token, API Key etc. based on which the URL will be appended. Enter the required parameter under Parameter Name and the corresponding value under Parameter Value. If you wish to add multiple parameters, select + Add Custom Parameters. |
| Entity Parameters | Append All Parameters- Select this option to send all parameters from Zoho Inventory to the external service. Append Selected Parameters- Select this option to send selected parameters from Zoho Inventory to the external service. |
| URL Preview | The URL generated for this webhook will be displayed here. |
Custom Parameters
If you wish to specify any custom parameters like your API Key, Auth token etc., you can make use of the custom parameters option.

HTTP Headers
If you wish to specify any HTTP headers in your webhook, you can check the INCLUDE HTTP HEADERS option.

Entity Parameters
There are two options available while communicating data with a third party application, namely,
- Append All Parameters- Select this option to communicate all data as and when it is created.
- Append Selected Parameters- Select this option to transfer only the data you want to send. If you choose this option, additional fields appear.
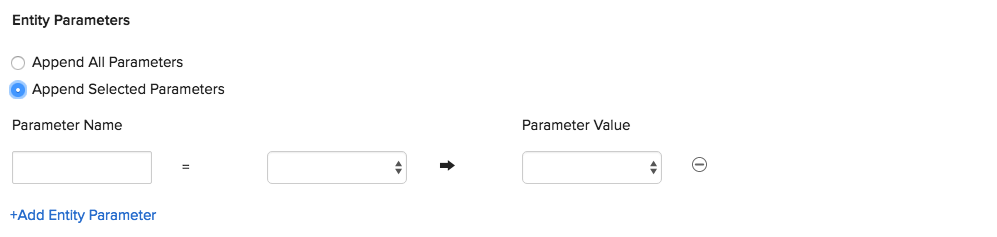
| Field | Description |
|---|---|
| Parameter Name | Enter the name of the parameter that you wish to append and select the module in the corresponding box. |
| Parameter Value | Select the desired parameter from the drop down. |
Note: You can add multiple entity parameters by selecting +Add Entity Parameter. You can add a maximum of 10 entity parameters.
User Defined Parameters
If you wish to add user defined parameters while accessing an external service, select the box Add User Defined Parameters.
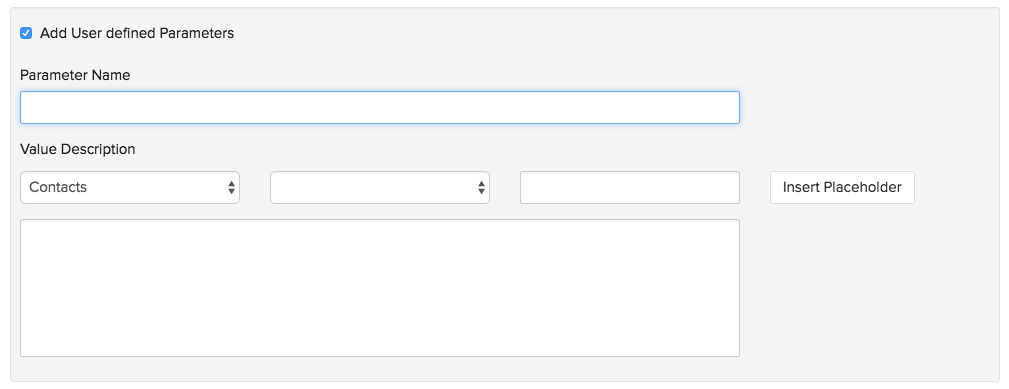
| Field | Description |
|---|---|
| Parameter Name | Enter the name of the parameter which you wish to update. |
| Value Description | Select a module of Zoho Inventory from the first drop down and select the corresponding parameter from the drop down of the adjacent box. This will generate the placeholder string for that parameter. You can enter the custom code in different formats. For example, if you wish to send a JSON or XML string with parameter values from a Sales Order, you can use the user defined parameters and placeholders format. If you wish to include the placeholder in the string, select Insert Placeholder. |
Click on Save to create a webhook. You can now select one of the many webhooks created to connect with an external service provider when a workflow rule is triggered.
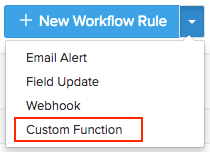
Custom Functions
Custom functions in Zoho Inventory allows you to write small pieces of code to automate your business processes. Be it providing a special discount on your customers’ invoice, or adding a late fee when an invoice becomes overdue, all you have to do is write a piece of code using Deluge script for a workflow rule and automation of the process will be taken care of.
Note: This feature is available only for selective pricing plans.
What is Deluge?
Deluge is an online scripting language integrated with Zoho Creator. It enables users to add logic to the application, incrementally, making it more powerful and robust.
To know about Deluge, refer the Deluge Reference Guide.
If you wish to learn Deluge by writing code samples, click here.
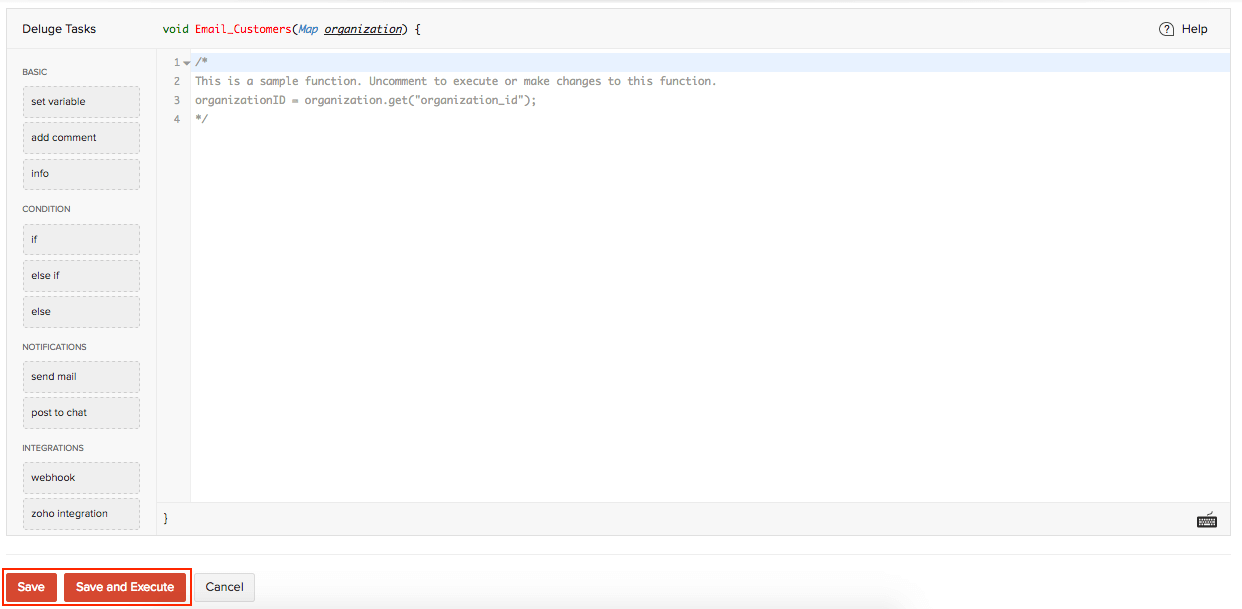
Creating and Executing a Custom function
To create a custom function,
- Go to Settings in the top right corner.
- Navigate to Organization Settings.
- Click Workflow Actions under Automation.
- Navigate to the Custom Functions in the left sidebar.
- Enter a name for your custom function and provide a short description.
- Choose the module for which you wish to create the custom function.
- Now, type in or drag the parameters that are mentioned on the left side of the script-box. This will place the syntax of the function.
- Choose the parameters of your choice and set the conditions for your custom function.
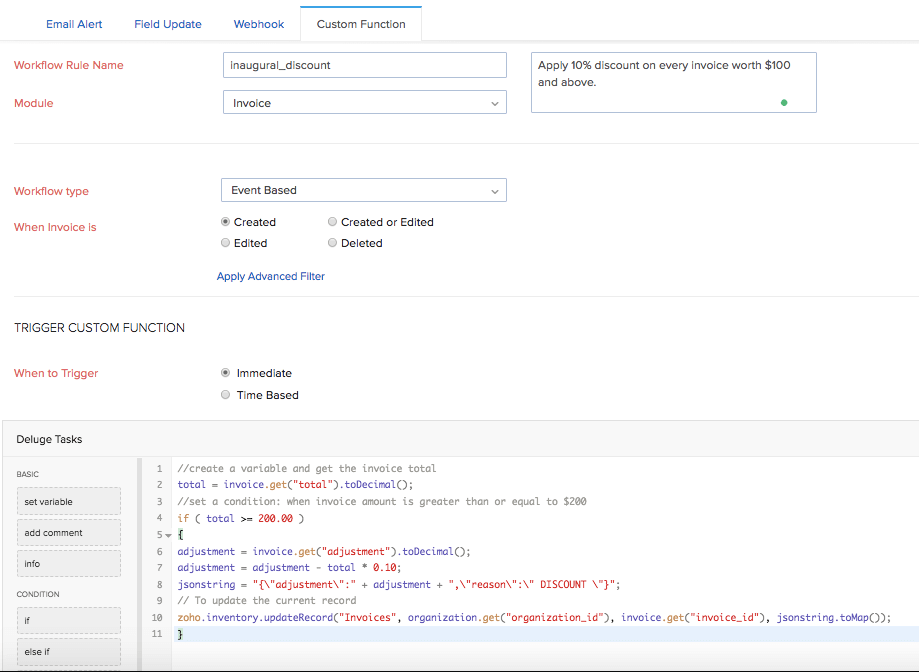
- Click Save for the changes to take effect.
Now, whenever the criteria is met, the workflow rule with the custom function will be triggered.
Default Fields
As of now, custom functions support Invoices, Sales Orders, Purchase Orders and Bills.
These modules will have the following fields from which you can get the necessary parameters for your custom function.
Invoice
The invoice map supports the following fields:
| Key Fields | Description |
|---|---|
| due_date | Invoice due date |
| payment_expected_date | Expected payment date for the invoice |
| reference_number | Reference number of the invoice |
| customer_id | Customer ID |
| customer_name | Name of the customer who is assigned to the invoice |
| currency_id | Currency ID |
| currency_code | Currency code |
| currency_symbol | Currency symbol |
| exchange_rate | Exchange rate involved in the invoice |
| discount_amount | Discount amount involved in the invoice |
| discount | Discount involved in the invoice |
| shipping_charge | Shipping charge entered in the invoice |
| adjustment | Adjustments |
| sub_total | Sub total of the invoice |
| tax_total | Total tax amount in the invoice |
| total | Total amount |
| balance | Balance |
| price_precision | Number of Decimal places |
| billing_address | Billing address of the customer |
| shipping_address | Shipping address of the customer |
| notes | Notes |
| terms | Terms and conditions |
| custom_fields | Invoice custom fields |
| salesperson_id | ID of the salesperson |
Sample map:
{
	"total": "0.0",
	"payment_terms": "0",
	"terms": “Checking”,
	"price_precision": "2",
	"payment_expected_date": "2016-06-31”,
	"date": "2016-06-30",
	"shipping_address": {
		"zip": "94588",
		"country": "USA",
		"address": "4910 Hopyard Rd",
		"city": "Pleasanton",
		"state": "CA",
		"fax": "Fax Number"
	},
	"balance": "0.0",
	"adjustment": "0.0",
	"currency_symbol": "Rs.",
	"salesperson_id": “7605000000336089”,
	"currency_code": "INR",
	"shipping_charge": "0.0",
	"custom_fields": [
		{
			"customfield_id": "7605000000336081",
			"is_active": true,
			"show_in_all_pdf": false,
			"value_formatted": "INV-8",
			"data_type": "autonumber",
			"index": 1,
			"label": "AutoNumber",
			"show_on_pdf": false,
			"value": "INV-8"
		},
		{
			"customfield_id": "7605000000351027",
			"is_active": true,
			"show_in_all_pdf": true,
			"value_formatted": "01 Aug 2016",
			"data_type": "date",
			"index": 2,
			"label": "Date",
			"show_on_pdf": true,
			"value": "2016-08-01"
		}
	],
	"currency_id": "7605000000000099",
	"exchange_rate": "1.0",
	"status": "draft",
	"sub_total": "12000.0",
	"customer_name": “Customer”,
	"invoice_number": "INV-000087",
	"discount_amount": "12000.0",
	"discount": "100.00%",
	"tax_total": "0.0",
	"reference_number": “checking”,
	"due_date": "2016-06-30",
	"invoice_id": "7605000000369043",
	"notes": "Thanks for your business.",
	"customer_id": "7605000000258011",
	"billing_address": {
		"zip": "94588",
		"country": "USA",
		"address": "4910 Hopyard Rd",
		"city": "Pleasanton",
		"state": "CA",
		"fax": "Fax Number"
	}
}
sales order
| Key Fields | Description |
|---|---|
| date | Sales Order date |
| tax_total | Total tax amount in the sales order |
| zcrm_potential_id | ID of the potential in Zoho CRM |
| discount_amount | Discount amount involved in the sales order |
| salesorder_id | Sales order ID |
| discount | Discount |
| shipment_date | Date on which shipment is made |
| billing_address | Billing address of the customer |
| line_items | Line items |
| currency_code | Currency code |
| total | Total amount |
| delivery_method_id | Delivery method ID |
| terms | Terms and conditions |
| delivery_method | Method of delivery |
| shipping_address | Shipping address of the customer |
| exchange_rate | Exchange rate involved in the sales order |
| currency_symbol | Currency symbol |
| custom_fields | Sales order custom fields |
| estimate_id | Estimate ID |
| reference_number | Reference number of the sales order |
| salesperson_name | Name of the salesperson involved |
| salesperson_id | ID of the salesperson involved |
| shipping_charge | Shipping charge entered in the sales order |
| salesorder_number | Your sales order number |
| sub_total | Sub total of the sales order |
| zcrm_potential_name | Name of the potential in Zoho CRM |
| adjustment | Adjustments made |
| customer_name | Name of the customer who is assigned to the sales order |
| customer_id | ID of the customer who is assigned to the sales order |
| currency_id | Currency ID |
| status | Status of your sales order |
Sample map:
{
	"date": "2016-05-23",
	"tax_total": "0.0",
	"zcrm_potential_id": "",
	"discount_amount": "1200.0",
	"salesorder_id": "7605000000295003",
	"discount": "10.00%",
	"shipment_date": "2016-05-23",
	"billing_address": {
		"zip": "94588",
		"country": "USA",
		"address": "4910 Hopyard Rd",
		"city": "Pleasanton",
		"state": "CA",
		"fax": "Fax Number"
	},
	"line_items": [
		{
			"bcy_rate": 12000,
			"line_item_id": "7605000000295011",
			"quantity": 1,
			"item_id": "7605000000259147",
			"tax_name": "",
			"description": "",
			"discount": 0,
			"item_total": 12000,
			"item_custom_fields": [
			],
			"tax_id": "",
			"is_invoiced": true,
			"item_order": 0,
			"tags": [
			],
			"stock_on_hand": "",
			"unit": "",
			"rate": 12000,
			"tax_type": "tax",
			"name": "Moto",
			"tax_percentage": 0
		}
	],
	"currency_code": "INR",
	"total": "10820.0",
	"delivery_method_id": "7605000000461053",
	"terms": "Terms & Conditions",
	"delivery_method": "Door Delivery",
	"shipping_address": {
		"zip": "",
		"country": "",
		"address": "",
		"city": "",
		"state": "",
		"fax": ""
	},
	"exchange_rate": "1.0",
	"currency_symbol": "Rs.",
	"custom_fields": [
		{
			"customfield_id": "7605000000321009",
			"is_active": true,
			"show_in_all_pdf": true,
			"value_formatted": "Text",
			"data_type": "string",
			"index": 1,
			"label": "Text",
			"show_on_pdf": true,
			"value": "Text"
		}
	],
	"estimate_id": "7605000000405047",
	"reference_number": "Reference",
	"salesperson_name": "Arun",
	"salesperson_id": "7605000000135003",
	"shipping_charge": "10.0",
	"salesorder_number": "SO-00002",
	"sub_total": "12000.0",
	"zcrm_potential_name": "",
	"adjustment": "10.0",
	"customer_name": "Arun",
	"customer_id": "7605000000101007",
	"currency_id": "7605000000000099",
	"status": "invoiced"
}
Purchase order
The purchase order map supports the following fields:
| Key Fields | Description |
|---|---|
| date | Date of the purchase order |
| delivery_address | Delivery address |
| tax_total | Total tax amount in the purchase order |
| delivery_org_address_id | ID of delivery org address |
| purchaseorder_id | Purchase order ID |
| expected_delivery_date | Expected delivery date |
| billing_address | Billing address of purchase order |
| line_items | Line items in the purchase order |
| currency_code | Currency code |
| total | Total of the purchase order |
| delivery_customer_id | Delivery customer ID |
| exchange_rate | Exchange rate involved in the purchase order |
| currency_symbol | Currency symbol |
| custom_fields | Purchase order custom fields |
| ship_via_id | ID of mode of shipping |
| vendor_name | Name of the vendor |
| reference_number | Reference number of your purchase order |
| purchaseorder_number | Purchase order number |
| delivery_date | Delivery date |
| vendor_id | Vendor ID |
| sub_total | Sub-total of the purchase order |
| ship_via | Means of shipping |
| attention | Attention |
| crm_owner_id | ID of Zoho CRM owner |
| currency_id | Currency ID |
| status | Status |
Sample map:
{
	"date": "2016-07-11",
	"delivery_address": {
		"zip": "94588",
		"country": "USA",
		"address": "4910 Hopyard Rd",
		"city": "Pleasanton",
		"state": "CA",
		"fax": "Fax Number"
	},
	"tax_total": "0.0",
	"delivery_org_address_id": "7605000000054013",
	"purchaseorder_id": "7605000000378500",
	"expected_delivery_date": "",
	"billing_address": {
		"zip": "94588",
		"country": "USA",
		"address": "4910 Hopyard Rd",
		"city": "Pleasanton",
		"state": "CA",
		"fax": "Fax Number"
	},
	"line_items": [
		{
			"bcy_rate": 1000,
			"line_item_id": "7605000000378504",
			"quantity": 1,
			"item_id": "7605000000298021",
			"tax_name": "",
			"description": "",
			"item_total": 1000,
			"tax_id": "",
			"item_order": 0,
			"tags": [

			],
			"unit": "No",
			"account_id": "7605000000000403",
			"rate": 1000,
			"tax_type": "tax",
			"account_name": "Advertising And Marketing",
			"name": "Moto G Turbo Edition",
			"tax_percentage": 0
		}
	],
	"currency_code": "INR",
	"total": "1000.0",
	"delivery_customer_id": "",
	"exchange_rate": "1.0",
	"currency_symbol": "Rs.",
	"custom_fields": "[]",
	"ship_via_id": "7605000000461053",
	"vendor_name": "Mr. Vendor",
	"reference_number": "Reference",
	"purchaseorder_number": "PO-00006",
	"delivery_date": "2016-07-11",
	"vendor_id": "7605000000112009",
	"sub_total": "1000.0",
	"ship_via": "Door Delivery",
	"attention": "Arun",
	"crm_owner_id": "",
	"currency_id": "7605000000000099",
	"status": "billed"
}
Bill
The bill map supports the following fields:
| Key Fields | Description |
|---|---|
| date | Date on the bill |
| bill_id | ID of the bill |
| purchaseorder_ids | ID of the purchase order involved |
| tax_total | Total tax amount in the bill |
| exchange_rate | Exchange rate involved in the bill |
| currency_symbol | Currency symbol |
| custom_fields | Bill custom fields |
| due_date | Due date of the bill |
| vendor_name | Name of the vendor involved |
| billing_address | Billing address |
| line_items | Line items in the bill |
| payment_terms | Payments terms associated to vendor |
| payment_expected_date | Expected payment date |
| reference_number | Reference number of the bill |
| currency_code | Currency code |
| total | Total on the bill |
| bill_number | Bill number |
| payment_made | Payment made for the bill |
| balance | Balance amount |
| recurring_bill_id | ID of the recurring bill profile |
| vendor_id | ID of the vendor involved |
| sub_total | Sub-total on the bill |
| status | Bill status |
Sample map:
{
	"date": "2016-10-12",
	"bill_id": "348960000000193039",
	"purchaseorder_ids": "[]",
	"tax_total": "0.0",
	"exchange_rate": "1.0",
	"currency_symbol": "£",
	"custom_fields": "[]",
	"due_date": "2016-10-15",
	"vendor_name": "Vendor",
	"billing_address": {"zip":"","fax":"","address":"","state":"","country":"","city":""},
	"line_items": [{"tags":[],"tax_name":"","project_name":"","tax_type":"tax","account_id":"348960000000000412","customer_name":"","is_billable":false,"product_type":"goods","line_item_id":"348960000000193047","invoice_number":"","sku":"","purchaseorder_item_id":"","account_name":"Credit Card Charges","unit":"1","item_order":0,"rate":33000,"bcy_rate":33000,"item_id":"348960000000087031","description":"","project_id":"","name":"refrigerator","tax_id":"","quantity":1,"invoice_id":"","tax_percentage":0,"customer_id":"","item_total":33000}],
	"payment_terms": "3",
	"payment_expected_date": "",
	"reference_number": "1",
	"currency_code": "GBP",
	"total": "33000.0",
	"bill_number": "Bill-001",
	"payment_made": "0.0",
	"balance": "33000.0",
	"recurring_bill_id": "",
	"vendor_id": "348960000000051033",
	"sub_total": "33000.0",
	"status": "open"
}
To know more about how to use Deluge scripts for writing custom functions, refer the Deluge Reference Guide.
To know more about different scenarios where custom functions could be useful, refer our Custom Function Scenarios page.
Custom Schedules
Zoho Inventory lets you create and run predefined tasks at the specified time intervals using schedules. You can create your tasks using a deluge script and schedule this task to be executed at a particular time or on a recurring basis.
Note: This feature is available only for selective pricing plans.
Scenarios
Here are a few scenarios where schedules can be created to execute custom actions. However, you can create custom schedules based on your firm’s requirements.
Scenario 1: Peter runs a supermarket. At the end of every month, he wants to give a 10% off on the next purchase to customers whose total purchase for the month exceeds a certain amount, let’s say 1000. Peter creates a schedule to email this to selective customers on the last day of the month.
Scenario 2: Peter uses a third party application for maintaining customer and employee database internally. He would like to sync all data from Zoho Inventory to the other application periodically. To do so, he creates a custom schedule to sync the data at 6 pm every day.
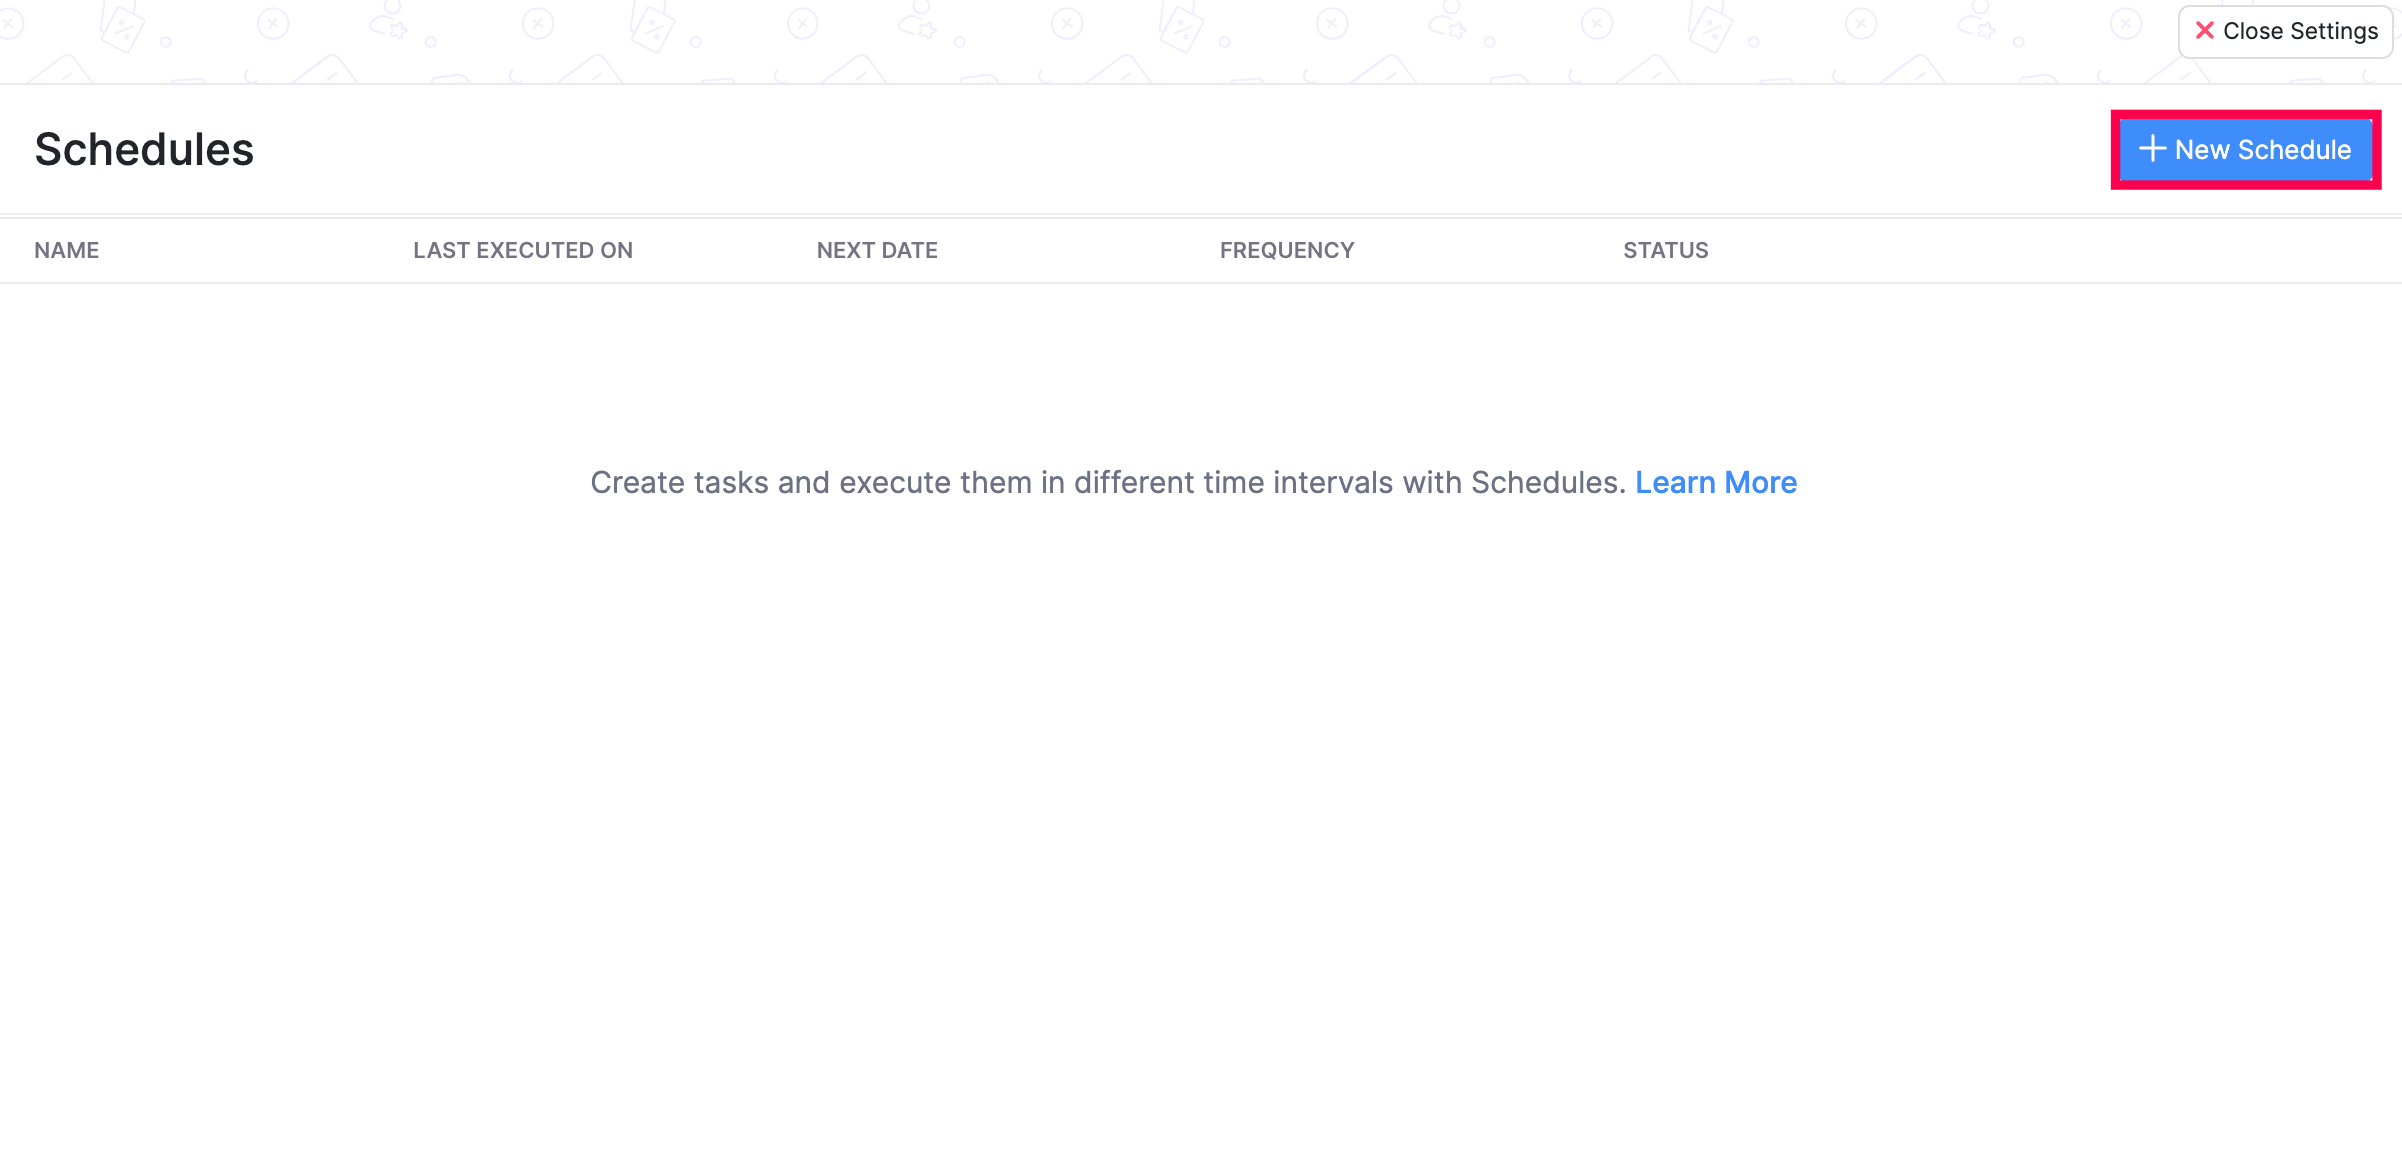
Creating New Schedules
To create a custom schedule in Zoho Inventory:
- Go to Settings in the top right corner.
- Navigate to Organization Settings.
- Click Schedules under Automation.
Click the + New Schedule button.
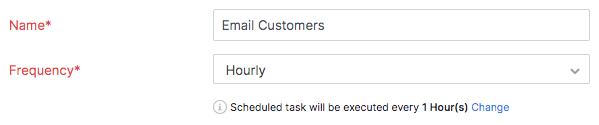
Enter a Name for your schedule.
Set the Frequency and recurrence pattern for the schedule to be executed. This can be hourly, daily, weekly, monthly or yearly.
Hourly: The task will be executed every hour (or based on your recurrence pattern).
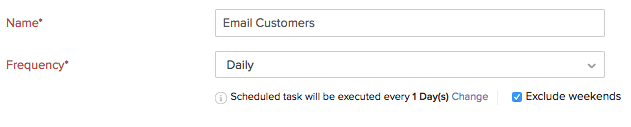
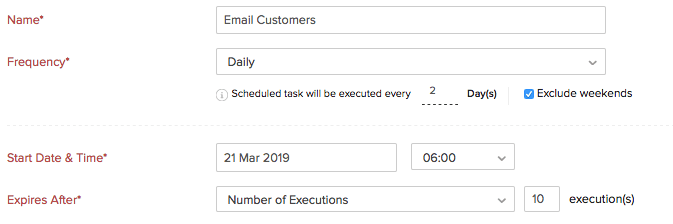
Daily: The task will be executed every day (or based on your recurrence pattern). You can choose to exclude the weekends.
Weekly: The task will be executed once a week (or based on your recurrence pattern). Select the day(s) of the week on which the task should be executed.

Monthly: Task will be executed once a month (or based on your recurrence pattern). This can be a specific date or a day in a month. For example, you can choose to execute it on the 5th of every month or the Second Saturday of every month.

Yearly: Task will be executed once a year (or based on your recurrence pattern). You can select the month and specify the date of execution or specify the day. For example, the task can be executed on the first Sunday in January or just January.

Set the Start Date and Time.
Warning: The start date of a schedule cannot be more than one year from the creation date.
- Select when the schedule should expire. It can expire after a number of executions or on a set date or not expire at all.
- Drag and drop options to create a Deluge function that will help to create your function.
Insight: Deluge is an online scripting language integrated with Zoho Services. It enables you to write your own functions that lets you modify the application to suit your needs, incrementally, making it more powerful.
- Click Save or Save and Execute to run it.
Note: You can only create up to 10 custom schedules.
Sample Function
Here’s a sample function for Scenario 1:
organizationID = organization.get("organization_id");
name = organization.get("name");
orgEmail = organization.get("email");
salesResponse = invokeUrl
[
url: "https://inventory.zoho.com/api/v1/organizations?organization_id=" + organizationID + "&from_date=" + toStartOfMonth(today).toString("YYYY-MM-dd") + "&to_date=" + eomonth(today,0).toString("YYYY-MM-dd")
type: GET
connection: "inventory_api_connection"
];
salesDetails = salesResponse.get("sales").toList();
for each sales in salesDetails
{
amount = sales.get("sales_with_tax");
if(amount > "<ENTER AMOUNT>")
{
customerName = sales.get("customer_name");
customerResponse = invokeUrl
[
url: "https://inventory.zoho.com/api/v1/contacts/" + sales.get("customer_id") + "?organization_id=" + organizationID
type: GET
connection: "inventory_api_connection"
];
customerDetails = customerResponse.get("contact");
customerEmail = customerDetails.get("email");
sendmail
[
from :zoho.adminuserid
to :customerEmail
subject :"Thank you for shopping! Here's a 10% discount!"
message :"<div>Dear " + customerName + ",<br></div><div><br></div><div>We just wanted to take a moment of our time to thank you for your continuous support.<br></div><div><br></div><div> Based on your recent purchases, we'd like to offer you a 10% off on your next purchase with us. <br></div><div><br></div><div>Please show this email during billing to avail this discount!<br></div><div><br></div><div>Regards,<br></div><div>" + name + "<br></div><div><br></div><div><br></div><div><br></div><div><br></div>"
]
}
}
Learn more from the Connections help document.
Other Actions
Mark Automation As Active or Inactive:
If an automation is no longer useful to you, you can mark it as Active or Inactive. To do so, place your cursor over the automation you want to deactivate and click the Mark as Inactive button.

Edit an Automation:
To edit the details of an automation, place your cursor over the automation and click the Edit button.

Filter Workflow Rules:
To filter the automations list, follow these steps:
- Go to Settings in the top right corner.
- Navigate to Organization Settings.
- Click Workflow Rules under Automation.
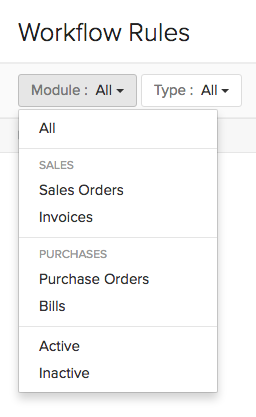
- Under Module, select one from the drop down to filter the workflows based on the module for which the workflow has been created.
You can also filter workflow rules based on whether they are active or inactive. Based on your selection, the corresponding workflow rules will be displayed as a list.