More Actions on Sales Orders
Export Sales Orders
To export your sales orders, follow the following steps:
- Open the Sales Orders tab
- Click on the Menu icon
- Select the Export sales orders option
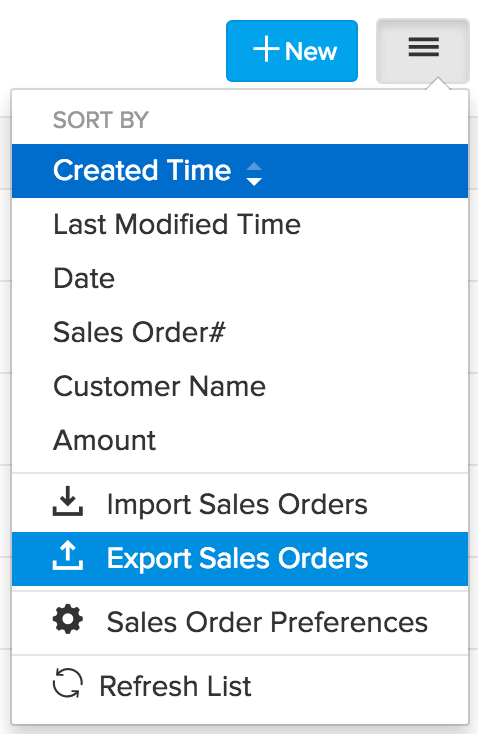
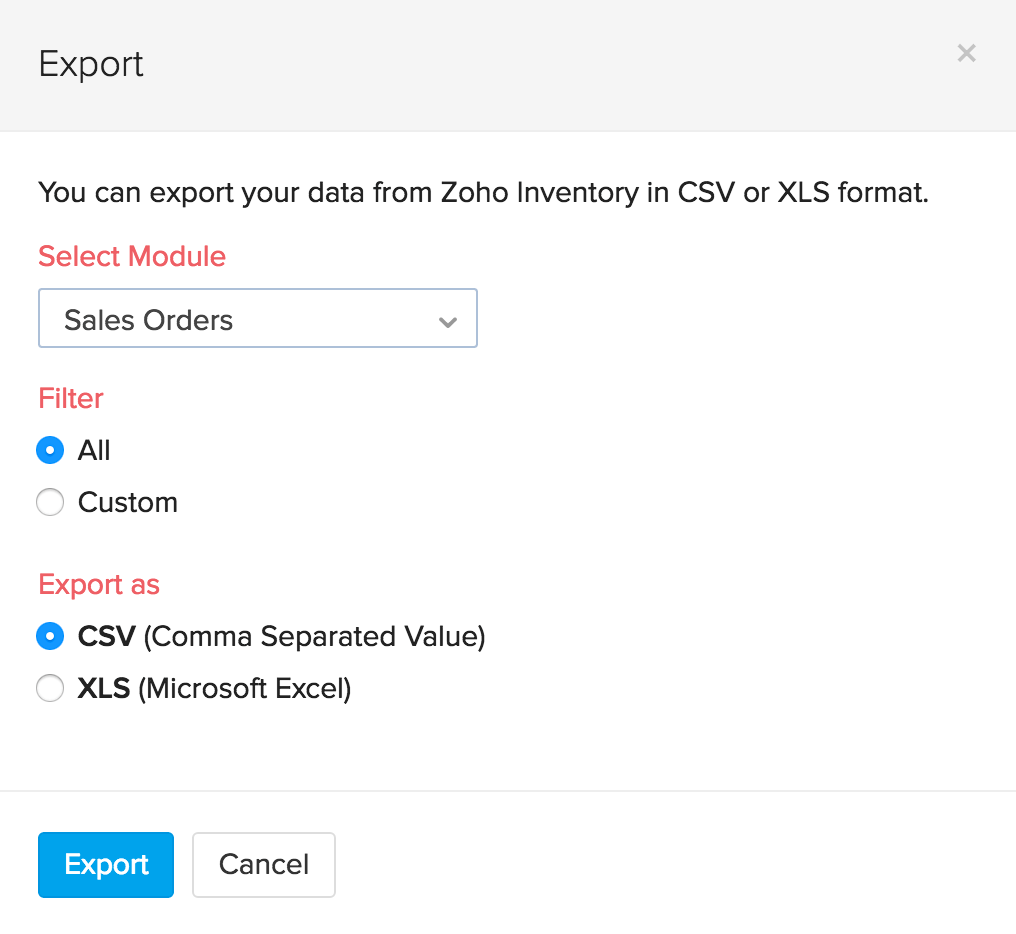
- A pop up with the options associated with exporting sales orders opens up.
- The entiry will be by default sales orders.
- Choose the format in which you wish to export your sales orders(either .CSV or.XLS).
- Click on Export to successfully export your sales orders.
Attach Files to Sales Order
You can attach documents associated with the sale like a coupon, a quote or any file that is a part of that deal.
To attach a file to a sales order:
- Open Sales Orders
- Select the preferred sales order
- Click on the More button
- Choose Attach File option in the drop down

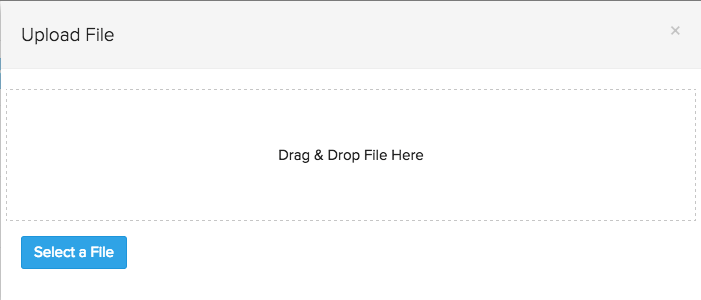
- An upload file pop up appears.
- You can drag and drop the file that is to be attached.
- You can also click on Select a File button to manually browse and select the file from your hard drive and attach them.
Edit Sales Order
- Navigate to the Sales Orders module.
- Select the preferred sales order.
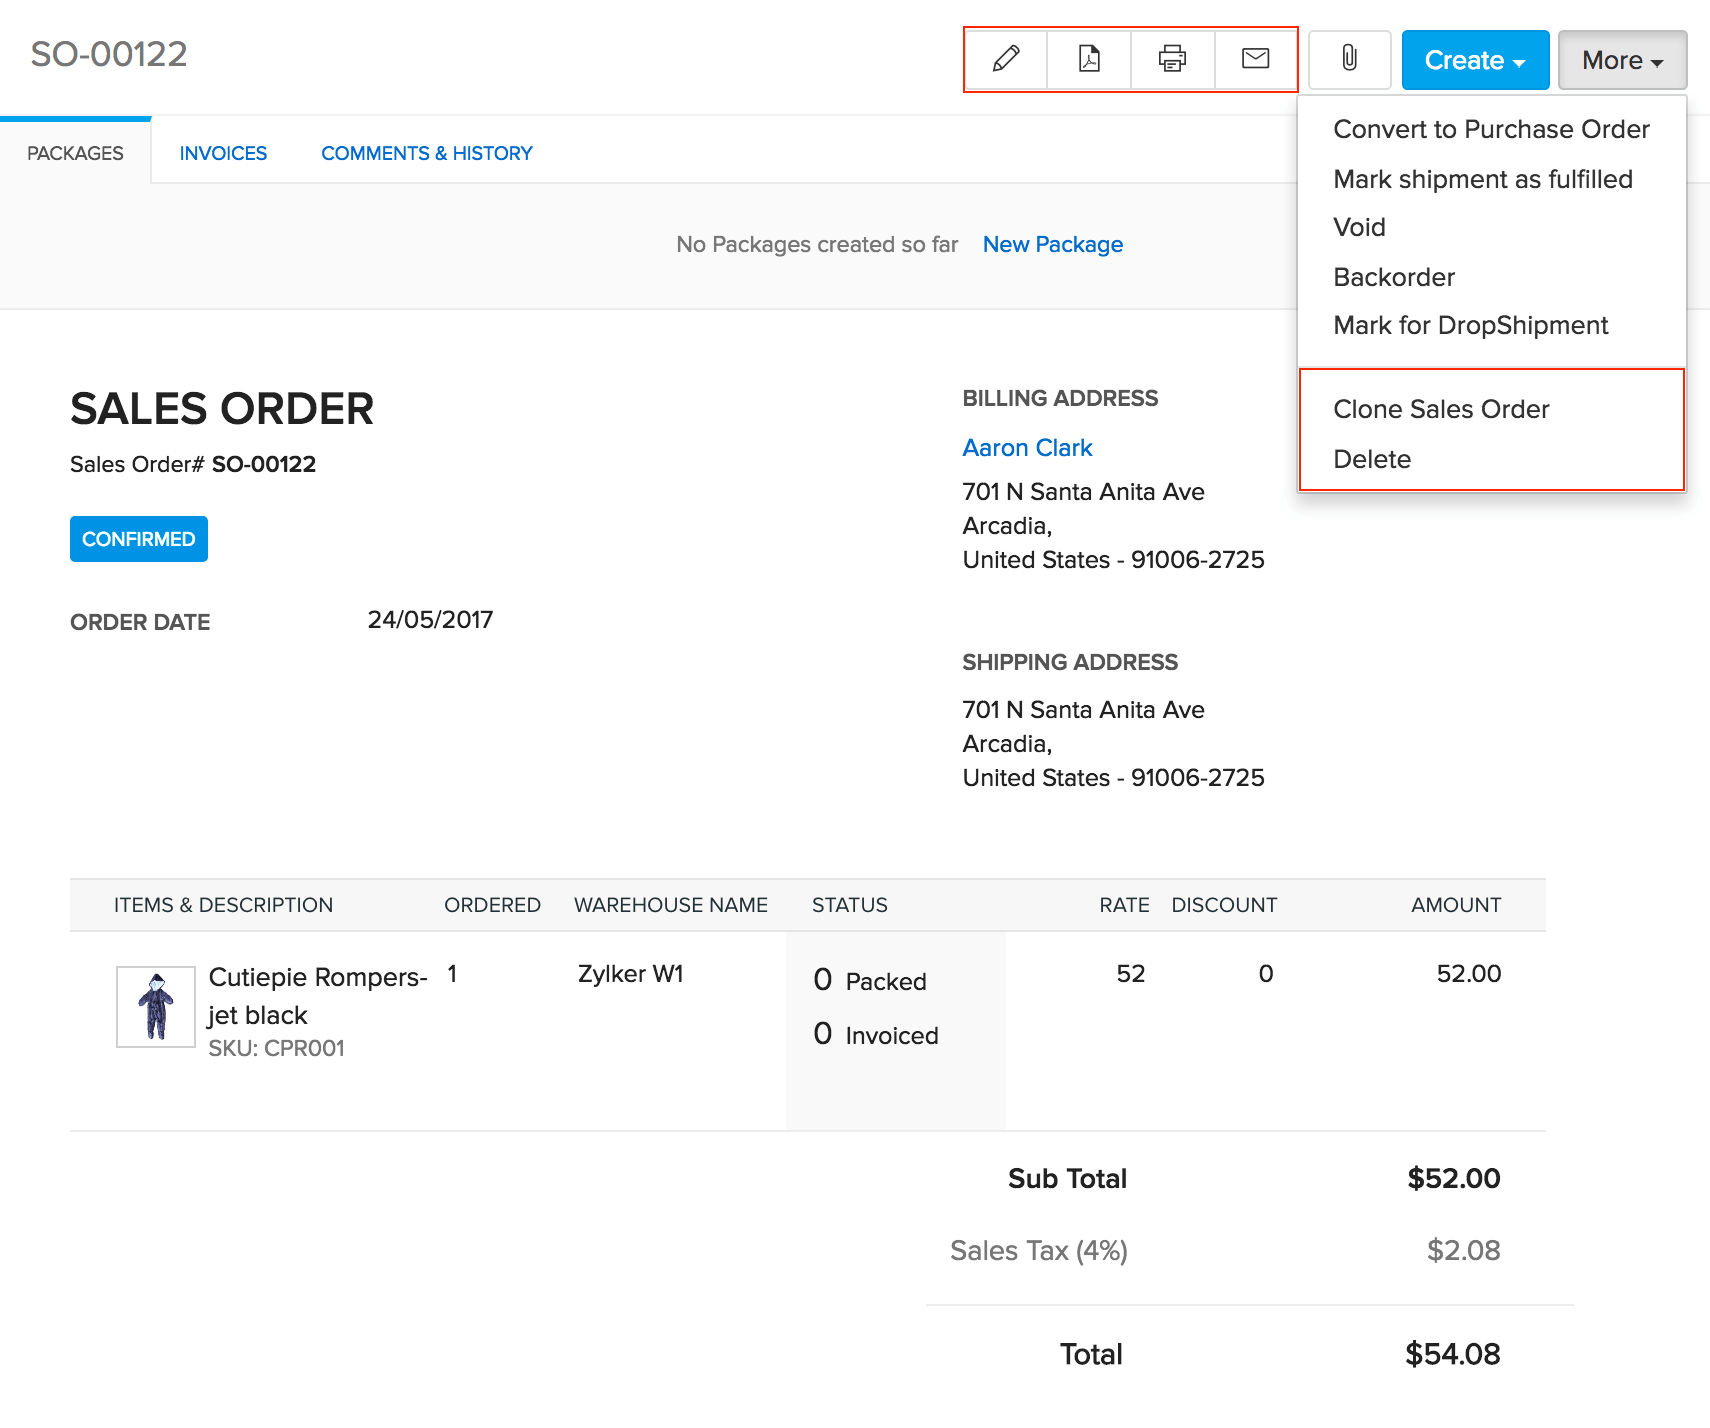
- Click on the Edit button.
- You will be directed to a sales order edit page.
- Update the necessary information.
- Click on the Save button.
- Important Note: To edit a sales order, it must not be in a partially shipped, shipped or fulfilled status.
Clone Sales Order
- Navigate to the Sales Orders module.
- Select the preferred sales order.

- Click on the More button.
- Select the Clone option from the dropdown.
- A New sales order page will open up.
- This page will have same data in all the fields including the customer information as the source except the date.
- Click on the Save button to produce a perfect clone of the sales order.
- This will be handy for cases when a customer wants to purchase the same set of items at a later period or repeatedly.
- Important note: You will not be able to clone a sales order from a marketplace.
Print Sales Order
- Navigate to the Sales Orders module.
- Select the preferred sales order.

- Click on the Print button.
- You will directed to a regular printing page where you can configure and print your order.
Save Sales Order as PDF
- Navigate to the Sales Orders module.
- Select the preferred sales order.

- Click on the PDF button.
- The sales order will be downloaded as a PDF into your default downloads folder.
Email Sales Order
Apart from the ability to send out a sales order immediately upon creation, you can also mail a sales order later to a customer or a contact. To do so:
- Navigate to the Sales Orders module.
- Select the preferred sales order.

- Click on the Mail button.
- You will be directed to a standard email page.
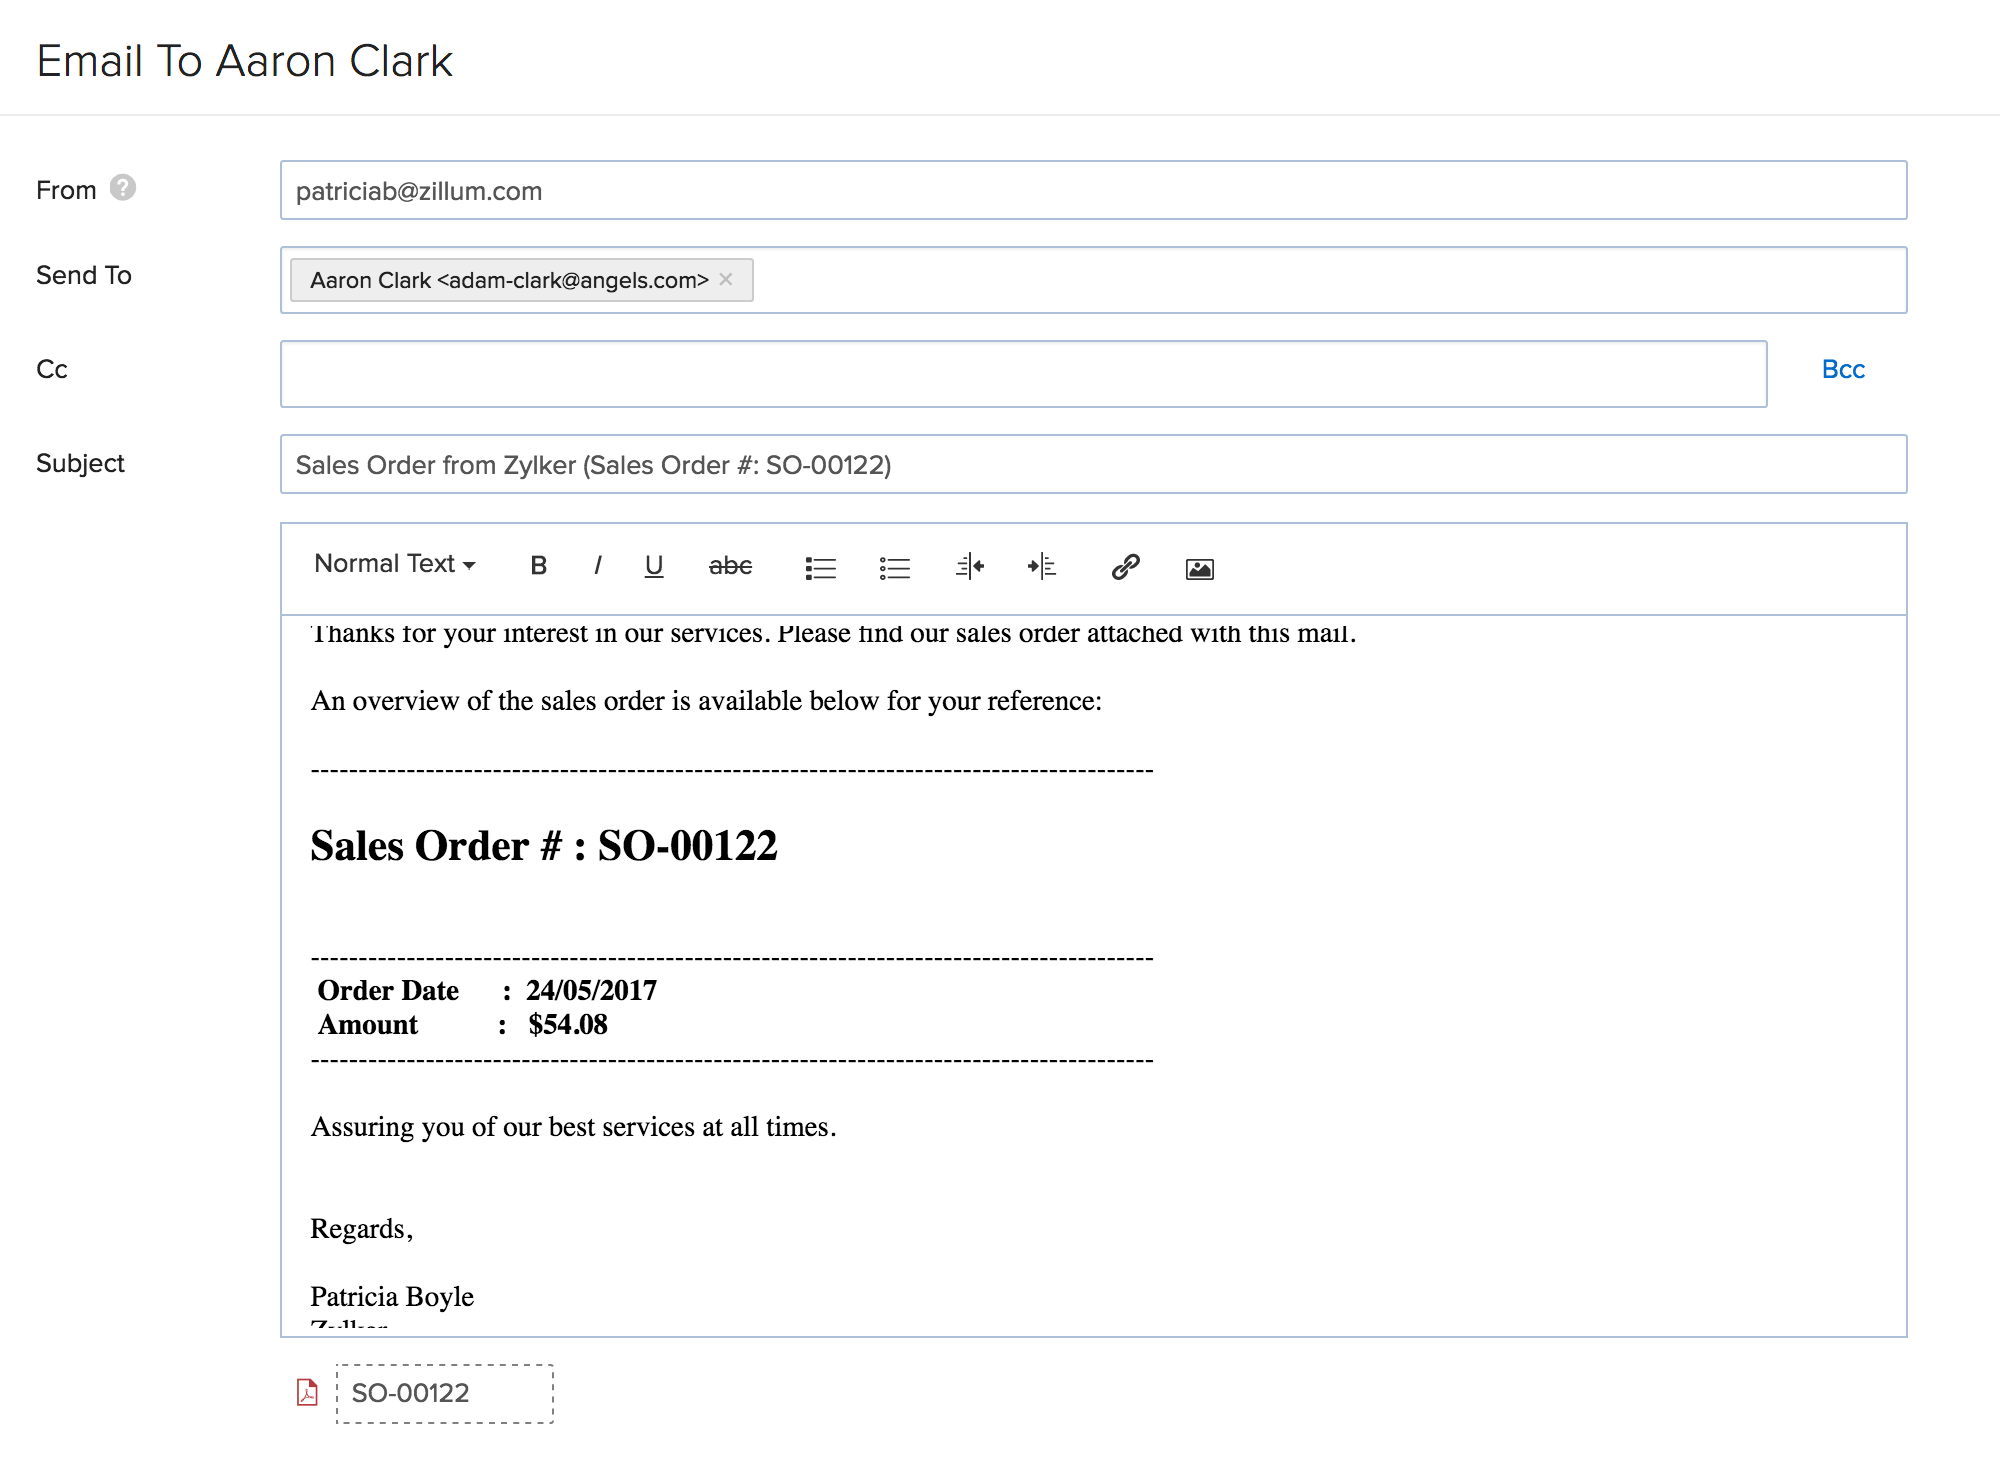
- If needed, you can add extra details or copy the mail to more people.
- You can find the sales order attached to the mail as a PDF.
- Click on the Send button.
- Note: You can also customize it by applying a template that you have created in Zoho Inventory.
Delete Sales Order
- Navigate to the Sales Orders module.
- Select the preferred sales order.

Click on the More button.
Select the Delete option from the dropdown.
A pop-up asking for confirmation of the action appears.
On confirmation, the sales order gets deleted.
Note: Unless a sales order is a draft or a confirmed order that does not have invoices or packages associated, it cannot be deleted.
Cancel items in a Sales Order
Let us consider a scenario where some of the items in a sales order have already been packed and shipped. But in the last minute your customer decides to cancel the rest. In situations like these, you can selectively cancel items and its quantity. To do so:
Prerequisite: Your sales order must have some items that are not yet packed or invoiced.
- Open a sales order of your choice.
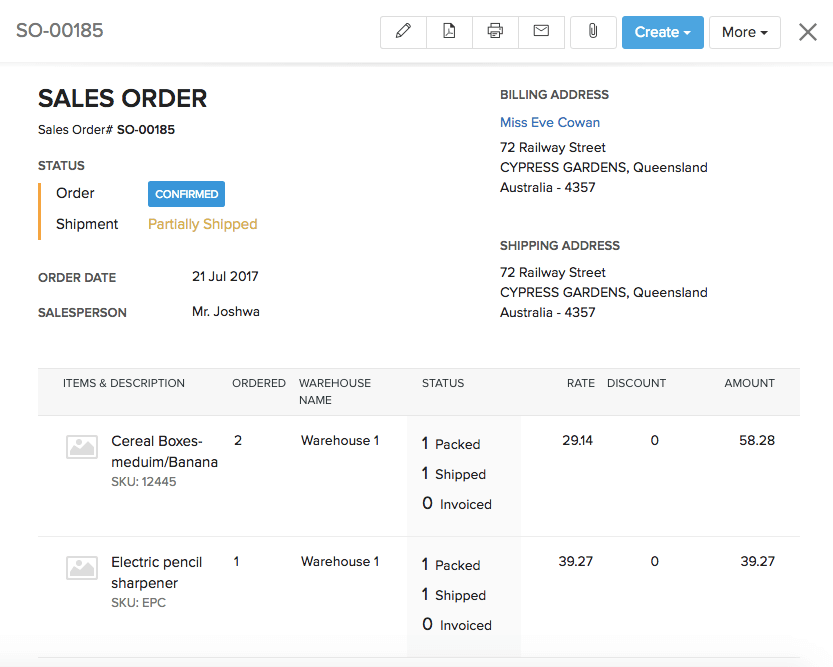
- Click on More button on the top right corner.
- Select the Cancel Items option from the dropdown menu.
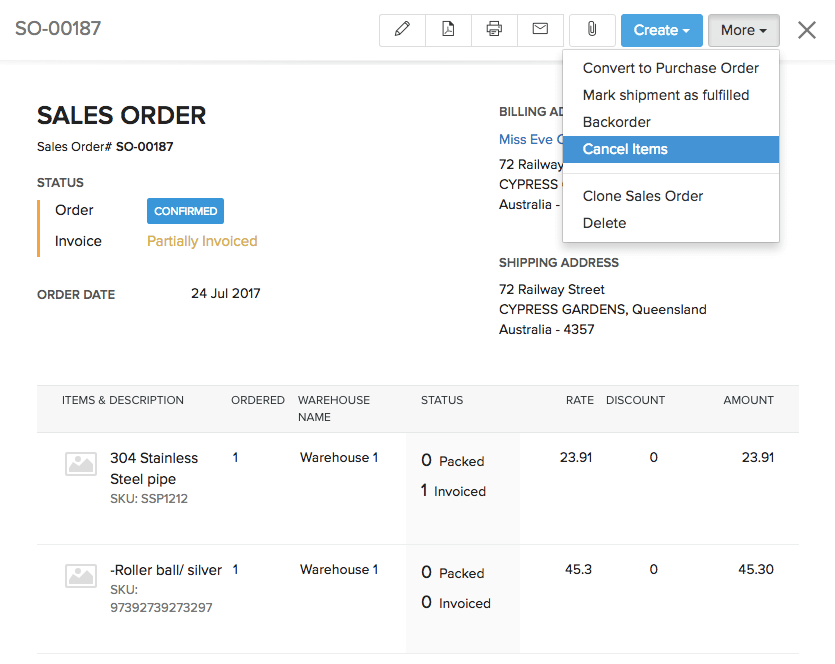
- A dialogue box opens up with the items and its quantity committed for the particular Sales Order.
- Retain the items that need to be cancelled.
- Mention the quantity of the item to cancel under Quantity to cancel.
- To proceed, click on Proceed button.

Note:
- You cannot cancel items for which a package or invoice is created from the particular Sales Order.
- Items cannot be cancelled from sales orders that have been marked for drop-shipment or back order.
- If your sales order is in draft or in confirmed state without any invoice or package associated, its line items can be either edited or the sales order itself can be voided.
Re-open Cancelled Items
To re-open the cancelled items in a sales order, follow the steps below:
- Open a sales order with cancelled items.
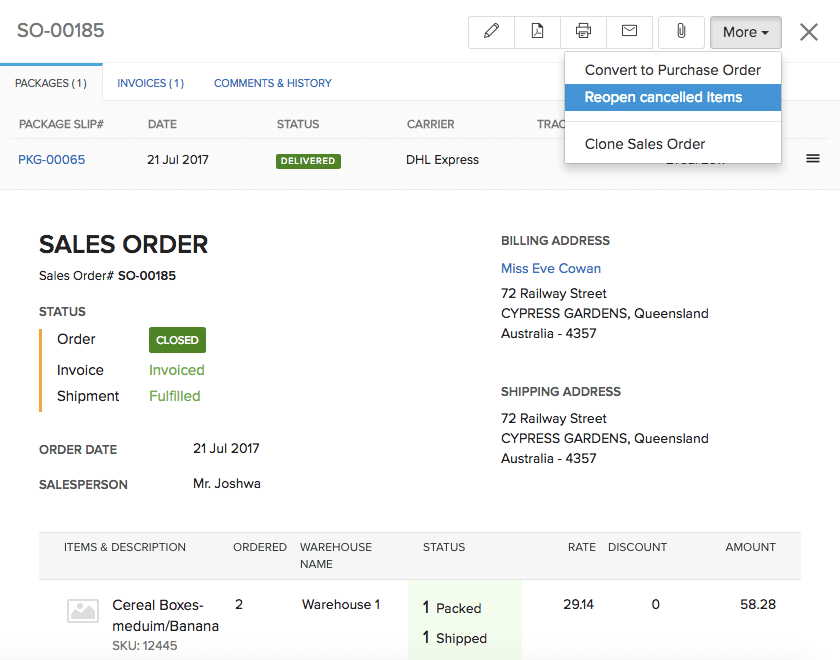
- Click on More button on the top right corner.
- Select Reopen cancelled items option. All the items cancelled in the sales order, will become available for further transactions.
Cancel Items in Bulk
In order to bulk cancel items in sales orders, follow the steps below:
Prerequisite: The sales orders must be in Confirmed status and should have some items that are not yet packed or invoiced.
- Click on the Sales Orders module on the sidebar.
- Select all the sales orders in which you wish to cancel the items.
- Click on More button and select Bulk Cancel items option from the dropdown menu.
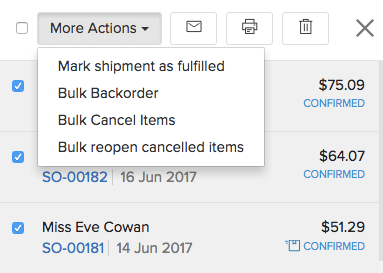
- Similarly, you can bulk re-open cancelled items in sales orders.
Note: You cannot edit the line items and its quantity while bulk cancelling items from sales orders. In order to do so, you need to open the specific sales order and then proceed with the cancellation.
Void Sales Order
To Void a sales order, follow these steps:
- Open Sales Orders tab.
- Select the preferred sales order.
- Click on the More button.
- Select the Void option.
- A pop to confirm the voiding action appears.
- Click on the Void It button to proceed.
- Another pop up appears to reconfirm the action as once a sales order is voided, the action cannot be reverted.
- To proceed click Proceed button.
- The status of your sales order changes to Void.
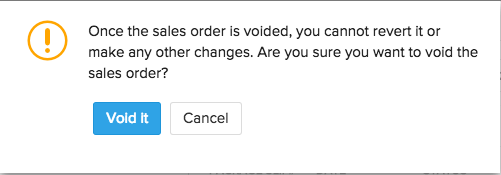
Note: A sales order that has been invoiced or paid(incase of marketplace orders) cannot be voided.
View invoice details within the sales order
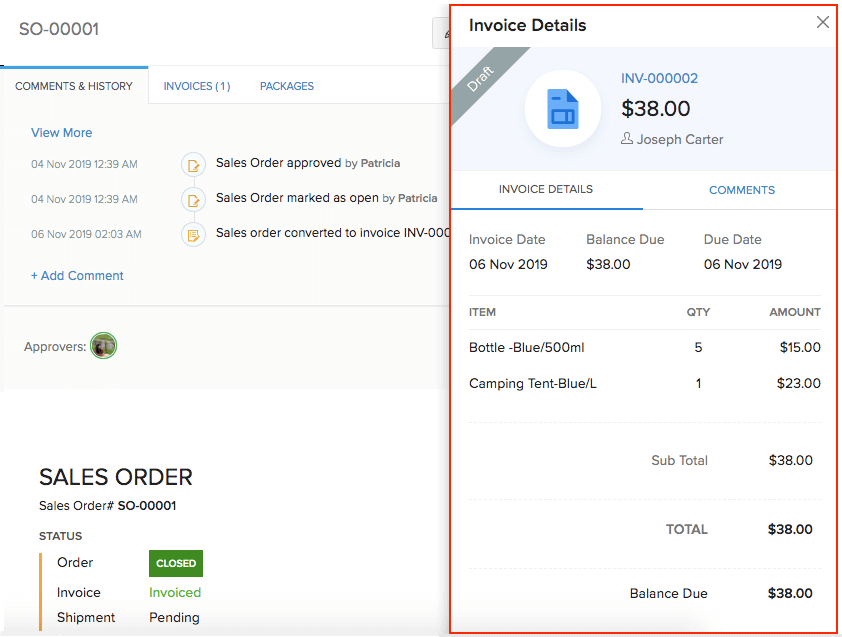
If you have associated invoices with a sales order, you can have a quick glance at its details from the sales order itself. To do so:
- Go to Sales Orders.
- Open a sales order with invoice associated.
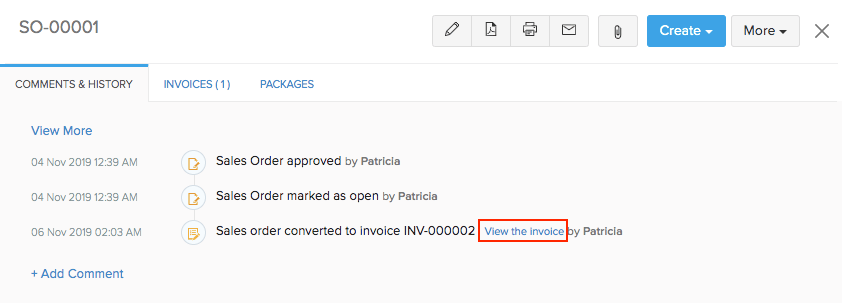
- Go to the Comments & History tab.
- Click View the Invoice link. A tab will open from the right with the details of the invoice.
Create Custom Views
Custom views are specific views to list your Sales Orders, based on your criteria. For example, out of all your Sales Orders in Zoho Inventory, you might want to view those sales orders which are supposed to be shipped today.
With Custom Views, you can simply create this filter, set criteria and use it to classify data.
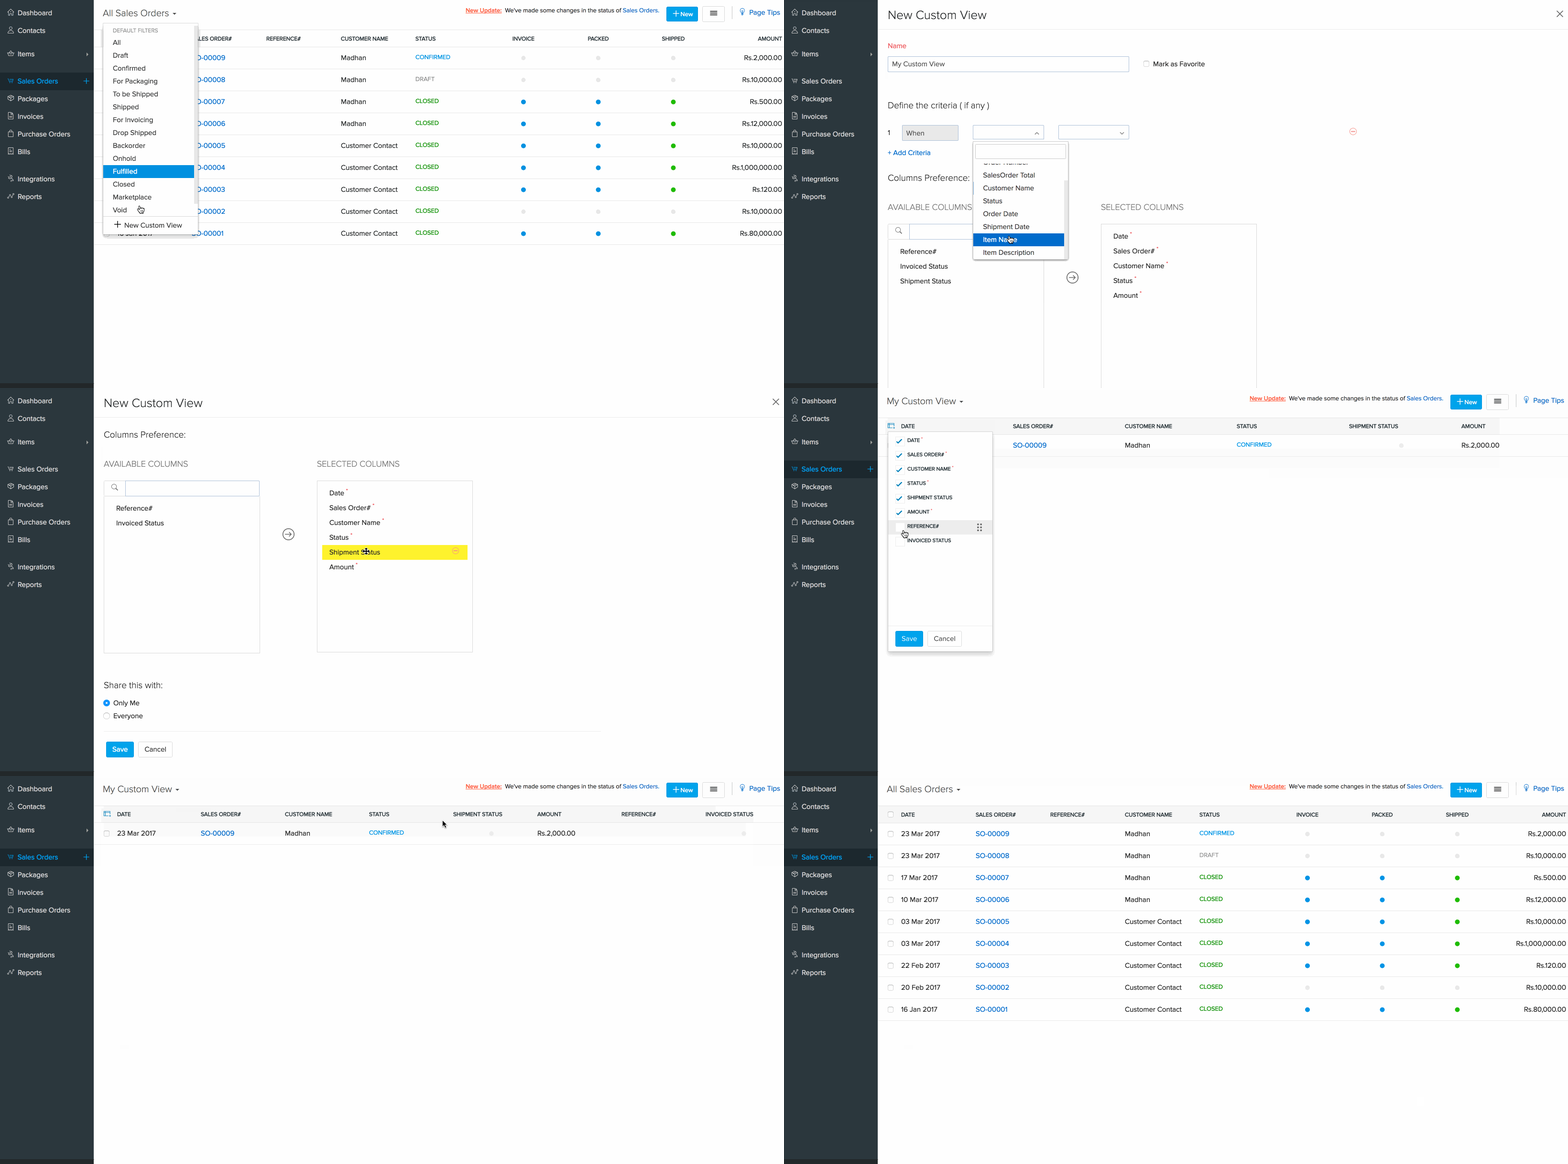
To create a Custom View:
- Go to the Sales Orders module.
- Under the All Sales Orders drop down, present at the top left, select + New Custom View.
- In the following page, give an appropriate Name to your view, define Criteria, Column Preference (i.e. columns which you want to see in the filtered results).
- Click Save. Your new custom view will now be listed under Created By Me, in the dropdown.
Create Custom Status
Sometimes you might want to mark some Sales Orders with a specific status, apart from the default ones present in Zoho Inventory. For example, you might have multiple Sales Orders that require backordering, but you may wish to backorder them later, instead of doing it right away. In such cases, it would be extremely convenient to assign a custom status to all those confirmed Sales Orders that require backordering. The custom status option would help you out with this.
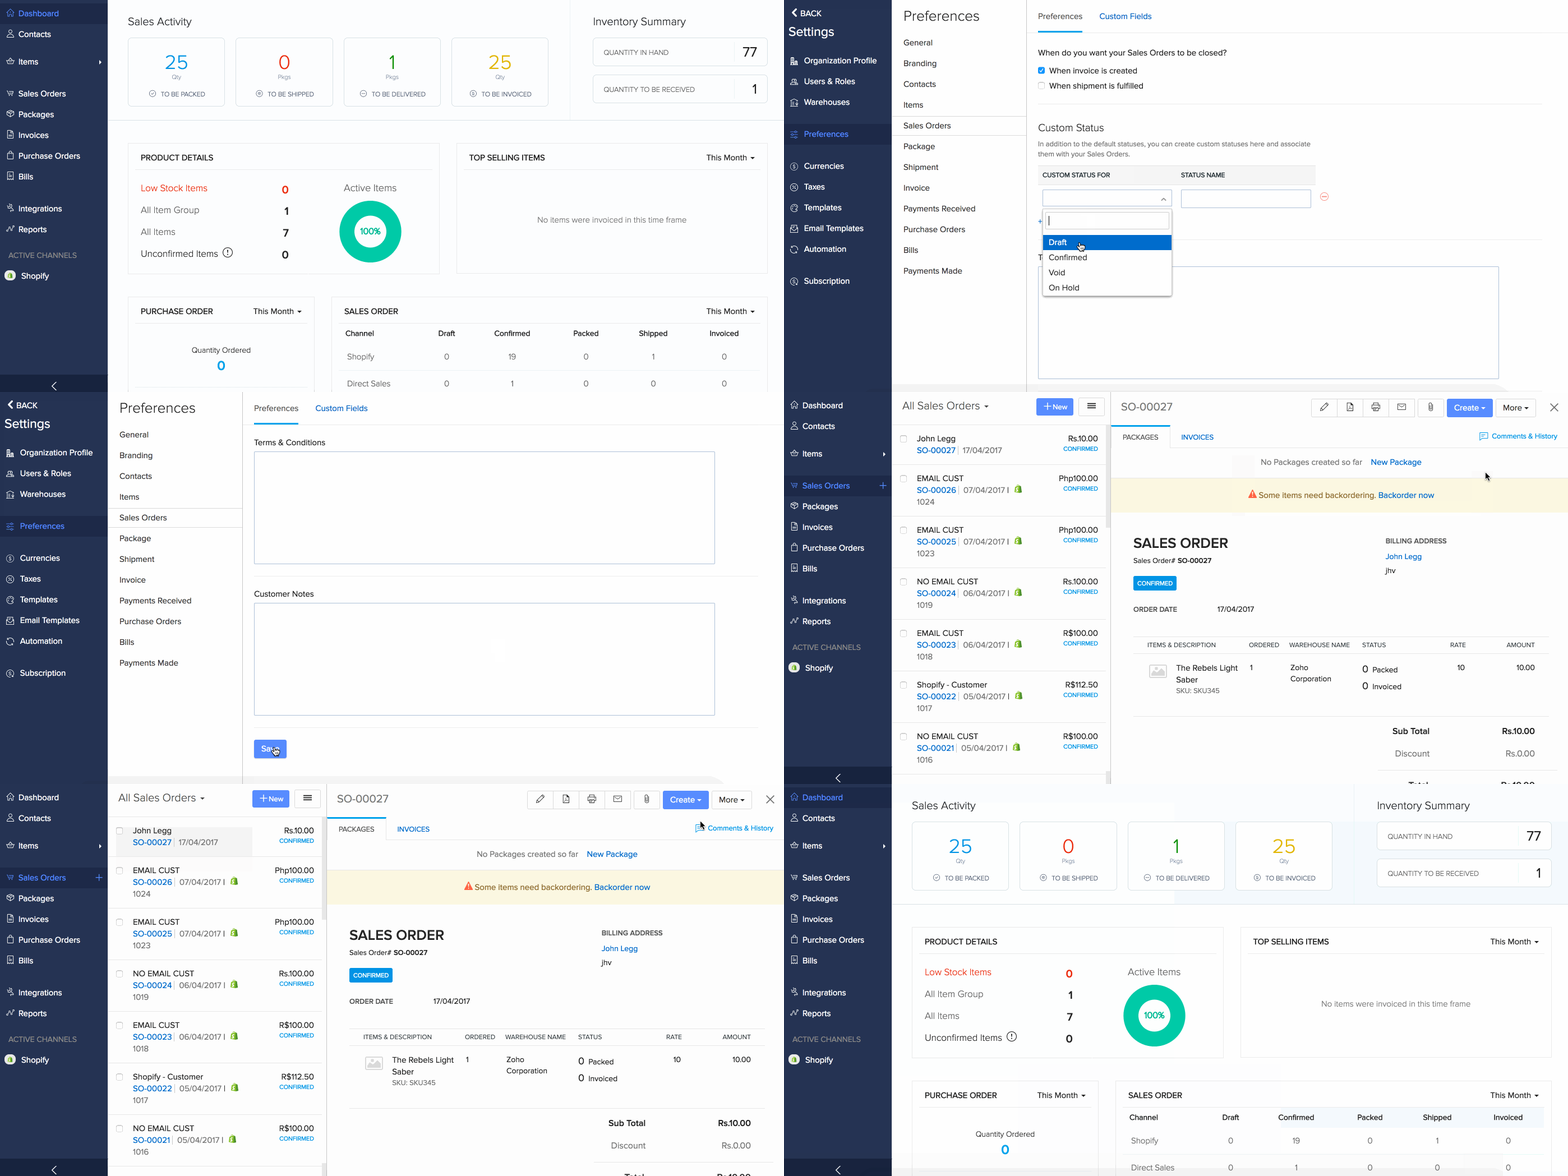
To create a Custom Status,
- Navigate to Settings -> Preferences -> Sales Orders.
- In the Custom Status section, click on Add New Custom Status.
- Select a default Sales Order status from the Custom Status For dropdown. This will act as a parent to your custom status. You will be able to mark your Sales Order with the custom status only when it has reached its corresponding parent status. For example, if your custom status name is “To be backordered” and its parent status is Confirmed, you will be able to mark only the Confirmed Sales Orders as To be backordered.
- Give the Status Name for your custom status.
- Click Save.
Now, go to any Sales Order with the status specified in the Custom Status For field. Click on the More button and you’ll have the option to mark the Sales Order with your custom status.
Notes
- You can revert back to the Sales Order’s original status by clicking on the More button and selecting the status name.
- If the parent status is changed, say from Draft to Confirmed, the custom status will be unmapped from the Sales Order.
How to filter them out?
You can create Custom Views for the custom statuses that you create, and you can them filter them out accordingly. When you create a custom view, select the Order Sub-Status as the criteria for the view.


