Item Groups
An Item Group in Zoho Inventory, contains variations of the same base item. It’s similar items, except in the time of creating one item you can easily create multiple items.
Scenario: Jason runs a textile showroom where he sells a variety of T-Shirts. Let’s say the T-Shirts available in the colors Blue, White, Red and in sizes S, M and L. So the variants would be T-Shirt/Blue/S, T-Shirt/Blue/M and T-Shirt/Blue/L. Likewise, there can be six more variants. To add these items one at a time into Zoho Inventory would be a tedious and repetitive task. However, using the Item Groups feature, he can add any number of such items in the time of adding just one.
How To Video
Create Item Group
To create an item group in Zoho Inventory:
Go to the Item Groups module under Items from the left sidebar.
Click the New Item Group button or the + New button on the top right corner to open the New Item Group page.

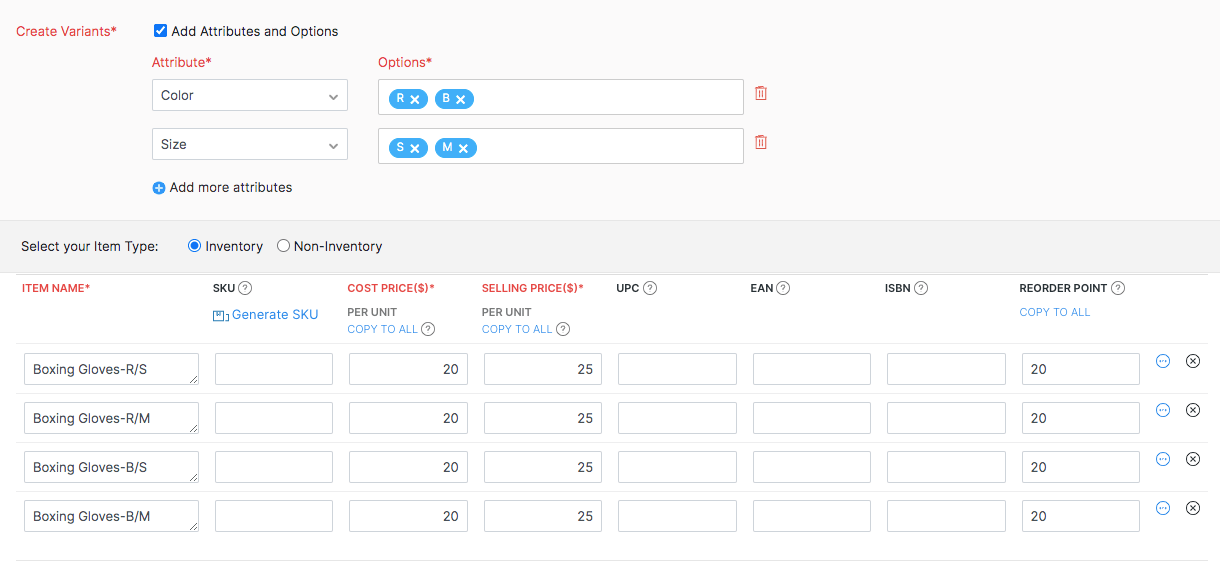
Select whether your item group is of the type ‘Goods’ or ‘Services’.
Enter the name of the item group.
If the items in this group qualifies for return, select the ‘Returnable Item’ option.
Select or add a Unit of Measurement (Unit) for the item group.
If you have enabled item categories, then assign a category to the item group. You can add a new category or choose from an existing category.
Insight: The category assigned will be applied to all items in the group. Likewise, a category assigned to one of the items in a group will apply to all the other items in the same group.
Select a Tax Preference. This will be applied to all the items in the group.
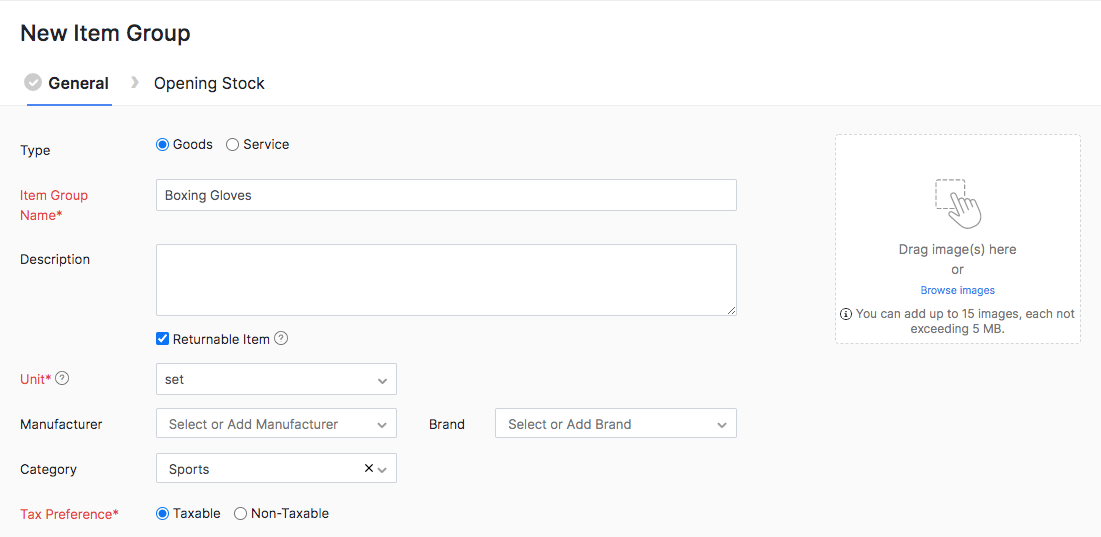
Add the attributes and options for this item group. Based on the item group name and attributes, a combination of variant names will be generated automatically. You can modify them as you see fit.
Choose whether you want the items in this group to be of inventory or non-inventory type.
Enter the SKU for all the items, or click Generate SKU to generate them automatically using our in-built tool.
Specify the Cost Price and Selling Price for the items. If the value remains the same for all items, click Copy To All to save time.
If available, you can add product codes like UPC(Universal Product Code), EAN(International Article Number) and ISBN(International Standard Book Number) in the respective fields.
Insight: The UPC and EAN fields are numeric fields. The MPN and ISBN are alphanumeric fields that support alphabets, numbers, spaces and even hyphens.
Configure the Sales, Purchase and Inventory accounts for the item group.
Click Save and Next to proceed.

For every variant, enter the Opening Stock and Opening Stock Value available in each warehouse.
Insight: Opening Stock refers to the stock you have on hand at the time of creating an item. The Opening Stock Value refers to the average purchase price of your opening stock. This will be used for FIFO Cost Lot Tracking.
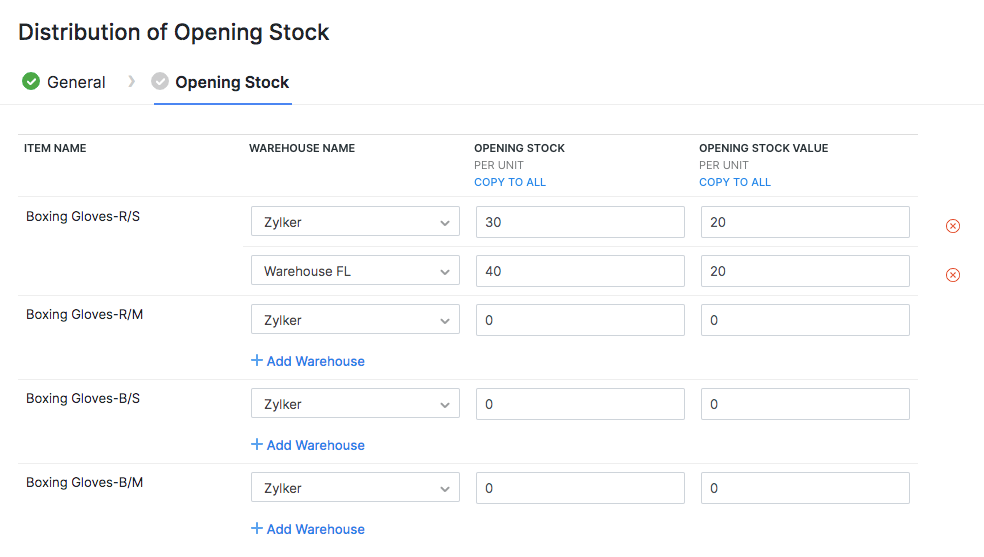
Click Save to create the item group.
Insight: The variants in the item group can be treated as independent items.
Add Attributes and Options
Attributes are properties used to describe an item. For example, a T-Shirt can be described by its color, size and brand. Likewise, there may be many such variants. Zoho Inventory generates all combination of variants based on the given attributes and options.
The Add Attributes and Options checkbox will be enabled by default.
If you wish to create an individual item and not a group, deselect the Add Attributes and Options option and proceed.
In the following pop-up, choose the To create a single item, proceed to the Items section option. The primary information that you’ve entered in the item groups page will be carried over to the New Item page.
Otherwise, if you choose to continue creating an item group,
- Enter an attribute and provide relevant options for the given attribute each separated by a comma.
- Likewise, to add another attribute, click the + New Attribute option. You can add up to three attributes per item group.
Based on the given item group name and attributes, a combination of variant names will be generated automatically. You can edit or remove them as you see fit.
Generating SKUs for an Item Group
Some item groups can have many variants and entering the SKU for each is likely to be time-consuming. Instead, you can create a pattern for SKU with your choice of given attributes and apply it across all variants in the group. This will help you save time from manual entry and also create meaningful SKUs for your items.
To generate SKUs for your item group:
Open a New Item Group page and enter the primary information and attributes.
Click the Generate SKU option under the SKU column.
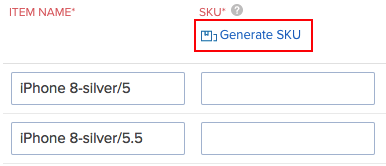
Go to the Configure SKU Pattern section.
Choose the attributes from the dropdown and the number of letters that should be displayed for each attribute. These form the parts of the SKU.

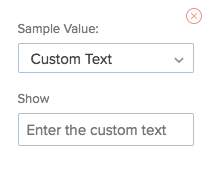
You can also add custom texts to the SKU. Click the Sample Value drop down and select the Custom Text option. Enter the text in the field below.
Pro Tip: You can select the attributes in any order. For the purpose of demonstration, we have selected Item Group Name followed by Color and Size.
View the changes you make to the SKU structure in the SKU Preview field. This is a read-only field. You cannot directly edit this text.
Choose the appropriate delimiter with which you want to separate the SKU texts and select the case used.

Click the Generate SKU button to generate the SKU for all items in the group. If there are any duplicates, the SKU will be generated with a number sequence.
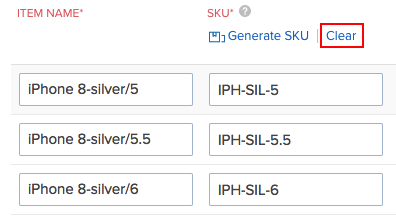
Click Clear to erase all values from the SKU field.
Edit Item Group
To edit an item group:
Go to the Item Groups module under Items from the left sidebar.
Click to open the item group whose details you want to edit.
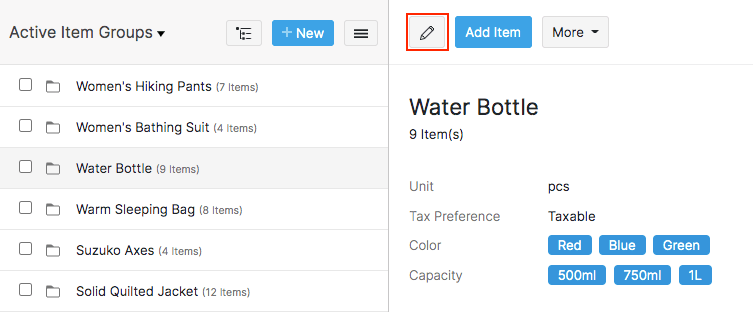
Click the Pencil icon on the top.
Make the necessary changes.
Click Save.
Remove Items from Group
To remove an item from an existing group:
Go to the Item Groups module under Items from the left sidebar.
Click to open the item group from which you want to remove an item.
Click the item that you wish to remove from the group.
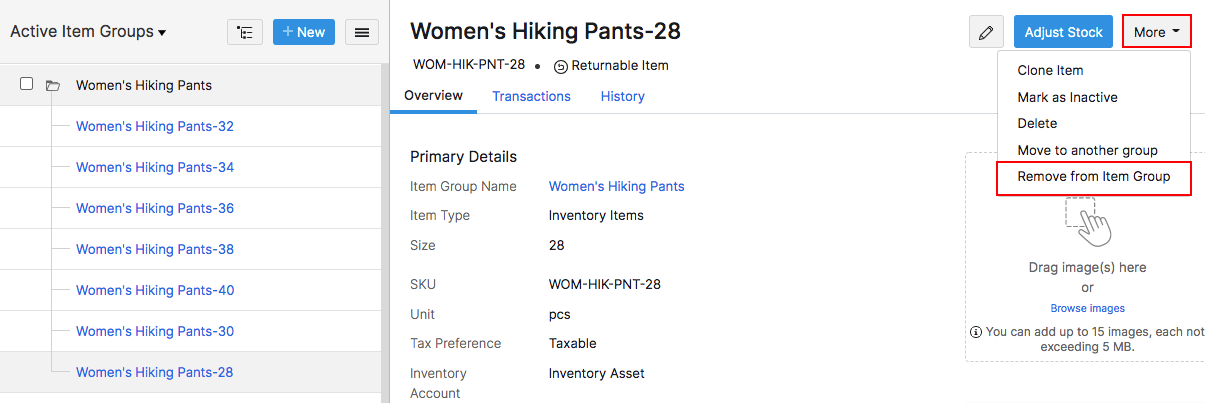
Click More and select Remove from Item Group option.
Confirm your action and the item will be removed from the existing group.
Move Item to Another Group
To move an item to another group:
Go to the Item Groups module under Items from the left sidebar.
Click to open an item group of your choice.
Go to the Item Details section.
Click to open the item that you wish to move to another group.
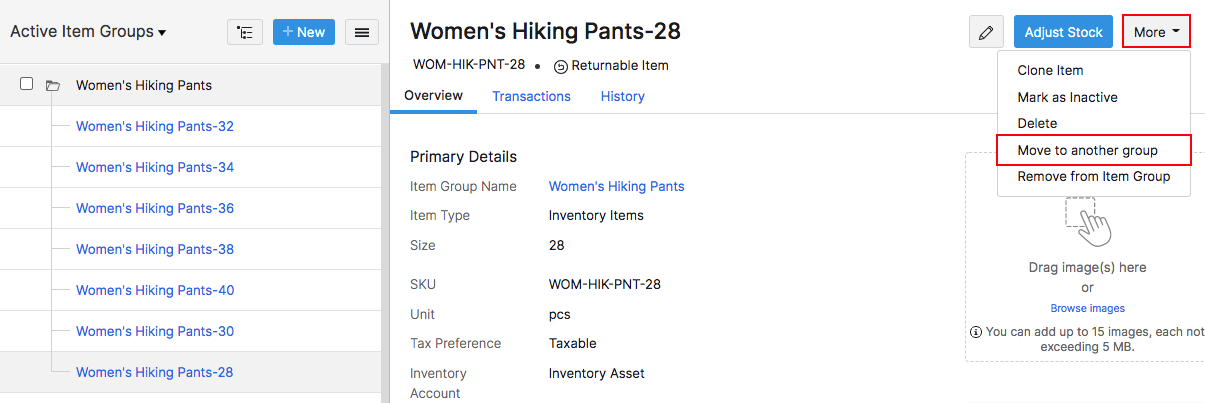
Click More and select the Move to another Group option.
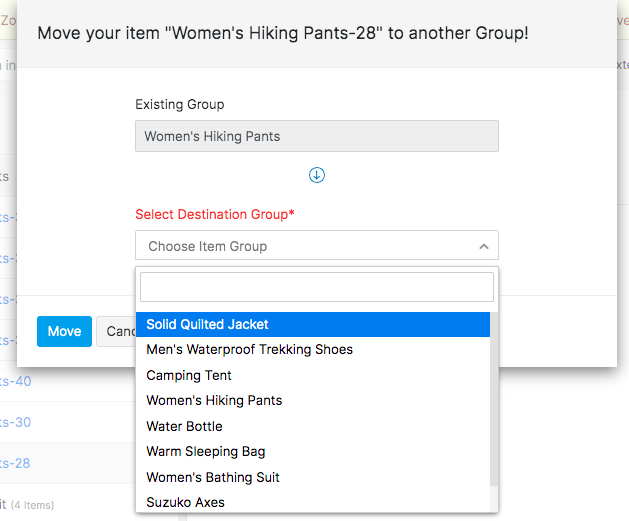
Select a Destination Group.
Select the attributes for the item.
Click the Move button and the item will be removed from the current group and added to the destination group.
Clone Item from a Group
Cloning helps you create an item quickly without having to enter all the details from scratch. This feature comes in handy when you want to:
- deactivate an item and create a new one in its place.
- create a new item with properties that are similar to the existing one.
An item group as a whole cannot be cloned, but you can clone the variants in the group.
To clone an item from a group:
Go to the Item Groups module under Items from the left sidebar.
Click to open an item group of your choice.
Go to the Item Details section.
Click to open the item that you wish to clone.
Click on More and select Clone Item.

The item details will be pre-filled. Make the necessary changes.
Click Save at the bottom to create the item by cloning.
Pro Tip: When you clone an item from a group, it’ll be created as an individual item and not as part of the group. Learn how you can move an item into a group.
Add New Item to Group
To create and add a new item to a group:
Go to the Item Groups module under Items from the left sidebar.
Click to open the item group to which you want to add a new item.
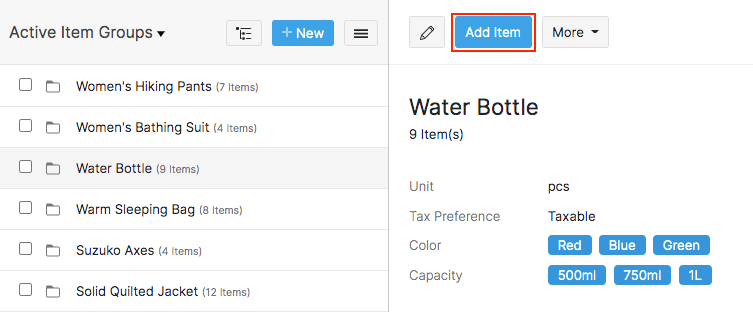
Click the Add Item button at the top of the page.
Enter the new item details and select the attributes. Make sure that the selected attributes are not identical to any of the existing items in the group.
Click Save at the bottom of the page. The item will be created and added to the same group.
Mark Item Group as Inactive
Go to the Item Groups module under Items from the left sidebar.
Click to open the item group you want to deactivate.
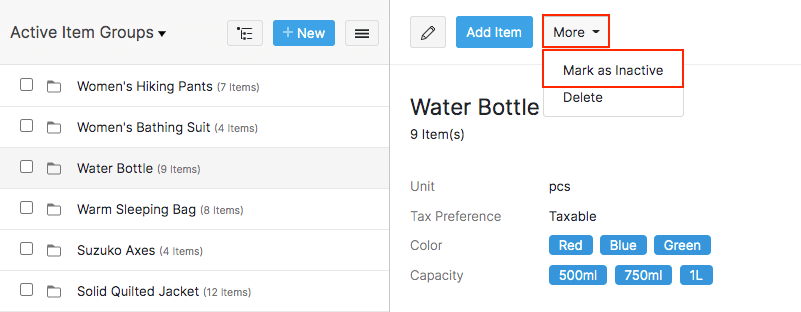
Click the More button and select the Mark as Inactive option from the dropdown. All the items in the item group will be marked as Inactive and will not be available while creating transactions.
To reactivate the item group, click More > Mark as Active. The items in the group will be available for transactions.
Similarly, you can also deactivate a single item in the item group. Doing so will not affect the status of the other items in the group.

Delete Item Group
To delete an item group in Zoho Inventory:
Go to the Item Groups module under Items from the left sidebar.
Click to open the item group you want to delete.
Click the More button and select the Delete option from the dropdown.
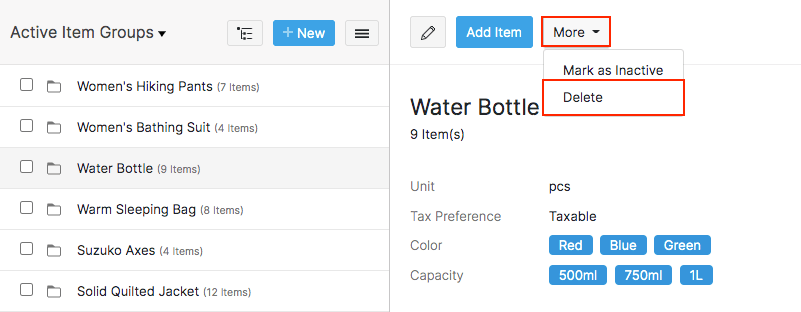
Confirm your action in the following pop-up to delete the item group permanently from Zoho Inventory.
Pro Tip: You will not be able to delete an item group if one or more items in it are associated with existing transactions in Zoho Inventory. However, you can either remove those items from the group and then try deleting the item group, or mark the item group as inactive.
Create an Item Group for Ungrouped Items
In Zoho Inventory, we normally have all our items neatly classified under different item groups. But in some cases, we also have to deal with items that are not a part of any item group.
The most common case of ungrouped items is because of the integration between Zoho Books and Zoho Inventory where, the items(Zoho Books does not support Item groups) created in Zoho Books are reflected in Zoho Inventory.
This may add clutter to your inventory. Hence, to resolve this case, we have introduced a feature that allows you to group all the ungrouped items in your inventory by defining new item groups or adding them to the existing ones.
Before we begin please note that only your inventory tracked items can be grouped together.
Go to the Items module under Items from the left sidebar.
Click on the Filter dropdown on top-left corner and select the Ungrouped Items filter.
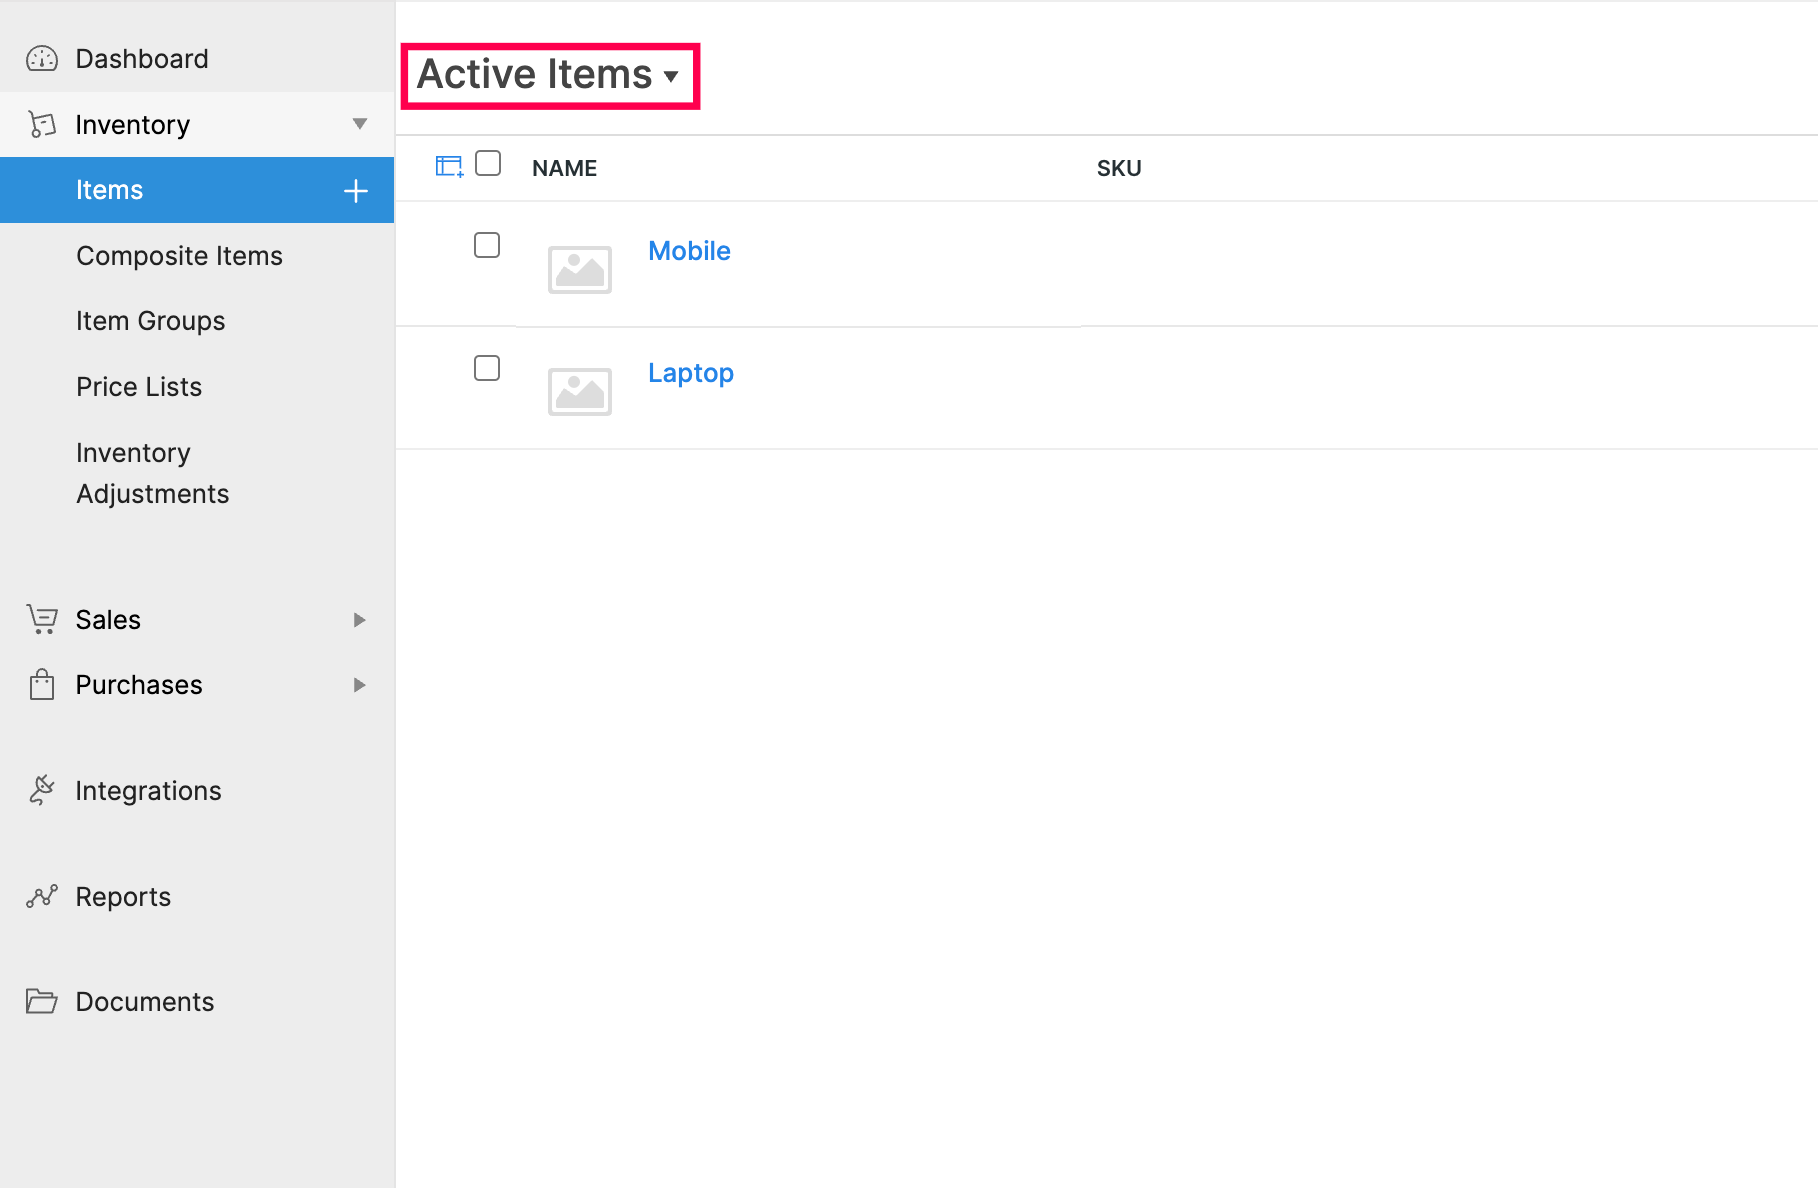
Select the items that you wish to group by checking the box near the item name.
Click on the Add to Group button on the top.
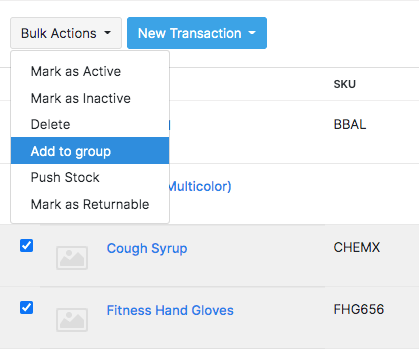
Choose whether you want create a new item group or add them to an existing group.
If you’re creating a new item group, enter the item group name, unit, SKUs and click Save.
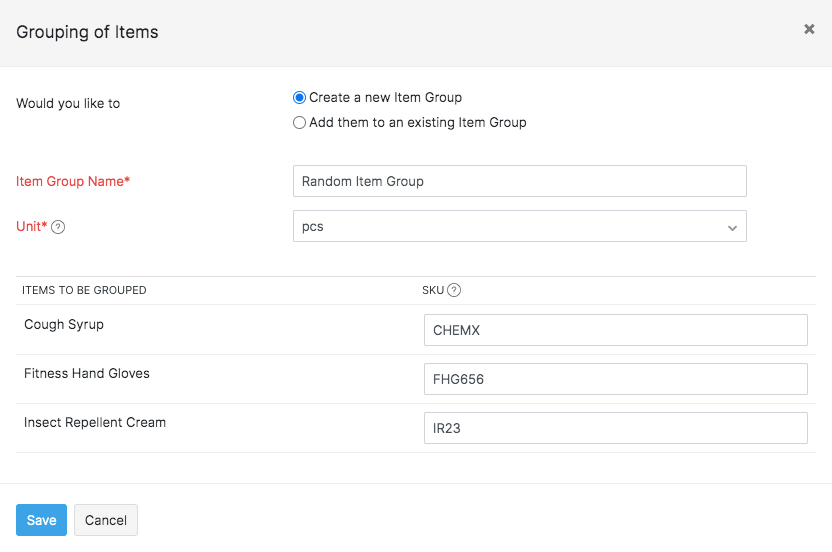
If you’re adding the items to an existing group,
- Choose the item group to which you want to add the items.
- Enter the SKUs and choose the attributes pertaining to the item group. Make sure the attributes are not identical to any item already present in the group.
- Click Save.
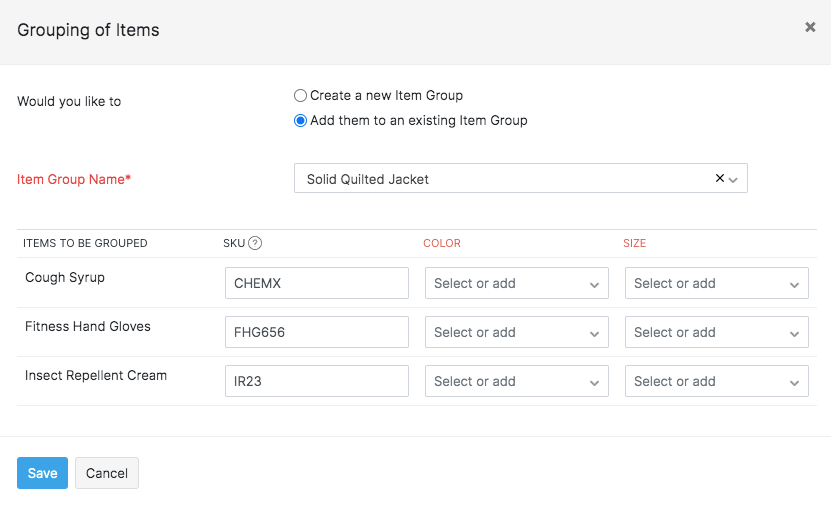
The items will be successfully grouped and classified under an item group.


