Inventory
SMS Notifications
Note: This feature is available only in the India edition of Zoho Inventory.
You can keep your customers informed of their quotes, invoices, and their pending payments using SMS notifications in Zoho Inventory. You can also use this feature to send them payment reminders, thank you messages, and payment retry messages.
Note:According to TRAI regulations, the URLs included in your SMS notifications must be whitelisted. Learn more about whitelisting URLs.
ON THIS PAGE…
- Enable SMS Notifications
- SMS Template Configuration
- Enable SMS for Primary Contacts
- Enable SMS for Contact Persons
- Enable SMS Notifications for Customers in Bulk
- Disable SMS Notifications for Primary Contact
- Disable SMS Notifications for Contact Persons
- Disable SMS Notifications in Bulk
- Send SMS Notifications
- View Sent SMS Notifications
Enable SMS Notifications
To enable SMS notifications for your organisation:
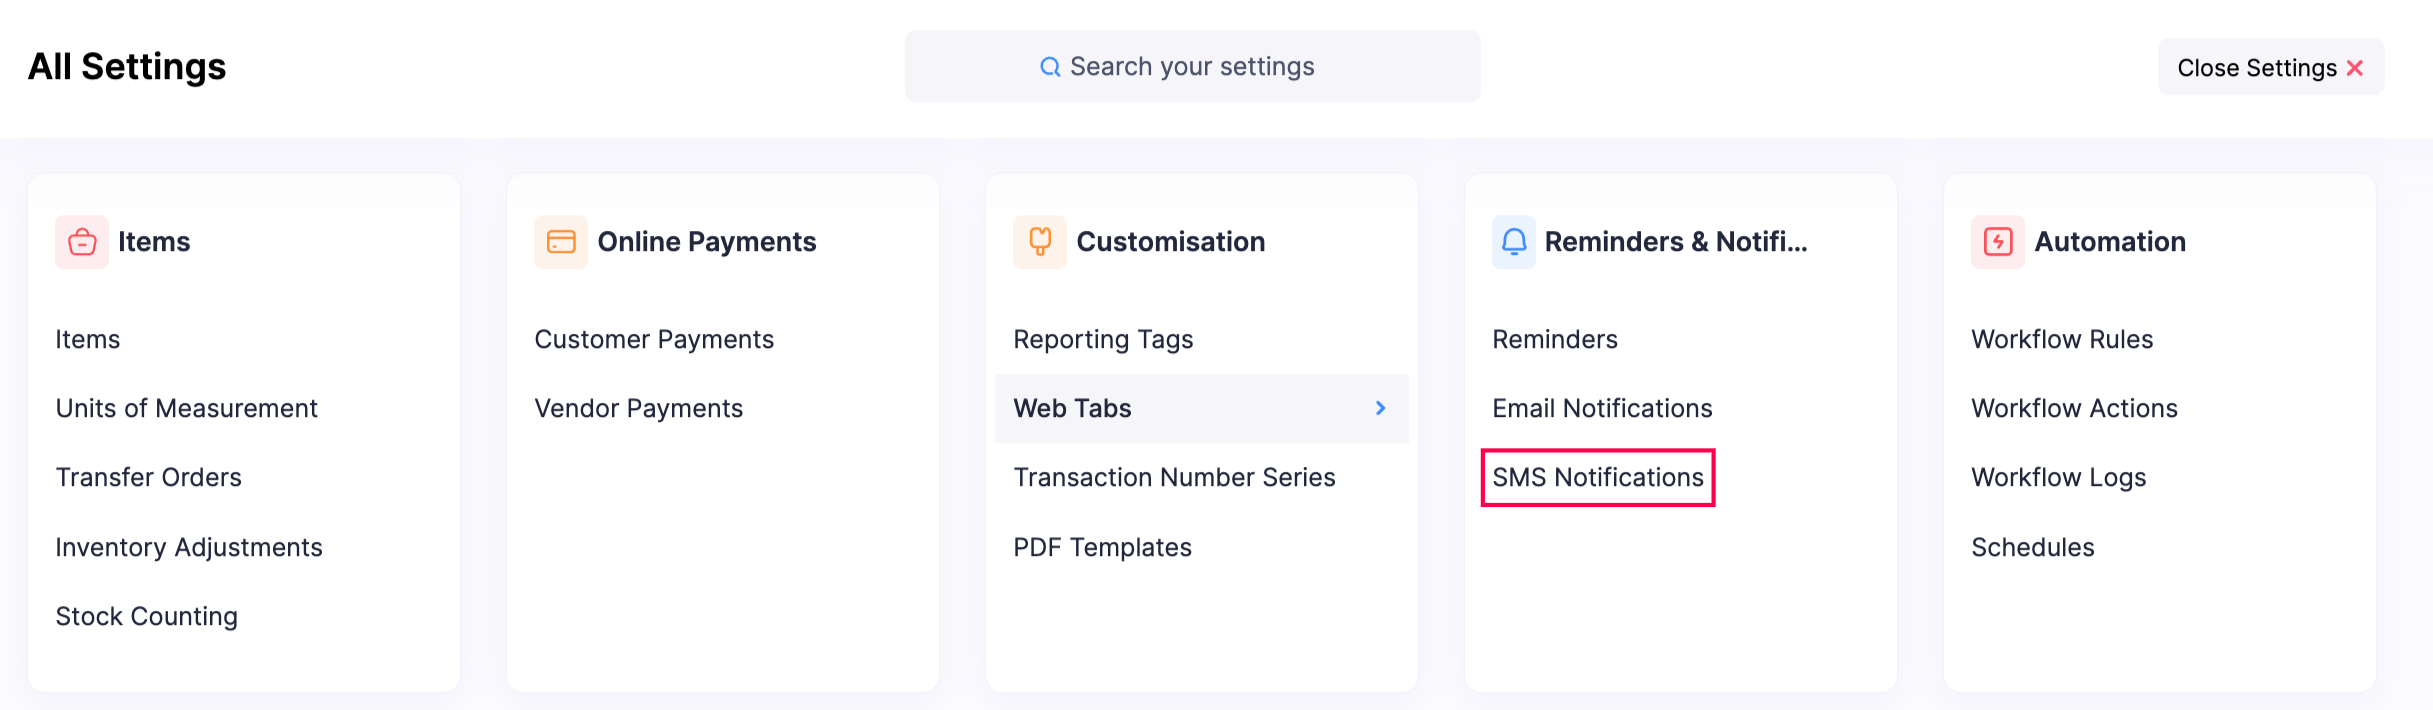
- Go to Settings at the top-right corner.
- Navigate to Reminders & Notifications and click SMS Notifications.
-
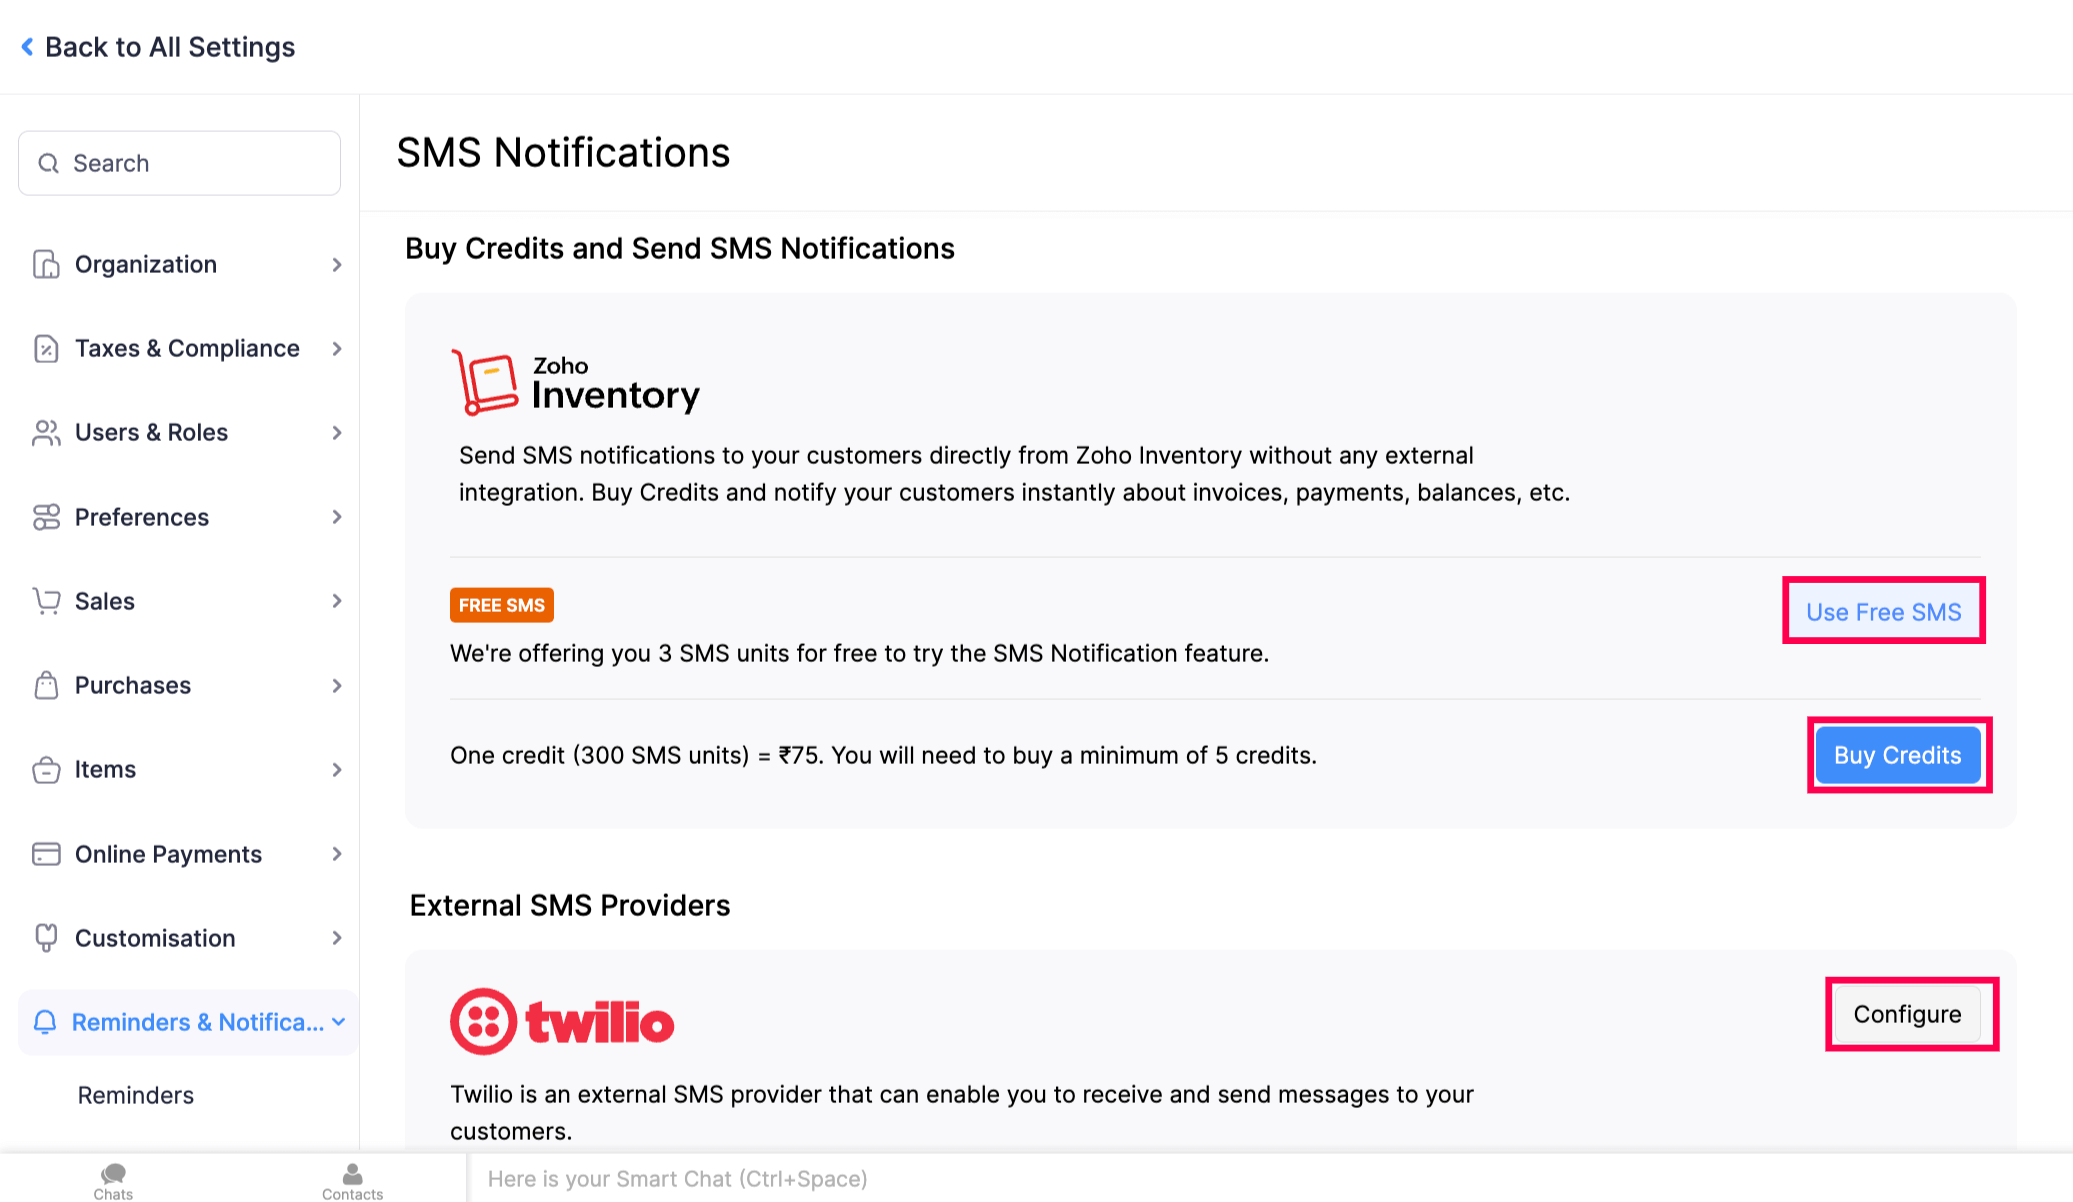
In the Buy SMS Credits and Send SMS Notifications section, you can select any of the following options:
-
Click Use Free SMS and get 3 SMS messages to learn how it works. (or)
-
Click Buy Credits to purchase SMS credits from Zoho Store. Each credit costs ₹75, and you can send 300 messages per credit. You must purchase a minimum of 5 credits. (or)
-
Click Configure next to Twilio under the External SMS Providers section to integrate with Twilio.
SMS notifications for your organisation will be enabled as soon as you perform any one of the actions mentioned above. Next, you can configure SMS templates for the notifications sent from your organisation.
SMS Template Configuration
You can configure the SMS templates in two ways:
- Configure SMS Notifications and Templates in Zoho Inventory
- DLT Registration and SMS Template Configuration
Configure SMS Notifications and Templates in Zoho Inventory
- Go to Settings in the top-right corner of the page.
- Navigate to Reminders & Notifications and click SMS Notifications.
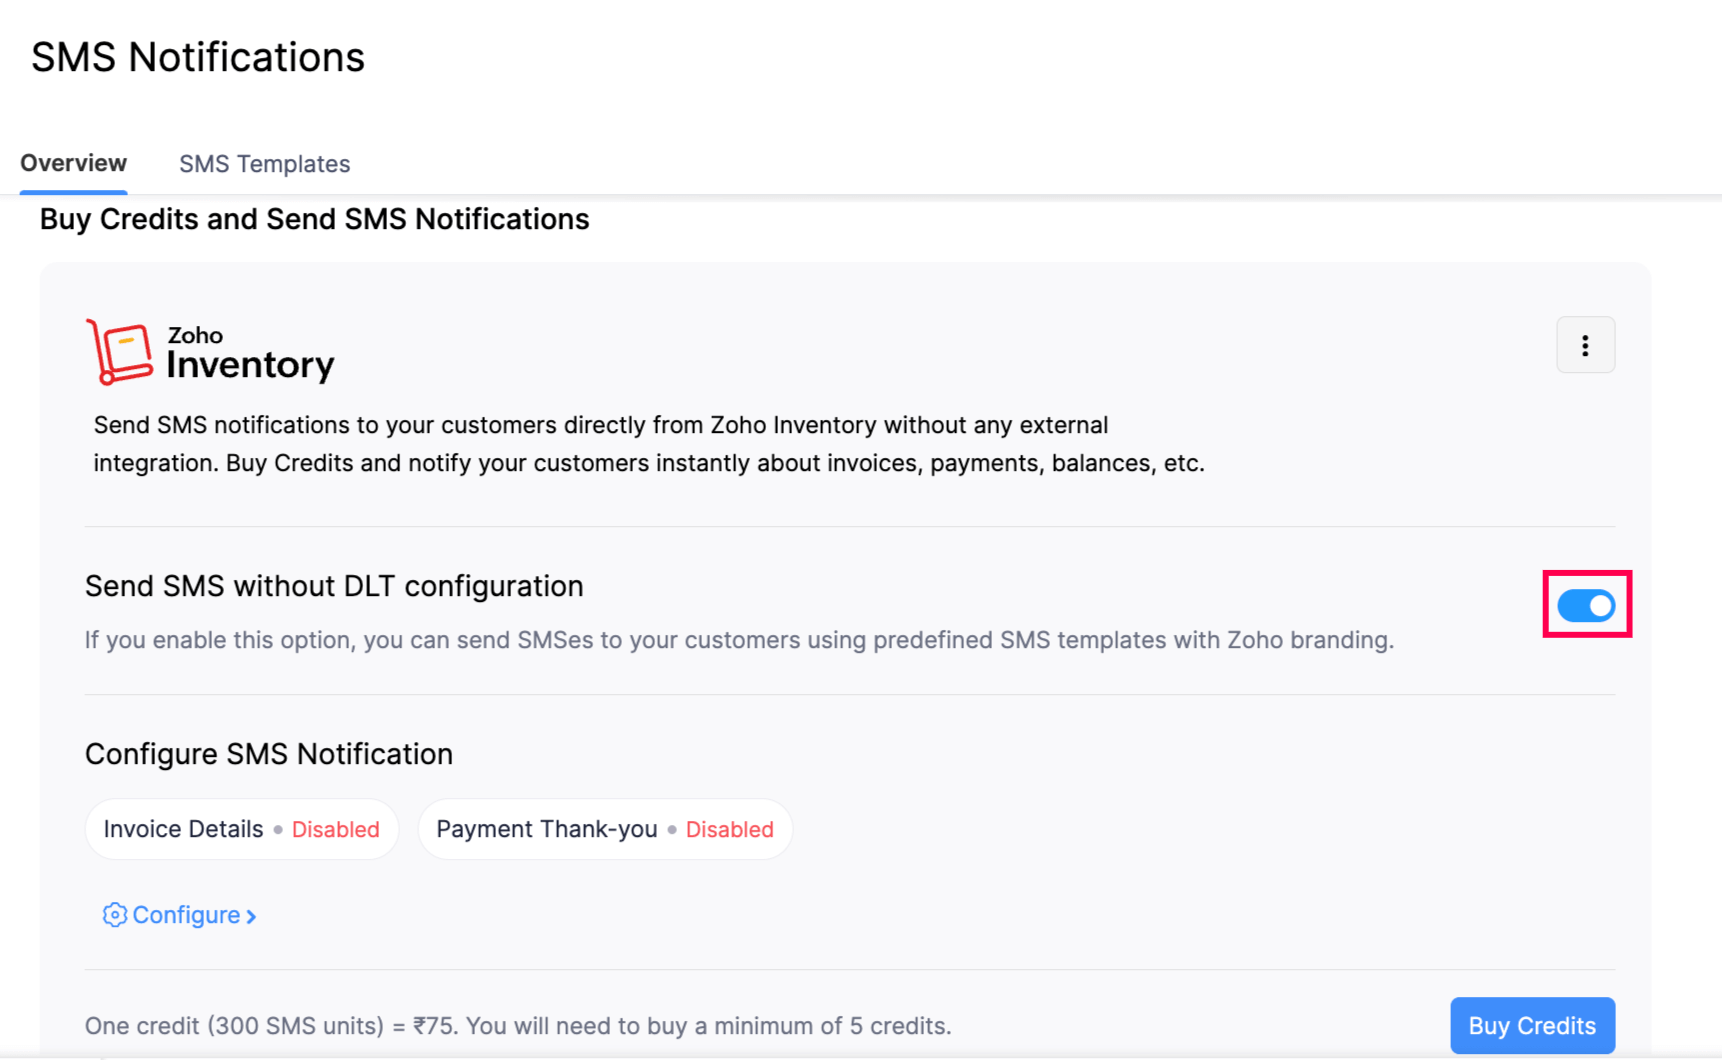
- In the Overview tab, slide the toggle next to Send SMS without DLT configuration.
- In the Configure SMS Notification section, click Configure to enable, disable, and configure your SMS notifications.
You can configure SMS notifications for the following messages:
| Notification Type | When you can send them |
|---|---|
| Invoice Details | You can send this reminder when you create an invoice and want to notify via SMS. Based on your preferences, Invoice Creation SMSes are sent automatically for recurring invoices. |
| Payment Thank-You | This notification is sent to your customers when you receive payments from them. |
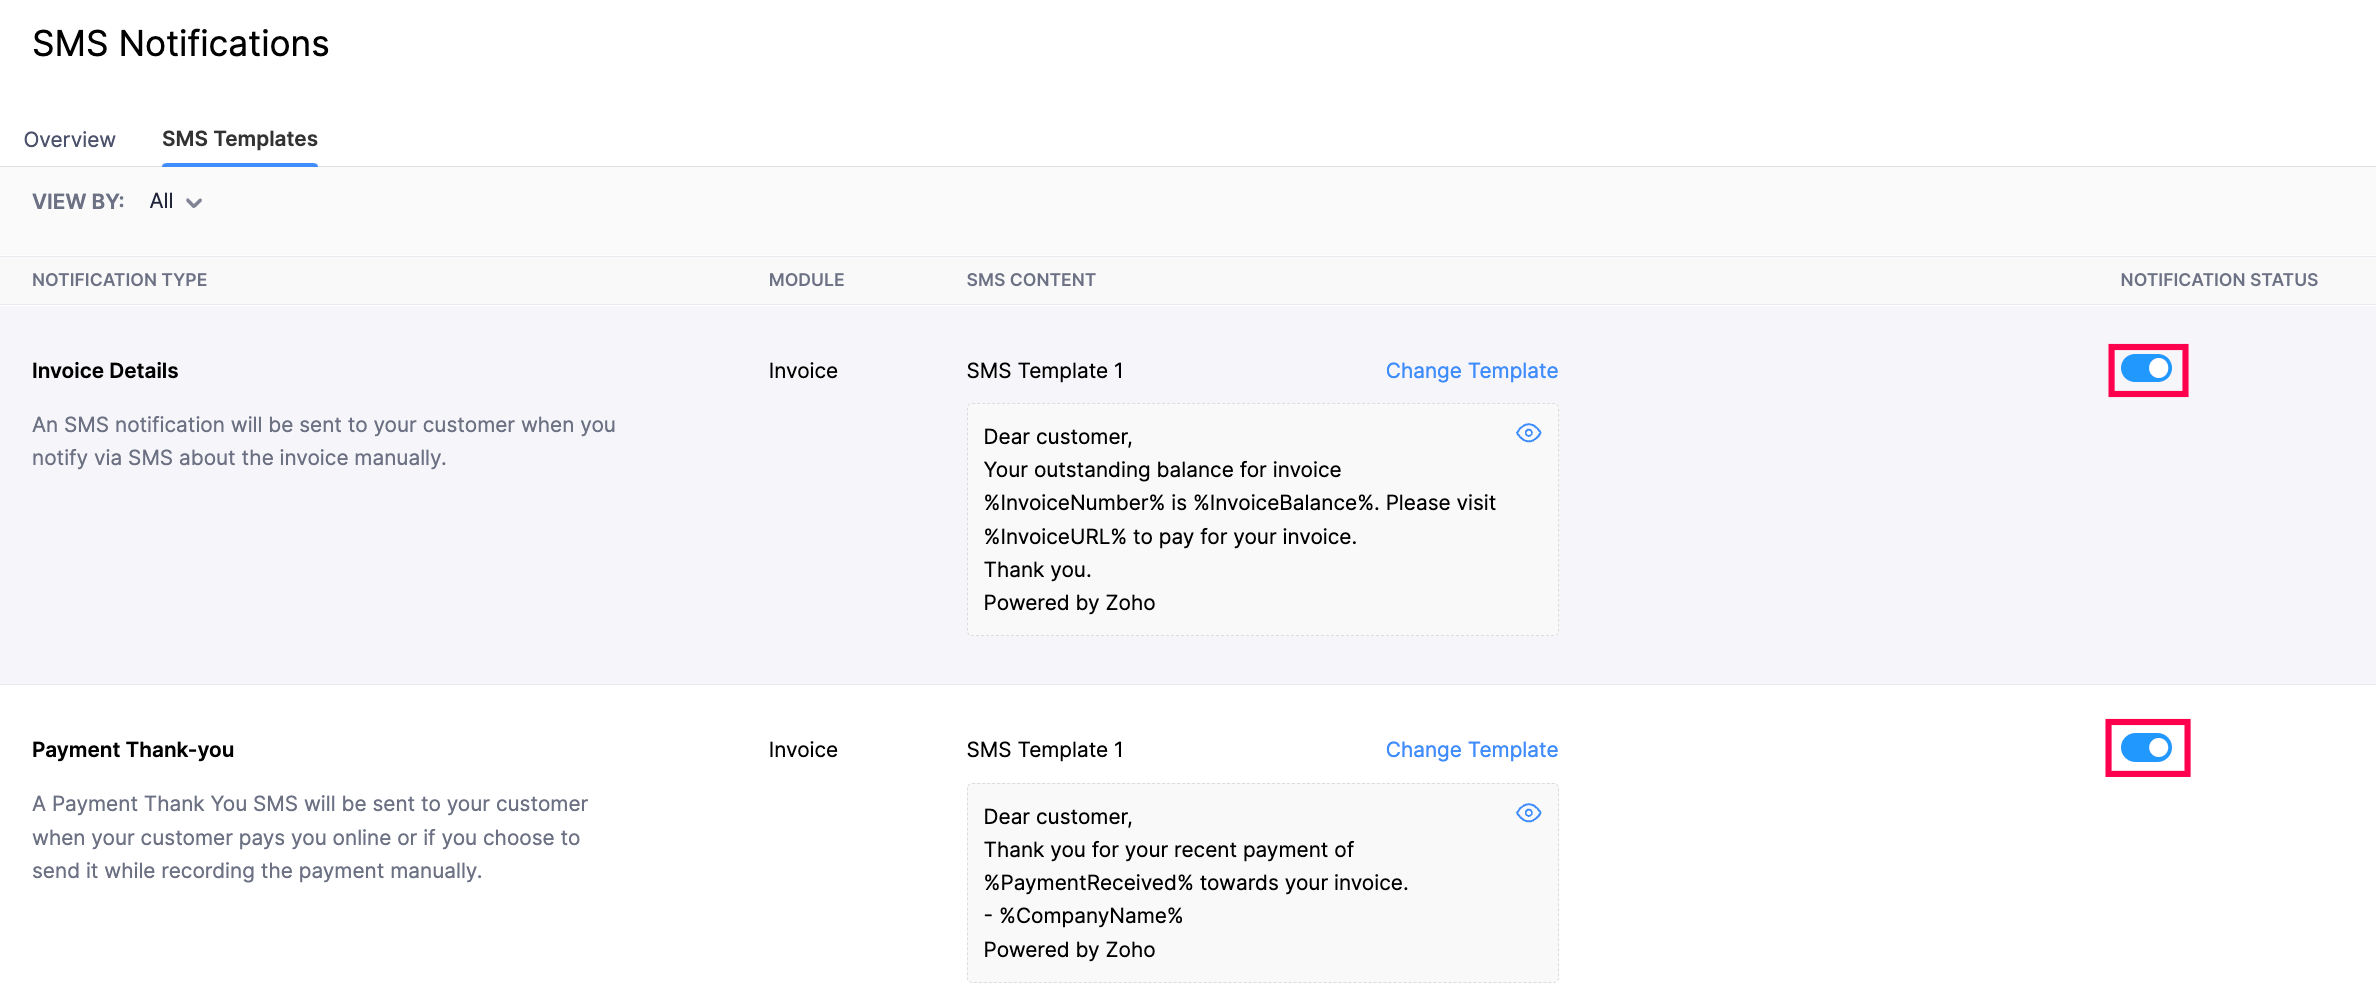
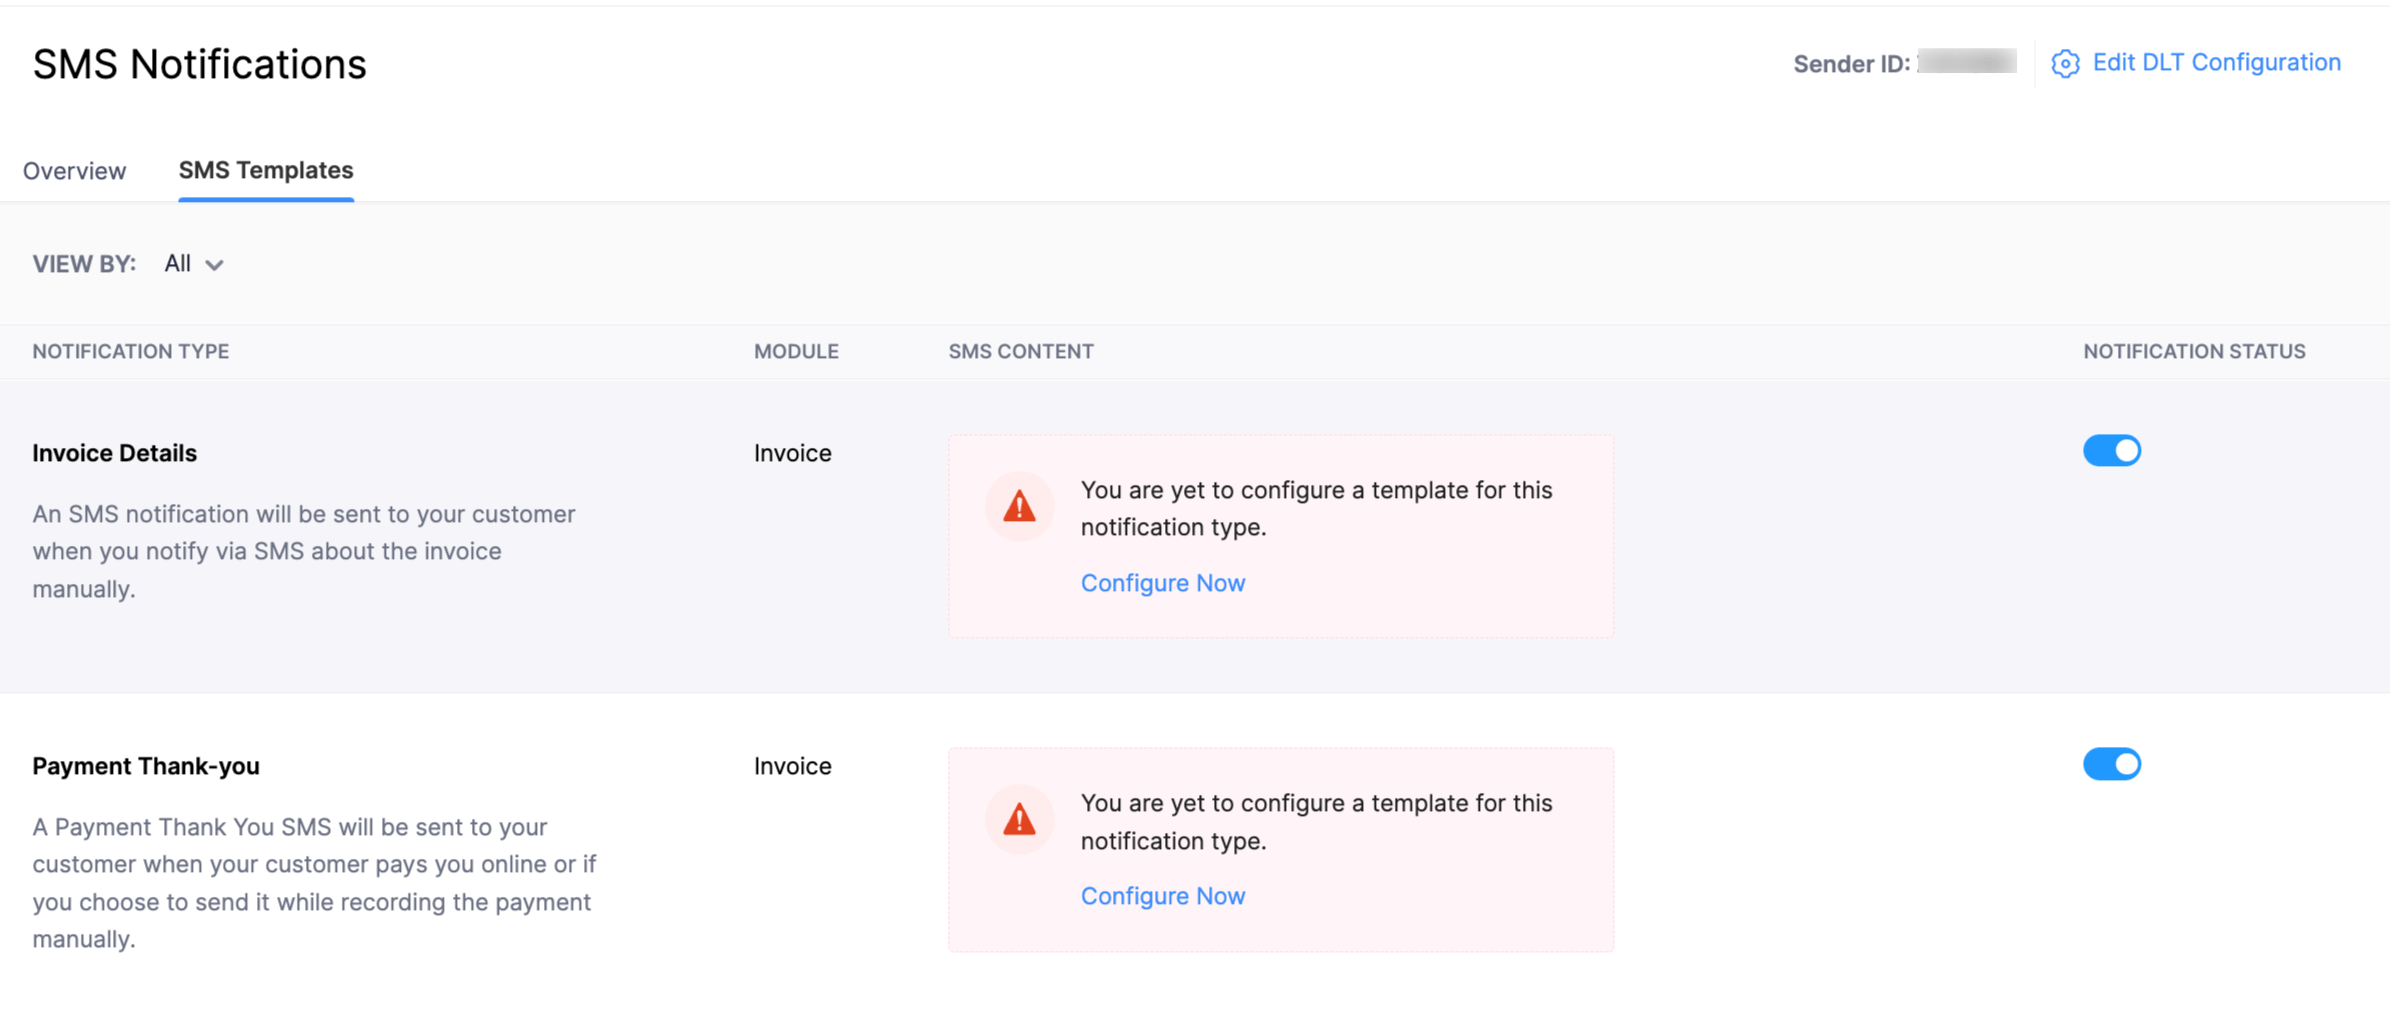
To configure the template of each SMS notification:
- Navigate to the SMS Templates tab in the SMS Notifications page.
- Slide the Notification Status toggle next to the notification types you want to enable.
- Click Change Template and select the preferred template for the enabled notifications.
Note: You cannot edit the content of your SMS templates. You can only change the templates for each notification.
DLT Registration and SMS Template Configuration
Distributed Ledger Technology also known as DLT, is a block-chain based registration system. According to the Telecom Regulatory Authority of India (TRAI), it is mandatory for businesses to register with DLT to send SMS to customers in order to avoid spam.
To send SMS notifications to your customer, you will have to:
- Register with a DLT Operator
- Configure DLT in Zoho Inventory
- Register SMS Templates in DLT
- Configure SMS Templates in Zoho Inventory
Note: This is not applicable for users sending SMS using the Twilio integration.
Register with a DLT Operator
You will have to first register yourself as an enterprise with any of the following DLT operators: Vodafone Idea Ltd, Videocon, BSNL, Jio, or Airtel to proceed further. Here’s how:
The steps below might vary based on the DLT operator you choose.
- Log in to your preferred DLT operator’s website.
- Select Enterprise.
- Choose No if you have not registered with any other DLT operators.
- Enter the necessary details.
- Upload the documents requested by your DLT operator.
- Click Submit, and you will receive an acknowledgement that the details have been correctly entered. You will also receive an email with the approval status.
Insight: If the registration is rejected, you will receive an email with the reason for rejection. You can make the necessary changes in the portal and re-register.
On successful registration, you’ll receive your DLT Registration Number and Sender ID in your email.
Configure DLT in Zoho Inventory
Once you have successfully registered with a DLT operator, you’ll have to configure the DLT details in Zoho Inventory. Here’s how:
- Go to Settings at the top-right corner.
- Navigate to Reminders & Notifications and click SMS Notifications.
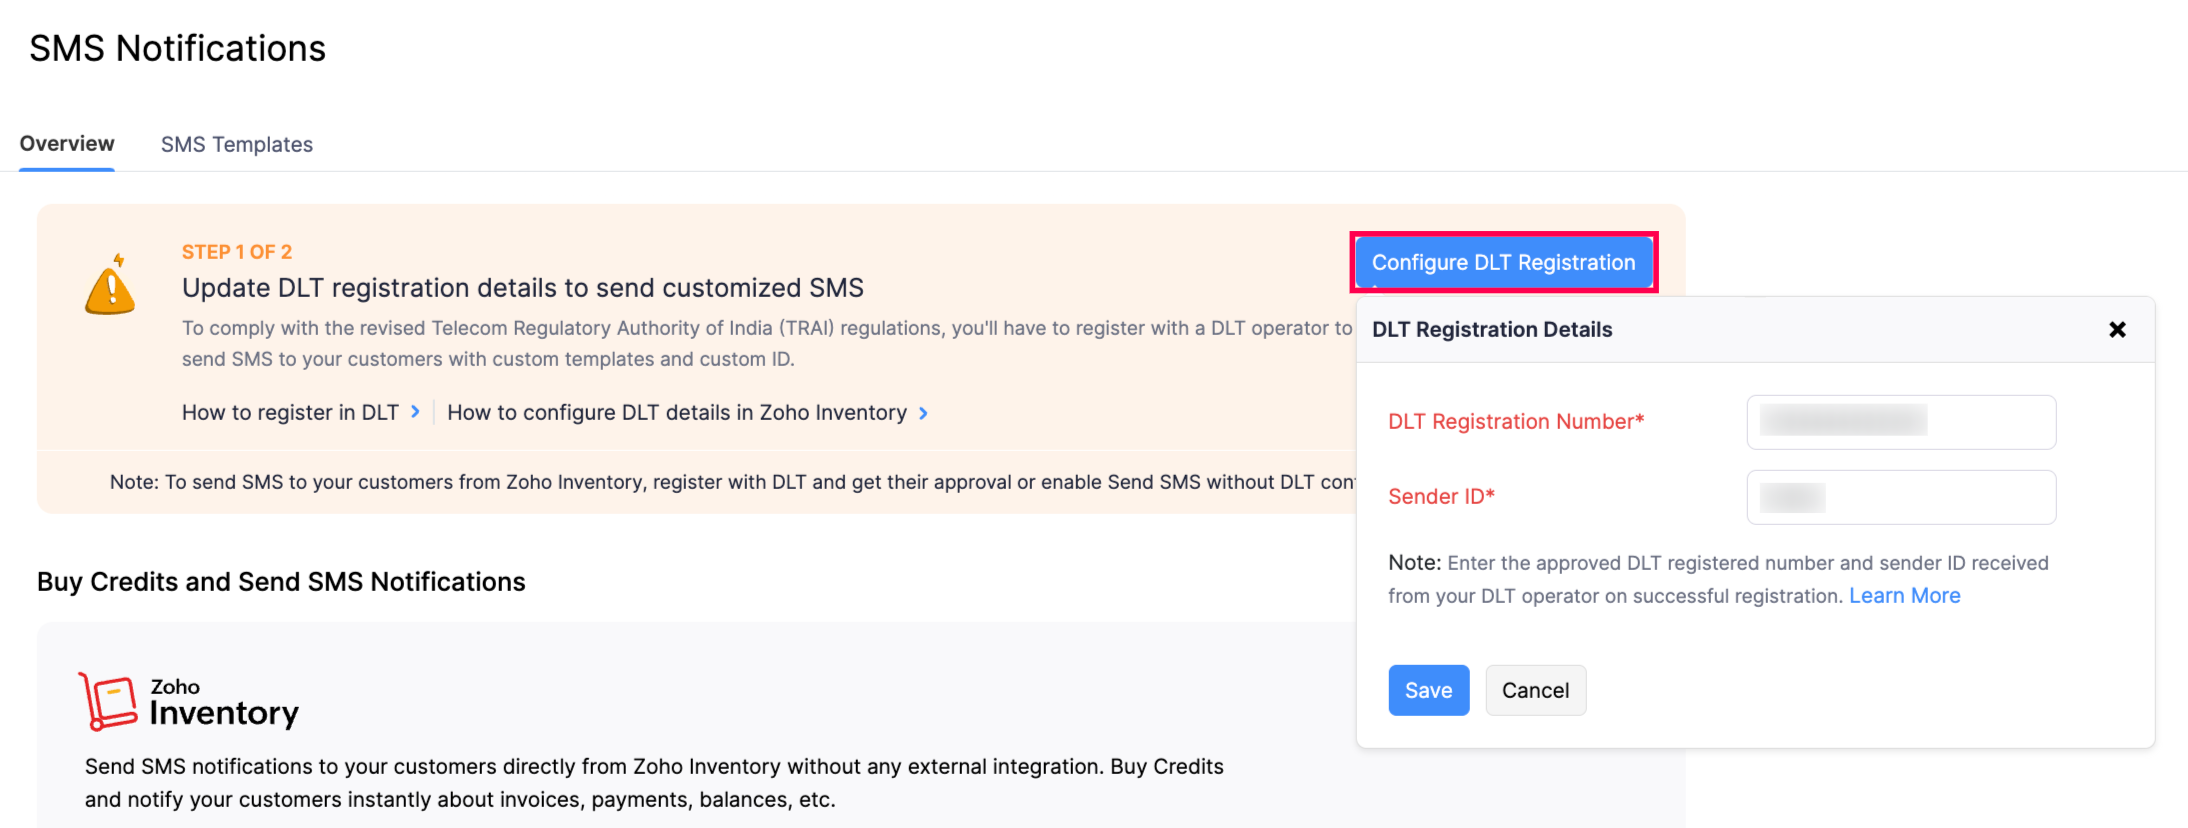
- In the Overview tab, click Configure DLT Registration in the Update DLT registration details to send customised SMS section.
- Enter the DLT Registration Number and Sender ID in the following pop-up.
- Click Save.
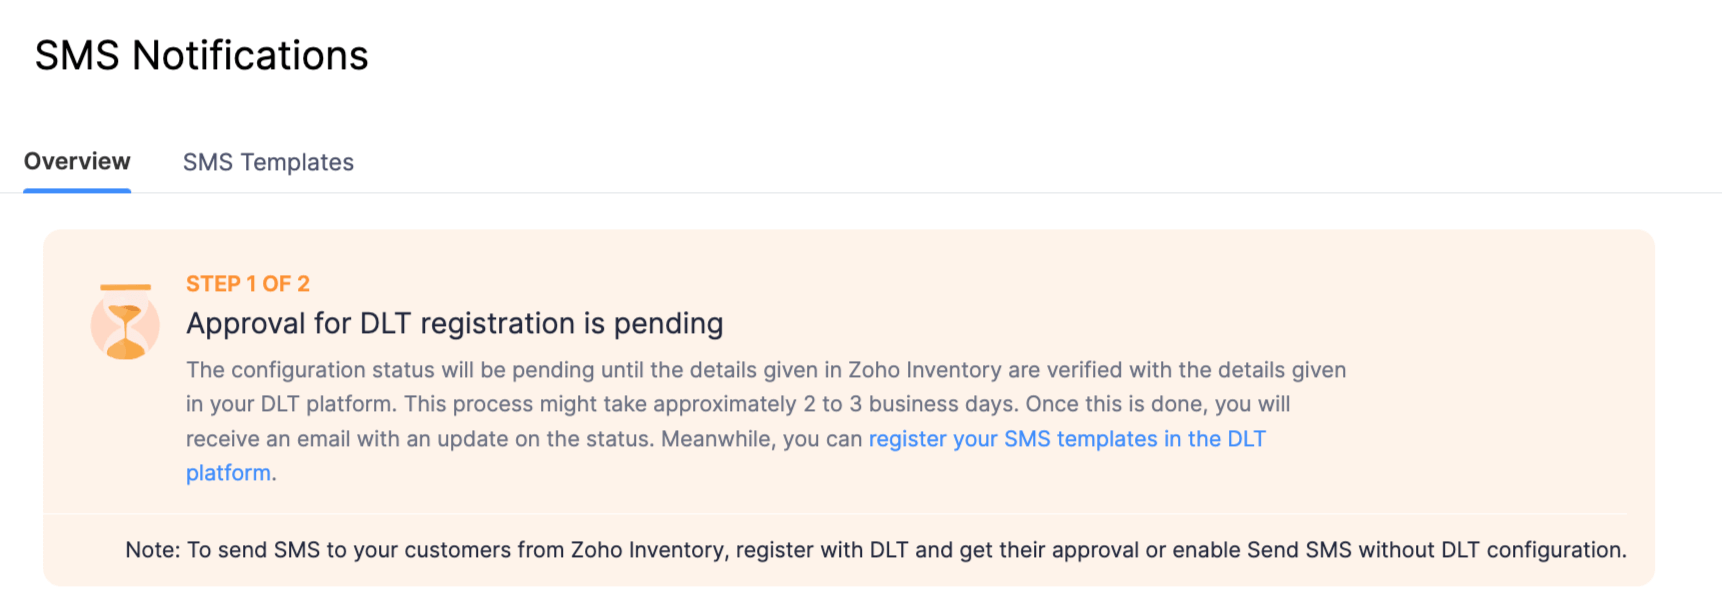
The details provided here will be cross verified with the DLT operator. The status of the configuration will be Pending until it is verified. You’ll receive an email informing if the configuration has been approved or rejected.
| Status | Description |
|---|---|
| Pending | The details are yet to be verified with the details present in the DLT platform. |
| Approved | The details have been successfully verified. |
| Rejected | The configuration has been rejected due to invalid or missing details. |
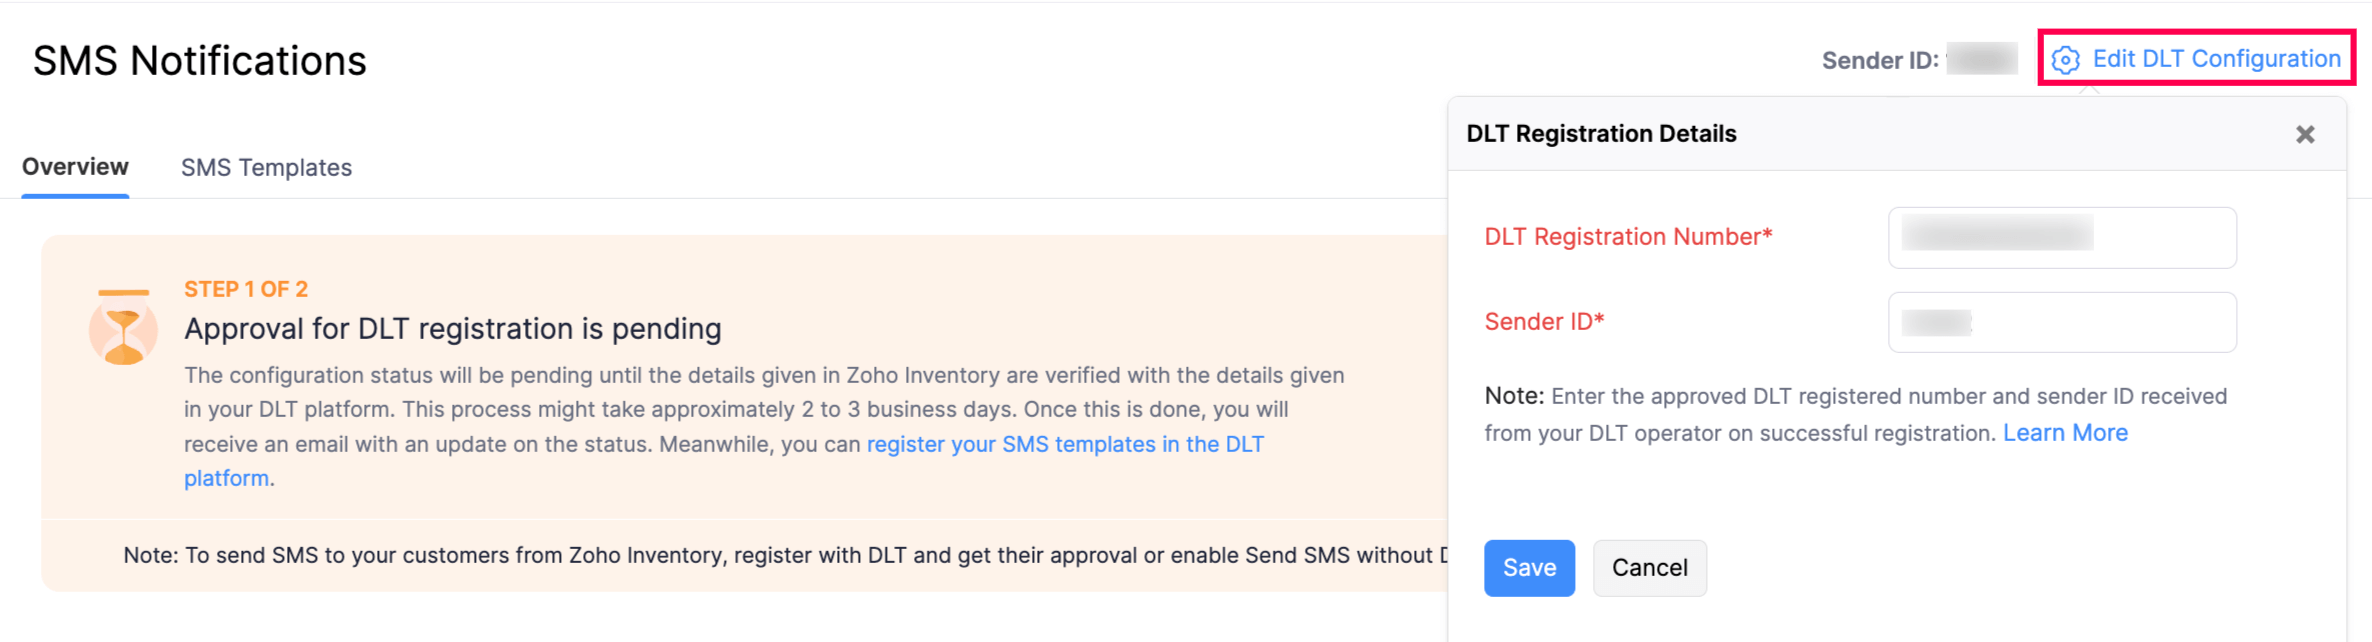
- If you want to make any changes to the DLT registration details after approval, click Edit DLT Configuration at the top right corner of the SMS Notifications page.
Register SMS Templates in DLT
To send SMS to your customers, you’ll have to register the SMS templates with DLT. If the SMS sent to your customers does not match the template registered in the DLT platform, the SMS will be barred. Here’s how you can register your SMS template in DLT:
Note: The steps below might vary based on the DLT operator you choose.
- Log in to the DLT website where you had registered for your DLT Registration Number and Sender ID.
- Go to Templates and click Add New Template.
- Enter the necessary details.
Insight: Choose whether the content type is Transactional, Promotional, Service Implicit or Service Explicit. Based on the content type, the list of approved headers will be auto-populated. You can select as many headers as necessary.
- Enter or paste the message content.
If you want to use a template from Zoho Inventory, you can do so by copying the content from the Message text box in the Configure Template pop-up. To send dynamic content, add variables.
- Click Submit.
On successful registration, you will receive the Template ID and the SMS Template via email.
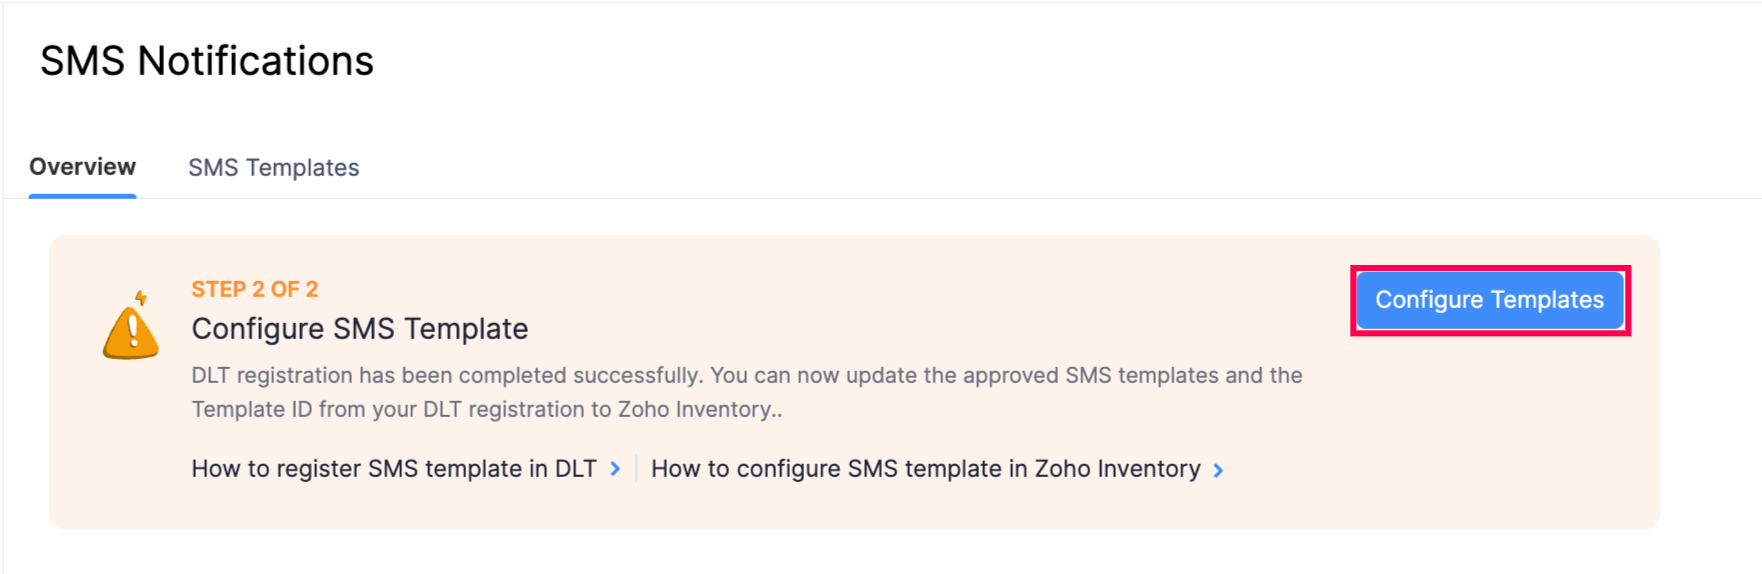
Configure SMS Templates in Zoho Inventory
- Go to Settings at the top right corner.
- Navigate to Reminders & Notifications and click SMS Notifications.
- In the Overview tab, click Configure Templates in the Configure SMS Template section.
- Slide the Notification Status toggle and click Configure Now next to each notification type.
- Enter the Template ID and SMS Template that was approved in the DLT platform.
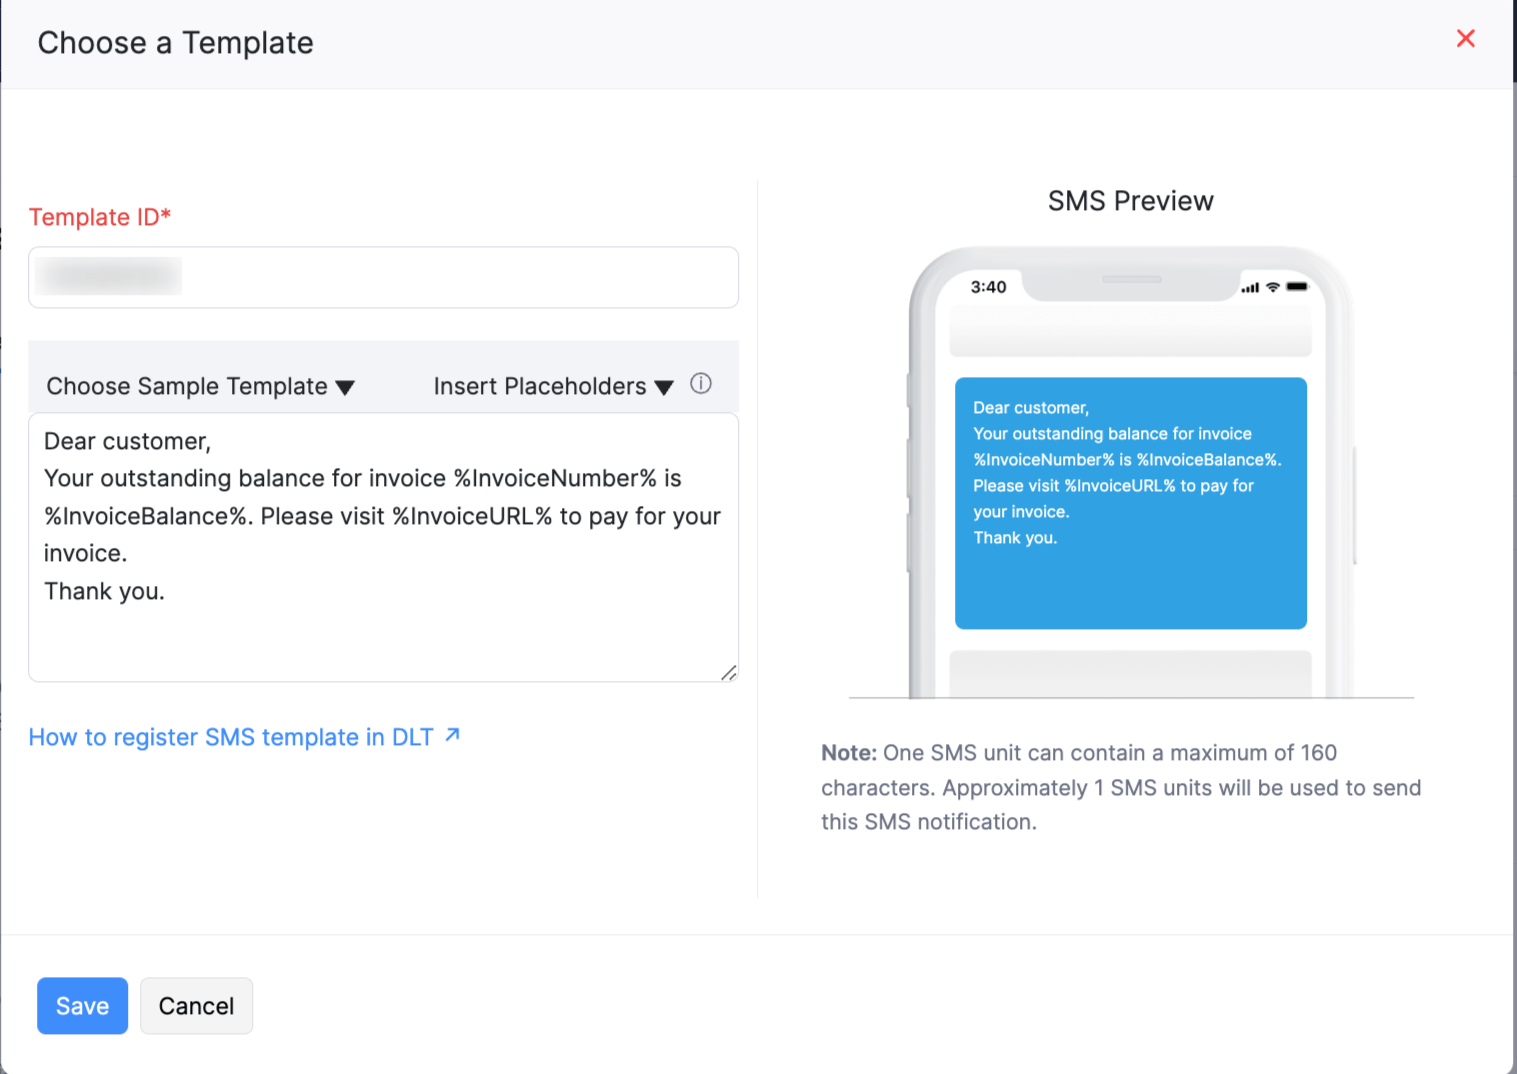
- Click Save.
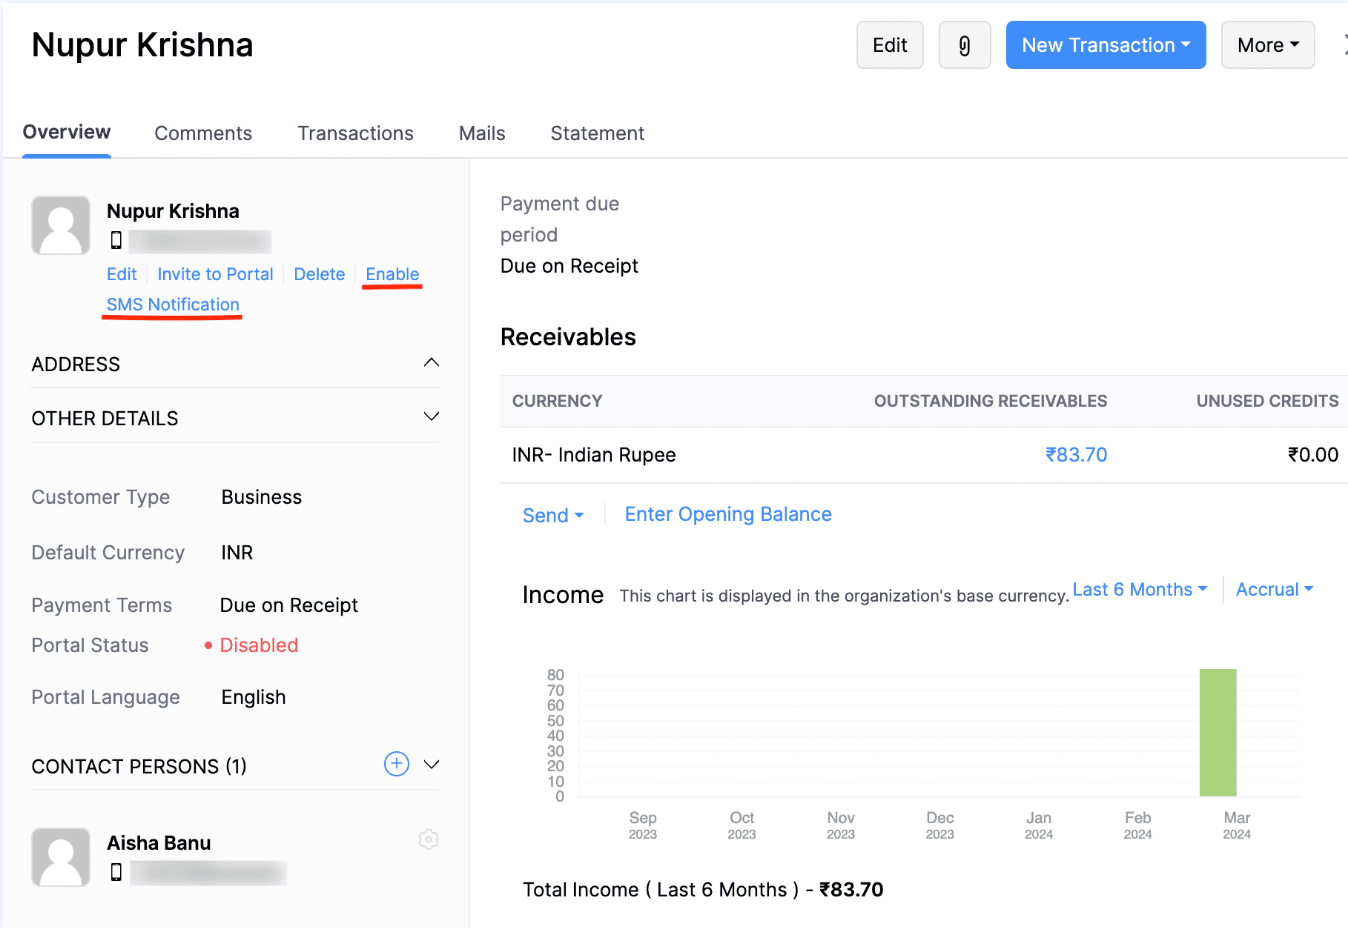
Enable SMS for Primary Contacts
To enable SMS for primary contacts:
- Navigate to Sales and click Customers.
- Click the customer for whom you want to enable SMS notifications.
- In the Overview tab, click Enable SMS Notification.
SMS notifications will be enabled for the respective primary contact.
Enable SMS for Contact Persons
To enable SMS notifications for contact persons:
- Navigate to Sales and click Customers.
- Click the customer for whom you want to enable SMS notifications.
- Scroll down to the Contact Persons section and click the Gear icon.
- Click Enable SMS Notification in the following dropdown.

SMS notifications will be enabled for the respective contact person.
Enable SMS Notifications for Customers in Bulk
You can enable SMS notifications for customers in bulk in two ways:
All Primary Contacts and Contact Persons
To enable SMS notifications for all primary contacts and contact persons:
- Go to Settings at the top-right corner.
- Navigate to Reminders & Notifications and click SMS Notifications.
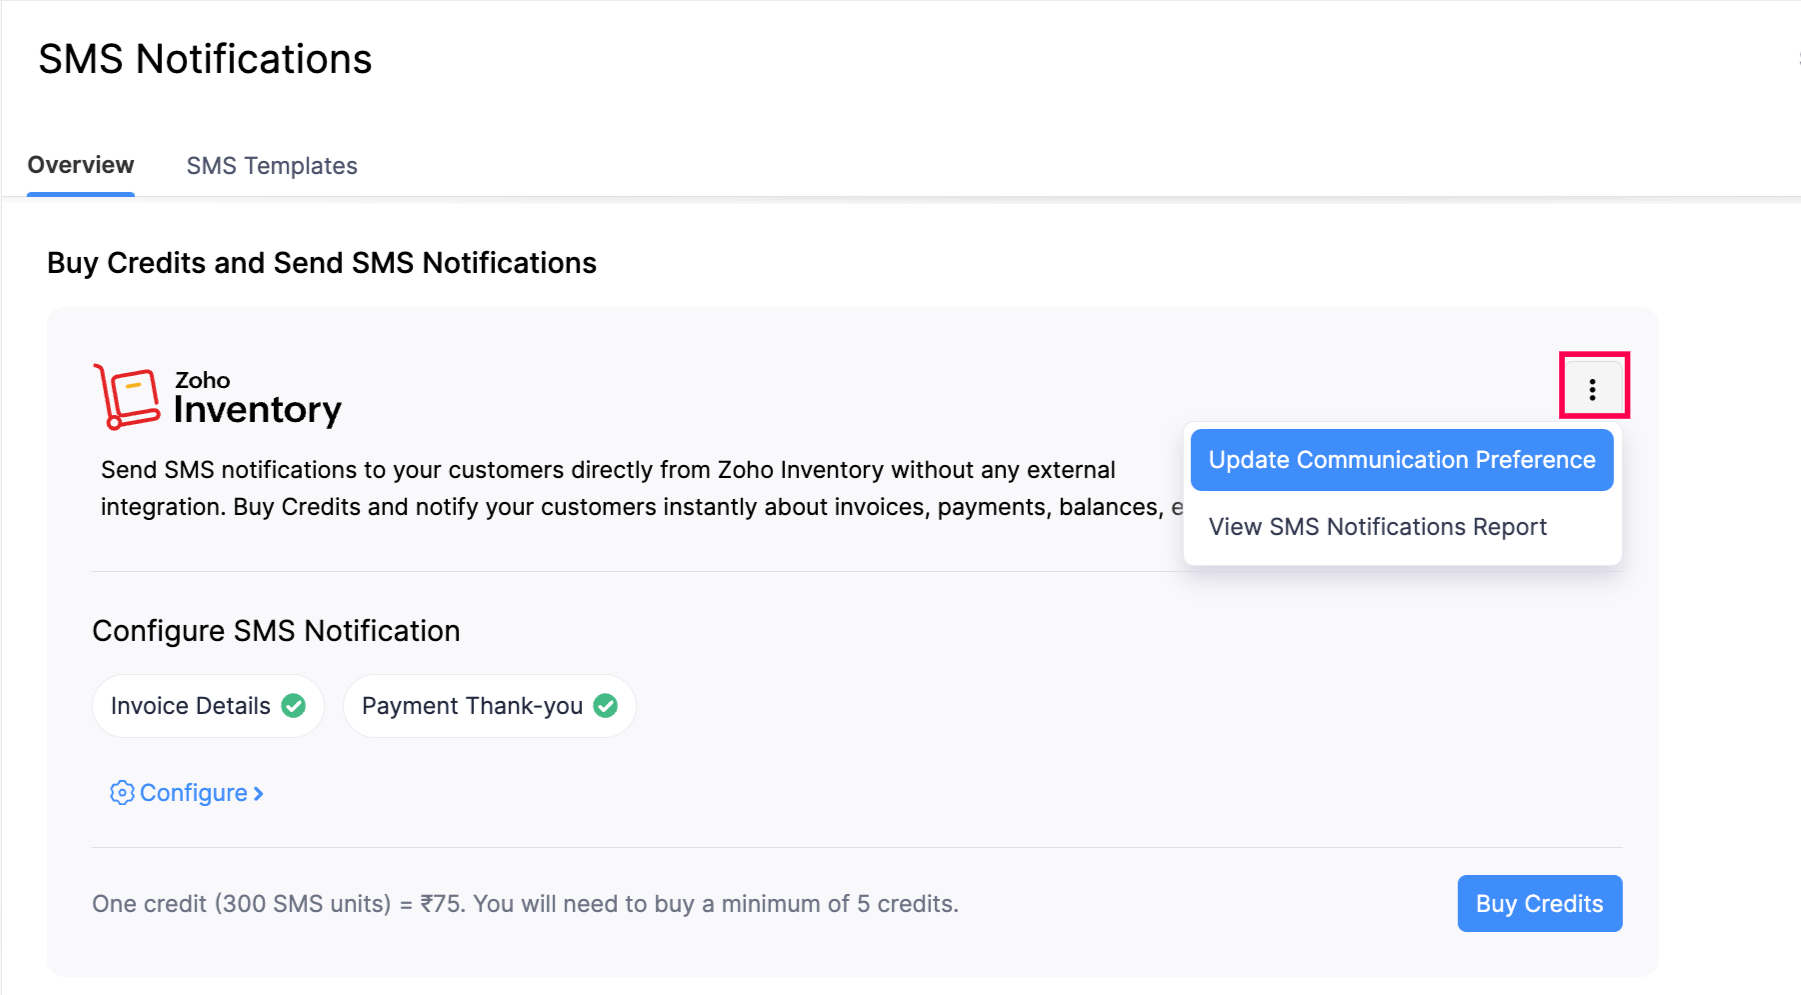
- Click the More icon in the Buy Credits and Send SMS Notifications section.
- Select Update Communication Preference from the drop-down.
- In the following pop-up, select the default recipients to whom you want to send the SMS notifications.
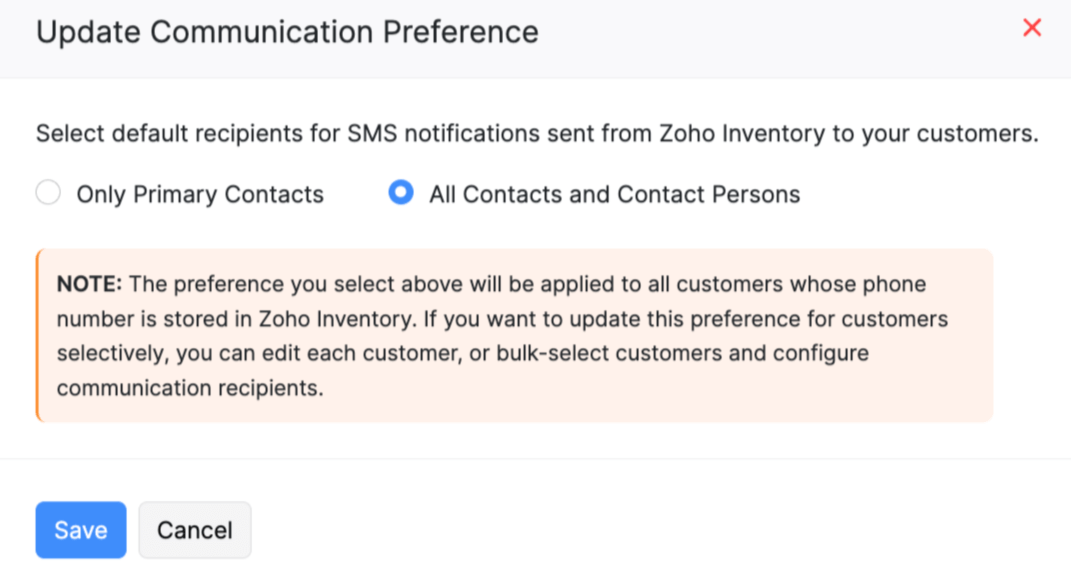
- Click Save.
Specific Primary Contacts and Contact Persons
To enable SMS Notifications for specific primary contacts and contact persons:
- Navigate to Sales and click Customers.
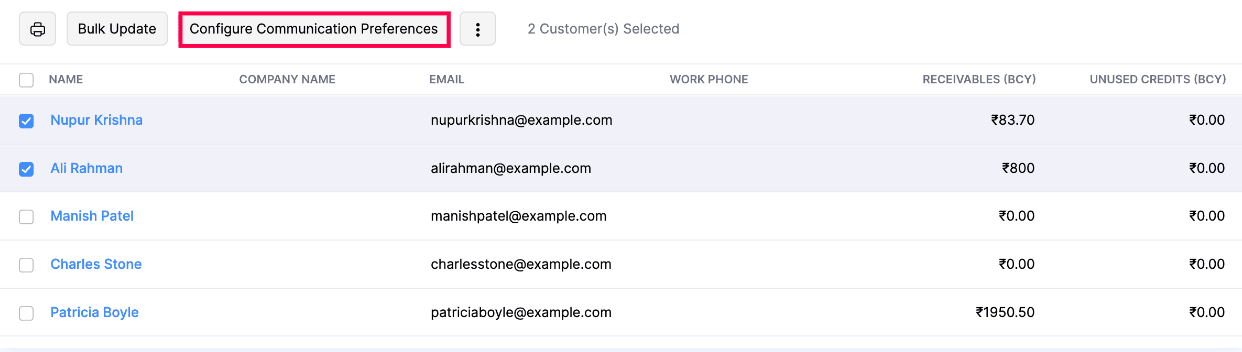
- Select all the customers for whom you want to enable SMS notification.
- Click Configure Communication Preferences at the top.
- Select the default recipients for SMS channel type in the pop-up that follows.
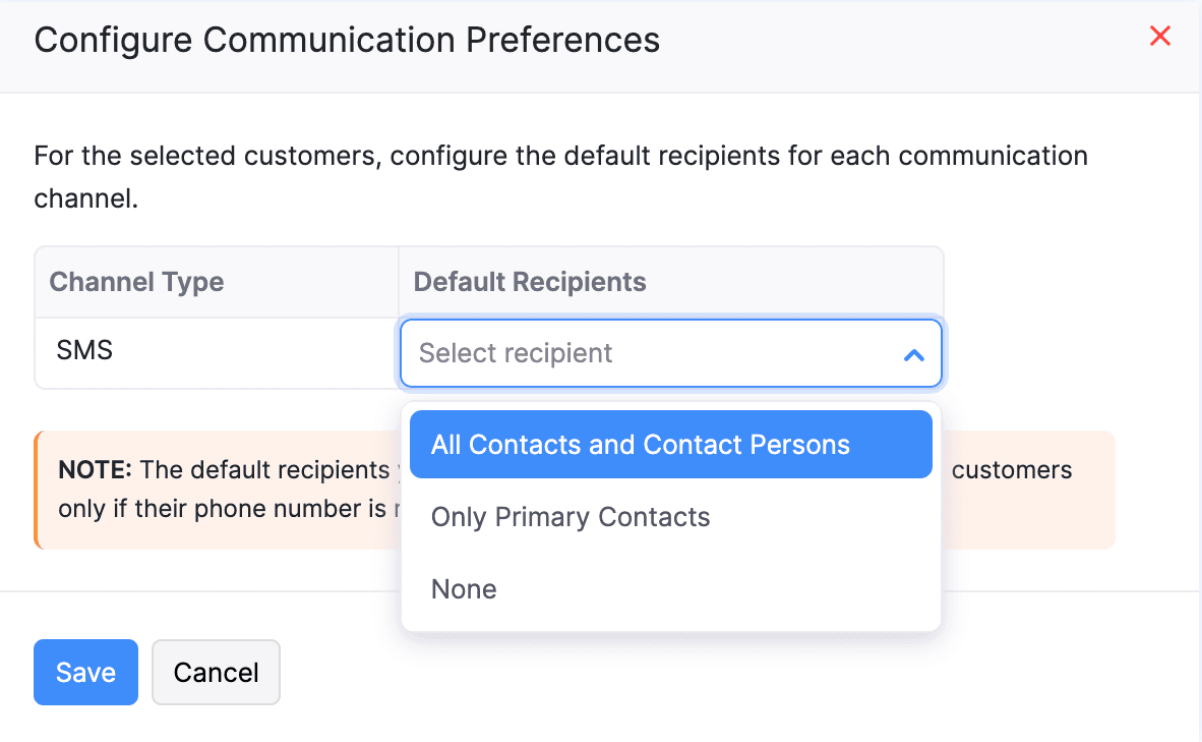
- Click Save.
SMS notifications will be enabled for the selected contacts.
Disable SMS Notifications for Primary Contact
To disable SMS notifications for primary contact:
- Navigate to Sales and click Customers.
- Click the customer for whom you want to disable SMS notifications.
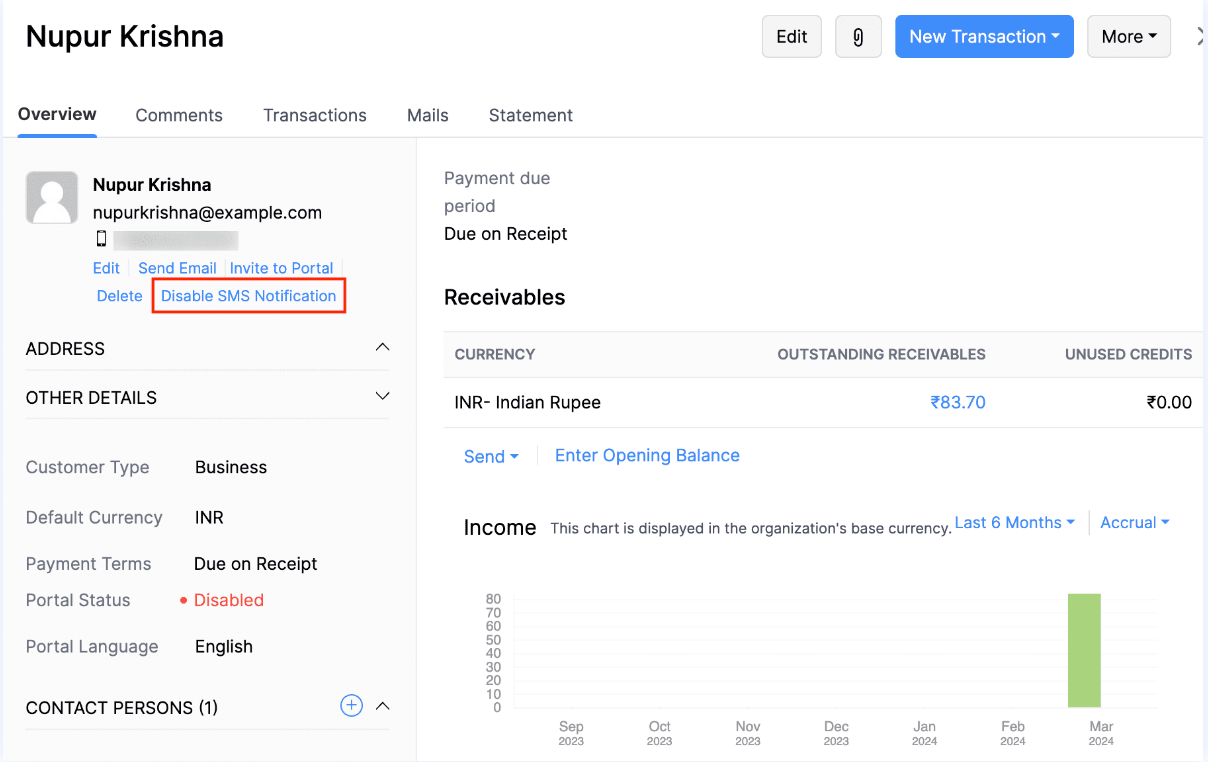
- In the Overview tab, click Disable SMS Notification.
The SMS notifications will be disabled for the respective primary contact.
Disable SMS Notifications for Contact Persons
To disable SMS notifications for contact persons:
- Navigate to Sales and click Customers.
- Click the customer for whom you want to disable SMS notifications.
- Scroll down to the Contact Persons section and click the Gear icon.
- Click Disable SMS Notification in the following drop-down.
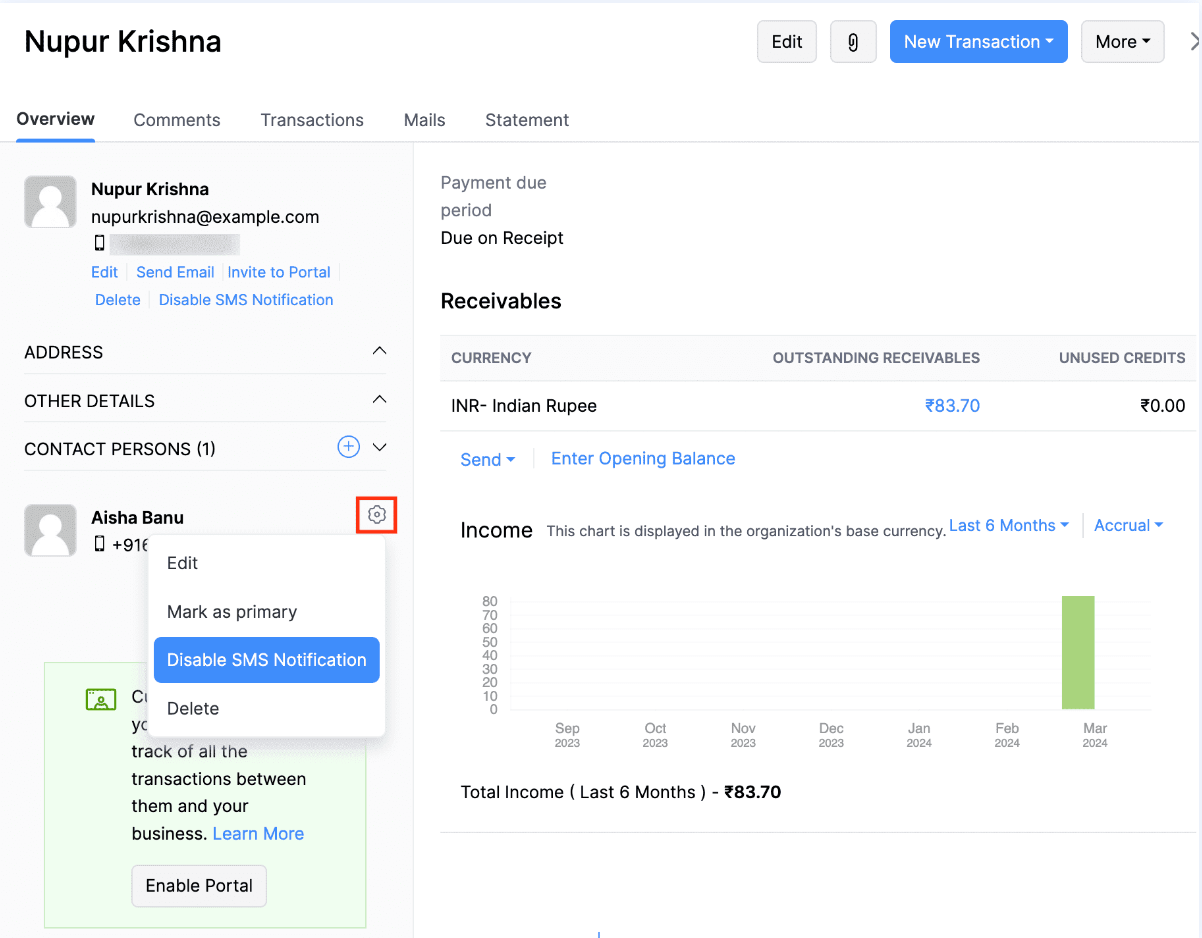
SMS notifications will be disabled for the respective contact person.
Disable SMS Notifications in Bulk
To disable SMS notifications for customers in bulk:
- Navigate to Sales and click Customers.
- Select all the customers for whom you want to disable SMS notification.
- Click Configure Communication Preferences at the top.

- In the default recipients field for SMS channel type, select None.
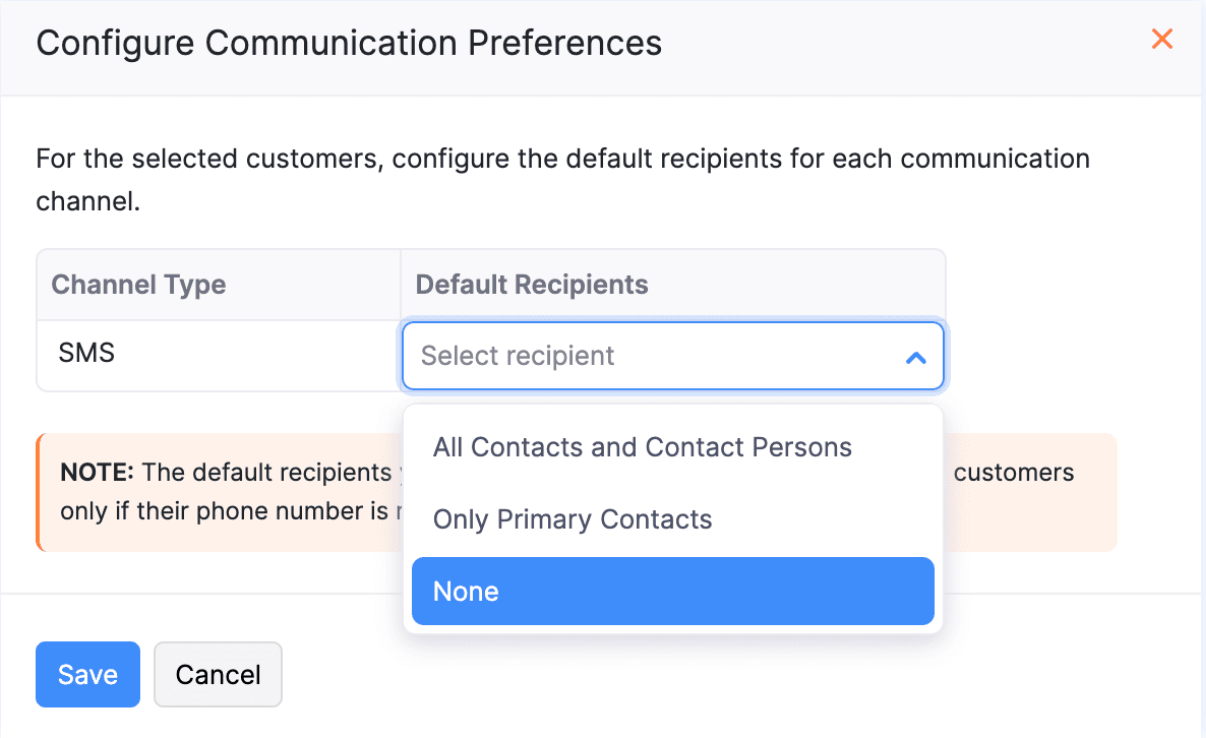
When the default recipients for customers are selected as None, the SMS notifications will not be sent to any contact persons.
Send SMS Notifications
Based on the SMS Notifications you’ve enabled and the contact preferences, SMS will be sent automatically to the respective customers and contact persons in the cases:
When you’ve configured the ‘Create and Send Invoice’ or ‘Create, Share and Send Invoices’ preferences for recurring invoices, an Invoice Creation SMS will be sent.
When you receive online payments from your customers, a Payment Thank You SMS will be sent.
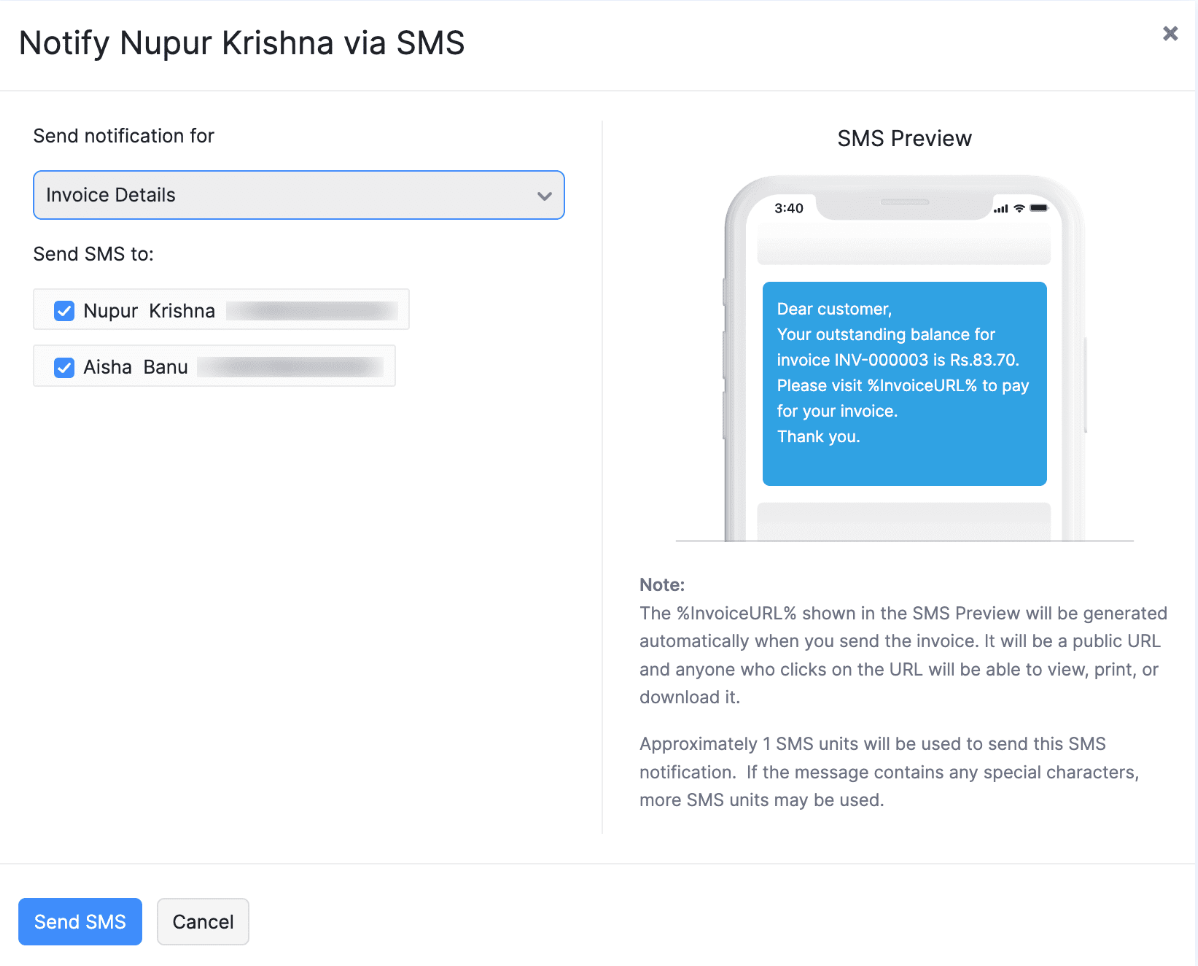
Apart from sending automated SMS notifications, you can also send them manually. Here’s how:
- Go to a module (say Invoices), select the invoice for which you want to send the SMS notifications.
- Click Send and select Send SMS from the following dropdown.
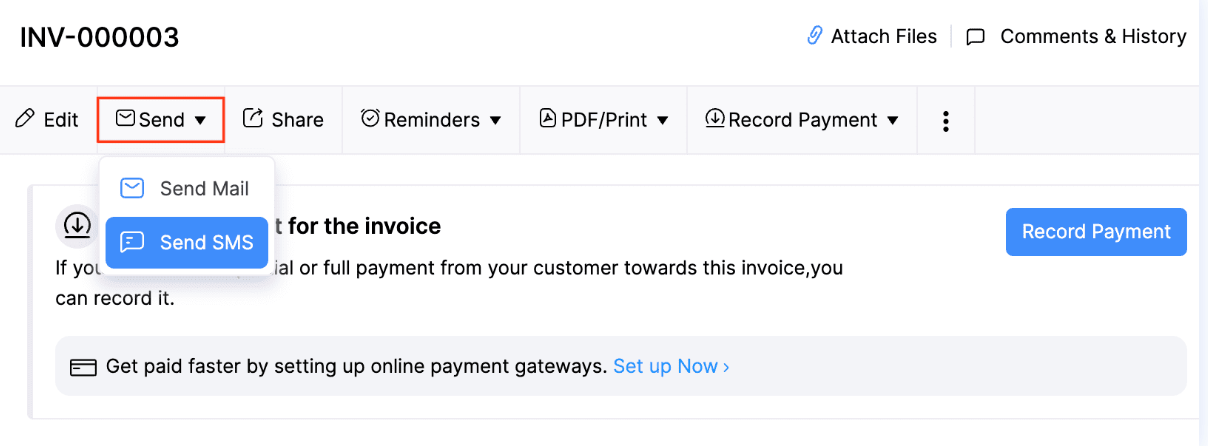
- You can select the contact to whom you want to send the SMS notifications in the following pop-up.
- Click Send SMS.
Also, you can send Payment Thank You SMS notifications when you’ve collected the payment offline and are recording it manually: Here’s how:
- Navigate to Sales and click Invoices.
- Click the invoice for which you want to send a thank-you notification.
- Click Record Payment.
- Check the Notify via SMS option and click Record Payment.
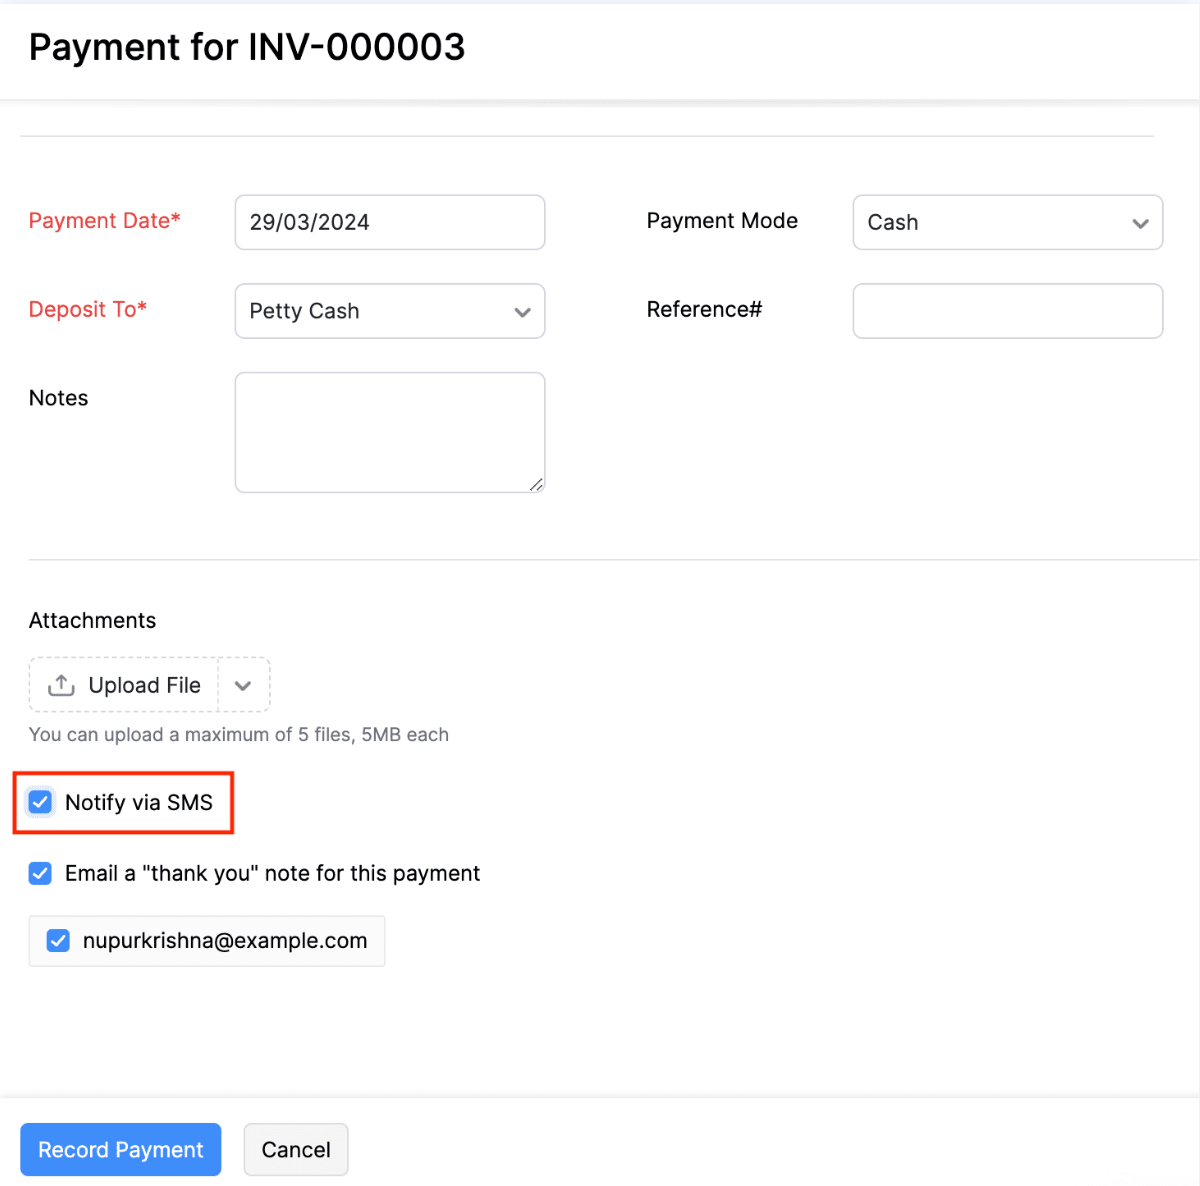
The Thank-You SMS notification will be sent to the customers.
Note: According to TRAI regulations, it is mandatory to complete the PE-TM binding process for the messages you send your customers. Learn more about the PE-TM binding chain process.
View Sent SMS Notifications
You can view the SMS notifications sent from Zoho Inventory using the SMS Notifications report. To view the report:
- Go to Settings in the top right corner.
- Navigate to Reminders & Notifications and click SMS Notifications.
- Click the More icon in the Buy Credits and Send SMS Notifications section.
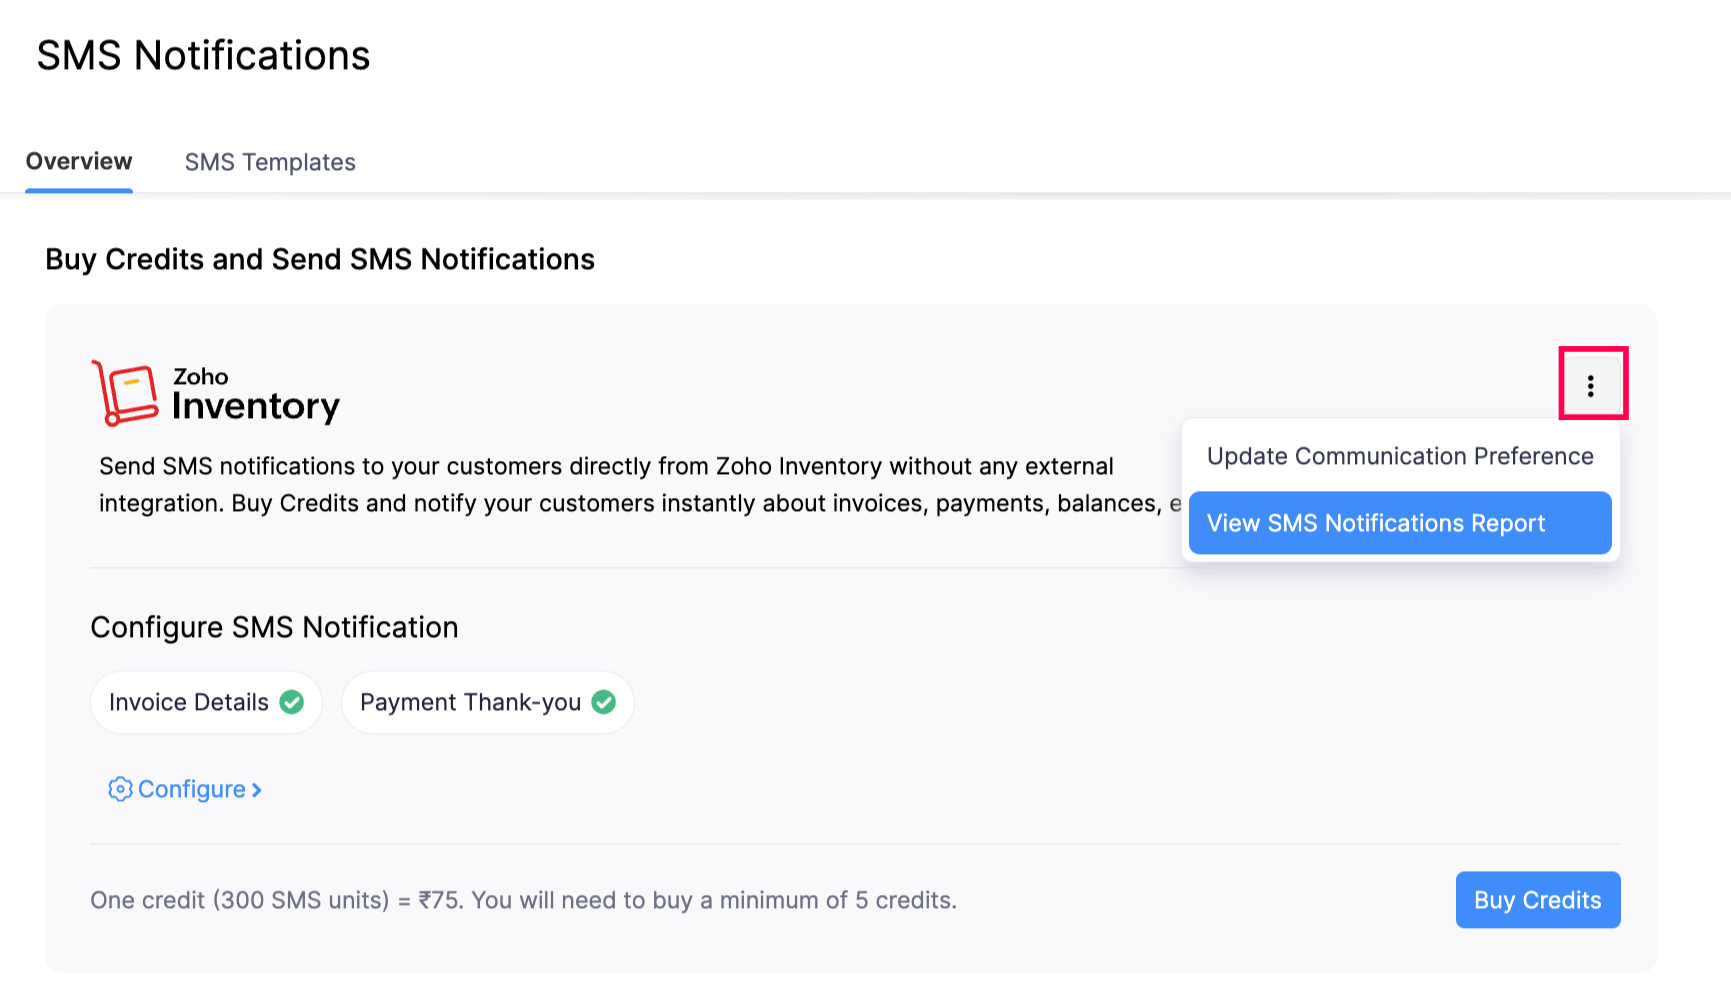
- Click View SMS Notifications Report.
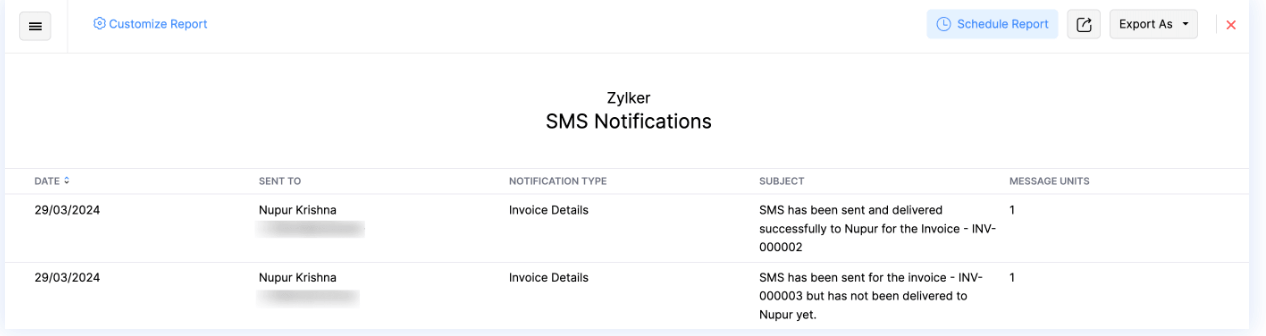
You will be redirected to the SMS notifications report.
You can also view this report in the Activity section of the Reports module.