
Integrations to Shipping Carriers
Down below, you can find the list of shipping carriers from all over the world (leaving out those from North America and Europe) and the steps to configure and operate these carriers.
Directly Integrated Carriers
Easypost Carriers
UPS
Zoho Inventory supports UPS domestic shipping within the USA, EU, Canada, Mexico, Puerto Rico and Asia Pacific (Singapore, Malaysia and Australia) regions.
Before you set up the integration, make sure you have an active account with UPS.
Setting up the integration
- Navigate to Settings - Integrations
- Click the Setup Now button below the UPS logo.
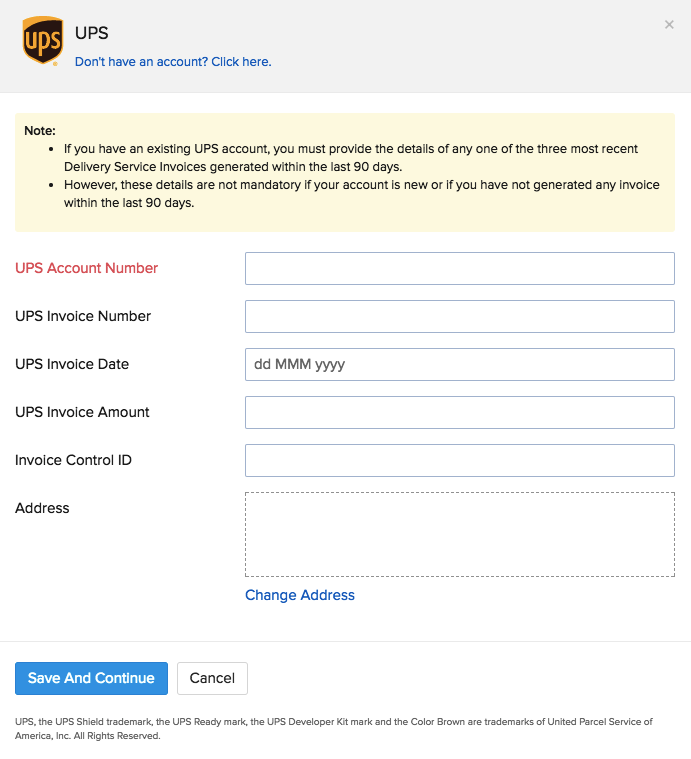
- Fill up all the necessary details - UPS Account Number and the details of the Delivery Service Invoice.
Note: If you have an existing UPS account, you must provide the details of any one of the three most recent Delivery Service Invoices generated within the last 90 days. However, these details are not mandatory if your account is new or if you have not generated any invoice within the last 90 days.
- Click the Save button to successfully integrate with UPS.
- To visit their website, click here.
Multi-piece shipment
You can ship several packages in a single UPS shipment.
To create a multi-piece UPS shipment for an order:
Open a sales order with several packages.
Click Create > Shipment and choose the Ship via Carrier option.
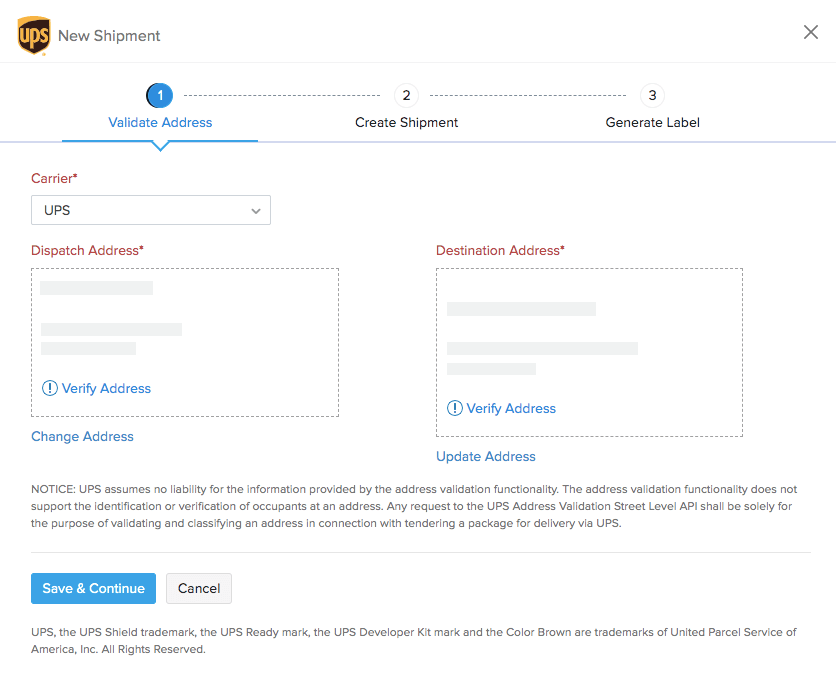
Select UPS as your carrier.
Validate the addresses and click Save & Continue.
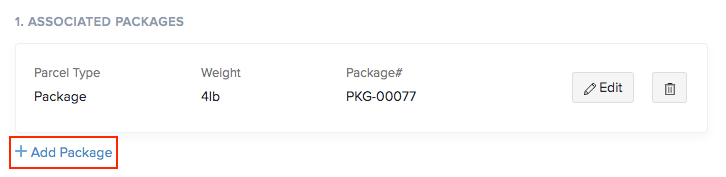
In the next step, click the + Add Package button under the Associated Packages section.
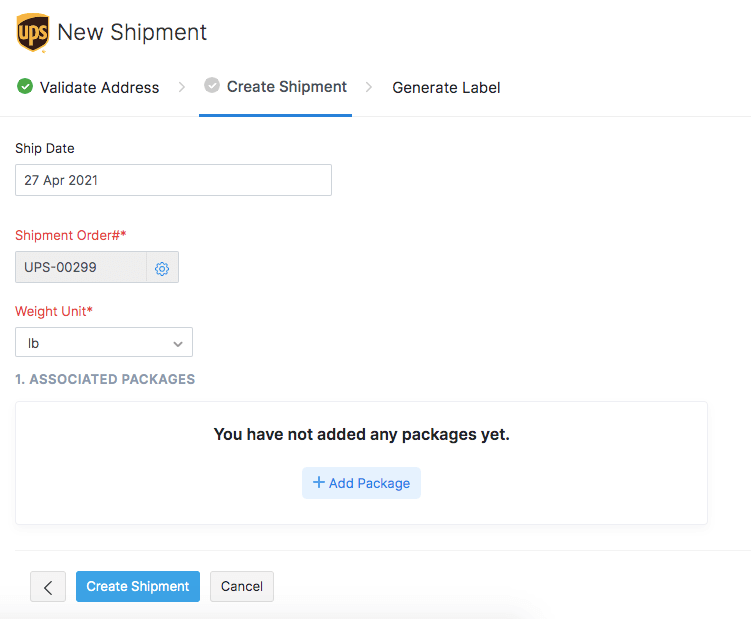
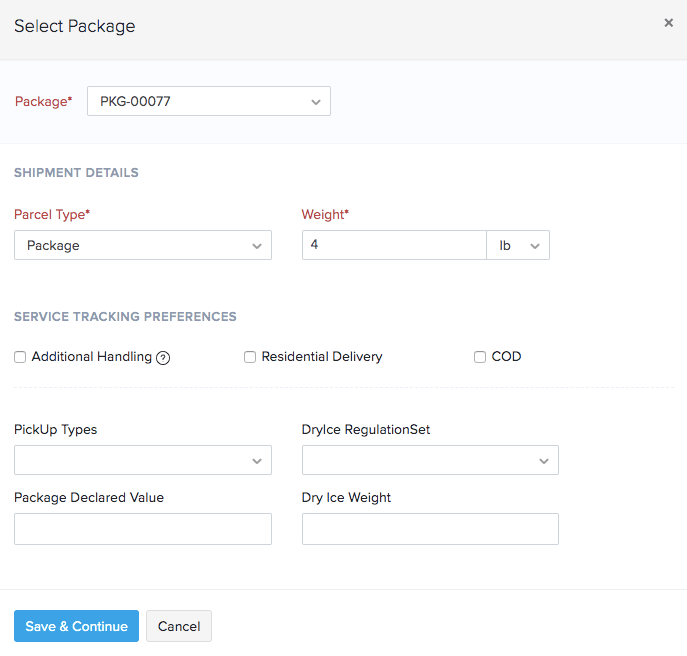
Select a package and enter its Shipment Details and select the Service Tracking Preferences.
Click Save & Continue.
To add another package, click + Add Package.
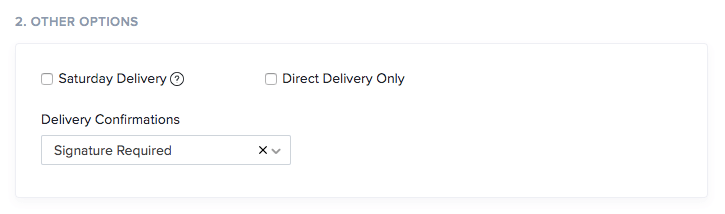
Select the delivery preferences under Other Options.
Click the Configure Billing Method option, where you can either choose to pay the transportation and duty costs yourself or charge a third party by providing their UPS account number, country code, and postal code. This feature helps drop-shippers who work with other vendors to supply goods to end customers.
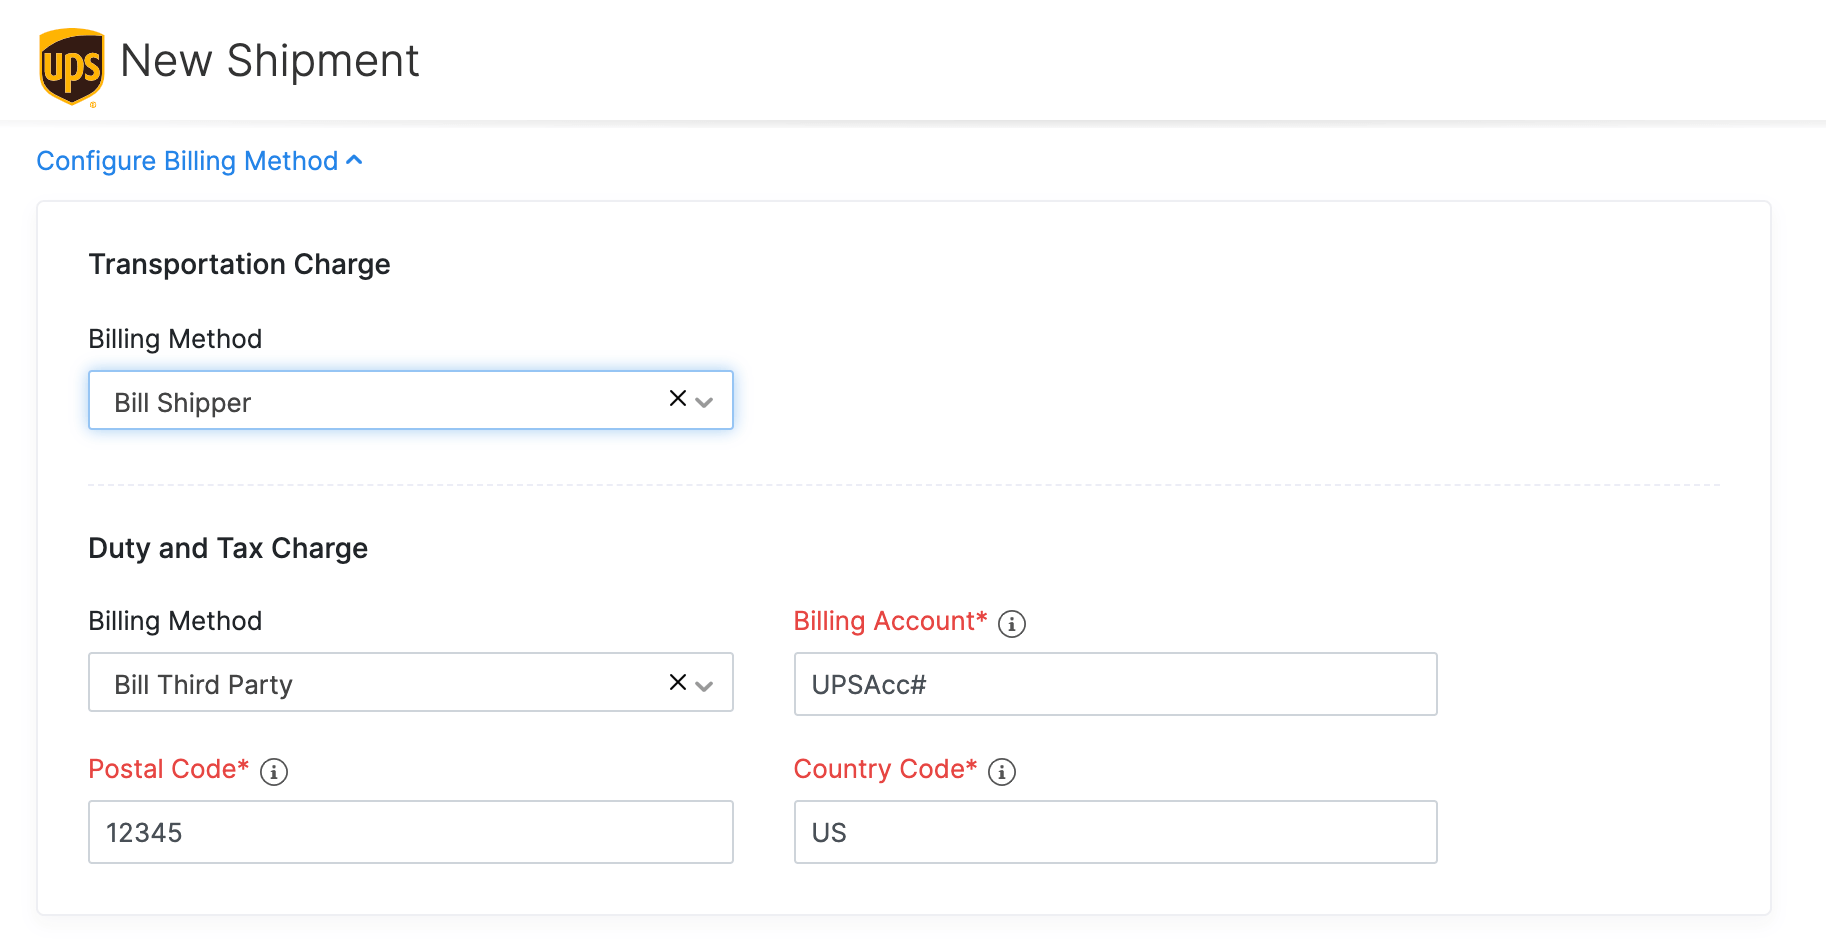
Insight: Shipping Duties is applicable only for international shipments. Shipping between US and Puerto Rico is considered Domestic by UPS.
Warning: Be aware of possible chargebacks on your UPS invoice if you’re shipping on a third-party account as they have 180 days to raise a dispute and rebill the original shipper. In case of refusal to pay or non-payment by the receiver, the original shipper will be charged a refusal fee along with the shipping fee.
- Click the Calculate Rates button under Choose Shipping Method to fetch the shipping rates.
- Choose a shipping rate and click Create Shipment.
Once you’ve created the shipment,
For each package, you can download and print the tracking number and shipment label.
You can also click the Check Status option to retrieve the status of your consignments.

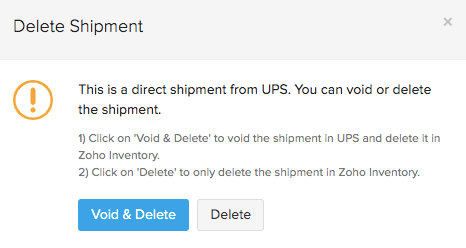
Voiding a shipment
To void/invalidate a UPS shipment:
Go to the Packages module.
Click the UPS shipment to view its details.
Go to More Actions and click the Delete Shipment option from the drop down.
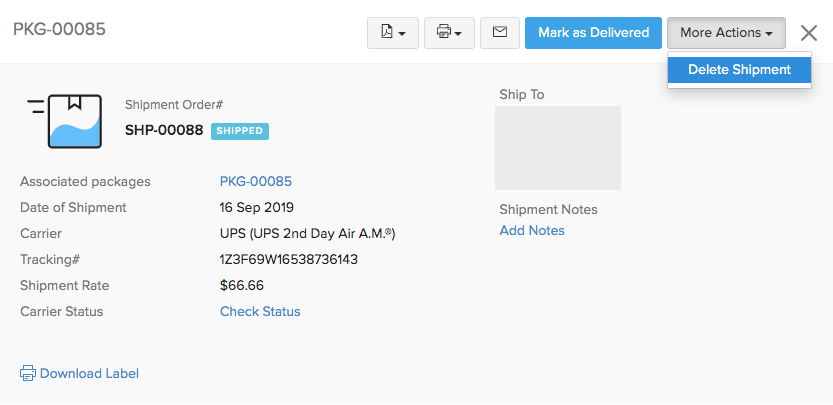
In the following pop-up click the Void & Delete option. This will void the shipment in Zoho Inventory and delete it in USPS.
End of day barcode
- At pickup time, if the UPS driver asks for an end of day barcode, point out the ‘bow tie’ box image that is printed in the lower right corner of the shipping label.
- There is no limit on the number of shipments a driver will take without a bar code. If the parcels are properly labeled, the driver is required to take them.
Insight: Zoho Inventory creates a sub-account of your original UPS Account using your UPS Account Number and address wherein all the shipments that you have created will be synced. Doing so allows you to keep the integration unaffected even when you change your UPS account credentials.
APC
Before we begin, make sure you have an active account with APC.
- Click on the Setup Now button below the APC logo on the Integrations page under shipping tab.

- Fill up all the necessary details - APC Shipper ID, APC Password, APC Facility. You can acquire this information from your carrier. The above details will be shared with Easypost on successful integration.
- Click on the Save button.
Aramex
Before we begin, make sure you have an active account with Aramex.
- Click on the Setup Now button below the Aramex logo on the Integrations page under shipping tab.
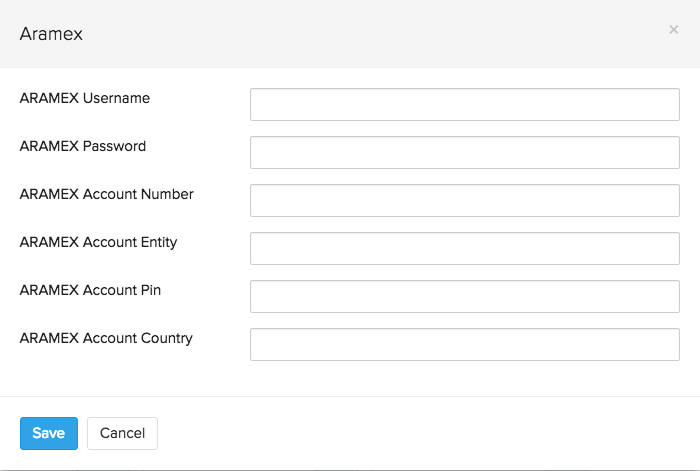
- Fill up all the necessary details - ARAMEX username, password, account number, account entity, account pin and account country. You can acquire this information from your carrier.
- The above details will be shared with Easypost to establish the integration successfully.
- Click on the Save button.
Australia Post
Before we begin, make sure you have an active account with Australia Post.
- Click on the Setup Now button below the Australia Post logo on the Integrations page under shipping tab.
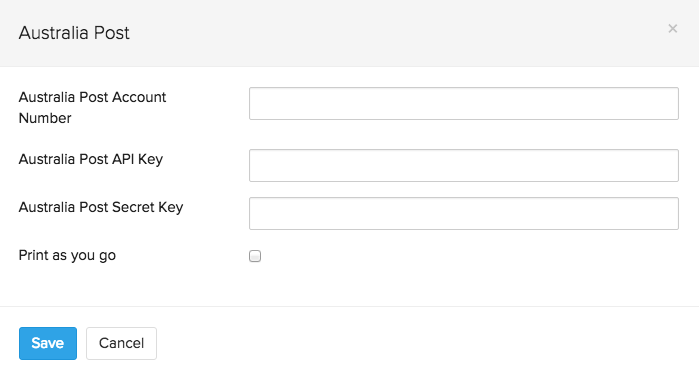
- Fill up all the necessary details - Australia Post Account Number, Australia Post API Key and Australia Post Secret Key. You can acquire this information from your carrier.
- The above details will be shared with Easypost to establish the integration successfully.
- Click on the Save button.
- You can find more information and tips on their website.
Fastway Couriers
Before we begin, make sure you have an active account with Fastway couriers.
- Click on the Setup Now button below the Fastway couriers logo on the Integrations page under shipping channels.
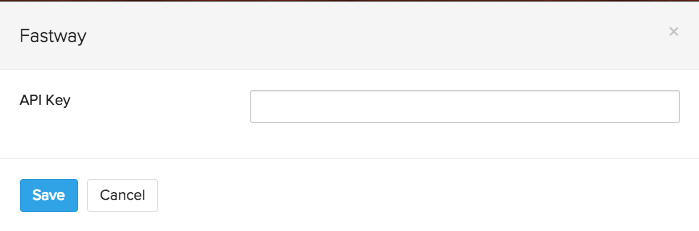
- Fill up all the necessary details - API key that you acquired from your carrier. The API Key will be shared with Easypost to establish the integration successfully.
- Click on the Save button.
- Find out more about them by clicking here.
Hong Kong Post
Before we begin, make sure you have an active account with Hong Kong Post.
- Go to Settings - Integrations.
- Click the Shipping Channels tab.
- Click on the Setup Now button below the Hong Kong Post logo.
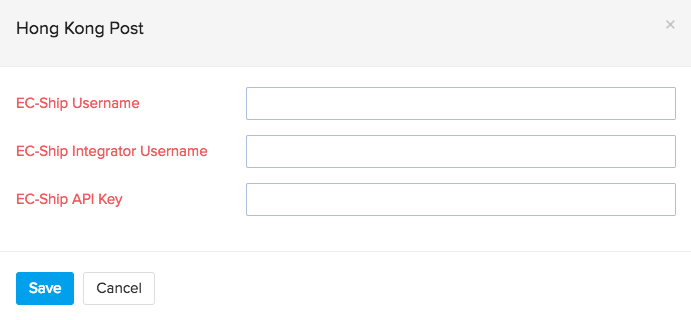
- Fill up all the necessary details that you acquired from your carrier.
- The above details will be shared with Easypost on successful integration.
- Click on the Save button.
IMEX
Before we begin, make sure you have an active account with IMEX.
- Click on the Setup Now button below the IMEX logo on the Integrations page under shipping tab.
- A pop-up with the following fields as shown in the image opens up.
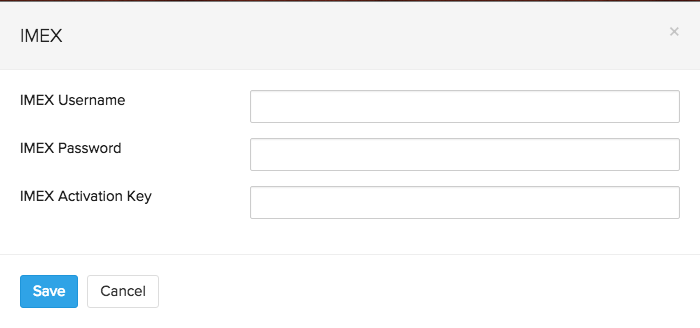
- Fill up all the necessary details - IMEX Username, Password and Activation Key. You can acquire this information from your carrier.
- The above details will be shared with Easypost to establish the integration successfully.
- Click on the Save button.
PostNL
Before we begin, make sure you have an active account with Post NL.
- Click on the Setup Now button below the PostNL logo on the Integrations page under shipping tab.
- A pop-up with the following fields as shown in the image opens up.
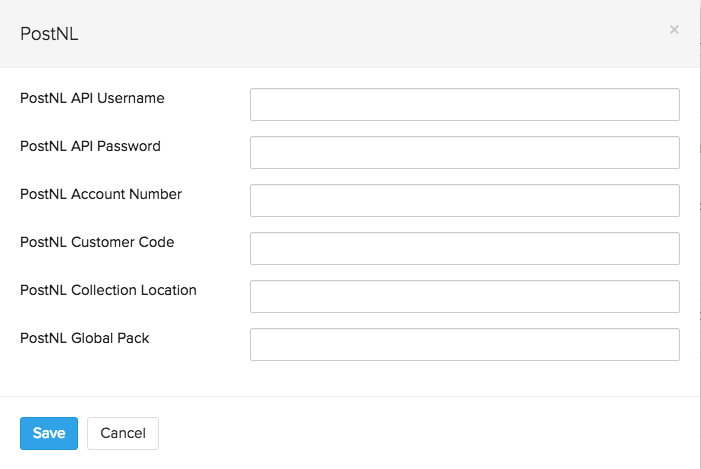
- Fill up all the necessary details - PostNL API Username, API password, Account Number, Customer Code, Collection Location and Global Pack. You can acquire this information from your carrier.
- The above details will be shared with Easypost to establish the integration successfully.
- Click on the Save button.