Inventory
GST Ready Features in Zoho Inventory
This section will give you a brief overview about the GST Ready features that are available in Zoho Inventory.
Configuring your Zoho Inventory
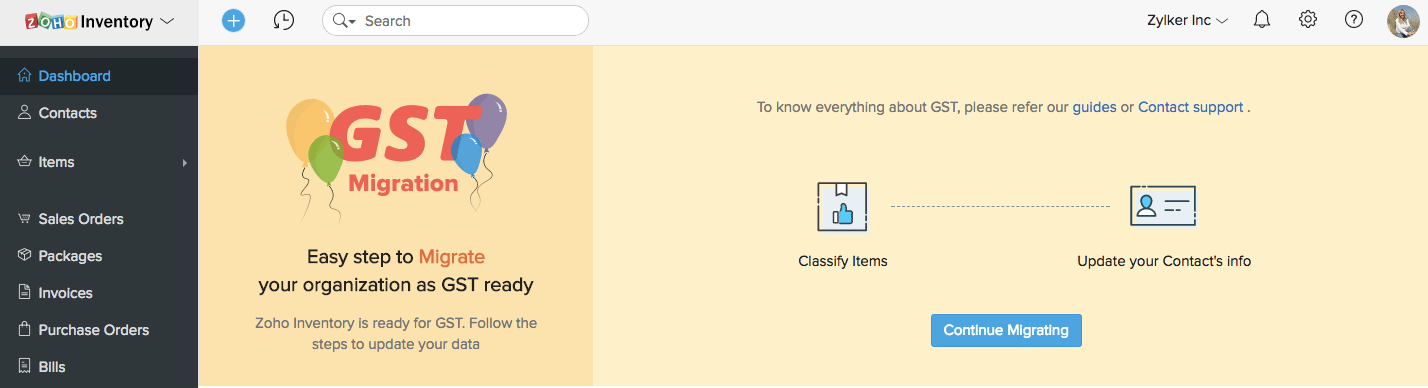
Zoho Inventory is now GST ready. As part of the rollout, you will have to perform a few basic functions in order to get your organization ready for GST. Below mentioned are a few simple steps to get you started.
Enabling GST Settings
For Existing Zoho Inventory users
If you already have a Zoho Inventory account, you will see a migration wizard when you log into your Zoho Inventory account. You should follow the steps mentioned in the wizard in order to make your Zoho Inventory account GST ready.
For new Zoho Inventory users
If you’re creating a new Indian Edition Zoho Inventory account after July 1, 2017, you will be prompted to setup your Tax preferences during the initial stages of sign up. Here, you will be asked whether you have registered for GST, and if so, you will be prompted to enter your GSTIN (GST Identification Number).
If you’ve skipped the process, you can still enable it by following the steps mentioned below:
- Click the GST Update section on the left sidebar, or click on the gear icon on the top right corner, and select Taxes.
- Under Taxes, click GST Settings.

-
Check the option Is your business registered for GST?. You will be prompted to enter a 15-digit GST identification number or the GSTIN.
-
Enter your 15-digit GSTIN.
-
If your business is registered under the composition scheme, check the option Is your business registered for composition scheme?. If you wish to know more about Composition scheme, click here.
-
Click Save for the changes to take effect.
Setting your default tax preference
Once you’re done with the GST Settings, the next step is to set up default tax preferences for Intrastate and Interstate transactions. Zoho Inventory will already have tax rates pre-populated under the Taxes section. But, to make it easier, you can set a default tax rate for intra and interstate transactions.
To set default tax preferences:
- Click the gear icon on the top right corner, and select Taxes.
- Go to the Default Tax Preference section.

- Choose a tax group for Intra State Tax Rate and Inter State Tax Rate from the respective drop-downs.
- Click Save.
But, what if you wish to change the tax rates for a few items that does not come under the default tax rate? In that case, you can edit them by following the steps mentioned below:
- Click on the Items module on the left sidebar.
- Select the item for which you wish to override the default tax preference and click on the Edit button on the top right corner.
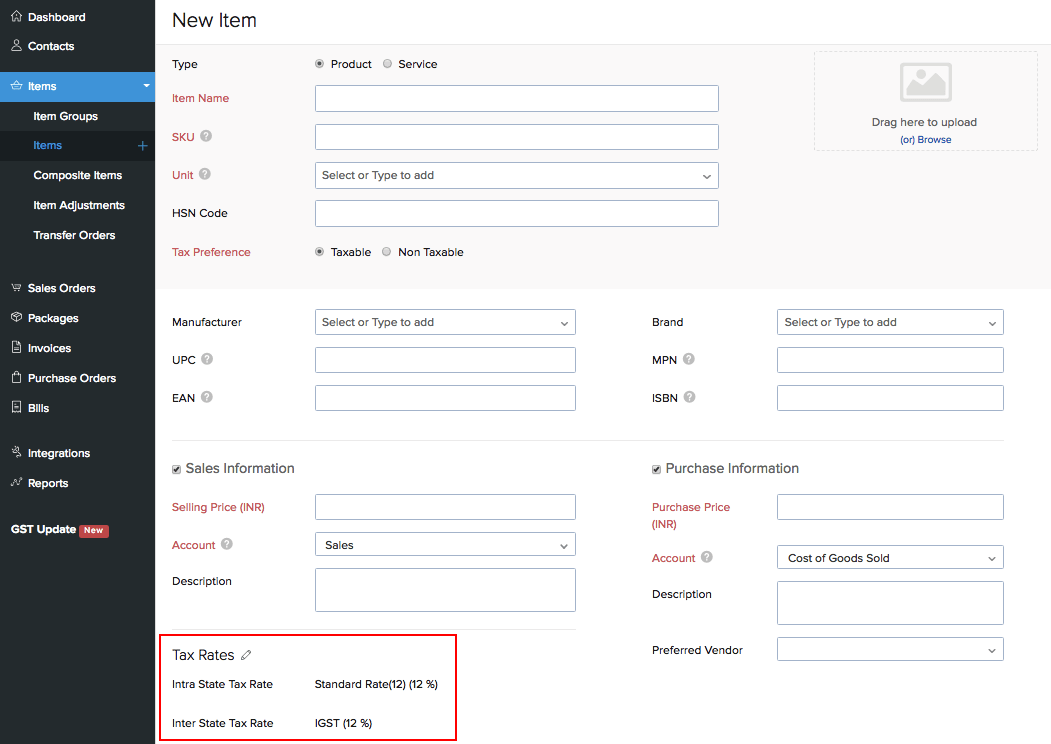
- Scroll down to the Tax Rates section and choose the appropriate tax rates.
- Once done, click Save for the changes to take effect.
Based on the Place of Supply chosen during the invoice creation, the system will choose between the set tax rates.
If you have not entered a shipping address for a contact, billing address will be taken as the default state. If there’s no address associated to the contact, it will be considered as an intrastate transaction(i.e transaction within the same state as of your organization).
Note: You can choose Tax Preference as Tax Exempt if the transactions with the particular contact fall under tax exemption.
Adding Additional Cess
By default Zoho Inventory will have all the tax rates pre-populated under the Taxes section which you can choose for your transactions. However, if you wish to add an additional cess, you can do so by following the steps mentioned below,
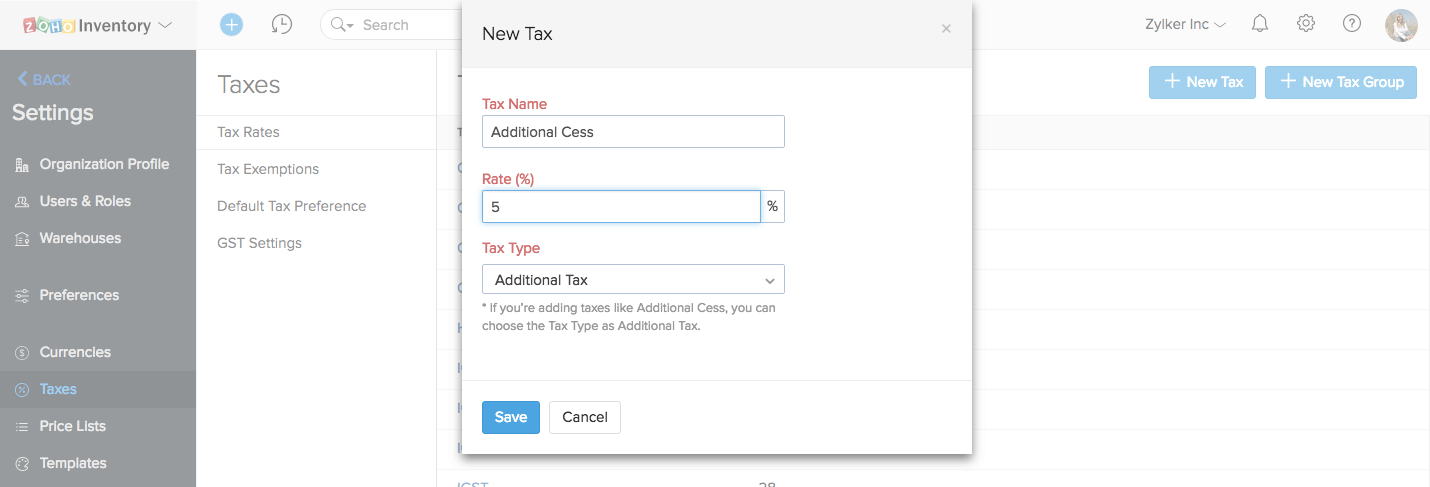
To add your taxes
- Click the gear icon on the top right corner, and select Taxes.
- Go to the Tax Rates section and click + New Tax.
- Give your tax a name and enter the rate set by the government.
- Choose the Tax Type as Cess.
- Click Save.
If you wish to add the newly created cess on top of another tax, you can create a new tax group, or add the cess to an existing tax group. If you wish to know how to create and manage tax groups, click here.
Adding GSTIN of your contacts
You can now classify your contacts under these four categories:
- Registered business
- Unregistered business
- Consumer
- Overseas
Associating one of the above categories to your contacts will be helpful while filing your GST returns. For example, if you’re marking a contact as a Registered Business, you will be including their GSTIN which will later be helpful while filing GST returns.
To add GSTIN to your contacts, follow the steps mentioned below:
- Select the Contacts module and click the + New button present on the top right corner.
- In the creation page you will be able to see GST Treatment dropdown under Other Details.
- You can choose from the following options:
- Registered business
- Unregistered business
- Consumer
- Overseas
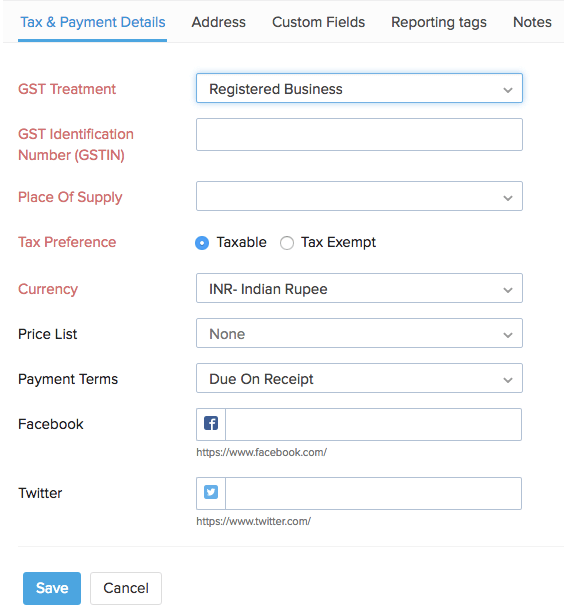
- If you choose the GST Treatment as Registered Business, you will be prompted to enter your contact’s GSTIN. This field is mandatory.
- Once done, click Save for the changes to take effect.
- The GSTIN added will be displayed in all the transactions that you raise for the particular contact.
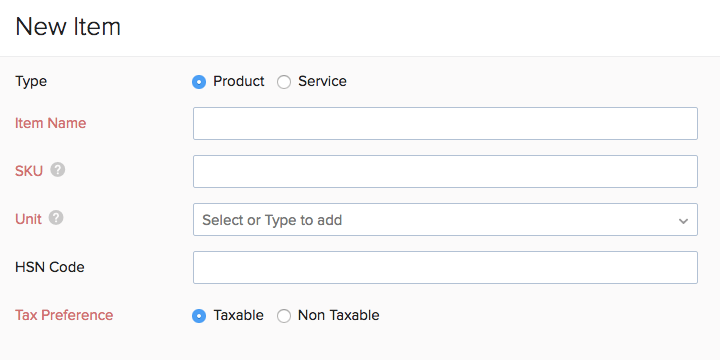
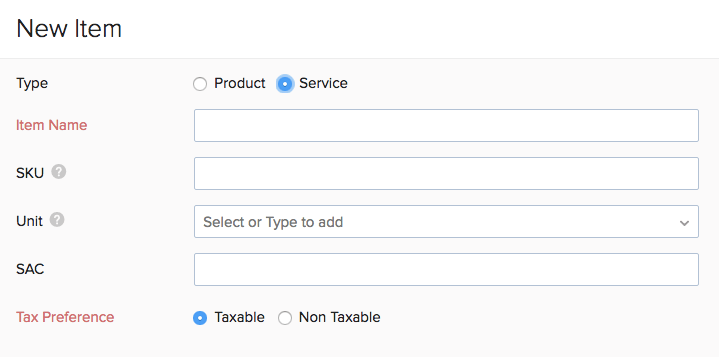
Classifying your Items
With Zoho Inventory, you can classify your items into Products or Services. Whenever you create an item, you will be asked to choose if it is a product or service. You can also enter their corresponding HSN and SAC codes in order to stay compliant with GST.
To add SAC or HSN,
- Select the Items module on the sidebar and click the + New button on the top right corner of the window.
- Now in the item creation page, you can fill in the SAC code for services and HSN for products.