
Managing Purchase Orders
In this section, you can learn about the different methods of creating purchase orders and sending it to your vendors.
- Creating a New Purchase Order
- Creating Purchase Order from Contacts
- Creating a drop shipment
- Status of a Purchase Order
- Editing a Purchase Order
- Deleting a Purchase Order
- Cancelling items in a Purchase Order
- Multi-warehouse operations related to Purchase Orders
Creating a New Purchase Order
- Click on the quick create (+) icon next to the Purchase Orders tab or the +New icon placed on top of the purchase order window to create a new purchase order.
- You will be navigated to a new window for entering the details for the new purchase order to be created.
Primary Purchase Information
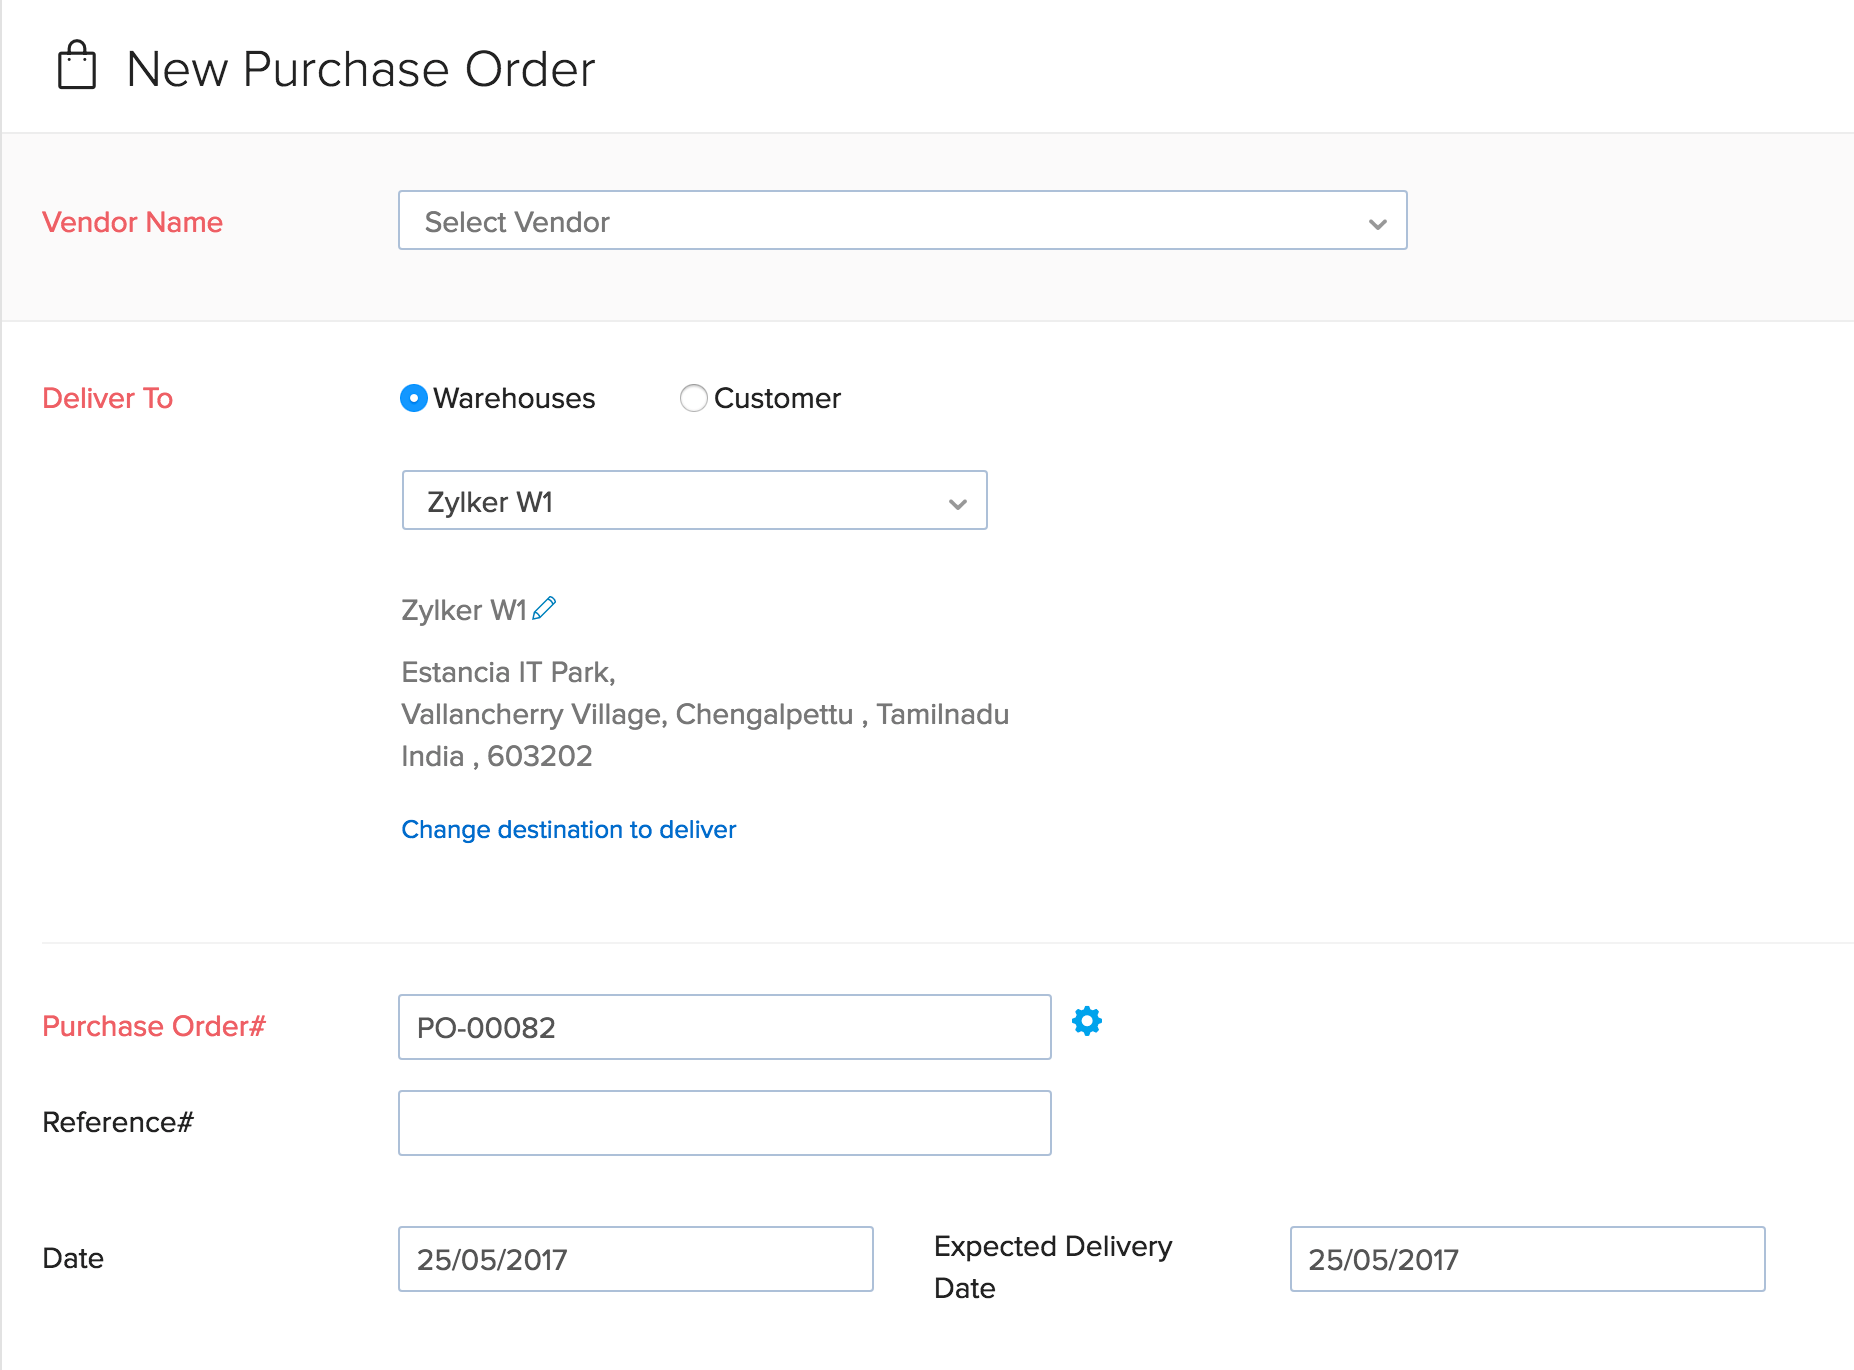
- Under the Vendor name field, you can either pick the vendors from the list you have already created or you can add a new vendor by clicking on the + New vendor option.
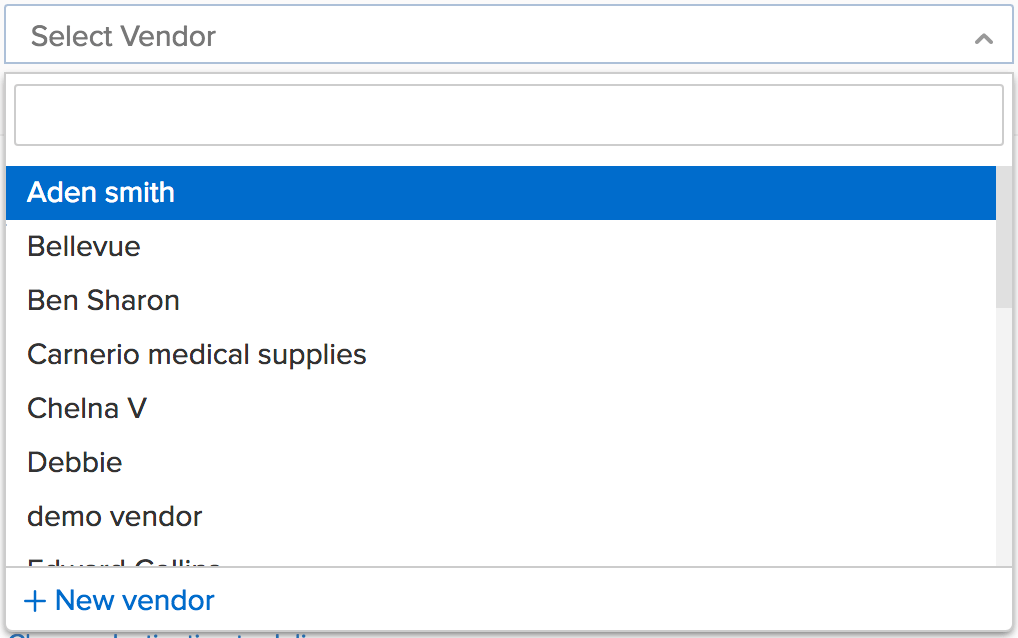
- After filling up the required details, click on Save And Select to add the new vendor to the purchase order being created.
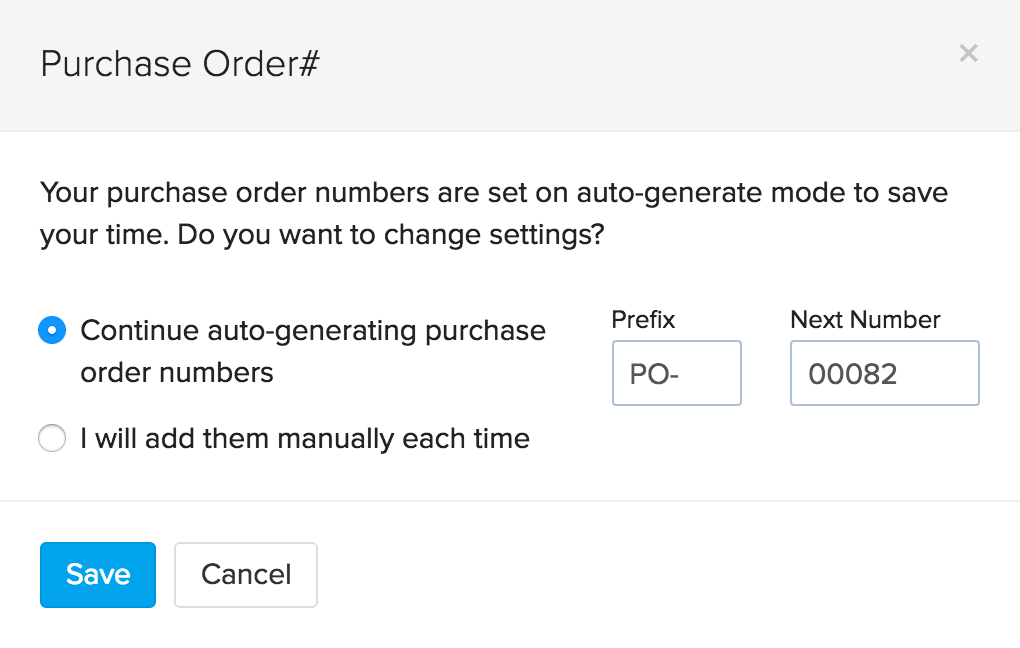
- In the Purchase Order# tab, a purchase order number is generated by default.
- If you wish to manually enter a purchase order number:
- Click on the Settings icon next to the tab.
- A pop-up will appear where you can select between auto-generated estimate number or manual entry of purchase order numbers.
- Date tab is the date on which the purchase order is created.
- In the Expected Delivery Date tab, you can set the date by which the product should be delivered by the vendor to the you.
- In the Shipment Preference tab, you can choose or type to add the preferred method of shipment to be done by the vendor.
Item Information

- Items can be added from the list of items shown in the drop down that have already been created by you in your Zoho Inventory account.
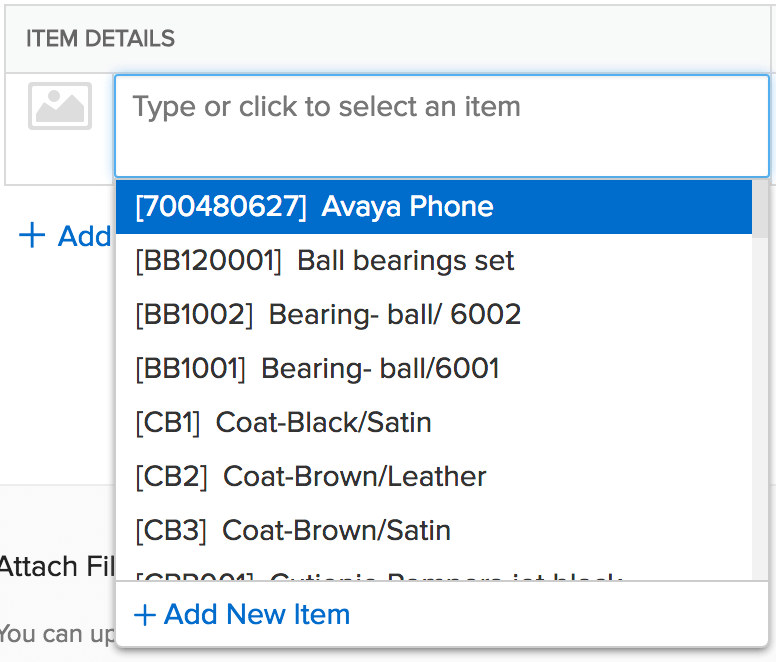
- Click on + Add another line option to add another item.
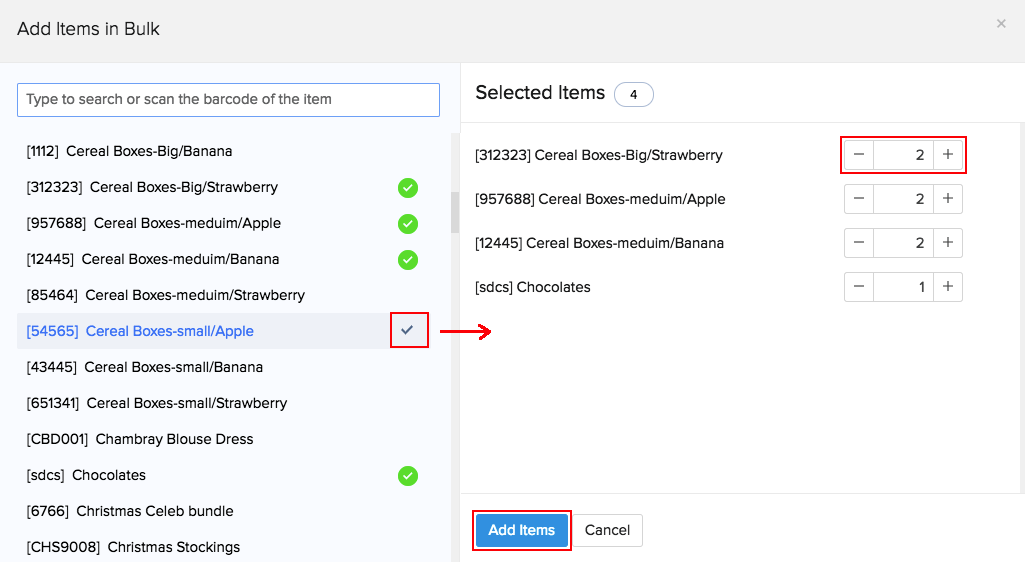
- Alternatively, you can also click the Add items in bulk option to add several items at once to your sales order.
Pro Tip: Instead of searching for the items from the list, you can select an item by scanning its barcode. When you scan the same barcode more than once, the quantity of the item gets incremented automatically.
- Enter the Quantity, Rate and Tax if applicable from the drop down.
- Tax drop down shows the taxes you created in the settings tab under taxes section and an option to add a new tax if applicable.
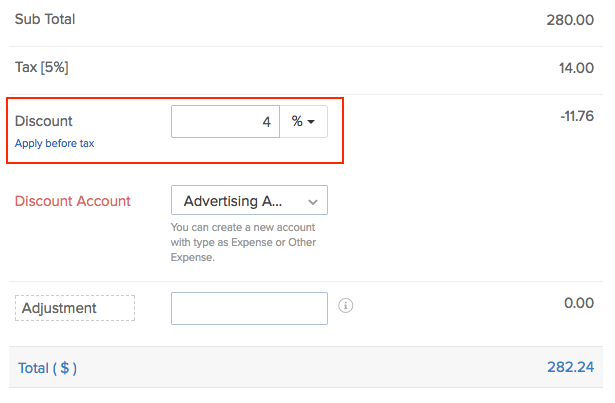
Discount Information
- Enter the discount rate (in currency or in percentage) provided by your vendor, if any.
- Click the Apply before tax option if the discount has to be applied before tax.
Note: Likewise, you can apply discounts on your bills.
Additional Information
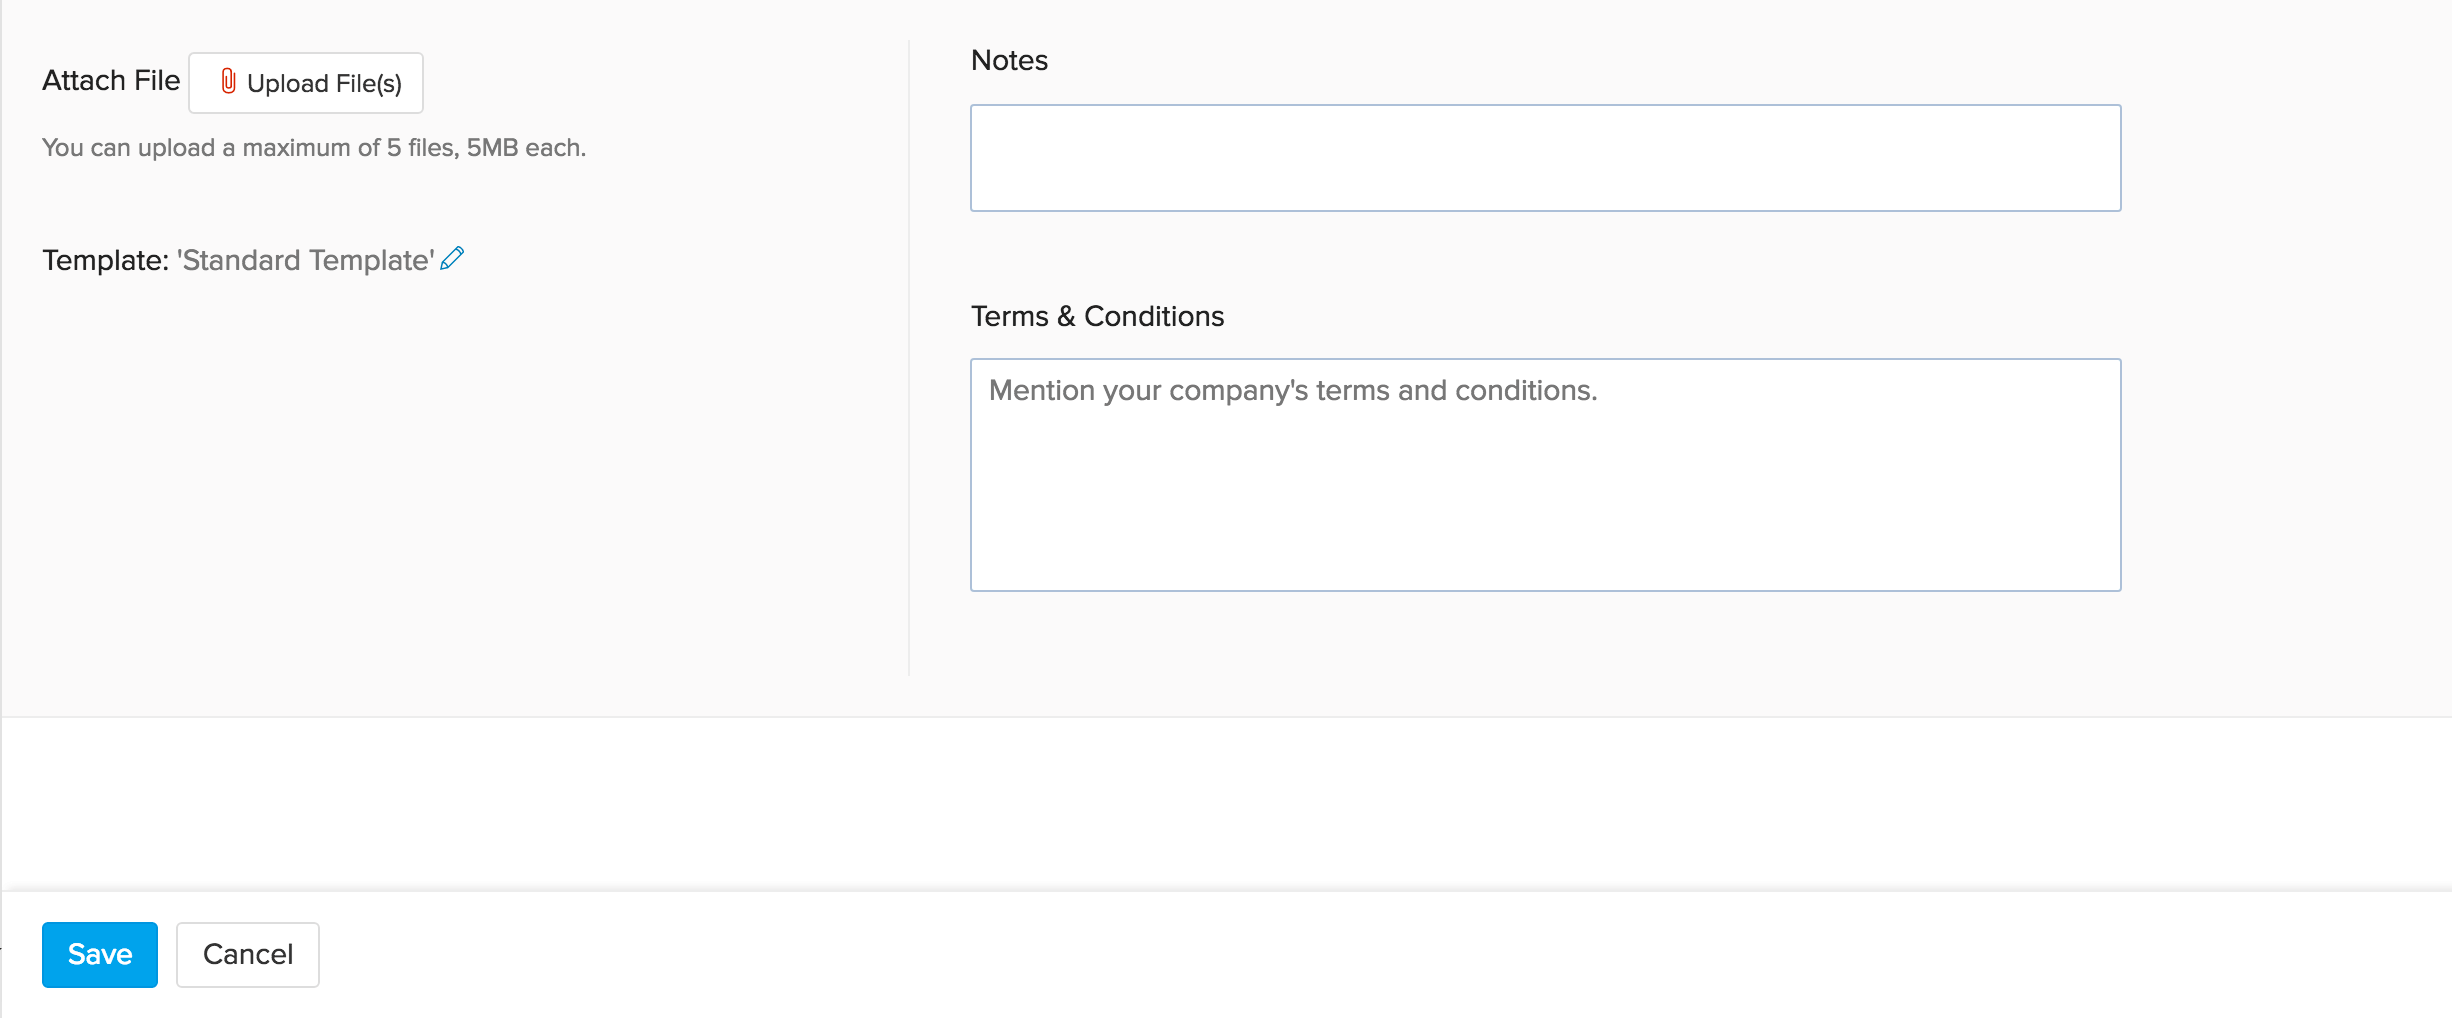
- You can record Notes of up to 2000 characters and purchase Terms & Conditions of up to 5000 characters for the purchase order.
- Check the Use this in future box to use the terms & conditions in all future purchase orders.
- This will be carried forward while converting the purchase order into a bill.
- In the Deliver To tab you are provided with two options.
- To create a normal purchase order, choose the option Organization.
- To make a drop shipment check the box near Customer. To know more about drop shipments, click here.
- The address to deliver can be changed by clicking on the Change destination to deliver.
- Now click on the Save button to save the new purchase order as a draft.
Creating a Purchase Order from Contacts
- Navigate to the Contacts tab.
- Select a contact.
- Click on the New Transaction button and select Purchase Order from the dropdown.
- You will be navigated to the New Purchase Order screen.
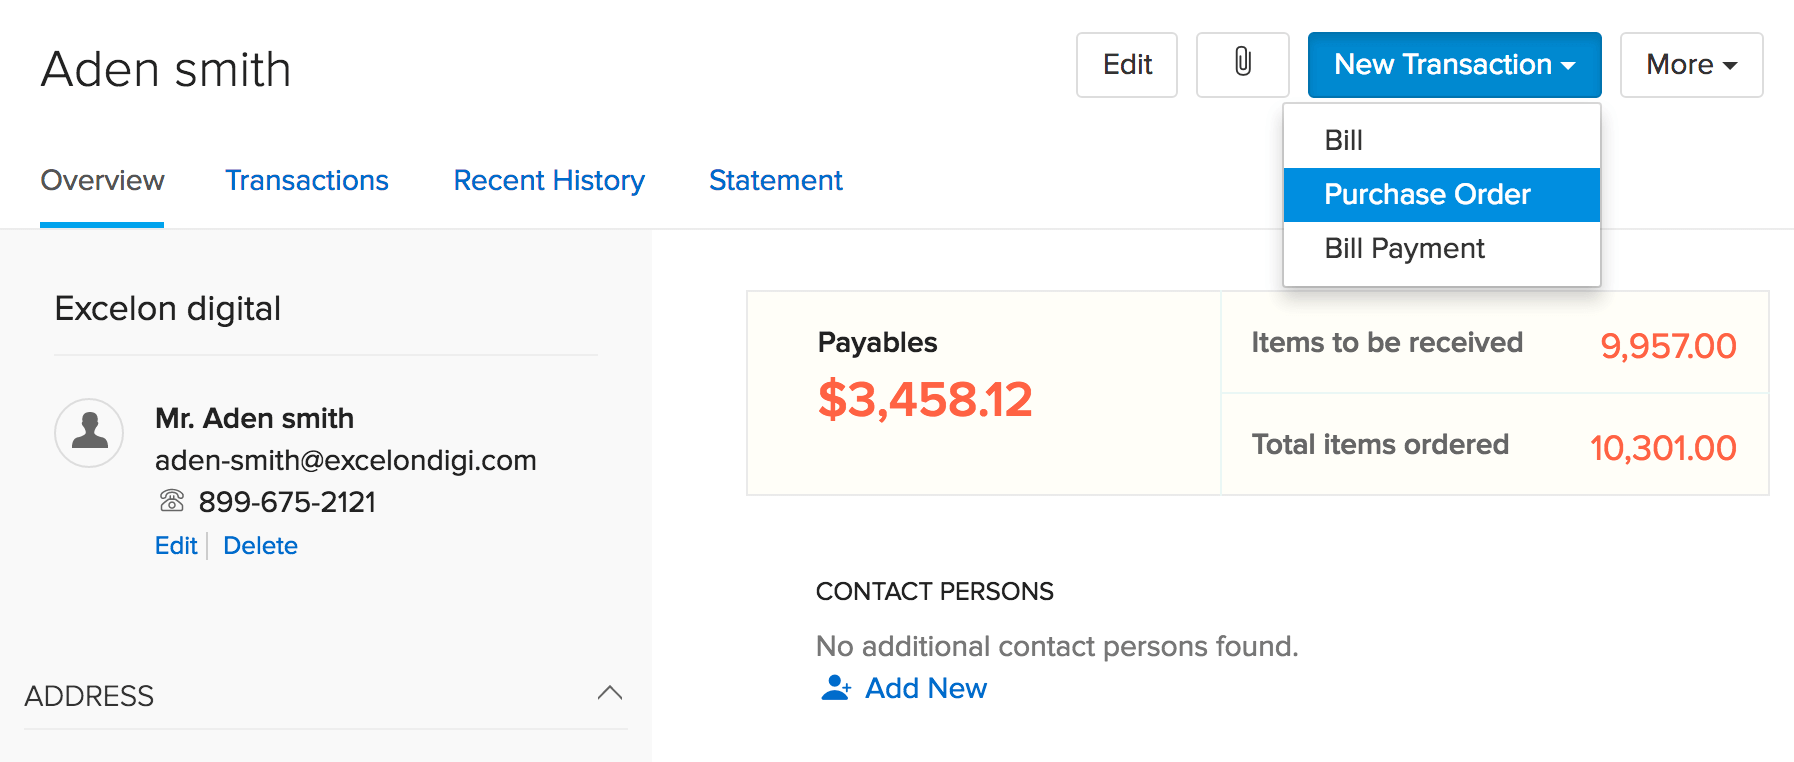
- Fill up the necessary details.
- Click on the Save button.
- After creating the new purchase order, you will be able to find it as a draft under the Purchase Orders tab.
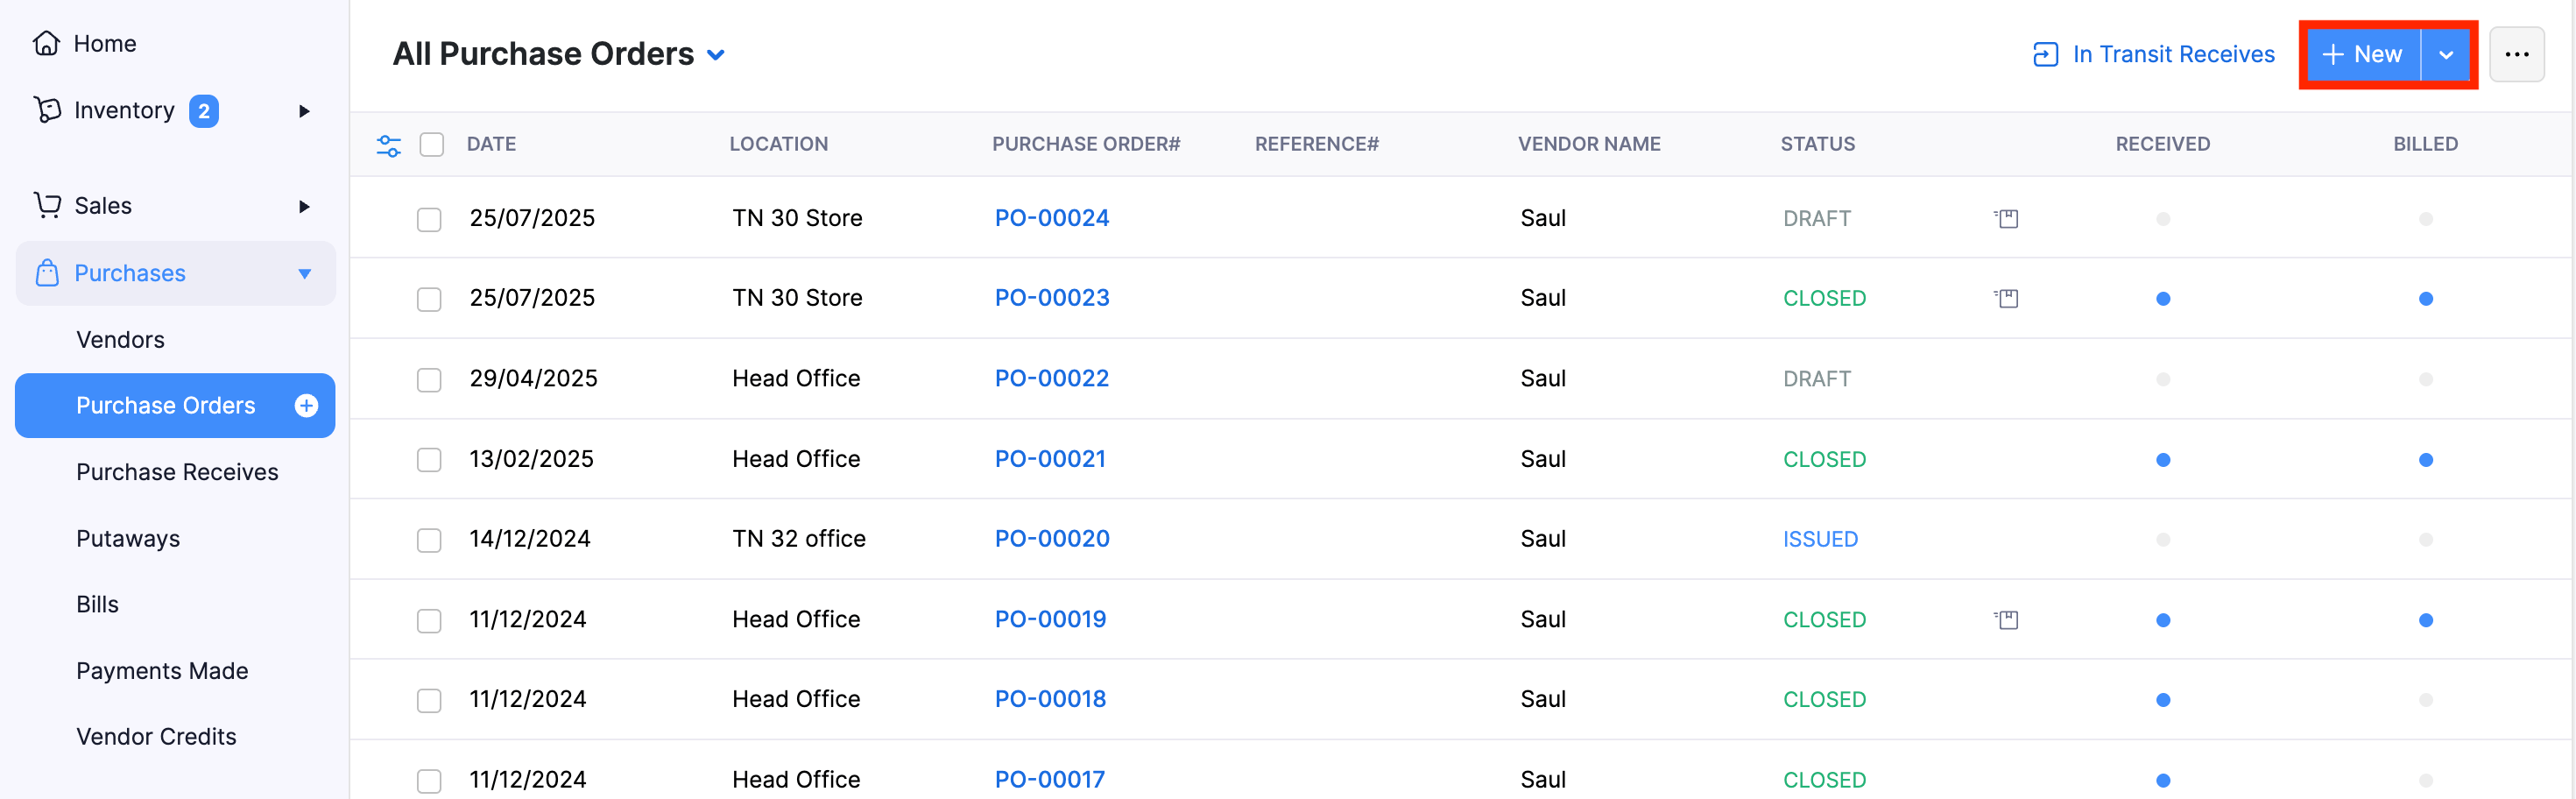
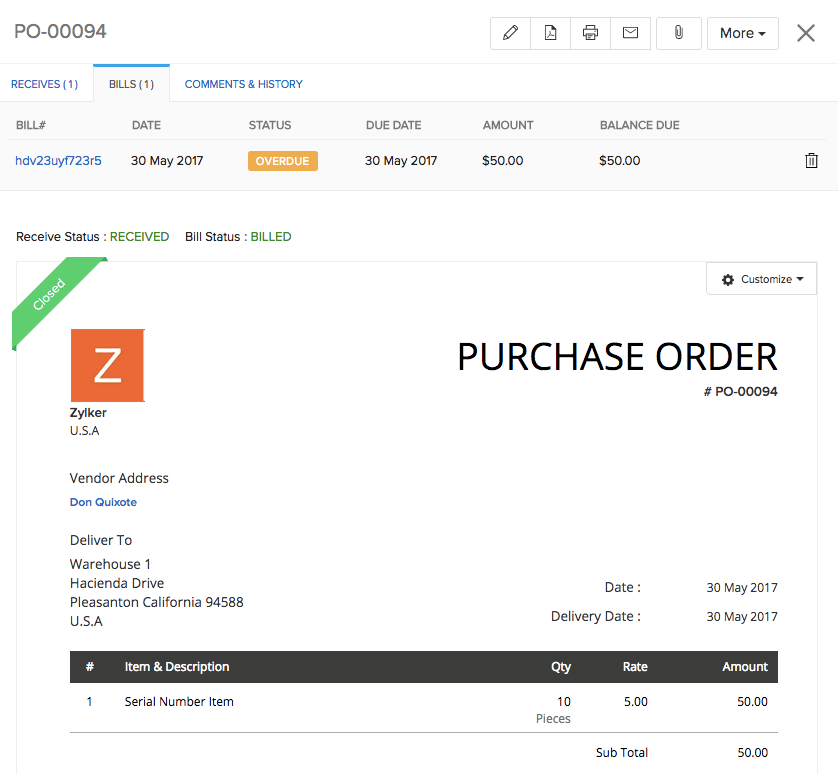
Status of a Purchase Order
These indicate the stages of progress a purchase order goes through. Lets take a look at what each status indicates:
- Draft - This status indicates, that a purchase order has been created and is yet to be sent to the vendor.
- Issued - This status indicates that a purchase order has successfully been sent to the vendor.
- Partially Received - This status indicates that portion of the list of items in the purchase order has been received by you/your organization from your vendor.
- Received - This indicates that all the items in your PO has been received by you/your organization from your vendor.
- Cancelled - This indicates that your purchase order has been cancelled.
Editing a Purchase Order
To edit a purchase order:
- Navigate to the Purchase Orders module.
- Open the preferred purchase order.
- Click the Edit button(Pencil like button).
- Update all the necessary changes.
- Click the Save button to update your changes.
Note: Be sure to mail the edited purchase order to your vendor after making the changes or he might fulfil the older unchanged order.
Important Note:
- Only Purchase orders in Draft or Issued status can be edited.
- In case of Issued purchase orders, if they have bills associated with them, then you can only increase the quantity of existing items or add new items to the order.
- You will not be able to remove or reduce the quantity that has already been billed.
- Workaround: If you need to reduce the quantity or remove a billed item from the purchase order, then the only way to do is, by deleting the bill associated with the order and try again.
- Once you are done with the changes, you can again convert the purchase order to a bill easily.
Deleting a Purchase Order
To delete a purchase order:
- Navigate to the Purchase Orders module.
- Open the preferred purchase order.
- Click on More - Delete.
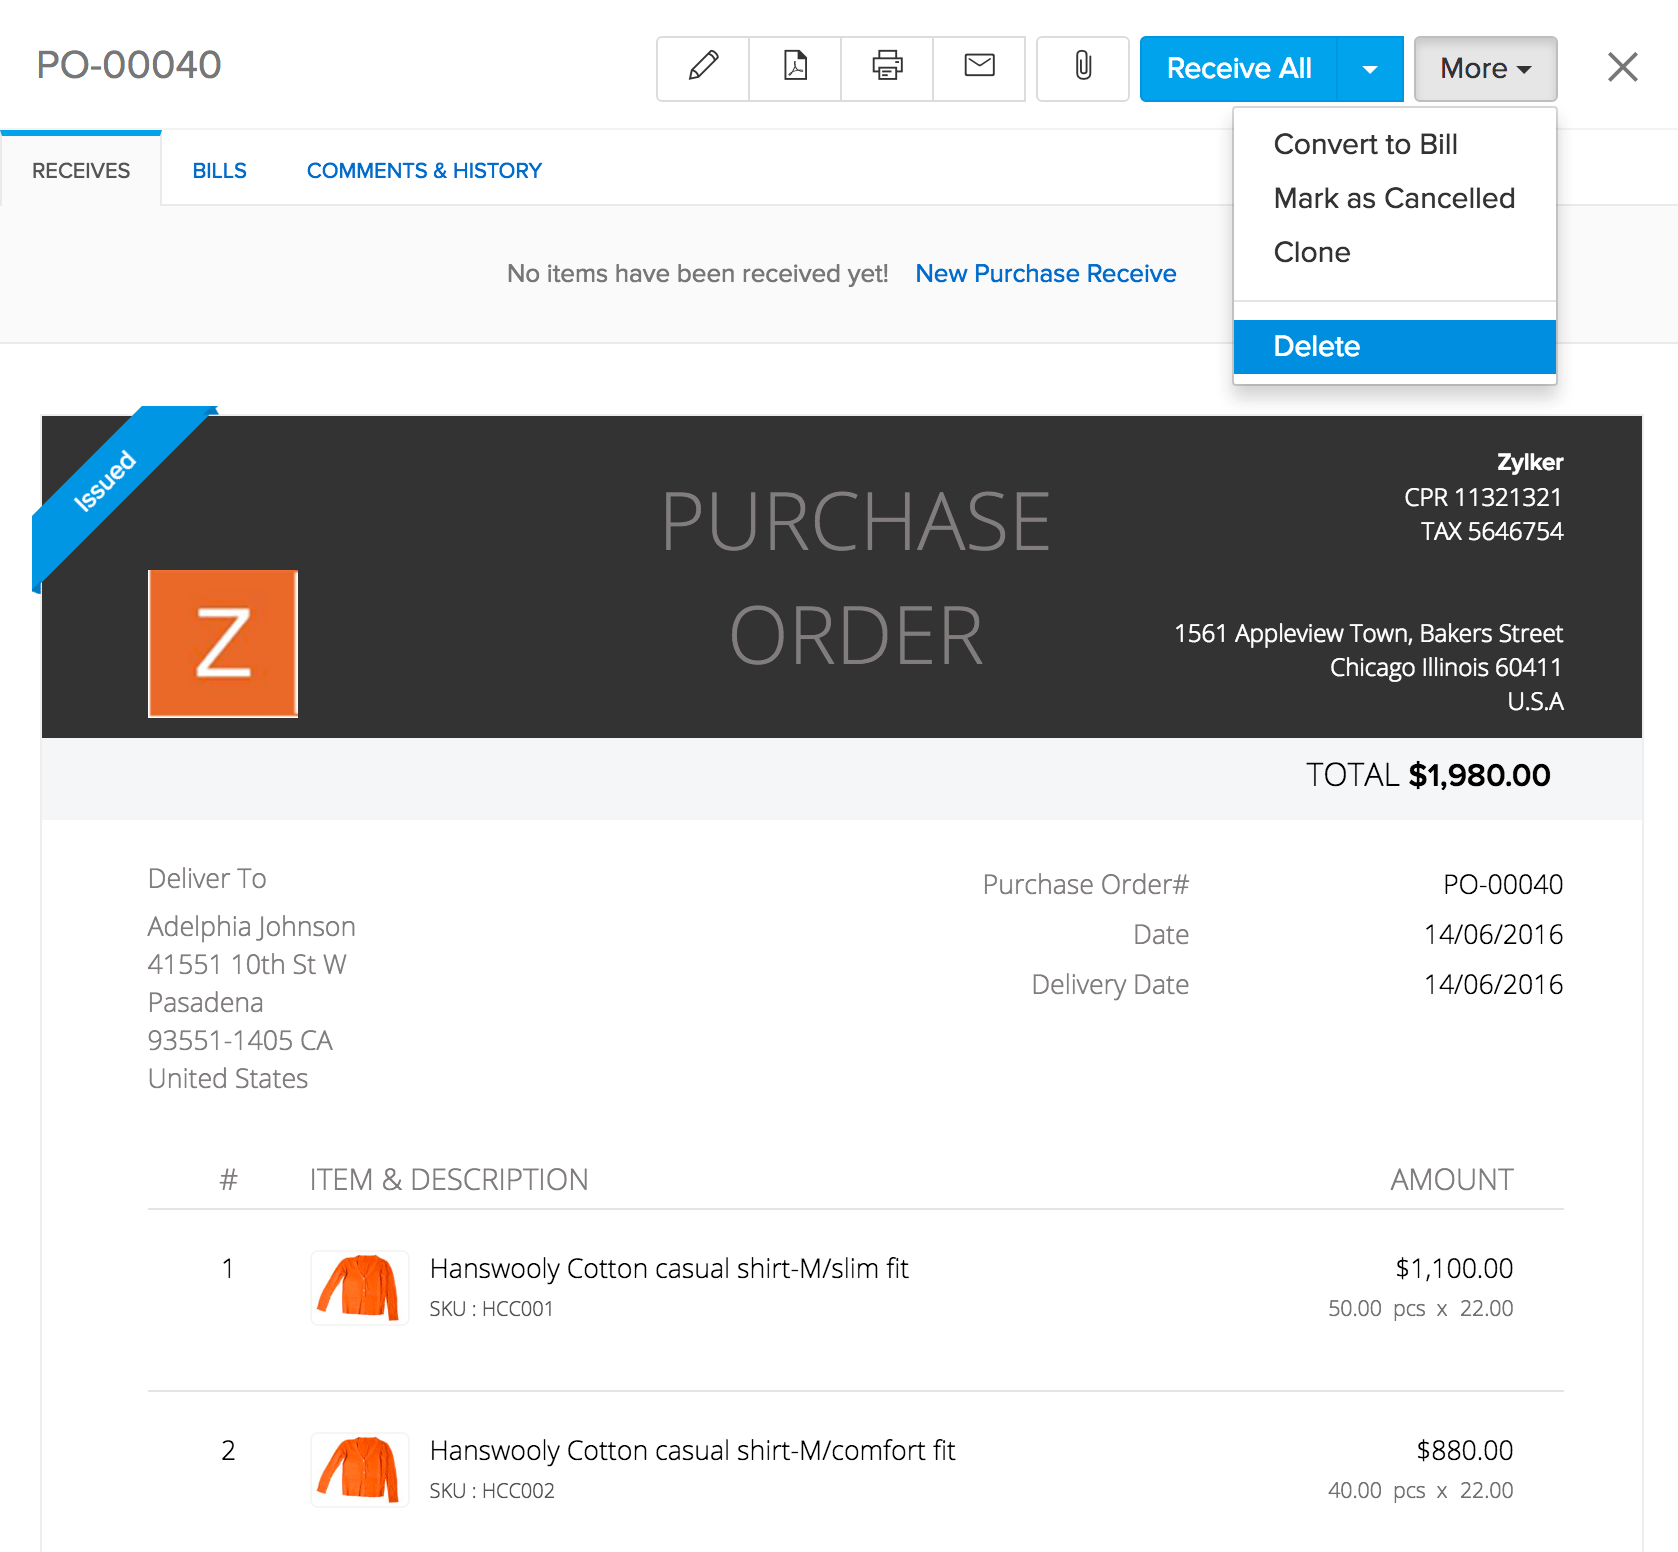
- Confirm your choice and the purchase order will be deleted.
Note: You can only delete purchase orders that are in the Draft and Issued status without any bills and receives associated with it.
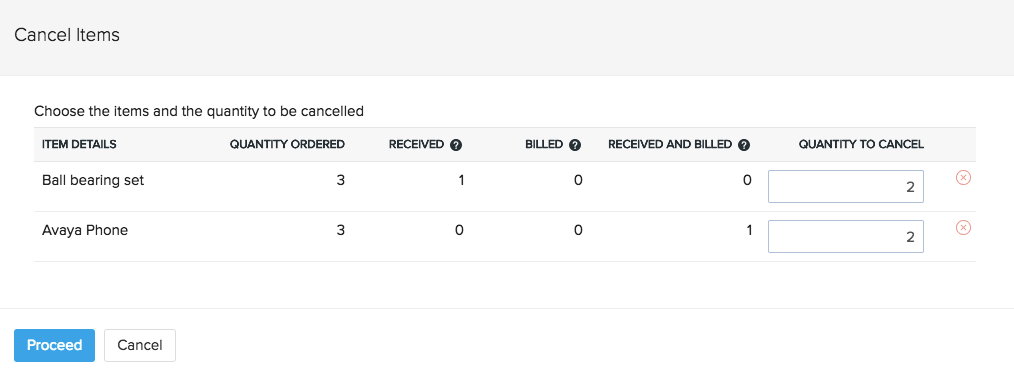
Cancelling items in a Purchase Order
After issuing a purchase order to your vendor, you might realize that you have ordered a wrong item or you have ordered some items excessively. In such cases, you can cancel selective items in the purchase order you have issued.
Prerequisite: Items in the purchase order must be partially billed or received.
Pro Tip: If there aren’t any bills or receives associated with the purchase order yet, you can invalidate the purchase order by clicking More and selecting Mark as Cancelled.
To cancel selective items in a purchase order:
- Navigate to the Purchase Orders module.
- Open the preferred purchase order.
- Click More - Cancel Items.
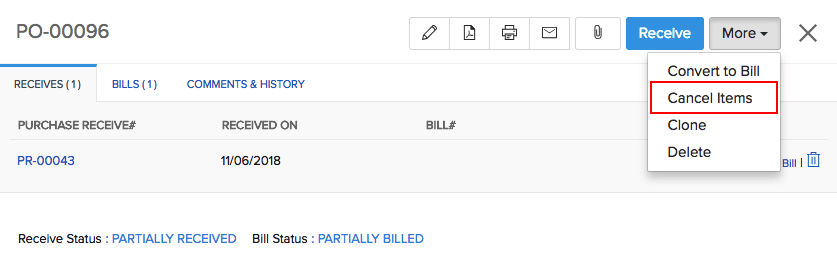
Insight: The quantity to cancel for each item is calculated automatically. You will only be able to cancel from the remaining quantity that has not been billed or received.
- Edit the items and the quantity to cancel for each item.
- Click Proceed to cancel the items.
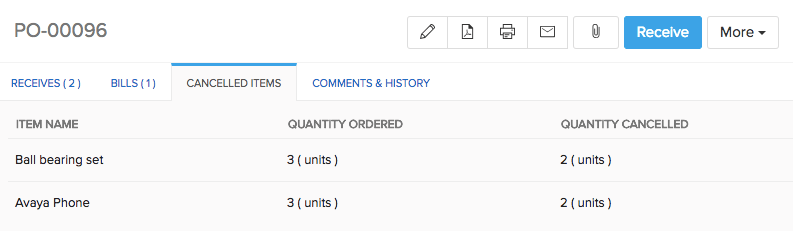
- You can view the details of the cancellation under the Cancelled Items tab in your purchase order.
- To undo the cancellation, once again go to More and click Reopen cancelled items.
Multi-warehouse operations related to Purchase Orders
If you’ve enabled multiple warehouse management for your organization, you’ll have additional steps and capabilities related to purchase orders. To know more, click here.