
Item Categories
As your business grows, you might have more items in your stock and managing them becomes more challenging. In Zoho Inventory, you can classify your items under several categories. This helps you organize your stock and access them easily, resulting in better inventory management.
Enable Item Categories
To get started with Item categories, you will have to enable the same from the settings.
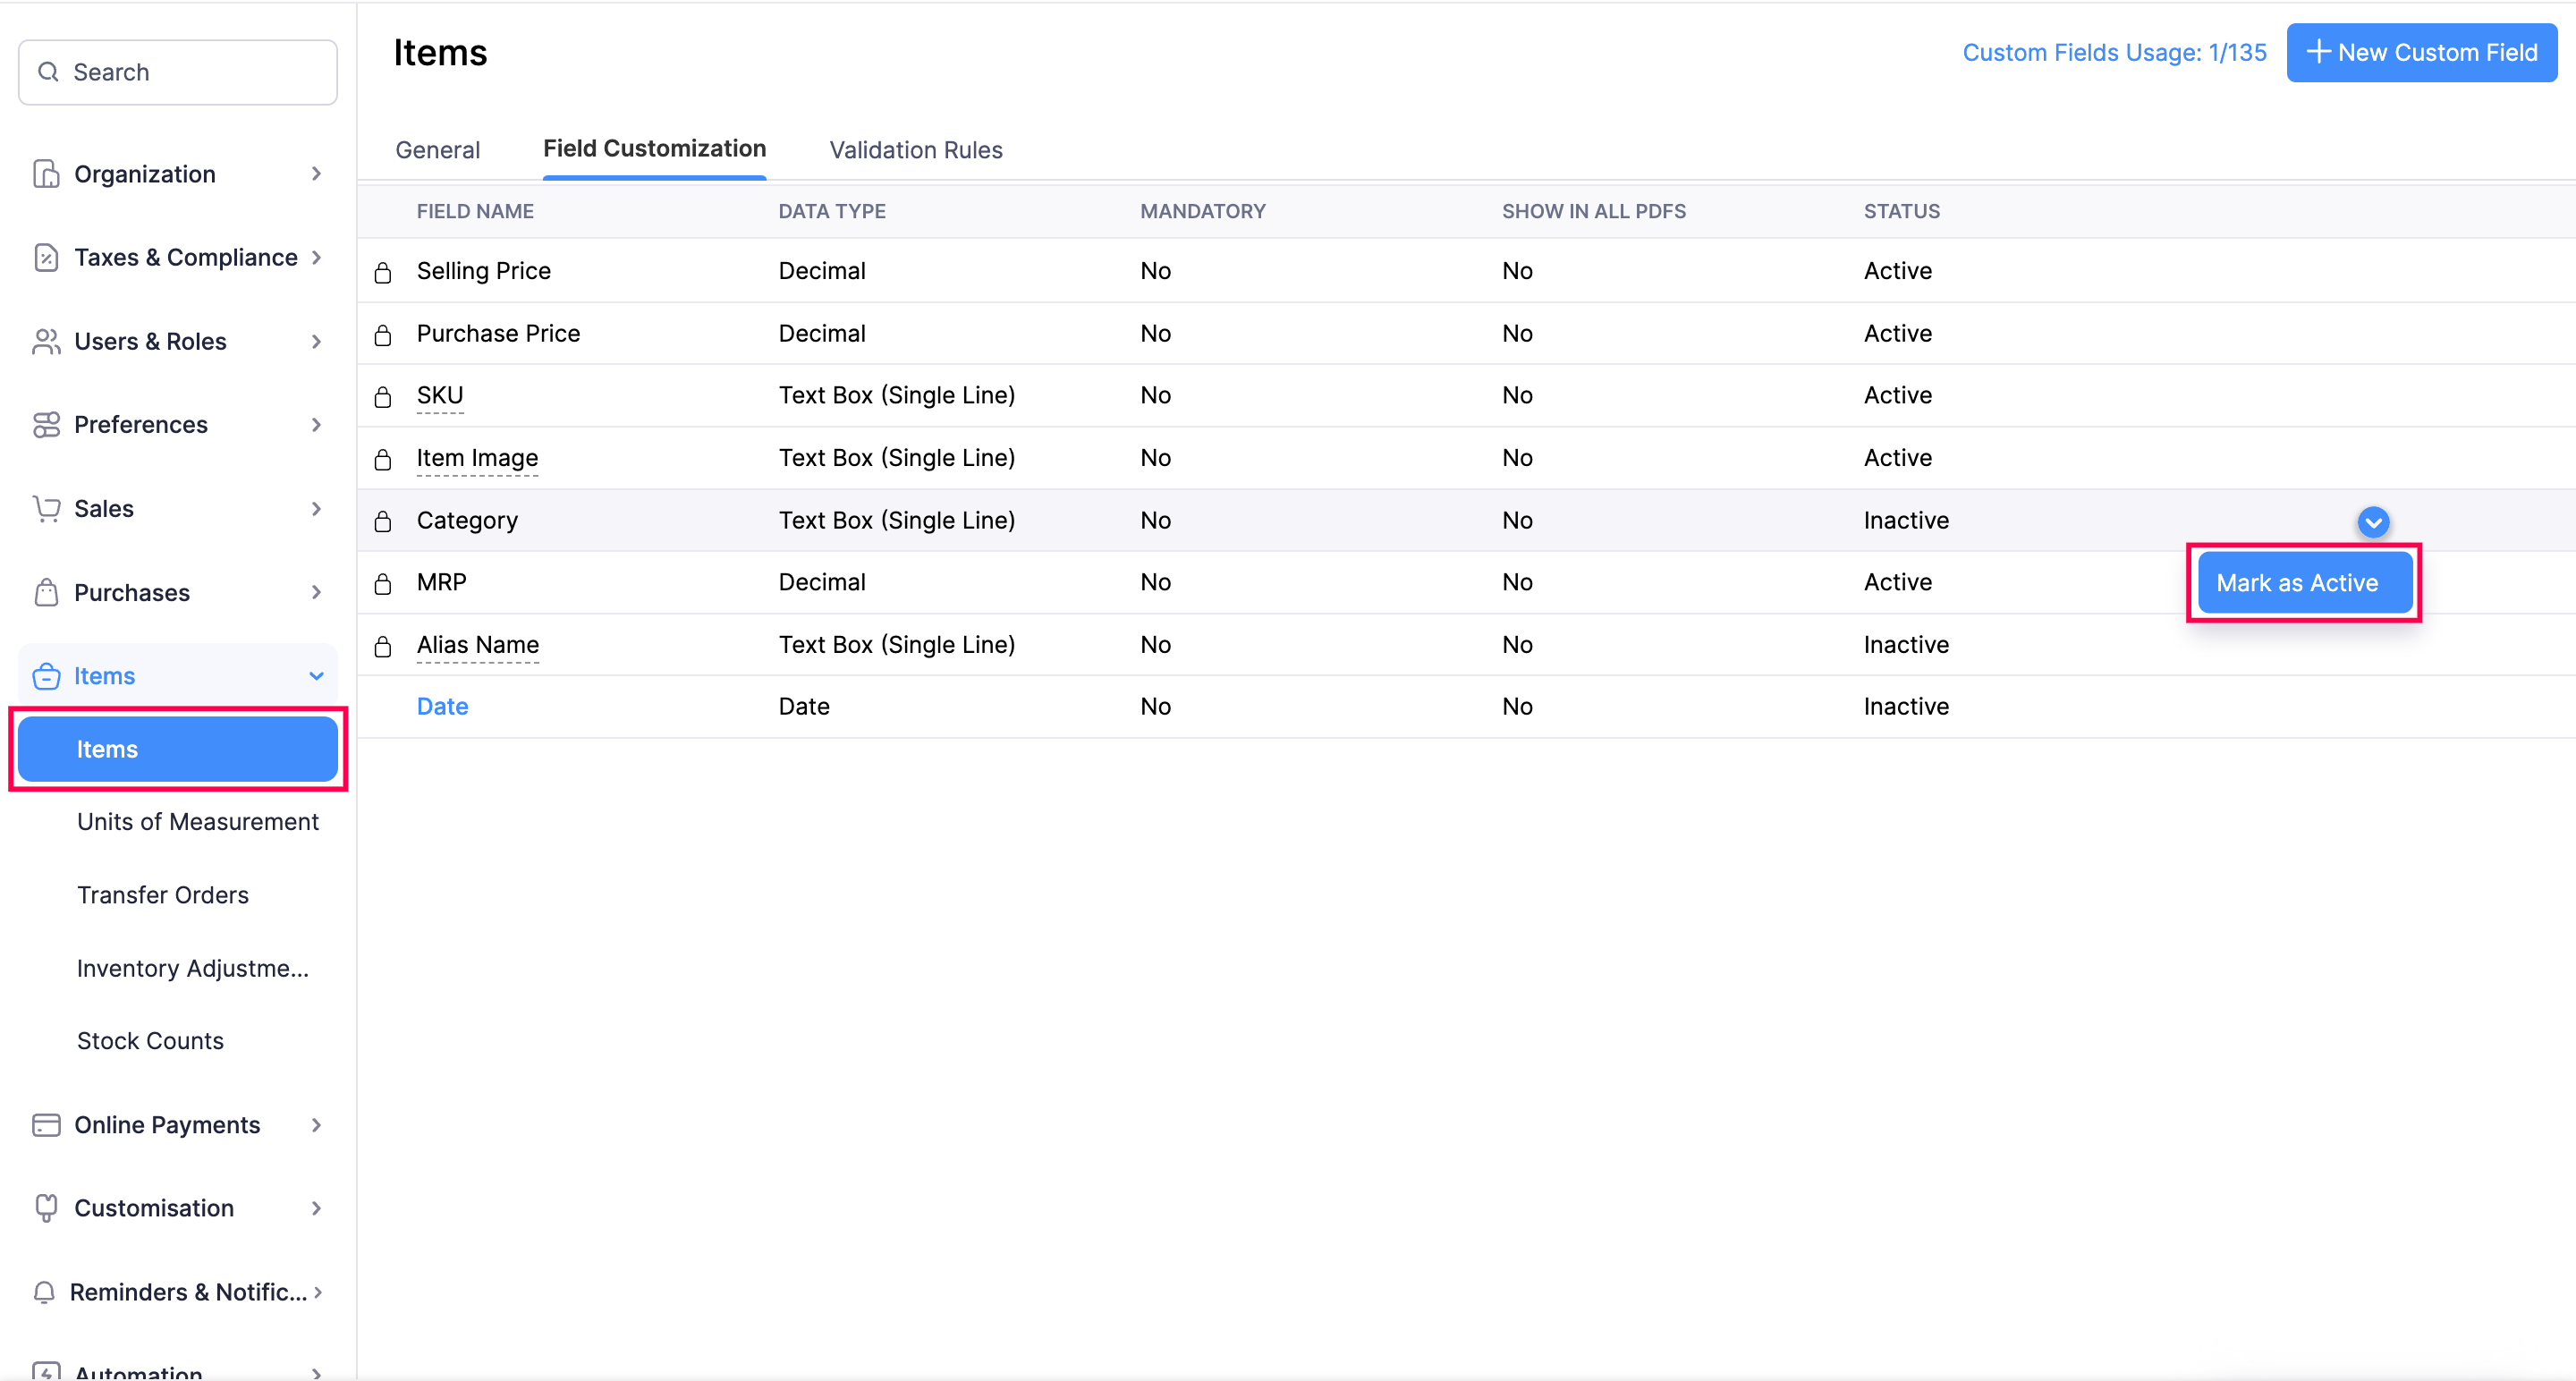
Click the Gear icon on the top right corner.
Navigate to Items under General in Module Settings.
Click Field Customization and click on Category.
Select Mark as Active.
Create a Category
To add a new item category:
Create a new item or edit an existing one.
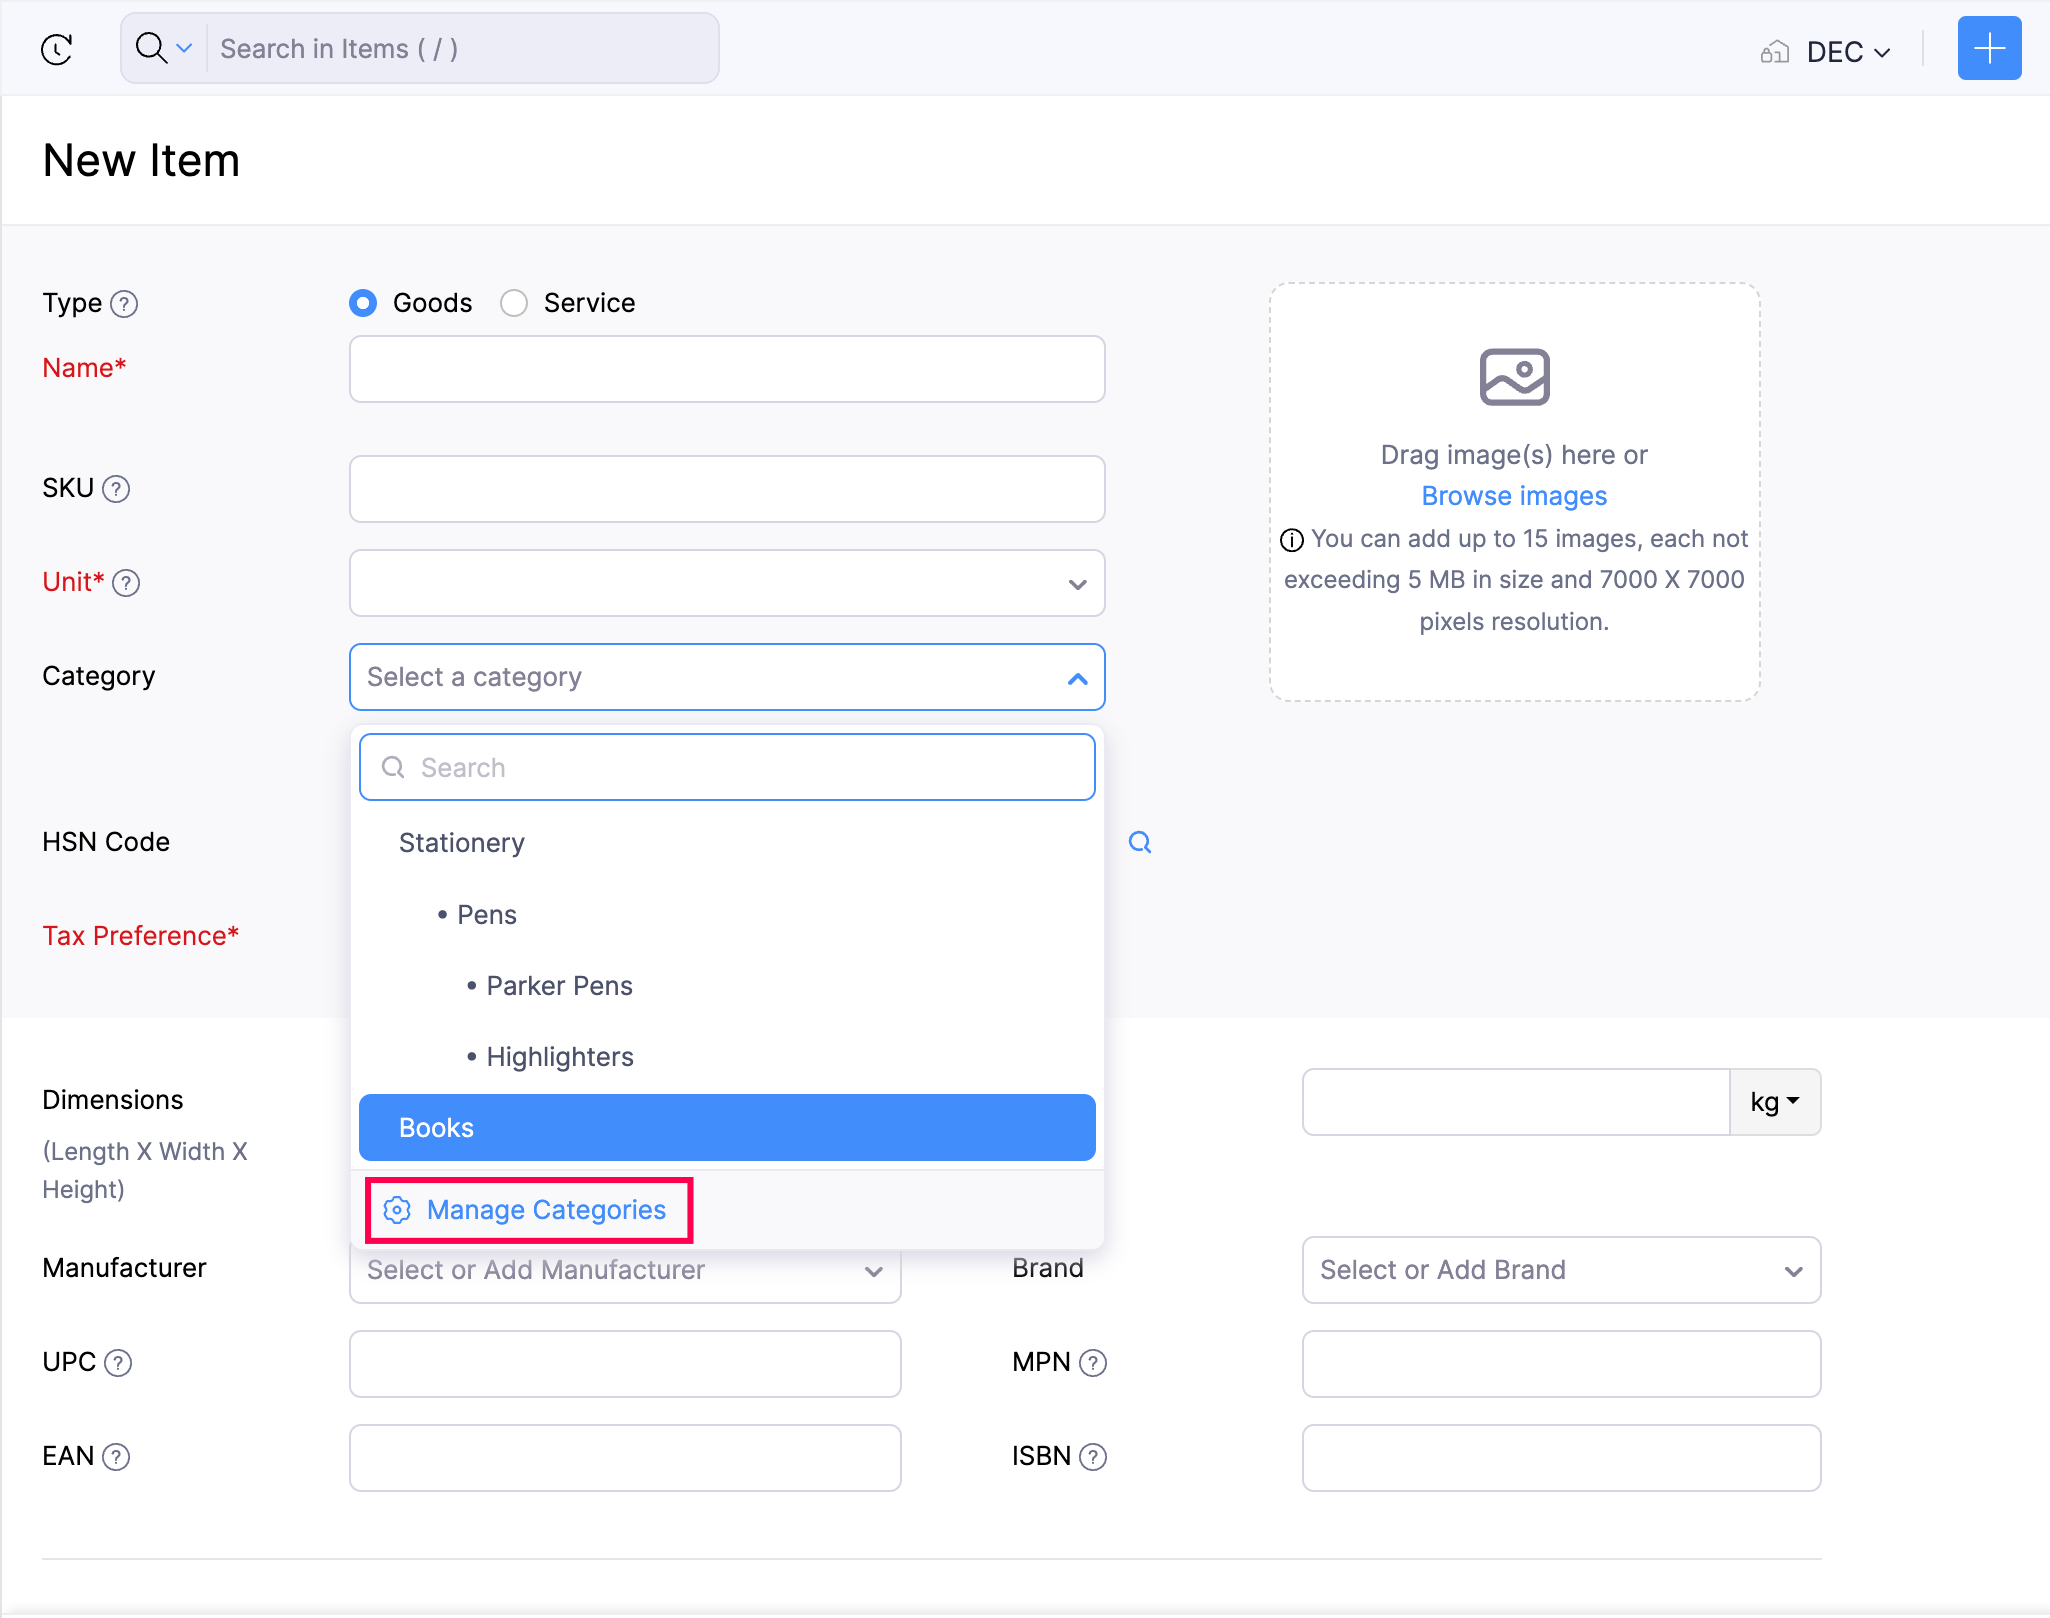
On the item creation/edit page, choose the Categories field.
Select Manage Categories option from the dropdown.
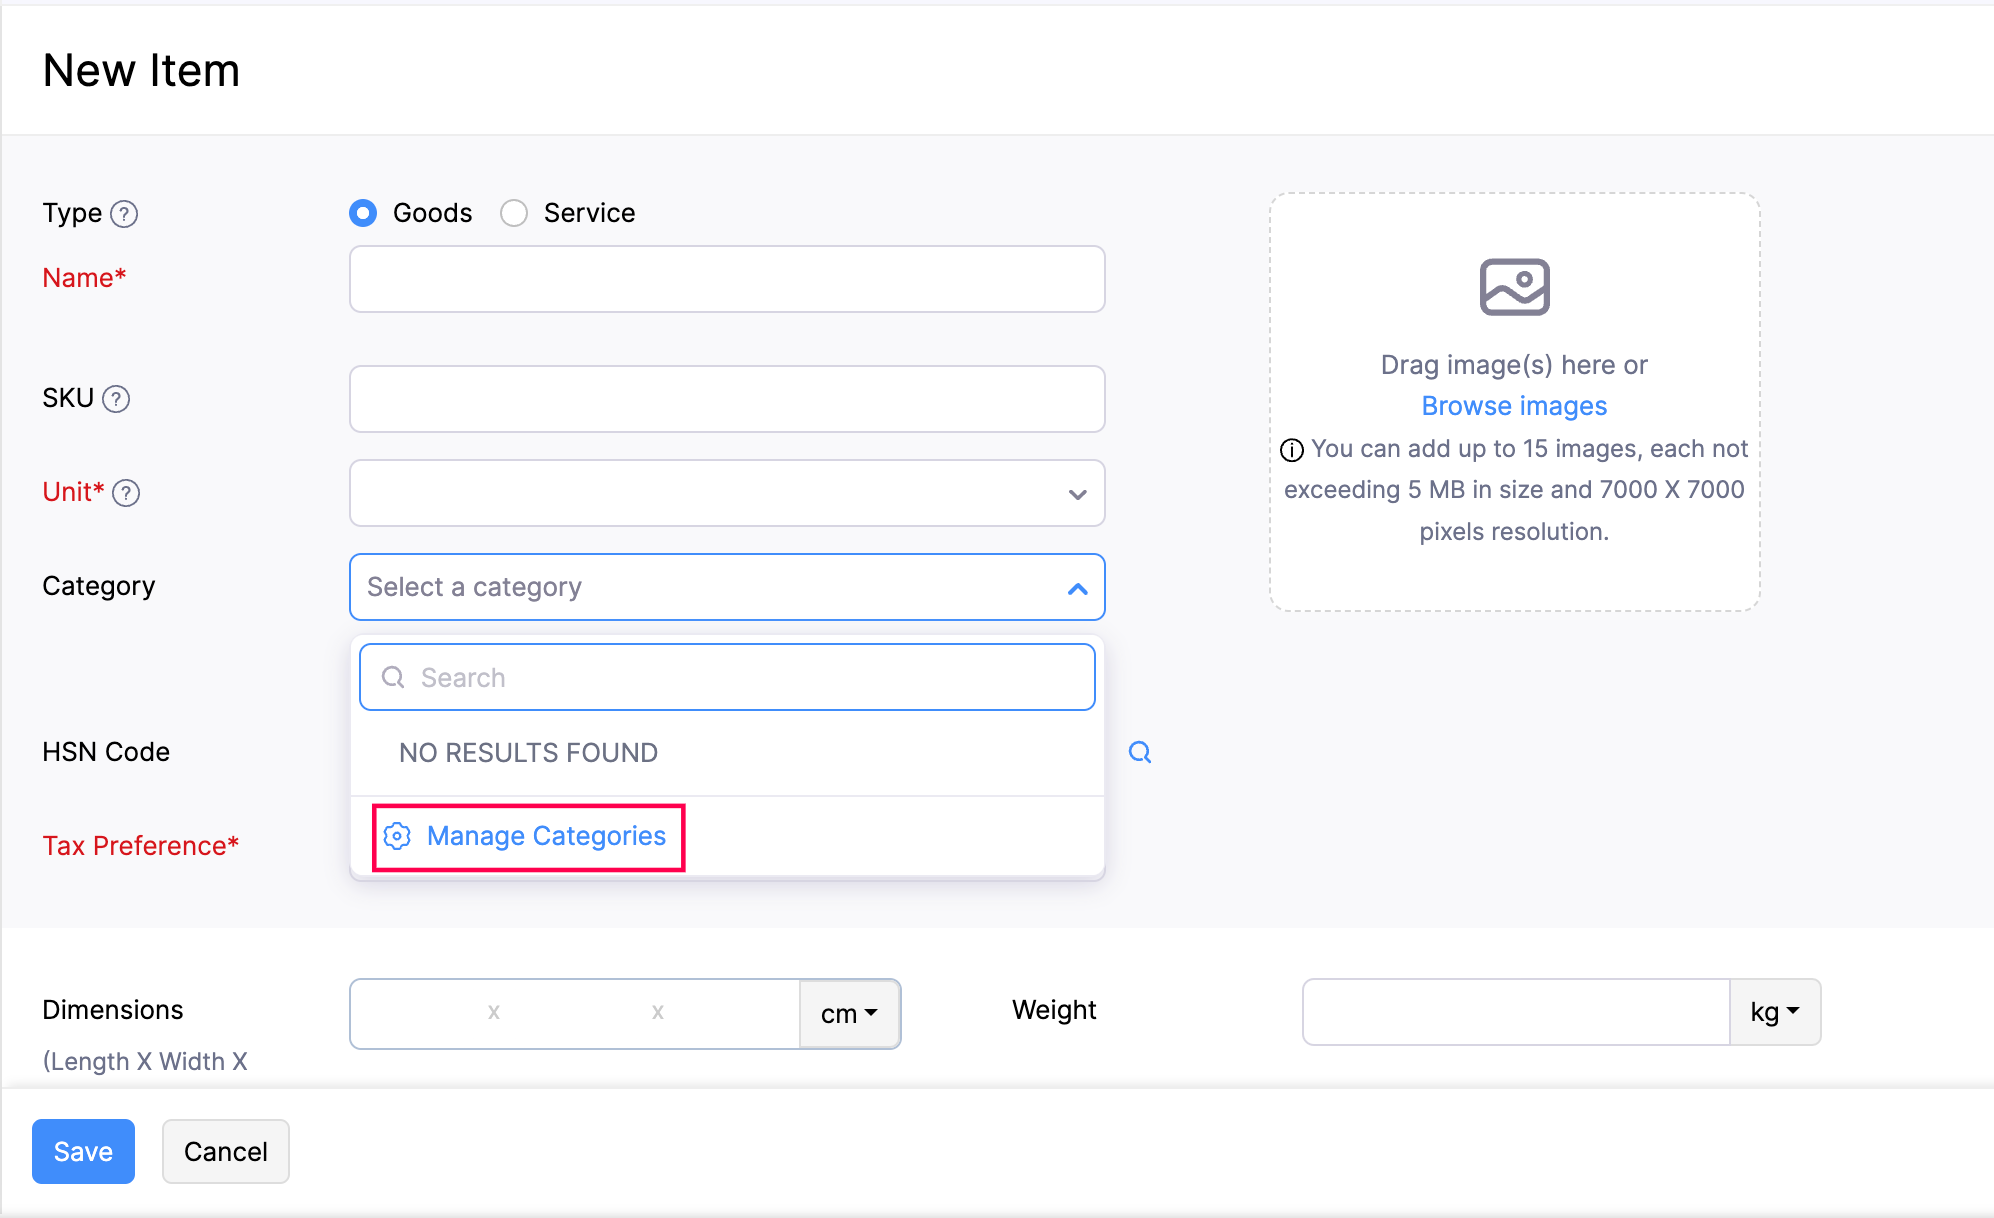
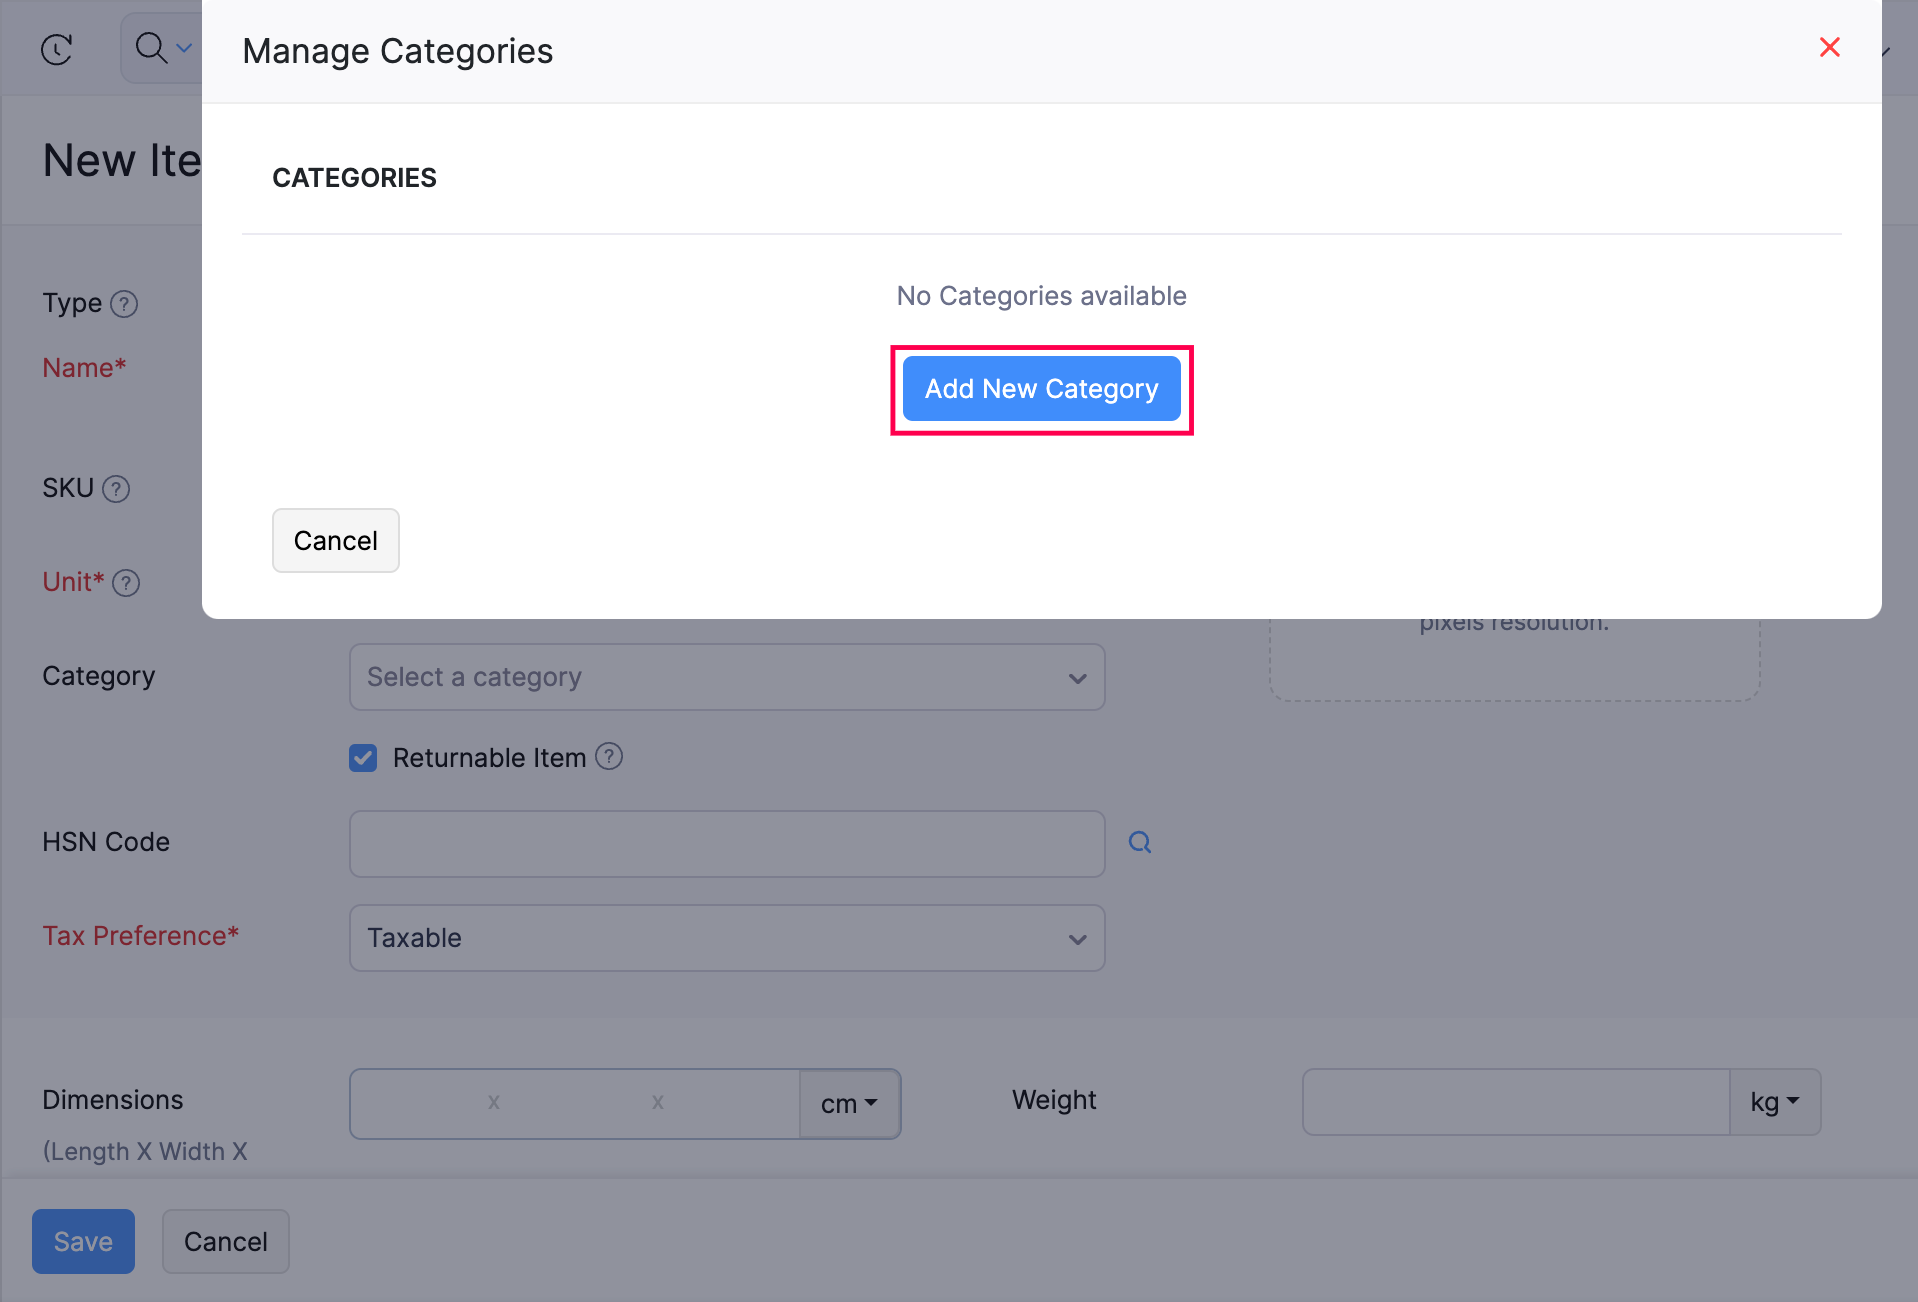
This will trigger a pop up for managing categories.
Click Add New Category.
Fill in the category name and select the parent category which it should come under.
If you are creating a new parent category, leave the parent category field empty. If you are creating a subcategory, select the appropriate parent category. For instance, ‘Stationery’ is a parent category. When you create a new subcategory ‘Pens’, choose its parent category as ‘Stationery’. Furthermore, ‘Parker Pens’, ‘Highlighters’, etc can be the subcategories of ‘Pens’.
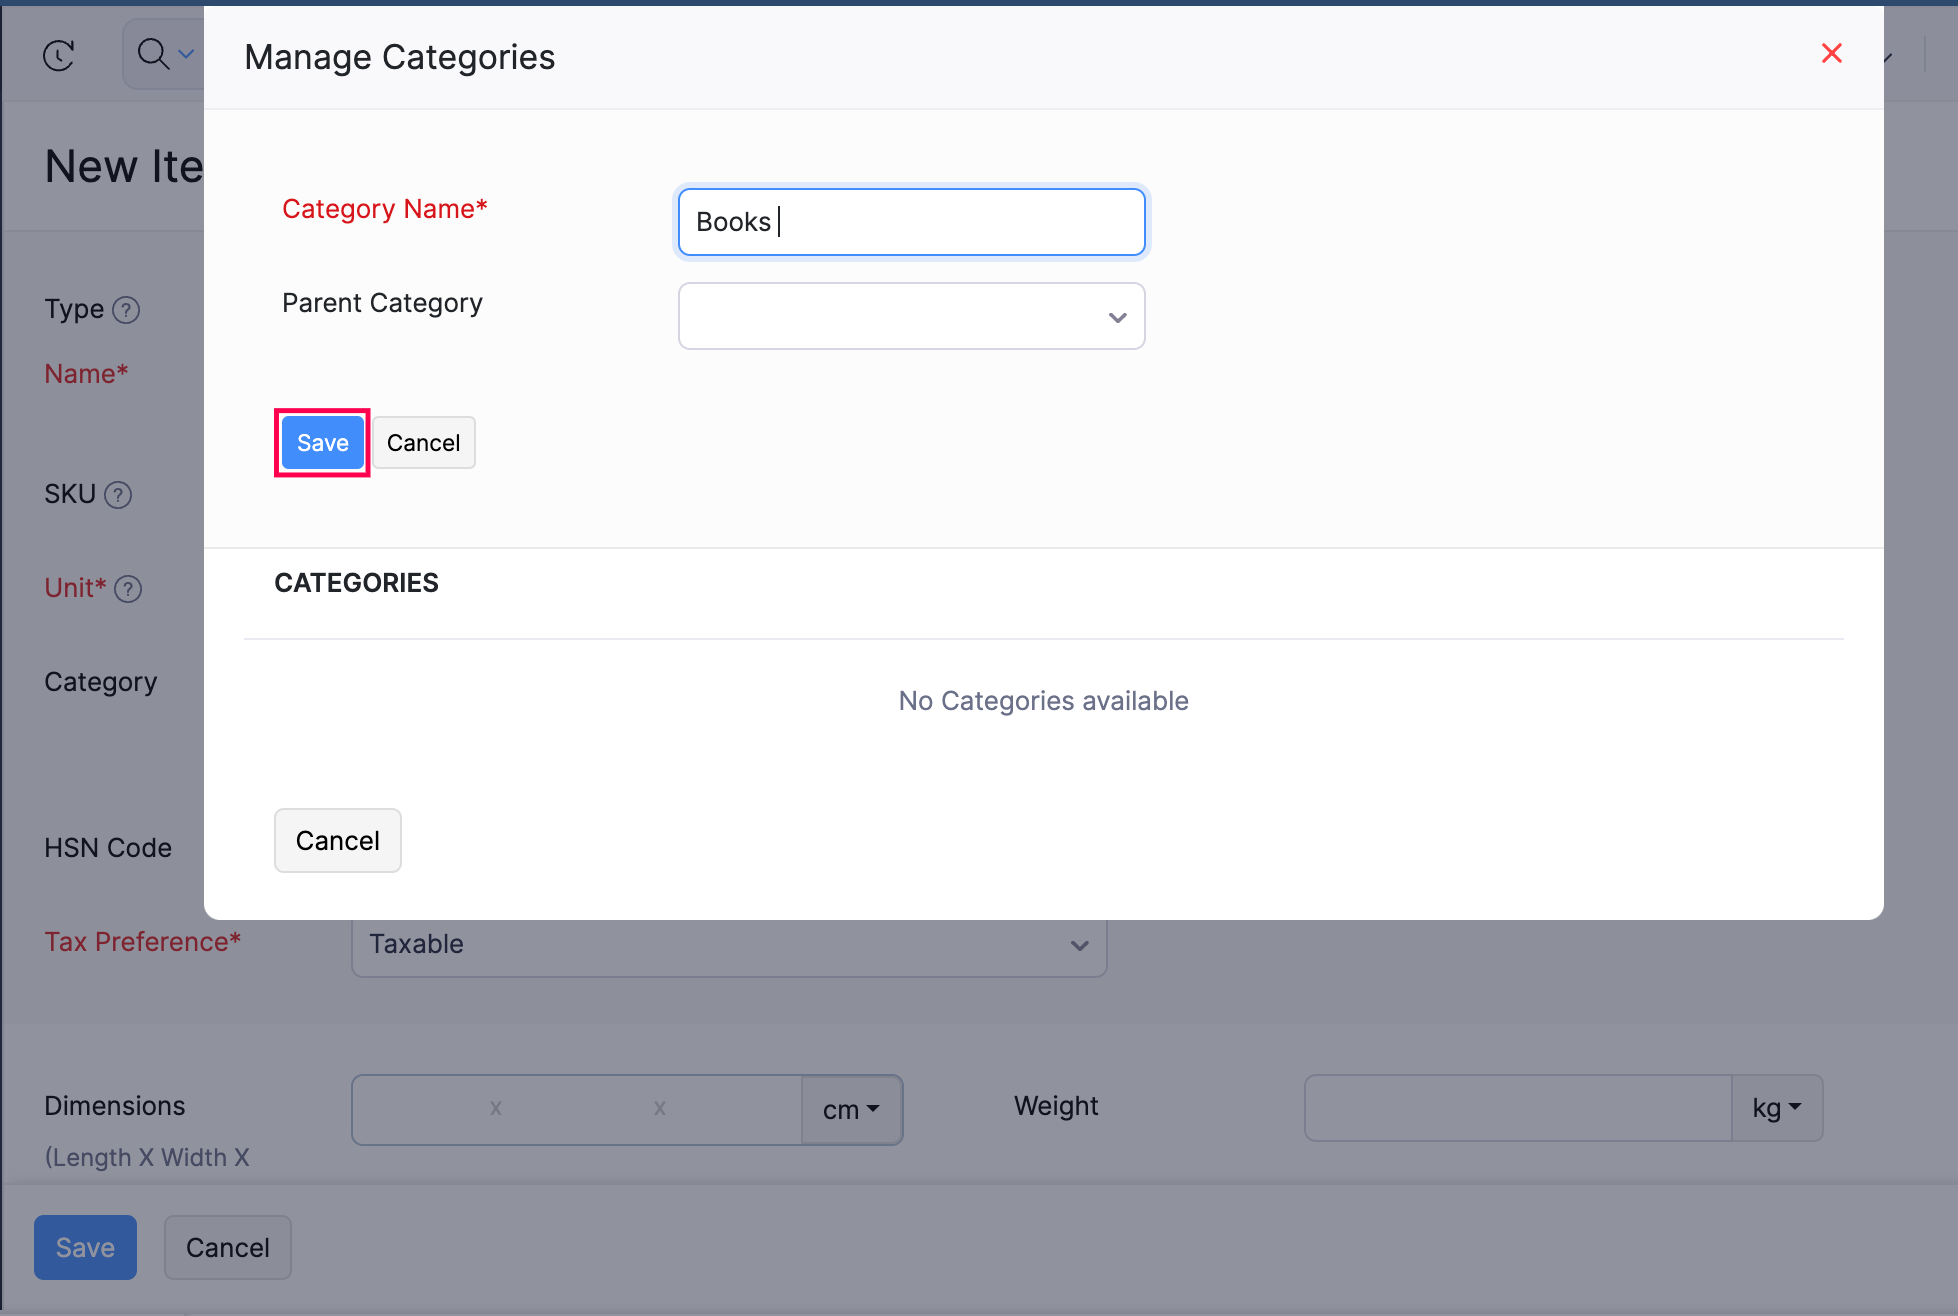
Click Save to add the category to the list of categories, which will henceforth be available inside the Manage Categories pop up.
Hover over the category that you wish to associate with that item, and click Apply this Category.
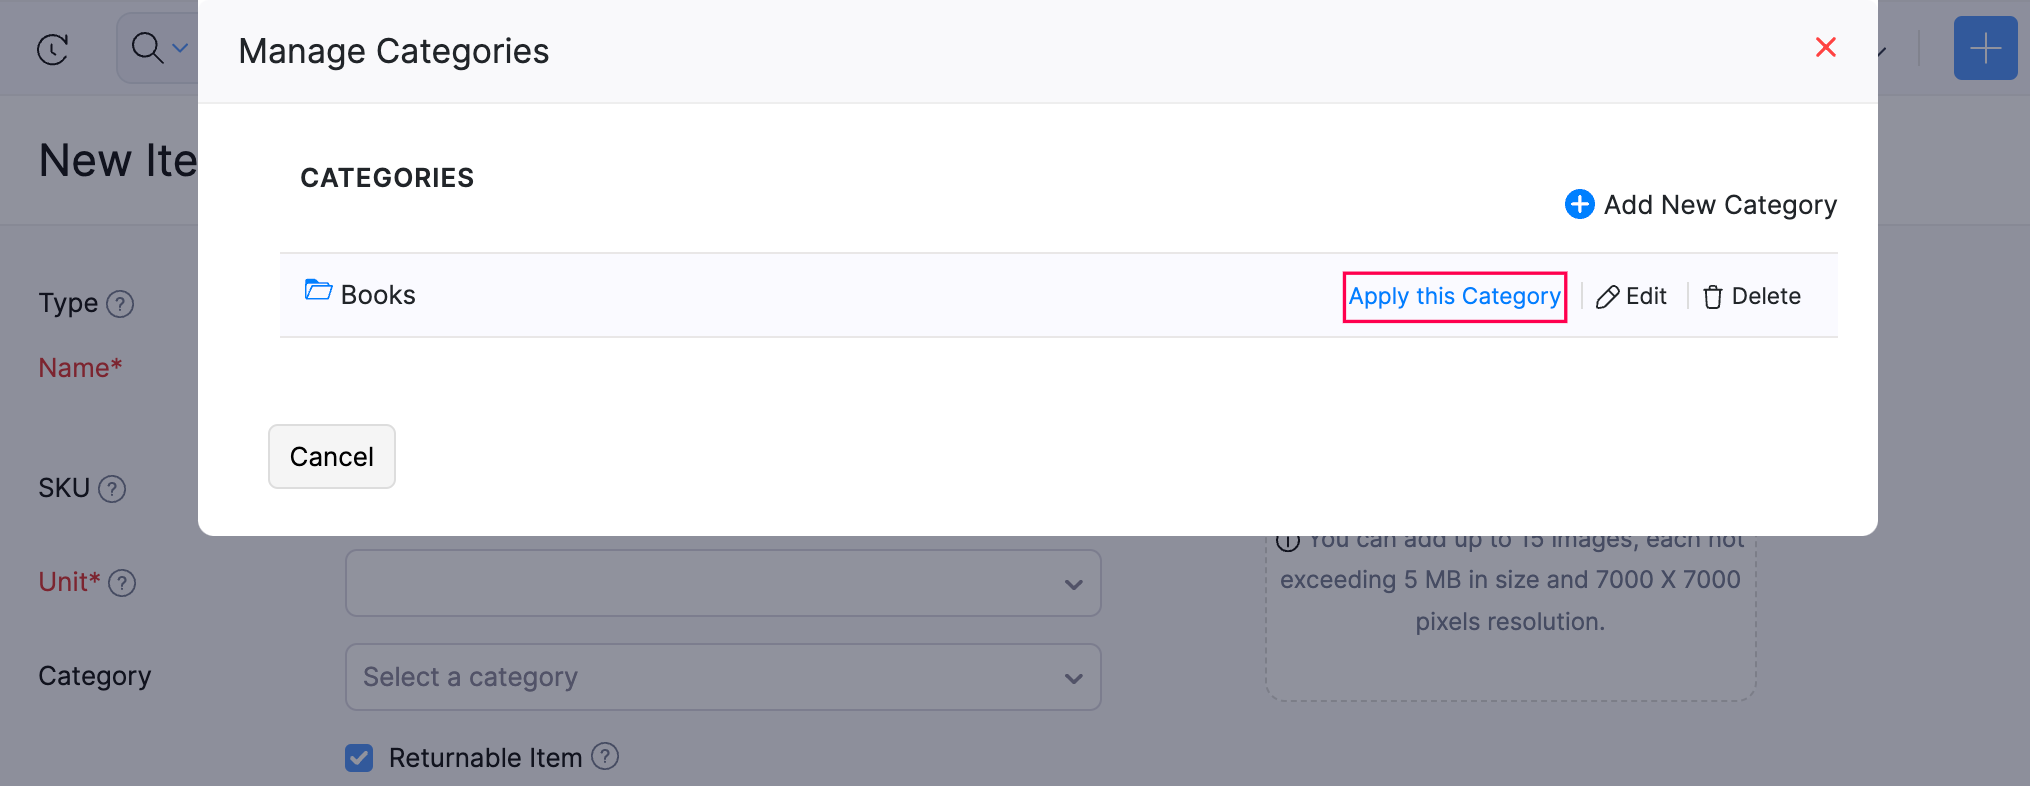
Pro Tip: You can assign a category to an individual item, item group or a composite item.
Edit a Category
To edit an existing category:
Create a new item or edit an existing one.
On the item creation/edit page, choose the Categories field.
Select Manage Categories option from the dropdown.
This will trigger a pop up for managing categories.
In the list of categories, hover over the category that you want to edit.
Click Edit which will open up the category details.
Make the necessary changes and click Save.
Other Operations
You can view items of a particular category by using the advanced search option or by creating a custom view of columns. This can be useful when you want to create transactions for a particular item category, like raising a sales order for all parker pens.
Learn how to perform advanced search or create a custom view.
Delete a Category
Insight: You have to delete the subcategories first to delete the parent category.
To delete a category:
Create a new item or edit an existing one.
On the item creation/edit page, choose the Categories field.
Select Manage Categories option from the dropdown.
This will trigger a pop up for managing categories.
In the list of categories, hover over the category that you want to edit.
Click the Delete option.
This will be followed by a success message and the category will be deleted.

Pro Tip: A category that has been associated with a product cannot be deleted. You can remove the category from the item, and then delete the same.
Sales by Category Report
To make informed decisions as to which category of items has brought in more revenue, you can head over to the Sales by Category report under the list of Sales Reports. With this report, you can get a glimpse of how each category is doing in terms of quantity sold and amount received.
Learn more about Sales by Category report here.