
Subscription
After you sign up for Zoho Inventory, you can start a 14-day trial with any plan (Standard, Professional, Premium, or Enterprise) where you can switch in-between plans to explore plan-specifc features. After or during your trial plan, you can subscribe to any one of the paid plans to continue using Zoho Inventory. If you do not upgrade to a paid plan, your organisation will automatically be moved to the free plan. Paid plans can be selected on an yearly or monthly basis.
Available Plans
Zoho Inventory offers a wide range of subscription plans to cater to every business need. To view which plan best suits your business, check out the Pricing page. You can check the prices in your preferred currency by selecting the currency from the dropdown.
You can also compare the prices and the features for each plan from the Pricing Comparison page.
Know Your Current Plan
There are two ways in which you can check your current plan:
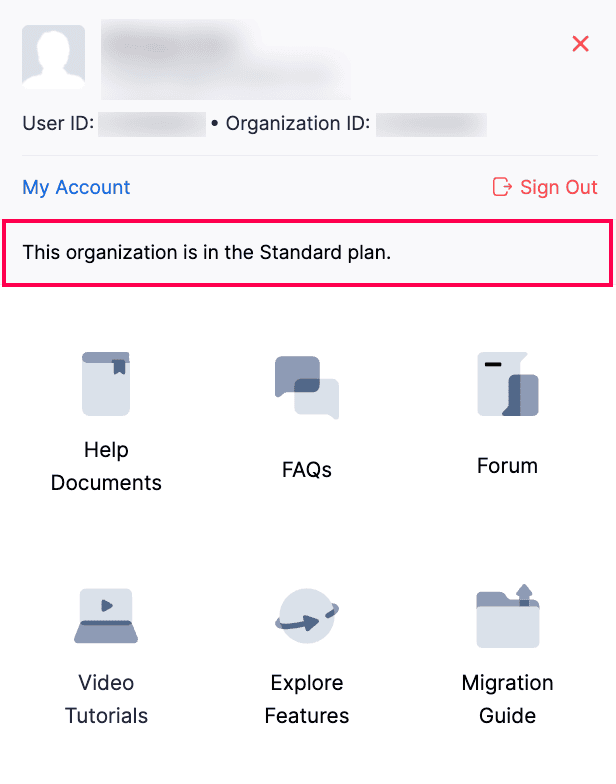
From your Profile
- Log in to your Zoho Inventory organization.
- Click your Profile in the top right corner.
- Your current plan details will be displayed in the sidebar.
From Manage Subscriptions
Click the Gear icon in the top right corner.
Go to Organization Settings.
Click Manage Subscription under Organization.
Here, you can check your current plan details, such as plan name, subscription date, usage cycle, and usage stats.
Upgrade to a Paid Plan
To upgrade your Zoho Inventory organisation to a paid plan:
- Click the Gear icon in the top right corner.
- Go to Organization Settings.
- Click Manage Subscription under Organization.
- Click Change Plan in the top right corner to go to the Subscription page.
- Select your desired plan and click Upgrade.
- Choose Monthly or Yearly billing, and select any Add-Ons if required.
- Click Proceed to go to the Payment Details page.
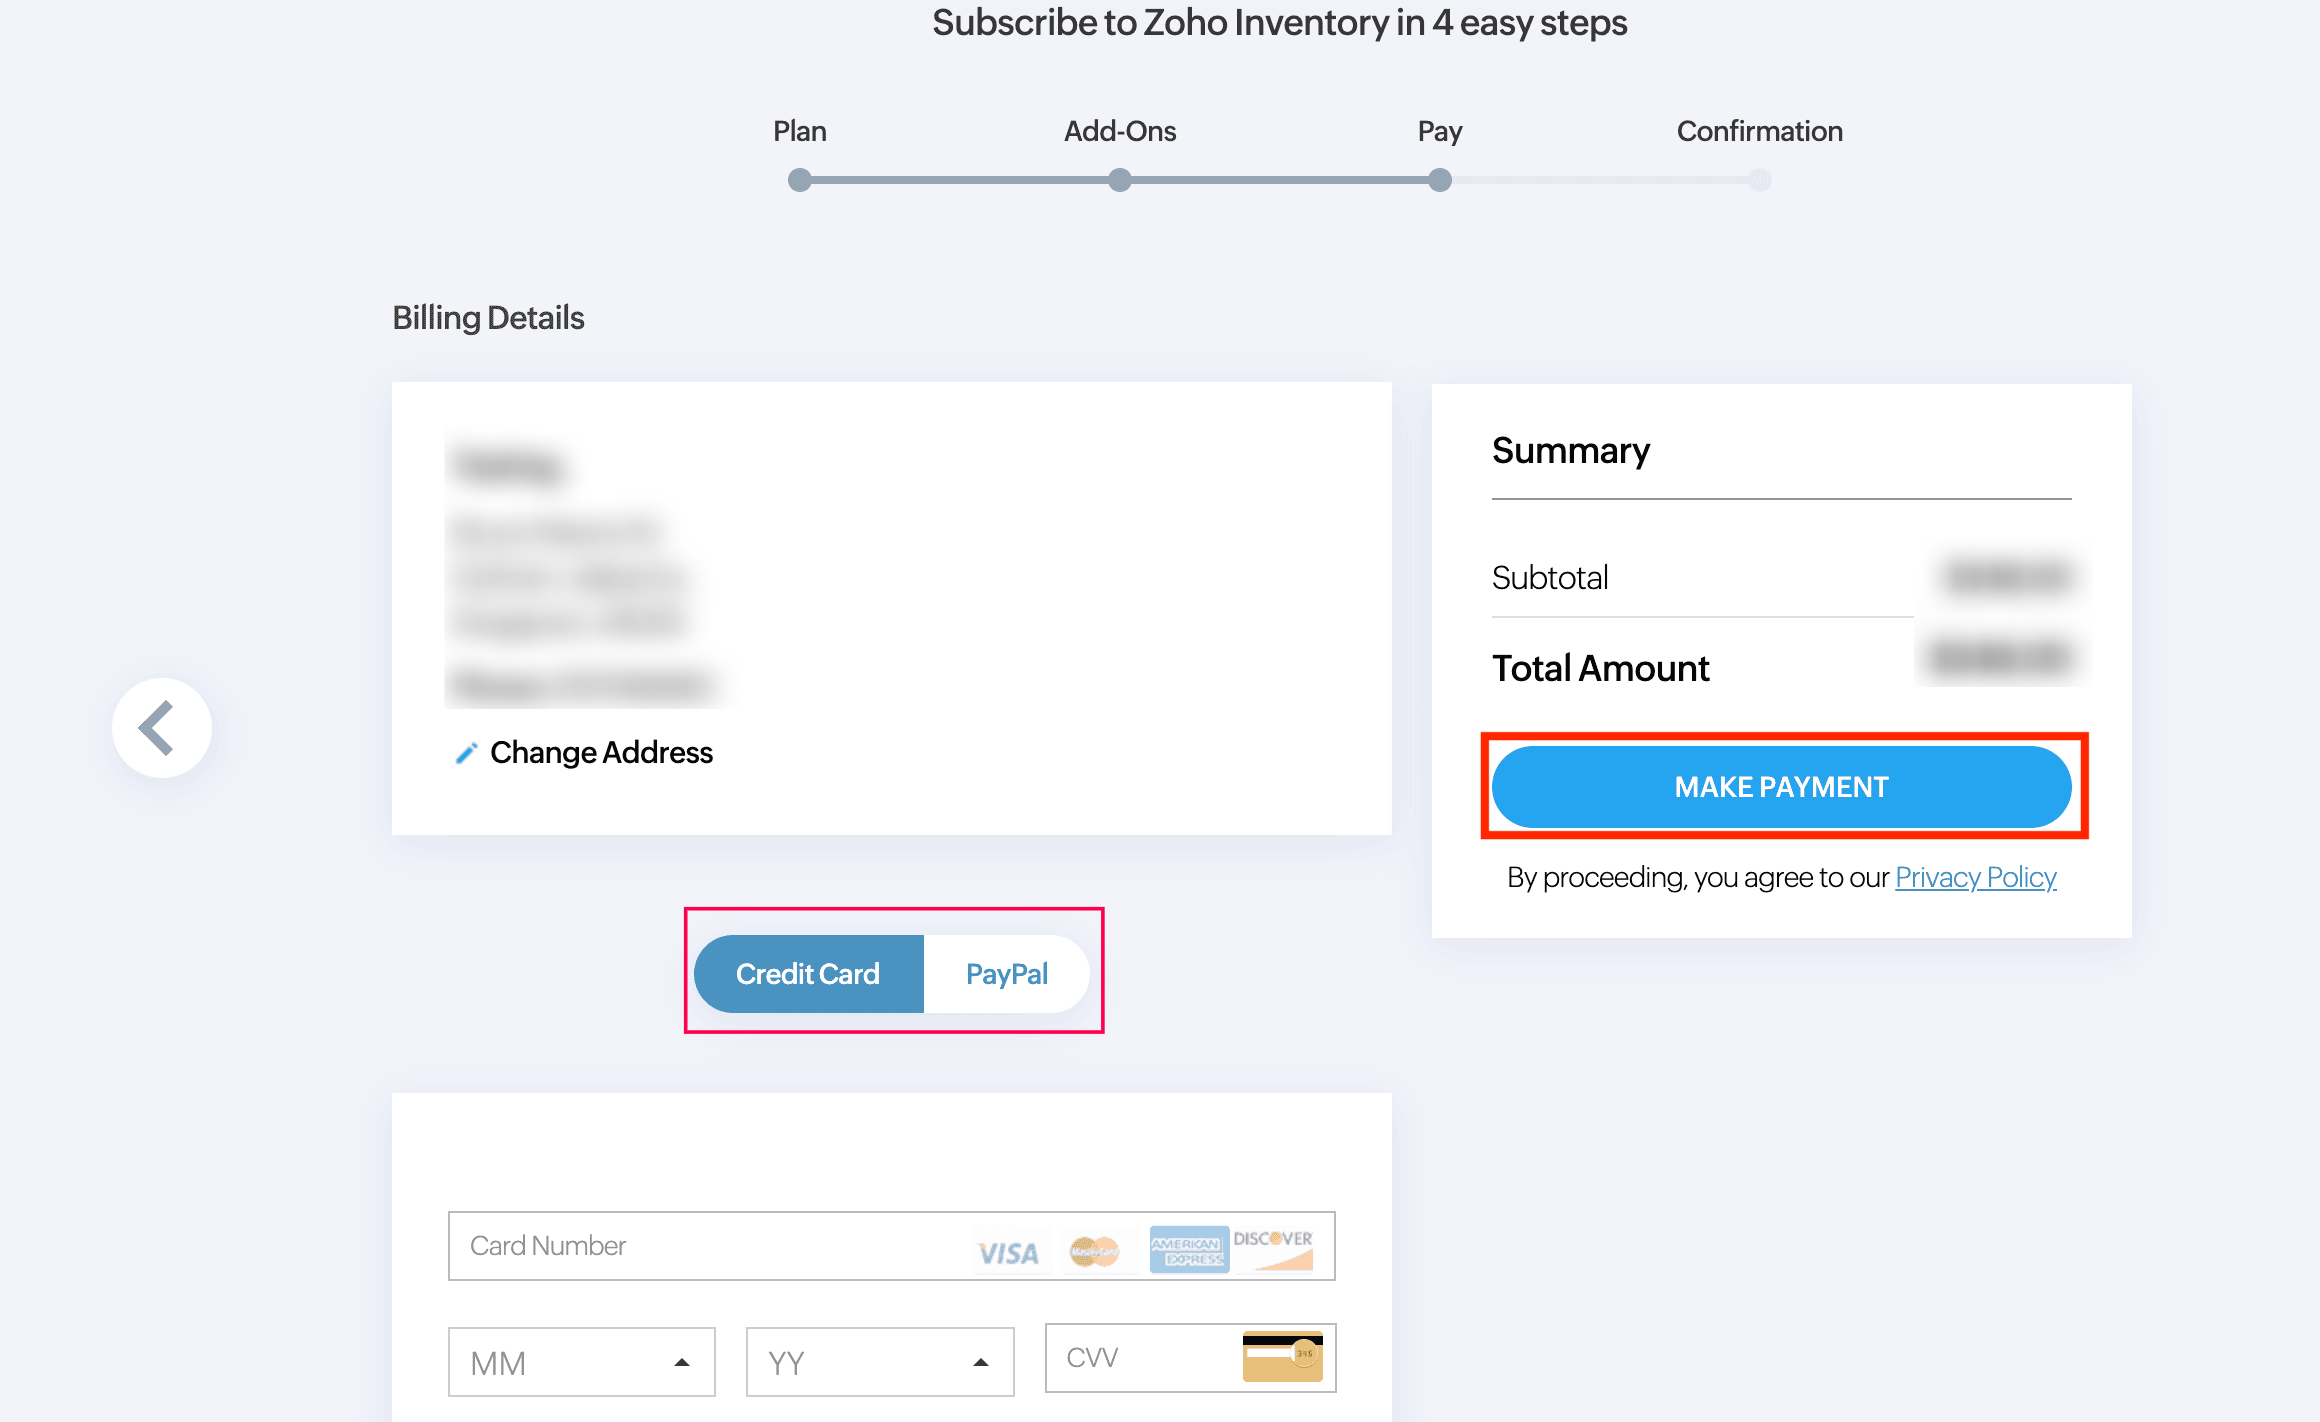
- Enter your Billing Address and provide the required details.
- Choose your payment type:
- Credit Card- Enter your card details such as card number, expiry date, CVV and billing address. Check your total amount, including tax, in the Summary section, and click Make Payment.
- PayPal- Click Continue in the Summary section to create or log in to your PayPal account. Enter your card number, expiry date, CVV, and billing address to update your payment method.
- Select your Payment Option and complete the payment.
Note: If your purchase was made offline, contact renewals@zohocorp.com to upgrade or renew your subscription.
Downgrade Your Subscription
Note: The manage subscriptions option will be visible only to the admins of the organisation.
- Click the Gear icon in the top right corner.
- Go to Organization Settings.
- Click Manage Subscription under Organization.
- Click Change Plan in the top right corner to go to the Subscription page.
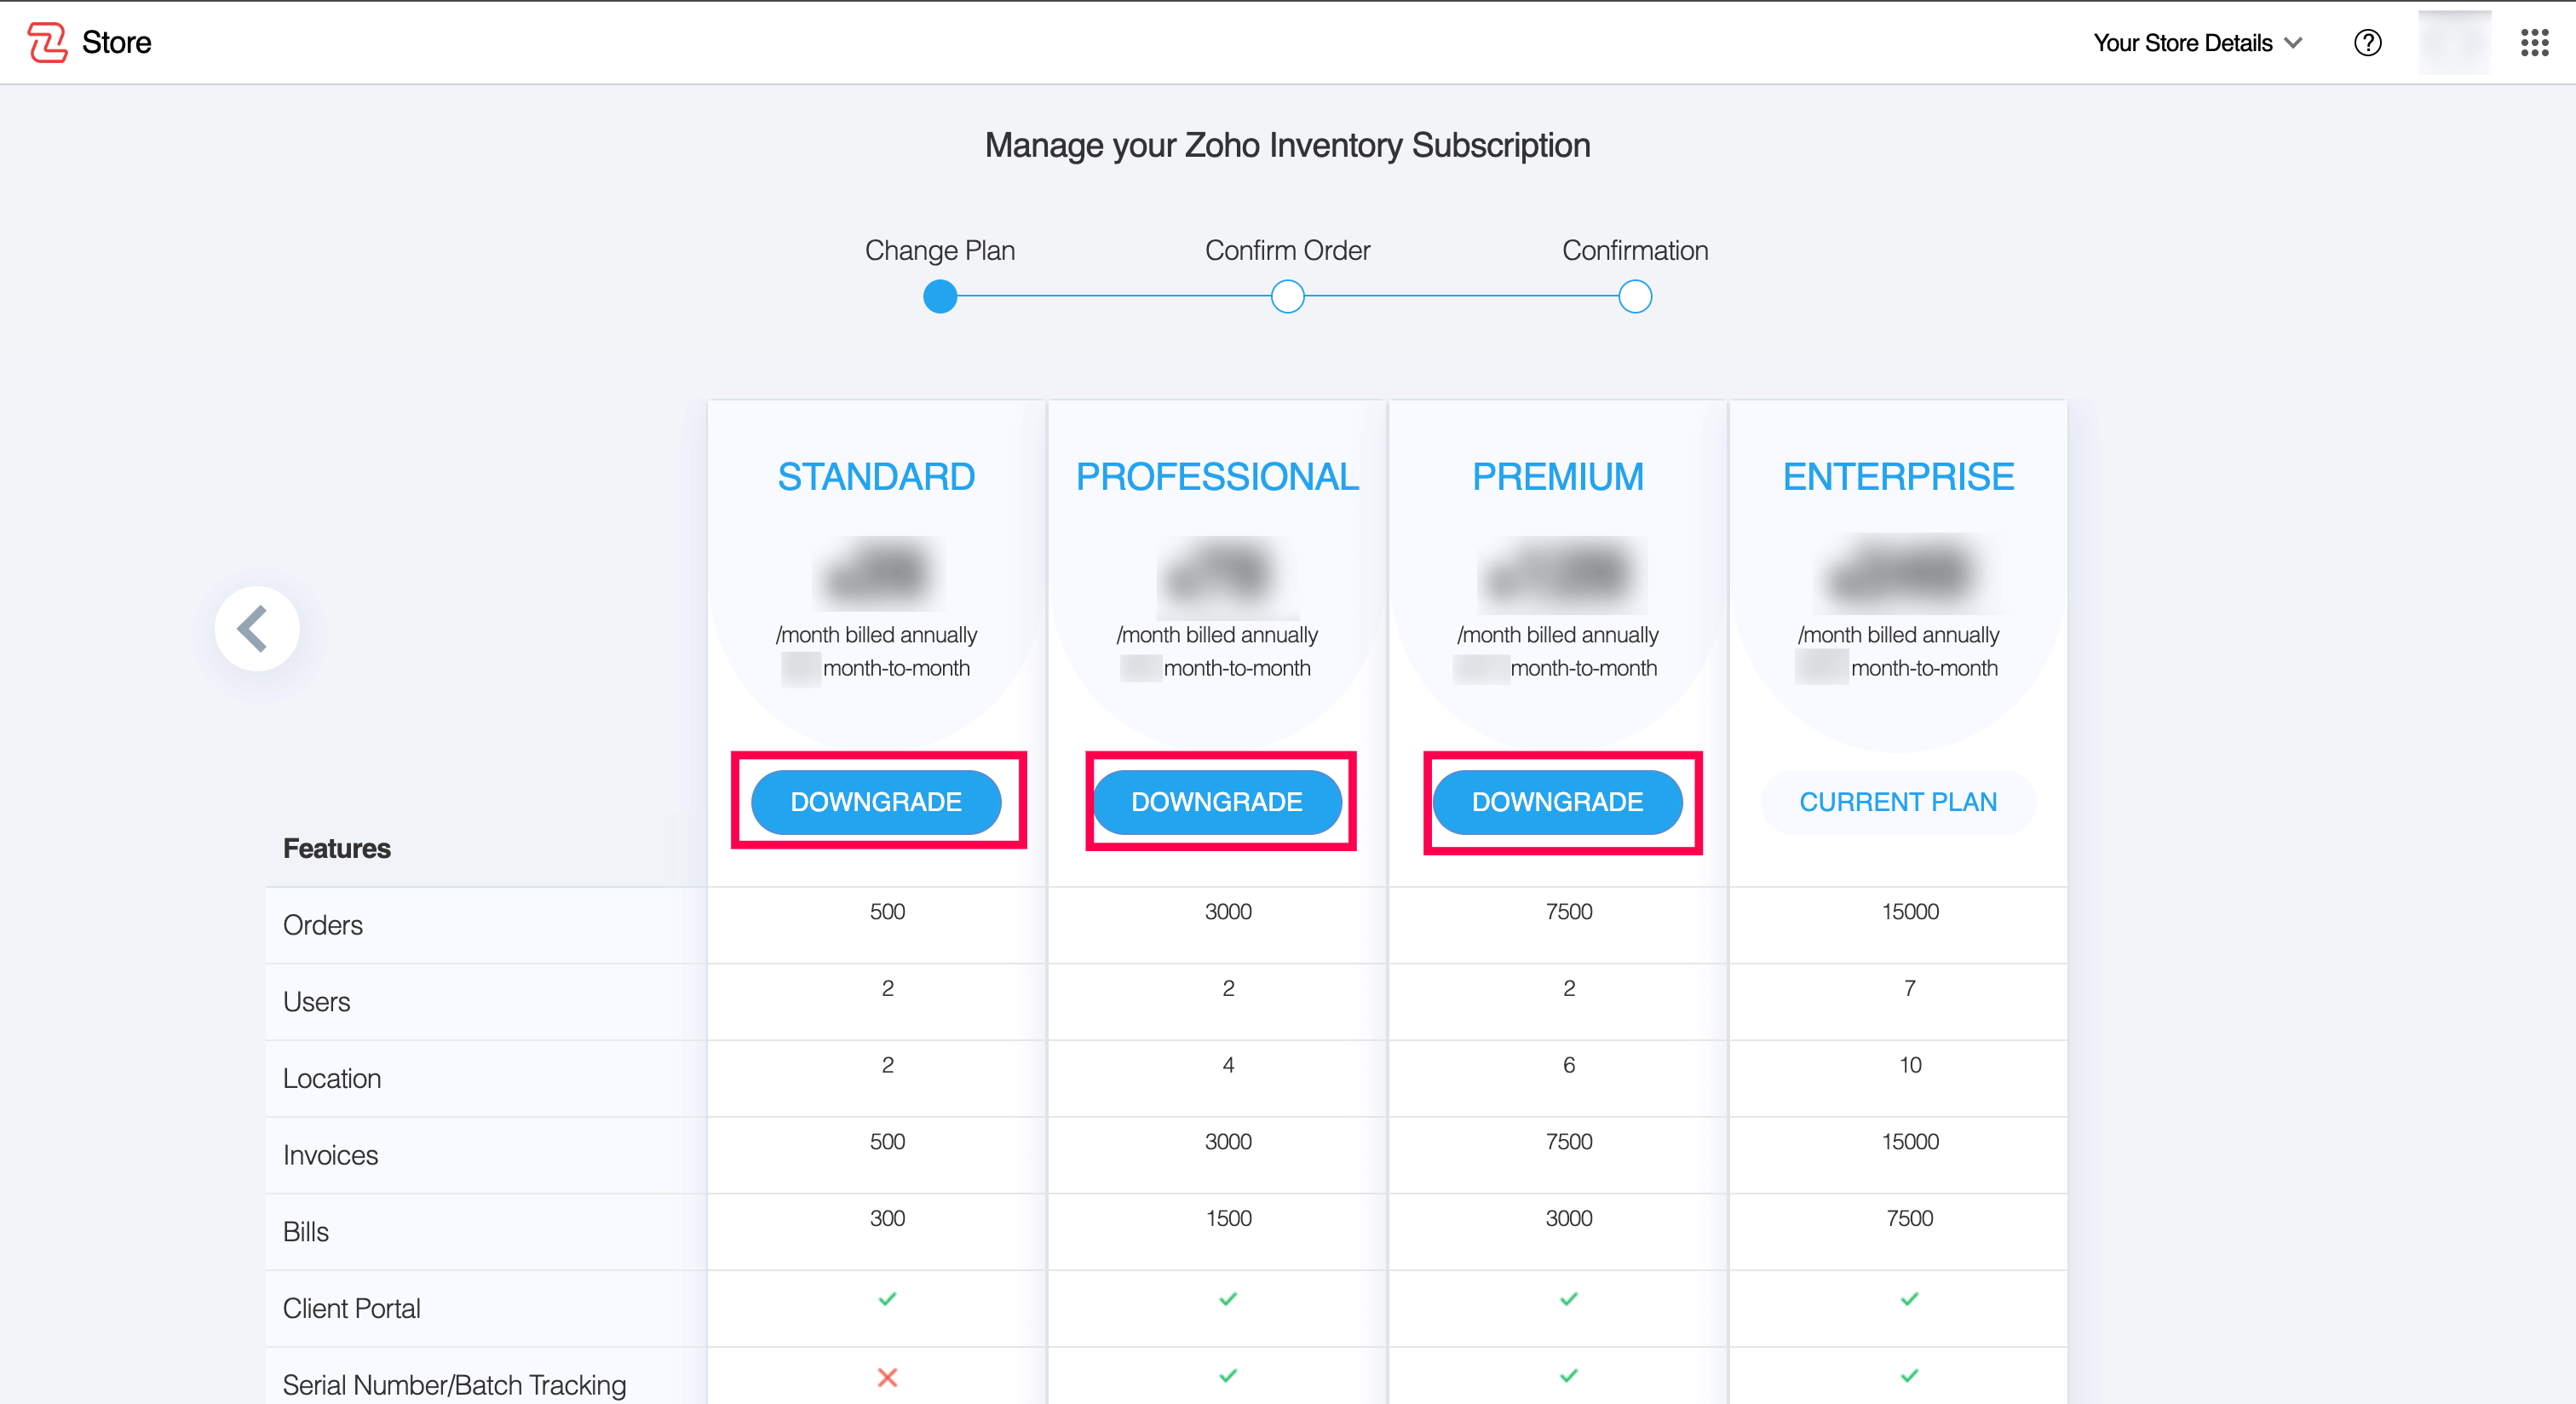
- You will be redirected to the Zoho Store homepage.
- Click Downgrade next to your desired plan.
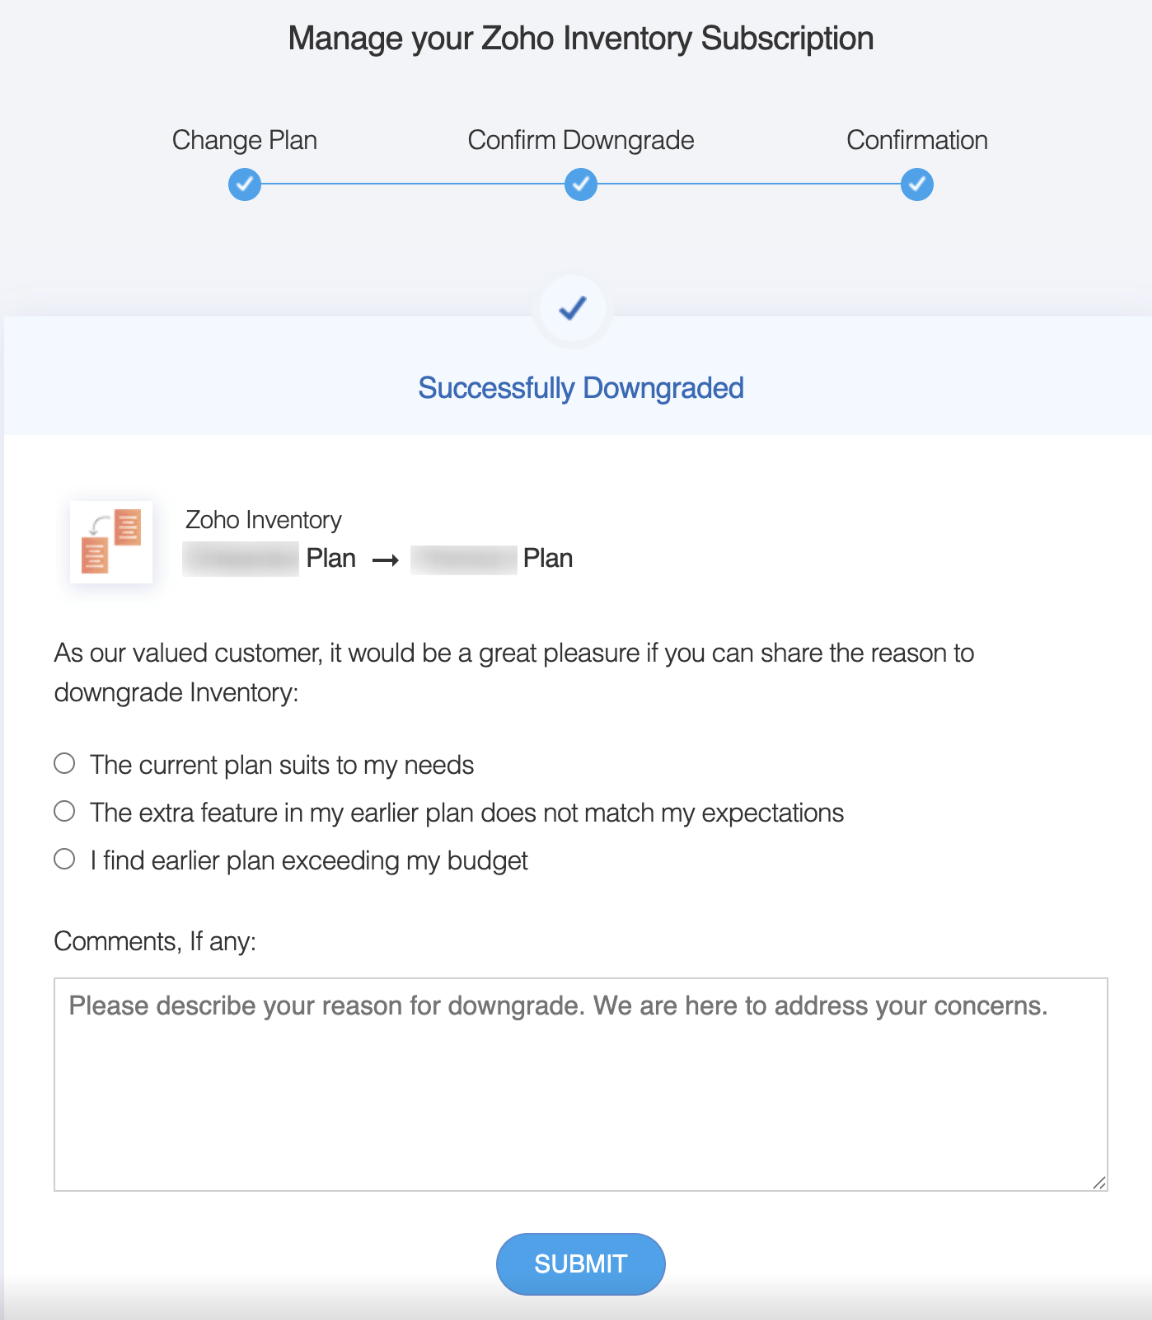
- Click YES, PROCEED DOWNGRADE in confirm downgrade page.
- Select your reason and click SUBMIT.
Cancel Your Subscription
Note: Cancelling your subscription does not mean deleting your account. Your existing data will be retained, and you can view them anytime. However, you’ll not be able to perform any functions in your organization thereafter.
If you wish to cancel your existing Zoho Inventory subscription:
Click the Gear icon in the top right corner.
Go to Organization Settings.
Click Manage Subscription under Organization.
Click Change Plan in the top right corner to go to the Subscription page.
You will be navigated to the Zoho Store homepage.
Scroll down and click Downgrade to Free Plan.
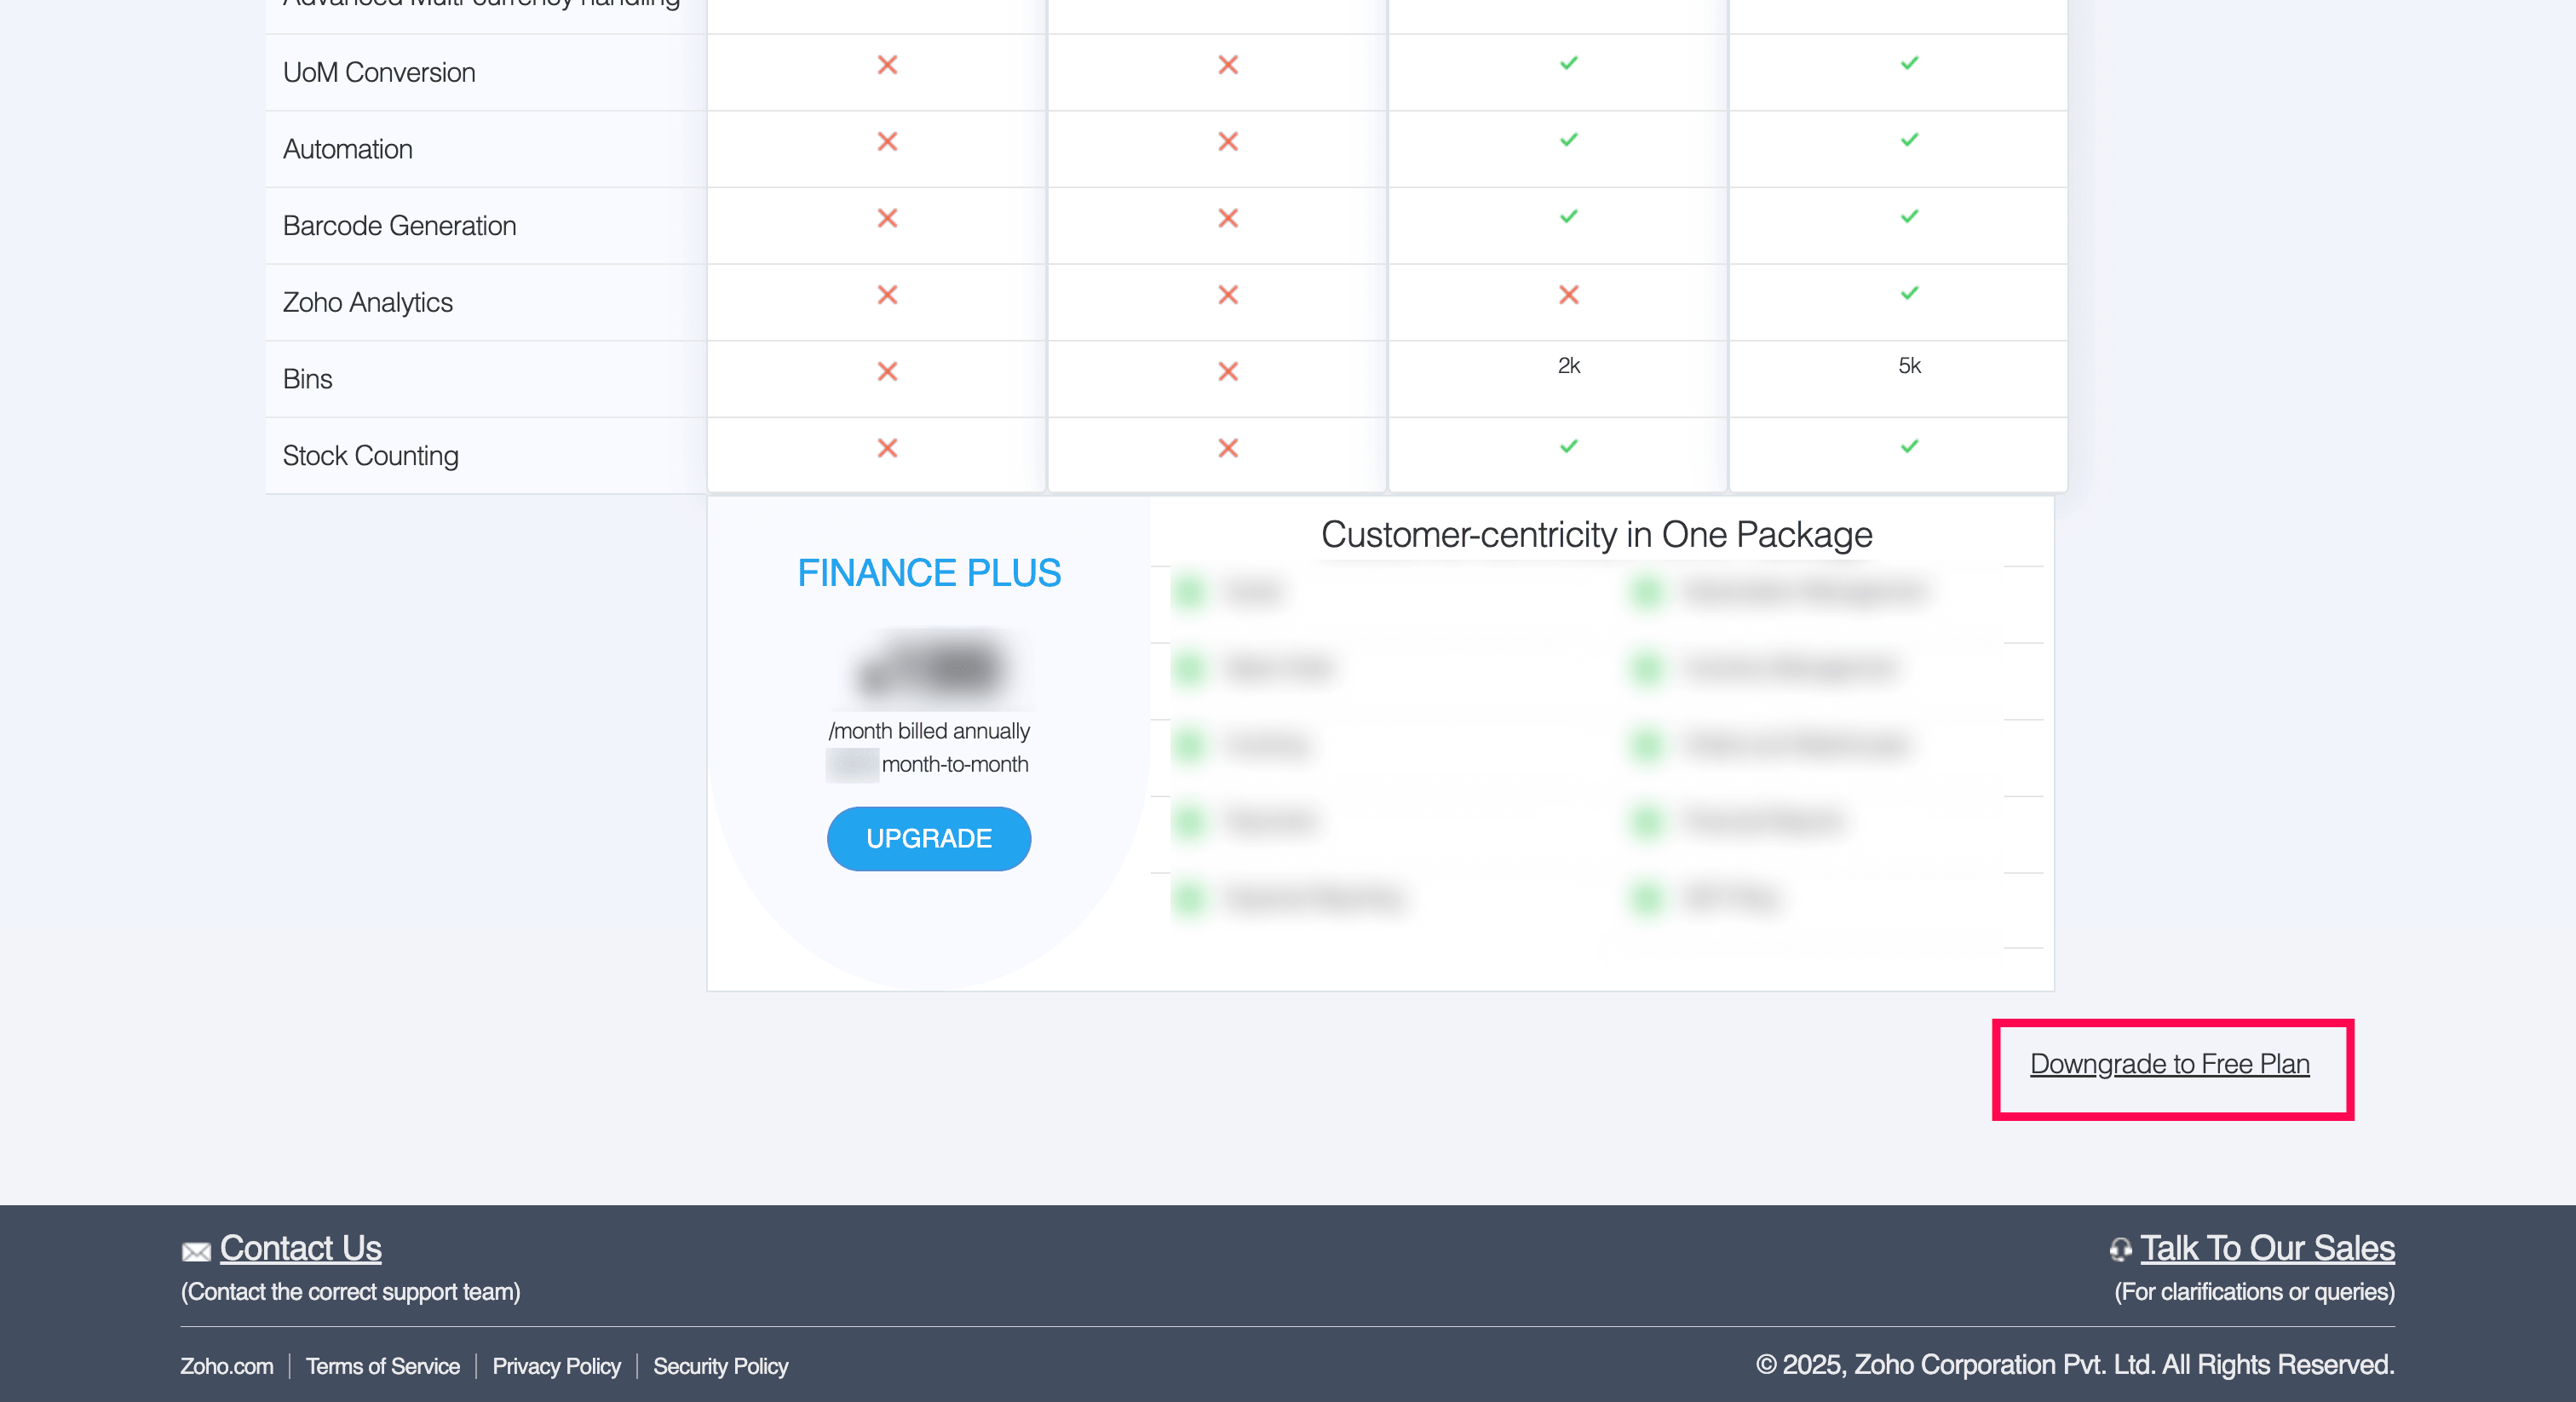
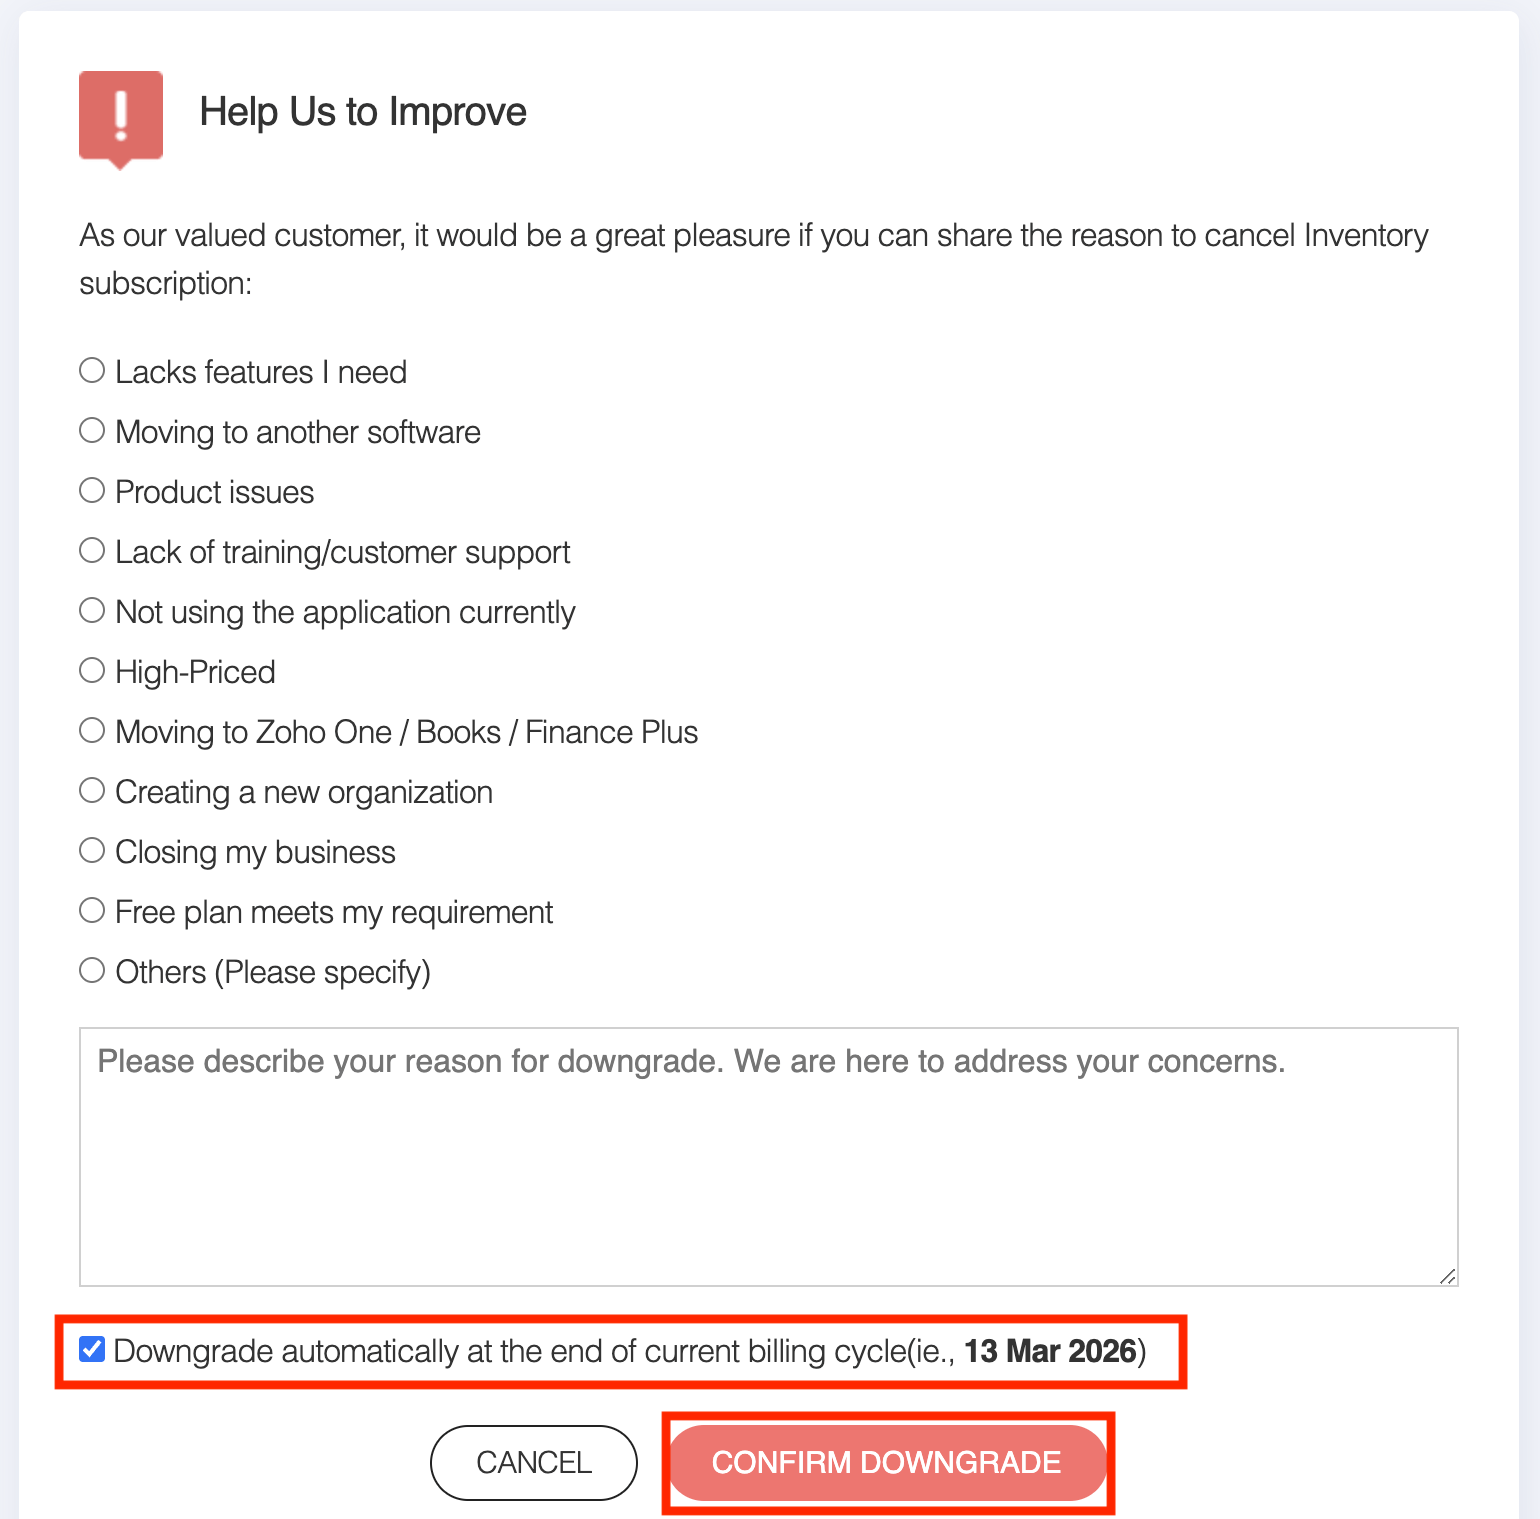
Select your reason. By enabling Downgrade automatically at the end of the current billing cycle, you can schedule your downgrade to take effect when your current billing cycle ends.
Click CONFIRM DOWNGRADE.
Note: You can use the free plan without any validity period with limited feature access.
Update Card and Address Details
To update your Card details, follow these steps.
- Click the Gear icon in the top right corner.
- Go to Organization Settings.
- Click Manage Subscription under Organization.
- Click Change Plan in the top right corner to go to the Subscription page.
- You will be navigated to the Zoho Store homepage.
- Click the Your Store Details tab in the top right corner.
- From the dropdown, select Payment Method.
- You’ll see your saved card details. Click Change next to the card you want to update.
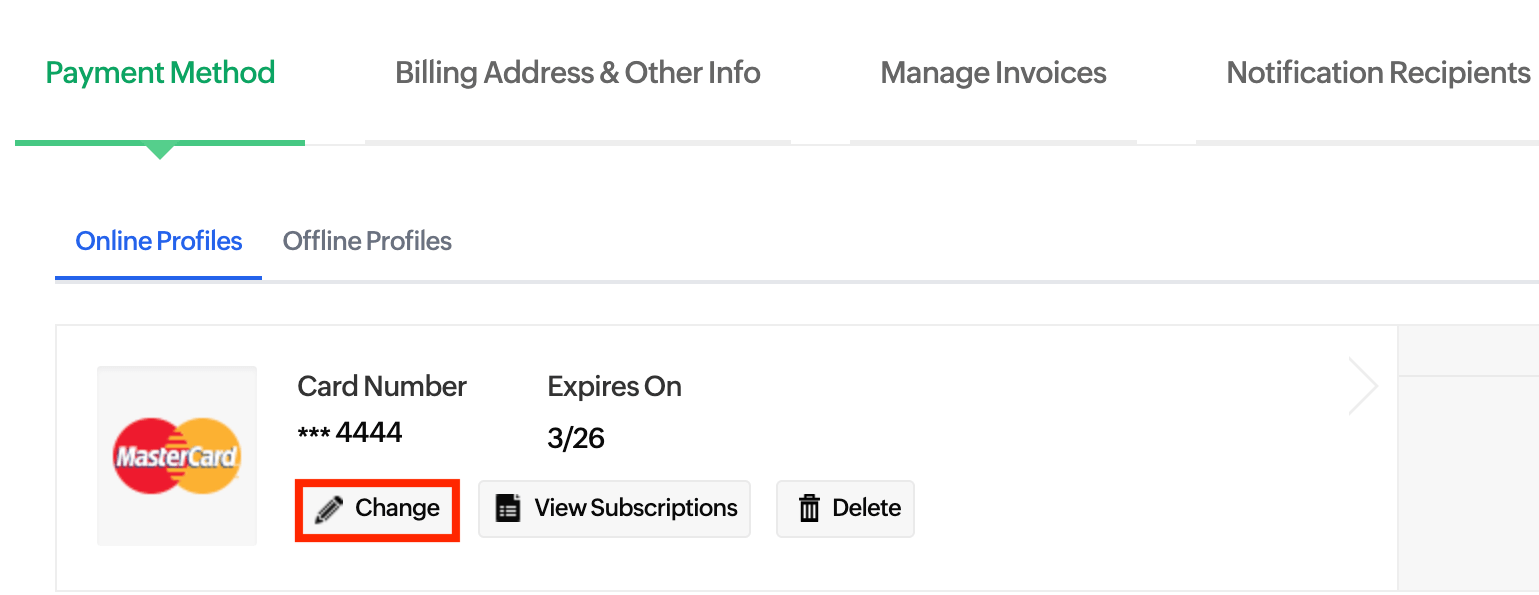
- Enter the card details and click Update.
Transaction History
Follow these steps to see every transaction you’ve made. This includes your plan upgrades, purchases, and renewals.
- Click the Gear icon in the top right corner.
- Go to Organization Settings.
- Click Manage Subscription under Organization.
- Click Change Plan in the top right corner to go to the Subscription page.
- You will be navigated to the Zoho Store homepage.
- Click the Your Store Details dropdown in the top right corner.
- From the dropdown, select Transaction History.
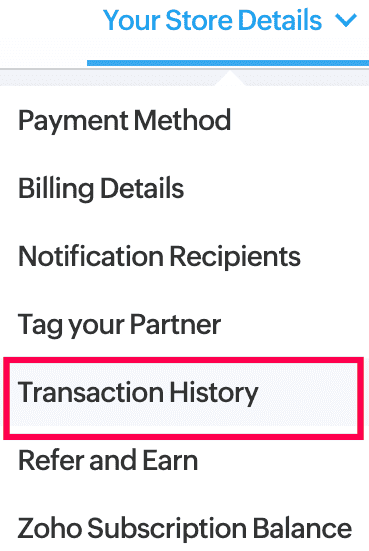
You can now view all your transactions, including plan upgrades, purchases, and renewals.
Note: You can also reach out to store-support@zohocorp.com to make changes to your subscription.