Inventory
Integrate Zoho Inventory With Yes Bank
Zoho Inventory has partnered with Yes Bank to help you pay your vendors quickly. Once you integrate, you will be able to:
- Make instant payments through IMPS, NEFT, A2A, & RTGS.
- Check your account’s real-time balance and the status of transactions.
- Make advance payments to your vendors.
- Pay bills in bulk.
Note: This integration is available only for the organisations in the India edition created under the zoho.in domain.
Scenario: Ramesh purchases multiple items from multiple vendors, bundles the products together as a kit and sells them. He pays his vendors online using internet banking and finds it time consuming. So, he integrates his Zoho Inventory organisation with Yes Bank. It enables him to make instant payments to his vendors directly from Zoho Inventory.
IN THIS PAGE…
Prerequisites
- An active Yes Bank current account.
- Your current account must be registered for API banking with Yes Bank. If you need assistance in registering for API banking, write to yesbank-support@zohofinance.com.
- Two-part password from Yes Bank to set up the integration. You will receive this once you register for the API banking.
- An active Zoho Inventory organisation.
Set up Yes Bank Integration
Once you have everything that’s mentioned in the prerequisites, you can start setting up the integration between Zoho Inventory and Yes Bank.
To set up the integration:
-
Log in to your Zoho Inventory organisation.
-
Click the Gear icon in the top right corner of the window and select Online Payments.
-
Go to the Vendor Payments tab.
-
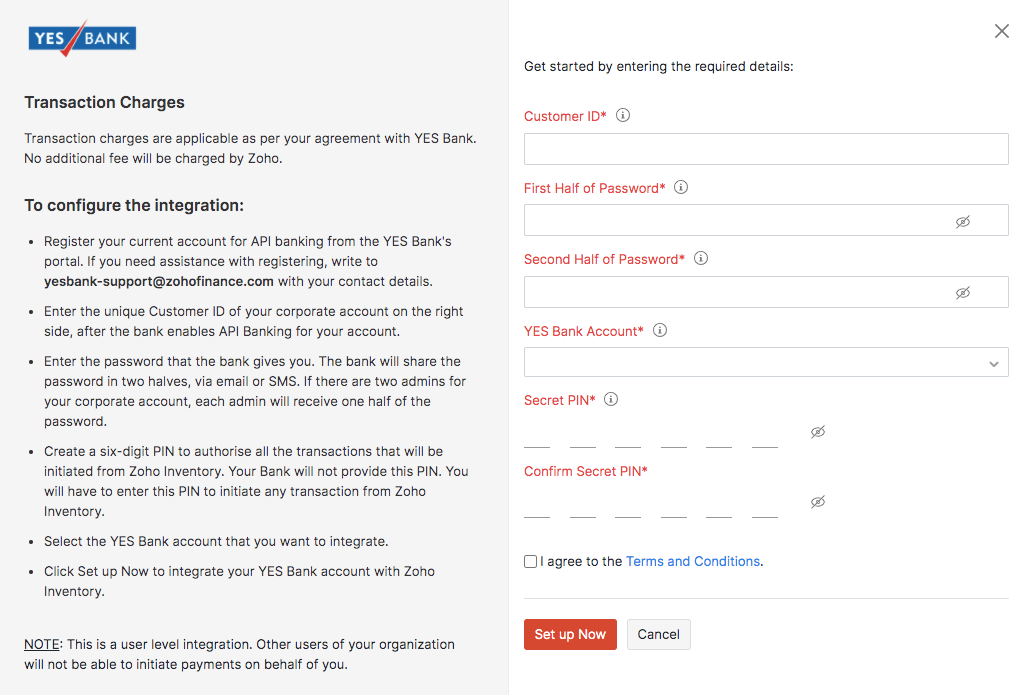
Click the Set up Now button under Yes Bank.

-
Enter your Yes Bank Customer ID.
-
Enter the two-part password that the bank has sent to your registered email address or mobile number in the First Half Password and Second Half Password fields.
-
Create a six-digit Secret PIN and re-enter it to confirm the PIN. Remember this PIN as you will need it to authorise payments from Zoho Inventory.
-
Select your Yes Bank Account that you want to integrate.
-
Read and agree to the Terms and Conditions.
-
Click Set up Now.
Your Zoho Inventory organisation will be integrated with your Yes Bank current account. The status of your current account will be displayed on the screen.
Add Vendor Bank Account
Before you can start making payments, you must add your vendor bank account details in Zoho Inventory.
To add a vendor bank account:
-
Go to the Vendors module in the left sidebar.
-
Select the vendor for whom you want to add the bank account details.
-
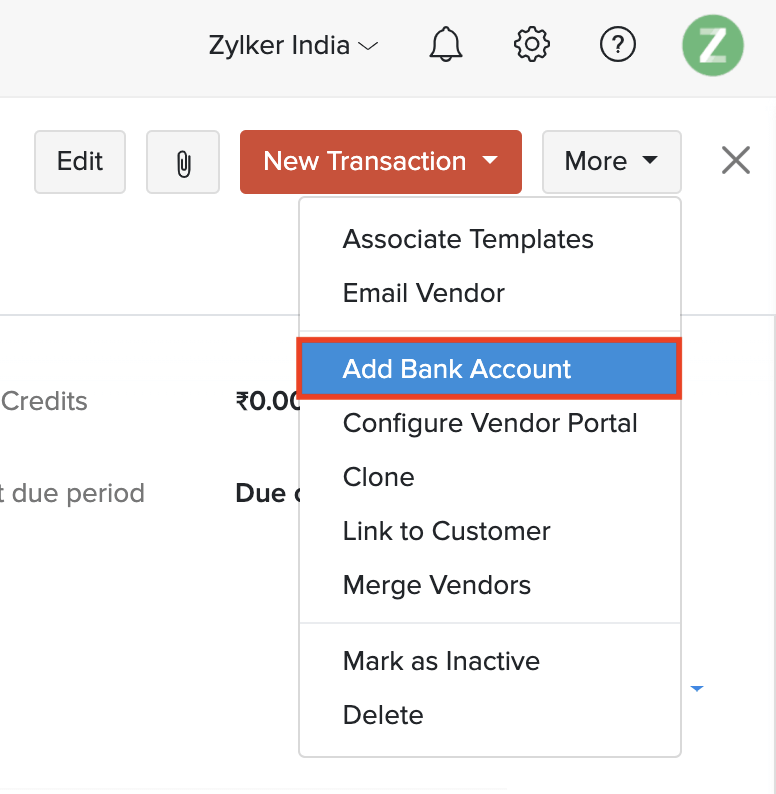
Click the More button in the top right corner and select Add Bank Account.
-
Enter the vendor’s bank account details.
-
Click Save.
Now, you will find an option to pay via Yes Bank for the bills that you create for this vendor.
Pay via Yes Bank
You can pay your bills faster via Yes Bank using different transaction types. To pay bills via Yes Bank:
-
Go to the Bills module in the left sidebar.
-
Select the bill for which you want to make the payment. If the bill is in the Draft status, make sure that you convert it to the Open status.
-
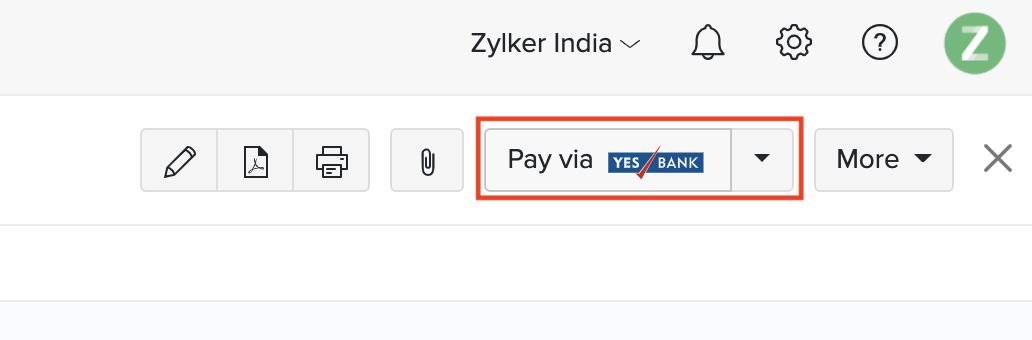
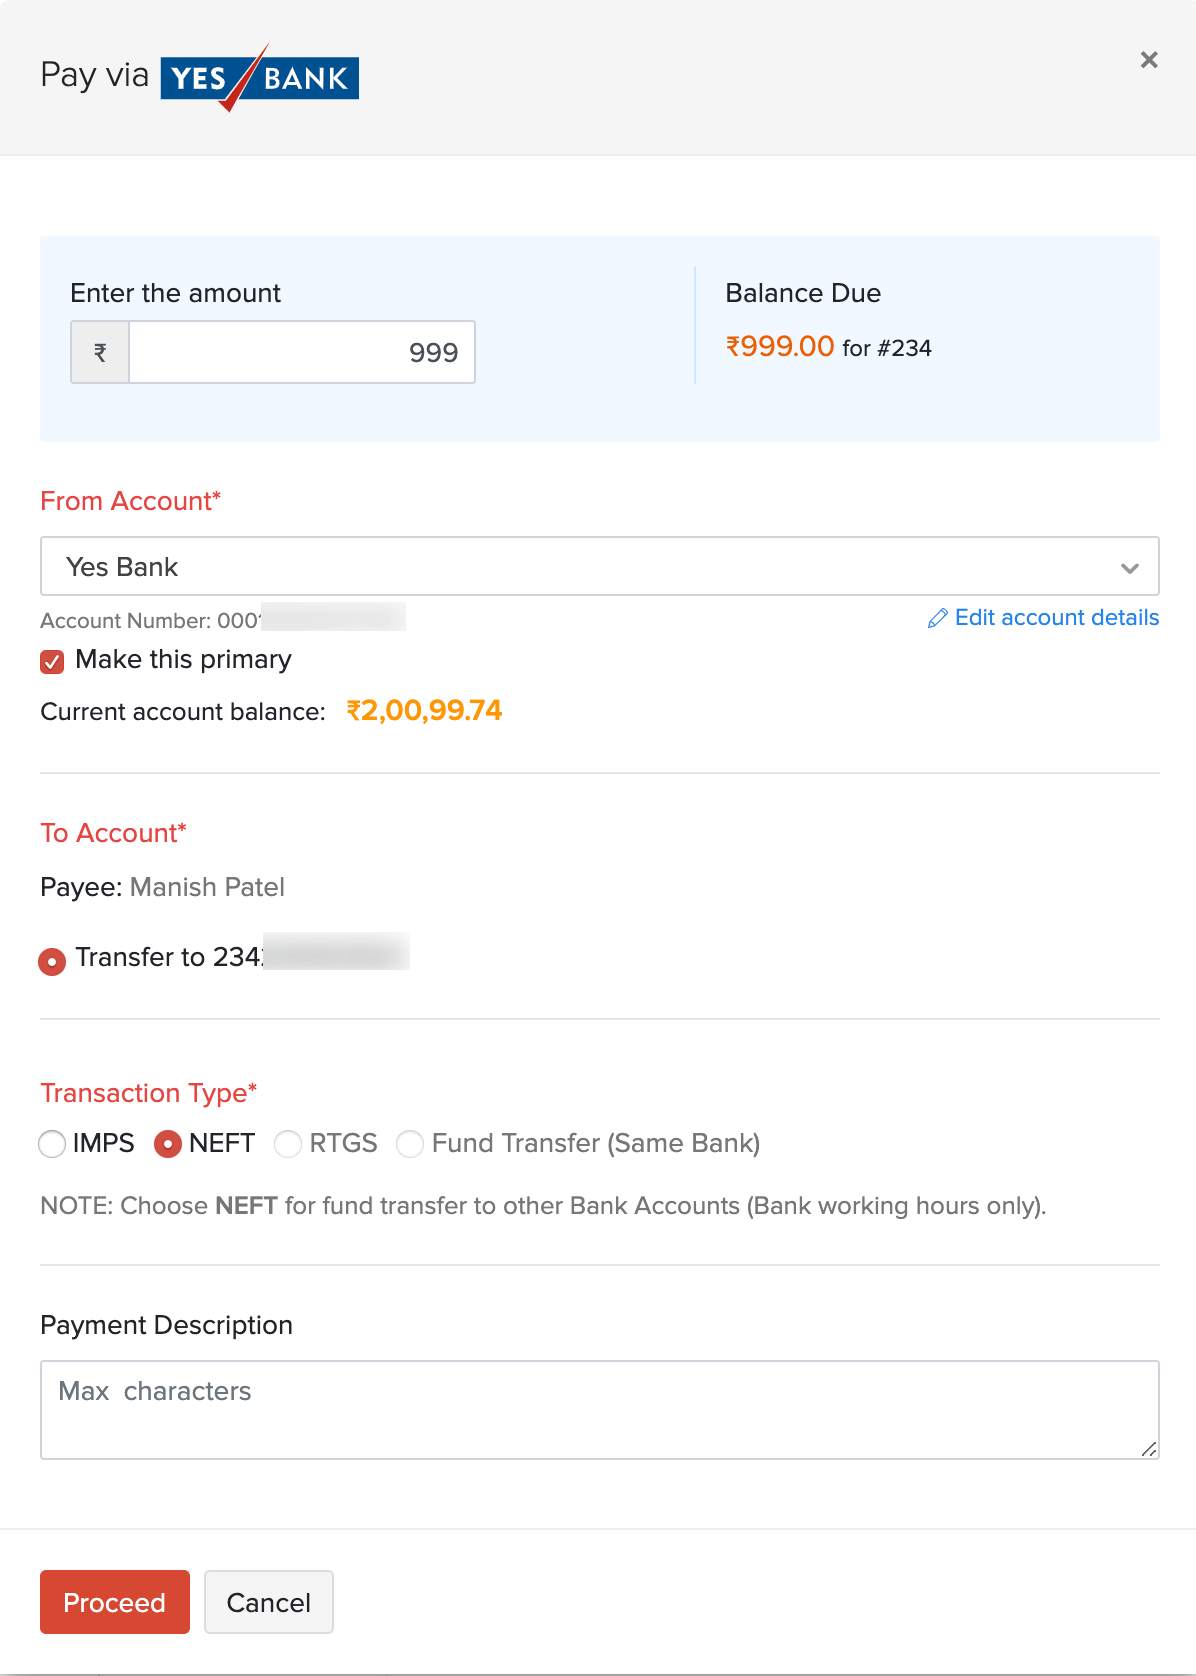
Click the Pay via Yes Bank button on the menu bar.
-
Enter the amount that you want to pay.
-
Select the From Account from which you want to make the payment.
-
Select the Transaction Type through which you want to make the payment.
Transaction Type | Description ——-|——- IMPS | This option is best suited if the amounts are lesser than ₹2,00,000 and you want to send it instantly. NEFT | Use this option when you want to transfer large sums of money as it does not have any upper limit. RTGS | Use this option if you want to transfer more than ₹2,00,000. Fund Transfer | Use this option if you’re making payment to a vendor who has an account in Yes Bank.
-
Click Proceed.
-
Enter the Secret PIN that you had configured while setting up the integration.
-
Click Initiate Payment.
The payment will be initiated and you will be notified as soon as the payment is deposited in the vendor’s bank account.
Pay Bills in Bulk
You can pay multiple bills from a vendor at a time. To pay bills in bulk:
-
Go to the Payments Made module from the left navigation pane.
-
Click the + New button from the top right corner of the page.
-
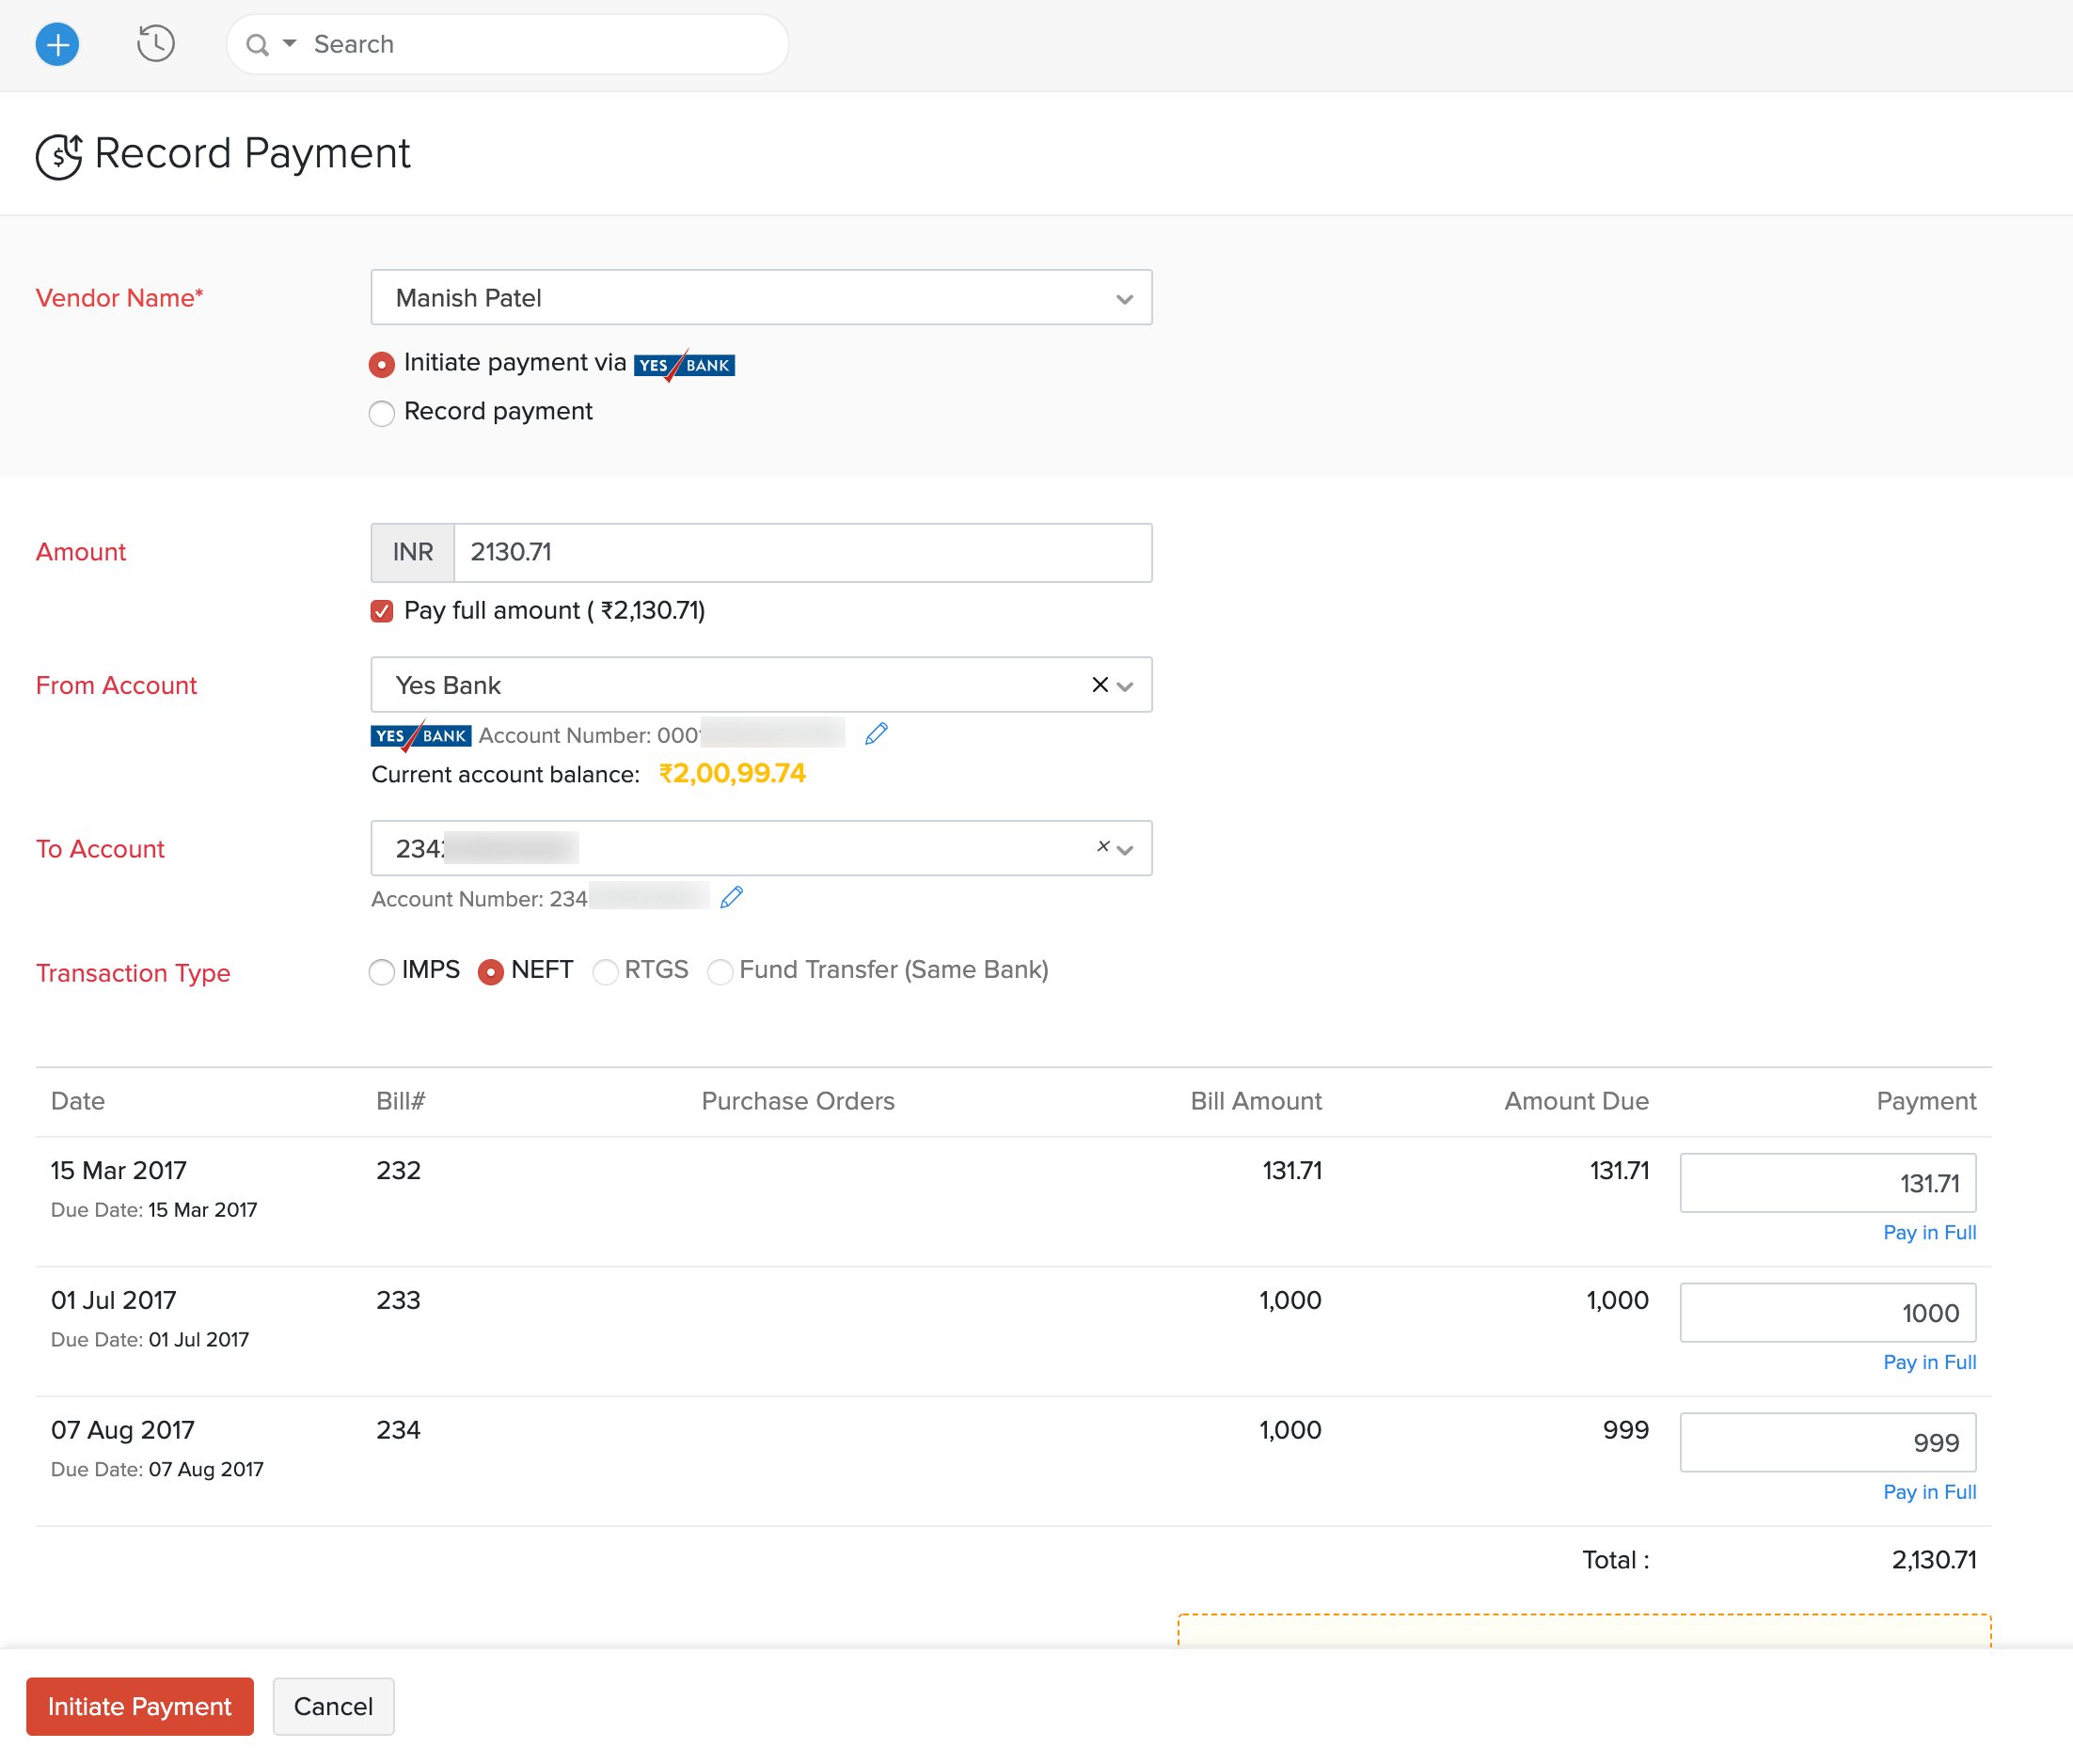
Choose the vendor for whom you would like to make payment and select the option Initiate Payment via Yes Bank.
-
Enter the Amount. You can also click Pay Full Amount and make payment for all the bills at once.
-
Select the From Account from which you want to initiate payment for all the bills.
-
Select the To Account and the Transaction Type.
-
Enter the split-up of the amount you’ll be paying towards each bill in the Payment column.
-
Verify your details and click Initiate Payment.
-
Enter the six-digit Secret PIN that you had configured during the integration setup.
-
Click Initiate Payment and your payment will be initiated.
Make Advance Payments
You can make advance payments to your vendors if you’ve added their bank account details. To make advance payments:
-
Go to the Payments Made module from the left sidebar of Zoho Inventory.
-
Click the + New button on the top right corner.
-
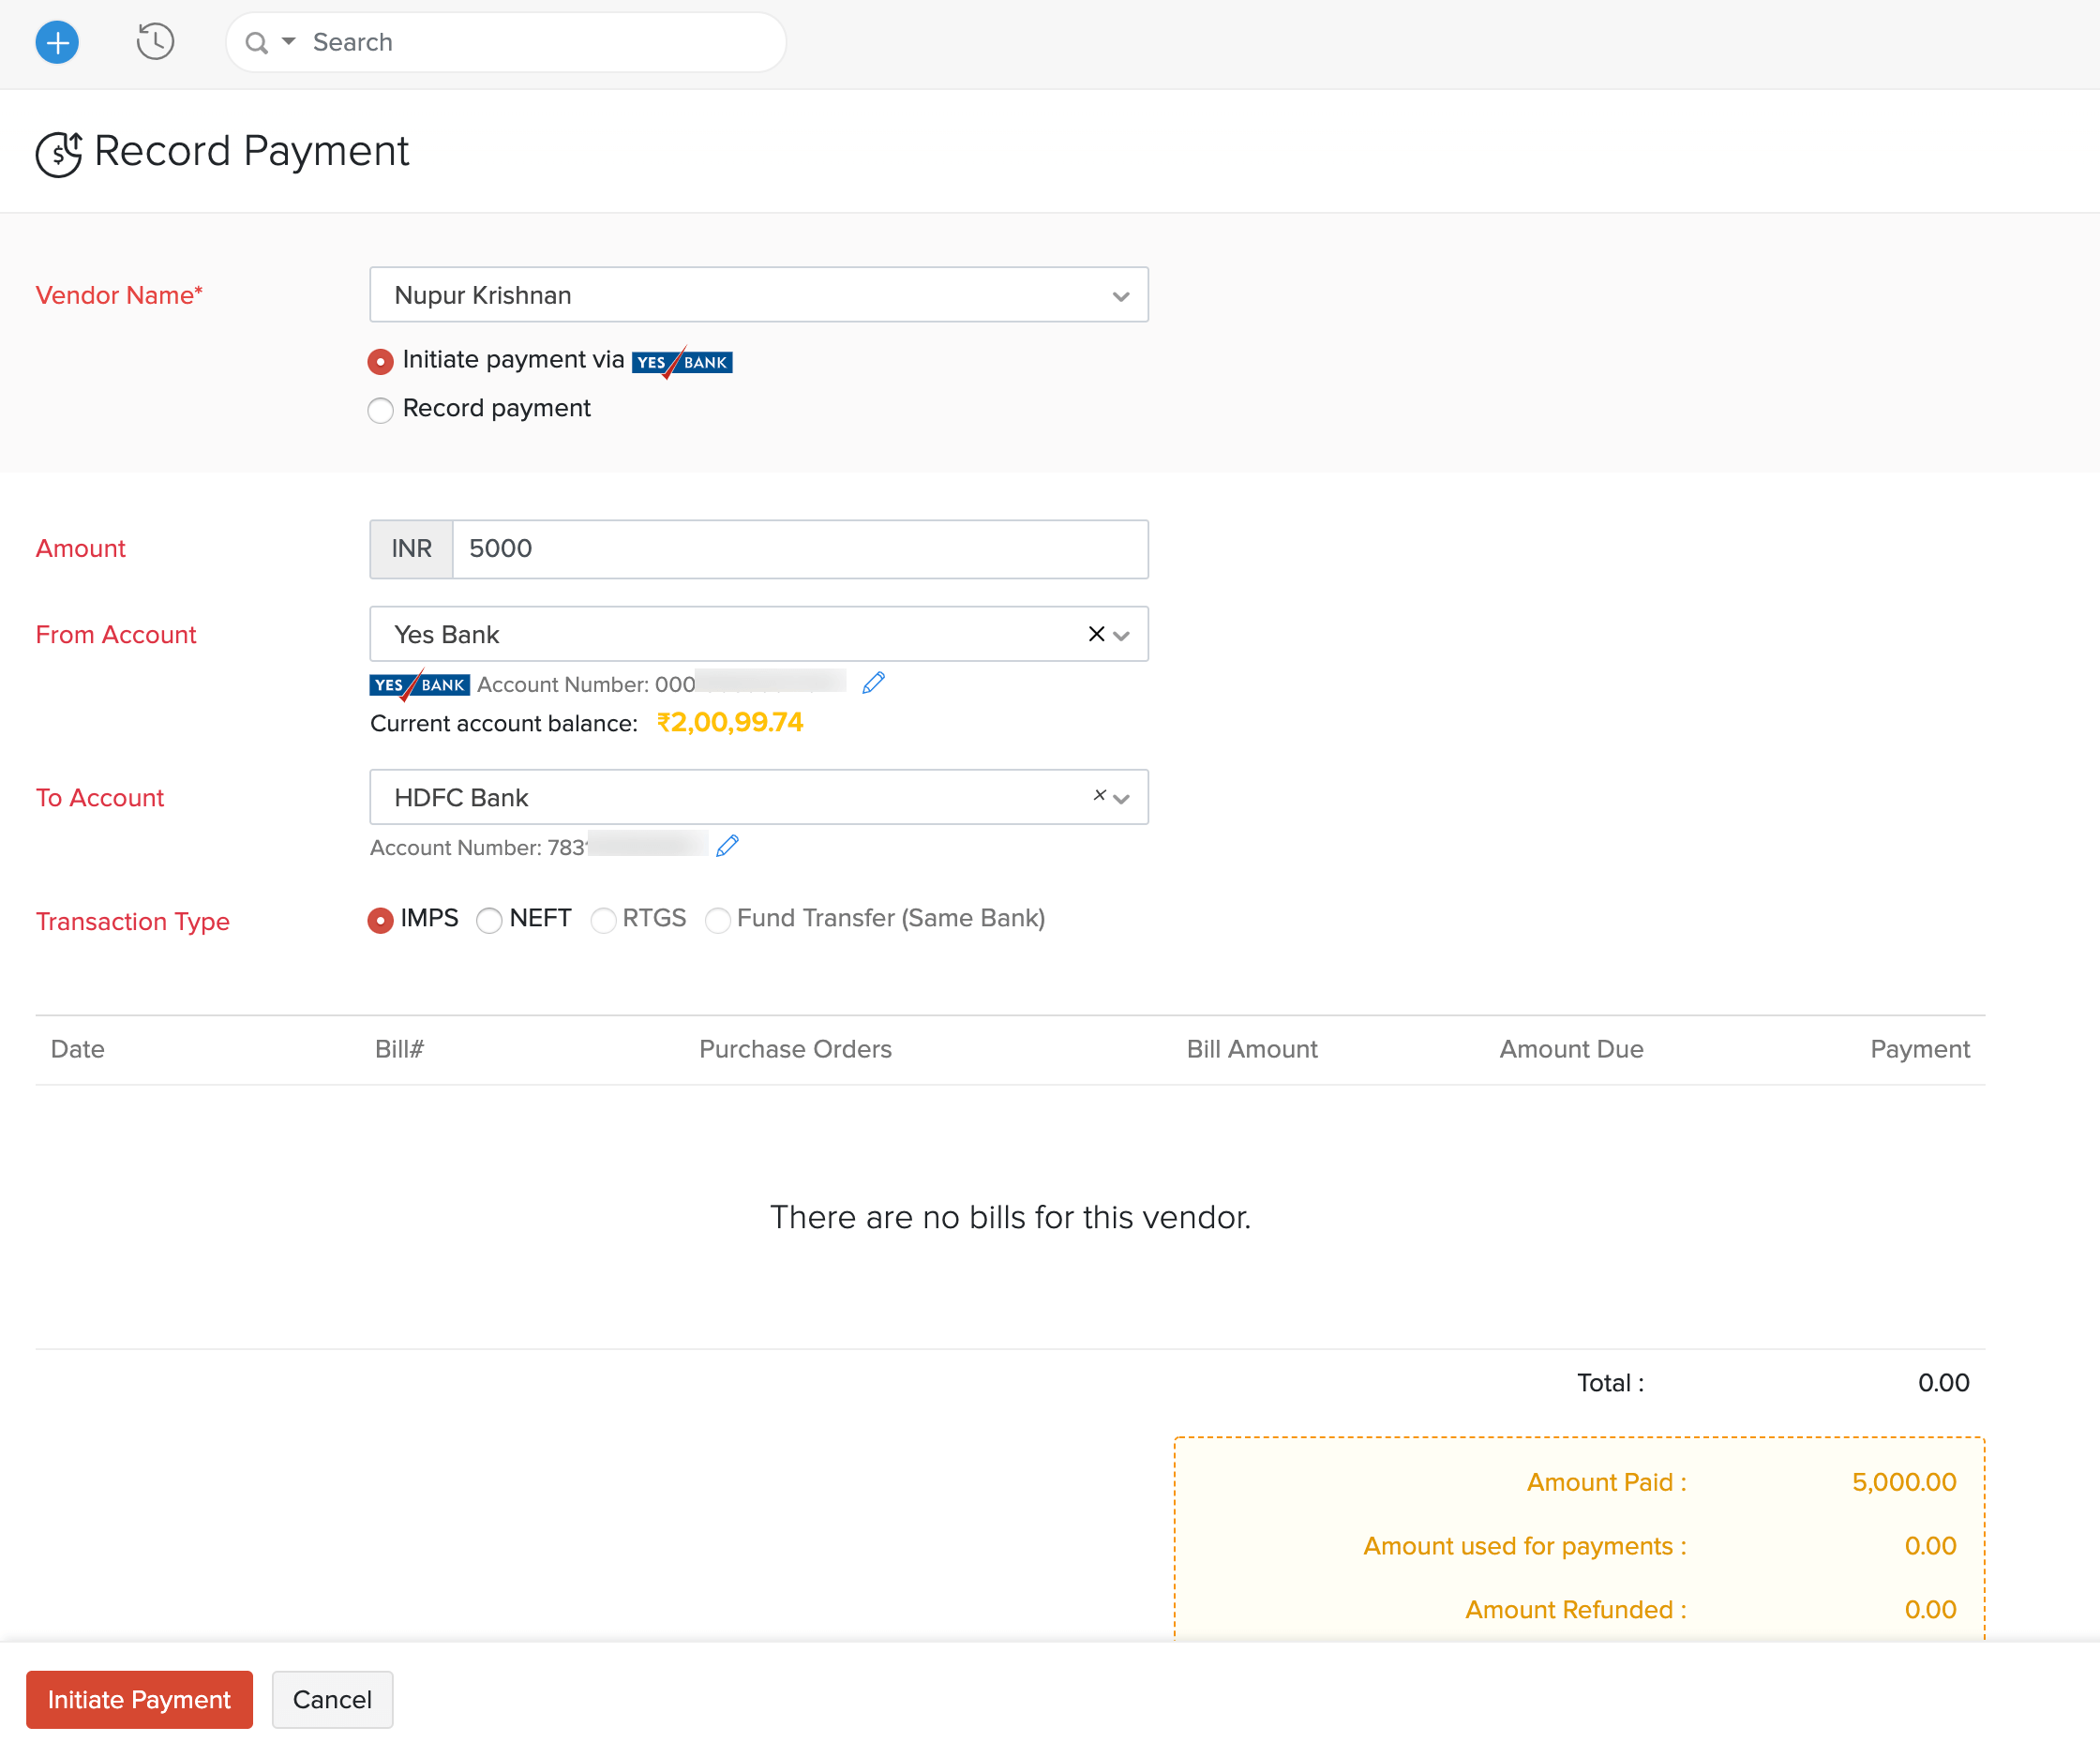
Select the vendor for whom you would like to make payment and select the option Initiate Payment via Yes Bank.
-
Enter the Amount to be paid.
-
Select the account from which you want to make the payment in the From Account option.
-
Select the To Account and the Transaction Type.
-
Verify your details and click Initiate Payment.
-
Click Yes, I’m Sure in the confirmation popup.
-
Enter the six-digit Secret PIN that you had configured during the integration setup.
-
Click Submit and your payment will be initiated.
Payment Statuses
Based on the stage each payment is in, the payment will have the following statuses.
| Status Name | Description |
|---|---|
| Uncleared | The payment is being processed and is yet to be deposited in the vendor’s bank account. It may be due to the NEFT/RTGS payments being initiated on a bank holiday or beyond the bank’s processing time period, in which case, the payment will get cleared on the next working day. |
| Cleared | The payment has been deposited in the vendor’s bank account. |
Disable Yes Bank Integration
You can disable the integration if you do not want to make payments via Yes Bank or want to change the account details.
Warning: Disabling the integration in Zoho Inventory will disable it from other integrated Zoho Finance applications as well. Once disabled, you will not be able to track the status of any uncleared transactions. The direct feed integration will also be deactivated.
To disable the integration:
-
Click the Gear icon in the top right corner and select Online Payments.
-
Open the Vendor Payments tab.
-
Click the Disable button under Yes Bank.

-
Click the I understand, disable my integration button in the popup and the integration between Zoho Inventory and Yes Bank will be disabled. Or, click Contact Support if you’re not sure about disabling the integration.
-
Confirm disabling Yes Bank integration.
Note:If you have any queries regarding the Yes Bank integration, write to us at yesbank-support@zohofinance.com.