
Integrate Zoho Inventory With AfterShip
AfterShip is a third-party shipment tracking service which integrates with Zoho Inventory to fetch and update the real-time status of your shipments from the respective carriers. This serves as alternative to the manual method of tracking shipments for medium to large businesses that ships thousands of orders each day.
Benefits of integrating with AfterShip:
- Supports tracking of over 400+ international couriers worldwide.
- Both the shipper and the receiver will be notified of the shipment status via e-mail or SMS.
- Fetches and updates the status of the shipment in Zoho Inventory in real-time.
How it works
Once you enable real-time tracking on your transaction, AfterShip transmits the tracking ID to the appropriate shipping carrier, receives the status of the shipment, and updates it in Zoho Inventory.
It also simultaneously notifies your customers on the whereabouts of their shipment via email and SMS.
Setting up the integration
Sign in to your Zoho Inventory account.
Go to Settings > Integrations > Shipping.
Zoho Inventory provides two ways to integrate with AfterShip:
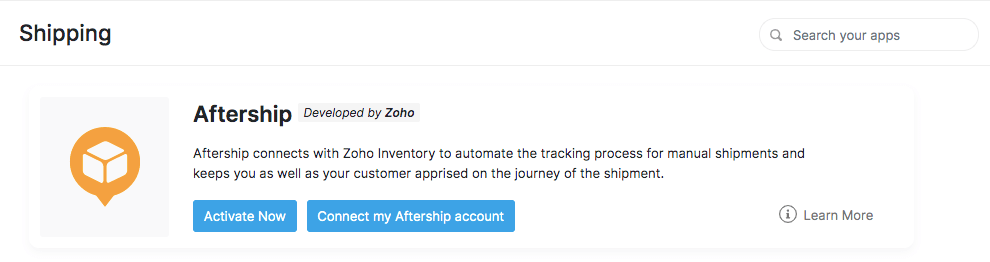
1. Use our readily available account
Note: To comply with the new SCC regulations, this option is not available for customers in the European Union.
- If you don’t have an account with AfterShip, you can use our readily available account to track your shipments.
- Click the Activate Now button to establish the integration instantly. This method does not require you to sign up or verify accounts.
- The tracking charges will be included as part of the Zoho Inventory subscription plan.
Note: Zoho Inventory only shares the tracking ID, carrier name and shipper account number (for selective carriers) with AfterShip. In this case, you will receive all the shipment related emails through Zoho Inventory and not AfterShip. This will help safeguard the personally identifiable information of your clients.
2. Connect your AfterShip account
Already with AfterShip? It just takes a couple more steps to get started.
- Click the Connect my AfterShip account button.
- Paste the API key in this space and proceed to connect.
- You can generate the API key by following the procedure as stated in this link.
Benefits:
- You can view the list of shipments that are marked for tracking in your AfterShip account.
- You will be able to send both email and SMS notification to your customers.
- You can customize your email and SMS content as you see fit.
Note: If you choose to integrate your AfterShip account, the charges incurred will be settled by you as a direct payment to AfterShip.
Warning: Zoho Inventory shares yours and your customers’ contact information, the shipment details as well as your shipper account number (for selective carries) with AfterShip. In this case, both you and your customer will receive all shipment related updates directly from AfterShip. Duly note that Zoho Inventory is not responsible for any information shared post integrating with AfterShip.
Tracking a Shipment
Note: You can only track manual shipments using this integration.
To track a shipment in Zoho Inventory:
Open a confirmed sales order.
Go to Create and select Ship > Ship Manually. A New Shipment page opens up.
Check the option that says ‘Track this shipment in real-time?’. Doing so will populate all the AfterShip supported professional carriers.
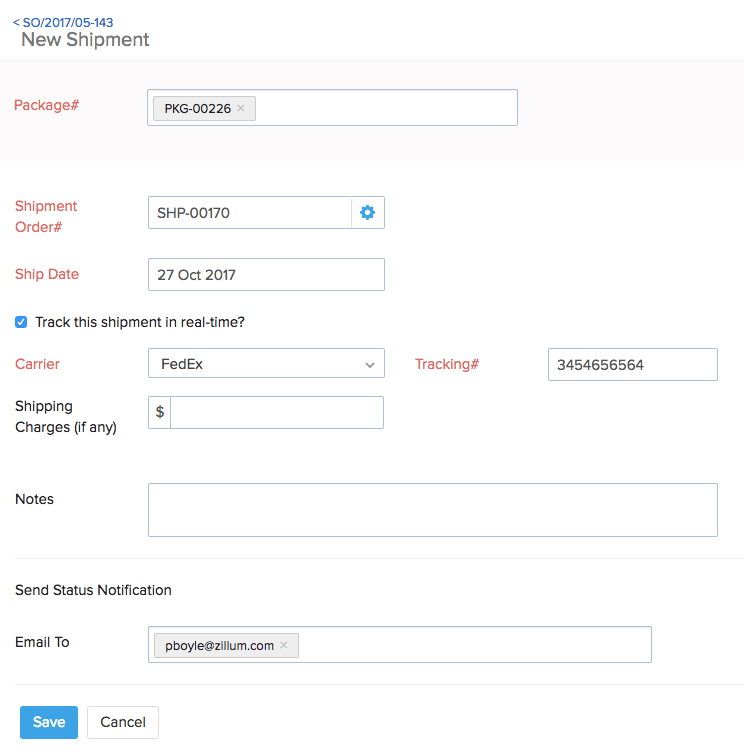
Find and select the appropriate carrier and enter the Tracking ID provided by them.
Specify the contact details of the customer to which the status notifications should be sent.
Fill up any other essential details and hit Save to create a package slip with the tracking ID and shipment details.
If you would like to enable tracking for an existing shipment:
Open an untracked shipment.
Click on the Enable real-time tracking option.
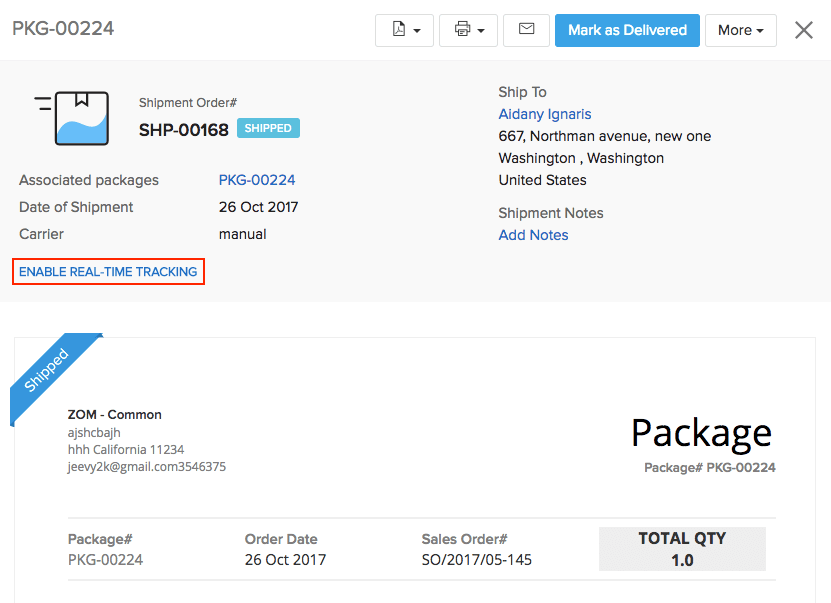
Provide the tracking details.
Specify the contact details of the customer to which the status notifications should be sent.

Click Save to start tracking the shipment.
Viewing the Shipment Status
To view the status of a tracked shipment:
Open a tracked shipment.
Click the View Tracking Status option. (Note: The same button appears as Shipment Timeline for shipments that are marked as Delivered.)
A tab opens on the right where you can view the current location and the complete timeline of a shipment.
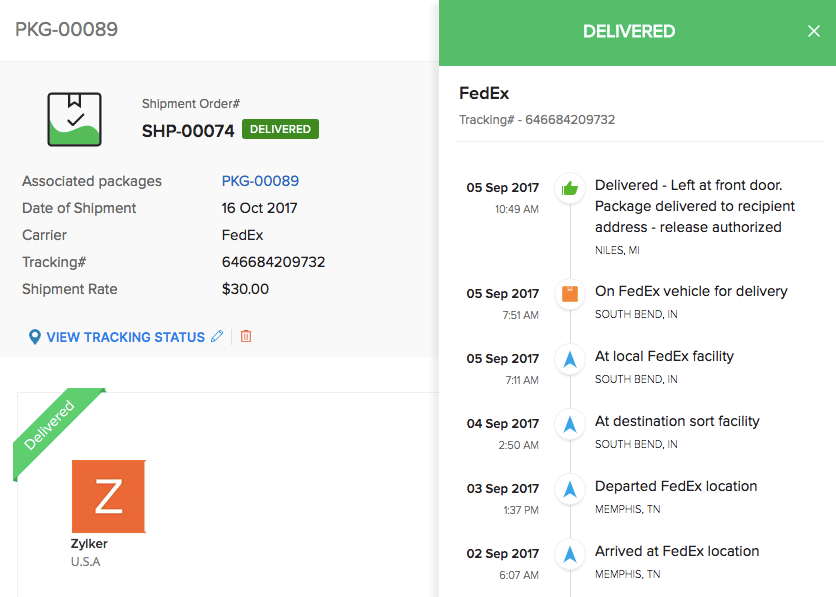
You can also click the Tracking URL to view the status of your shipment directly on the carrier’s website.
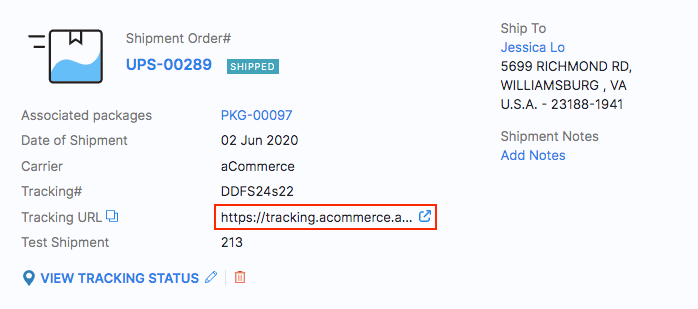
Note: When the shipment is delivered, AfterShip automatically marks the status as Delivered in Zoho Inventory. If the status is not updated due to some unexpected reasons, you can manually mark it as Delivered.
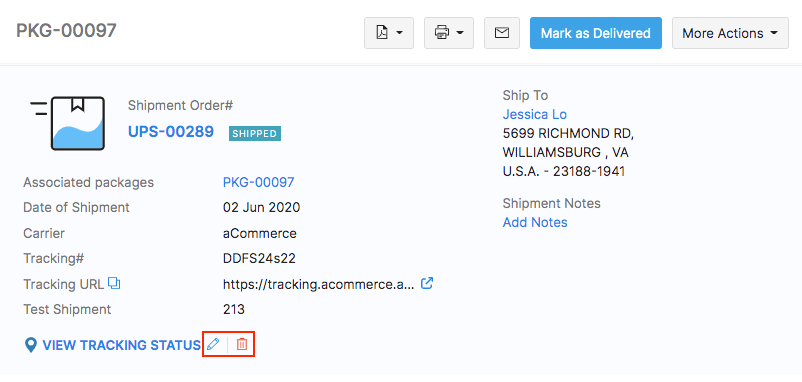
Updating/Deleting the AfterShip Tracking Details
You can update or remove the AfterShip tracking details such as Carrier, Tracking Number, Shipper Account Number, and Tracking Key for your shipped packages in Zoho Inventory.
To edit the tracking details:
Go to the Packages module on the left sidebar.
Open an AfterShip tracked shipment under Shipped Packages.
Click the Pencil icon next to the Shipment In Transit option.
Update the tracking details and click Save.
To delete the tracking details, click the Trash Can icon.
Insight: The changes made will be saved in your AfterShip account on top of the existing tracking details. If needed, you can remove the previous tracking information from your AfterShip account directly. This is not required if you are using the common AfterShip account.
Deactivating the integration
To deactivate this integration,
- Go to Settings > Integrations > Shipping.
- Under AfterShip, click the Deactivate button.