More Actions on Items
Edit Item Details
To edit the details of an item:
- Go to the Items module under *Items from the left sidebar.
- Click to open the item you wish to edit.
- Click the
 icon on the top of the item page.
 - Make the necessary changes.
- Click the Save button on the bottom to successfully update the changes.
Or,
You can also modify the item details while creating a transaction.
- Open a transaction of your choice (sales order, purchase order, invoice or bill).
- Go to the Item Details section.
- Add an item to the transaction.
- Click the
icon next to the line item.
- Make changes to the item.
- Click Save and Update Line Item if you want to update the changes in the transaction as well as in the item details page. Or, click Save if you want to update the changes only in the item details page.
Apply Filters on Items
To apply a filter:
Go to the Items module under Items from the left sidebar.
Select the filter tab present in the top-left corner.
Choose a filter.

Doing this will display a narrowed down view of the module.
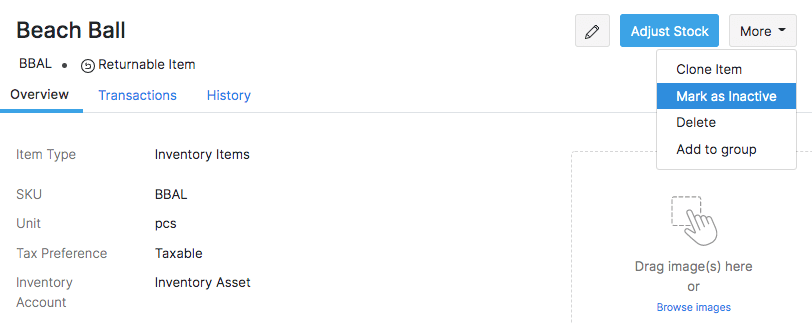
Deactivate & Reactivate Items
If you wish to delete an item but you have a lot of transactions associated with it which makes it impossible to do so, you can opt to deactivate the item instead. Once you mark an item as Inactive in Zoho Inventory, you’ll no longer be able to add it to your new transactions.
To mark an item as inactive:
Go to the Items module under Items from the left sidebar.
Open the item you want to deactivate.
Click the More button on the top right corner of the item details page.
Select the Mark as Inactive option from the dropdown. The item becomes inactive.
To reactivate the item, click More > Mark as Active. It’ll once again be available to use in transactions.
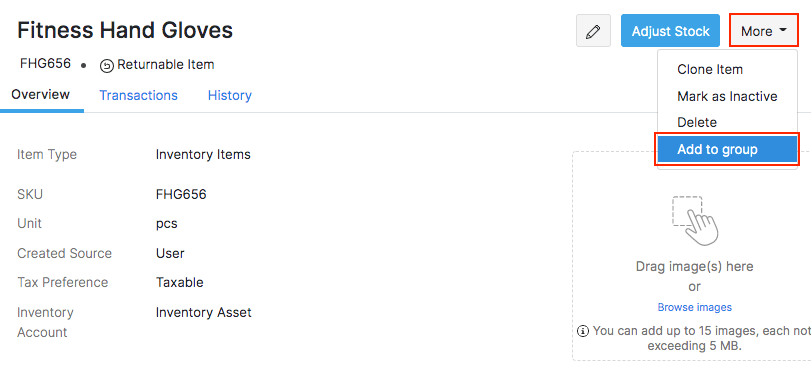
Add Item to a Group
To add an individual item as part of a new or an existing item group:
Go to the Items module under Items from the left sidebar.
Click the item name you wish to add to a group.
Click the More button on the top right corner and select the Add to Group option.
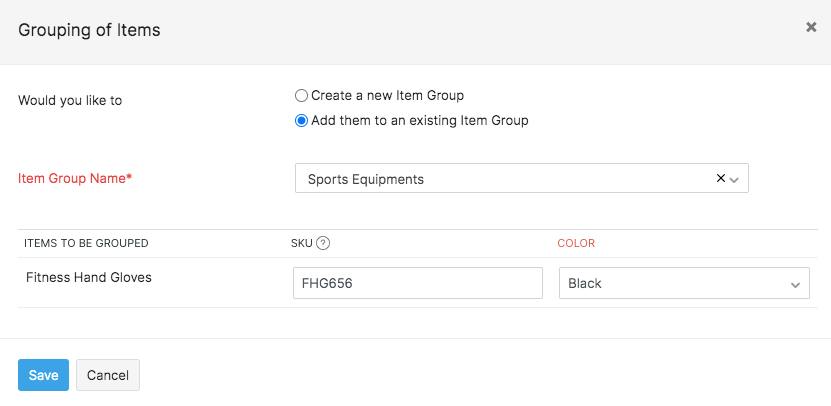
Choose whether you want create a new item group or add it to an existing group.
If you’re creating a new item group, enter the item group name, unit, SKU and click Save.
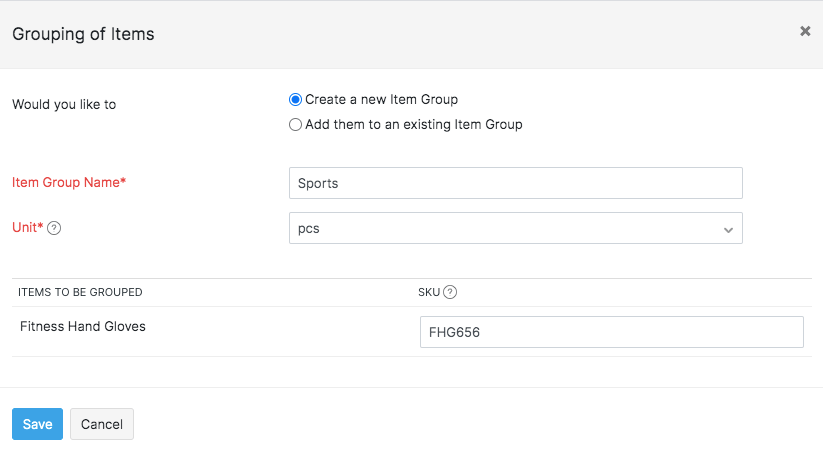
If you’re adding it to an existing group,
- Choose the item group to which you want to add the item.
- Enter the SKU and choose the attributes pertaining to the item group. Make sure the attributes are not identical to any item already present in the group.
- Click Save.
The item will now become a part of the selected/new item group.
Adjust Stock for an Item
To adjust the quantity or value for an item in Zoho Inventory,
Go to the Items module under Items from the left sidebar.
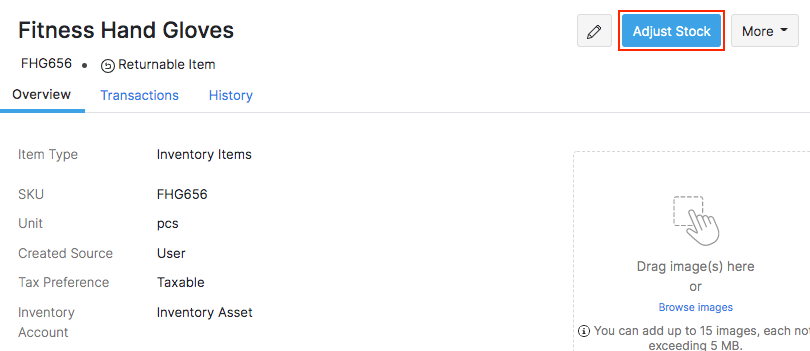
Click the item name whose quantity or value you want to adjust.
Click the Adjust Stock button on the top.
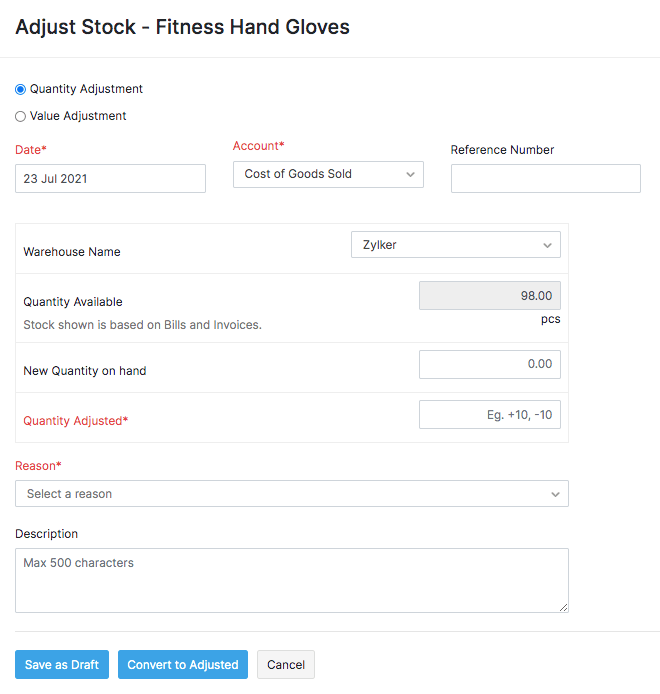
Select whether you want to make a quantity or a value adjustment.
To make a quantity adjustment,
- Select the Date and Account for the adjustment.
- Select the warehouse in which this stock adjustment should be reflected.
- Enter either the New Quantity in Hand directly or enter the Quantity Adjusted.
- Select the reason for making this adjustment.
- Save it as draft or adjust it immediately.
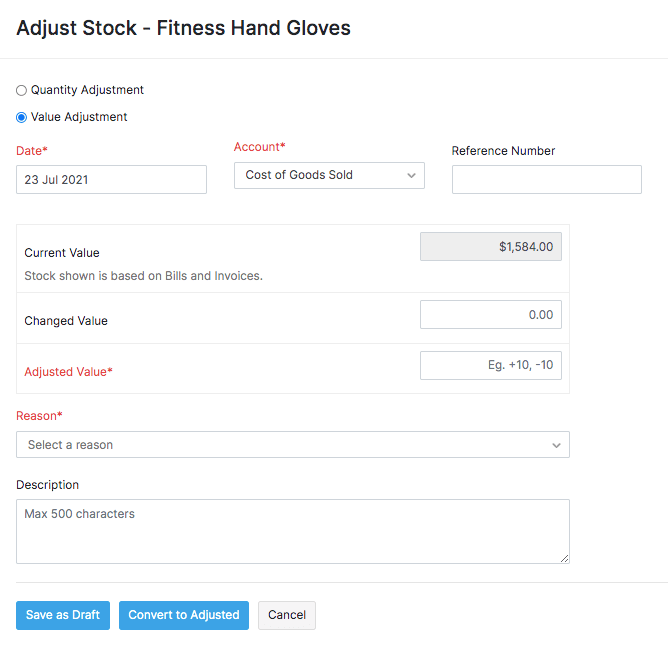
To make a value adjustment,
- Select the Date and Account for the adjustment.
- Enter either the Changed Value or the Adjusted Value.
- Select the reason for making this adjustment.
- Save it as draft or adjust it immediately.
Learn more about Inventory Adjustments in Zoho Inventory.
Reorder Items from Vendor
It is crucial to be aware when your stock is going low so your can fulfil your orders on time and keep a loyal customer base. When an item goes to the low stock zone, you can find out using two ways:
- You can list them using the Low Stock filter.
- Set a reorder level and receive a notification when the stock level goes low.
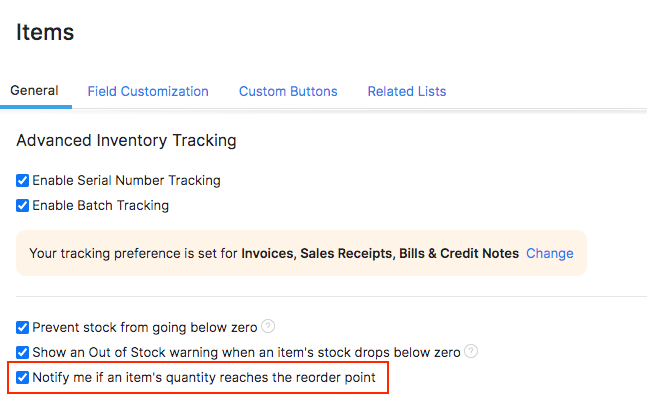
Setting low stock alerts
To enable low stock alerts:
Go to Settings in the top right corner.
Scroll down to Module Settings. Click Items under General.
Select the option Notify me if an item’s quantity reaches the reorder point.
Click Save.
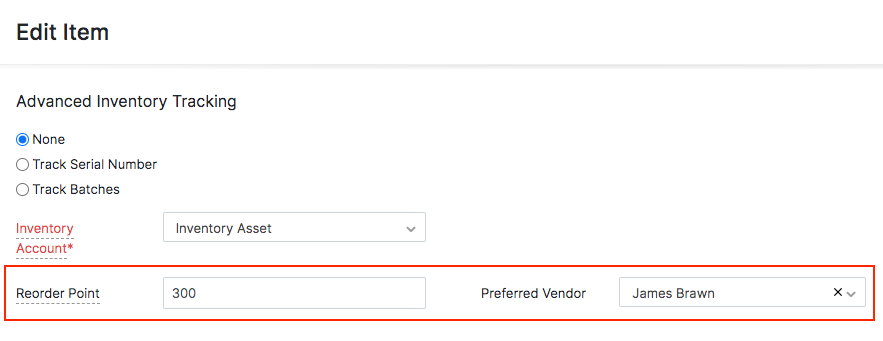
To set reorder level for an item:
Go to the Items module under Items from the left sidebar.
Select a preferred item/composite item.
Click the Edit button.
Update the Reorder Level and Preferred Vendor fields.
Click the Save button. Henceforth, you will receive a re-order notification mail whenever this item goes below your set re-order point.
Reordering Items from Preferred Vendor
You can perform a re-order to stock up the supplies that you are low on.
To do so,
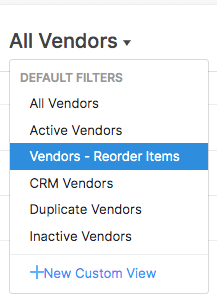
Go to the Vendors module under Purchases from the left sidebar.
Under the filter tab, choose the filter Vendor - Reorder Items to list out all vendors who are associated with items whose stock is below the re-order point.
Select a vendor.
Click the Order Now option under their contact information.
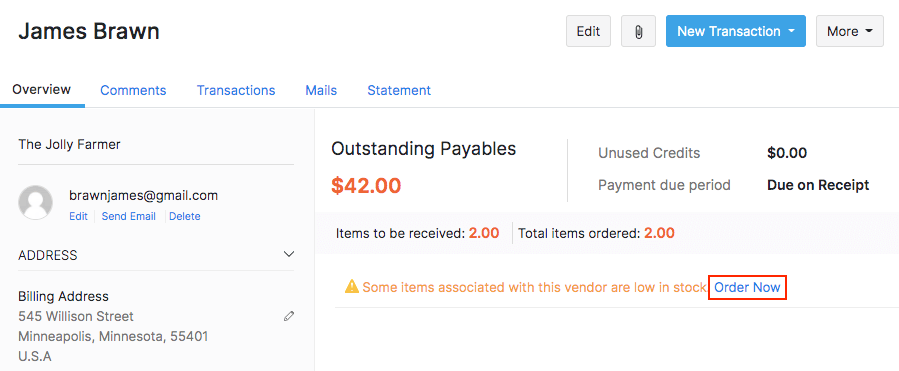
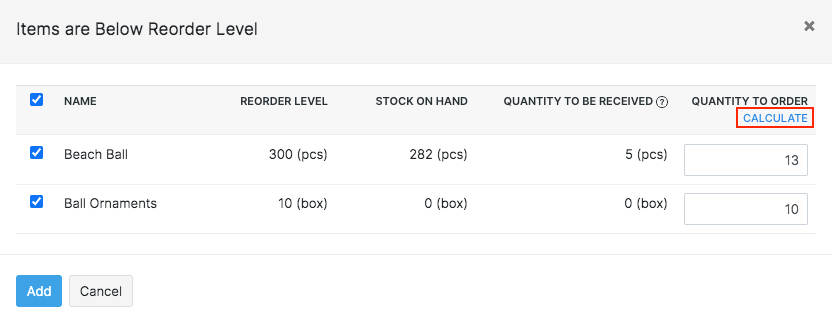
You’ll be redirected to a new purchase order page along with a pop-up that has all the low stock items associated to this vendor.
Select the items of your choice and enter the quantity to order. If you have trouble determining the required quantity, click the Calculate option.
Add the items to the purchase order and send it to your vendor.
Clone Item
Cloning helps you create an item quickly without having to enter all the details from scratch. This feature comes in handy when you want to:
- deactivate an item and create a new one in its place.
- create a new item with properties that are similar to the existing one.
To clone an item:
Go to the Items module under Items from the left sidebar.
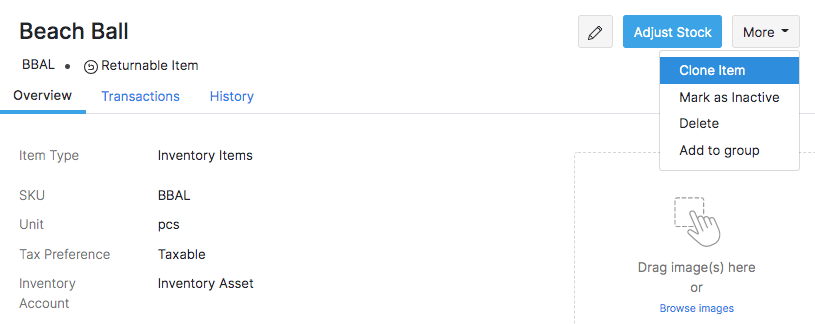
Open an item that you want to clone.
Click on More and select Clone Item.
The item details will be pre-filled. Make the necessary changes.
Scroll down and click Save to create the item.
Export Items
To export items from your Zoho Inventory account:
Go to the Items module under Items from the left sidebar.
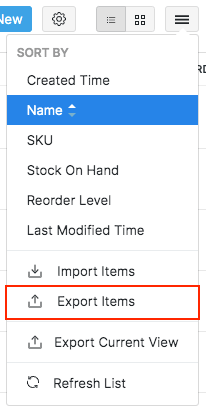
Click on the Menu icon on the top right corner of the page.
Select Export Items option from the dropdown.
Filter the items you wish to export by selecting one of the following options:
- All: Export all items.
- Custom: Set a custom date range and export the items created within this date range.
Select the format in which you want to download your export file.
Enter a password to secure your export file if needed.
Choose whether you want to include the batch numbers and serial numbers of the items in the export file.
Click the Export button in the bottom. The file will be downloaded to your device.

Delete Item
Before you delete an item you have to ensure that it has no transactions associated with it. If there are some transactions, then you have to delete them before you delete an item. Even opening stock and stock adjustments are considered as transactions.
To delete an item in Zoho Inventory:
Go to the Items module under Items from the left sidebar.
Select the item to be deleted.
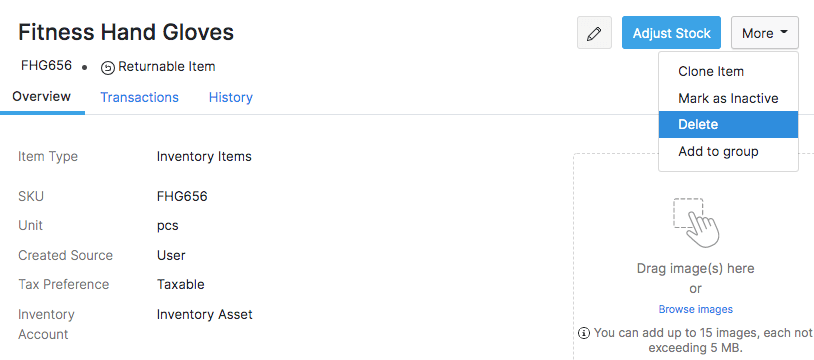
Click on the More button on the top of the page.
Select the Delete option in the drop down.
Confirm your action by clicking Delete again in the pop-up.
Deleting items in bulk
You can also delete multiple / all items at once in Zoho Inventory. To do so,
- Go to the Items module under Items from the left sidebar.
- In the items list view, select the items that you wish to delete.
- Click the button with the trash can icon on the top of the page.
The items will be deleted, provided they do not have any transactions associated with them.
Update New GST Rates
You can view and update the new GST tax rates for both items and composite items, in accordance with the revised four-slab (5%, 12%, 18%, and 28%) GST structure introduced by the Indian Government on September 22, 2025
To update the item’s tax rate,
- Go to the Items module under Items from the left sidebar.
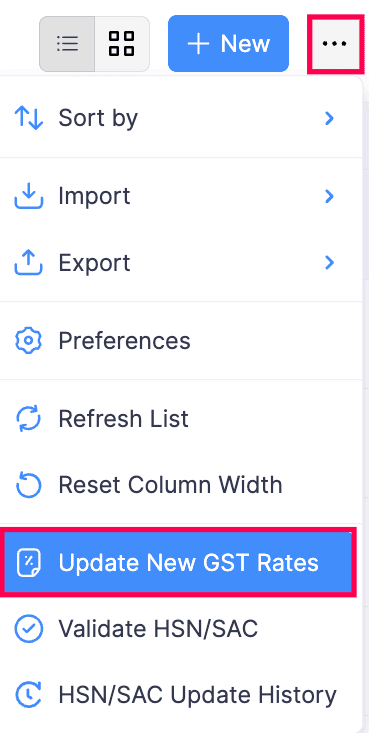
- Click the More icon on the top right corner of the page.
- Select Update New GST Rates from the dropdown.
Click Refresh List to preview the recently added or updated items.
Check the Update tax rated for the items in my recurring transactions box if you have items with the old tax rates in your recurring invoices.
Click Schedule Update Now to update your tax rates automatically.

- Click Download as XLS file in the top right corner above the item table to download the GST summary of items in an XLS file.
Validate HSN/SACs in Bulk
You can verify if the HSN (for goods) or SAC (for services) codes for your items are correct, and update them in bulk.
To validate the HSN/SAC in bulk:
Go to the Items module under Items from the left sidebar.
Click the More icon on the top right corner of the page.
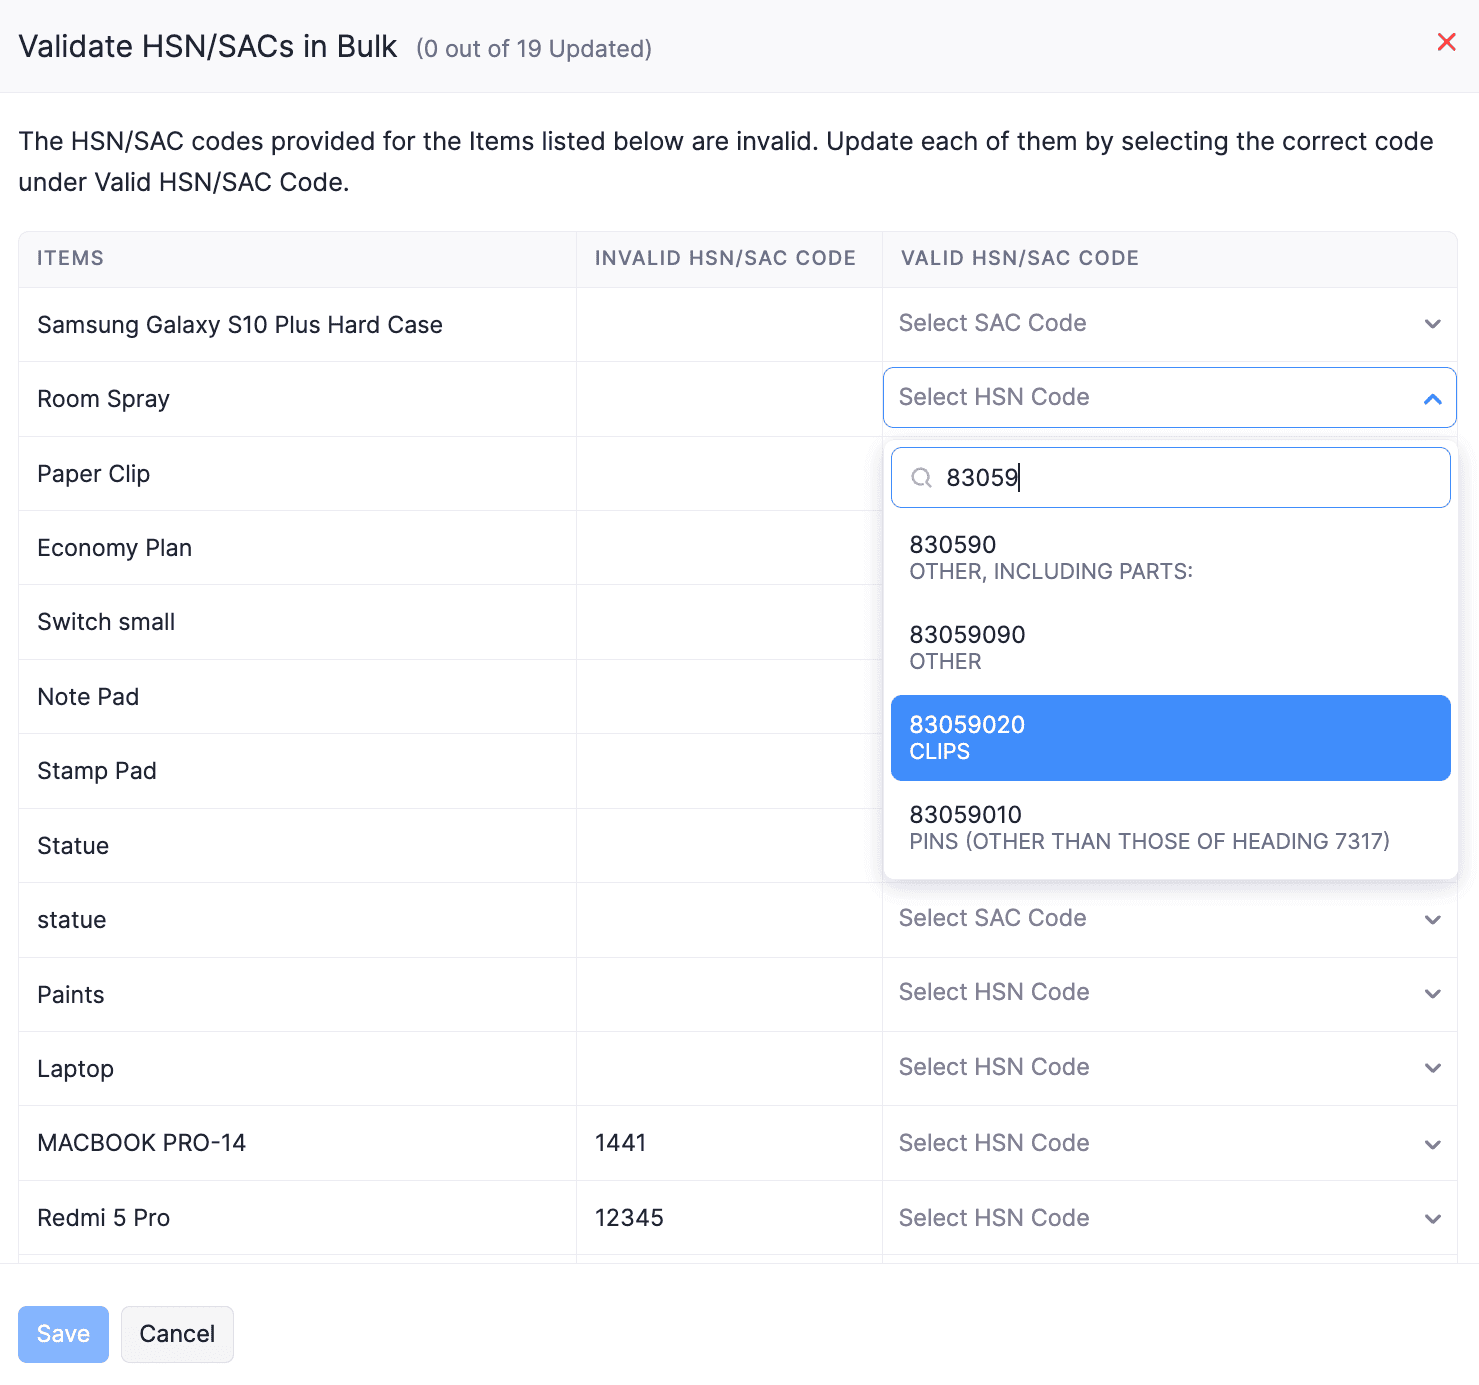
Click Validate HSN/SAC from the dropdown to view items with invalid or missing HSN/SAC codes
Select the correct HSN/SAC codes for the items from the dropdown.
Click Save to update the HSN/SAC codes for the listed items.
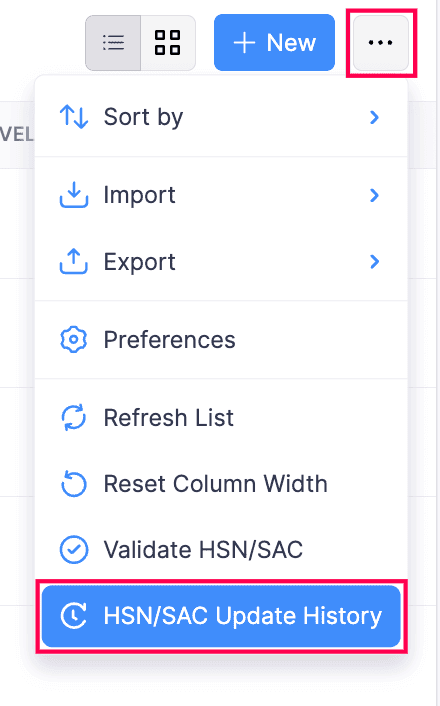
HSN/SAC Update History
You can view the recently updated HSN/SAC codes in the HSN/SAC Update History.
To view the HSN/SAC Update History,
- Go to the Items module under Items from the left sidebar.
- Click on the More icon in the top right corner of the page.
- Select HSN/SAC Update History from the dropdown to see recently updated items