Inventory
Set up e-Invoicing in Zoho Inventory
Setting up e-Invoicing in Zoho Inventory is a one-time process and once completed, you can start generating e-Invoices.
IN THIS PAGE…
Enable e-Invoicing
Here’s how you can enable e-Invoicing in Zoho Inventory:
- Log in to Zoho Inventory.
- Go to Settings, then Preferences.
- Select e-Invoicing from the left menu.
- Enable the e-Invoicing in Zoho Inventory option.
Now e-Invoicing will be enabled for your organisation and you can proceed to connect with the e-Invoicing portal.
Connect with the IRP
The Invoice Registration Portal (IRP) is the e-Invoicing portal to which you need to send your invoice details. The IRP will then issue a unique IRN for each invoice submitted.
To start e-Invoicing, you need to connect Zoho Inventory with the IRP, after which, you can push invoices to the portal easily. The steps involved in connecting to the IRP will vary based on whether you generate e-Way Bills through Zoho Inventory or not.
Connecting to the IRP if you generate e-Way Bills through Zoho Inventory
If you create e-Way Bills directly from Zoho Inventory, you would have connected your organisation with the e-Way Bill portal. The same credentials can be used to log in to the IRP as well. Zoho Inventory will automatically use your e-Way Bill portal credentials to connect you with the IRP.
Connecting to the IRP if you do not generate e-Way Bills through Zoho Inventory
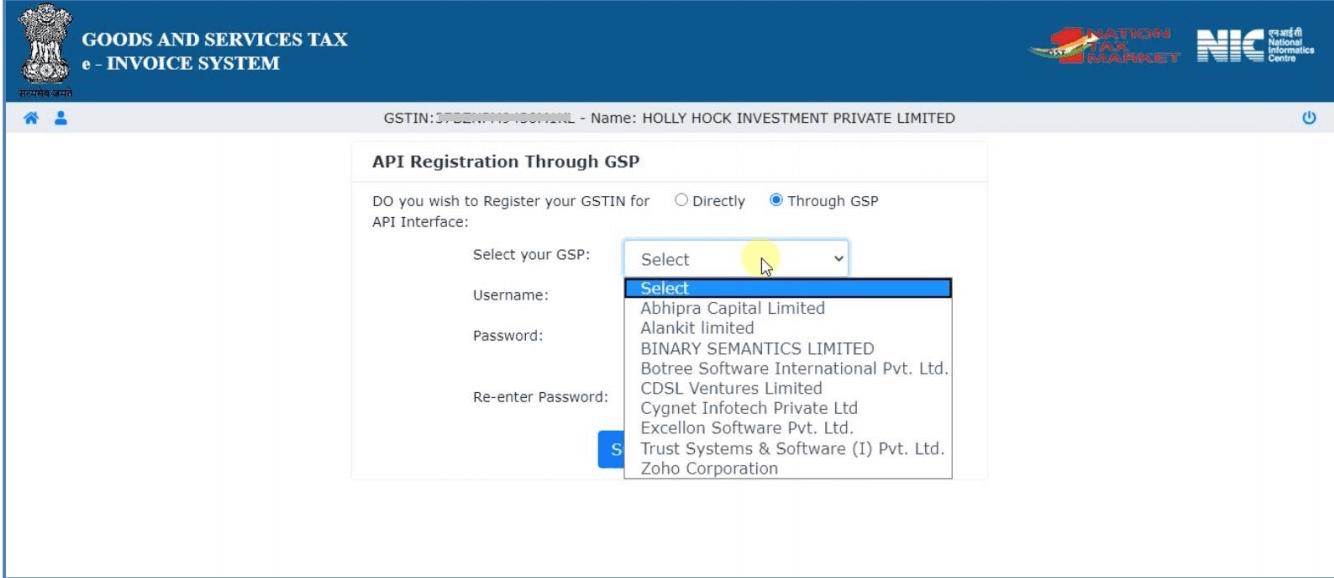
If you’ve not connected Zoho Inventory with the e-Way Bill portal, then you need to generate a username and password by registering Zoho Corporation as your GST Suvidha Provider in the IRP. To do this:
- Log in to the Invoice Registration Portal (IRP).
- Click API Registration from the menu.
- Select the Create API User option under User Credentials.
- Choose the Through GSP option.
- Select Zoho Corporation in the GSP dropdown.
- Enter a Username and Password.
- Re-enter the password.
- Click Submit.
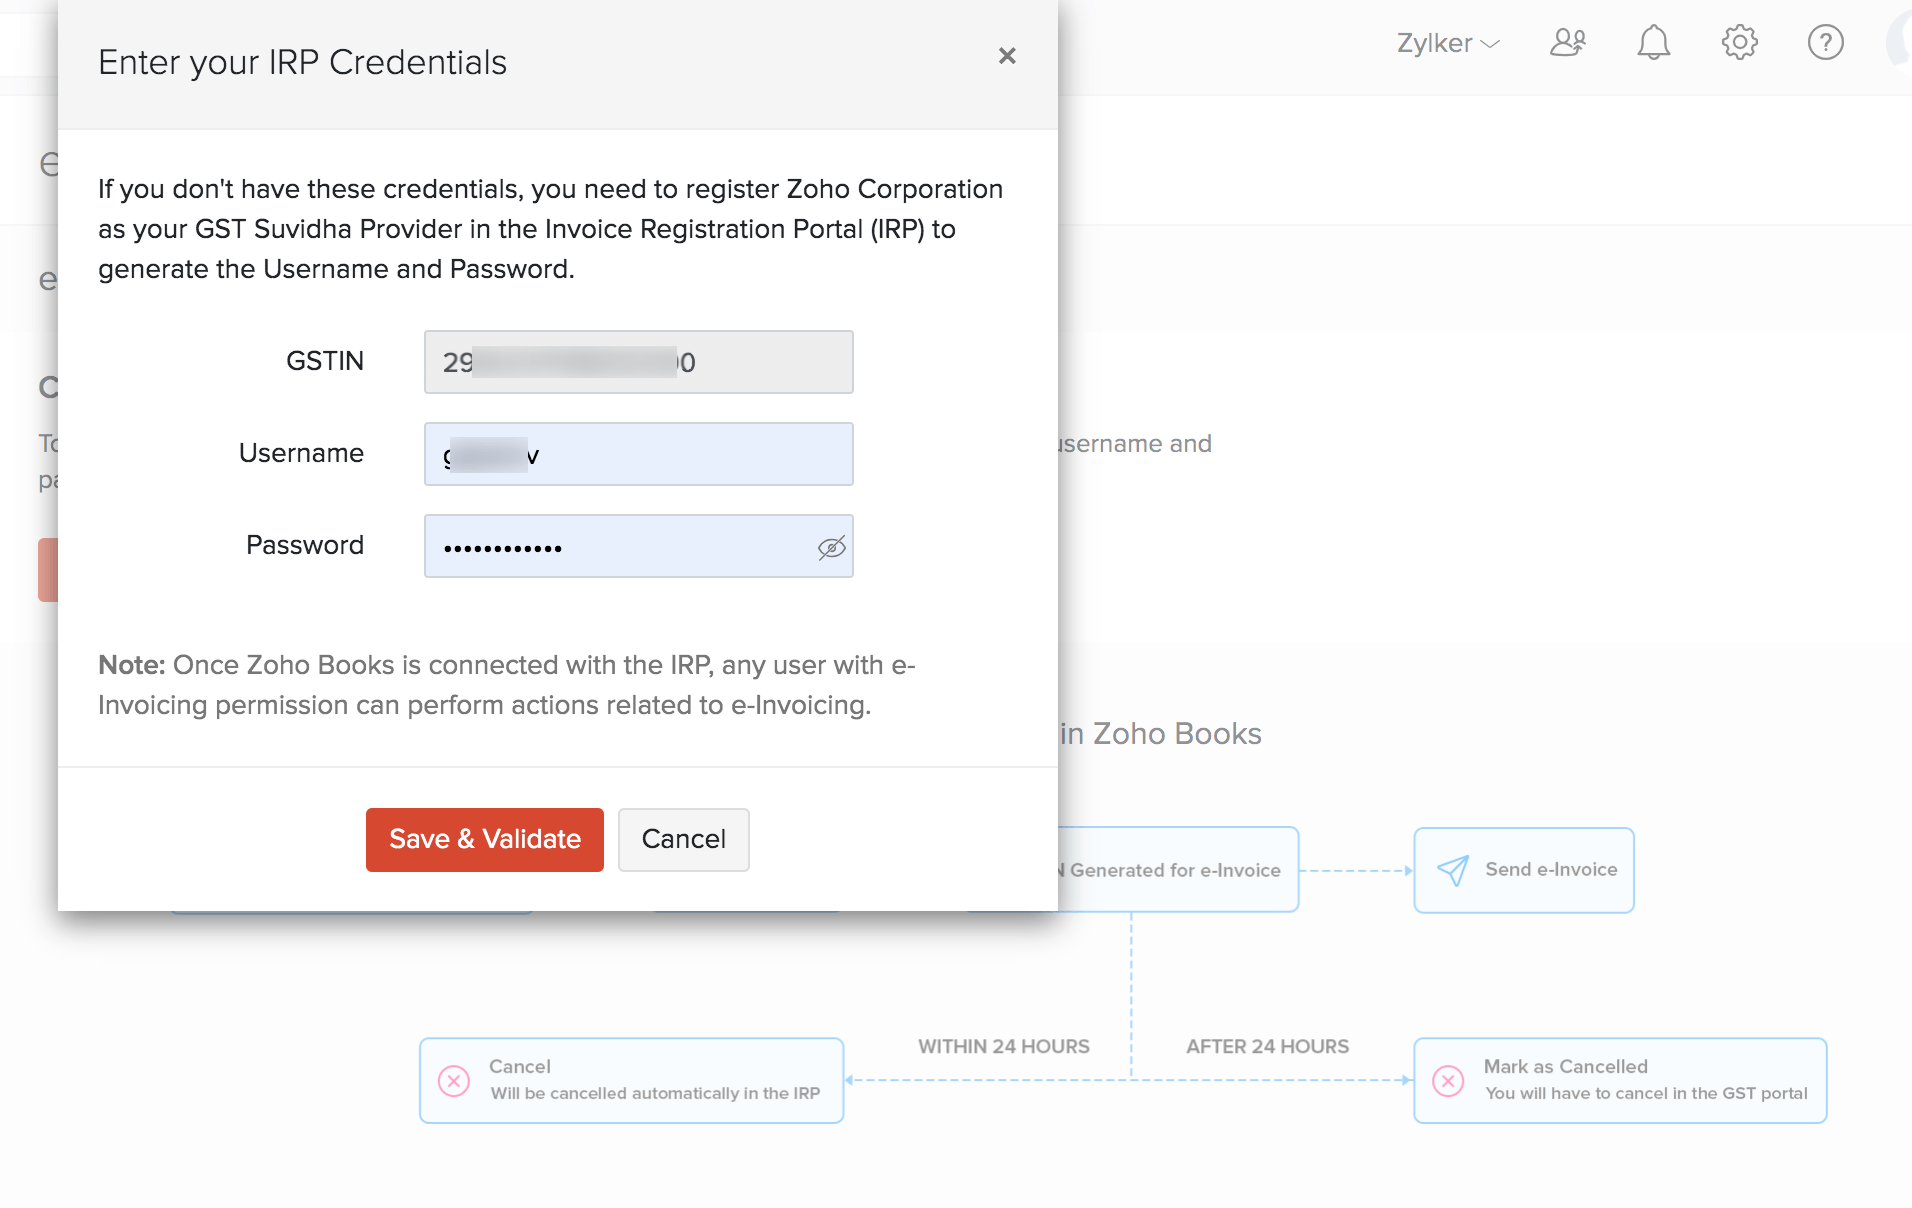
Once completed, Zoho Corporation will be listed under the View tab in the IRP. You can then proceed to connect IRP with Zoho Inventory. To do this:
- Log in to Zoho Inventory.
- Go to Settings, then Preferences.
- Select e-Invoicing from the left menu.
- Click Connect Now.
- Enter the Username and Password that you used while registering Zoho Corporation as your GST Suvidha Provider(GSP) in the IRP.
- Click Save & Validate.
Configure User Permissions
Now that you’ve connected Zoho Inventory with the e-Invoicing portal, you can configure which of your organisation users should have e-Invoicing permissions. For example, you might want only the Sales team to be able to push invoices to the portal and also cancel them if needed. In that case, you can provide this access only to the sales team.
To do this:
- Go to Settings, then Users & Roles.
- Select the Roles tab on top of the page.
- Create a new role or edit an existing one.
- Scroll down to the e-Invoicing section.
- Select the Push and Cancel Transactions option. This option will be enabled for all the Admin users by default.
- Click Save.
You can assign this role as necessary to users.