
Customers & Vendors - Overview
As a business or a freelancer, you’ll have a lot of customers to buy products or services from you. As customers are important to any business, it is essential to save their contact information to create transactions quickly and do business efficiently in the long term. The Customers/Vendors module in Zoho Inventory is where you save the details of your customers and vendors. You can save the details of your customers such as name, email address, phone numbers, billing and shipping addresses, website information and other details in this module. Apart from saving your customer’s information, you can send emails, view customer statements, and create sales transactions for the customer in the contact details page itself. In this document, we’ll learn more about how to make the most of this module.
Creating a Customer/Vendor
There are multiple ways in which you can add new customers/vendors in Zoho Inventory:
- Create Customers from the Customers Module
- Create Vendors from the Vendors Module
- Create Customers/Vendors from a Transaction
1. Creating Customers from the Customers Module
To add a new customer in Zoho Inventory:
Go to the Customers module in the left sidebar.
Click the
 button in the top right corner of the page.
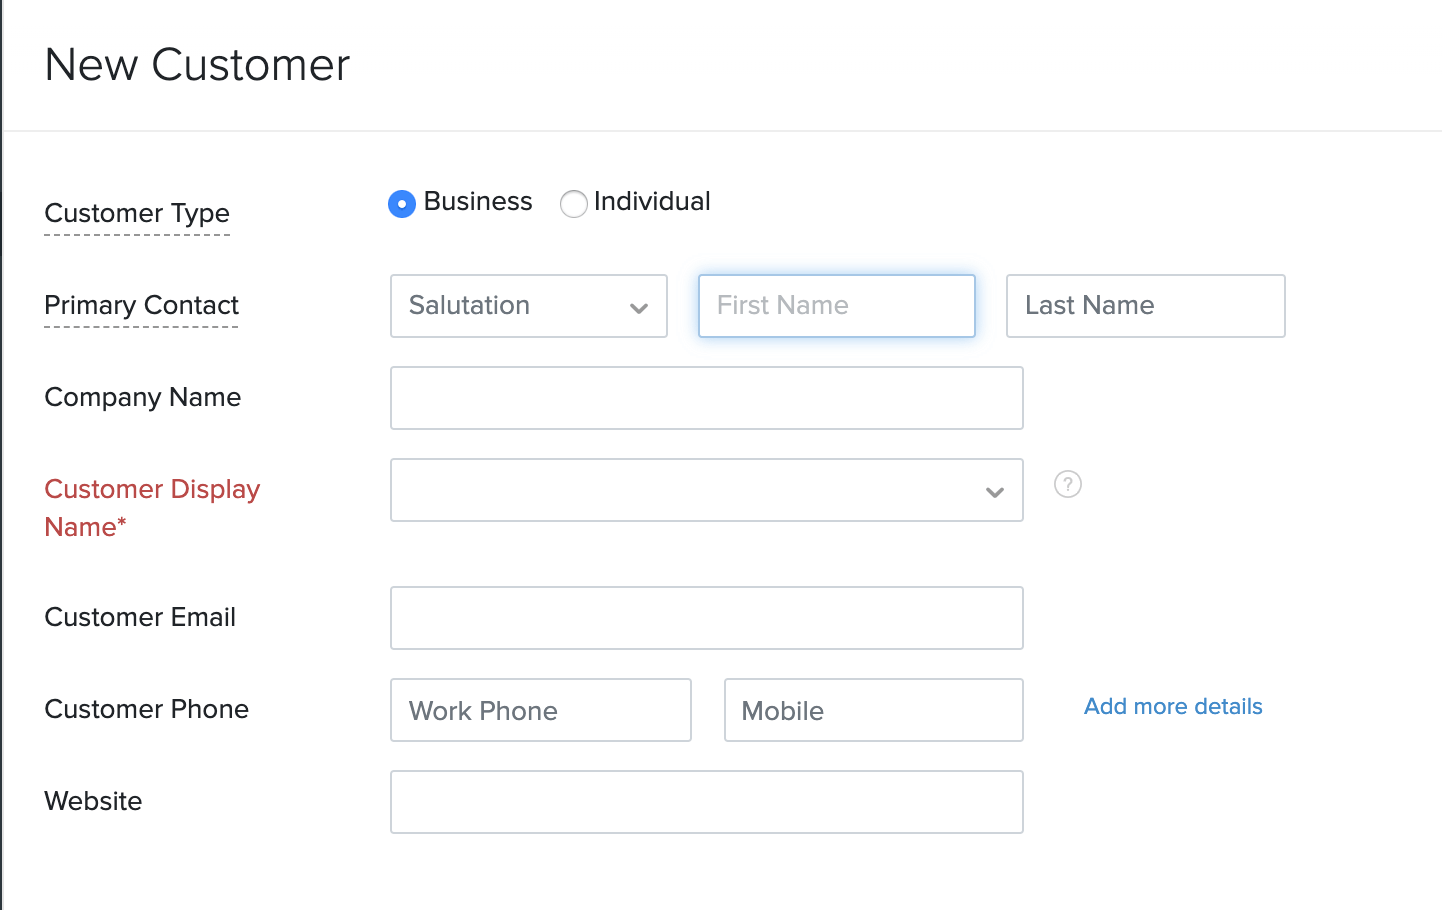
Enter the basic information such as the name of the Customer Type, Primary Contact, Company Name, Customer Display Name, Customer Email, Customer Phone and Website information.
| Fields | Description |
|---|---|
| Customer Type | If your customer is a business, choose Business. If not, choose Individual)(Only for customers) |
| Primary Contact | It refers to the main contact to whom the transactions will be created. |
| Company Name | Here, you can enter the official name of the customer’s company. |
| Display Name | The name that you give here will appear on all your sales and purchase transactions for that customer. |
| You can enter a valid email ID of your customer. All your correspondence with this customer will be directed to this email ID. | |
| Phone | You can add your Customer’s work phone and mobile number here. |
| Website | If your customer has any website, you can mention the URL here. |
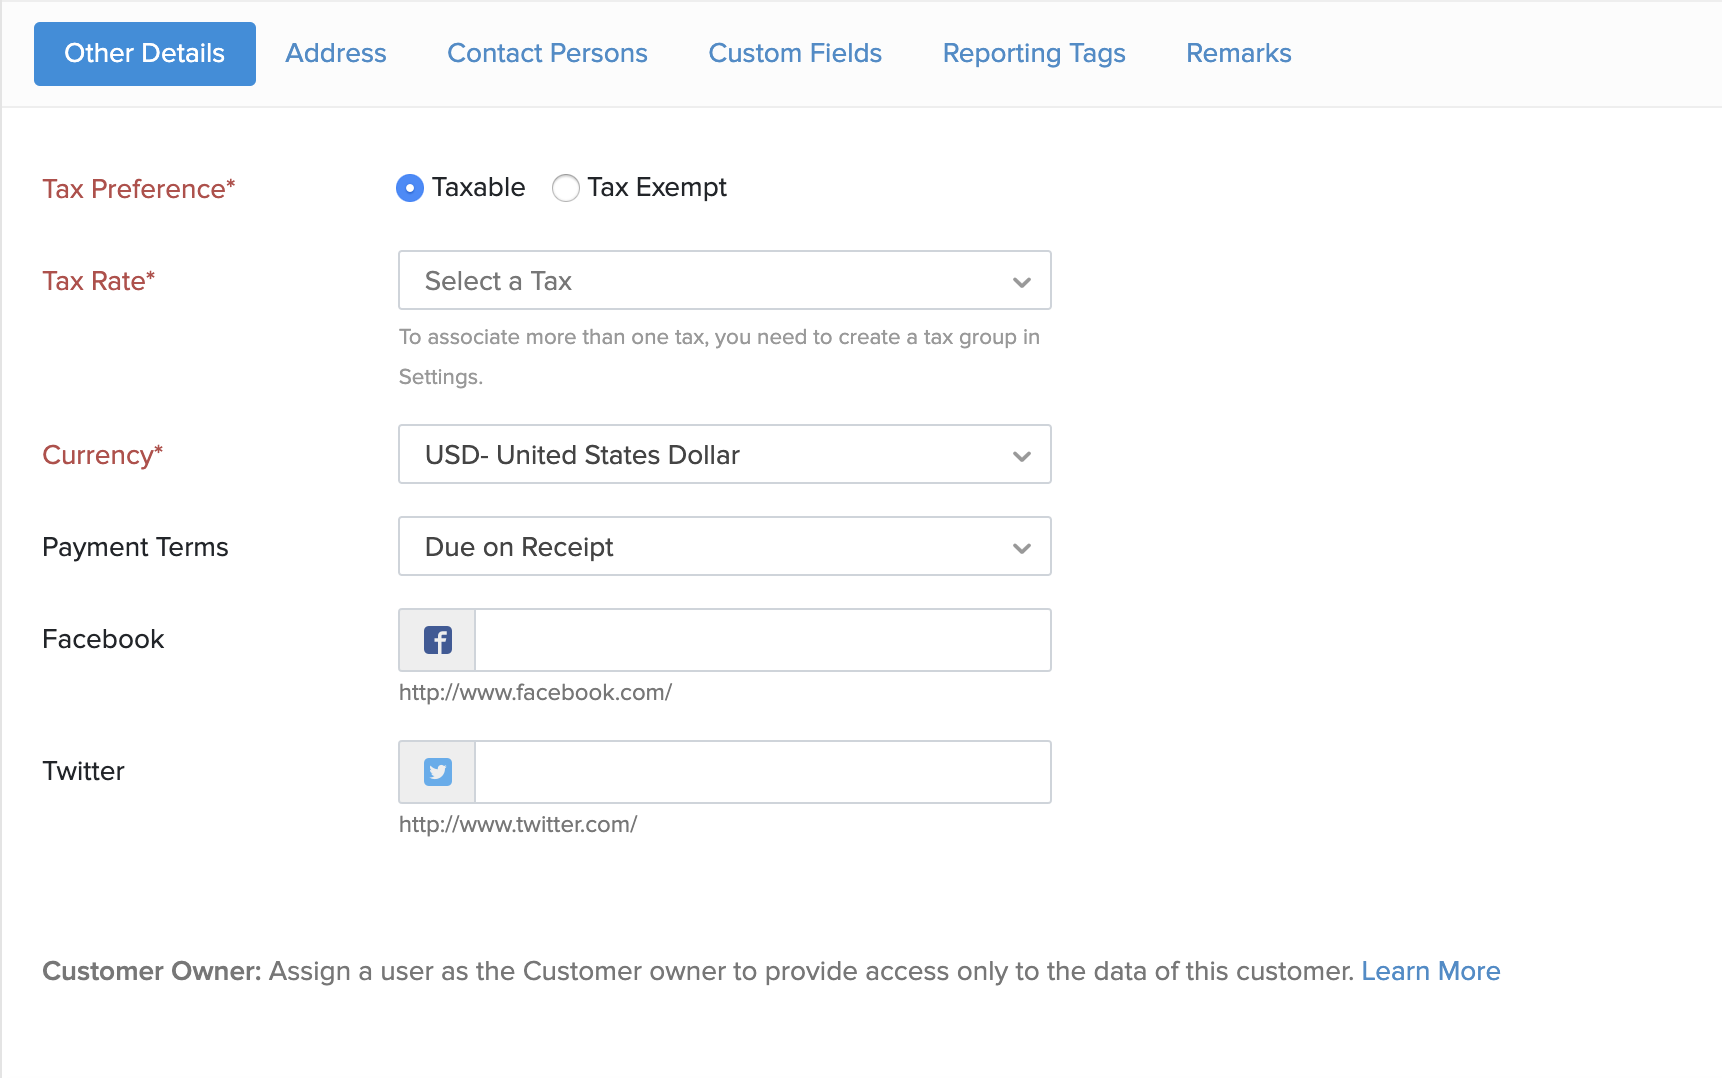
- In the Other Details section below, you can enter customer currency and payment terms. This section also includes provisions to enter the tax details of your customer. If needed, you can also provide your customer’s official social media handle links here.
Insight:You can add additional currencies in the Currency Preferences and you can associate them to a customer.
Pro Tip: If you have an overseas customer to whom you wish to invoice in foreign currency, you can select the customer’s currency from the dropdown. All the transactions created for the customer will be displayed in their currency.
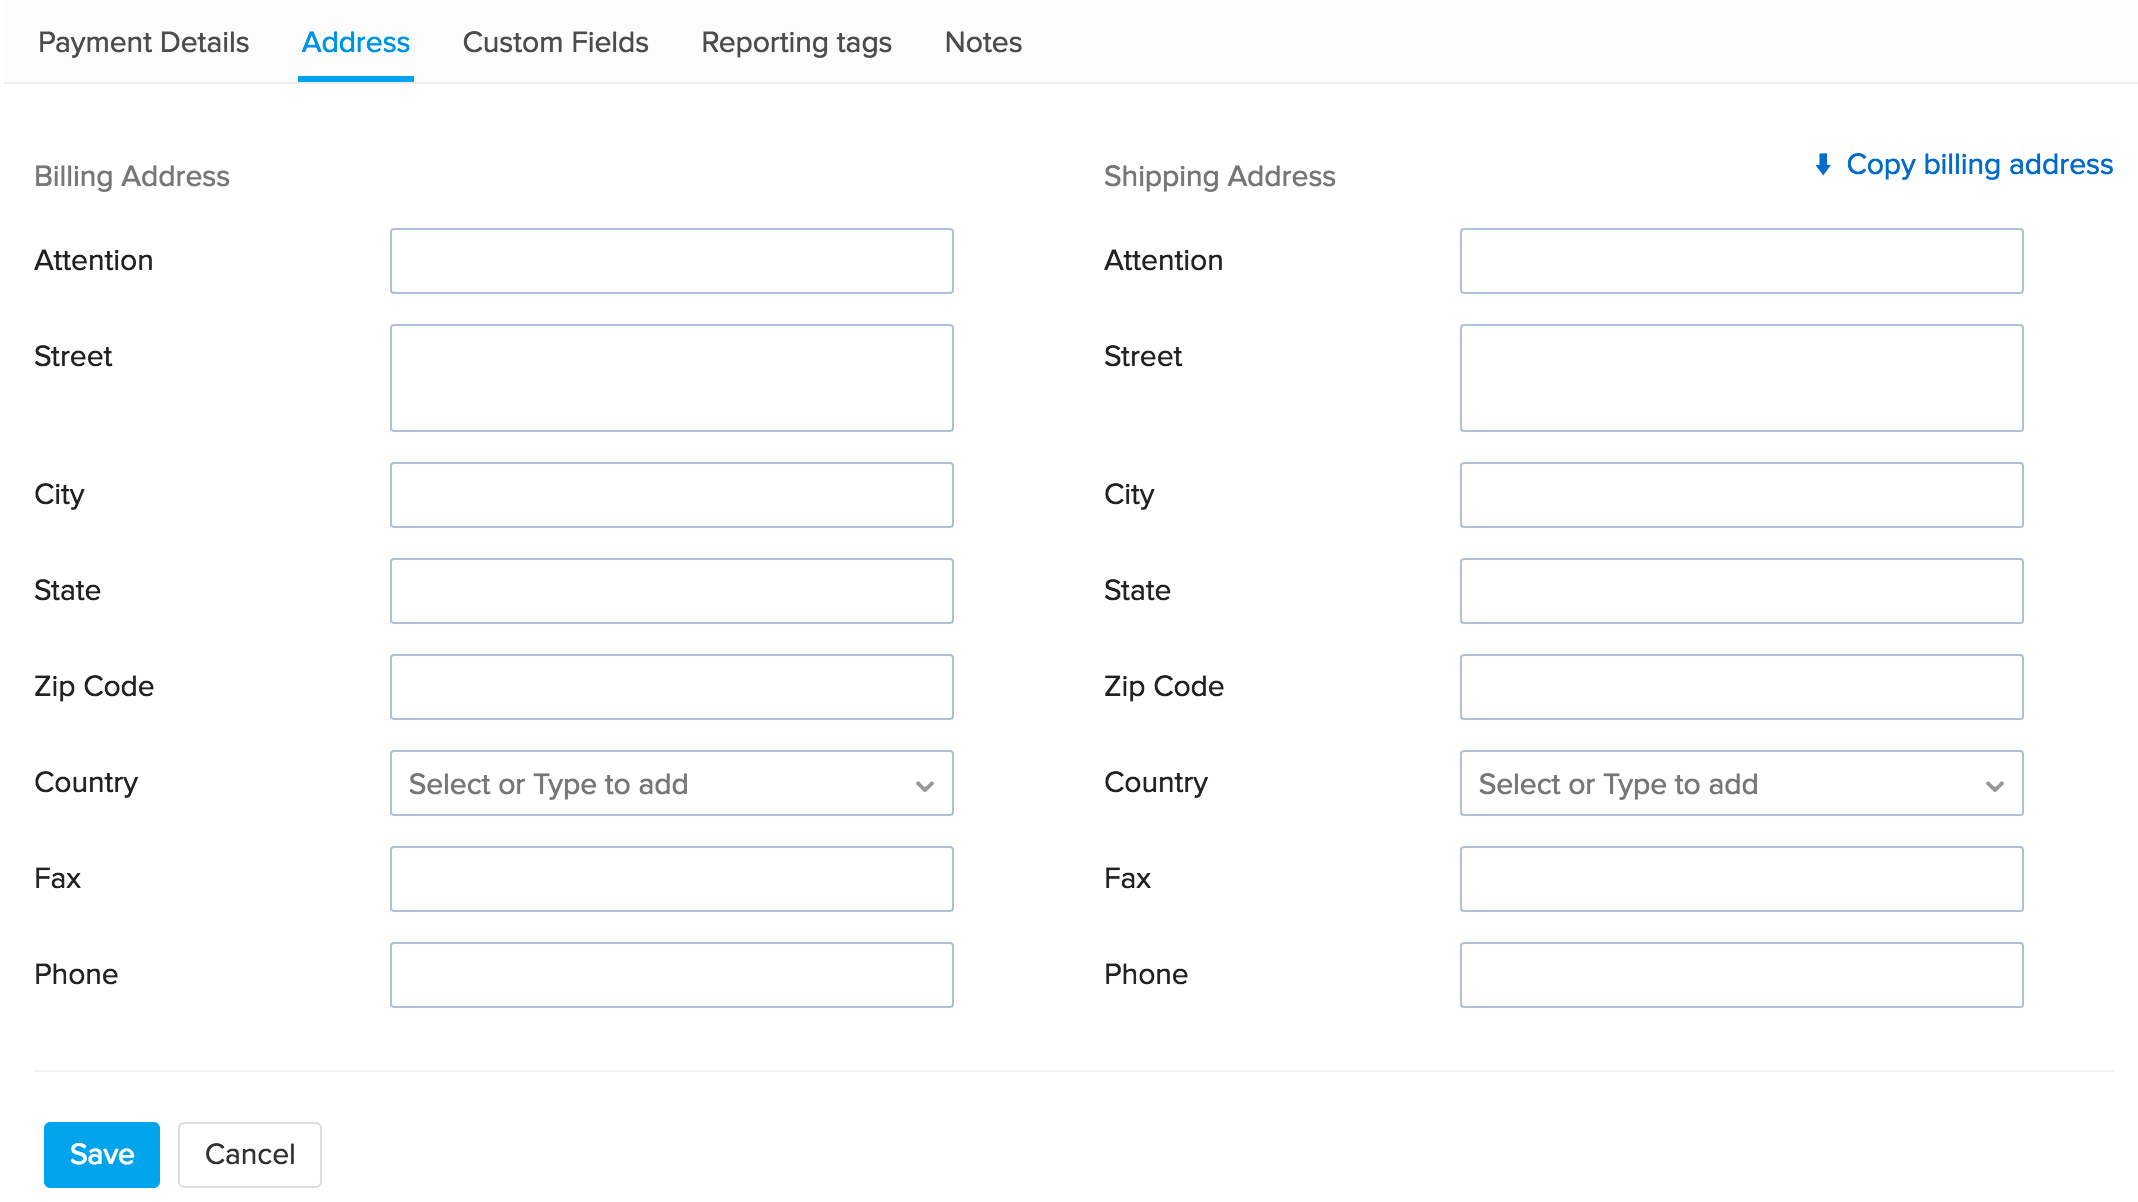
- Go to the Address tab to enter your contact’s Billing and Shipping Addresses. If the shipping address is the same as the billing address, then click on the Copy billing address option to avoid re-entering the address.
Insight: If you want to add additional addresses, you can add them (up to 25) in the contact Overview page after you save the contact. Once you add multiple addresses, you can manually select one of the addresses when you create a transaction.
Go to the Contact Persons tab. Here, you can add additional contact persons for your customer.
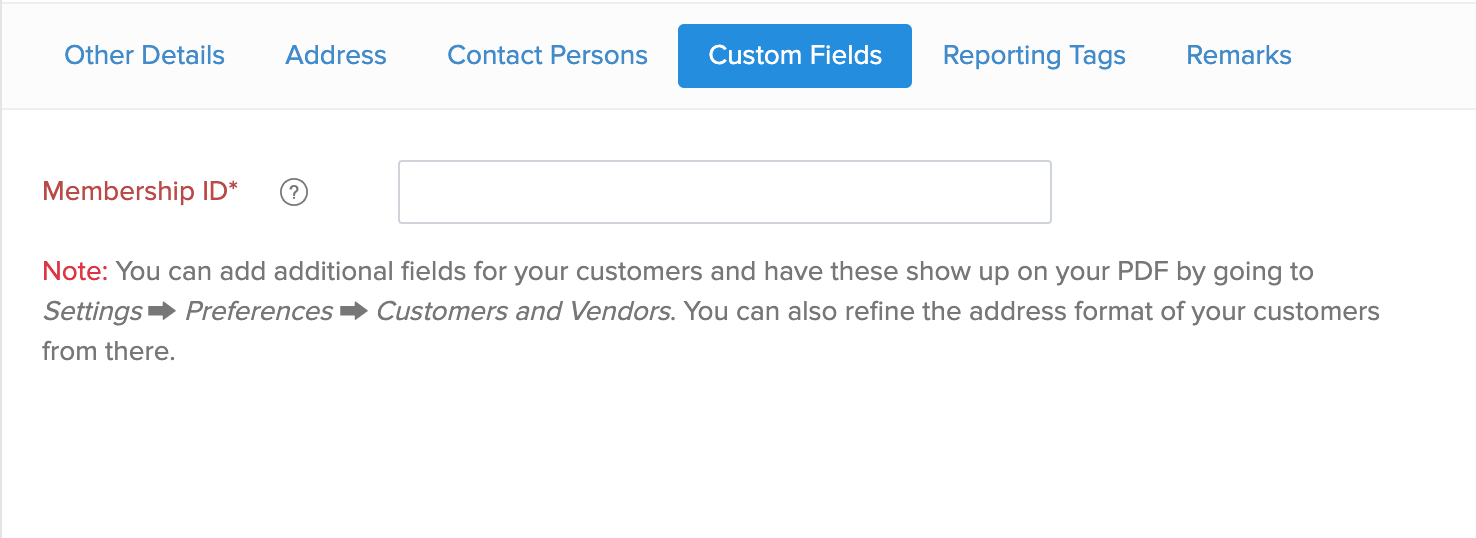
Go to the Custom Fields tab. Here, you can view the custom fields you have added in your contact preference. Learn more about contact preferences.
Insight: Custom Fields are additional fields that you add to include additional information regarding your customer. Before you can add those information here, you must create custom fields in the Preferences. Learn more about Custom Fields.
Go to Reporting Tags. Here, you can view the reporting tags which you have created in Zoho Books and assign a tag to the customer.
The Notes tab is where you can add internal notes about that customer for your reference.
Click Save to create a new customer.
2. Create Vendors from the Vendors module
To add a new vendor in Zoho Inventory:
Go to the Vendors module in the left sidebar.
Click the
icon on the top right corner of the page.Enter the basic information such as the name of the Primary Contact, Company Name, Vendor Display Name, Vendor Email, Customer Phone and Website information.
To know in-detail about all the fields inside go to this help section.
3. Create Customers/Vendors from a Transaction
Let us take a scenario where you have filled out the order information but you haven’t created a customer/vendor earlier. However, in Zoho Inventory, you can create new customers/vendors in the new transaction page itself instead of discarding the changes.
To create a customer/vendor from a transaction:
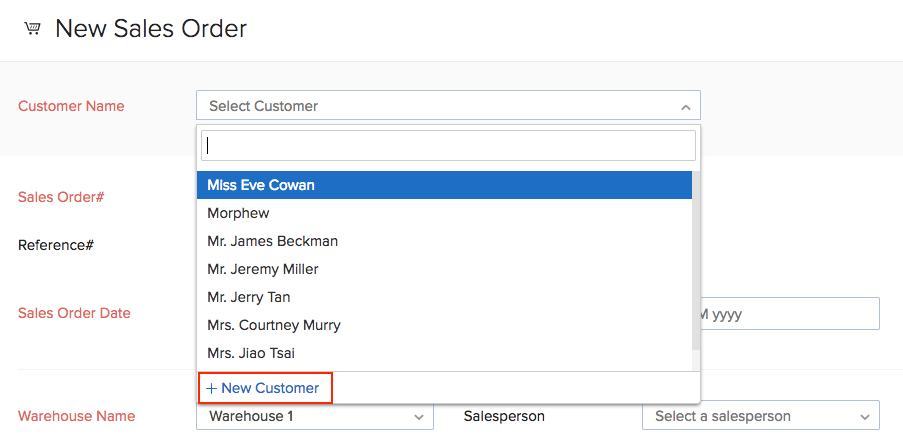
- Create a new transaction (Sales Order or Invoice).
- Click the dropdown in the Customer Name / Vendor Name field.
- Click the + New Customer / + New Vendor option.
- Enter the basic information of your customer/vendor. For a detailed explanation on the fields involved, refer to this help section.
- Click on the Save and Select button to create the customer and add it to your transaction.
Import Customers & Vendors
If you are migrating from an existing system to Zoho Inventory, you can import all your contacts instead of creating them. You can import contacts from:
Import from Existing System
You can import your contacts and contact persons into Zoho Inventory in the form of a .CSV or a .TSV file. The file size can be up to a maximum of 1 MB.
To import :
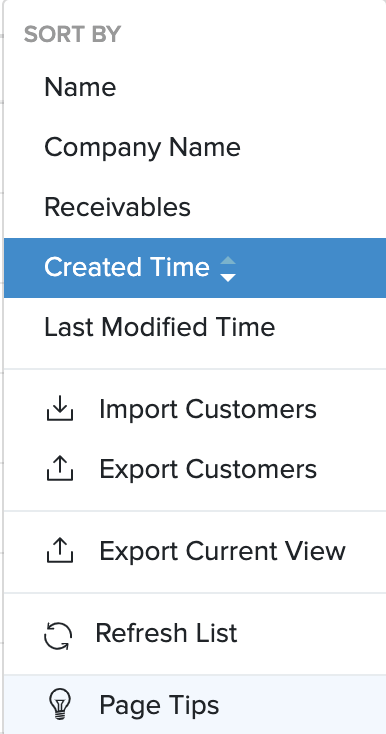
- Go to the Customers or Vendors tab.
- Click the More icon and select the Import Customers or Import Vendors option from the dropdown.
- Choose whether you’re importing the customers/vendors or their contact persons.
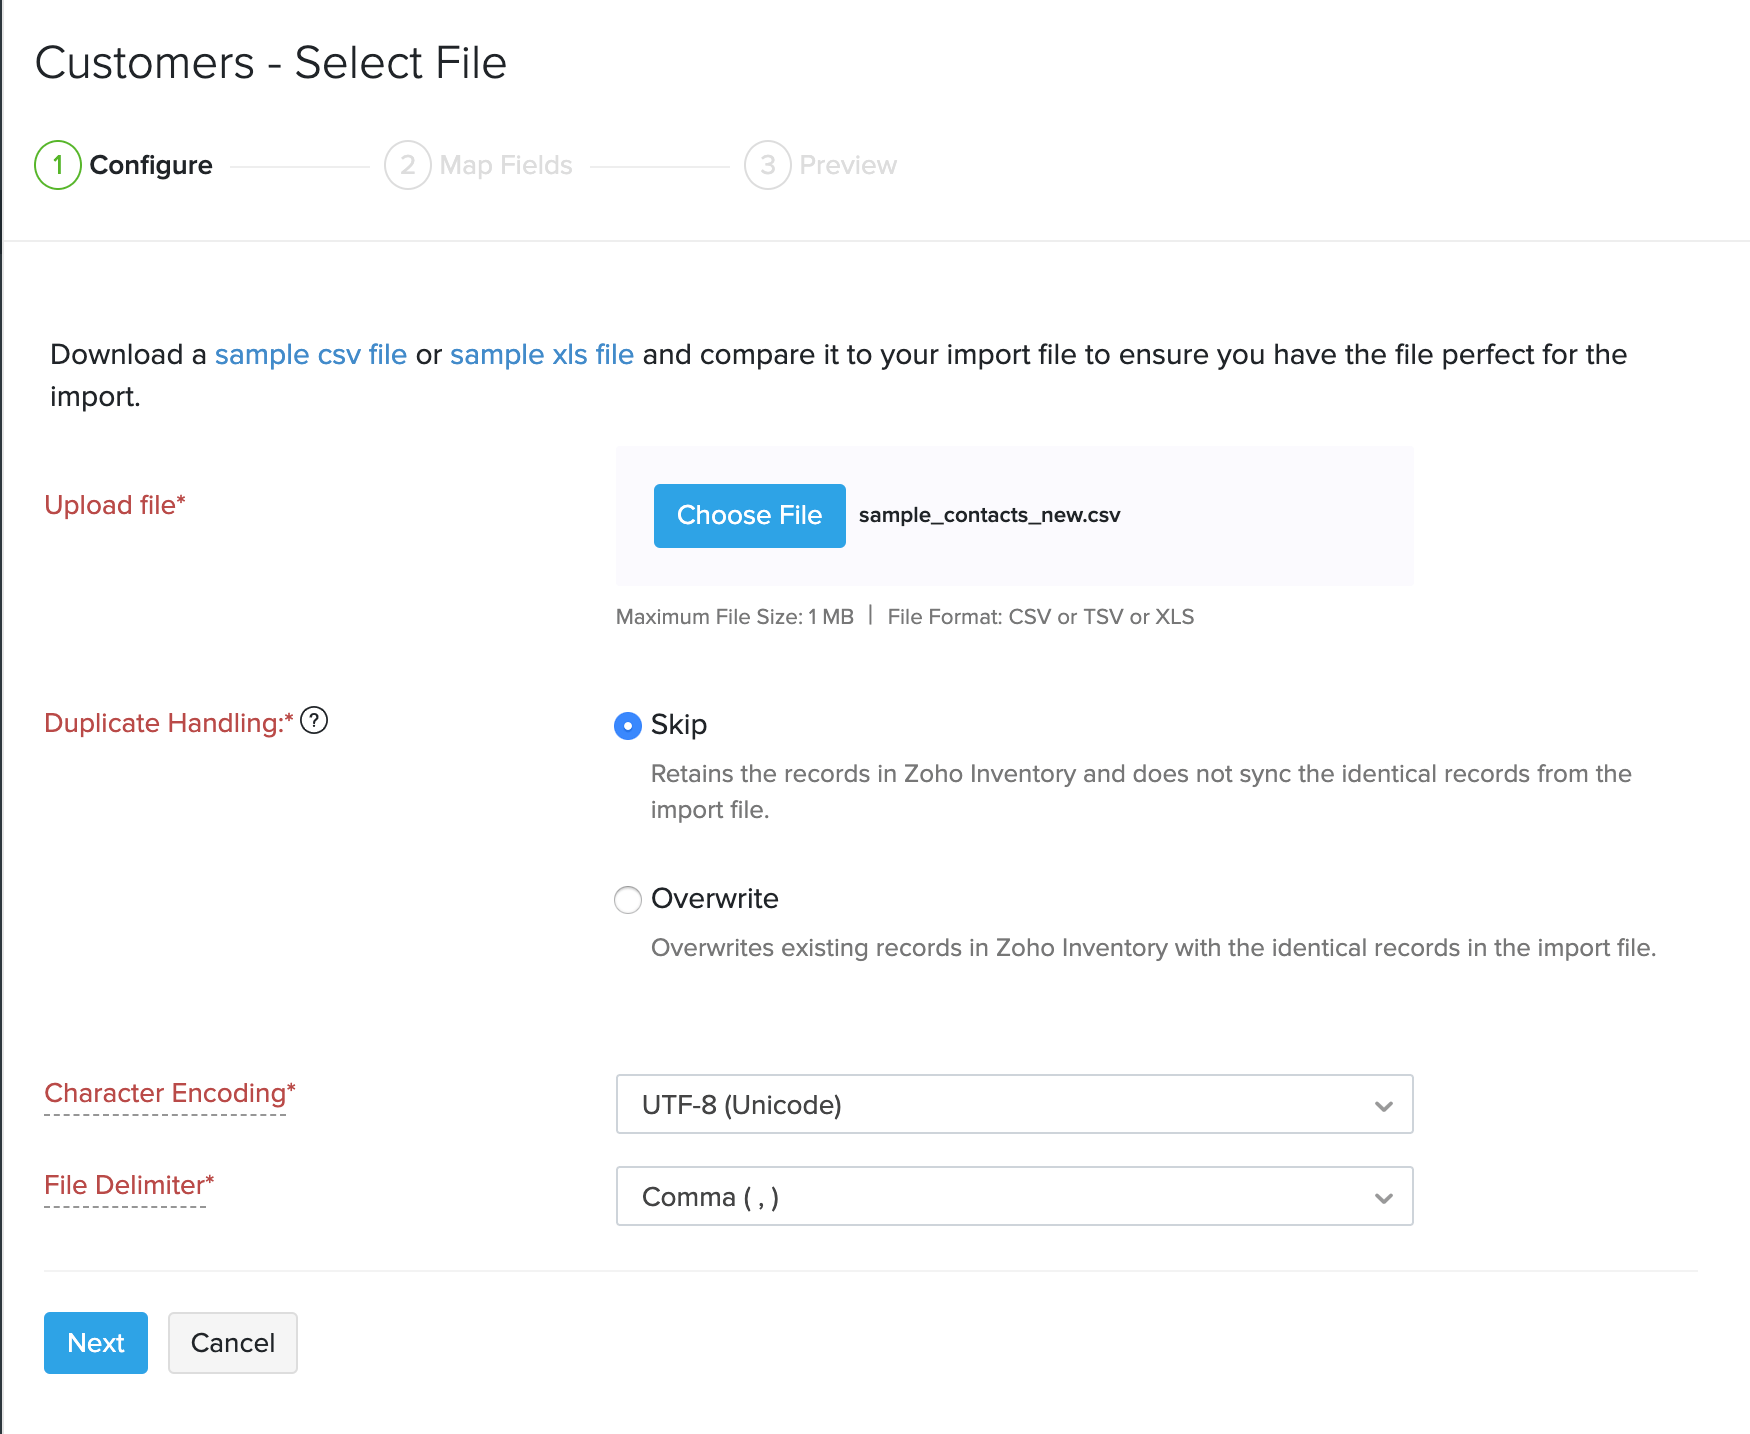
- Download the sample file and compare it with your file to make sure to have it in the right format.
- Click the Choose File button and select the file to be imported from your device.
- Choose whether to skip or overwrite duplicate contacts.
- Select the Character Encoding based on your import file. By default, UTF-8 (Unicode) is selected.
- Choose the appropriate File Delimiter. The default delimiter is Comma ( , ).
- Click Next.
- Match the fields from Zoho Inventory (Left) with the appropriate field names in your import file (Right).
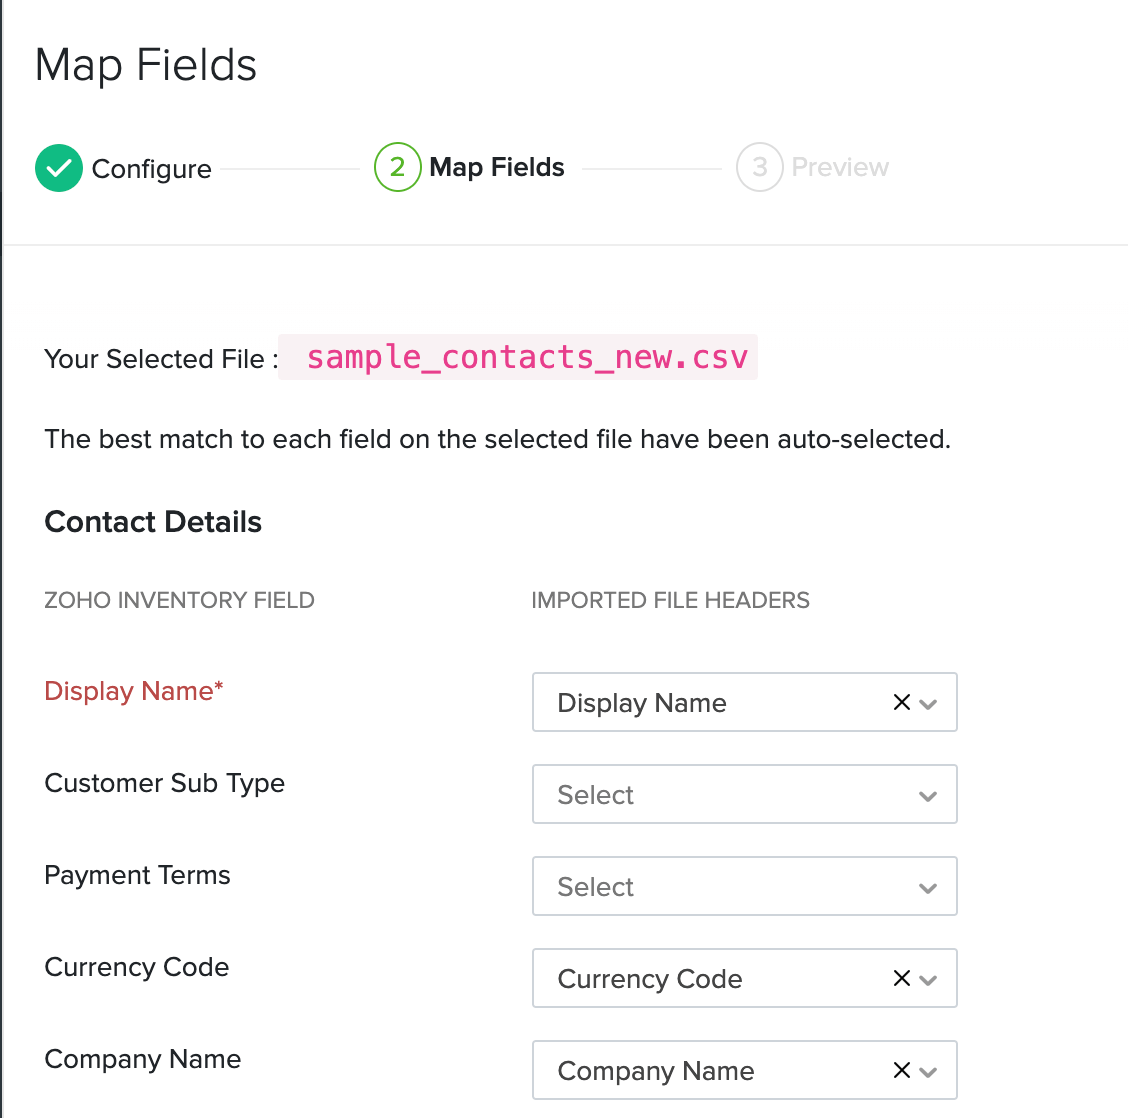
Check the Save these selections for use during future imports option if you wish to use the same mapping of fields in future imports.
Click Next.
You can see the status of all the contacts that are ready to be imported, that are skipped and the unmapped fields. If any contact is skipped, check the file again.
Click Import.

Import from Zoho Books
The Zoho Inventory and Zoho Books apps are seamlessly integrated and hence, the moment you integrate your organizations in both apps, all your data will be synced i.e., when you add a new contact in Zoho Books, the contact will be available in Zoho Inventory and vice-versa.
To know more about the process of integrating Zoho Inventory with Zoho Books, click here.
Import from Zoho CRM
Zoho Inventory can be integrated with your Zoho CRM account. Using this integration, you will able to sync your accounts, contacts and vendors in Zoho CRM, with the contacts module in Zoho Inventory.
This is a two-way integration. Therefore, when you convert a Lead into an Account in Zoho CRM, it automatically gets added as a Customer in Zoho Inventory during the next sync.
Likewise, when you obtain a new Customer from a Marketplace in Zoho Inventory, this customer gets added to your Zoho CRM database.
To know more about the process of integrating Zoho Inventory with Zoho CRM, click here.
Import from Office365
Office365 is Microsoft’s productivity software suite that consists of all office-ready applications. If you have your customer and vendor information in Office365, you can import them into Zoho Inventory.
Before that, you’ll have to integrate your Office365 account with Zoho Inventory. After establishing the integration, you can import your customers/vendors from Office365 to Zoho Inventory. Learn how.
Import from G Suite
G Suite is Google’s suite of online apps to connect people in your company. If you have your customer information in G Suite, you can import them into Zoho Inventory easily.
Firstly, you need to set up the Zoho Inventory - G Suite Integration after which, you can import your Google contacts into Zoho Inventory. Learn how.
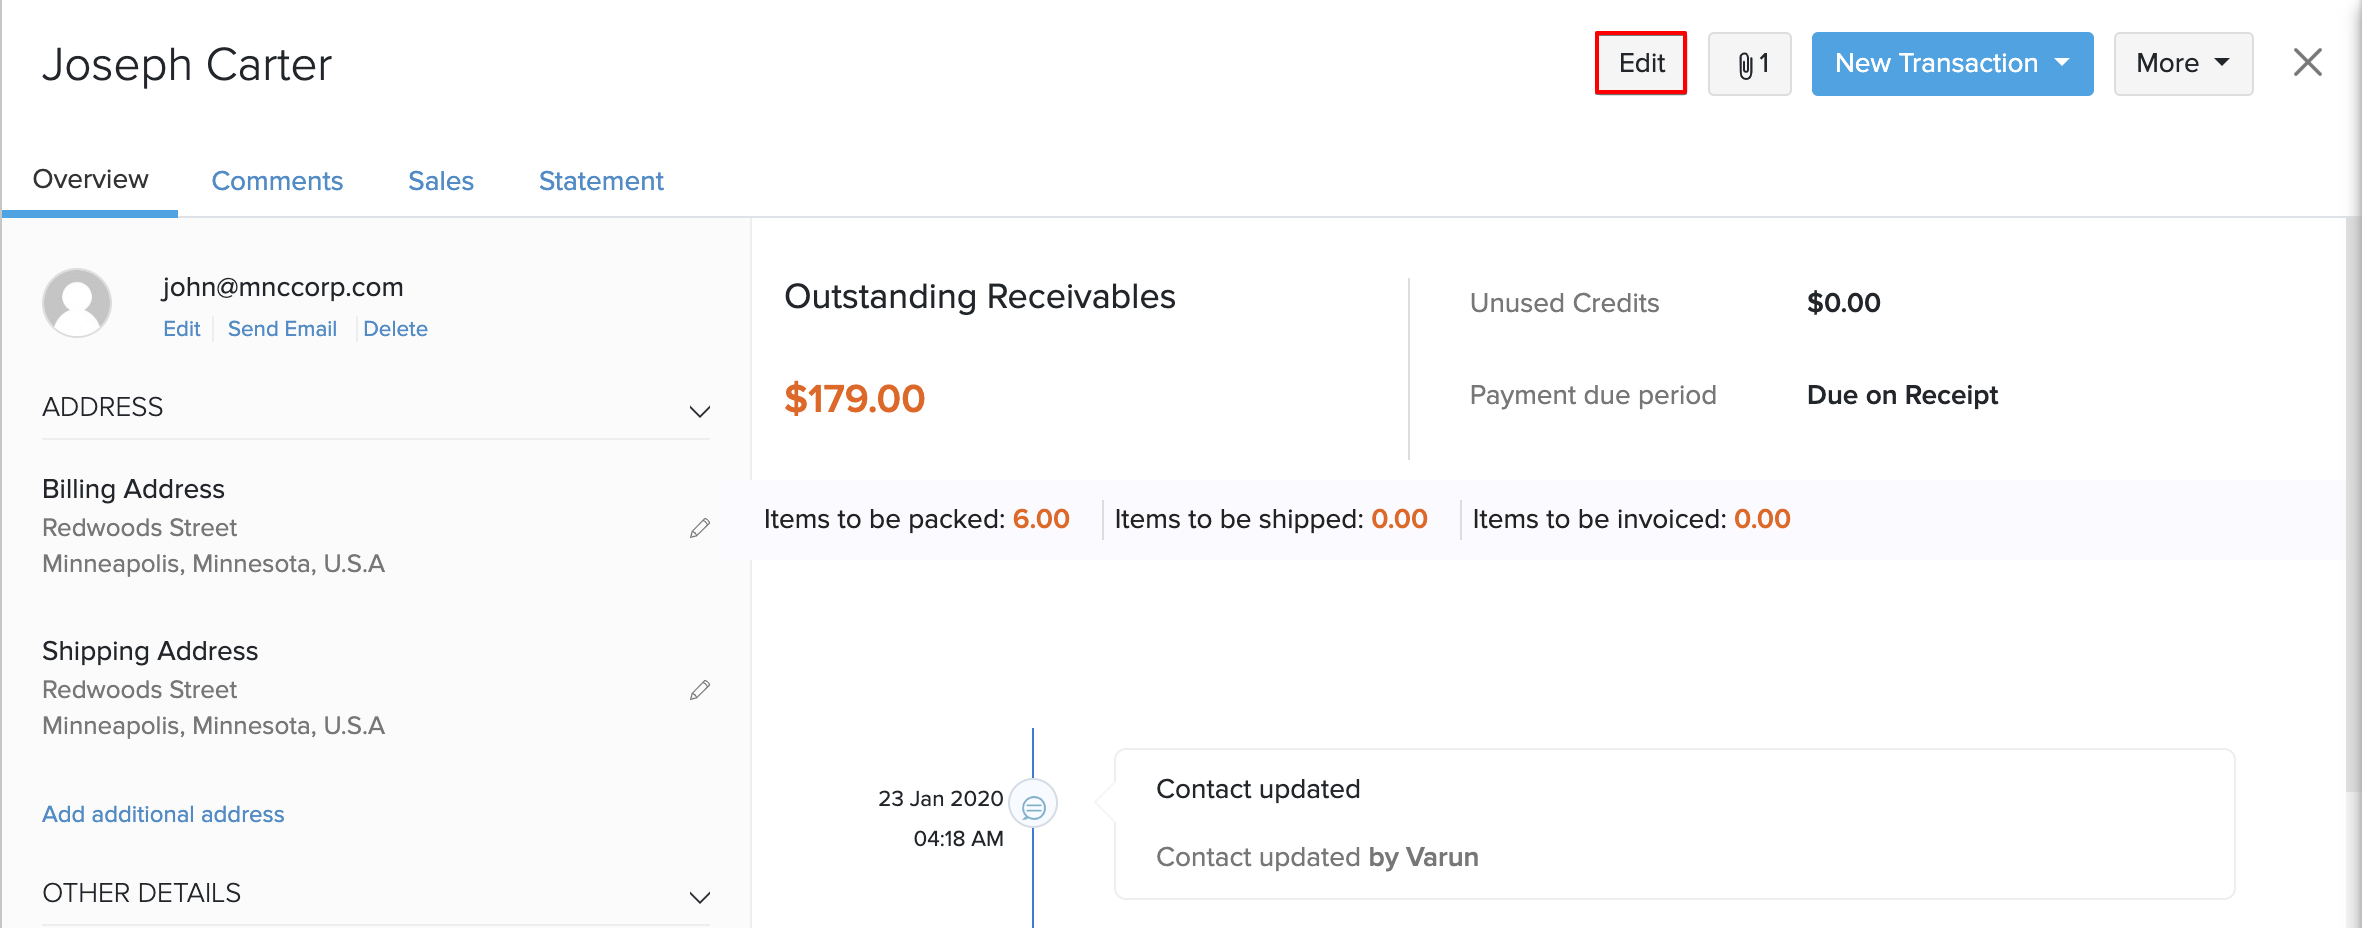
Edit Customers/Vendors Details
At any point of time, you can add some missing information or update your contacts’ information in Zoho Inventory. To edit a contact:
- Navigate to either the Customers or Vendors module.
- Open the contact you wish to edit.
- Click the Edit button in the top right corner of the page.
- Update the necessary information.
- Click Save to update the changes.
Insight: When you update the billing address or the shipping address of a contact, you can choose to update the changes across all draft transactions of the particular contact.