Understand common actions in timeline report for tablet
There are some common actions that are available in the report without having to predefine them. These actions are available in default position. They are often required because of which they mandatorily appear in the report. The following are the common actions:
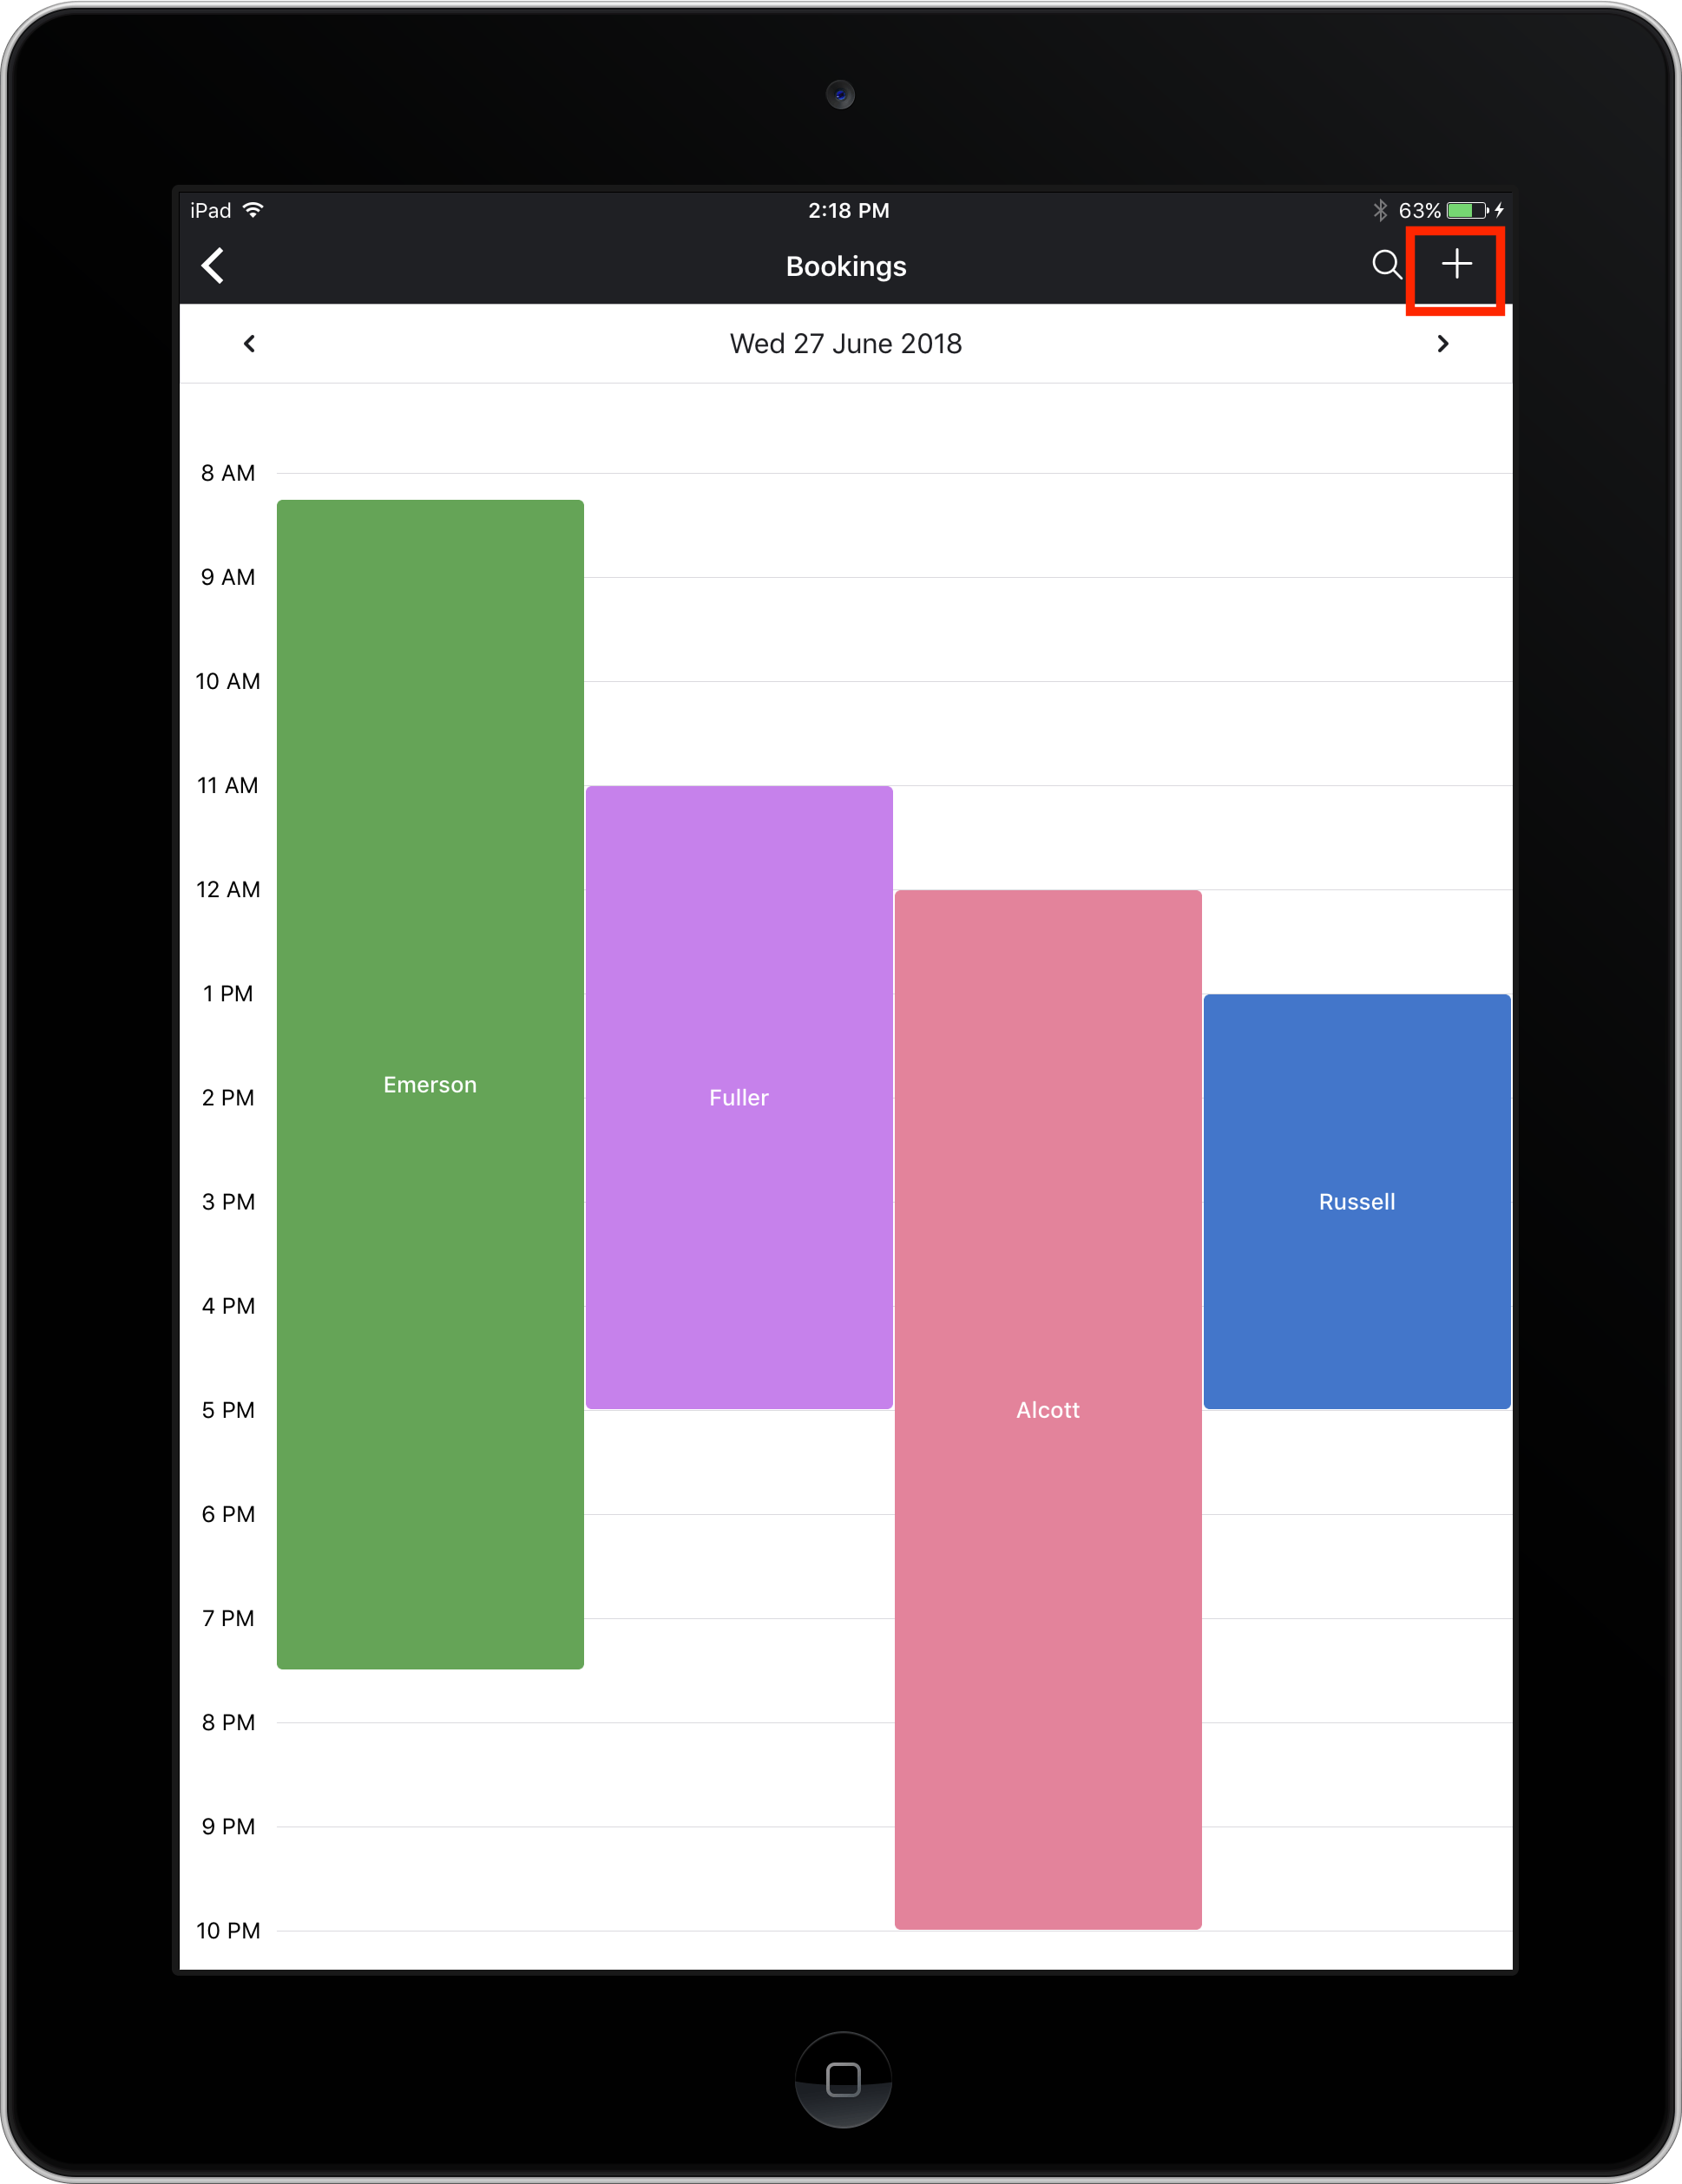
Add a record
The add record icon appears at the top-right corner of the report along with the search icon. This enables you to add a new record to the report. Tapping the add icon opens the Form screen. You can fill in the field values and submit. You will find that the record that you submitted is displayed in your report.
Search records
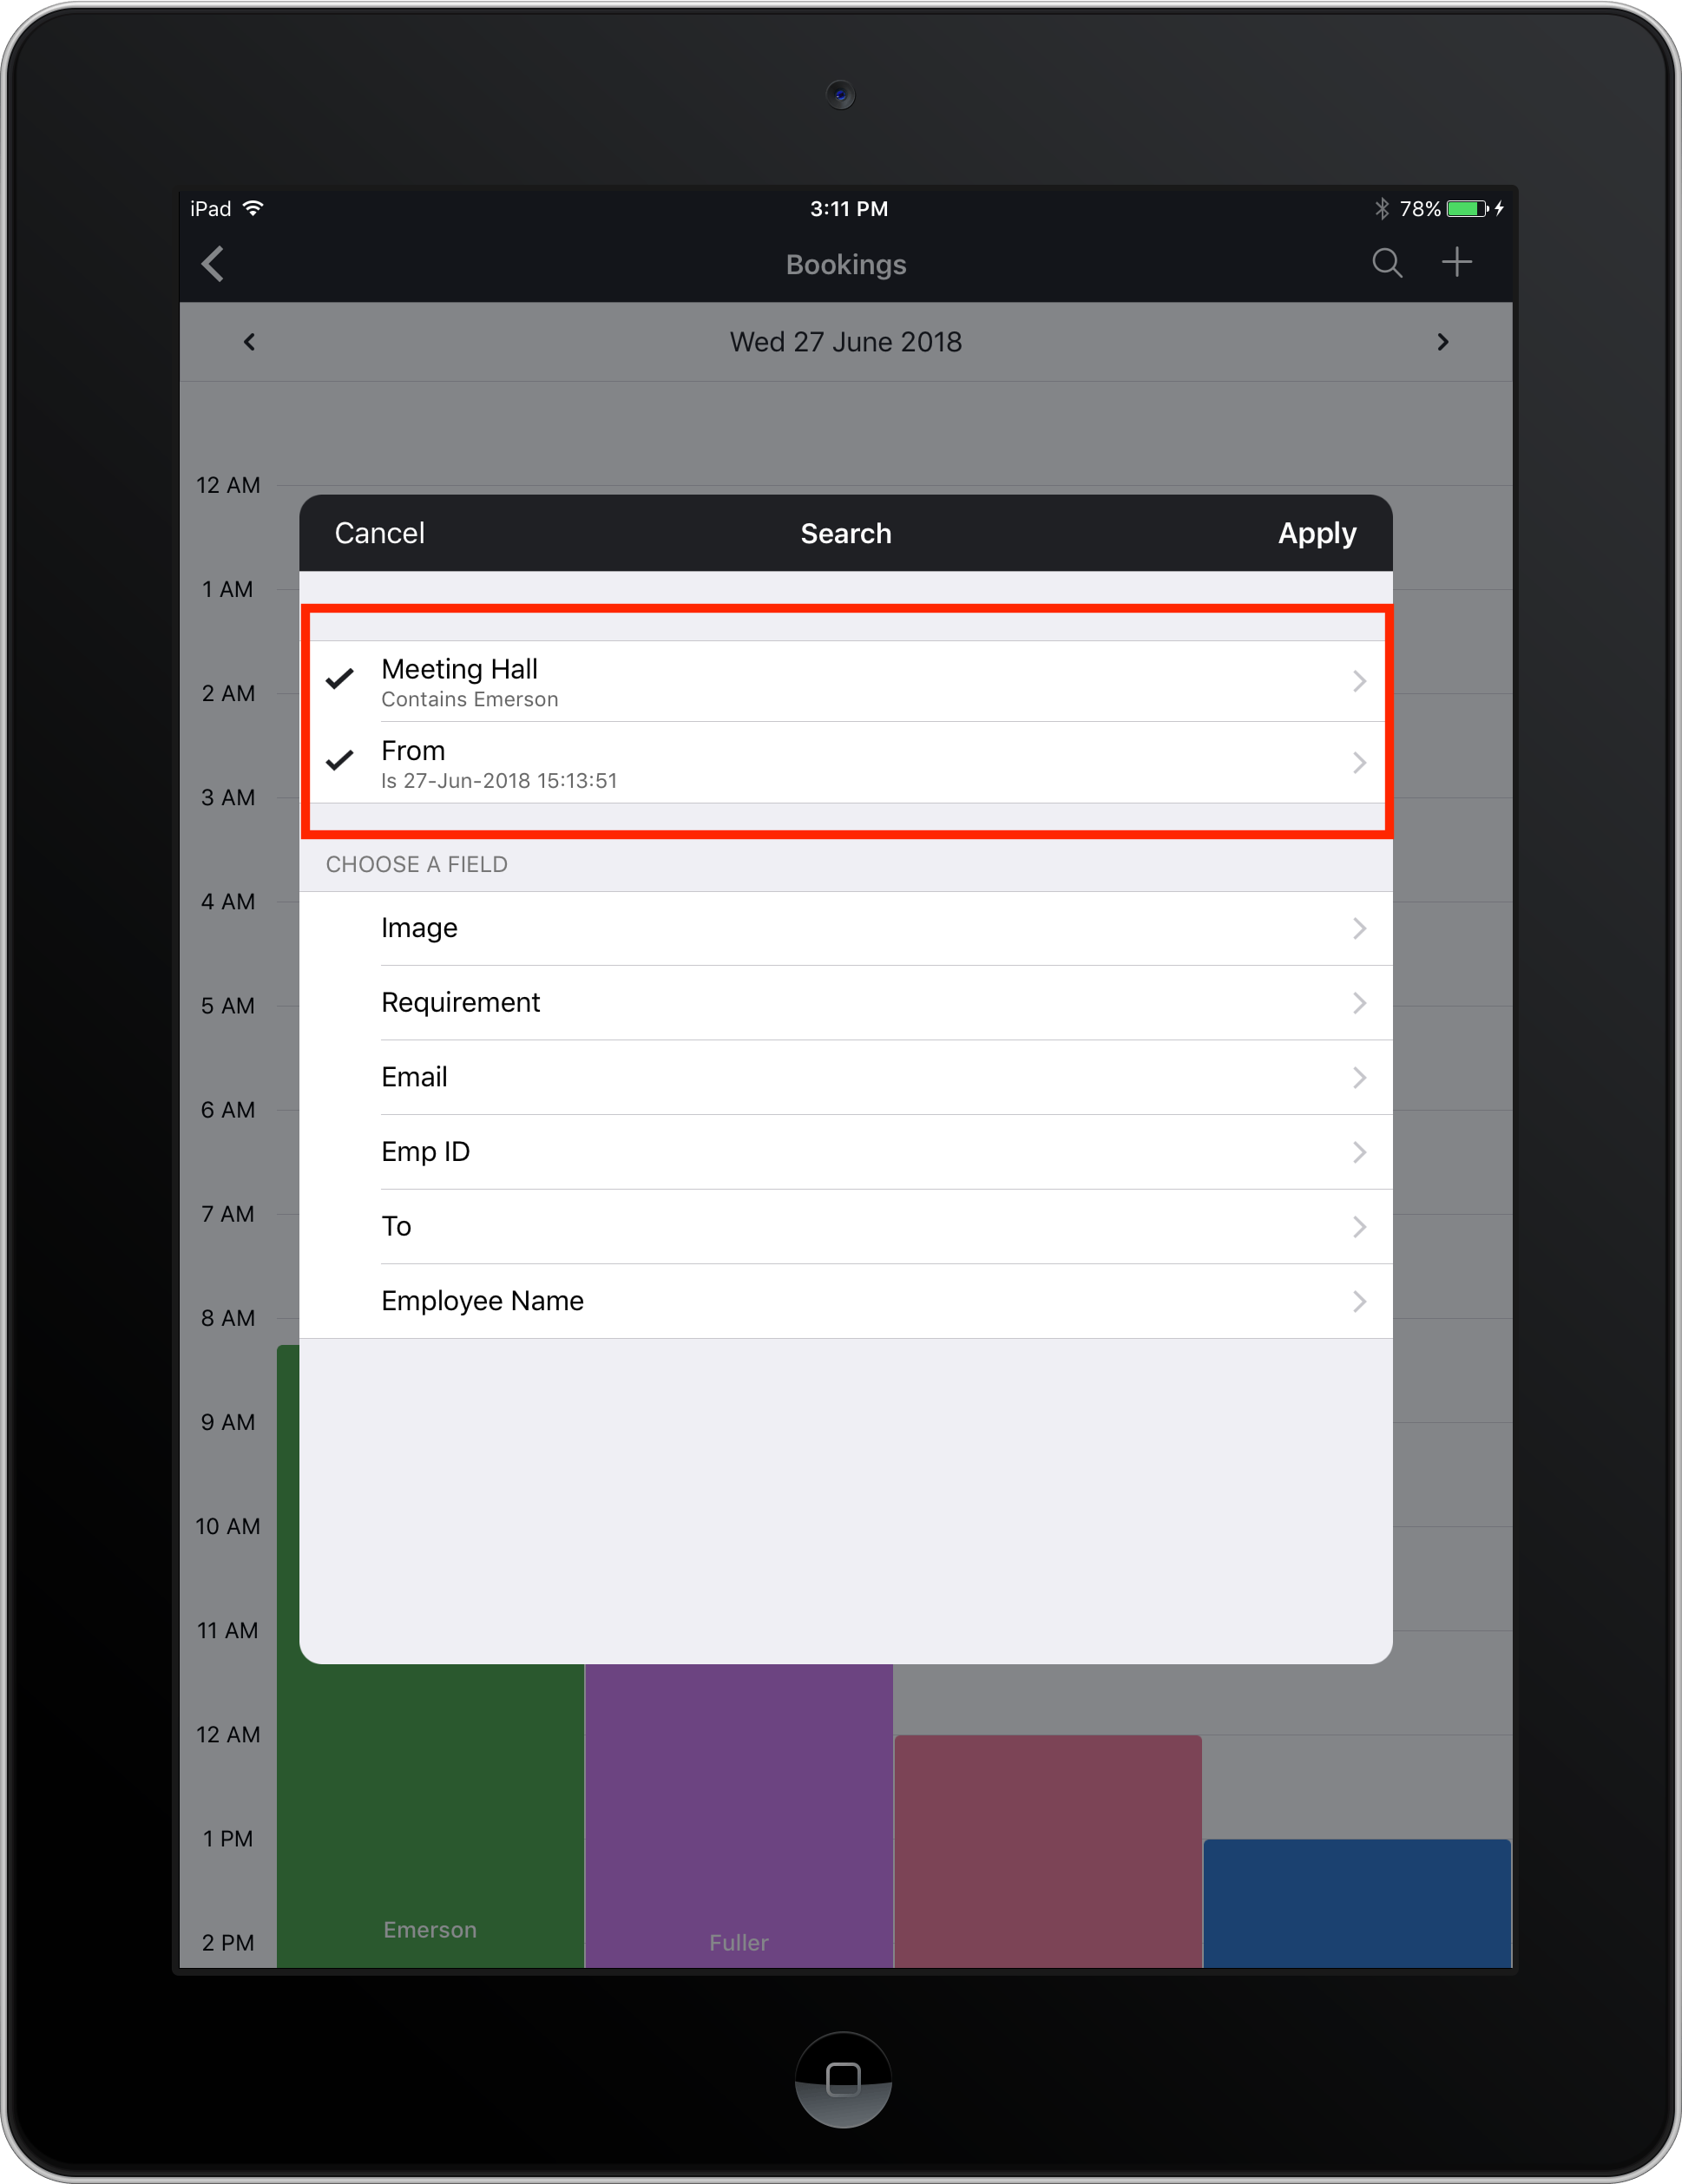
Search enables you to look for specific data within a report. On tapping the search icon, the search screen lists the fields of the report. You need to select the field, operator and the condition by which you want to run the search. The records that match the condition are displayed. You can select multiple fields, thereby specifying multiple conditions based on which the records need to be looked for.
The search option helps you sift through voluminous records and narrow down to information that you require. Let's assume you have an Conference booking app. You have a report that displays hall details and the bookings for the day. If you are looking for a availablity of particular at a specific time. Tap on the search field. All the fields in the report are listed. Select the fields that would help you single out the required records. In this case, select Hall field, select the operator "is" enter the name of the hall; select date-time field and specify date and time. The relevant records are displayed.
For Radio button, Dropdown, Checkbox and Multiselect field types, the criteria values will be pre-populated based on the configured options. So, the user can use the field values to search for matching records.
Note: Closing the report after applying the search criteria save the report in that state. On accessing the report the next time, the report loads with the previously applied search criteria, displaying only the records that match the same. To view all the records you must remove or clear the search criteria.
Print records
To access print option, tap on the icon in the header. The printer needs to be configured to be able to print.
Export records
Exporting records help you obtain or download the records that are in Creator report into a specific format for a purpose outside of Zoho Creator environment. To access the option, click on the hamburger icon. Selecting Export displays the congruent window. Supported formats include: Spreadsheet, HTML, XML, JSON, CSV, and TSV. Select the required format to export the records.
Zoho CRM Training Programs
Learn how to use the best tools for sales force automation and better customer engagement from Zoho's implementation specialists.
Zoho DataPrep Personalized Demo
If you'd like a personalized walk-through of our data preparation tool, please request a demo and we'll be happy to show you how to get the best out of Zoho DataPrep.
- Zoho Workerly Home
- Forums
- Connect With Us:


- Zoho Recruit Home
- Forums
- Connect With Us:
You are currently viewing the help pages of Qntrl’s earlier version. Click here to view our latest version—Qntrl 3.0's help articles.


Zoho Sheet Resources
Zoho Forms Resources
Zoho Sign Resources
Sign, Paperless!
Zoho TeamInbox Resources
Zoho DataPrep Resources
Design. Discuss. Deliver.
Related Articles
Understand timeline report
Timeline report is a date-driven report that allows you to visually present the events that take place within a timeframe. It displays records on an hourly calendar based on the date and date-time field types. The report is equipped with a dynamic ...Understand common actions in calendar report
There are some common actions that are available in the report without having to predefine them. These actions are available in default positions. They are often required because of which they mandatorily appear in the report. The following are the ...Understand common actions in spreadsheet report
There are some common actions that are available in the report without having to predefine them. These actions are available in default position. They are often required because of which they mandatorily appear in the report. The following are the ...Understand common actions in kanban report
There are some common actions that are available in the report without having to predefine them. These actions are available in default positions. They are often required because of which they mandatorily appear in the report. The following are the ...Understand common actions in map report
There are some common actions that are available in the report without having to predefine them. These actions are available in default positions. They are often required because of which they mandatorily appear in the report. The following are the ...