
Create & Send Recurring Invoices
To get started off with Recurring Invoices, you’ll have to make sure they are enabled in Zoho Books. After doing so, you can create a recurring invoice or import them directly from your system.
Enable Recurring Invoices
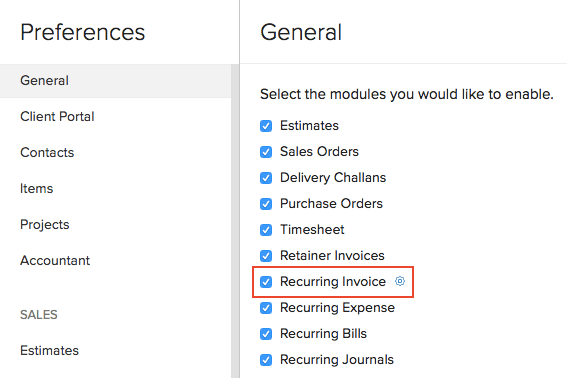
Before you start creating recurring invoices, you’ll have to ensure that the Recurring Invoices module is enabled in Zoho Books. Here’s how you can do it:
- Log in to your Zoho Books account.
- Go to Settings > Preferences.
- Mark the box Recurring Invoice under the General settings.
- Click Save at the bottom of the page.
Create Recurring Invoice
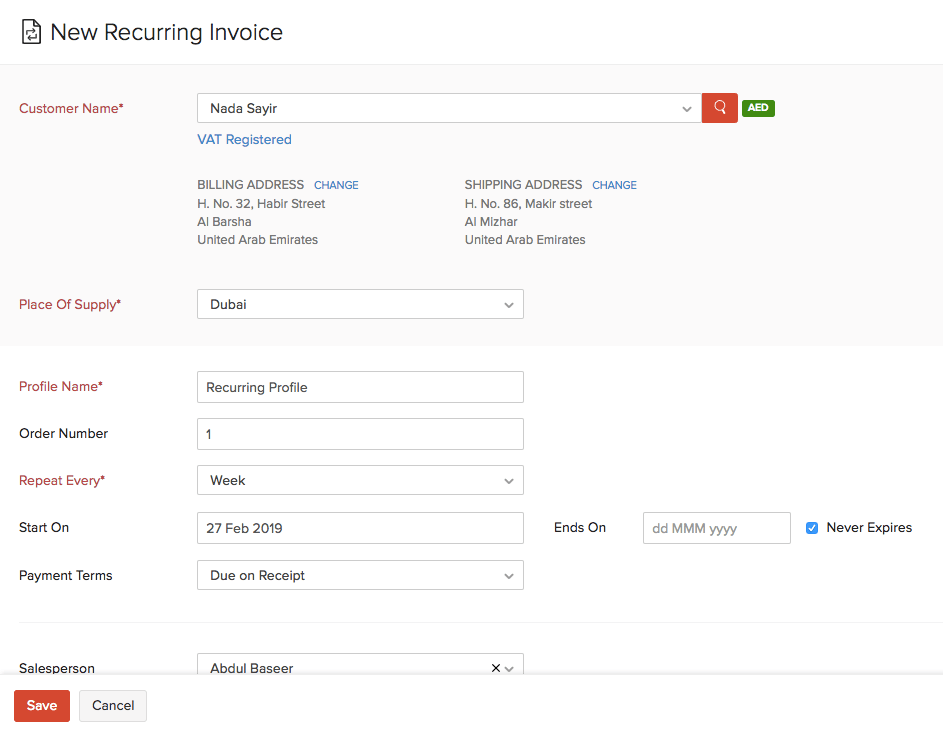
When you create a recurring invoice for a customer, you basically set up a recurring profile for them. This recurring profile will contain all the invoices which are generated and yet to be generated. You can configure how to save a recurring invoice from the Recurring Invoice Preferences.
Scenario: Patricia creates an invoice of AED 2,625 for her customer Nada. She requires an invoice of the same details and amount to be sent every week to the customer. In such a case, Patricia can create a recurring invoice on a weekly basis. Every week Nada would receive an invoice of the same amount with the updated date.
To create a new recurring invoice:
- Go to Sales > Recurring Invoices.
- Click the + New button in the top right corner of the page (or press n).
- Fill in the following details:
Customer Name
Select the customer for whom you want to create a recurring invoice.
Profile Name
Enter a name for the profile which will generate all the recurring invoices.
Repeat Every
Choose the time interval for which the recurring invoice is to be generated. You can choose from the standard time periods such as week, month, year, or enter your own by clicking Custom.
Salesperson
Associate a sales person to the recurring invoice.
Associate Project Hours
Associate any project associated with the recurring invoice.
Item Details
Select the items for which you want to create a recurring invoice.
To insert a header row below a line item, click the More icon next to it, and select Insert New Header. You can also click the dropdown next to + New Row below the Item Table, and select New Header to add one.
To insert a subtotal row below a line item, click the More icon next to it, and select Insert New Subtotal. You can also click the dropdown next to + New Row below the Item Table, and select New Subtotal to add one.
You can also enter the Customer Notes and Terms & Conditions to be displayed in the recurring invoice.
Click Save.
After a recurring invoice has been created, the child invoices generated will be saved as Draft or sent to your customers right away. Learn how to configure these settings in the Recurring Invoice Preferences.
If a recurring invoice or profile has been created for an earlier date, then the child invoices will be generated only after the current date.
Let’s understand this better with the help of an example. Today is February 28th, 2019. You create a recurring invoice today for the date January 31st, 2019 on a weekly basis. So the child invoices would be on February 7th, February 14th, February 21st, February 28th, March 7th, and so on. The latest invoice for the recurring profile should be generated today (February 28th). However, child invoices will be generated only after the current date(today). So the first invoice for the recurring profile will be generated on March 7th, 2018.
Import Recurring Invoices
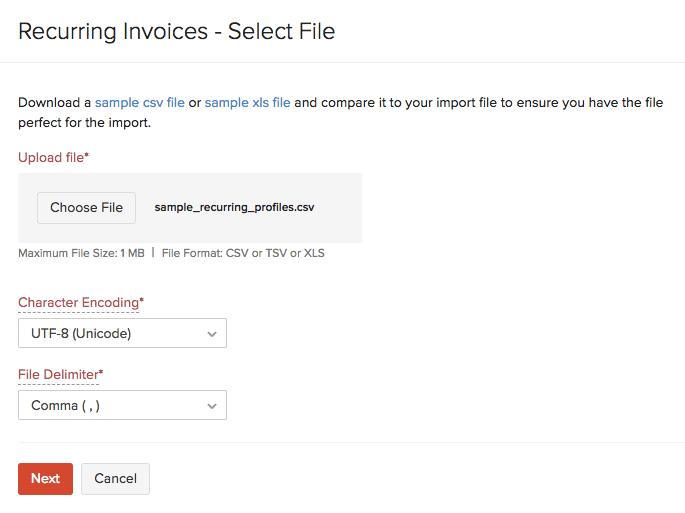
You can import a list of recurring invoices you have in the CSV, TSV or XLS format. Here’s how:
- Go to Sales > Recurring Invoices.
- Click the More icon in the top right corner of the page.
- Select Import Recurring Invoices.

- Click the Choose File button under Upload File. You can download the sample CSV or XLS file for your reference by clicking sample csv file or sample xls file.
Insight: The file size cannot be more 1 MB.
- Choose the Character Encoding and File Delimiter for your file. The Field Delimiter is used to separate two values in a row. While importing recurring invoices, the default file delimiter is comma (,).
Insight: Character Encoding is used to pair numbers with characters. By default, the Unicode Transformation Format (UTF-8) encoding is used which supports a wide range of characters that go beyond 8 bits.
- Click Next.
- Ensure that all the fields are mapped correctly in the Map Fields page.
- Mark the box Save these selections for use during future imports if you want to use the similar import format for the next time.
- Click Next.
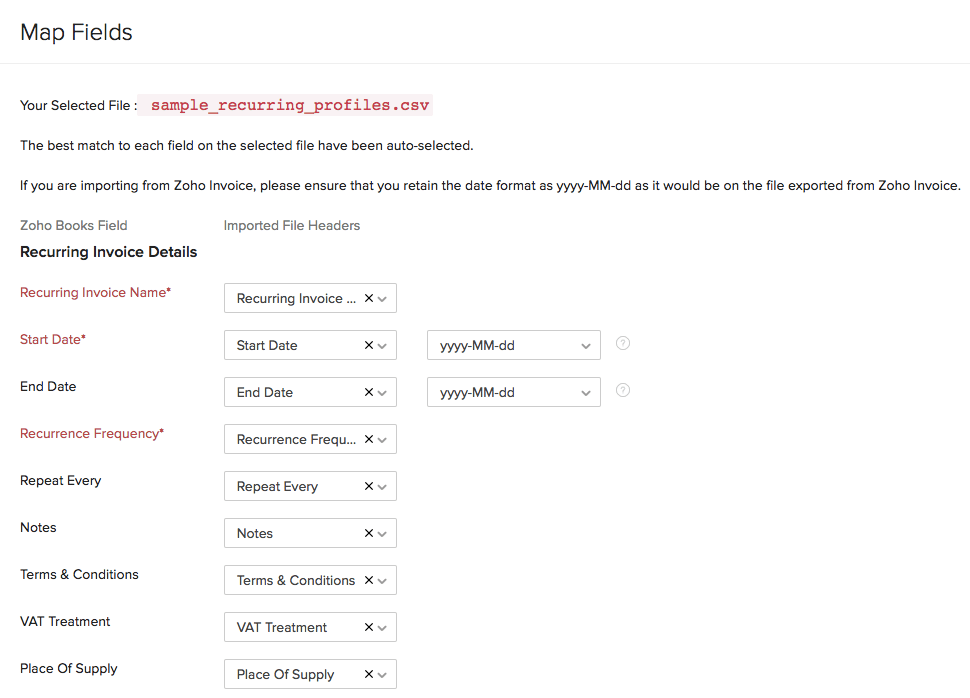
- Click Import.
Next >
Receiving Payments
Related
- Overview - Recurring Invoices
- Recurring Invoice Workflow
- Manage Recurring Invoices
- Other Actions for Recurring Invoice
- Recurring Invoice Preferences
 Yes
No
Yes
No
Thank you for your feedback!