
Avalara AvaTax Integration
Avalara is a tax service that helps you calculate the right sales tax for every sale. It uses your customer’s location, what you’re selling, and the latest tax rules to get the correct rates. This means you don’t have to check tax rates manually or track changes yourself.
If your business sells in multiple states or regions, tax rates can vary often. Managing this manually takes time and increases the probability for errors. When you connect Avalara with Zoho Books, it automatically applies the correct tax rates and exemptions for each sale, helping you stay compliant with tax laws effortlessly.
How Avalara Works
- First, connect Avalara to your Zoho Books organization by entering the required credentials.
- When you add or edit an item, choose the correct Tax Code from the dropdown.
- When you add or update a customer, ensure you enter a valid address to ensure correct tax calculations. If the customer is Tax-Exempt, add their Exemption Number or select the appropriate Entity Code. For customers outside the USA, enter their Tax ID and country details to fetch their tax information for transactions. This tax information includes the Tax Rules, Rates, Exemptions, and tax registration details based on the customer’s country. Zoho Books then uses this information to calculate taxes correctly, apply, or exempt taxes on transactions according to local tax laws.
- When you create sales transactions like Quotes, Invoices, or Sales Orders and add items, Avalara automatically checks if each item is taxable, verifies the customer’s tax status, and applies the correct tax rate based on the customer’s address. You can adjust tax settings directly within the transaction form if needed. In the Tax Details section, you can review the tax rates Avalara applied and update them manually for individual items or the whole transaction. You can also change the Entity Code while creating the transaction, but this change applies only to that specific transaction. To update the Entity Code for a customer permanently, go to the Customer Details page and edit it there.
Set Up Avalara in Zoho Books
Prerequisites:
- Keep your Avalara account’s Account Number, License Key, and Company Code (if available) ready before you start setting up Avalara in Zoho Books. If you don’t have an account already, set up your Avalara AvaTax account and continue with the following steps.
- Avalara cannot be enabled if you’ve enabled the Sales Receipts module in Zoho Books. This is because Sales Receipts record the sale and payment together, and Avalara needs to calculate taxes before the sale is completed. Ensure you’ve disabled Sales Receipts before you enable Avalara. To disable this module, go to Settings > General > under Select the modules you would like to enable, uncheck Sales Receipts, and click Save.
To set up Avalara in Zoho Books:
- Log in to your Zoho Books organization.
- Go to Settings.
- Select Taxes under Taxes & Compliance.
- In the Taxes pane, select Tax Rates.
- Click Use Avalara Integration in the top right corner.

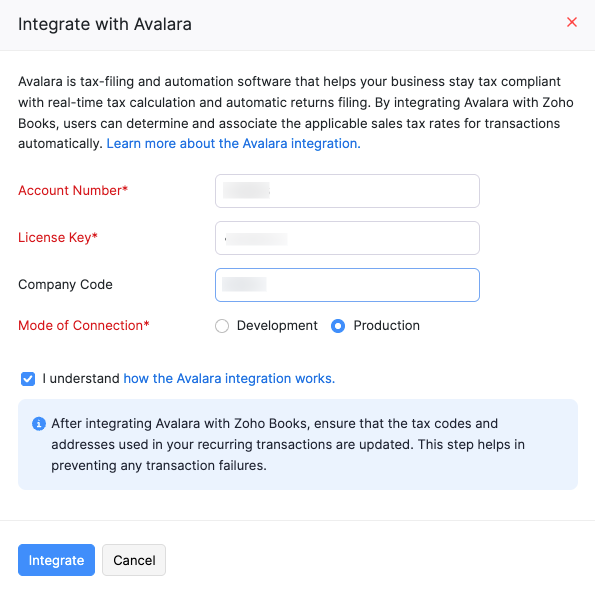
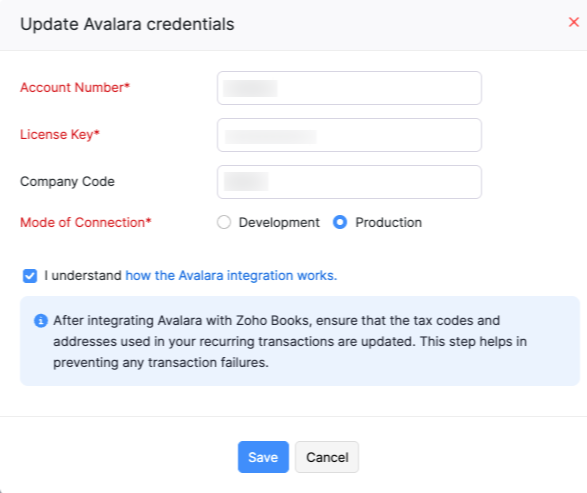
- In the Integrate with Avalara popup, complete the following details:
- Account Number: Enter your Avalara account number. You can find it in your Avalara Dashboard or in the welcome email sent when your account was created.
- License Key: Enter your Avalara license key. This key is unique to your account and required for integration. You need separate license keys for Production and Development accounts.
- Company Code: Enter the company code provided by Avalara. This code links the correct company in your Avalara account to this integration.
- Mode of Connection: Select Development to test the integration in a sandbox environment or Production to make it live.
- Check I understand how the Avalara integration works to confirm the integration details and acknowledge how it functions in Zoho Books.
- Click Integrate.
Insight: When you set up the integration, Zoho Books shares your Address, Country, and Account Details safely with Avalara AvaTax. AvaTax is Avalara’s cloud service that automatically calculates sales tax for every transaction. It checks where your customer is, what you are selling, and the latest tax rules to give you the correct tax amount.
Select a Customer Address to Apply Taxes
For accurate tax calculations, Avalara needs to know which customer address to use when applying tax rates. By default, Zoho Books uses the customer’s billing address, but you can change this based on your business needs. To choose a different address:
- Go to Settings.
- Select Taxes under Taxes and Compliance.
- In the Taxes pane, select Avalara.
- Under Configure Integration, in the Applicable For field, click Change, and choose one of the following:
- Use Billing Address: Selected by default. Applies taxes based on the customer’s billing address.
- Use Shipping Address: Apply taxes based on the customer’s shipping address.
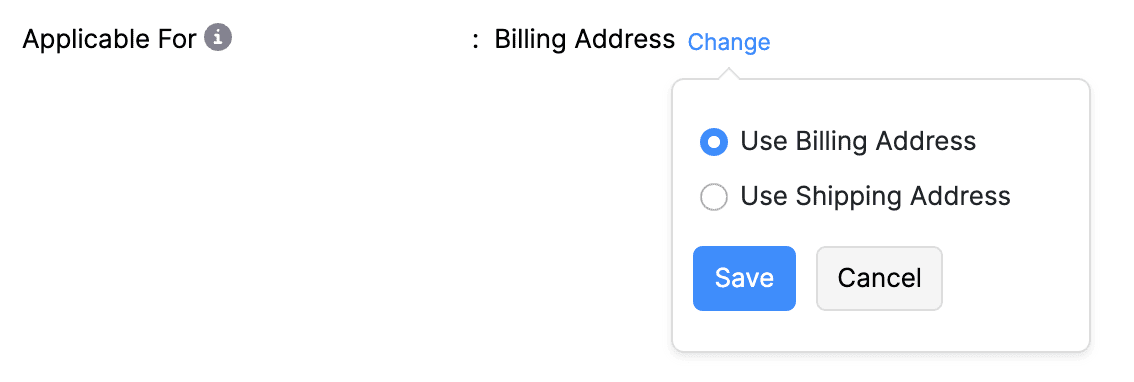
- Click Save.
The selected address will now be used to fetch accurate taxes for transactions through Avalara.
Apply Discounts in Transactions
When you integrate Zoho Books with Avalara for automatic tax calculation, it’s important to handle discounts carefully because they directly affect how tax is calculated. Discounts can reduce the taxable amount, and Avalara needs to know how these discounts apply to ensure accurate tax rates. To support this, Zoho Books allows you to apply discounts in three ways:
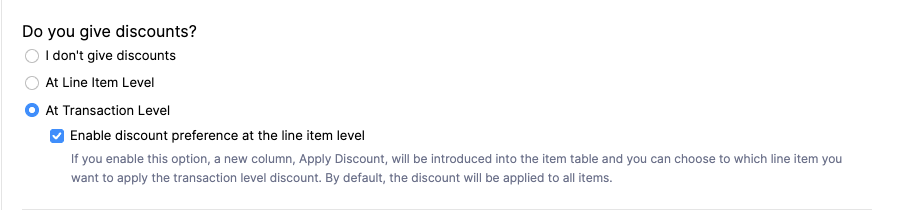
- At Line Item Level: The discount is applied directly to individual line items.
- At Transaction Level: The discount is applied proportionately across all items in the transaction.
- At transaction level with item selection: If you check Enable discount preference at the line item level, a new Apply Discount column appears in the item table of your transactions. You can then choose which line items to apply the transaction-level discount to. By default, the discount applies to all items.
This flexibility ensures that tax is calculated correctly based on how discounts are applied within each transaction. Learn how to configure discounts for your organization.
Notes:
- If you choose At the Line Item Level, item rates cannot be Tax-Inclusive.
- The Discount, Amount, Sub Total, and Total will be recalculated by Avalara after you save the transaction. As a result, the discount amount might take some time to appear in the Item Table.
Automate Tax Calculation With Avalara
Enter a Tax Code for an Item
After integrating Avalara with Zoho Books, enter a Tax Code to each item to tell Avalara how to tax it in different locations. Avalara will then automatically check if the item is taxable and apply the correct tax rate in your transactions. To enter a tax code:
- Go to Items on the left sidebar, and select Items.
- Click + New in the top right corner. To edit an existing item, select it, and click the Edit icon in the top right corner of the Details page.
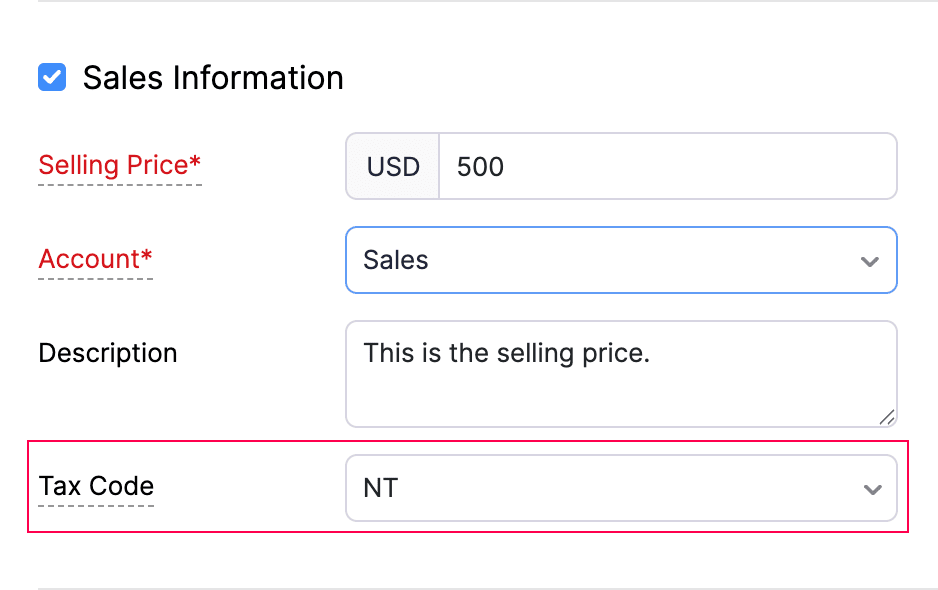
- In the New Item or Edit Item page, enter the Tax Code and fill in the other required details.
Pro Tips:
- You can import multiple items into Zoho Books in bulk with their Avalara Tax Codes. Just add a column named Avalara Tax Code in your import file, enter the tax codes for each item, and import the file into Zoho Books.
- For items you’ve already added, export the list of items, add a column for Avalara Tax Code, update the tax codes in the file, and re-import it to update them all at once. During the import, choose Duplicate Handling as Overwrite Items. This will replace the existing item details in Zoho Books with the updated details from your file. This helps you quickly update tax codes for multiple items without editing them one by one.
- Click Save.
Once you enter a tax code for an item, Zoho Books will apply taxes based on that tax code in any transaction that includes the item. Later, when creating new items, you can select the same tax code from the dropdown if you want to use it again.
Assign an Entity/Use Code and Exemption Number to a Customer (If Applicable)
Avalara automatically calculates tax based on the customer’s address. If a customer is tax-exempt, you’ll need to assign an Entity/Use Code and Exemption Number. To do this:
- Go to Sales on the left sidebar, and select Customers.
- Click + New in the top right corner to add a new customer. To edit an existing one, select the customer and click Edit in the top right corner of the Details page.
- In the New Customer or Edit Customer page, go to the Other Details tab and complete the following fields:
- Entity/Use Code: Choose the correct entity/use code if the customer is Tax-Exempt (e.g., a religious or charitable organization).

- Exemption Number: If the customer has a government-issued tax exemption certificate, enter the exemption number to make them tax-exempt in Zoho Books.

- Click the Address tab at the bottom and enter a valid Billing and Shipping address. Avalara verifies the addresses using Geolocation Technology to ensure accurate tax rates.
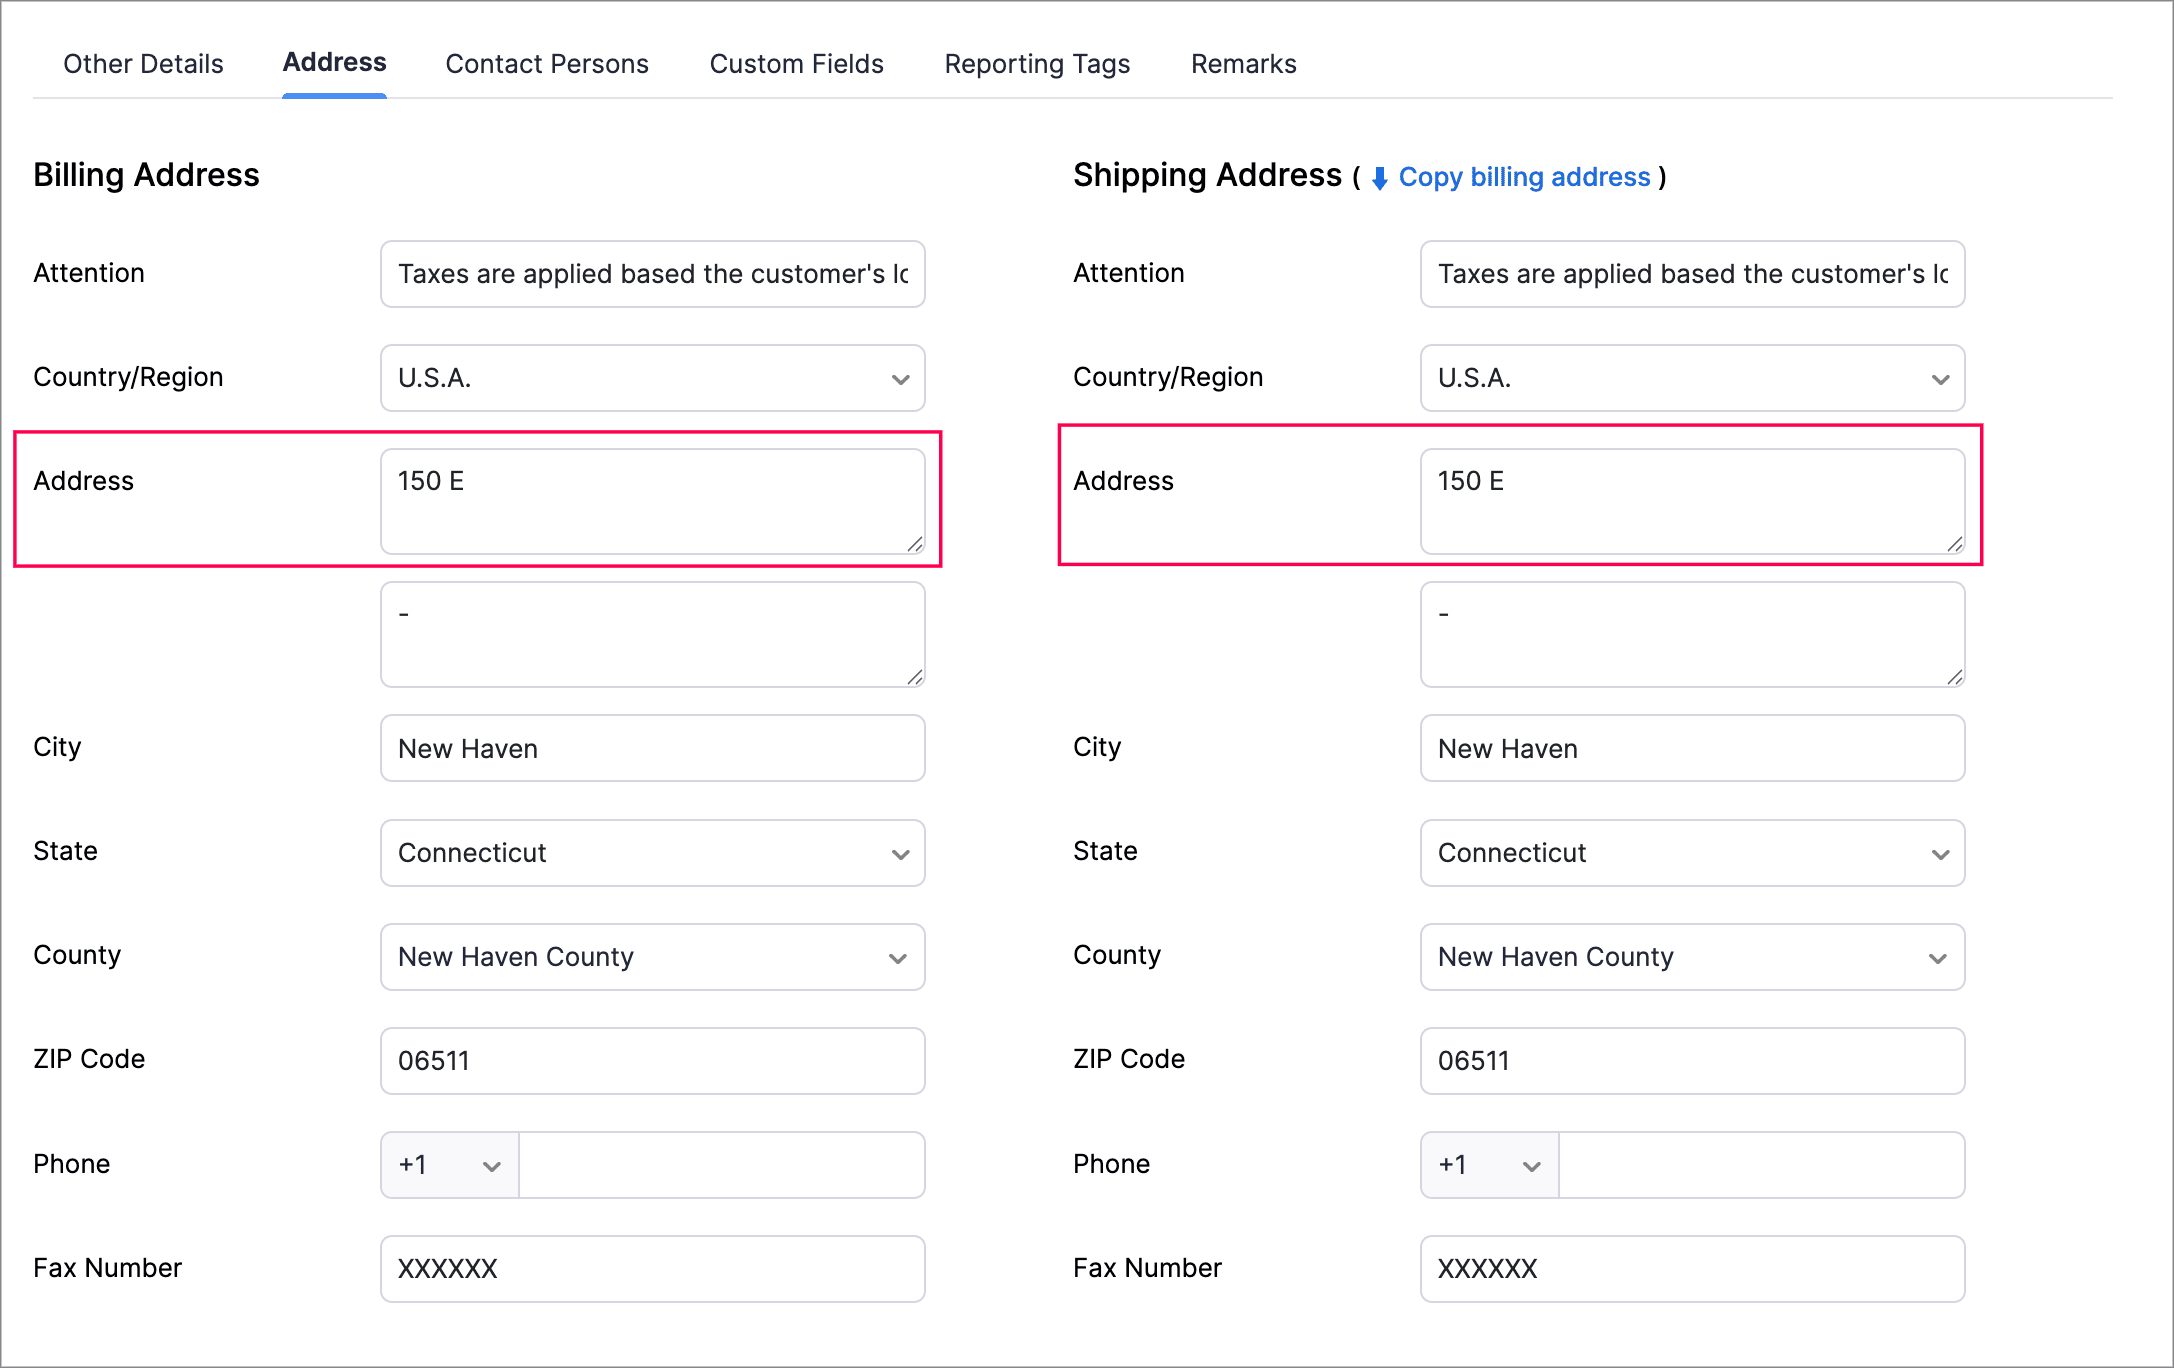
Insights:
- Ensure that you enter the customer’s complete address in the Address Line 1 of the Address field (as annotated in the image above). Avalara uses information only from the first address field to calculate sales tax. If the full address is not entered, or if a part of it is entered in the second line, the sales tax in a transaction may not be applied based on the correct location.
- If the address is not verified, you will see Not Verified below the address. In this case, tax rates will be fetched using the Zip Code, but accuracy may be affected.
- To verify the address, click Verify Address next to the Address field. Avalara then checks the address, corrects errors, and formats it according to postal standards. This ensures the most accurate sales tax rates based on the verified location. If the address is invalid or incomplete, you’ll be prompted to update it.
Note: Avalara uses the Tax ID and Country Details during customer creation to assign the required tax rates for the customers. Enter the other necessary details, and click Save.
Modify the Entity/Use Code in a Transaction
You can modify an item’s tax status or a customer’s tax exemption code directly within a transaction for exceptions like:
- A normally taxable customer needing tax exemption for a specific transaction.
- A different shipping address affects tax rates.
To modify the Entity/Use Code in a transaction:
- Go to Sales on the left sidebar, and select the transaction you want to create for the customer.
- Click + New in the top right corner to create a new transaction.
- In the New Transaction page, choose the customer from the Customer Name dropdown.
- In the Entity/Use Code field, click the Edit icon to update the Entity/Use Code.
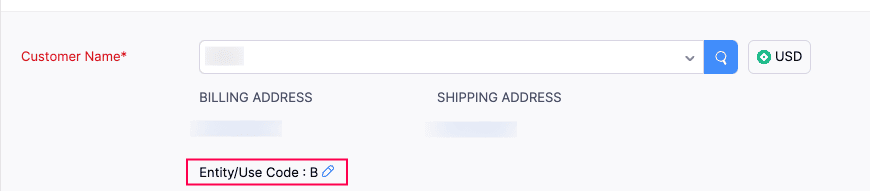
The Entity/Use Code you have updated will now be applied to the customer for that specific transaction.
Add Shipping Charges as a Line Item in a Transaction
Adding shipping charges as a line item ensures they’re included in tax calculations where applicable. If Zoho Books is integrated with Avalara, it determines whether shipping is taxable based on the customer’s location. To add shipping charges as a line item in a transaction:
- Go to Sales on the left sidebar, and select the transaction you want to create.
- Click + New in the top right corner.
- Enter the required details. Next, in the Item Table, select the items for the transaction.
- Click + Add New Row and enter Shipping Charges as the item name. In the TAX CODE column, enter the relevant tax code for the item.

- Click Save as Draft to save it as a draft, or Save and Send to send it to the customer.
The Shipping Charges item will now be automatically applied based on the selected tax code.
Alternatively, you can simplify the process by creating Shipping Charges as an item and then adding it to the transaction. To do this:
- Go to Items on the left sidebar, and select Items.
- Click + New in the top right corner.
- Under Sales Information, choose the account as Shipping Charge and fill in the other details.
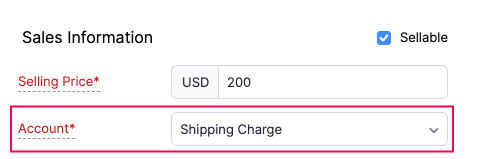
- Click Save.
Now, you can simply add Shipping Charges to any transaction by selecting it from the Item Table.
Update Your Avalara Credentials
If your Avalara credentials expire, change, or you need to switch the connection mode while keeping the integration active, you’ll need to update your credentials in Zoho Books. Also, credentials can become outdated if your Avalara password or API key is updated, the connection environment changes (like moving from sandbox to production), or if Avalara requires a security reset. To update your credentials:
- Go to Settings.
- Select Taxes under Taxes & Compliance.
- In the Taxes pane on the right, select Avalara.
- Click Update Credentials in the top right corner.

- Click Save.
Your Avalara credentials will now be updated.
Disable the Integration
You can disable the Avalara integration at three levels:
- Disable Tax Calculation: Taxes will not be calculated on any transaction created once this option is disabled.
- Disable Address Verification: Avalara will no longer verify the addresses of the contacts to ensure accurate tax rates.
- Disable Avalara Integration: The integration with Avalara will be completely disabled. You can then go back to using the sales tax rates you set up manually in Zoho Books.
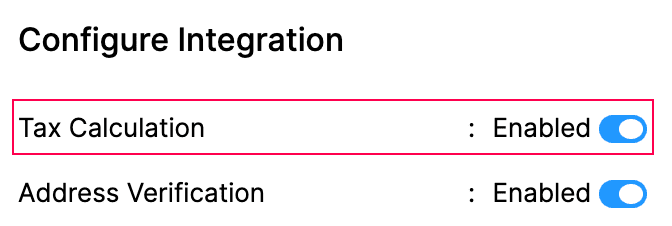
Disable Tax Calculation
To disable tax calculation for Avalara:
- Go to Settings.
- Select Taxes under Taxes & Compliance.
- In the Taxes pane on the right, select Avalara.
- Under Configure Integration, disable the Tax Calculation toggle.
Taxes will no longer be calculated on any new transactions created after this change.
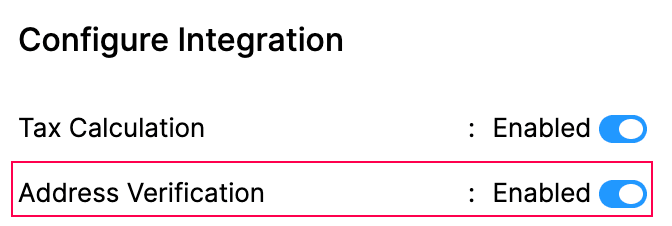
Disable Address Verification
To disable address verification:
- Go to Settings.
- Select Taxes under Taxes & Compliance.
- In the Taxes pane on the right, select Avalara.
- Under Configure Integration, disable the Address Verification toggle.
Avalara will no longer verify your customers’ addresses.
Disable the Entire Integration
To disable the entire integration:
- Go to Settings.
- Select Taxes under Taxes & Compliance.
- In the Taxes pane on the right, select Avalara.
- Click Disable Avalara Integration in the top right corner.

- In the popup that follows, click Yes to confirm.
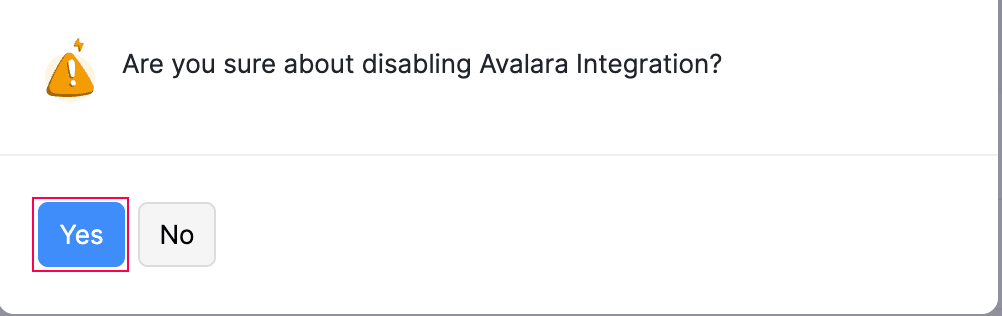
The integration will be completely disabled, and you’ll be reverted back to sales tax for tax calculations in your organization.
 Yes
No
Yes
No
Thank you for your feedback!