
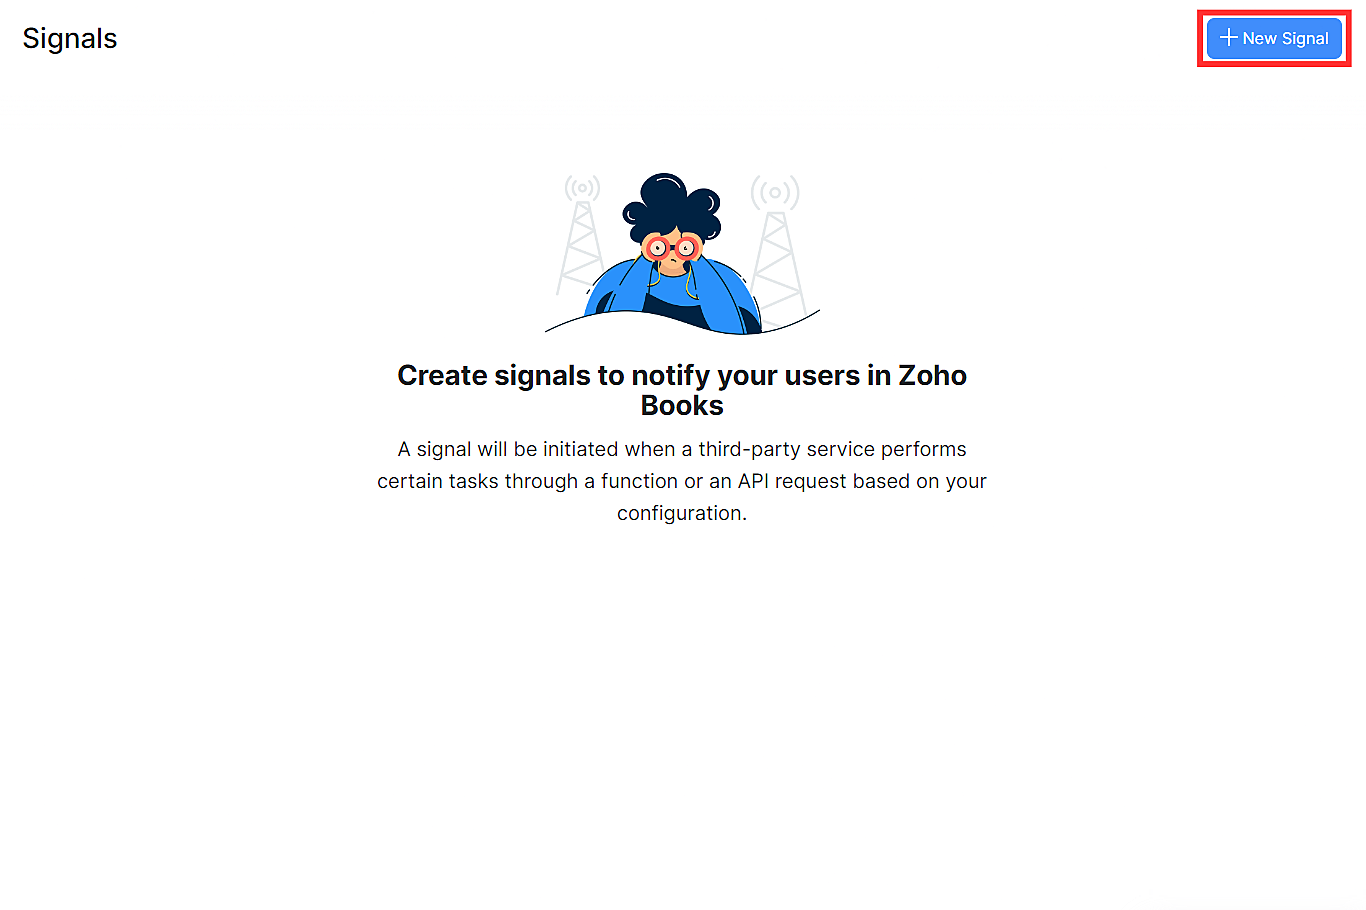
Signals
The Signals feature in Zoho Books sends in-app notifications to users in your organisation whenever an action is performed in a third-party app that you had configured. Signals will help you stay updated on activities that will affect your business and take informed decisions. Let’s take a look at a scenario to understand this better:
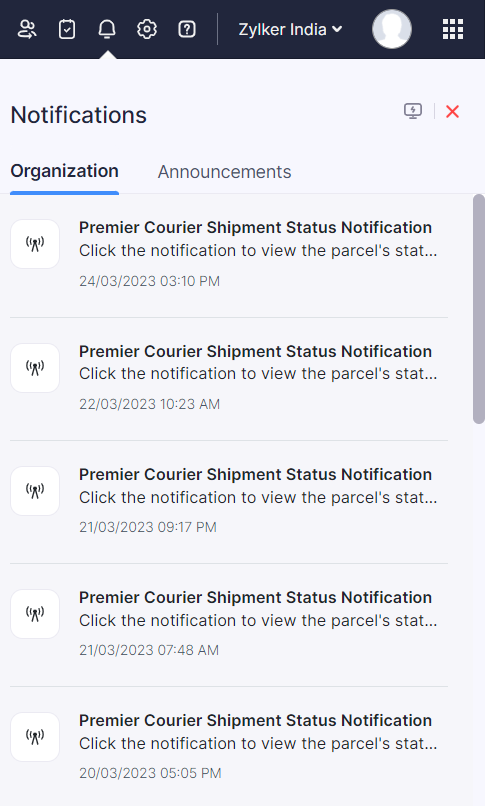
Scenario: Door to Door is an e-commerce company that primarily operates online. They use Zoho Books to manage their business and Premier Courier to ship their products. By using the Signals feature in Zoho Books, Door to Door receives timely notifications about the status of their packages. This information enables them to inform their customers about the status of their shipments. Also, they receive notifications when a shipment could not be delivered to the customer. In such cases, they immediately contact the customer and re-initiate the delivery after identifying why the shipment wasn’t delivered. This helps them provide a positive customer experience.
Similarly, you can use the Signals feature to connect your Zoho Books organisation with a third-party app and receive notifications based on your business needs.
Note: This feature is available only in specific plans of Zoho Books. Visit the pricing page to check if it’s available in your current plan.
Create a New Signal
To create a signal in Zoho Books:
- Go to Settings on the top right corner of the page.
- Select Signals under Developer Space.
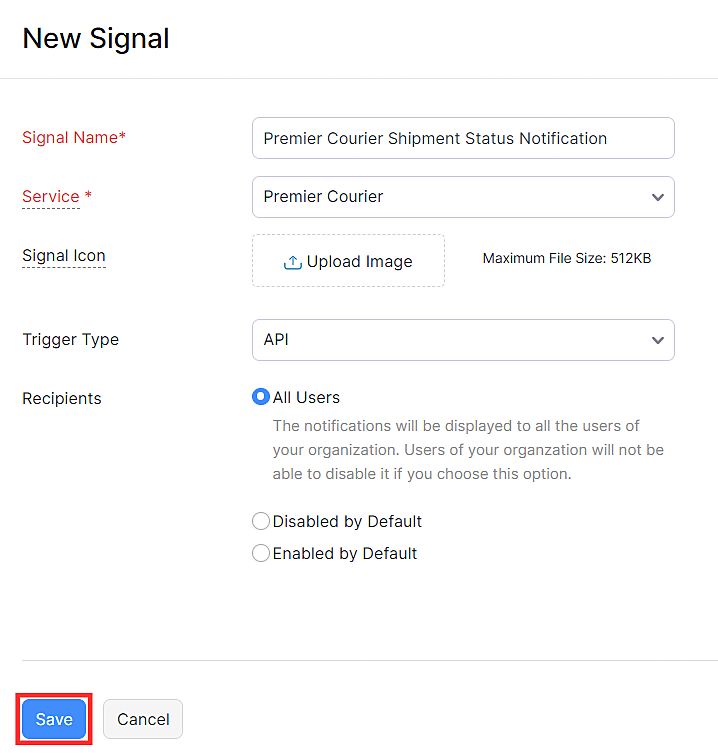
- Click + New Signal on the top right corner of the page.
Enter a name for the signal in the Signal Name field.
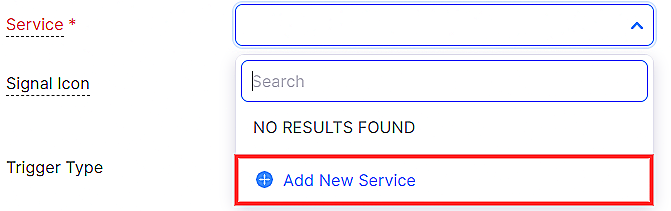
Add or select the third-party app from which you’ll receive notifications in the Service dropdown.
- Click Add New Service from the dropdown.
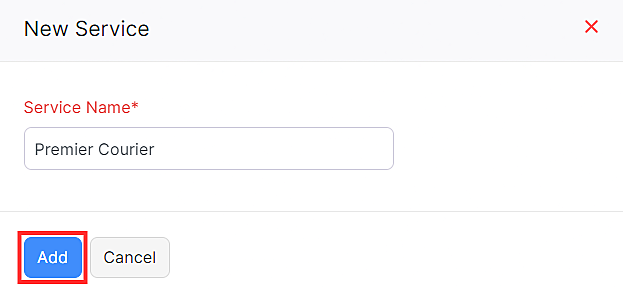
- On the New Service page, enter the name of the third-party app in the Service Name field and click Add. The third-party app will be listed in the Service field.
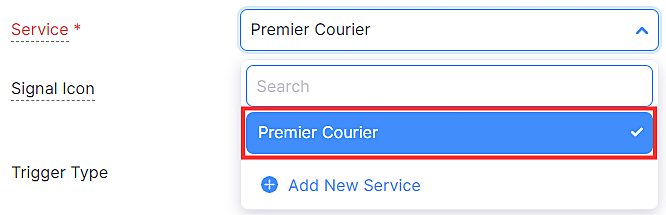
- Click the Service dropdown and select the third-party app for which you’re creating the signal.
You can upload an image for the signal. This will help in identifying notifications from a signal.
Click Upload Image next to Signal Icon.
- On the page that appears, select the icon and click Open.
Select how you want to trigger the signal from the Trigger Type dropdown. You can trigger the signal using a function or an API.
- You can trigger the signal using an API if the signal’s message can be constructed in the third-party app itself.
- You can trigger the signal using a Function if the message and actions need to be constructed dynamically i.e., it requires data from books.
In the Recipients field, you can choose how the users in your organisation will receive notifications for the signal.
- All Users: Select this option if you want all the users in your organisation to receive the notification for this signal. They will not be able to disable notifications for this signal.
- Disabled by Default: Select this option if only the user who created the signal do receive notifications for it. The notification will be disabled for other users in your organisation. They can enable notifications for this signal from the Signals’ list page if required.
- Enabled by Default: Select this option if you want all users in your organisation to receive notifications for this signal. Users can disable notifications for this signal from the Signals’ list page.
Click Save.
Note: If you select the Trigger Type as Function and if you are using a Connection in the function, you will have to select the ZohoBooks.Signals.CREATE and ZohoBooks.Signals.READ scopes as these will not be included in the ZohoBooks.fullaccess.All scope.
Insight: You can format the content in the message field of the function or the API. The following formatting options are supported:
- Bold: Enclose the contents in asterisks (*). For example, *This content is bold.*
- Italics: Enclose the contents in carets (^). For example, ^This content is in italics.^
- Line break: Use ~br~ to insert a line break.
If you selected the Trigger Type of the signal as Function, the OAuth URL and ZAPI Key URL will be generated and displayed in a pop up. You can copy the URL from the pop up.
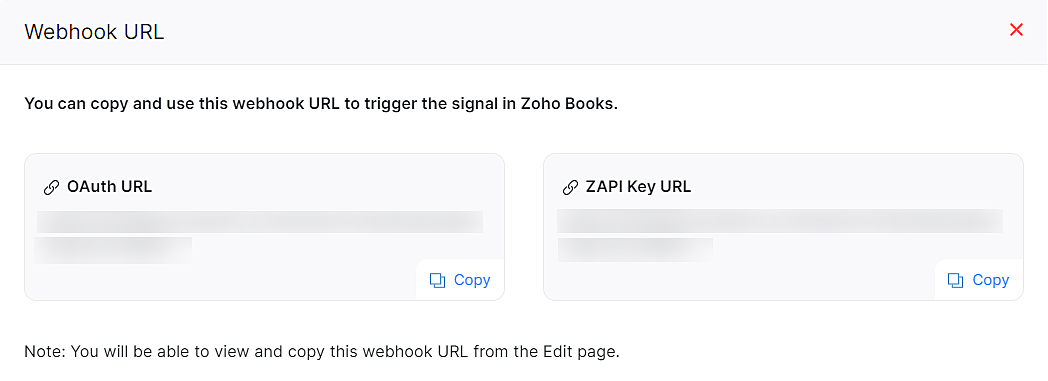
If you selected the Trigger Type of the signal as API, the namespace will be generated and displayed in a pop up. You can copy the namespace from the pop up.

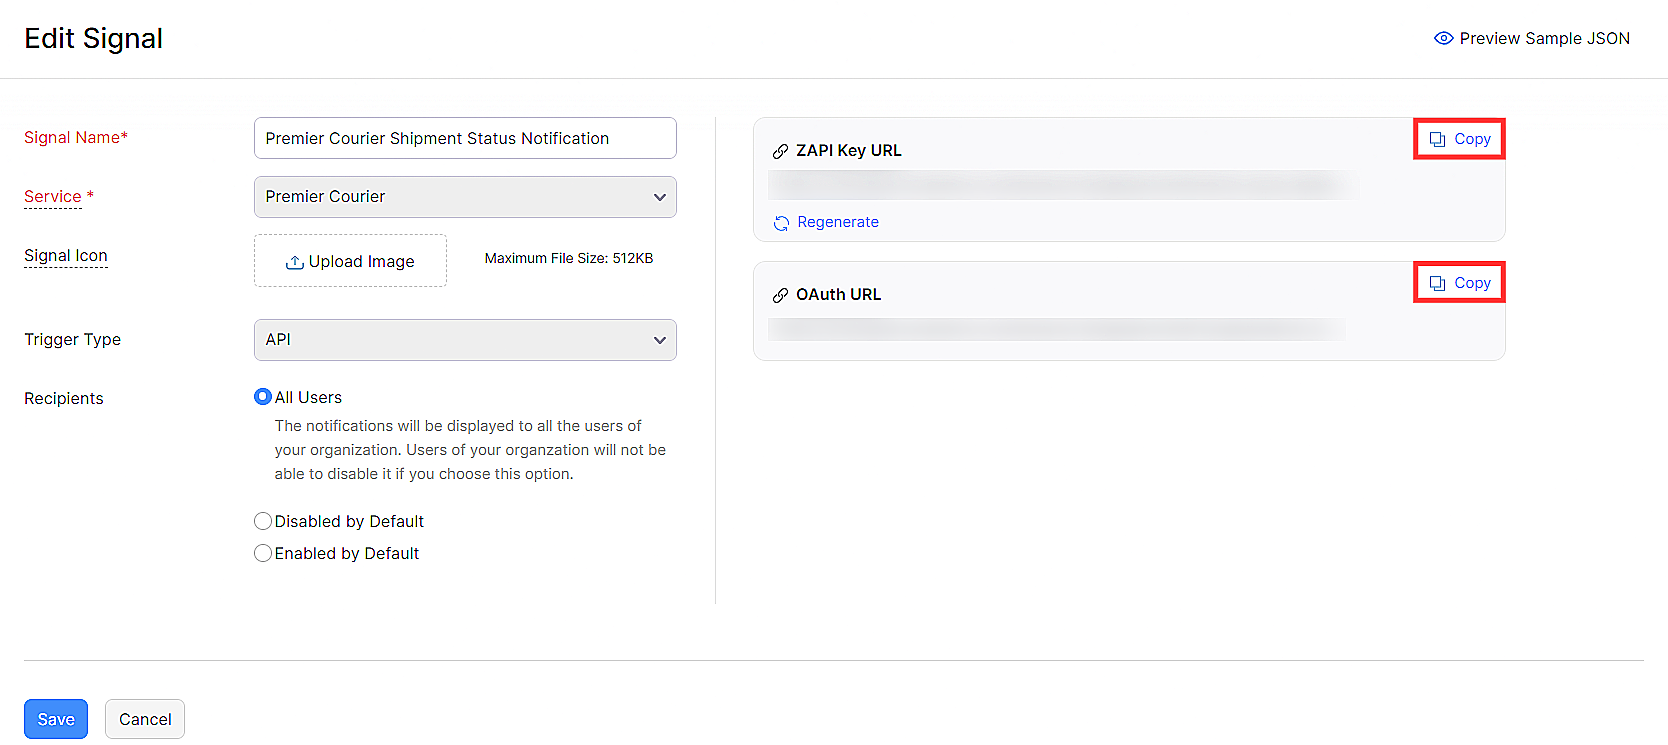
For both function and API trigger types, the OAuth URL and ZAPI Key URL will be displayed on the Edit page of the signal. You can copy them from there as well.
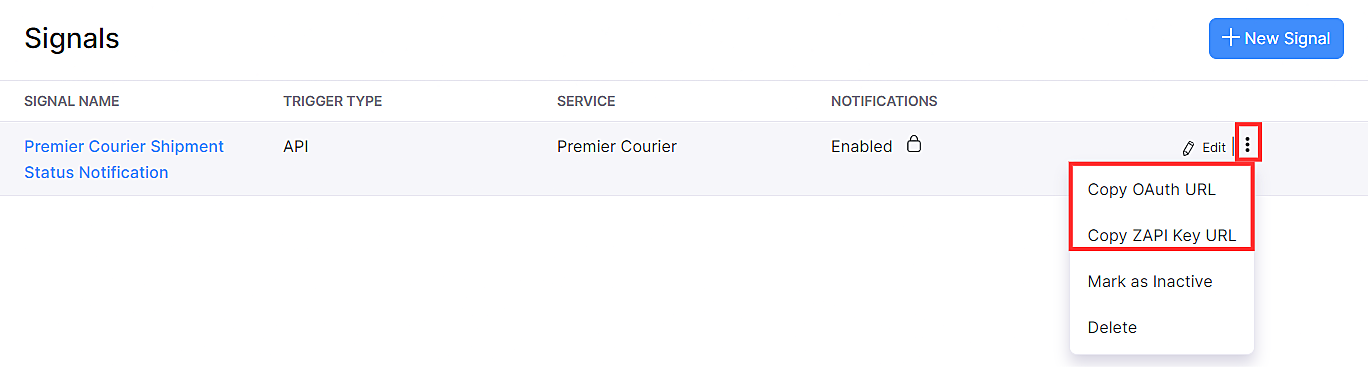
You can also copy the URLs by clicking the More button next to the signal on the Signals’ list page.
Insight: You do use OAuth if the third-party app supports OAuth authentication. You do use ZAPI Key when the third-party app doesn’t support OAuth authentication or if you want to configure the signal easily.
You can now configure the URL in the third-party application to set up signals. If you want to add any additional attributes to the script, you can do so at the time of the API call.
| Attribute | Description |
|---|---|
| Header | The header of the API request. |
| Parameters | The query parameters of the API. |
| Body | It is a string that contains the request body of the API call. |
Pro Tip: Limit access to the URL to a few trusted and authorised users. If exposed, any user who has access to the URL can use it to trigger notifications for the signal.
Now that you’ve created a signal, you’ll receive in-app notifications in your Zoho Books organisation when the third-party app performs the task that you have configured.
Manage Signal Notifications
A user with access to Settings can manage the notification preference for signals from the Signals list page. Here’s how:
- Go to Settings on the top right corner of the page.
- Select Signals under Developer Space.
- On the Signals list page, hover the cursor over the signal for which you want to change the notification preference and
- Slide the toggle next to Enabled if you don’t want to receive notifications from that signal.
- Slide the toggle next to Disabled if you want to receive notifications from that signal.

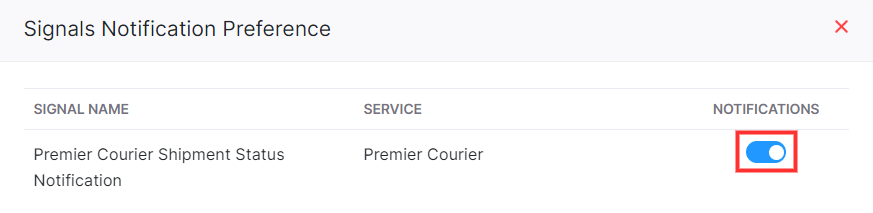
A user who doesn’t have access to Settings can manage the notification preference for signals from the Notifications section. Here’s how:
- Click the Notifications button on the top right corner of the page.
- Click the Gear icon on the top right corner of the Notifications section.
- On the Signals Notification Preference page, hover the cursor over the signal for which you want to change the notification preference and
- Slide the toggle next to Enabled if you don’t want to receive notifications from that signal.
- Slide the toggle next to Disabled if you want to receive notifications from that signal.
Note: If the user who created the signal selected the Recipients as All Users, all the users in your organisation will receive notifications from that signal and they’ll not be able to disable it.
Edit a Signal
If you want to make any changes to the signal, you can do that on the Edit page of the signal. Here’s how:
- Go to Settings on the top right corner of the page.
- Select Signals under Developer Space.
- Click the Edit button next to the signal.

- On the Edit Signal page, make the necessary changes and click Save.
Delete a Signal
If you no longer need a signal, you can delete it.
Warning: Once you delete a signal, you’ll not able to retrieve it and you’ll stop receiving notifications for that signal.
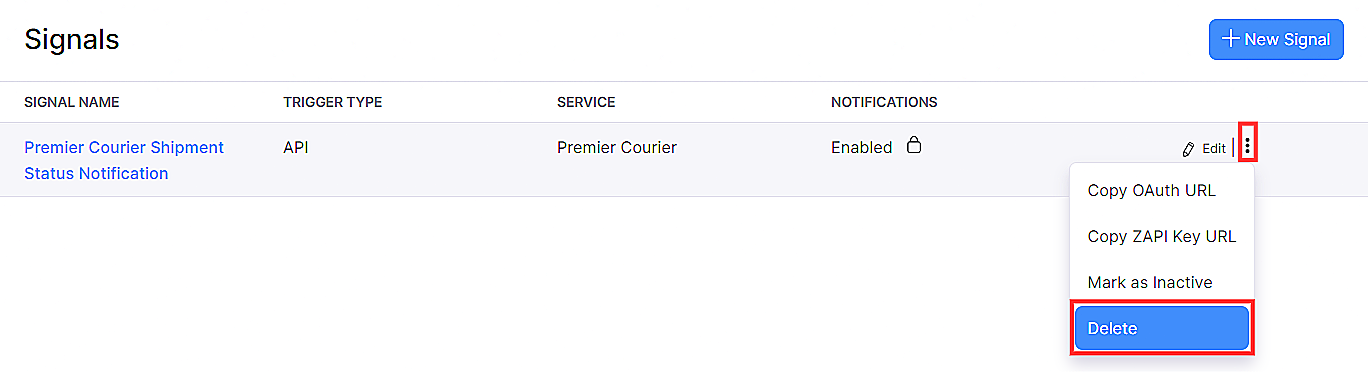
To delete a signal:
- Go to Settings on the top right corner of the page.
- Select Signals under Developer Space.
- Click the More button next to the signal and select Delete from the dropdown.
- In the pop up that appears, click Delete.
Even after deleting a signal in Zoho Books, the corresponding configuration made in the third-party app will exist. Ensure that you delete the configuration in the third-party app as well.
Mark as Inactive
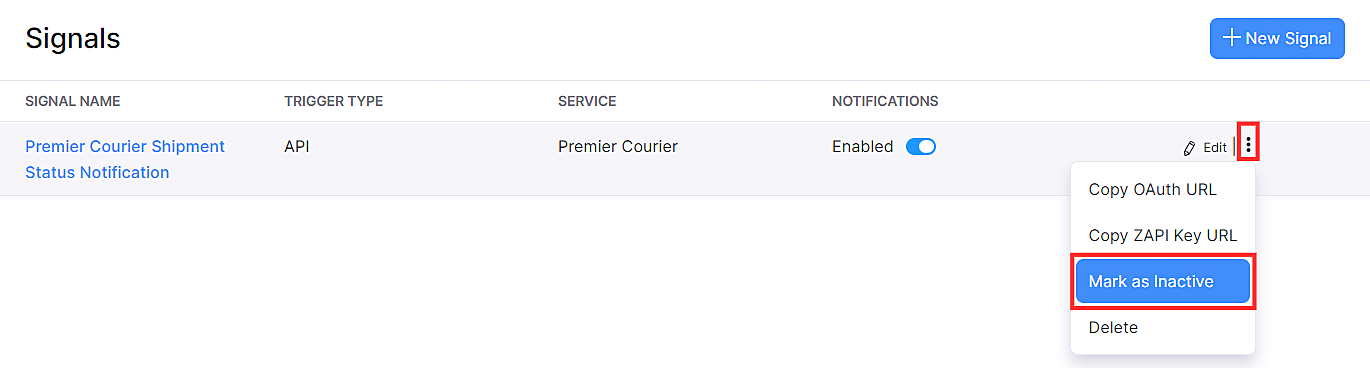
If you don’t need a signal but you don’t want to delete it, you can mark it as inactive. Here’s how:
- Go to Settings on the top right corner of the page.
- Select Signals under Developer Space.
- Click the More button next to the signal and select Mark as Inactive from the dropdown.
Regenerate ZAPI Key URL
The ZAPI Key will be included in the invoking URL as a part of the query parameter. Since it’s included in the invoking URL, it requires no extra configuration. However, if the ZAPI Key URL is exposed, any user can use it to trigger notifications for the signal. If the ZAPI Key is exposed, you can regenerate it. Here’s how:
- Go to Settings on the top right corner of the page.
- Select Signals under Developer Space.
- Select the Edit button next to the signal.
- On the Edit Signal page, select Regenerate below the ZAPI Key URL field.
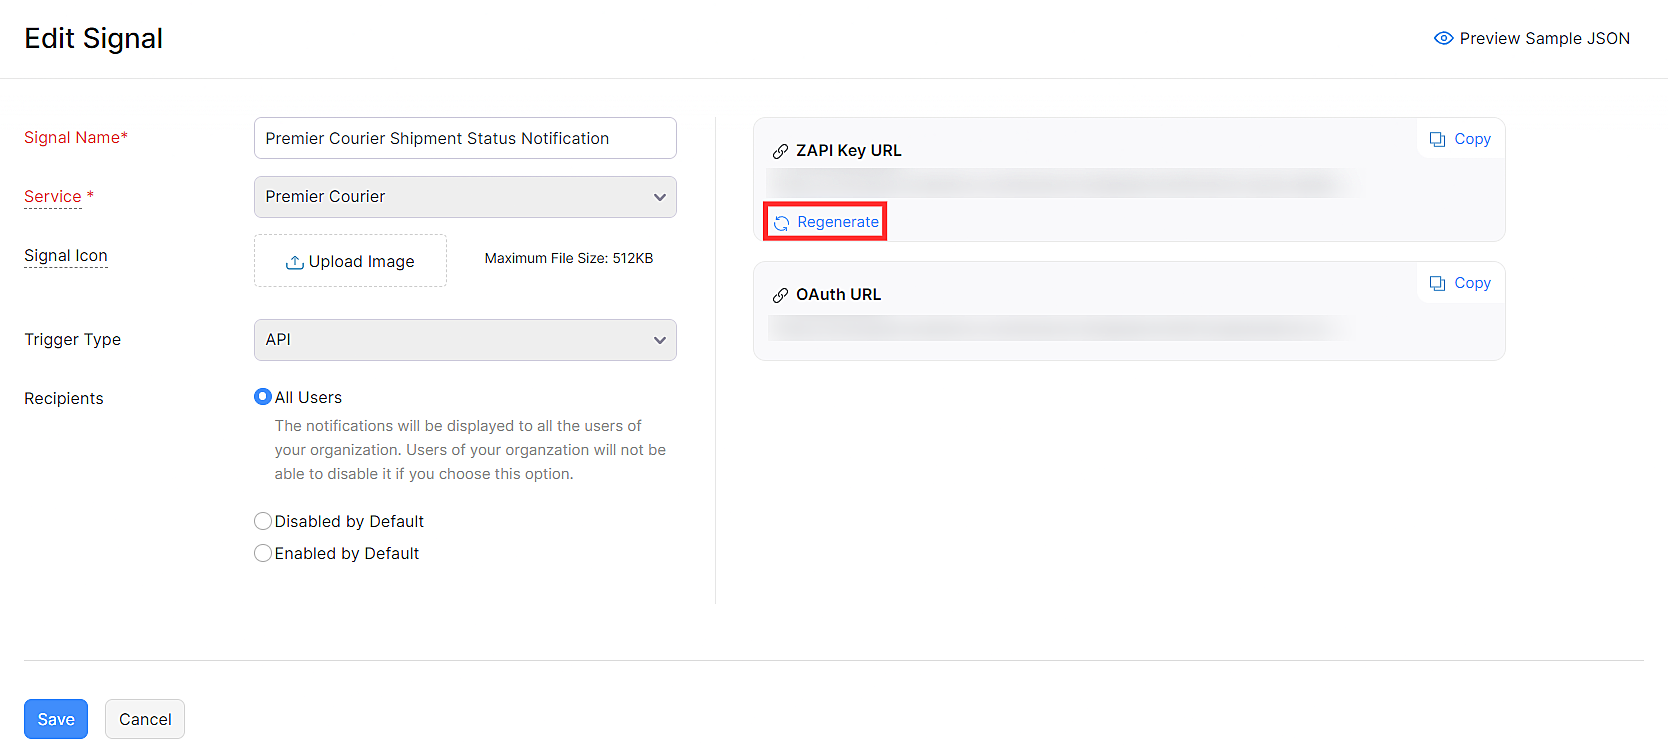
The ZAPI Key will be regenerated. Ensure that you replace the old ZAPI Key with the new one in all the other places where you used it.
 Yes
No
Yes
No
Thank you for your feedback!