
Migrate From QuickBooks Online to Zoho Books
You can now import your chart of accounts, customers, vendors, products and services, sales and purchase transactions, opening balances, and other data from your QuickBooks Online account into Zoho Books easily. In this document, we will explain each step involved in this migration process.
Note: If you don’t have access to the migration tool, write to us at migrations@zohobooks.com and request to enable the tool for your Zoho Books organisation.
Migrate Your QuickBooks Online Data
To migrate your QuickBooks Online data into Zoho Books, you must first export all the data from QuickBooks Online as a ZIP file. Once you have the ZIP file, you can migrate the data into your Zoho Books organisation. Here’s how:
- Go to the QBO Migration module on the left sidebar.
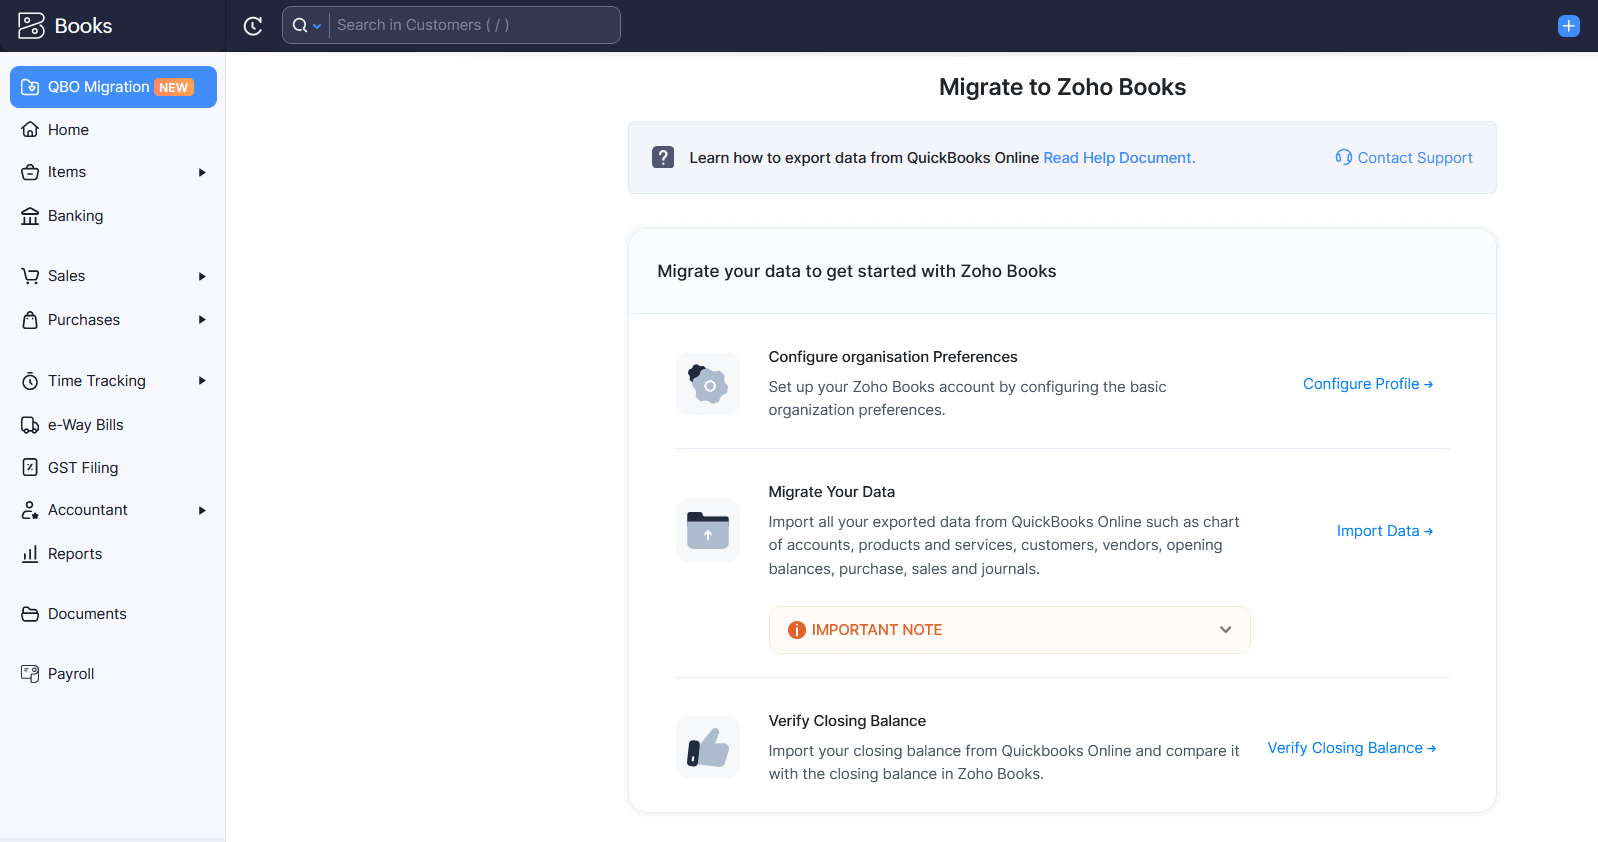
The import process consists of three steps:
- Configure your Zoho Books organisation’s preferences
- Import your QuickBooks account’s data
- Verify your closing balance
1. Configure Organisation Preferences
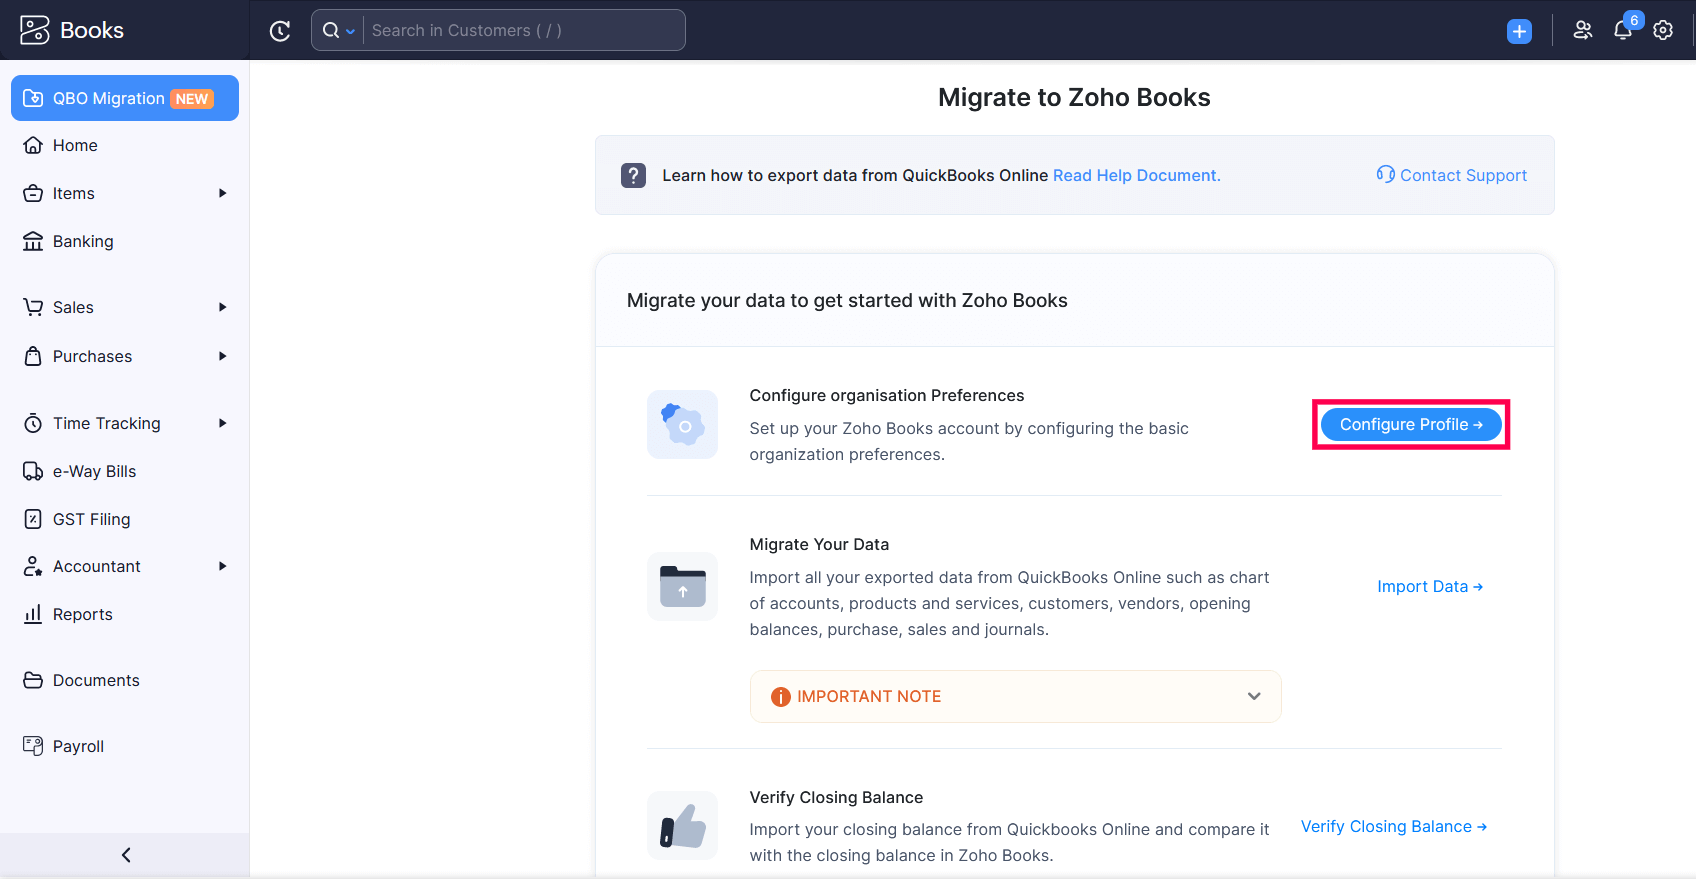
To configure your Zoho Books organisation:
- In the Migrate your data to get started with Zoho Books section, click Configure Preferences next to Configure Organisation Preferences.
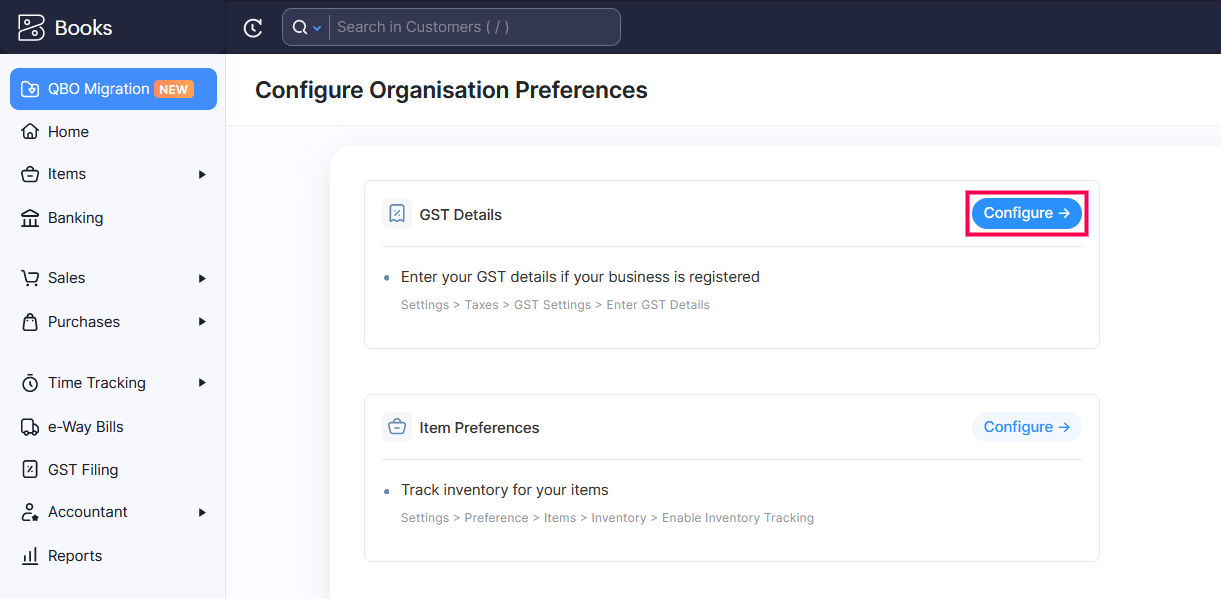
In the Configure Organisation Preferences page, you can configure the following preferences:
1.1 GST Details
If your business is GST registered, you can enter the GST details, and configure taxes in Zoho Books. Here’s how:
- In the Configure Organisation Preferences page, click Configure next to GST Details.
- In the GST Settings page, select the Is your business registered for GST? option.
- Enter your 15 digits GSTIN.
- Enter the date on which your business was registered for GST in the GST Registered On field.

- Click Save.
If your business is not GST registered, you can create pre-GST taxes in the Tax Rates section.
Once you’ve entered the GST details, click Back on the top left corner of the page.
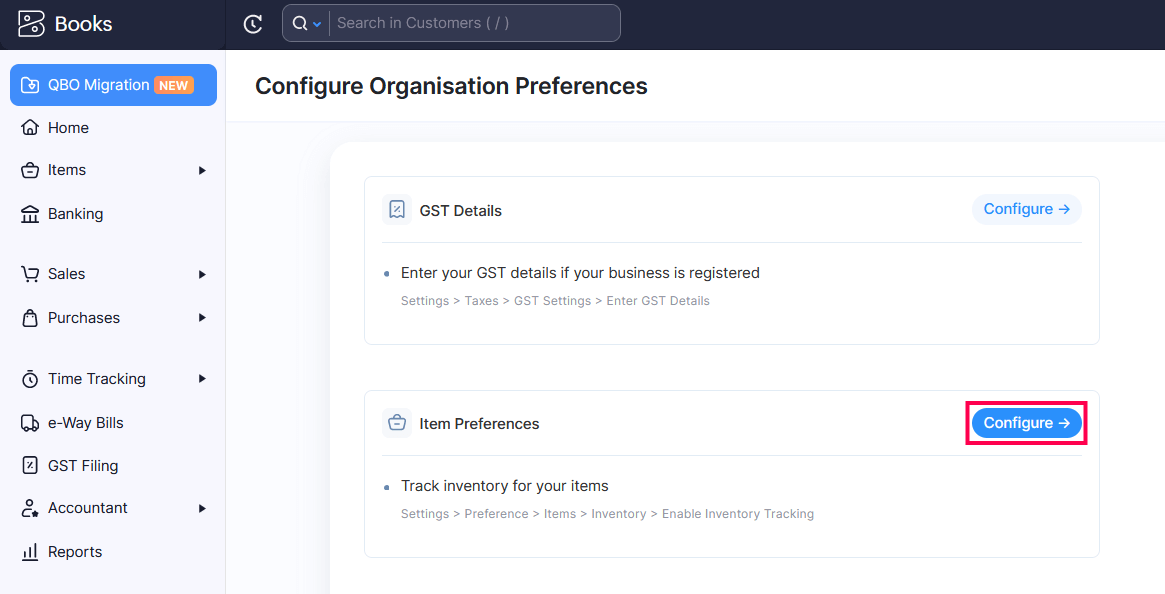
1.2 Item Preferences
In item preferences, you can enable inventory tracking, and enable HSN or SAC field. Here’s how:
- In the Configure Organisation Preferences page, click Configure next to Item Preferences.
- To enable inventory tracking, select the Enable Inventory Tracking option and enter the Inventory Start Date. This date should be the same as your Opening Balance Date.

- To enable the HSN code or SAC field, check the Enable the HSN Code or SAC field option under HSN Code or SAC. Select the 4-digit HSN Code or SAC option if your business’s annual turnover was less than ₹5 crores in the previous year and the 6-digit HSN Code or SAC option otherwise.
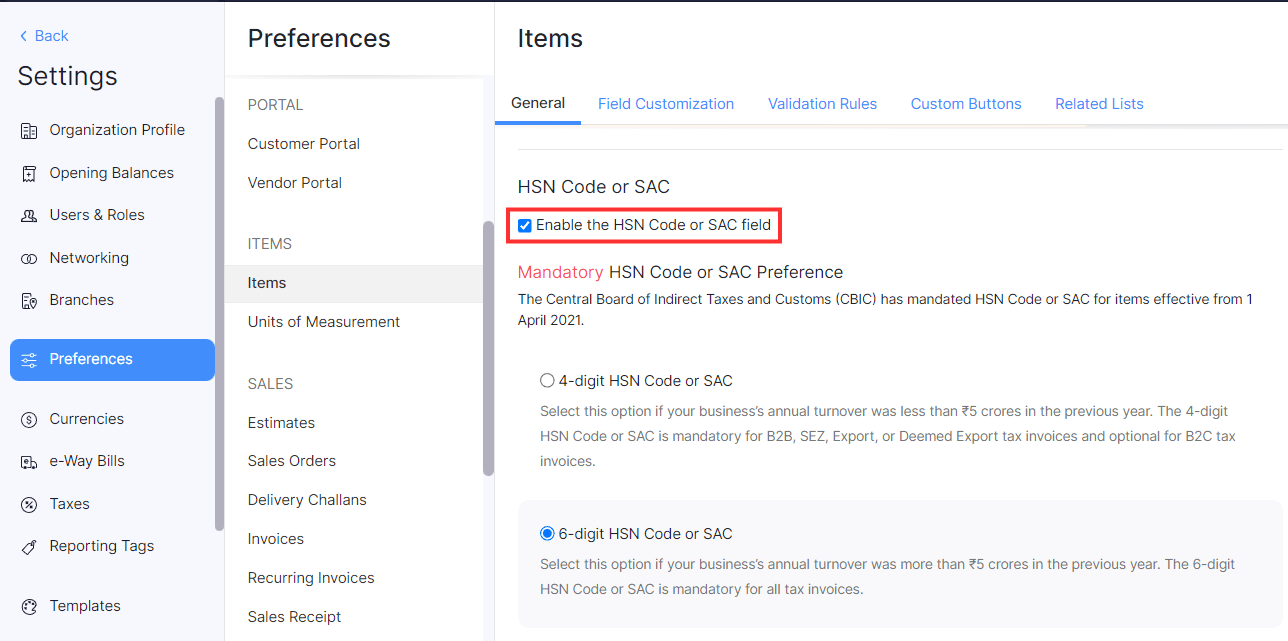
- Click Save.
Once you’ve configured the item preferences, click Back on the top left corner of the page.
1.3. Other Preferences
1.3.1 SKU for Inventory
You can track inventory for the items in your organisation seamlessly using the Stock Keeping Unit (SKU). To do so, you will have to mark the SKU field as active and mandatory in Zoho Books. Here’s how:
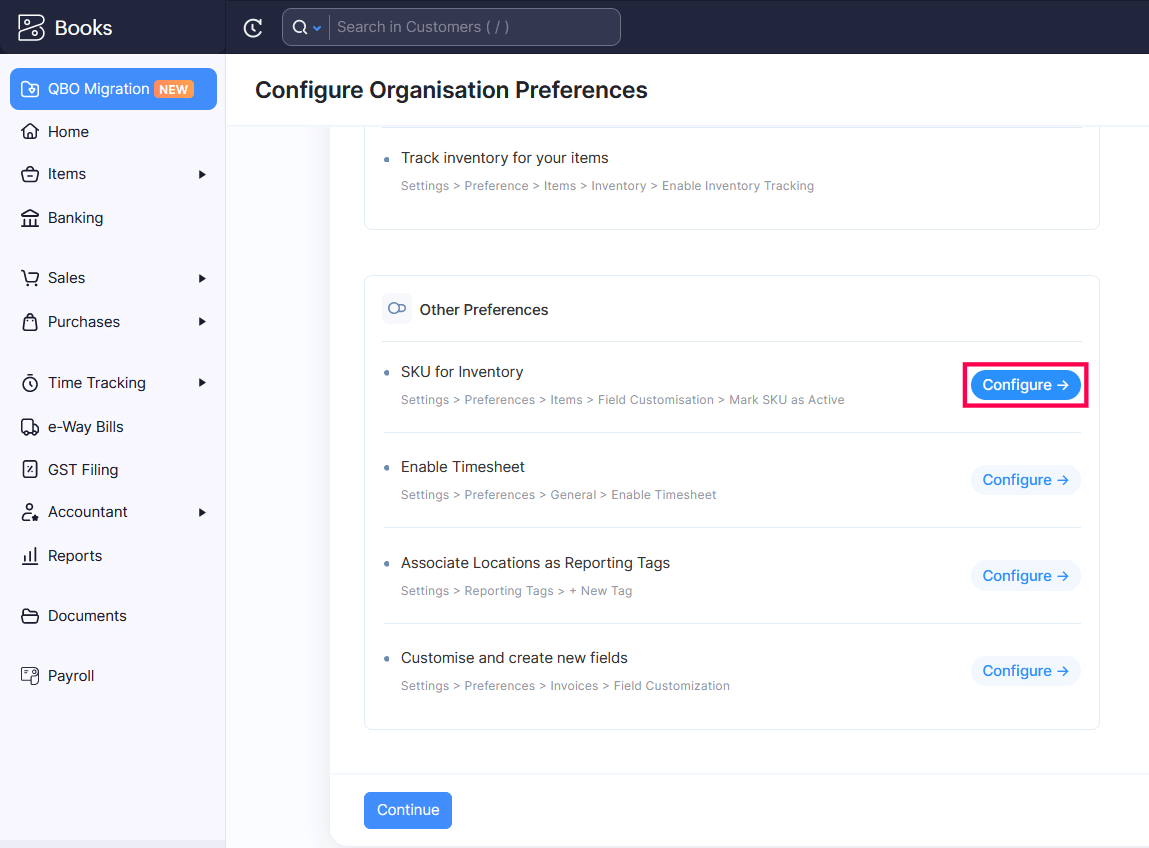
- In the Configure Organisation Preferences page, click Configure next to SKU for Inventory.
- Hover over the SKU field and click the dropdown.
- Select Mark as Active and Mark as Mandatory.
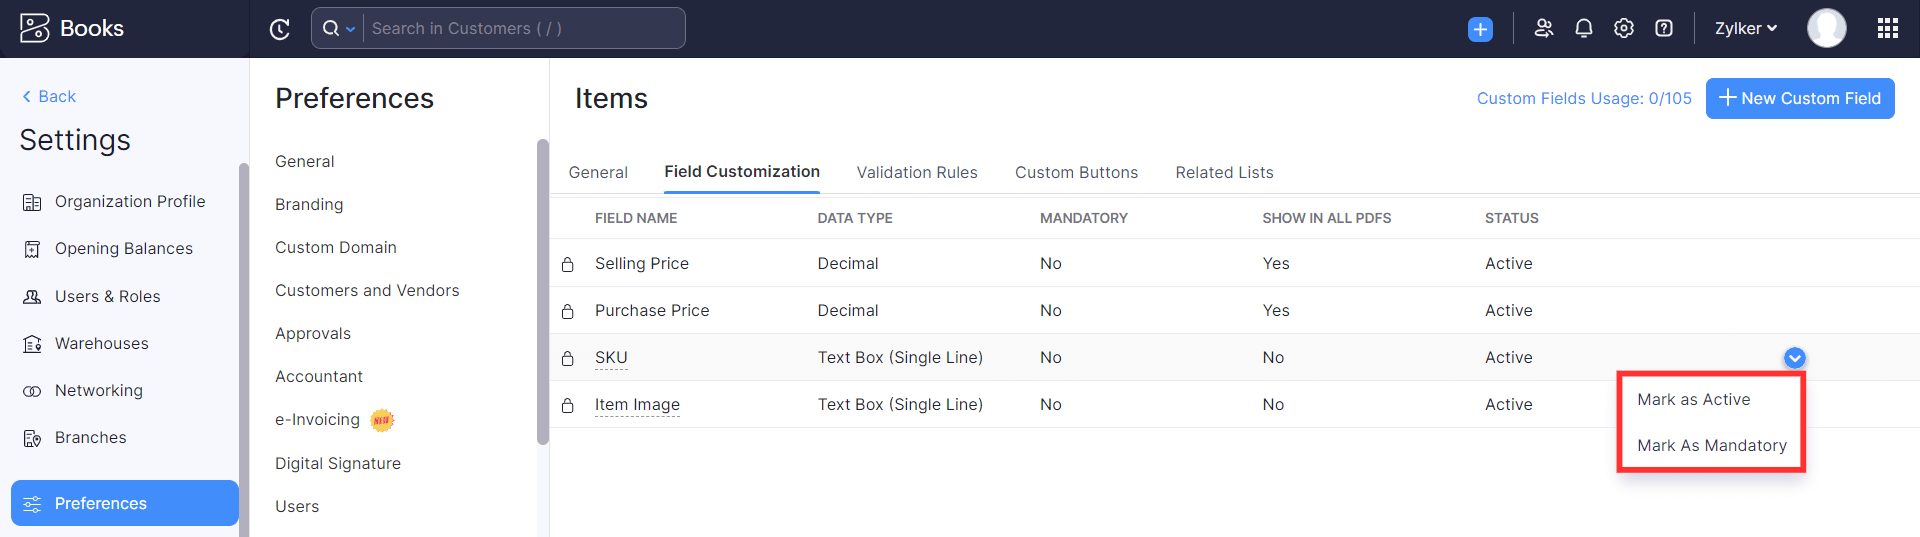
The SKU field will be made active and mandatory for all items. Click Back on the top left corner of the page.
1.3.2 Enable Timesheet
To start creating and tracking your projects in Zoho Books, you will need to enable the Timesheet module. Here’s how you can do it:
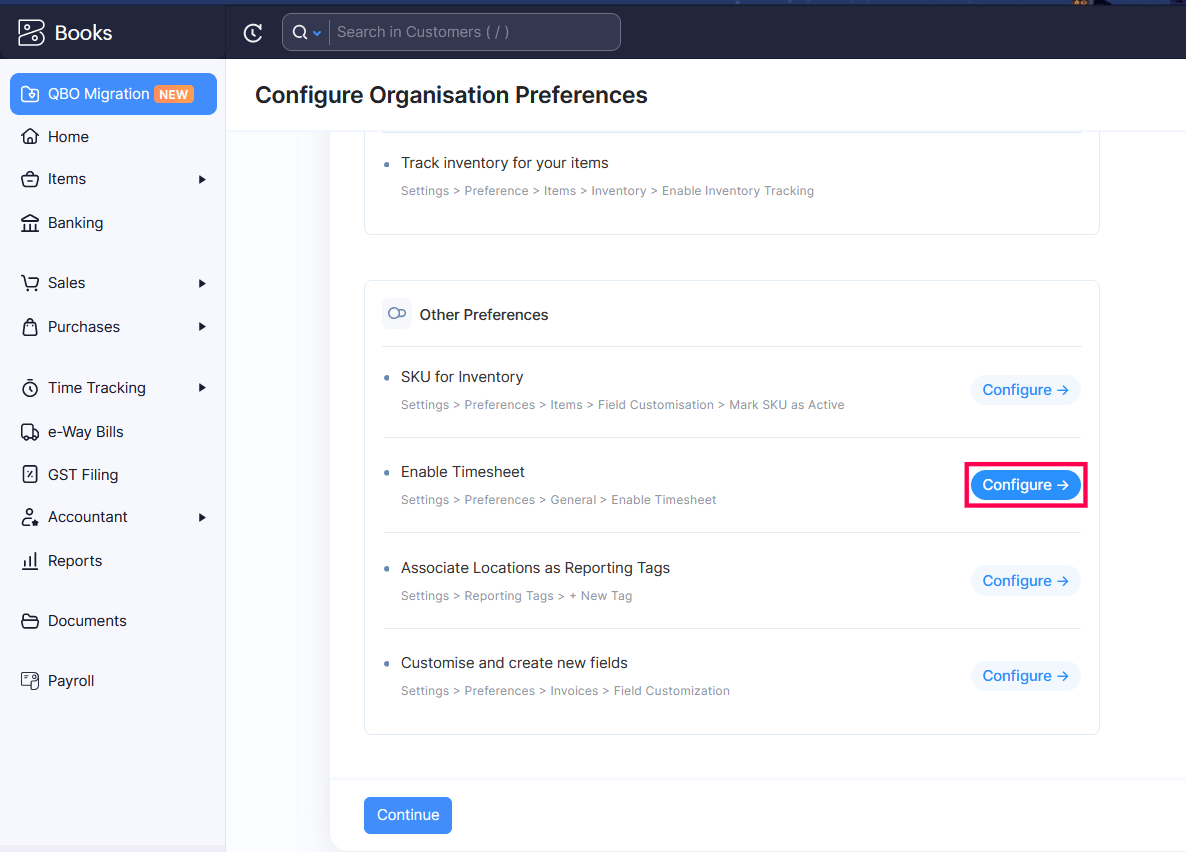
- In the Configure Organisation Preferences page, click Configure next to Enable Timesheet section.
- In the Settings page, click General.
- Check the Timesheet option under Select the modules you would like to enable section.
- Click Save at the bottom of the page.
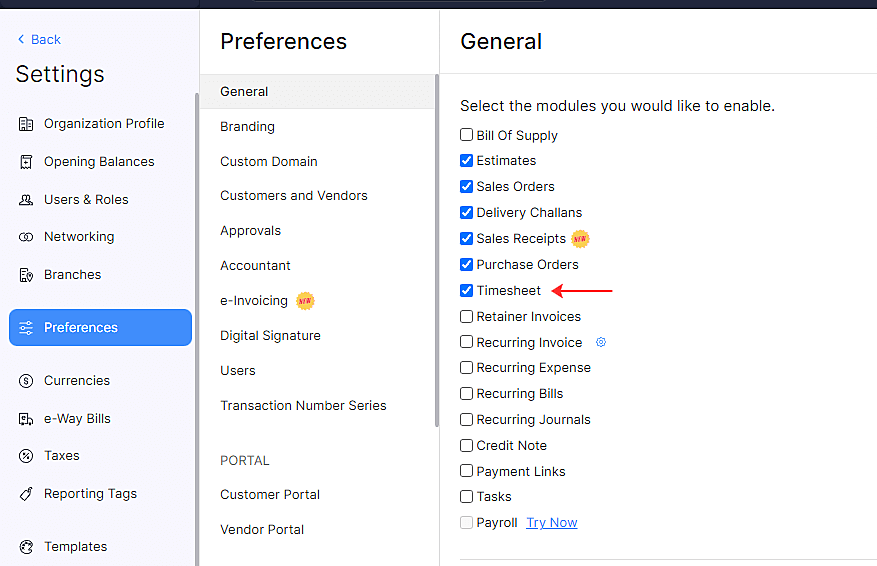
You will now be able to log time spent performing individual tasks associated with your projects in Zoho Books. Click Back on the top left corner of the page.
1.3.3 Associate Locations as Reporting Tags
If you have your items, contacts, or transactions associated with certain locations, you can track them in Zoho Books using Reporting Tags.
To create a reporting tag:
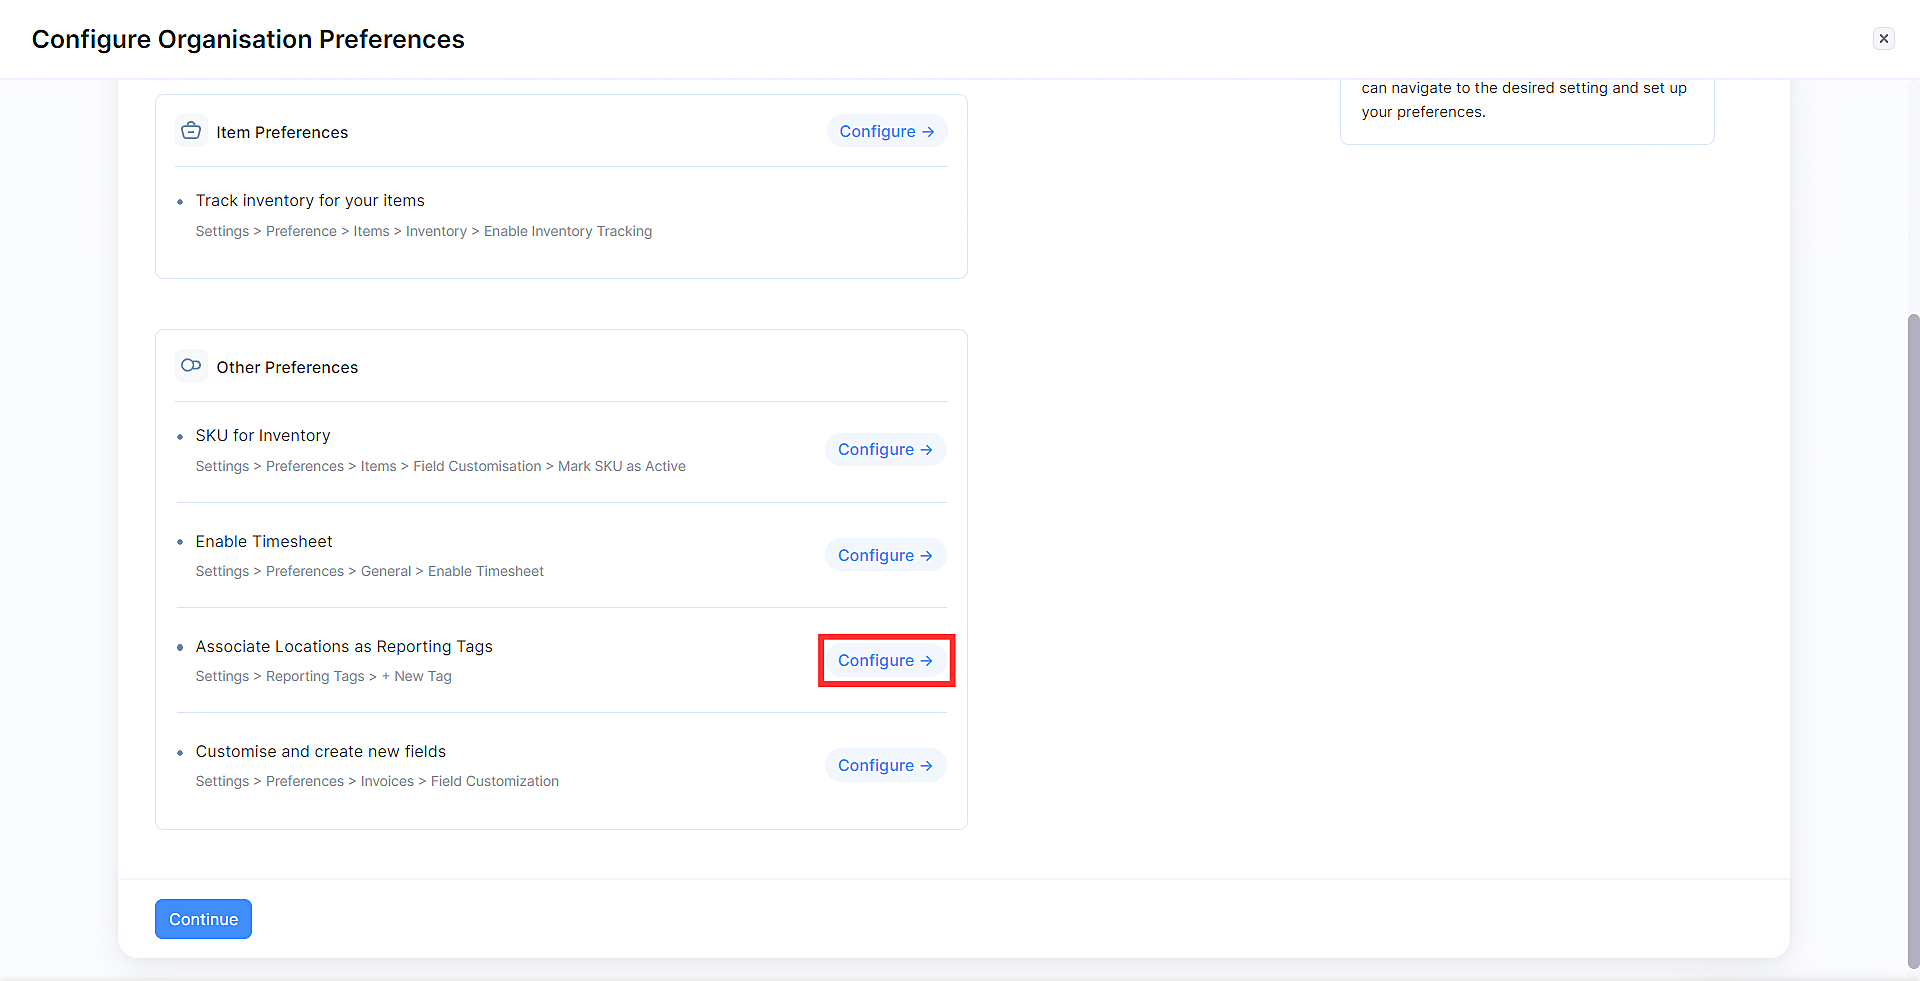
- In the Configure Organisation Preferences page, click Configure next to Associate Locations as Reporting Tags.
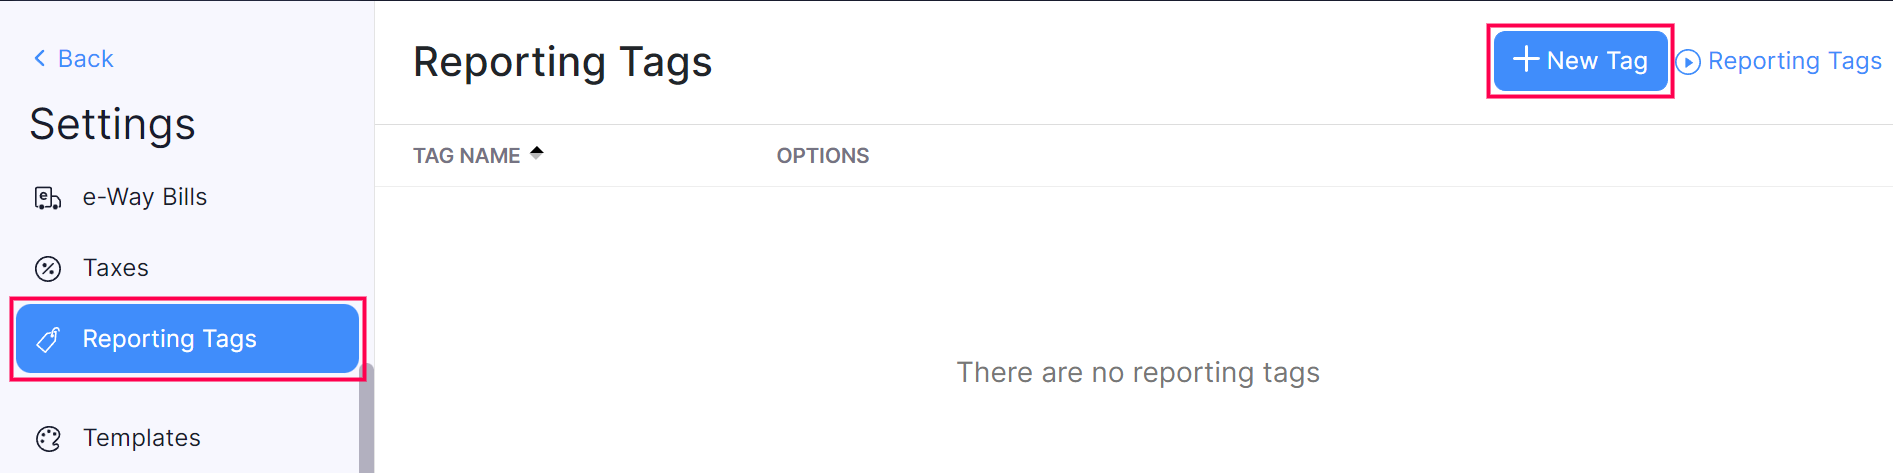
- In the Settings page, select Reporting Tags.
- Click + New Tag in the top right corner.
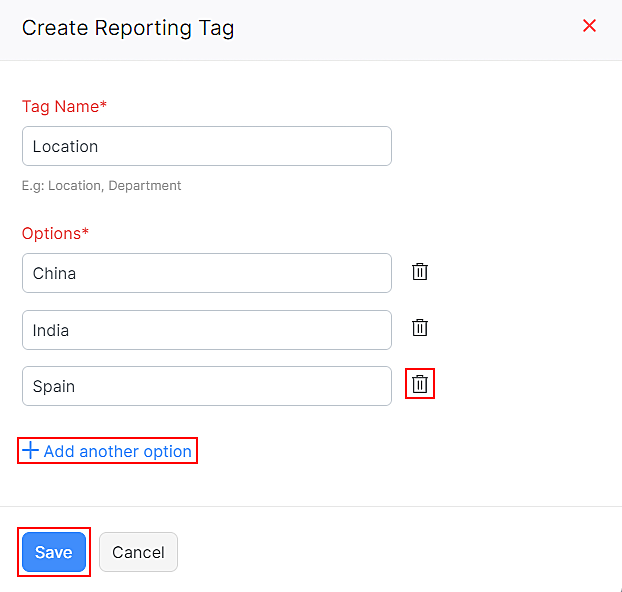
- Enter a Tag Name and provide the Options.
- Add more options by clicking + Add Another Option or delete an option by clicking the Delete icon.
- Click Save.
You will now be able to associate reporting tags with different transactions and records and filter your reports using them. Click Back on the top left corner of the page.
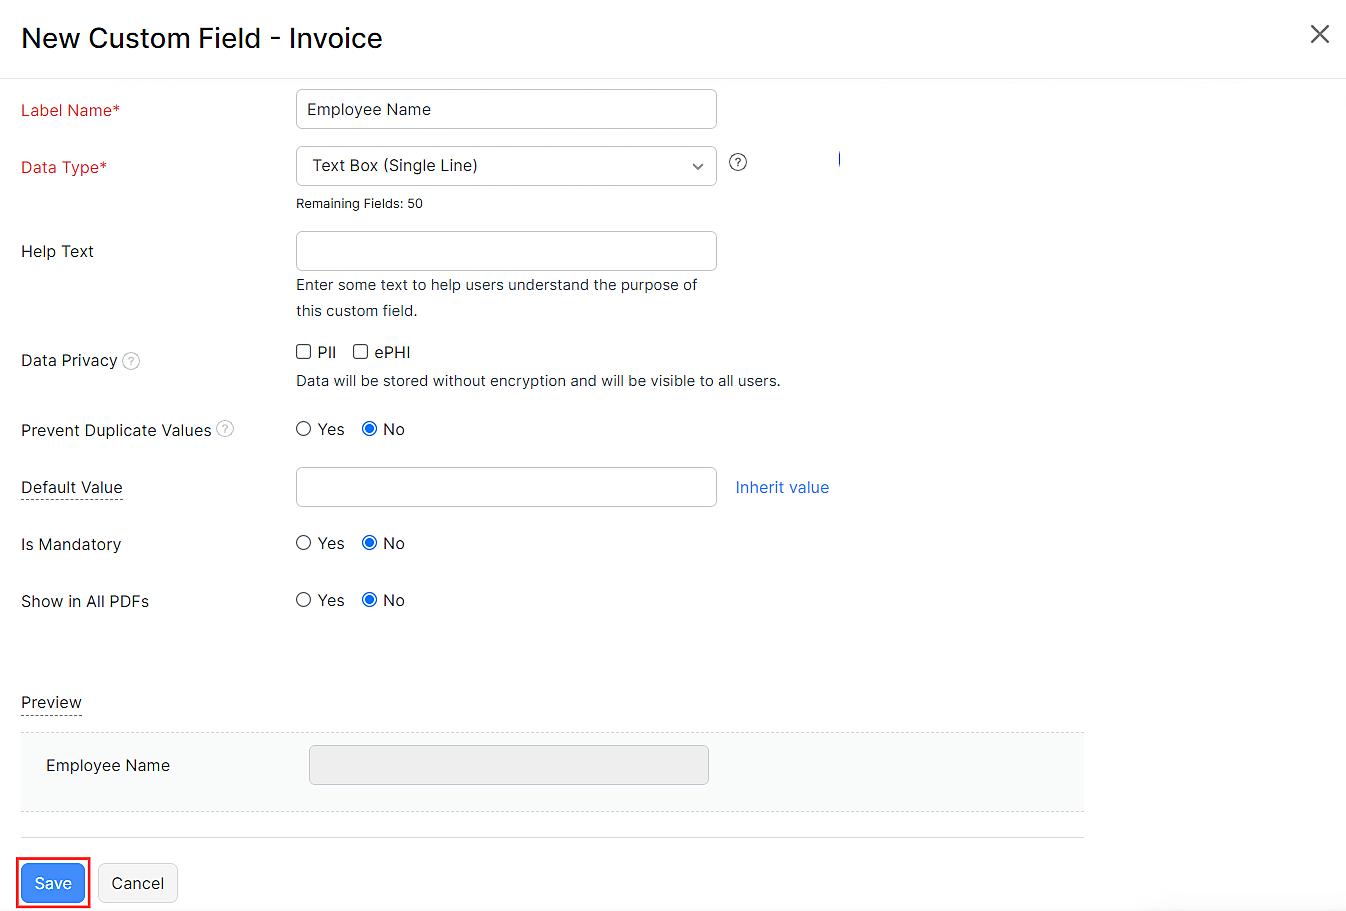
1.3.4 Customise and Create New Fields
If you have certain fields in your transactions that you cannot find in Zoho Books, you can create Fields for them. Here’s how:
- In the Configure Organisation Preferences page, click Configure next to Customize and Create New Fields.

- In the Settings page, select Preferences.
- Select the module in the left menu for which you want to create a custom field.
- Next, select the Fields tab at the top of the page.
- Click + New Field on the top right corner of the page.

- Fill in the required fields and click Save.
Once you configure all the organisation preferences, click Continue. The organisation preferences you configured will be saved.
2. Import Your Data
Now that you’ve configured your organisation preferences, you can import your QuickBooks Online data into your Zoho Books organisation. Here’s how:
- In the Migrate your data to get started with Zoho Books section, click Import Data next to Migrate Your Data.

You can import the following data:
2.1 Masters
In the Masters section, you can import your QuickBooks Online account’s Chart of Accounts (Account List), Items (Products and Services), Customers, and Vendors data. Here’s how:
- Click the module that you’re importing and click Choose File under the module.
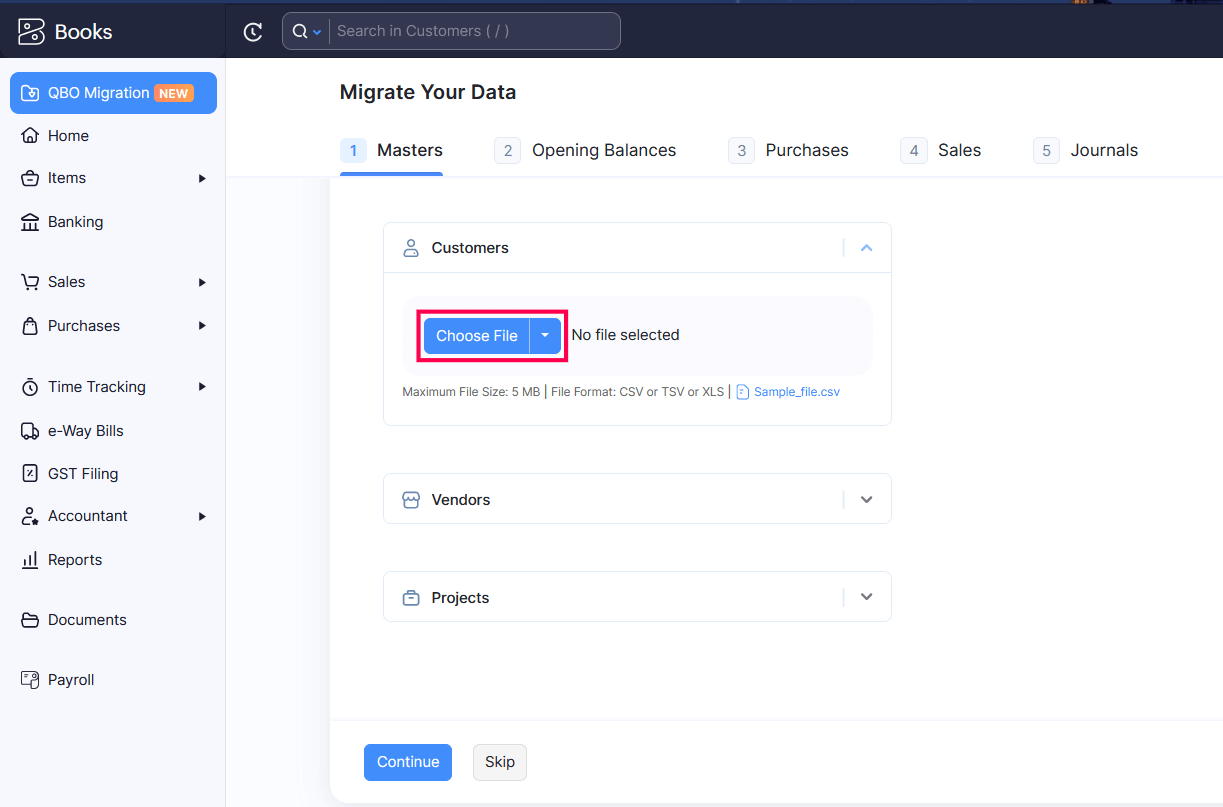
Insight: You can download the sample file and use it to ensure that the exported file is in the same format.
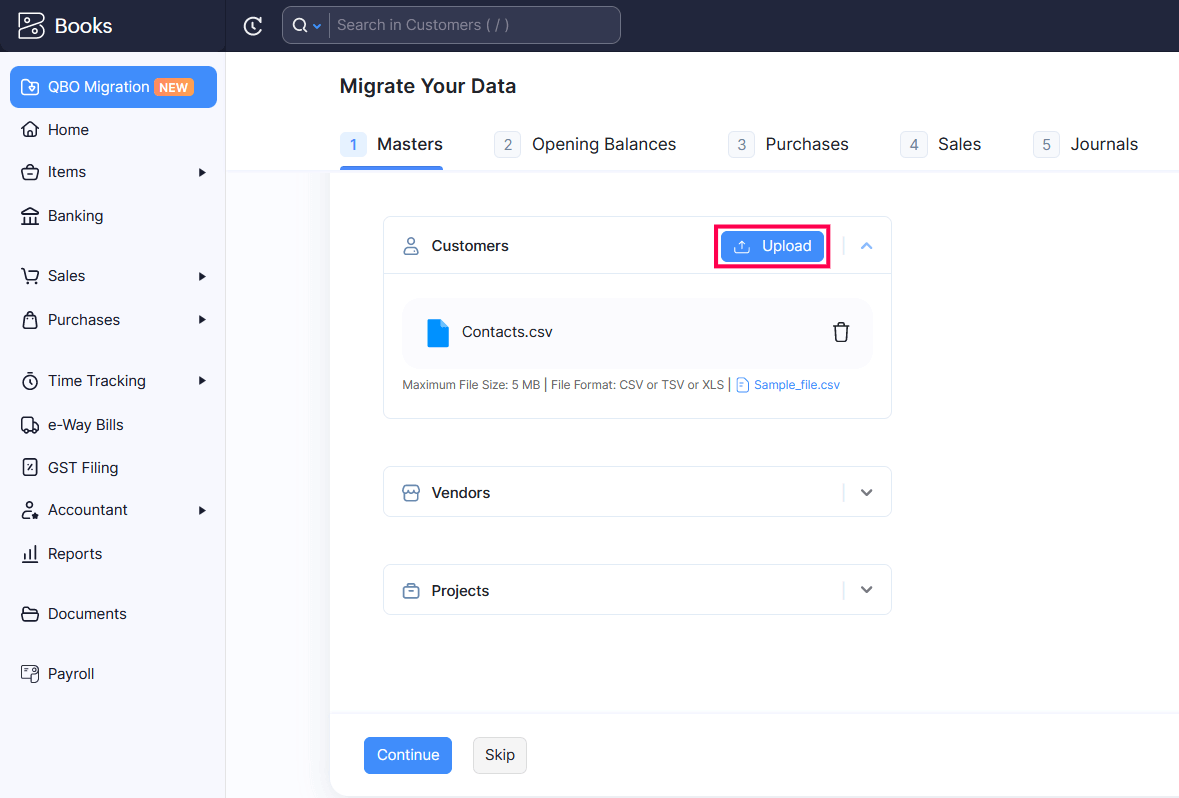
- On the page that appears, select the file that you want to import and click Open.
- Click Upload next to the respective section.
- The Uploaded File Preview page will appear. Make sure that the value in No. of records skipped section is zero. If it is non-zero, click the No.of records skipped dropdown to view the reason why the fields could not be imported. Enter the correct details in the import file, click Cancel, and import the corrected file.

- Click Import and Continue.

Once the import is successful, the status of that module will change to File Uploaded.
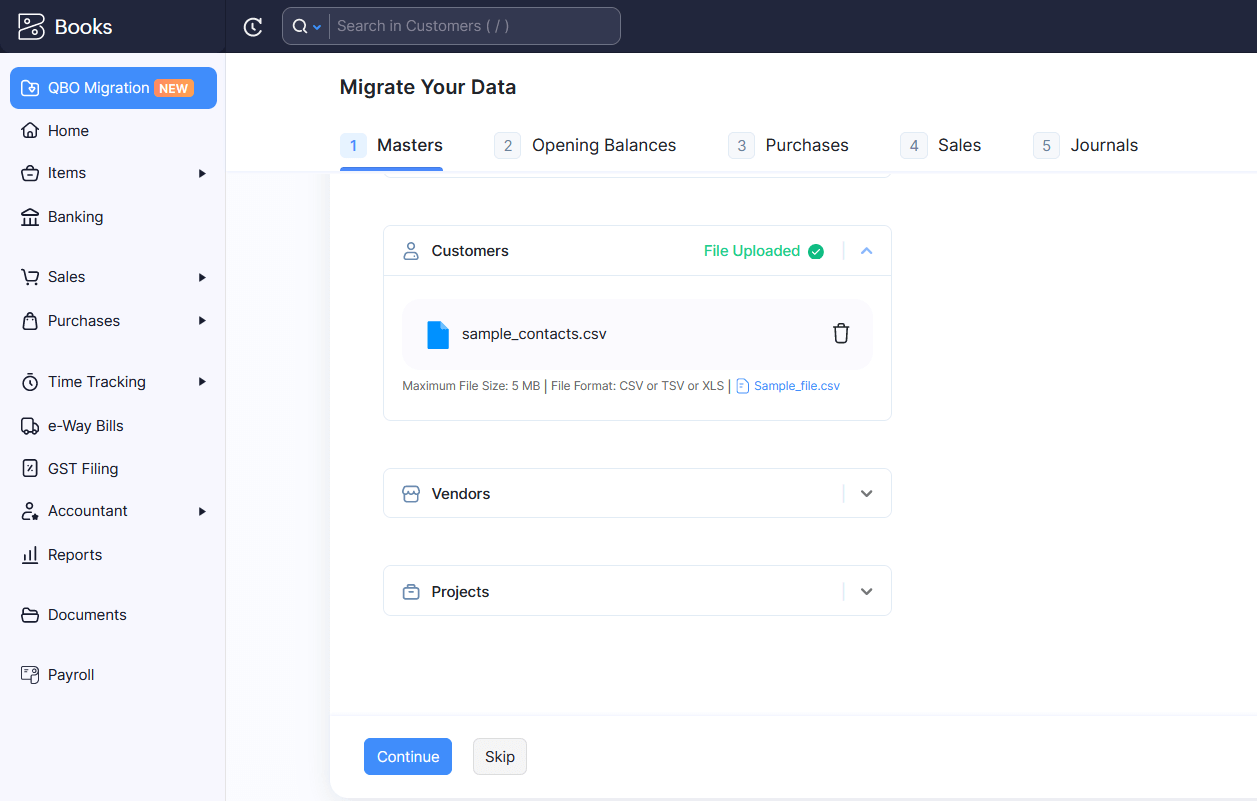
Follow the same process for the other modules under the Masters tab. Click Continue once you’ve imported data for all the modules under the Masters tab.
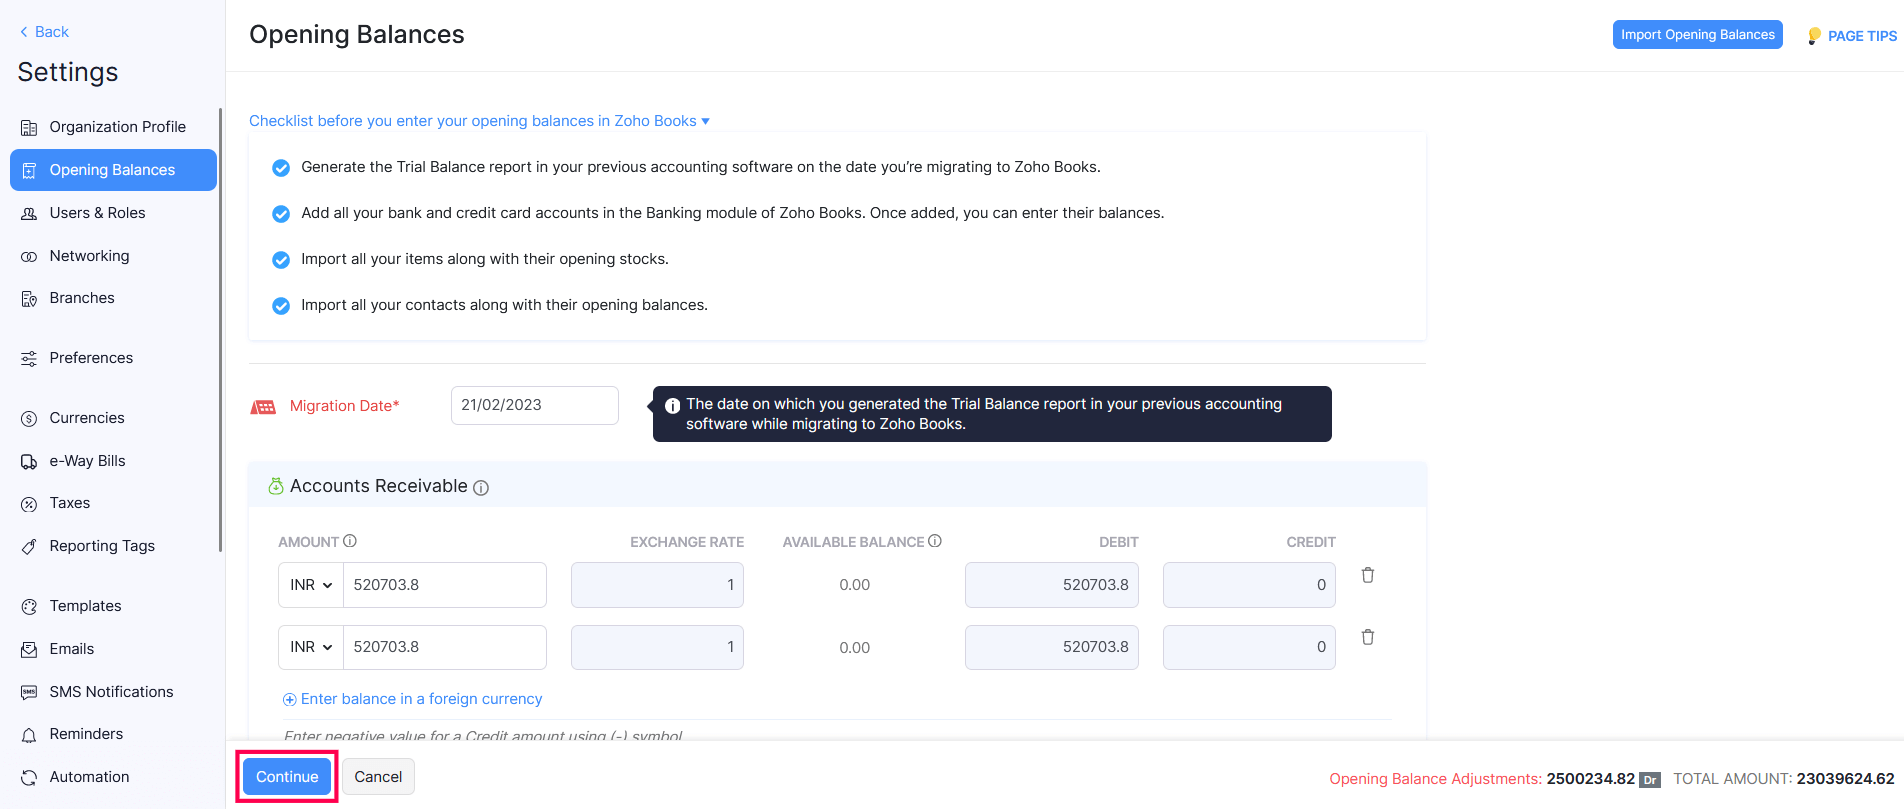
2.2 Opening Balances
In the Opening Balances section, you can import your QuickBooks Online accounts’ Opening Balances, Accounts Receivable, and Accounts Payable data. To import them:
- Follow the same steps you followed to import the modules under the Masters tab.
- Click Continue once you’ve imported the data for all the accounts in this page.
Note: To update the opening balance of your customers, you will have to import the Customer Balance Detail report in the Accounts Receivable module. Similarly, to update the opening balance of your vendors, you will have to import the Supplier Balance Detail report in the Accounts Payable module.
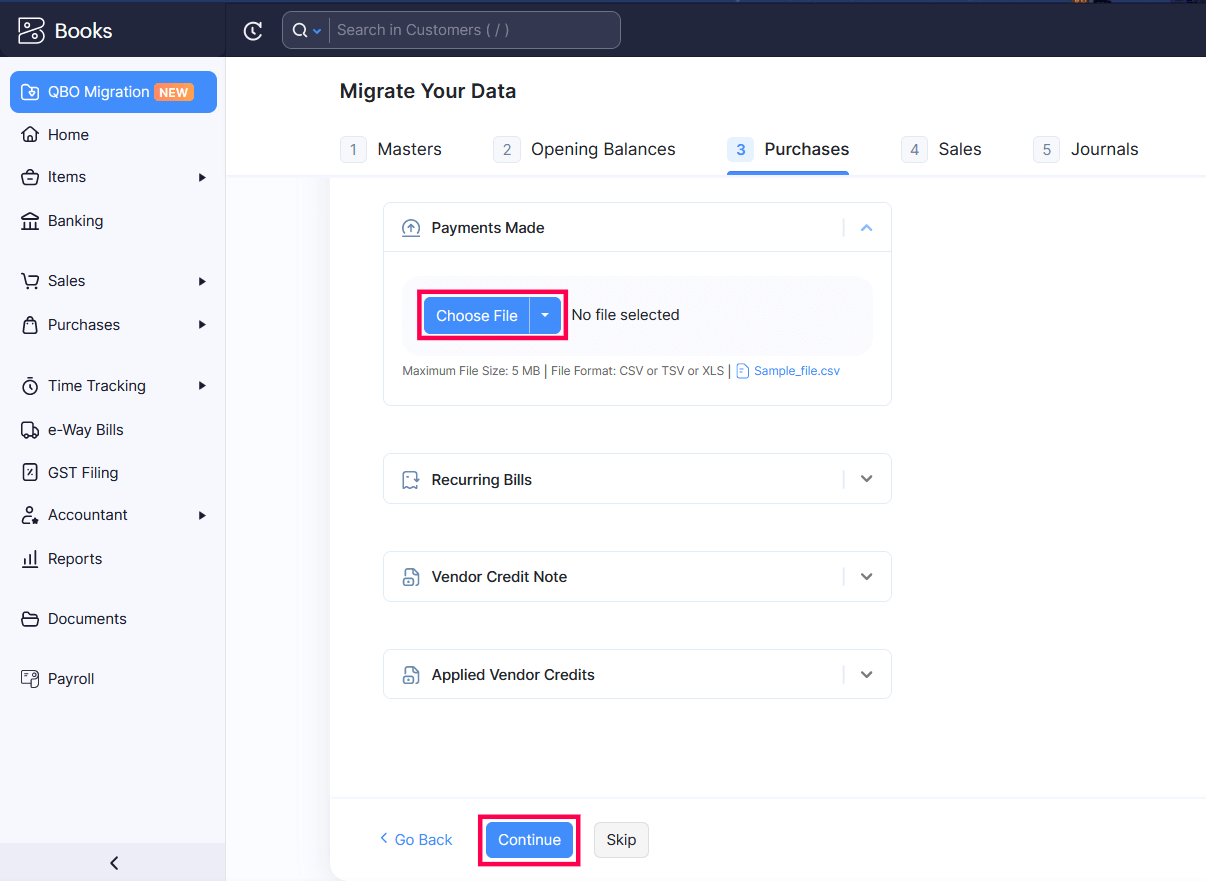
2.3 Purchases
In the Purchases section, you can import your QuickBooks Online accounts’ expenses, purchase orders, bills, payments made, and vendor credits. To import them:
- Follow the same steps you followed to import the modules under the Masters tab.
- Click Continue once you’ve imported the data for all the modules under the Purchases tab.
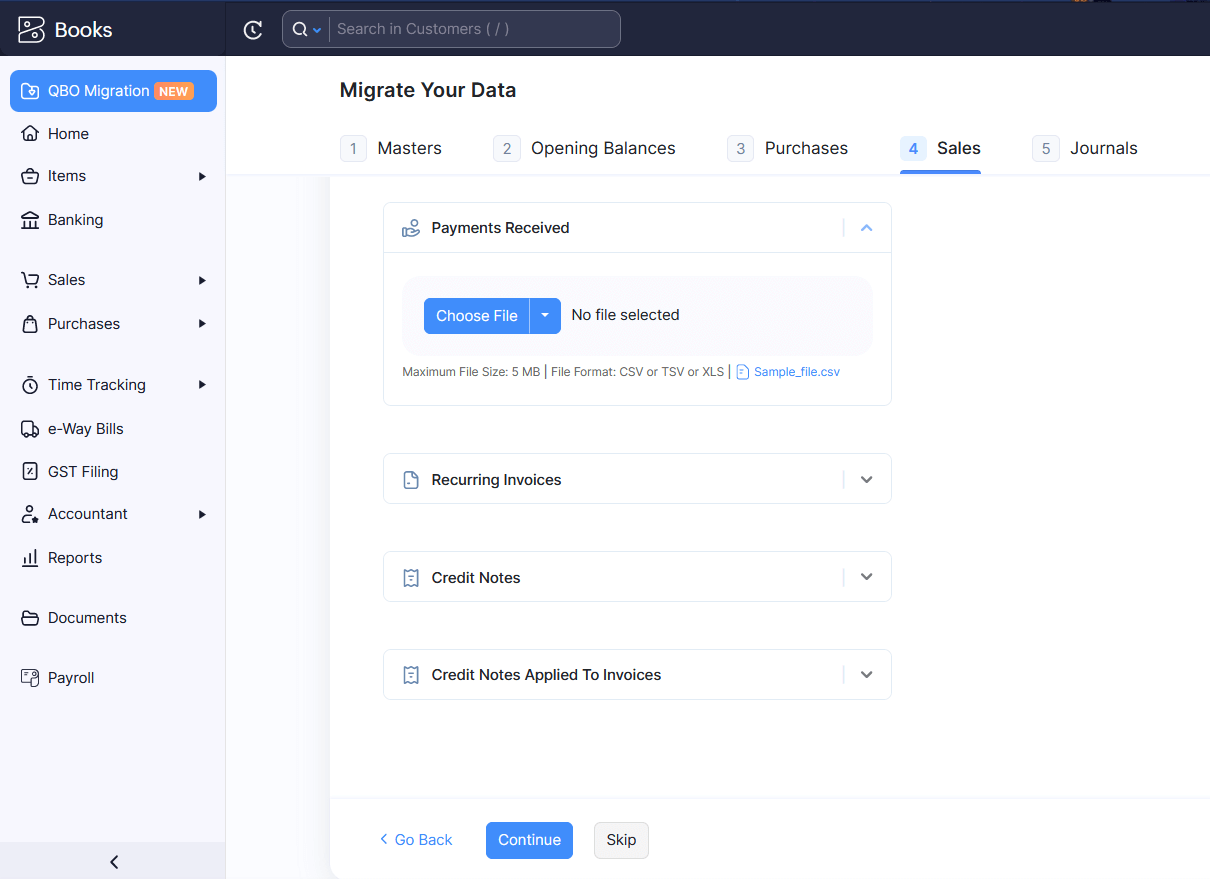
2.4 Sales
Under the Sales section, you can import your QuickBooks Online accounts’ estimates, sales orders, invoices, payments received, and credit notes. To import them:
- Follow the same steps you followed to import the modules under the Masters tab.
- Click Continue once you’ve imported data for all the modules under the Sales tab.
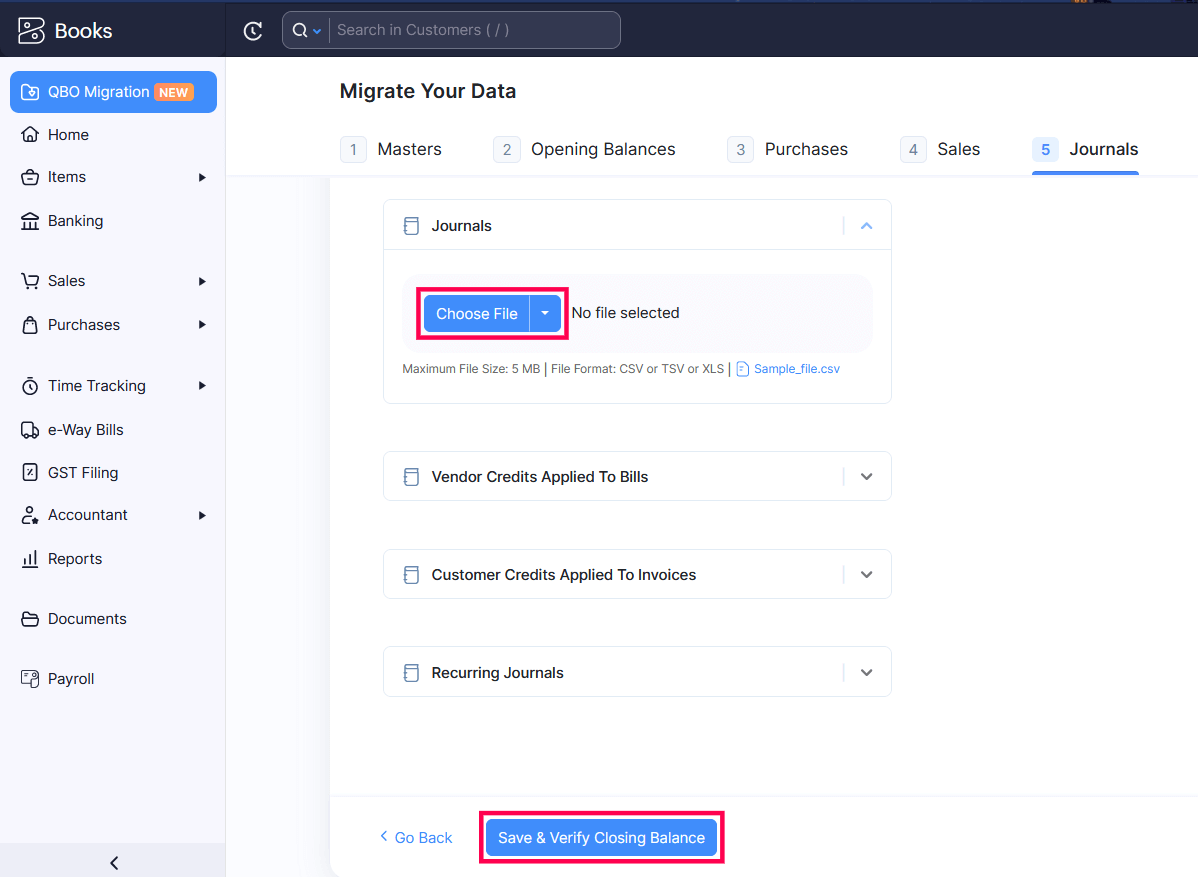
2.5 Journals
In the Journals section, you can import the journals from your QuickBooks Online account. Here’s how:
- Follow the same steps you followed to import the modules under the Masters tab.
- Click Save and Verify Closing Balance. You’ll be redirected to the Import Trial Balance and Journal Report page where you will have to import the trial balance and journal report.
3. Verify Closing Balance
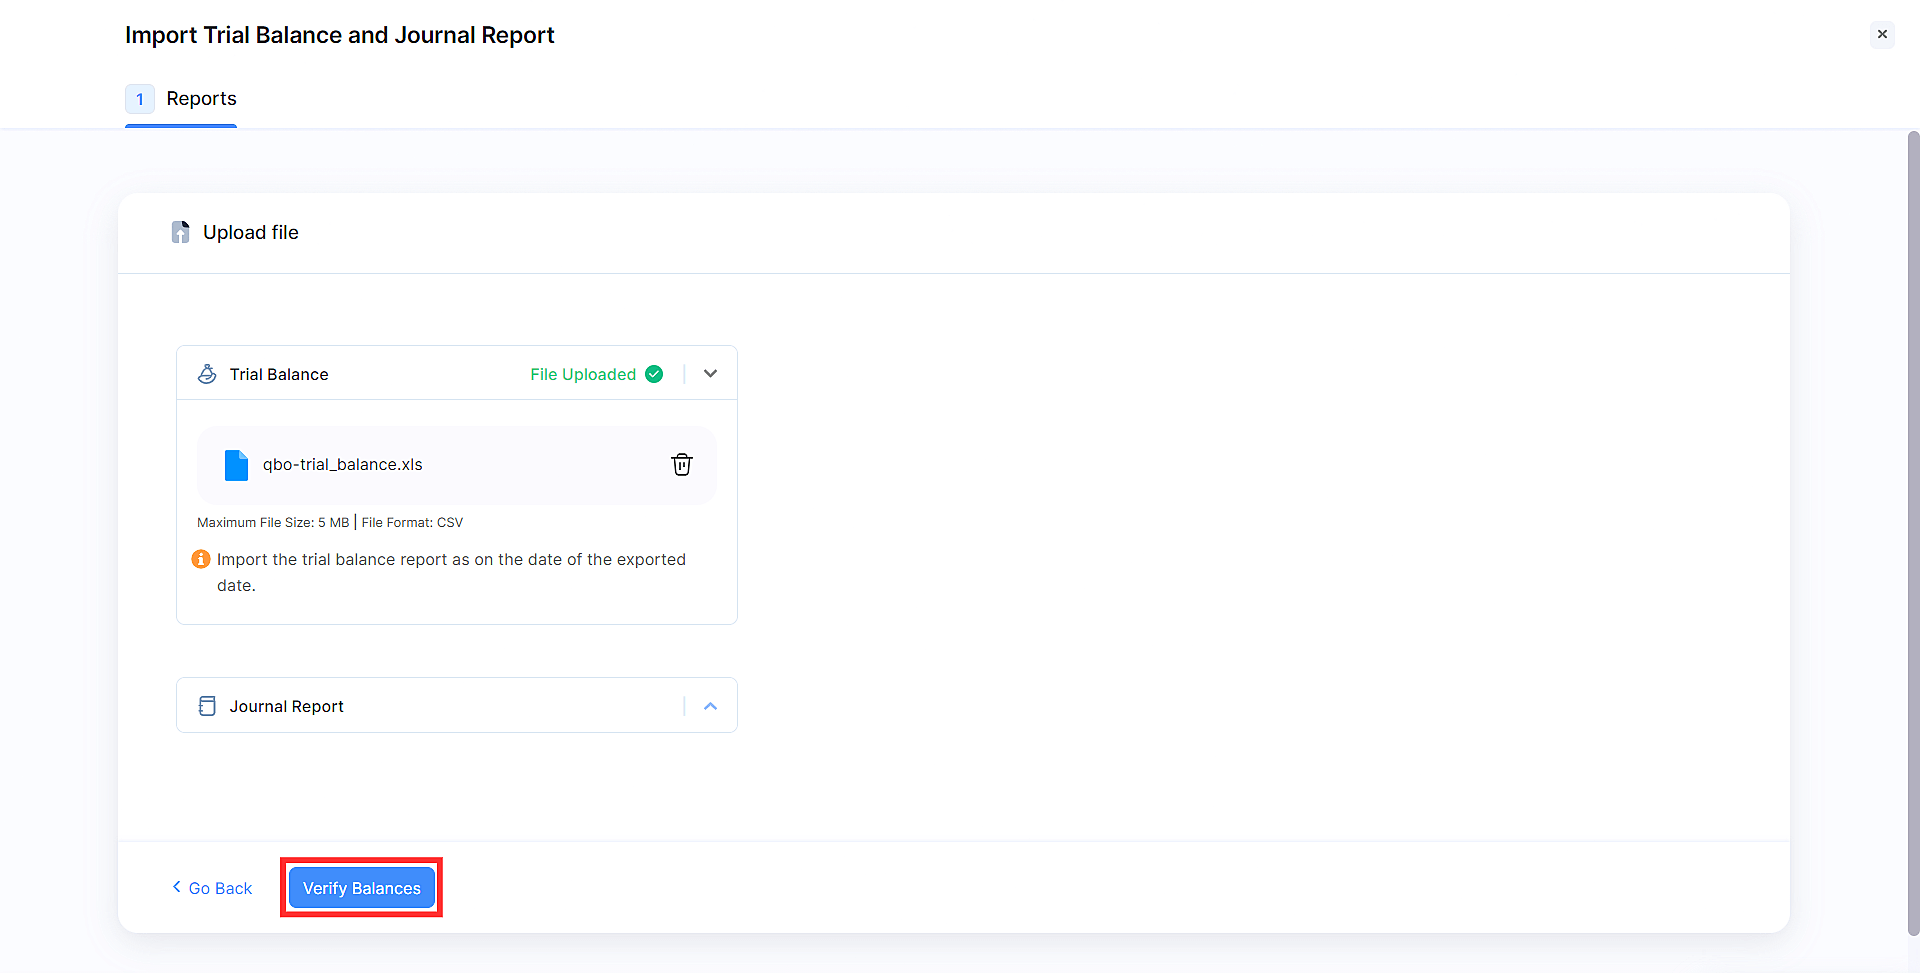
On the Import Trial Balance and Journal Report page, you’ll have to import the trial balance and journal report of your QuickBooks Online account to verify your closing balance. Here’s how:
- Click Trial Balance or Journal Repor****t.
- Click Choose File under Trial Balance or Journal Report.
- On the page that appears, select the file that you want to import and click Open.
- Click Upload next to the respective section.
- Click Import and Continue.
- Click Verify Balances after you import the correct trial balance and journal report.
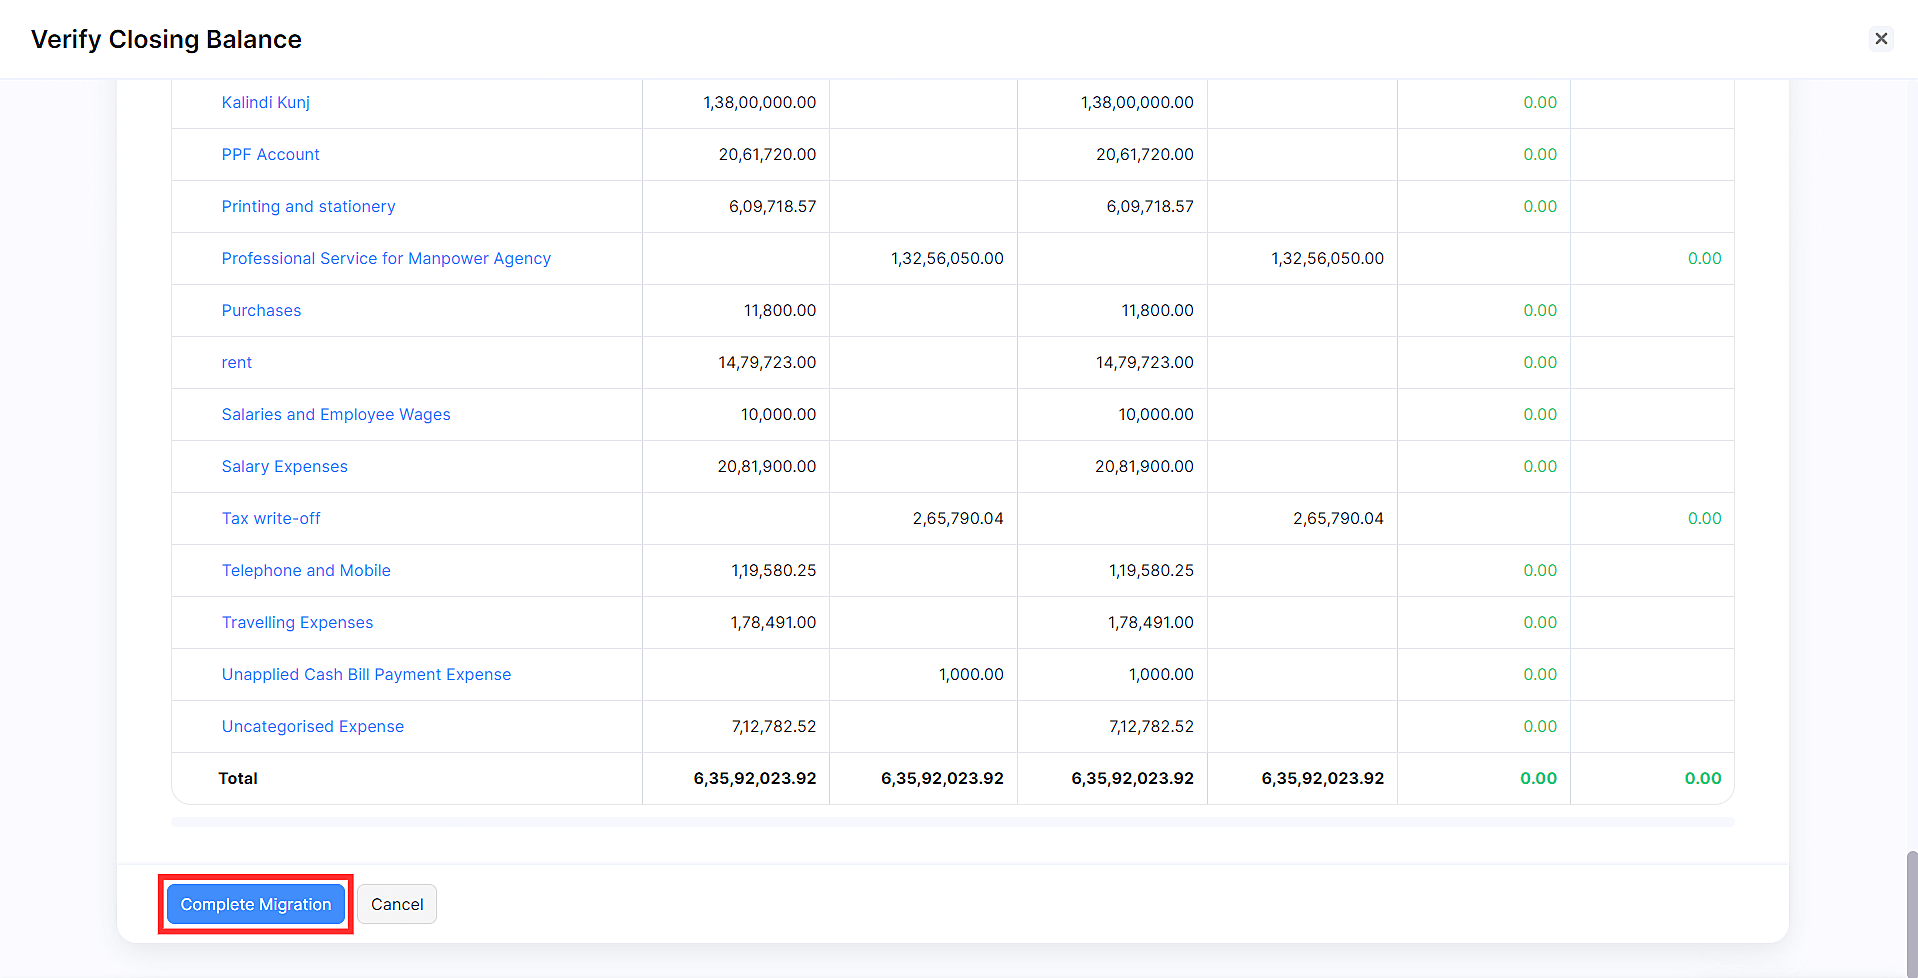
Once you’ve imported them, you can view the summary of the closing balance in Zoho Books, the closing balance in QuickBooks, and the net difference in closing balances.
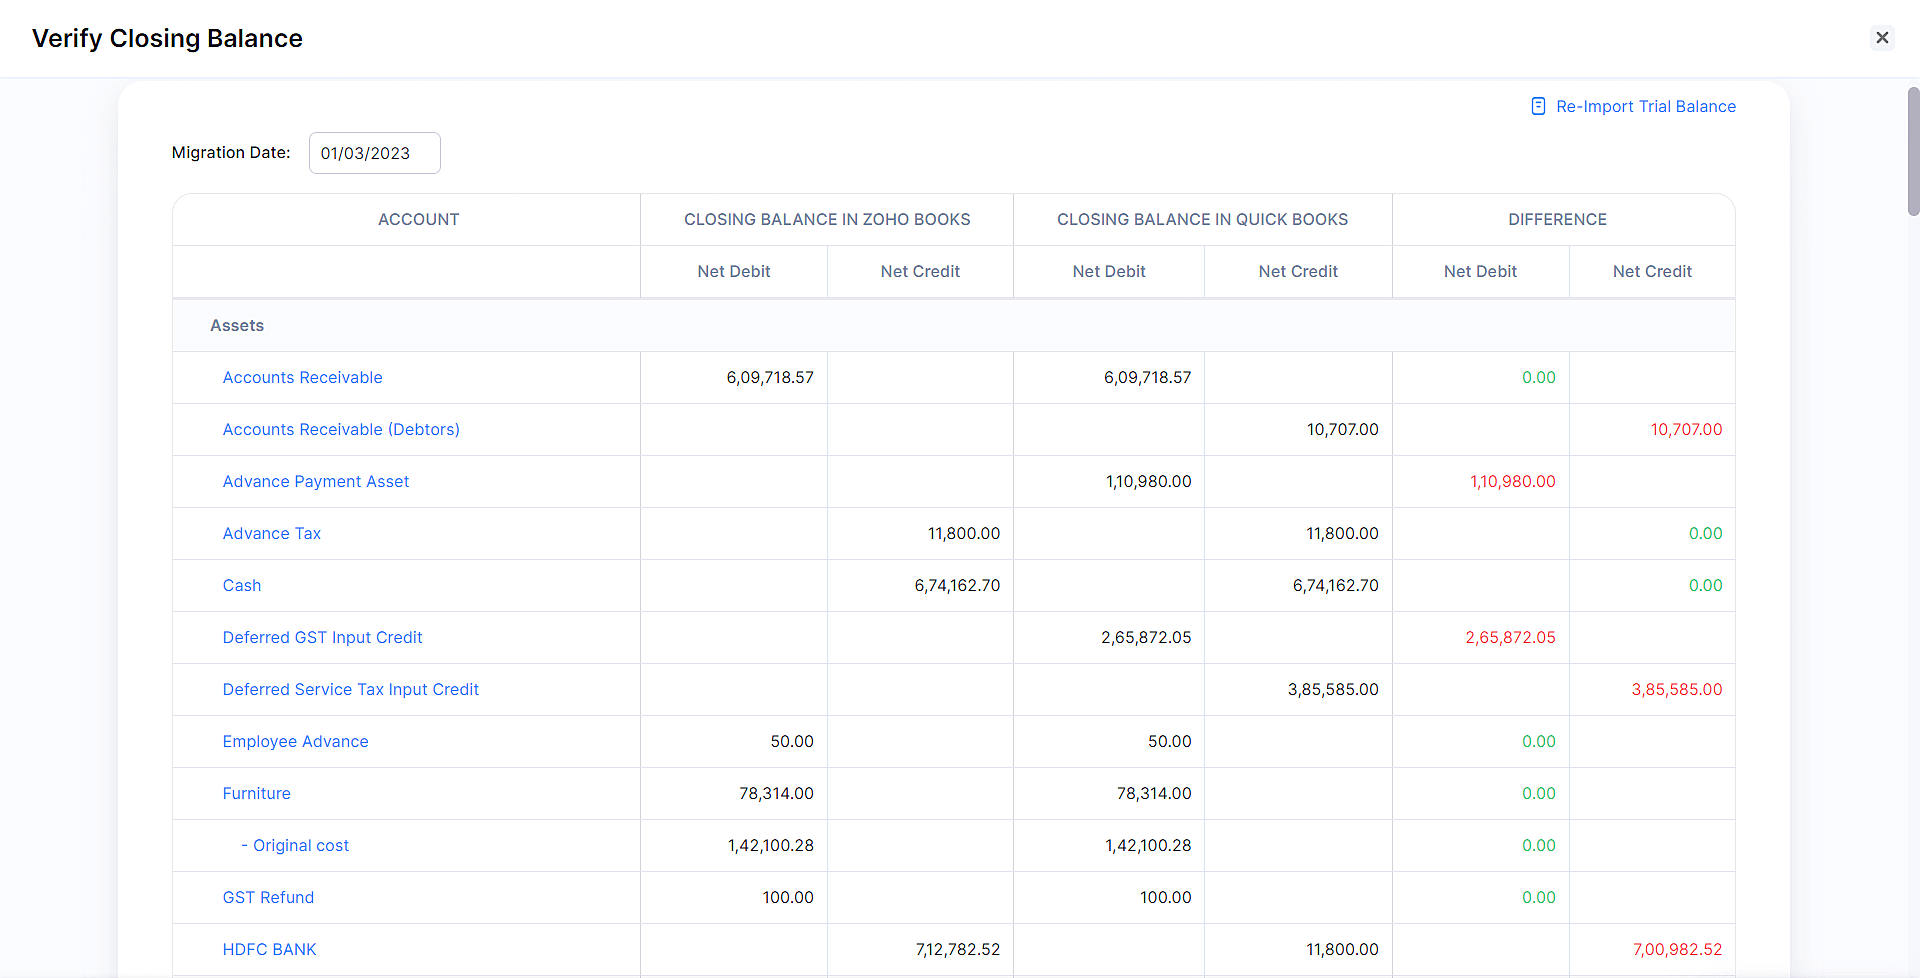
By selecting an account, you can view the transactions recorded in Zoho Books for that account and the transactions imported from QuickBooks.
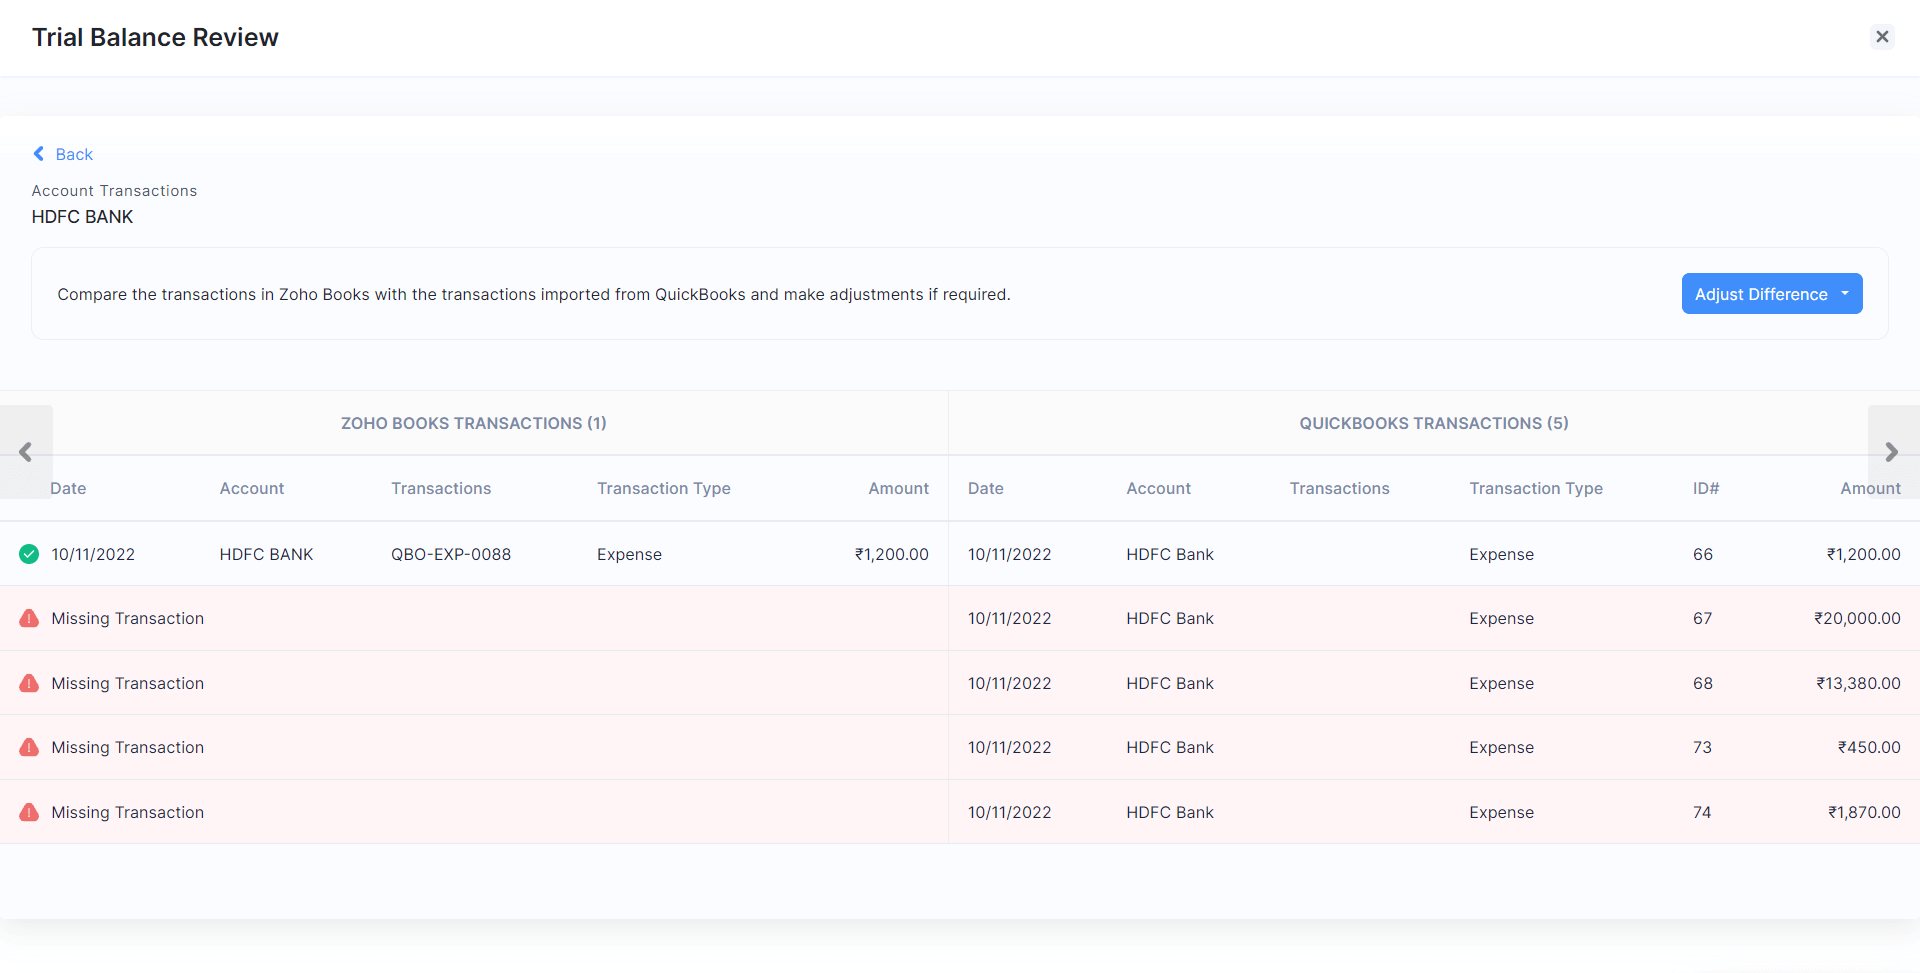
Make sure that there is no mismatch between the transactions recorded in Zoho Books for that account and the transactions imported from QuickBooks. However, if there is a mismatch, click the Adjust Difference dropdown on the top right corner of the page and:
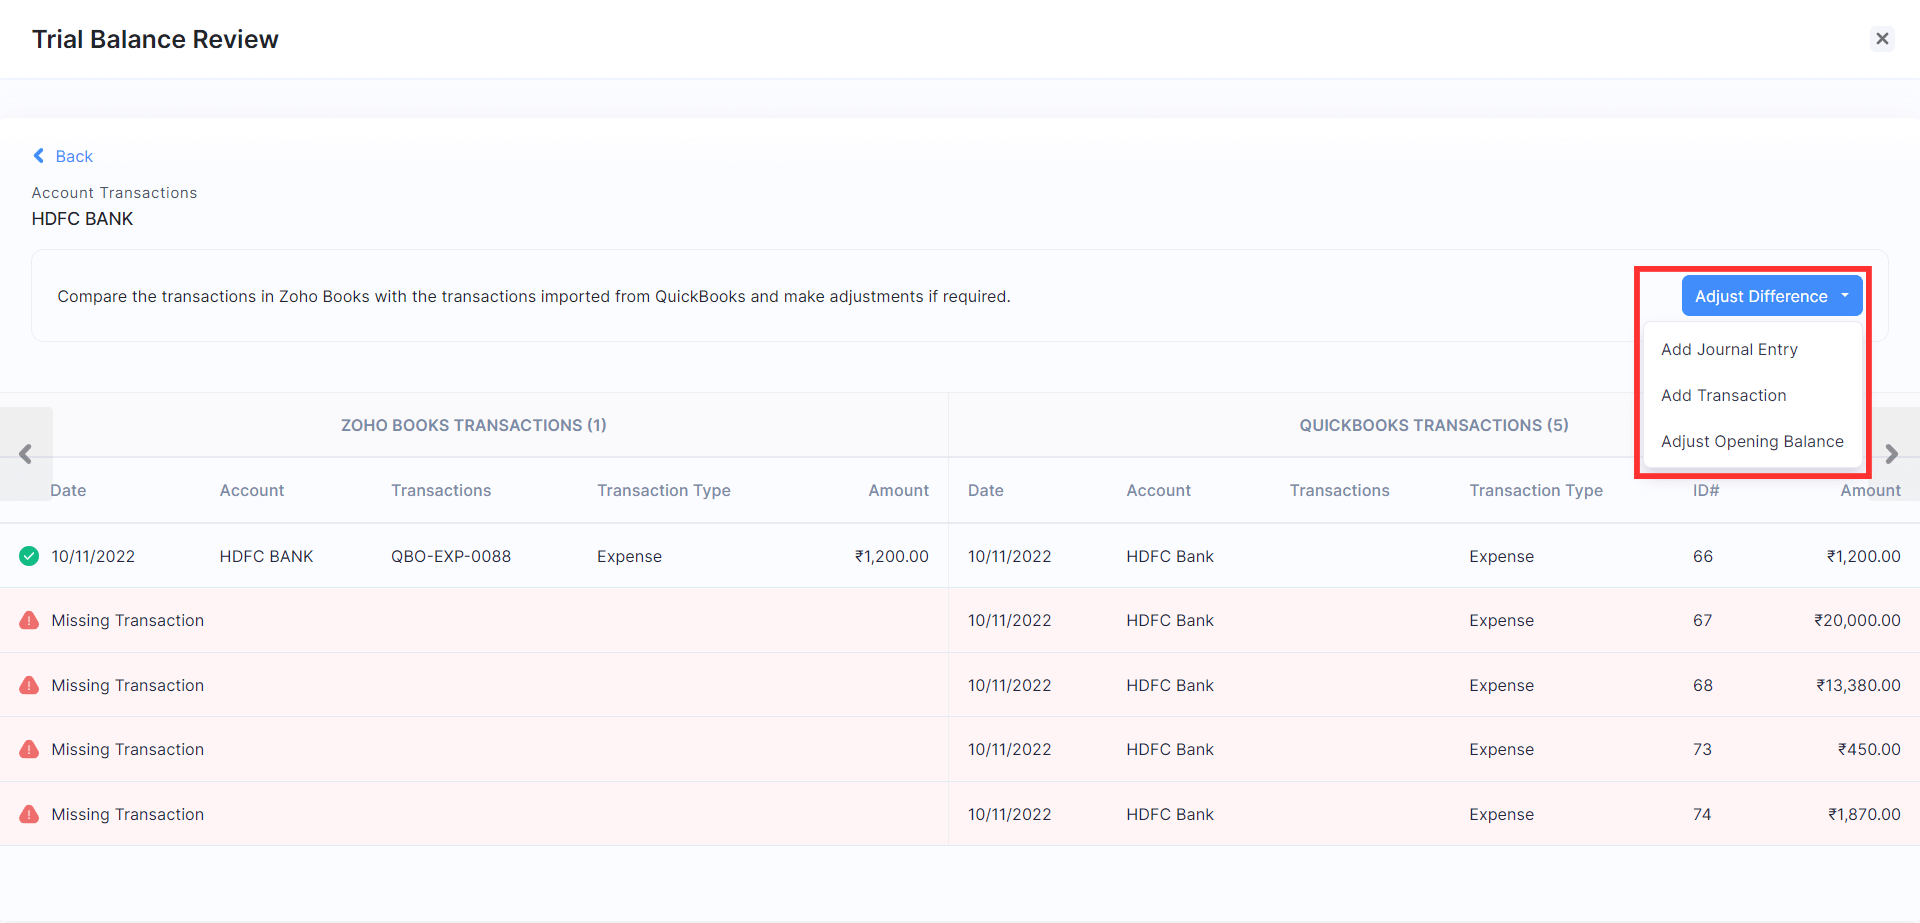
- Select Add Journal Entry if you want to create a manual journal in Zoho Books to adjust the difference.
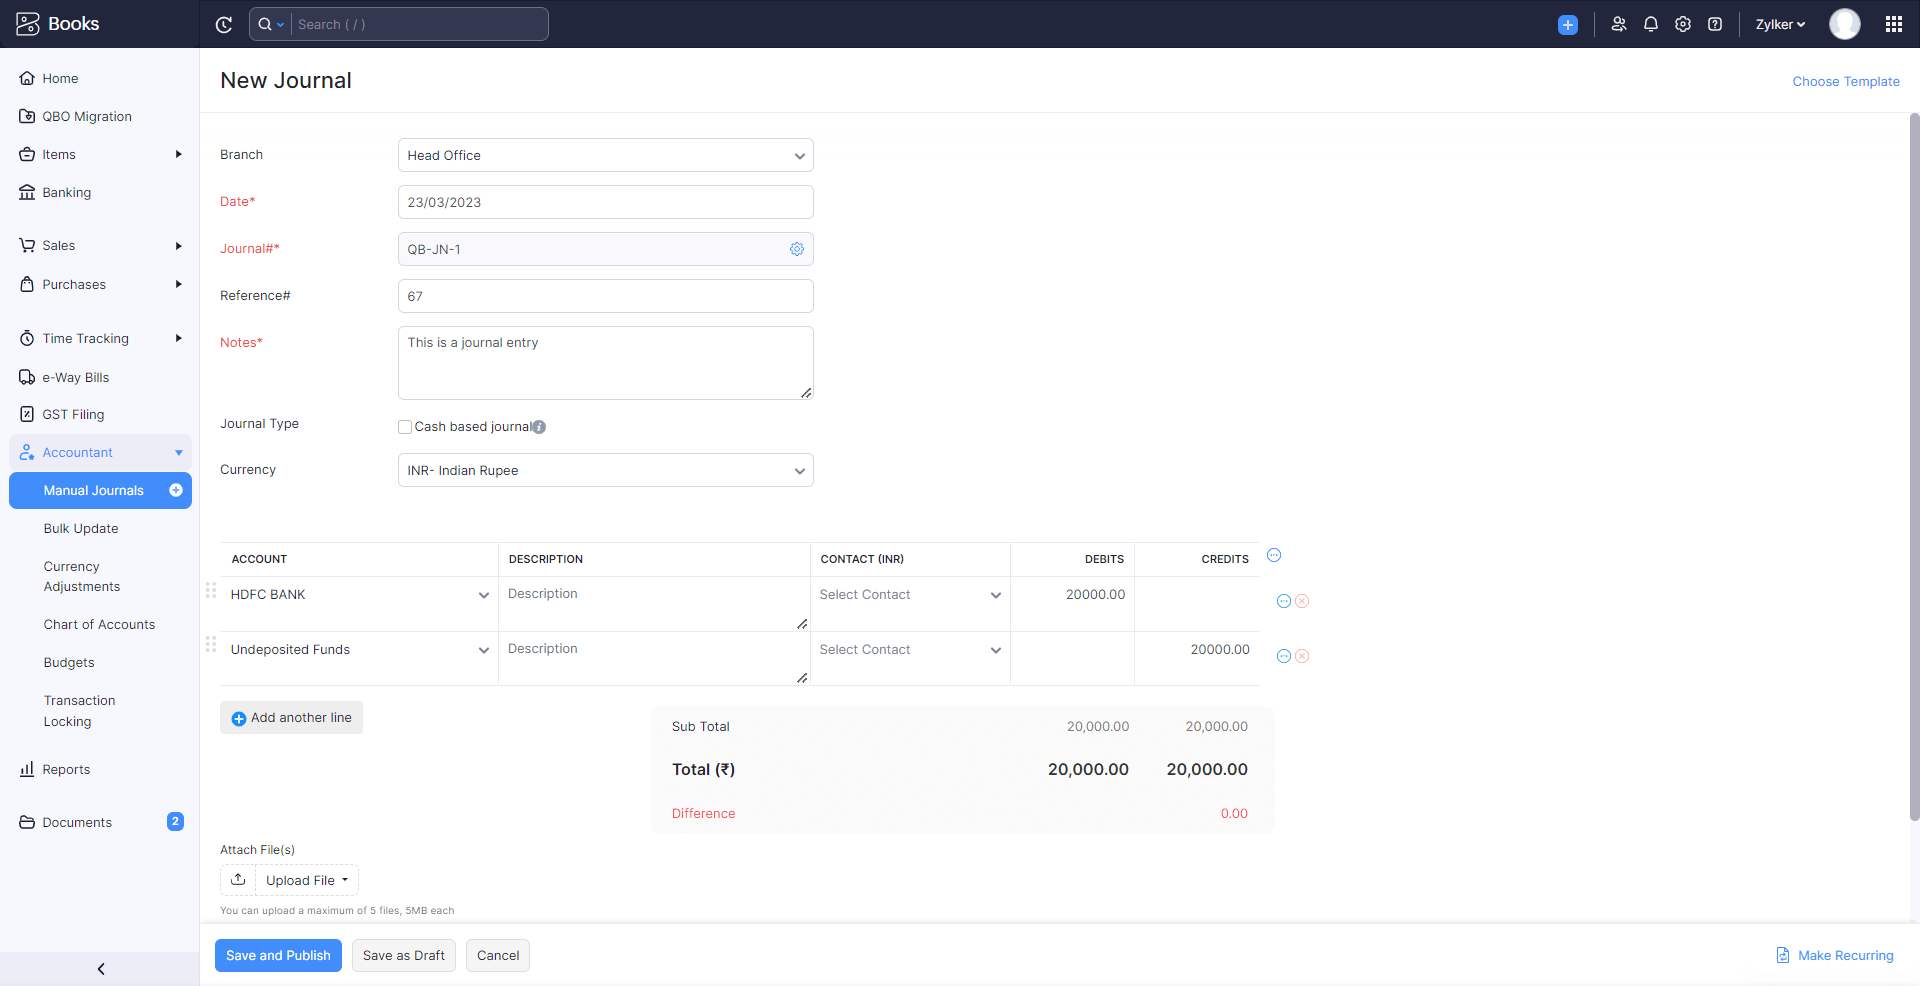
You’ll be redirected to the New Journal page. Enter the Date on which the adjustment was made. Ensure that this date is the same date on which you created the journal entry in your QuickBooks organisation.
Enter the Reference Number with which the journal will be associated. Enter the reason for creating the journal entry in the Notes field. Notes is a mandatory field as the reason for creating each journal entry is unique.
Check the Journal Type as Cash based journal if the adjustment was done by cash.
Select the currency in which the journal entry was made from the Currency dropdown.
Select the Account from which the amount is debited and an account to which the amount is credited.
Choose the contact whom you wish to associate with the journal entry.
Enter the Debit and Credit amount that needs to be recorded. Ensure that the amount debited is equal to the amount credited.
Click Save and Publish.
Refer to our help document on Manual Journals for more information.
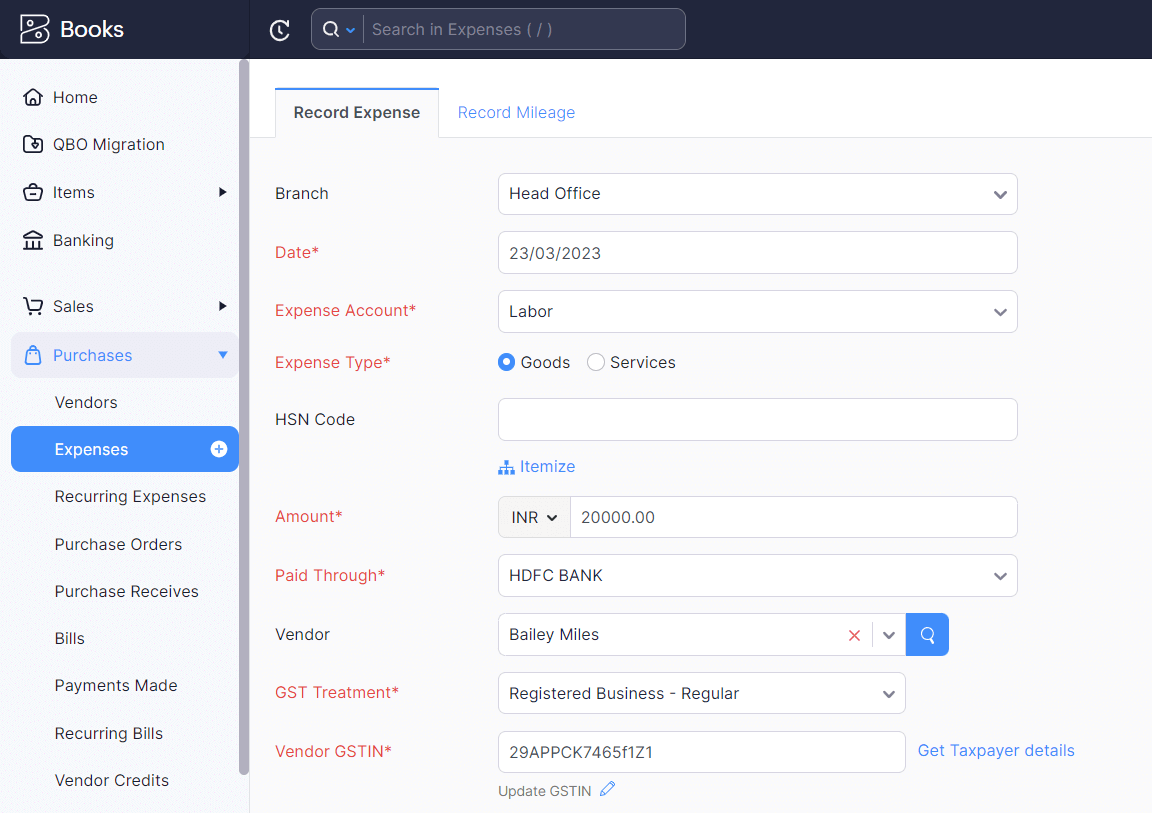
Select Add Transaction if you want to create a transaction in Zoho Books to adjust the difference.
- You’ll be redirected to the New Invoice page. Click Sales in the LHS if you want to create an estimate, sales order, invoice, or credit note. Click Purchases in the LHS if you want to create an expense, bill, purchase order, or vendor credit.
- Click the + button next to the module. Enter the required details. Ensure that the transaction date is the same as the date on which you created the transaction in your QuickBooks organisation.
- Click Save.
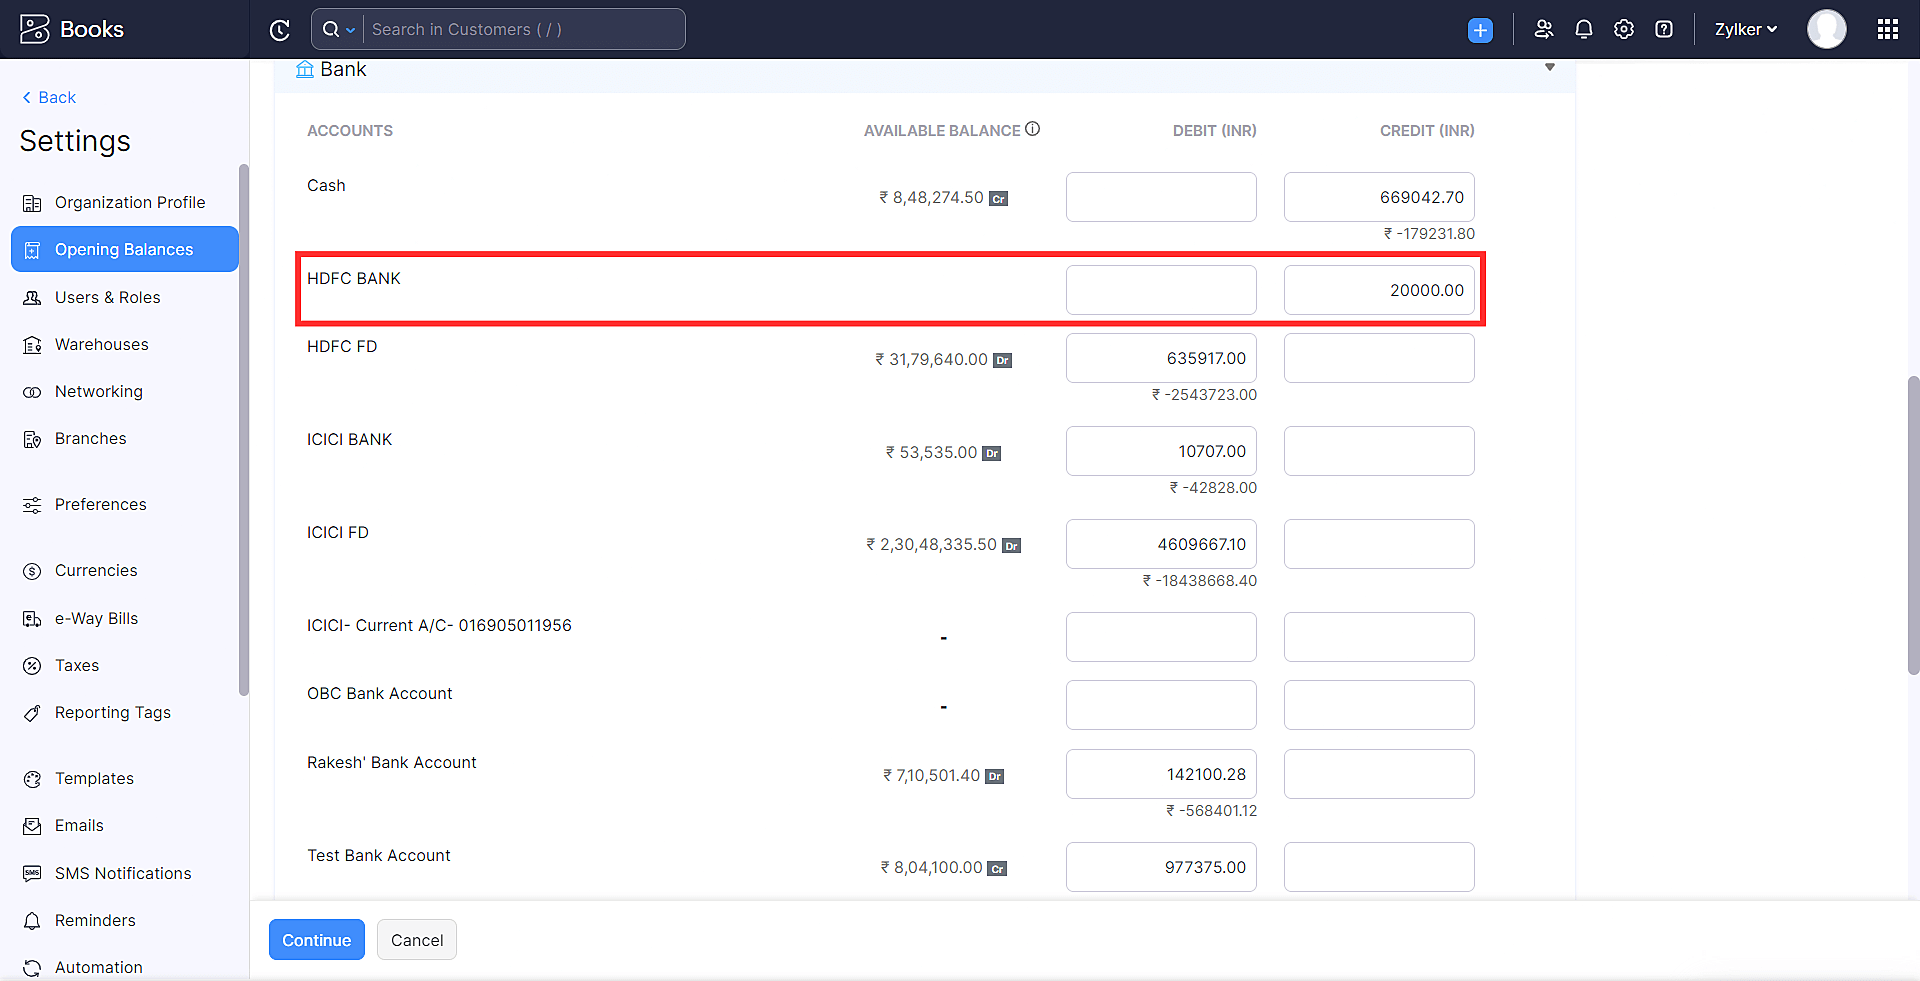
Select Adjust Opening Balance if you want to adjust the opening balance recorded in Zoho Books to adjust the difference.
- You’ll be redirected to the Opening Balances page. Select the account for which you want to adjust the opening balance.
- Enter the Debit and Credit balance for that account.
- Click Continue.
Refer to our help document on Opening Balances for more information.
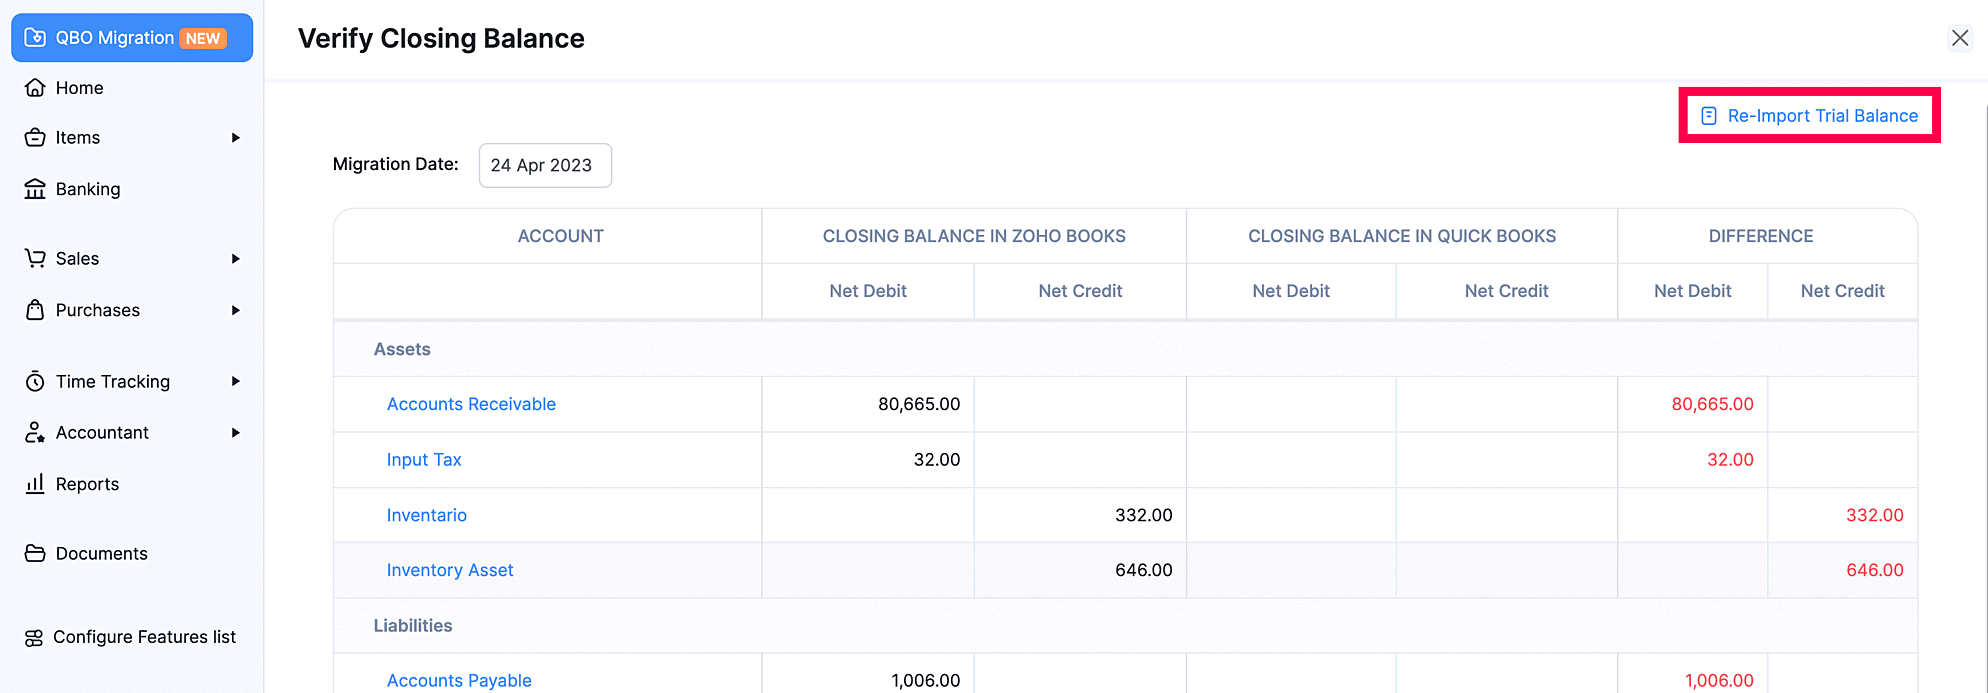
In case the trial balance you imported is incorrect or you want to change the trial balance, you can change it.
- Click Re-Import Trial Balance on the top right corner of the Verify Closing Balance page. You’ll be redirected to the Import Trial Balance and Journal Report page where you can import the correct trial balance.
After importing the trial balance and verifying the closing balances, ensure that the net difference in the closing balance in Zoho Books and the closing balance in QuickBooks is zero for all the accounts. Next, click Complete Migration at the bottom of the page.
You’ve successfully migrated to Zoho Books and you can start using Zoho Books to manage your business finance.
Note: If you have doubts about migration or if you face any issues with the migration, write to us at support.india@zohobooks.com and we will help you migrate from QuickBooks to Zoho Books.
What You Can Do after Migrating
Now that you have migrated to Zoho Books successfully, you can customise your organisation further. You can set up payment gateways to accept online payments or integrate with other apps such as Zoho CRM and Zoho Analytics.
Zoho Books also has many features that you can utilise to streamline your accounting process, here’s some of them to get you started:
- Transaction approvals
- Auto-charge for recurring transactions
- Template customisation
- Payment reminders
- Customer Portal
Note: If you have any queries, or if you’re facing any issues with the migration process, write to us at migrations@zohobooks.com and we will help you migrate from QuickBooks to Zoho Books.
 Yes
No
Yes
No
Thank you for your feedback!