
Emails
Emails under Settings lets you take control of the emails sent from your organization. To configure your email preferences and customize email templates:
- Go to Settings in the top right corner.
- Select Email Notifications under Reminders & Notifications.
Let’s take a look at the preferences you can configure from here.
Sender Email Preferences
You can configure the email addresses used in the From field of emails sent from Zoho Books. However, these emails may sometimes land in your recipient’s spam folder, causing them to go unnoticed. This usually happens when the email address in the From field belongs to a domain that does not have DKIM (DomainKeys Identified Mail) set up.
What is DKIM?
DKIM(Domain Keys Identified Mail) is used to prevent spam and allows the recipient’s email server to verify whether an email was sent and authorized by the owner of that domain.
Domain Classification
Zoho Books classifies domains into two categories to help you identify which email addresses, if used in the From field of emails, could cause those emails to land in the recipient’s spam folder.
To find out which category your email addresses belong to:
- Go to Settings in the top right corner.
- Select Email Notifications under Reminders & Notifications.
- Click Sender Email Preferences in the left pane.
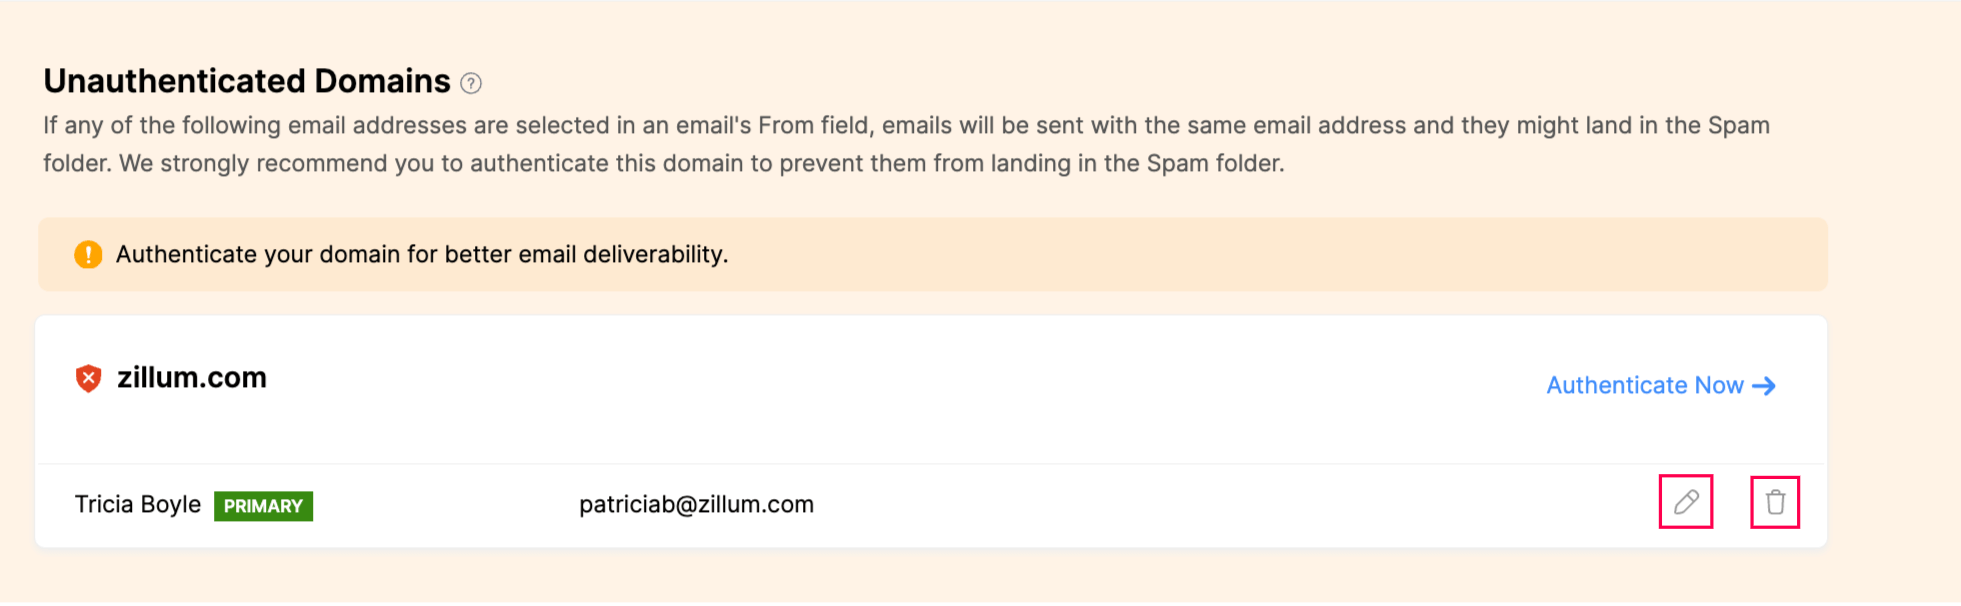
Unauthenticated Domains
Domains without DKIM records configured are considered unauthenticated. If you use an email address from such a domain as the sender in Zoho Books, the email may be flagged as spam. To prevent this, Zoho Books automatically replaces the sender’s email address to message-service@sender.zohobooks.com when sending emails on your behalf. This ensures your emails have a better chance of reaching the recipient’s inbox instead of being marked as spam.
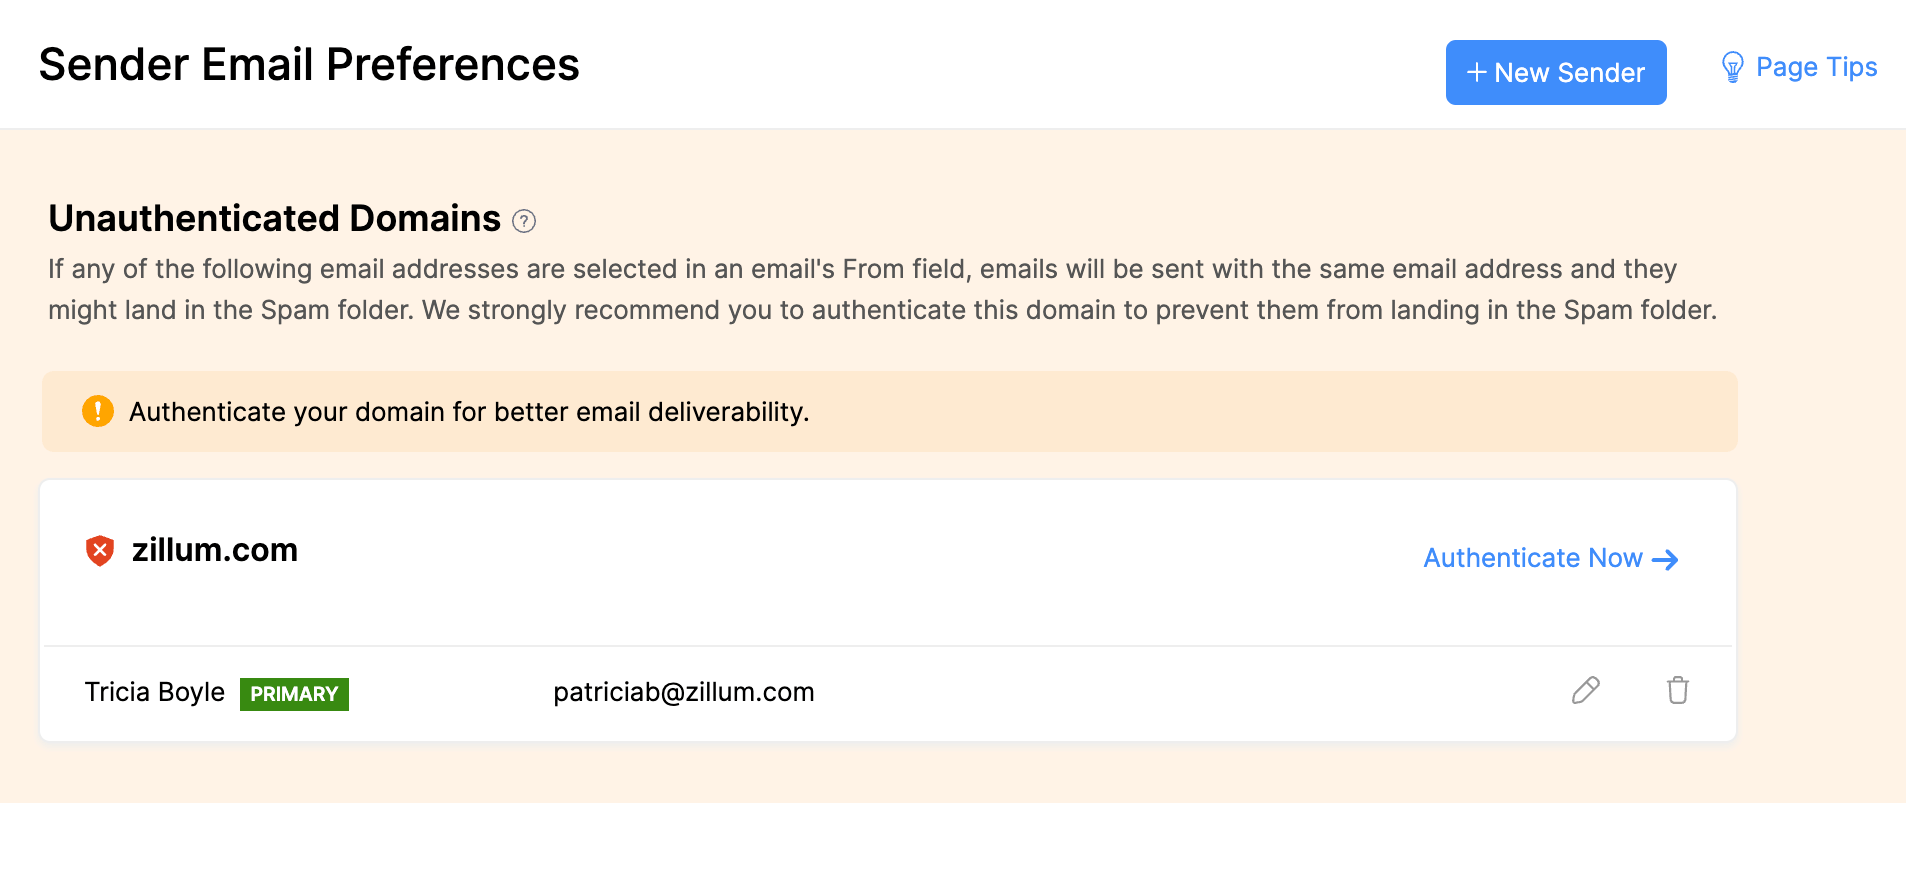
The address message-service@sender.zohobooks.com is used only in the From address of emails sent by Zoho Books, not in the Reply address. This means your customers will still see your name in their inbox, and when they reply, the response will be delivered directly to your email address.
To use the email addresses under this category in the From field, you must authenticate their domains.
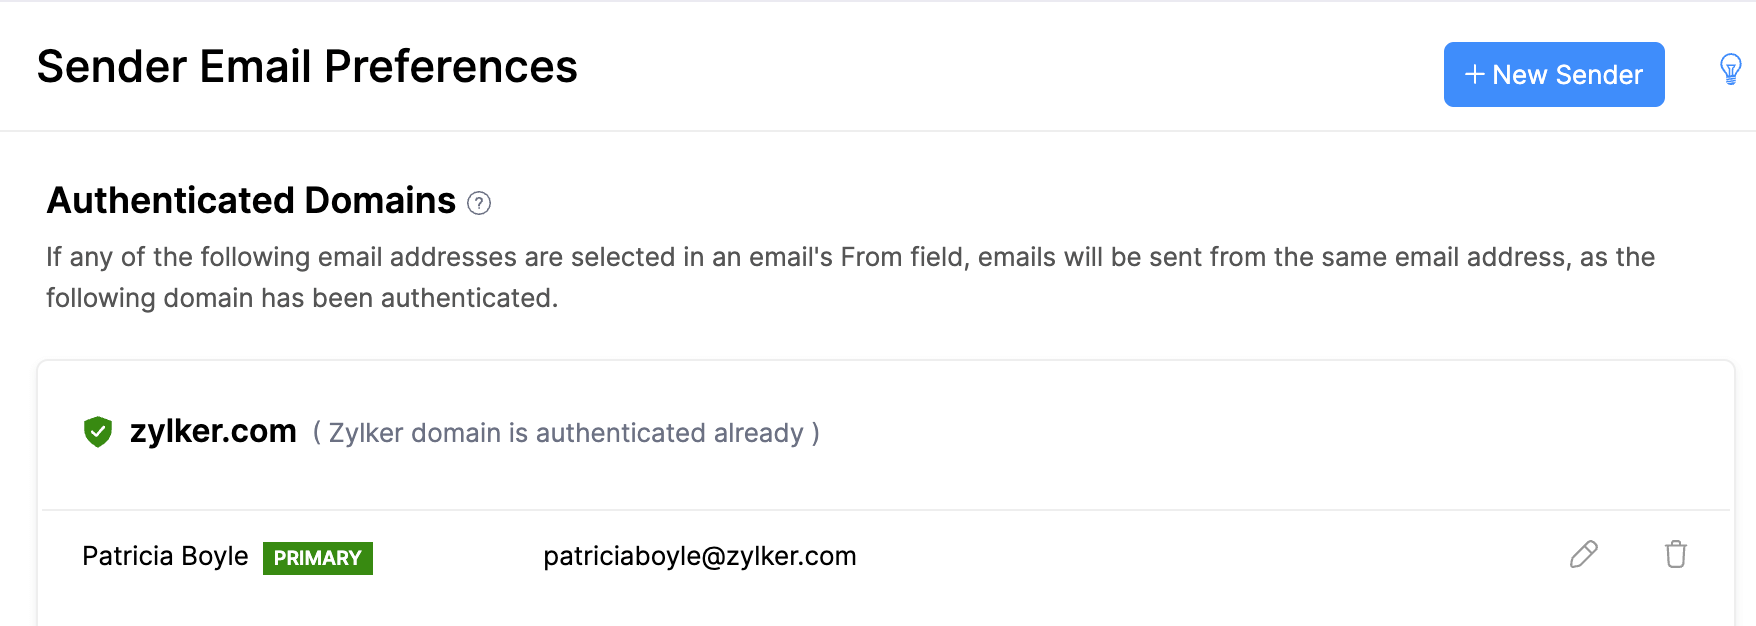
Authenticated Domains
Email addresses from domains with DKIM records are trusted by Zoho Books and can be safely used in the From field of emails. You don’t need to worry about these emails being flagged as spam when sent from Zoho Books.
Authenticate Domains
Emails listed under the Unauthenticated Domains section can be authenticated by adding DKIM records for their domains. To do this:
- Go to Settings in the top right corner of the page.
- Select Email Notifications under Reminders & Notifications.
- Click Sender Email Preferences on the left sidebar.
- Click Authenticate Now next to the domain that you want to authenticate.
- Copy the Host Name and Value for the DKIM record and add it to the DNS settings of your domain name provider.
- Click Validate
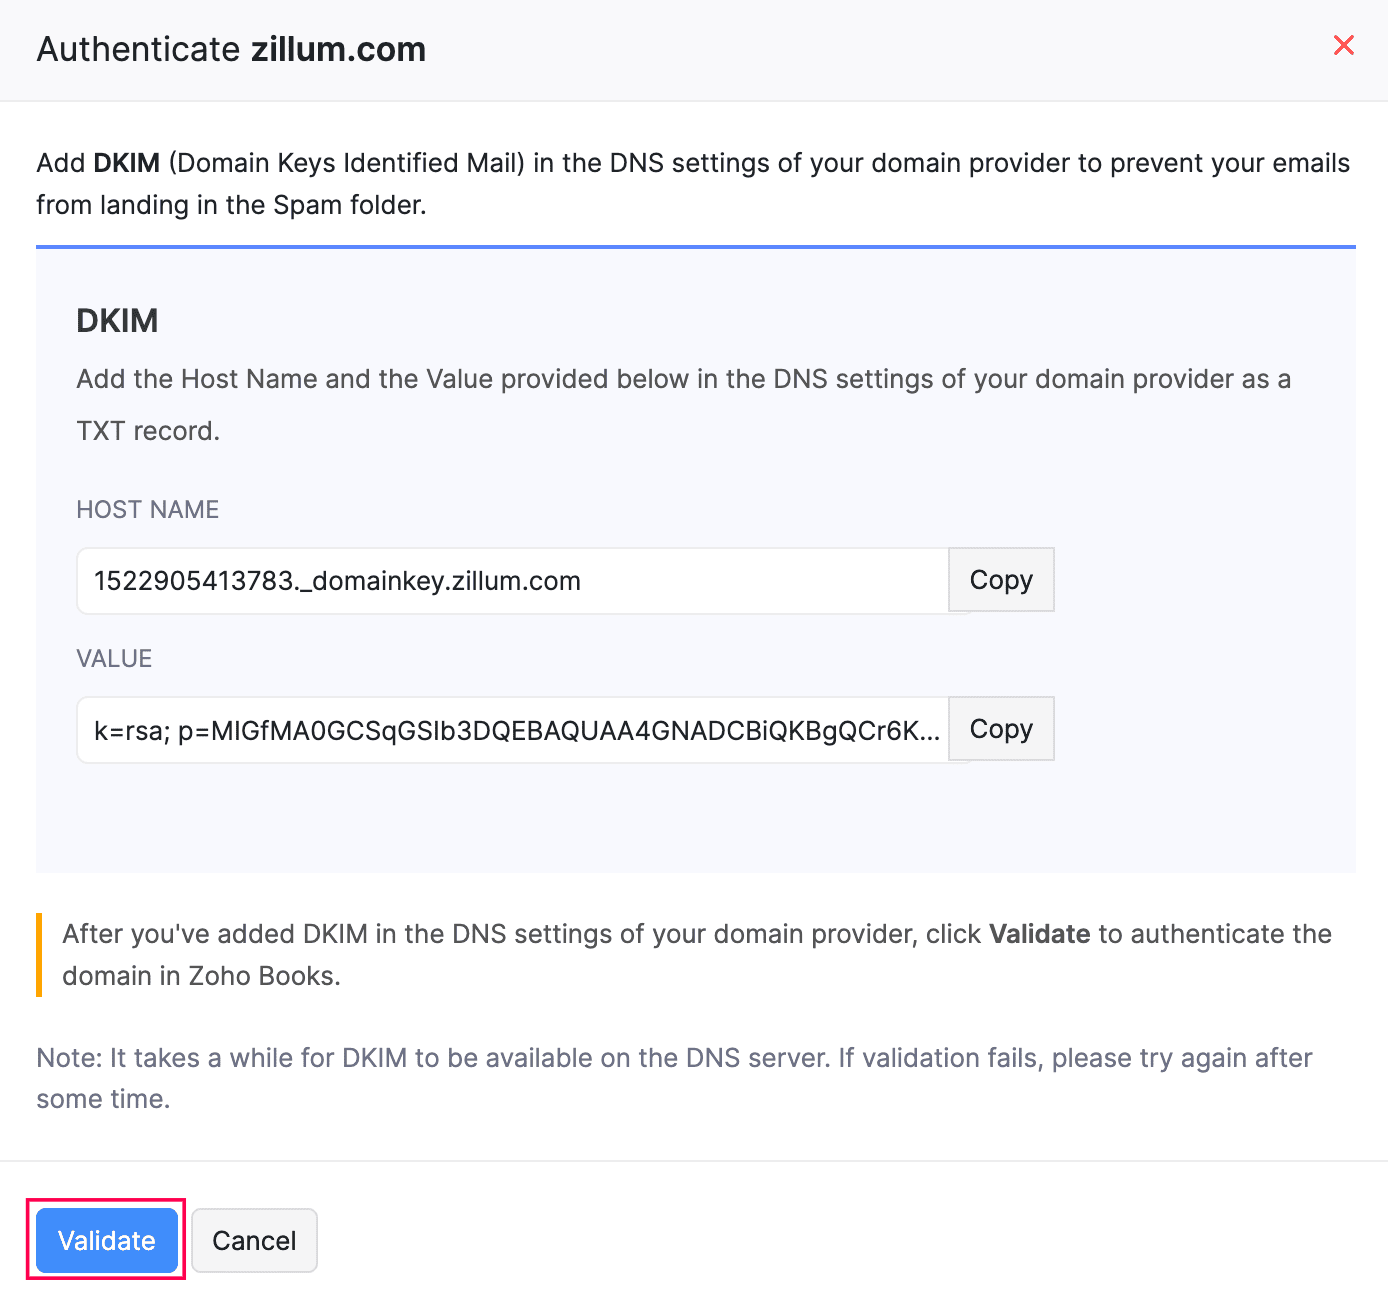
Insight: It will take a while for your newly added records to reflect on the DNS server. If your validation fails, wait for a while and try again. Also, you can continue to use Zoho Books while the records are being validated.
Note: If you use GoDaddy as your domain provider, the Host Name for the DKIM record will have to be slightly modified. You must remove your domain name from the record before adding it. For example, if the Host Name is 1522406527365._domainkey.patricia.com, you must remove your domain name from it and add 1522406527365._domainkey alone.
Once your DKIM record is successfully added and validated, your domain will be listed under the Authenticated Domains category. Emails sent from this domain can now be used in the From address without being replaced, and you don’t have to worry about them landing in the spam folder.
Note: If the Locations or Branches feature is enabled in your organisation, each transaction will be associated with a specific location or branch. Emails of such transactions will be sent to your contacts from the primary contact’s email address of the respective location or branch.
Other Actions
You can perform a few other actions in the Sender Email Preferences page.
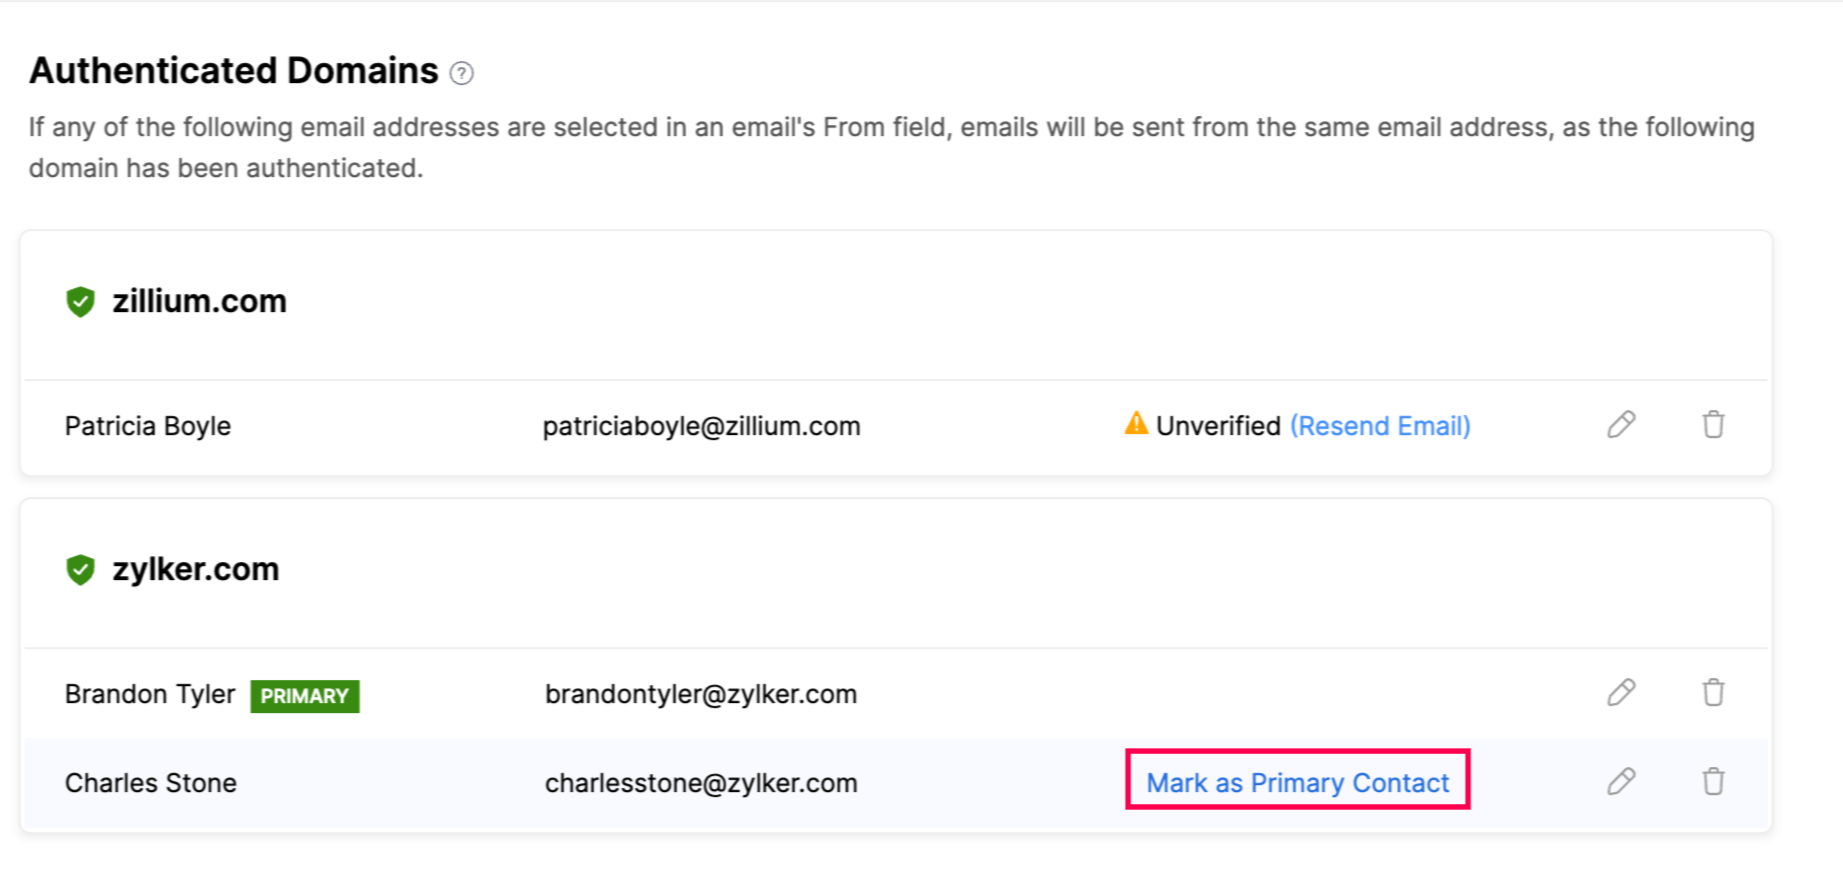
Mark Primary Contacts
A primary contact is the email address used for communication between your Zoho Books organization and Zoho. You’ll receive important updates about your Zoho Books subscription and usage-related emails at this address.
Also, this email address will be used as default in the From address of emails sent from Zoho Books, unless you change it manually while sending an email.
To mark a contact as primary, hover over an email address and click Mark as Primary Contact.
Add New Sender Email Addresses
You will be able to add new sender email addresses and select them when you send emails from Zoho Books. To do this:
- Go to Settings in the top right corner of the page.
- Select Email Notifications under Reminders & Notifications.
- Click Sender Email Preferences on the left sidebar.
- In this page, click + New Sender in the top right corner.
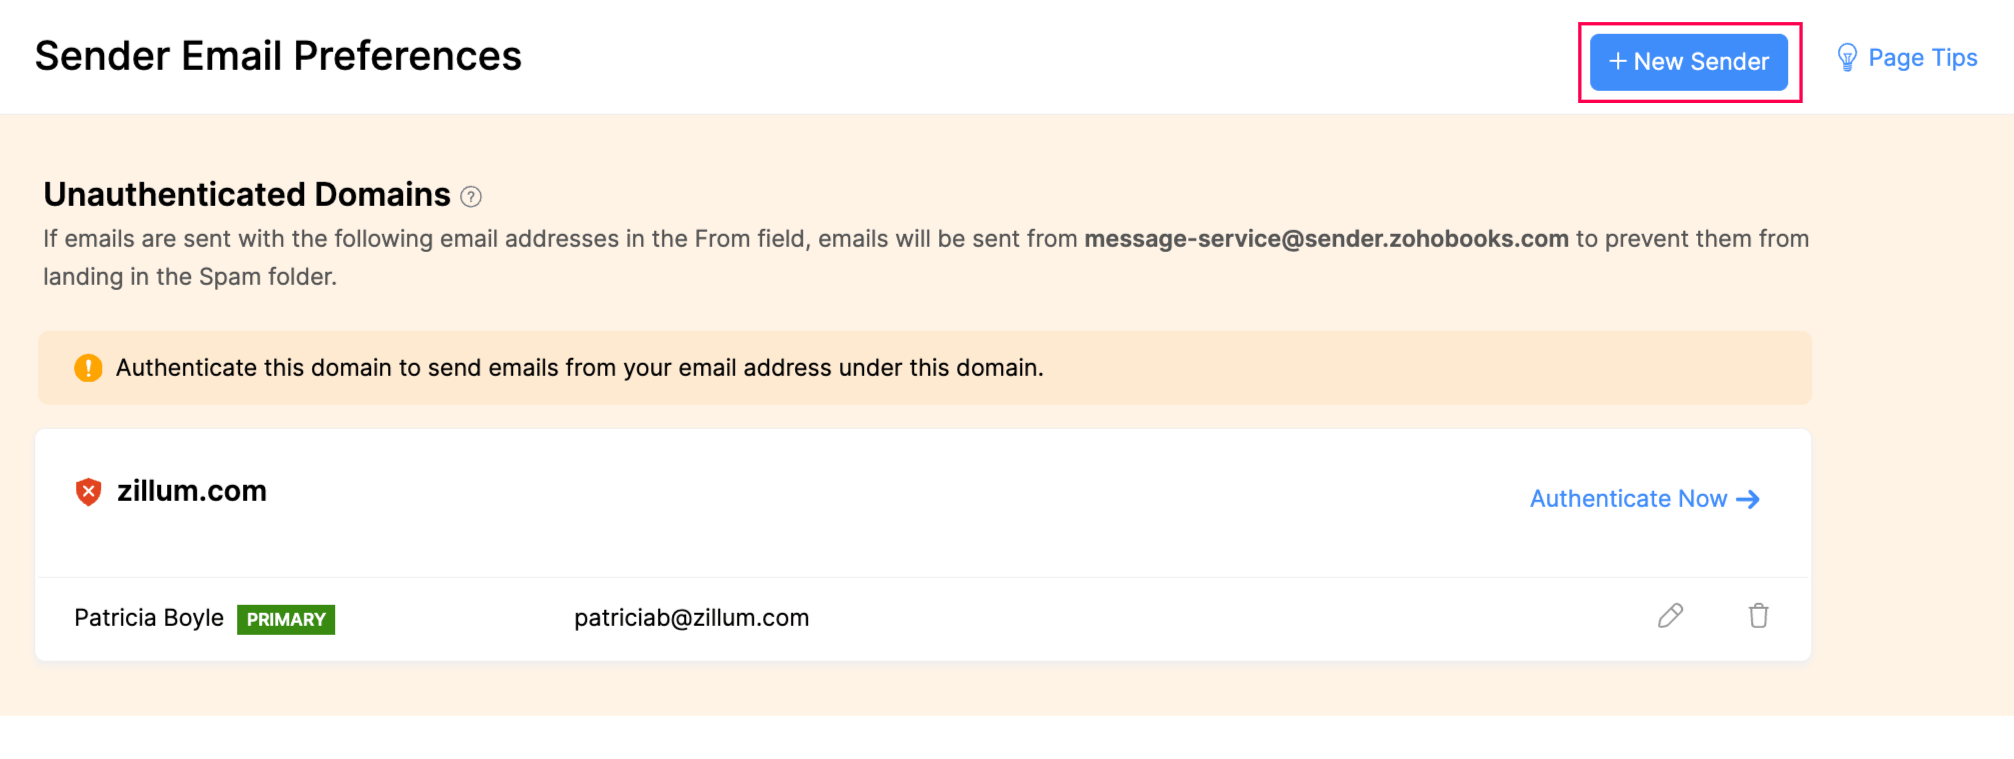
- Add a Name and an Email.
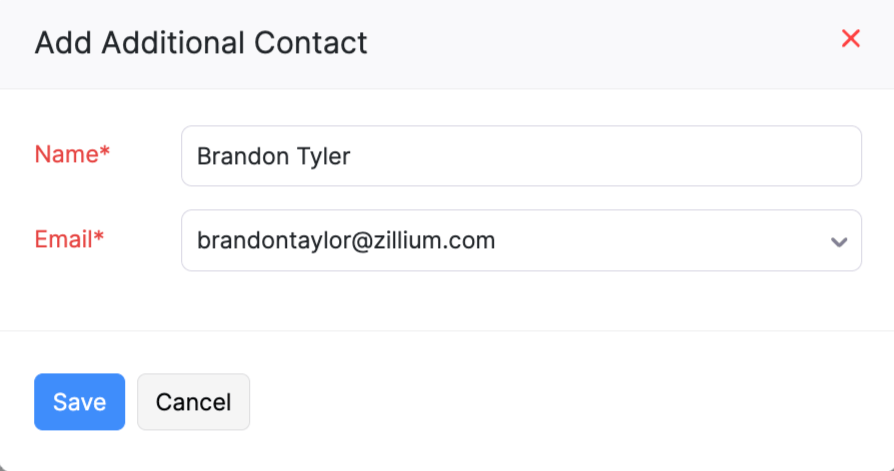
- Click Save.
Now, a verification email will be sent to the email address that you added. Once the email address has been verified, you will be able to use it in the From field of emails sent from Zoho Books.
Insight: Adding an email address this way will only enable the email address to be used for sending emails from Zoho Books and is not to be confused with adding users to your organization.
Resend Verification Emails
As mentioned in the previous section, when you add a new sender email address, a verification email will be sent to that email address. However, if the email was not received, you can resend the verification email. Here’s how:
- Go to Settings in the top right corner of the page.
- Select Email Notifications under Reminders & Notifications.
- Click Sender Email Preferences on the left sidebar.
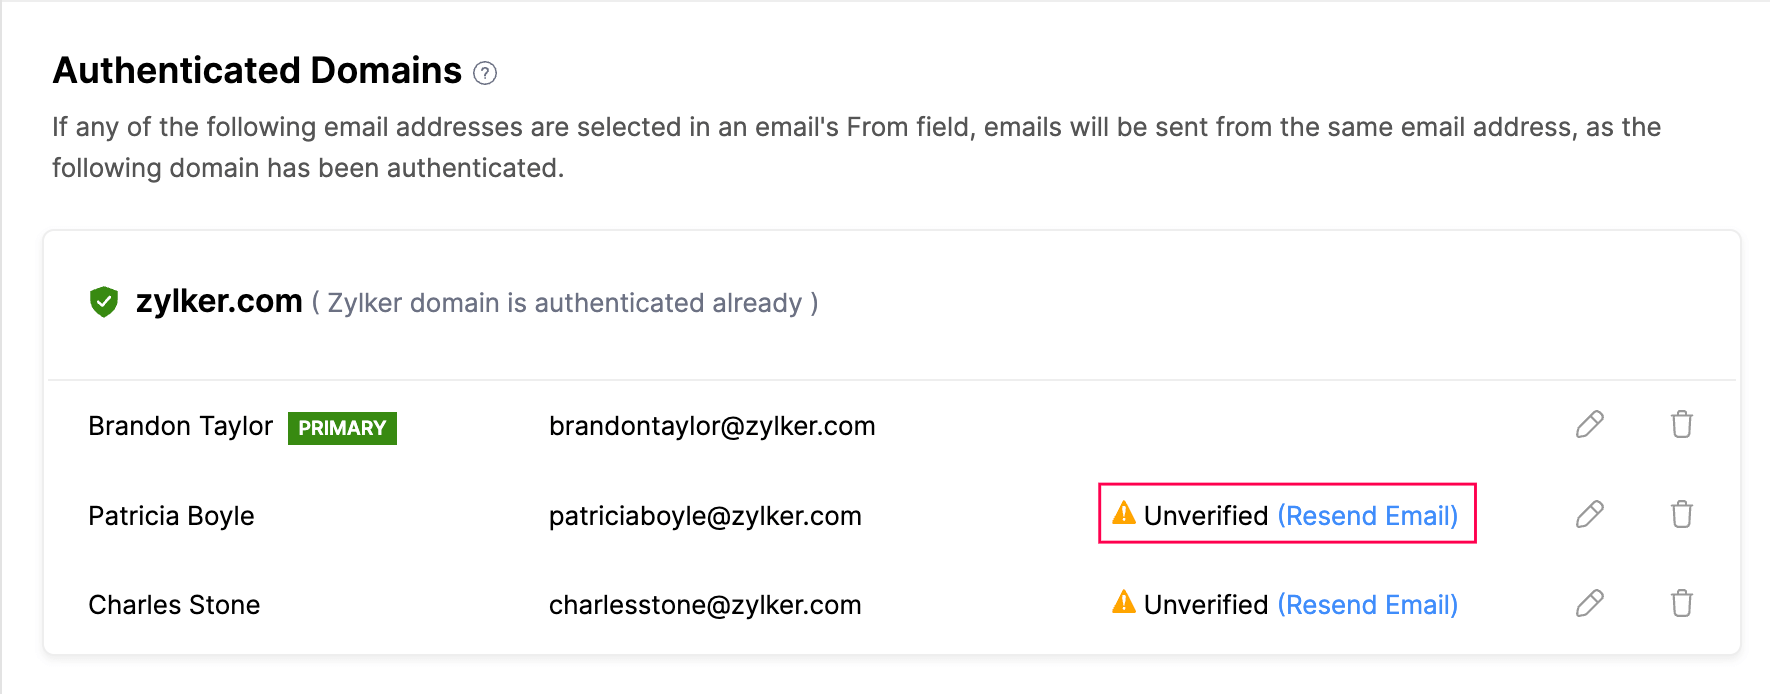
- Click Resend Email next to an email address that has not been verified yet.
The verification email will be sent again.
Edit/Delete Email Addresses
You can choose to edit or delete your users’ email addresses from Zoho Books by clicking the Edit or Delete icons, respectively, which can be found on the right side of an email address.
Email Relay
Email relays forward or relay your emails to their destination while minimizing the risk of them being flagged as spam. Using a custom SMTP allows businesses to send emails from their own domain or other public domains, reducing the likelihood of spam filters. Custom SMTP also helps authenticate senders and checks for spam, ensuring more reliable email delivery. You now have the option to set up email relay servers to send emails from Zoho Books with custom SMTP. Here’s how:
- Go to Settings in the top-right corner.
- Select Email Notifications under Reminders and Notifications,
- Navigate to the Email Relay section under Preferences in the left pane.
- Click + New Server.
- Enter the Server Name.
- Select the Port number.
- Enter the Daily Mail Limit.
- Select an option in the Use Secure Connection field.
- Select your Mail Delivery Preference. To apply the settings to the entire domain, select Domain-based. If the settings should apply only to a specific email address, select Email-based.
- Choose your domain from the Domain in this Server field.
- If authentication is required, select Yes and enter the Username and Password. If not, select No in the Authentication Required field.
- Click Save.
After saving the configuration, you need to enable the email relay that you set up. To do this, go to Settings > Reminders and Notifications > Email Notifications > Email Relay. Enable the toggle next to the email relay that you set up.
Email Insights
Emails are the conventional method of communicating with customers. However, it can be a hassle to check whether your customers have viewed the emails that you have sent them. The Email Insights feature in Zoho Books lets you keep track of the notification emails sent to customers. With this, you can know when a customer has opened a notification email.
Scenario: Patricia sends an invoice via email to her customer, John, and requests immediate payment for it. However, John claims that he hasn’t received the invoice yet. Since Patricia has enabled Email Insights, she is able to check whether John viewed the invoice, along with the exact date and time when he viewed it. This helps her take further actions accordingly.
Enable Email Insights
When you enable email insights, you will be able to track notification emails for:
- Invoices
- Retainer Invoices
- Quotes
To enable Email Insights:
- Go to Settings in the top right corner of the page.
- Select Email Notifications under Reminders & Notifications
- Click Email Insights on the left sidebar.
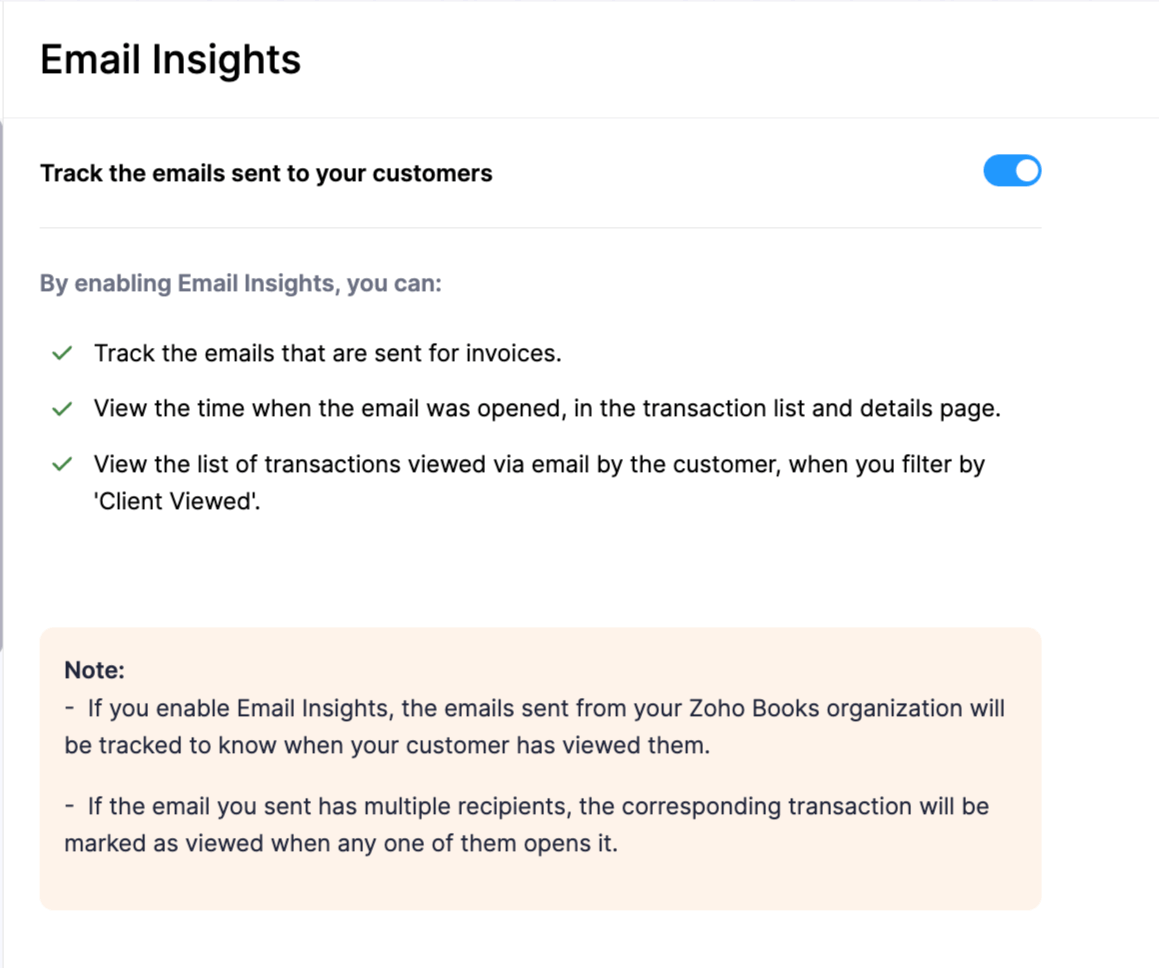
- Enable Track the emails sent to your customers.
Notes:
- If you enable Email Insights, the emails sent from your Zoho Books organization will be tracked to know when your customer has viewed them.
- If the email you sent has multiple recipients, the corresponding transaction will be marked as viewed when any one of them opens it.
Track the Status of Transaction Emails
After enabling email insights, you can view the status of the notification email in the following places:
Transaction List Views
You can view the status of notification emails in the transaction list view for the Invoices , Retainer Invoices and Quotes modules. The status will be indicated using icons that are placed near every transaction in the list. Here’s what the icons mean:
 : Indicates that the transaction was sent via mail.
 : Indicates that the transaction’s notification mail was opened.
 : Indicates that the transaction was viewed from the customer portal.

Pro Tip: Select Client Viewed in the view filter dropdown to view a list of transactions that have been viewed by your customers from the customer portal and their email inbox.
Transaction Details Page
In the transactions details page, you can view the status of transactions under Comments & History in the top right corner of the page.
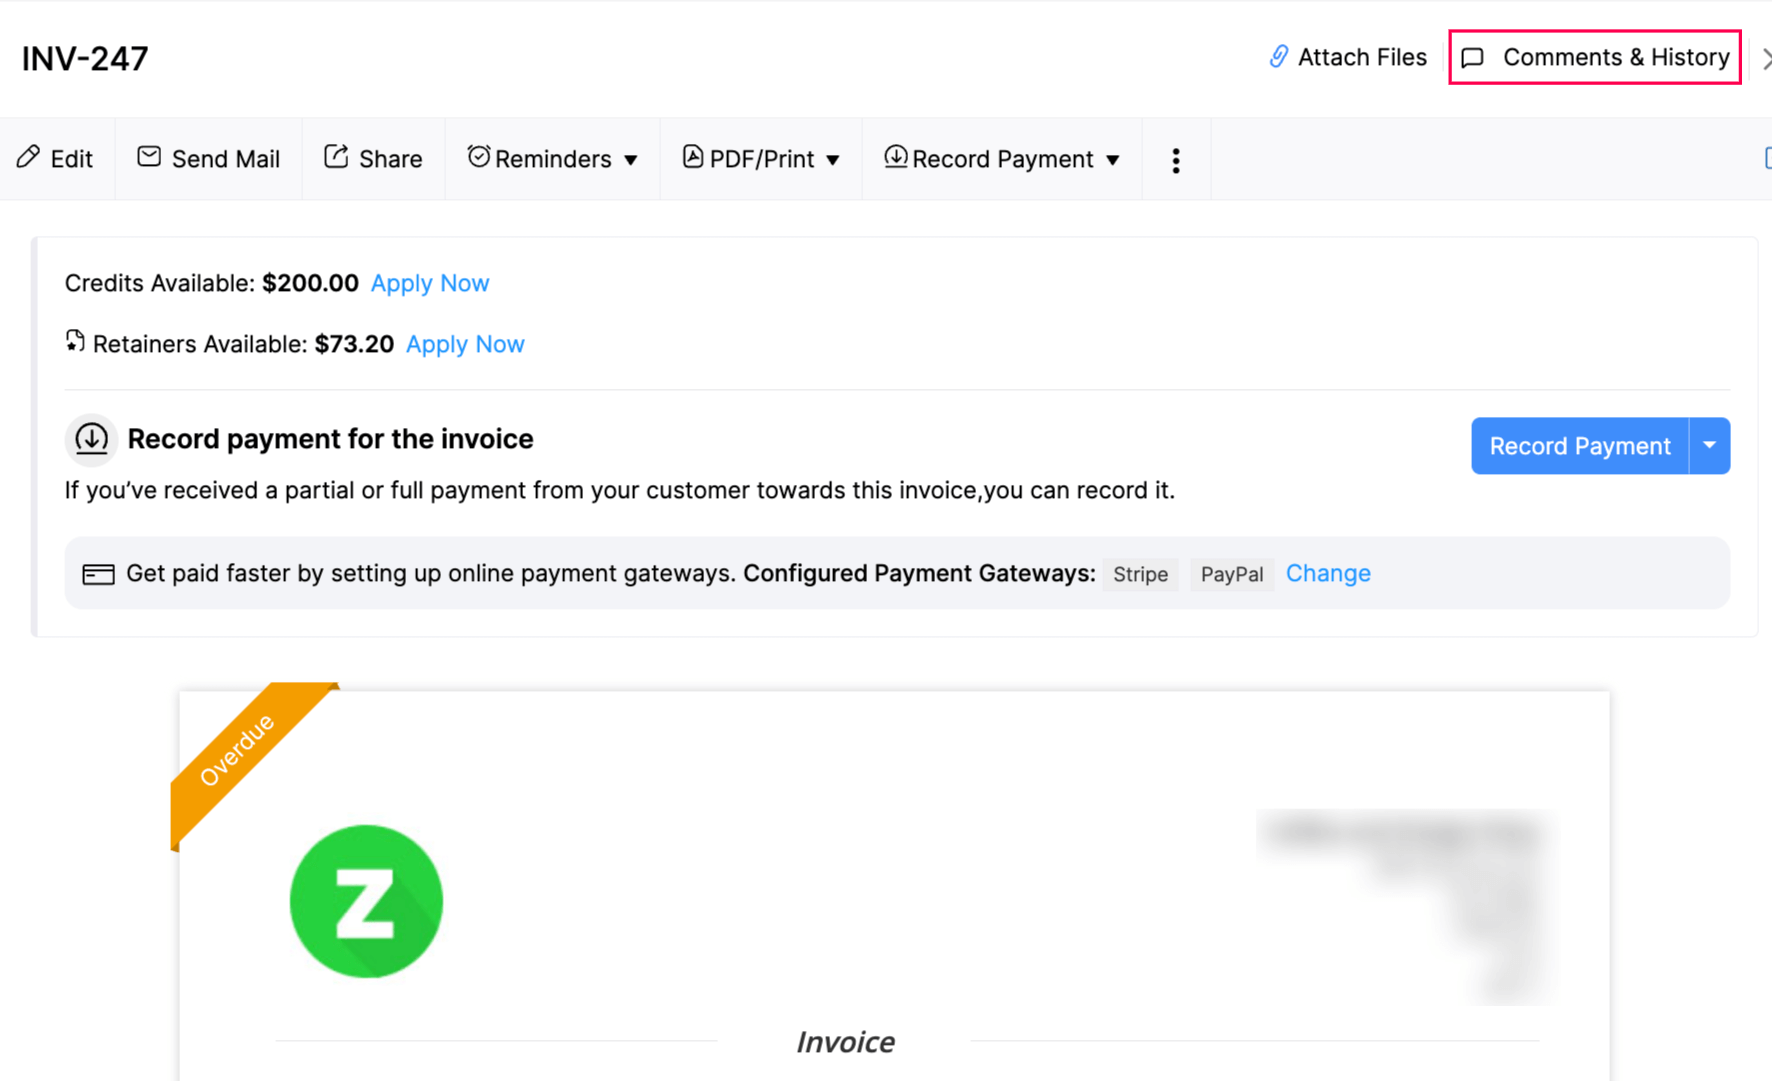
Insight: If the email you sent has multiple recipients or has your users’ email addresses in the CC or BCC fields, the corresponding transaction will be marked as viewed when any one of them opens it.
How does Zoho Books track email activity?
Zoho Books uses web beacons (the industry standard followed by email service providers for tracking emails) to track emails sent to your customers.
A small graphic, the size of one pixel, is embedded at the bottom of HTML emails sent from Zoho Books. When a recipient opens the email and chooses to display images in it, this tiny image is downloaded from our server. This download enables Zoho Books to track when your email was opened.
Warning: If your customer does not choose to display images for your email, Zoho Books will not be able to track the status. Hence, in some cases, Zoho Books could display the status of your email as being unopened, even if it was opened by your customers.
Email Templates
Email templates in Zoho Books let you create unique, customer-centric notification emails that can be sent to your customers. You can create email templates that reflect your branding and customize the email content accordingly.
Create Email Templates
Go to Settings in the top right corner of the page.
Select Email Notifications under Reminders & Notifications.
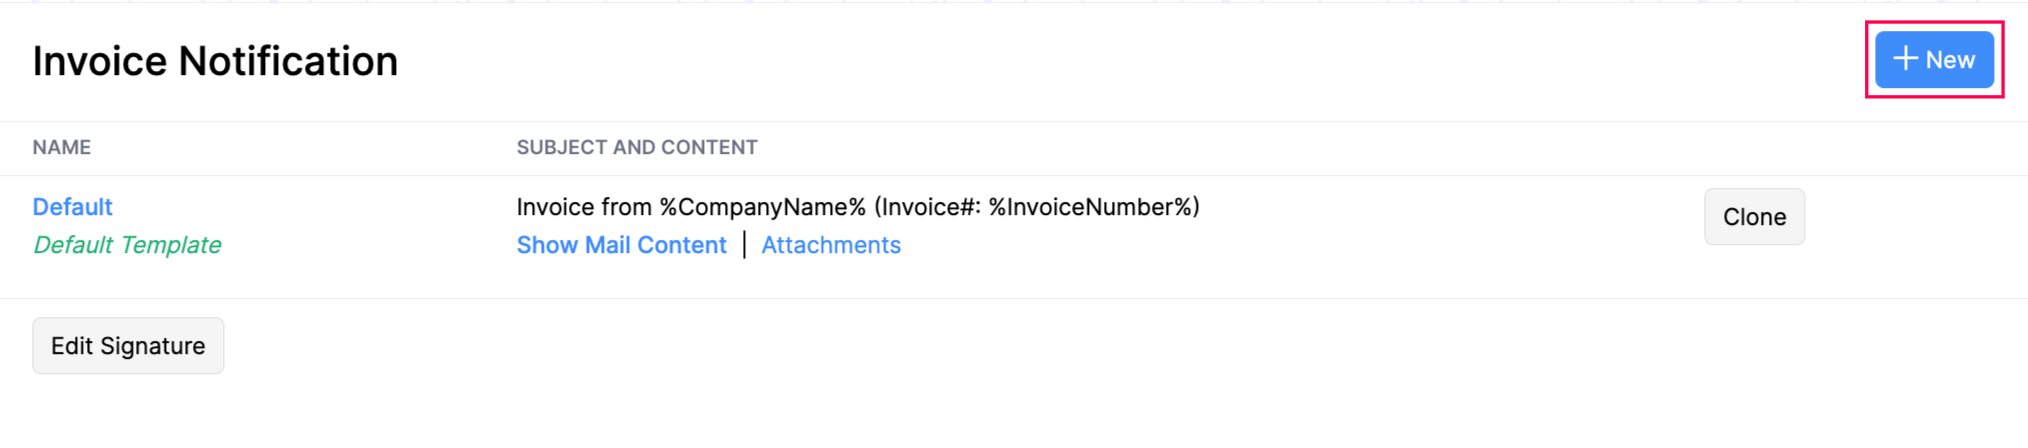
In the Templates section, select the module for which you want to create the email template.
Pro Tip: You can also clone a pre-built email template, make changes to it, and then save it as a new template.
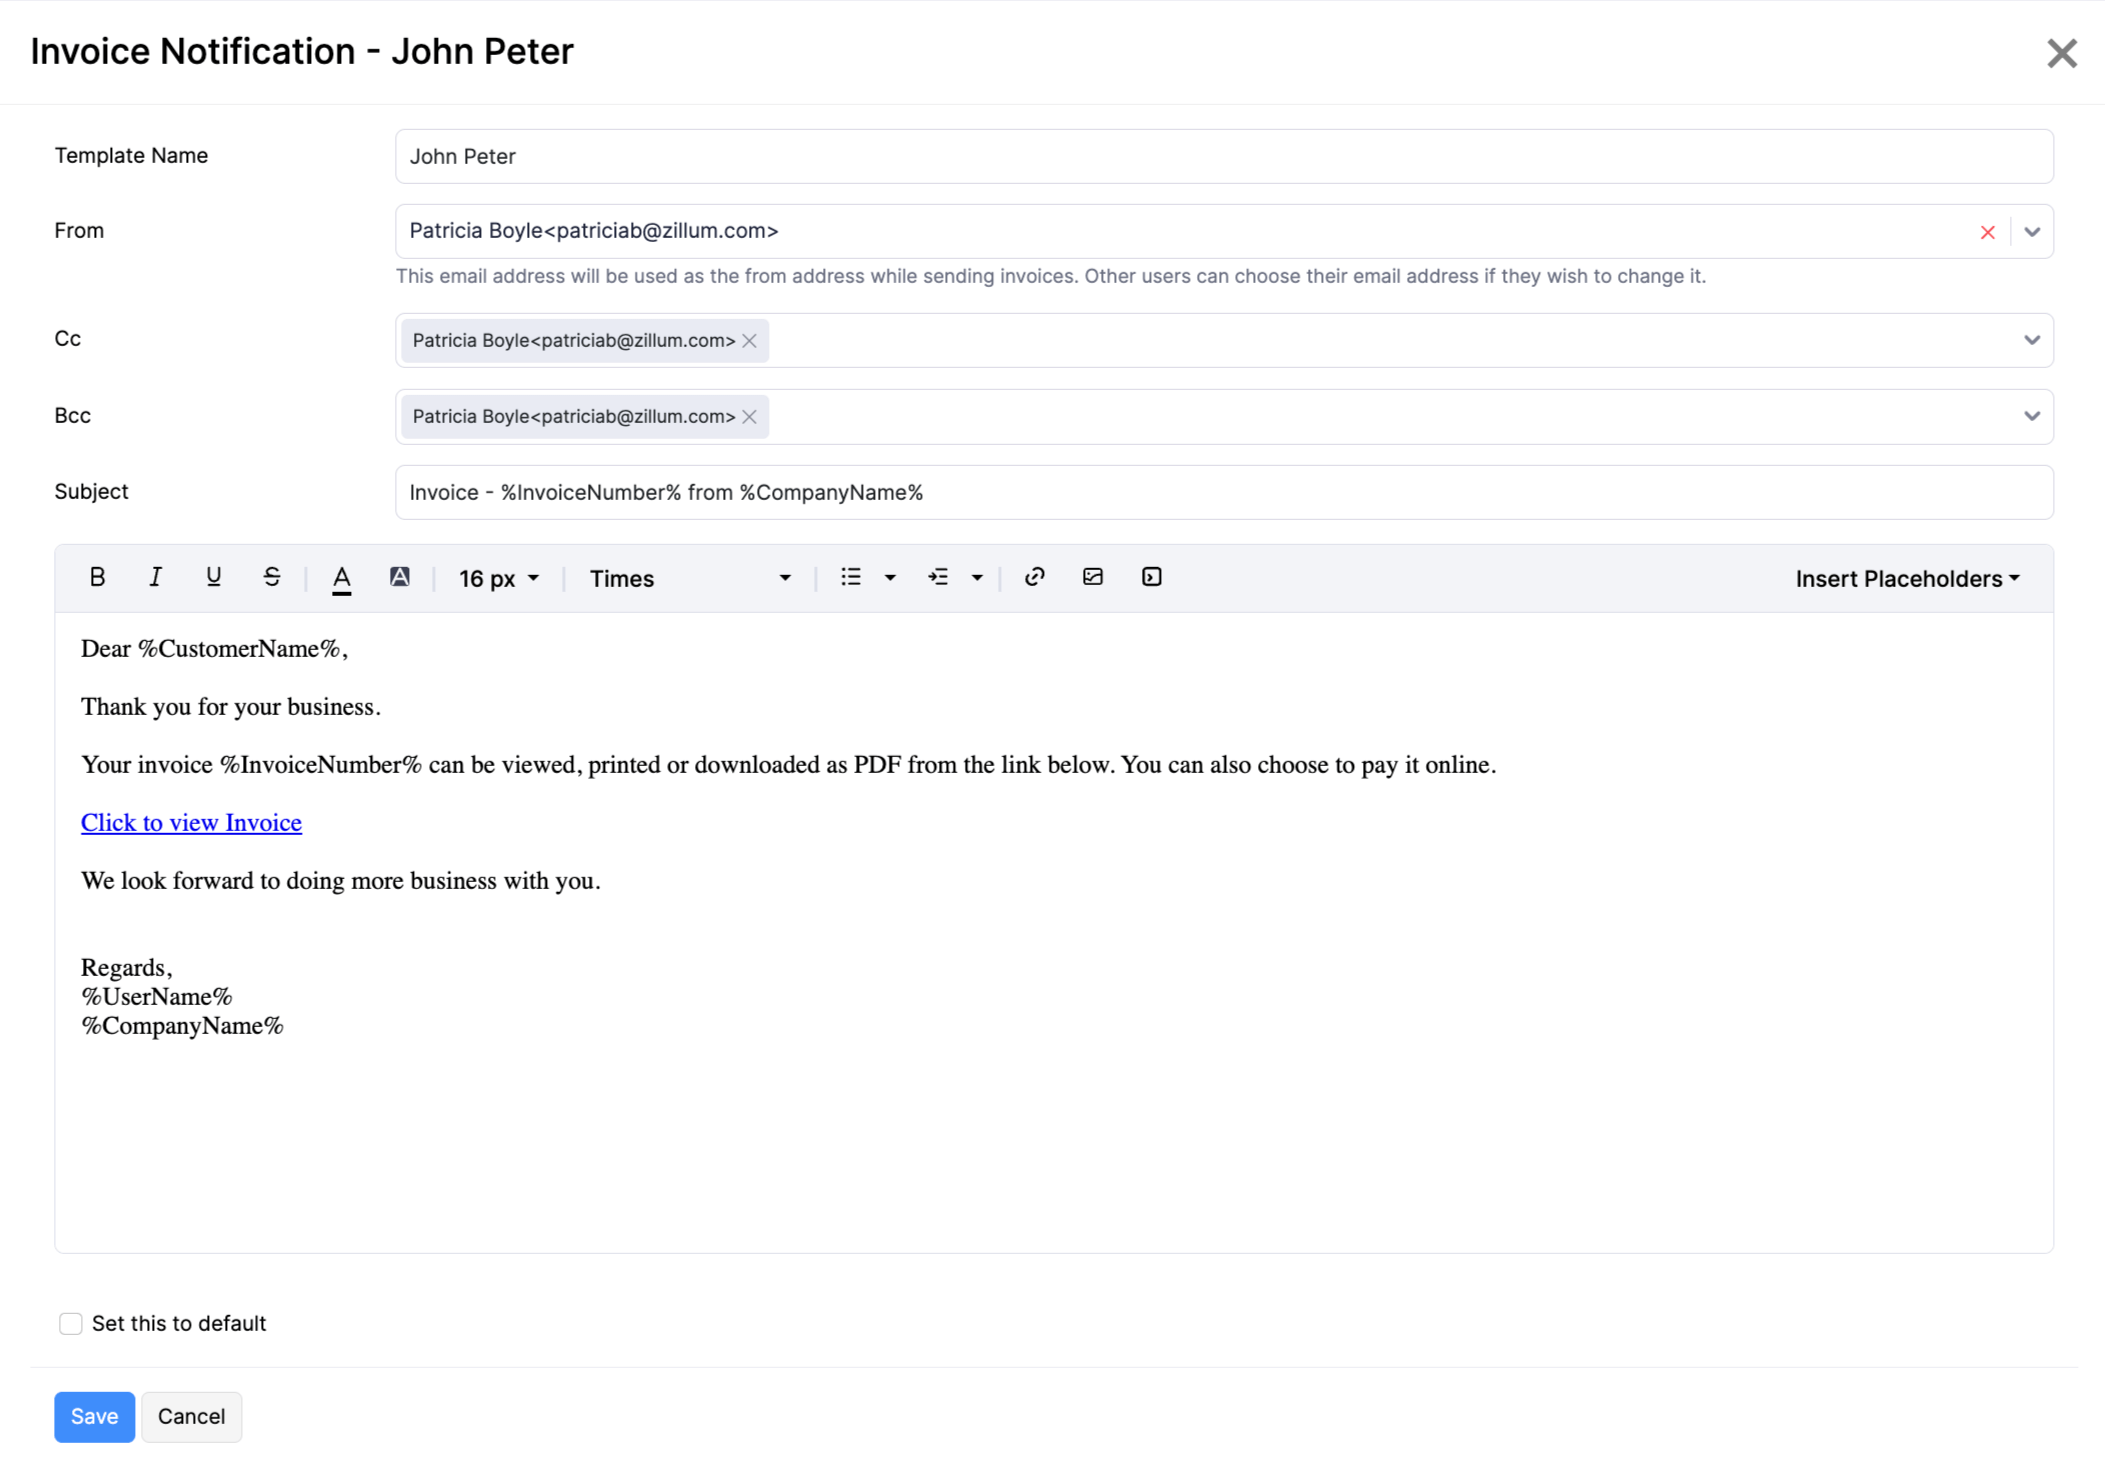
Click +New on the top-right corner to create a new template.
- Enter a Template Name for the email template you are creating.
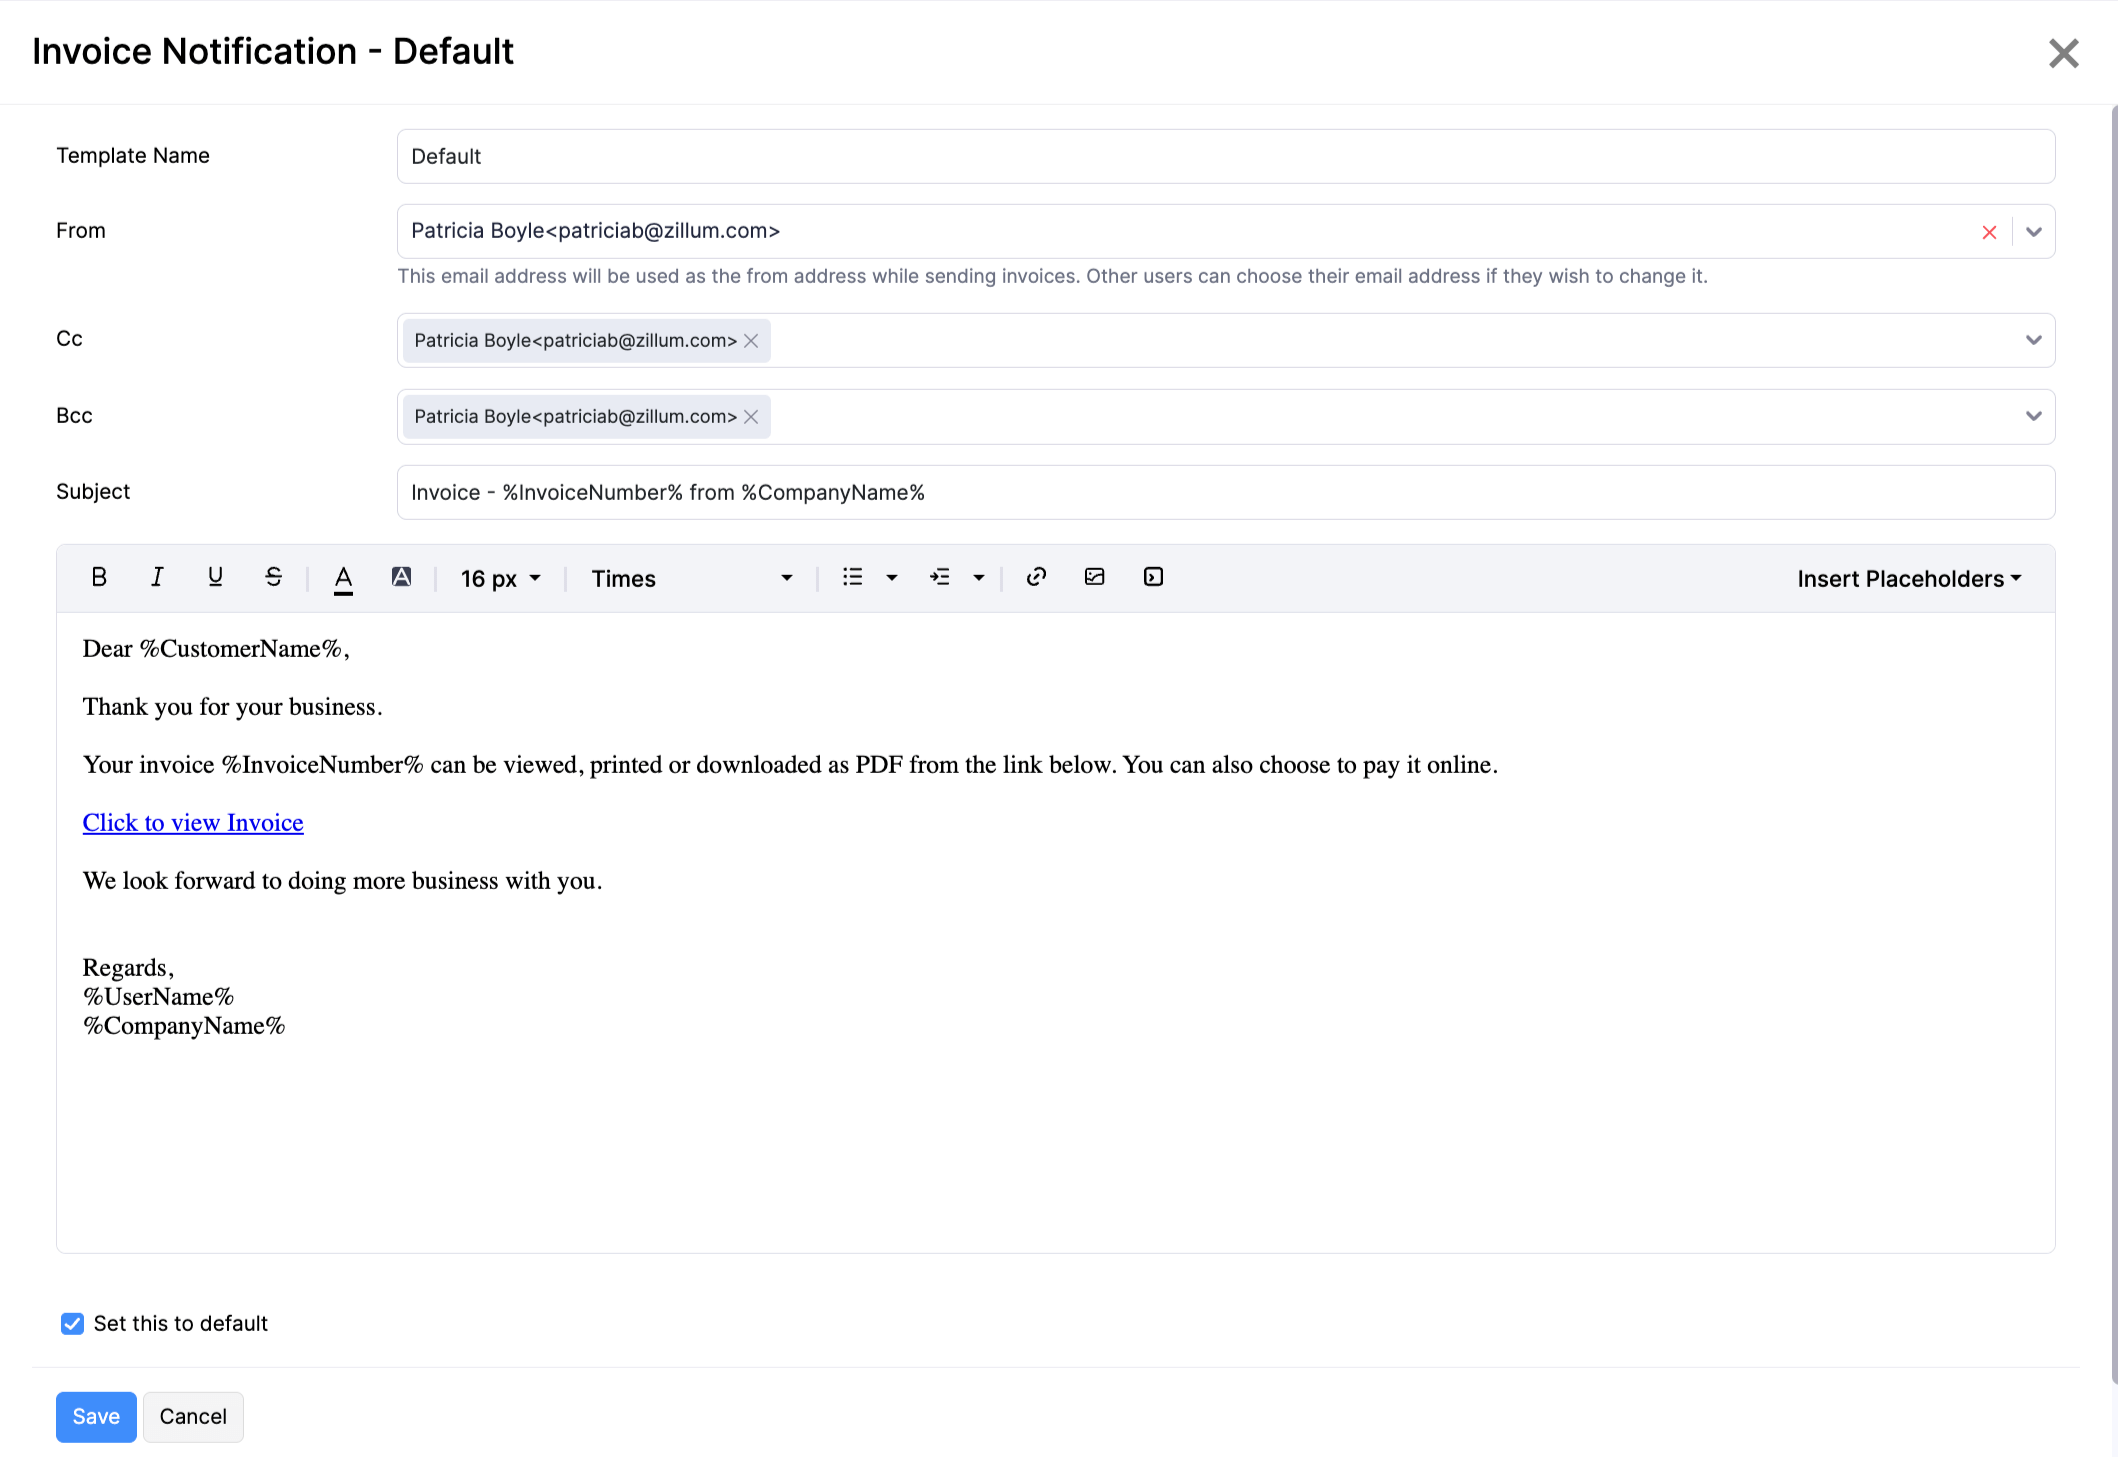
- Add or select email addresses for the From, CC and BCC fields.
- Enter the Subject of the email.
- Customize the email content according to your needs.
- Mark Set this to default if you want to use this template as the default.
- Click Save.
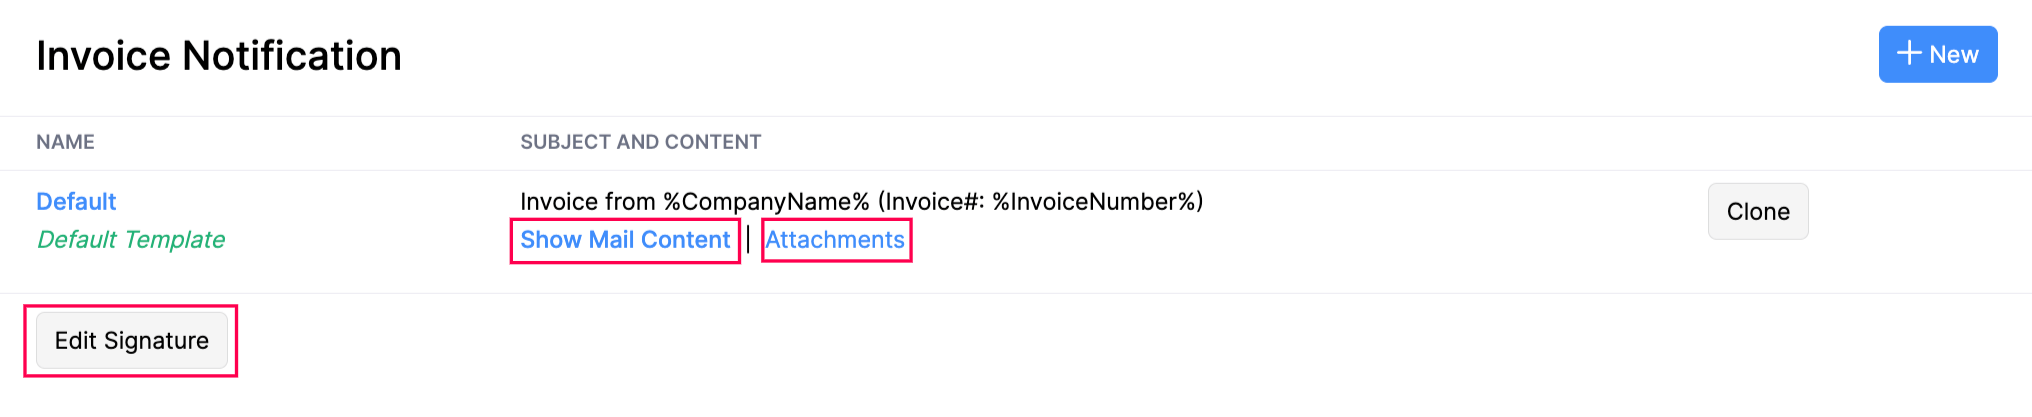
- To add a common signature to the different email templates of a module, click the Edit Signature button.
- You can also add up to five files (each of 5MB) to each email template by clicking Attach File(s).
- To edit a template, click Show Mail Content or the template name.
Customize Email Templates
You can personalize the content of email templates to reflect your business and branding better. Here’s how:
- Go to Settings in the top right corner of the page.
- Select Email Notifications under Reminders & Notifications.
- In the Templates section, select the module for which you want to create the email template.
- Select an existing email template or create a new one.
- In the text box, enter the message that you want to send to your customers.
- Use the tools available from the toolbox to format your email content.
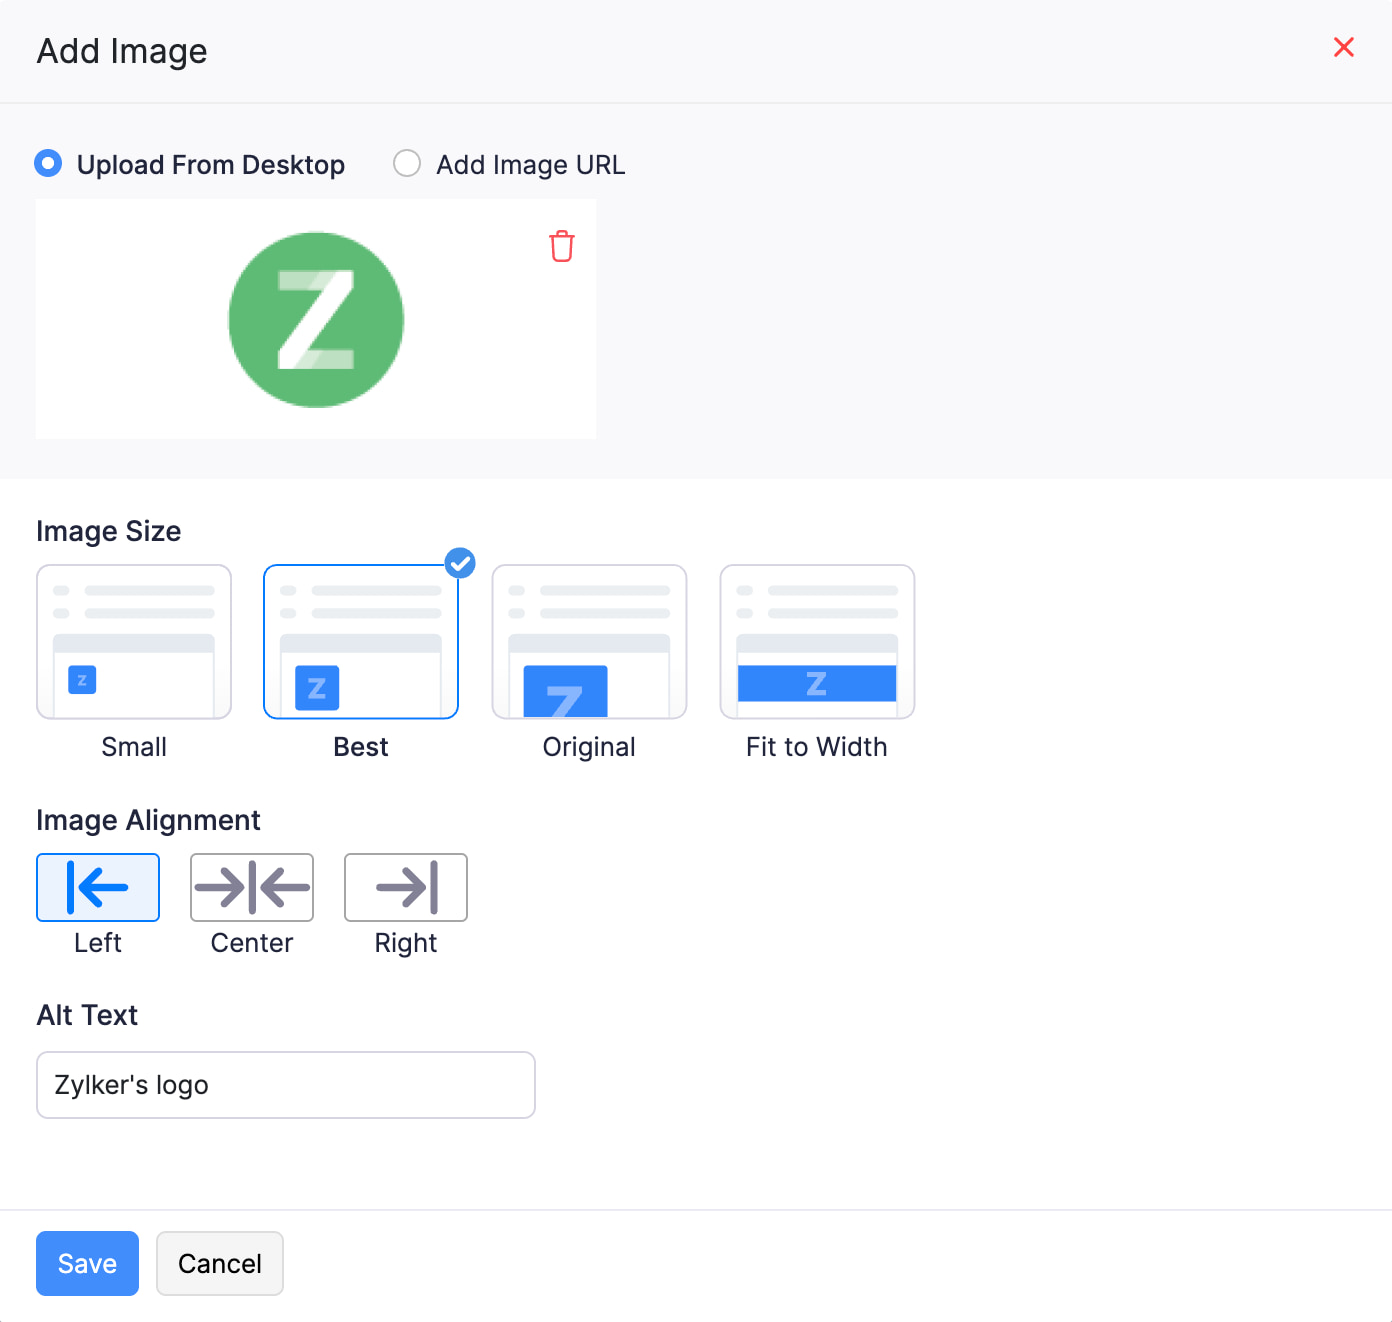
- To insert an image to the email template, click the Insert Image icon.
- In the pop-up that appears, select if you want to Upload From Desktop or Add Image URL.
- If you select Upload From Desktop, you can drag and drop the image or click Upload to add the required image.
- If you select Add Image URL, add the URL in the text box below Image URL and click Fetch URL. If the URL is valid, the image will be displayed.
- After you’ve added the image, select the Image Size and Image Position.
- Provide the image’s Alt Text. This is the content that will be shown if the image does not load.
- Click Save. The image will be added to the email template.
- To add hyperlinks, select the words to be hyperlinked, click the Create Link icon, enter the URL, and click Add.
- To make your email content dynamic, click Insert Placeholders and choose a placeholder from the list.
- Click Save to apply your changes.
Associate Email Templates with Customers & Vendors
Add a personal touch to the notification emails sent to different customers. In Zoho Books, you can send client-specific notification emails to customers by assigning email templates for them. Once you have created email templates, here’s how you can associate them with a customer:
- Go to Sales or Purchases on the left sidebar, and select Customers or Vendors.
- Select the customer or vendor for whom you want to associate templates.
- Click the More dropdown in the top right corner and select Associate Templates.
- In the pop-up, select the templates that you want to associate with this customer/vendor.
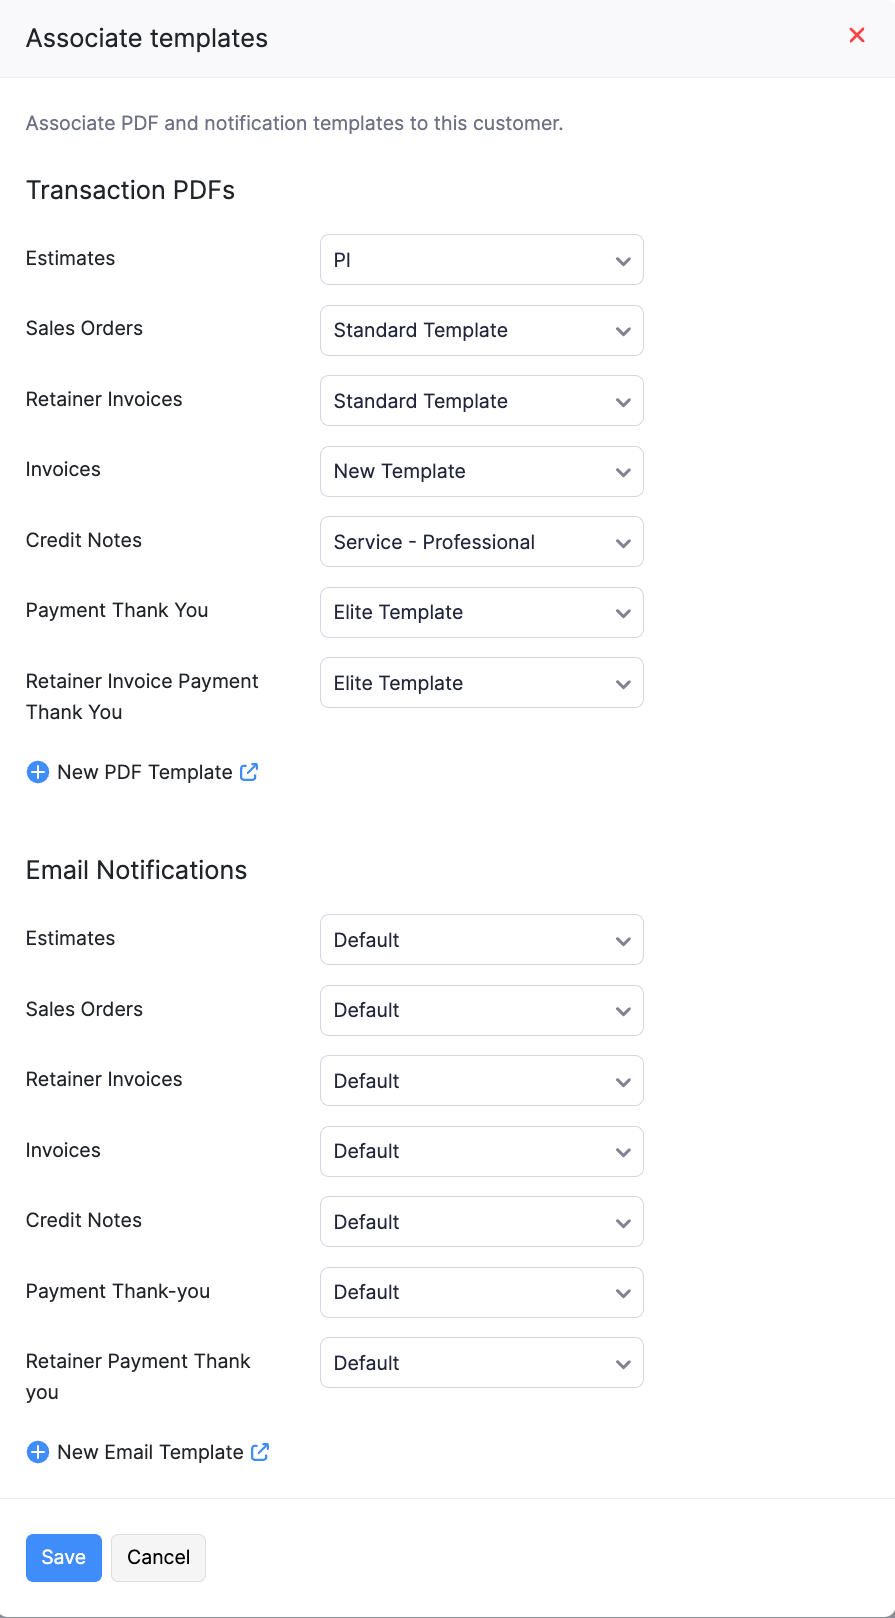
- Click Save.
Now, these templates will be set as default for this customer and will be used for all future emails. You can change these templates any time.
 Yes
No
Yes
No
Thank you for your feedback!