Tags
Tags are like labels, which you stick to a notebook or a file. Tags can be associated with expenses or expense reports for easy identification and classification.
As your organization grows, your business may open new departments and branches. By creating these departments or branches as tags, you can associate these tags with your expenses or expense reports. Later, you can easily filter analytic reports using the tags to identify the expenses incurred in various departments or branches of your business.
Let’s look at a few scenarios to understand this better:
Scenario 1: Matt owns a manufacturing company. He wants to group the expenses based on the cost centers of the organization. Matt can create a tag and add the cost centers as different options under it. He can then associate them with the expenses individually or to a particular report to classify the expenses on the basis of cost centers easily.
Scenario 2: Cole runs a product based company. The sales team of his organization undertakes business trips regularly to engage in sales and marketing activities. Cole would like to know the most visited location. Cole can create these locations as options under a tag and run analytics based on these tags to know the most visited location.
Scenario 3: John runs a retail store with branches spread across various countries. He would like to track the expenses incurred in these branches. Now, John can create options with each branch name under a tag and associate them to the expenses and expense reports accordingly. He can run analytic reports based on these tags to get insight into the expenses of the branches.
Enabling Tags and Configuring Preferences
To enable tags for your organization:
- Click Admin View.
- Go to Settings on the left sidebar.
(OR)
Click Settings in the top right corner of the page.
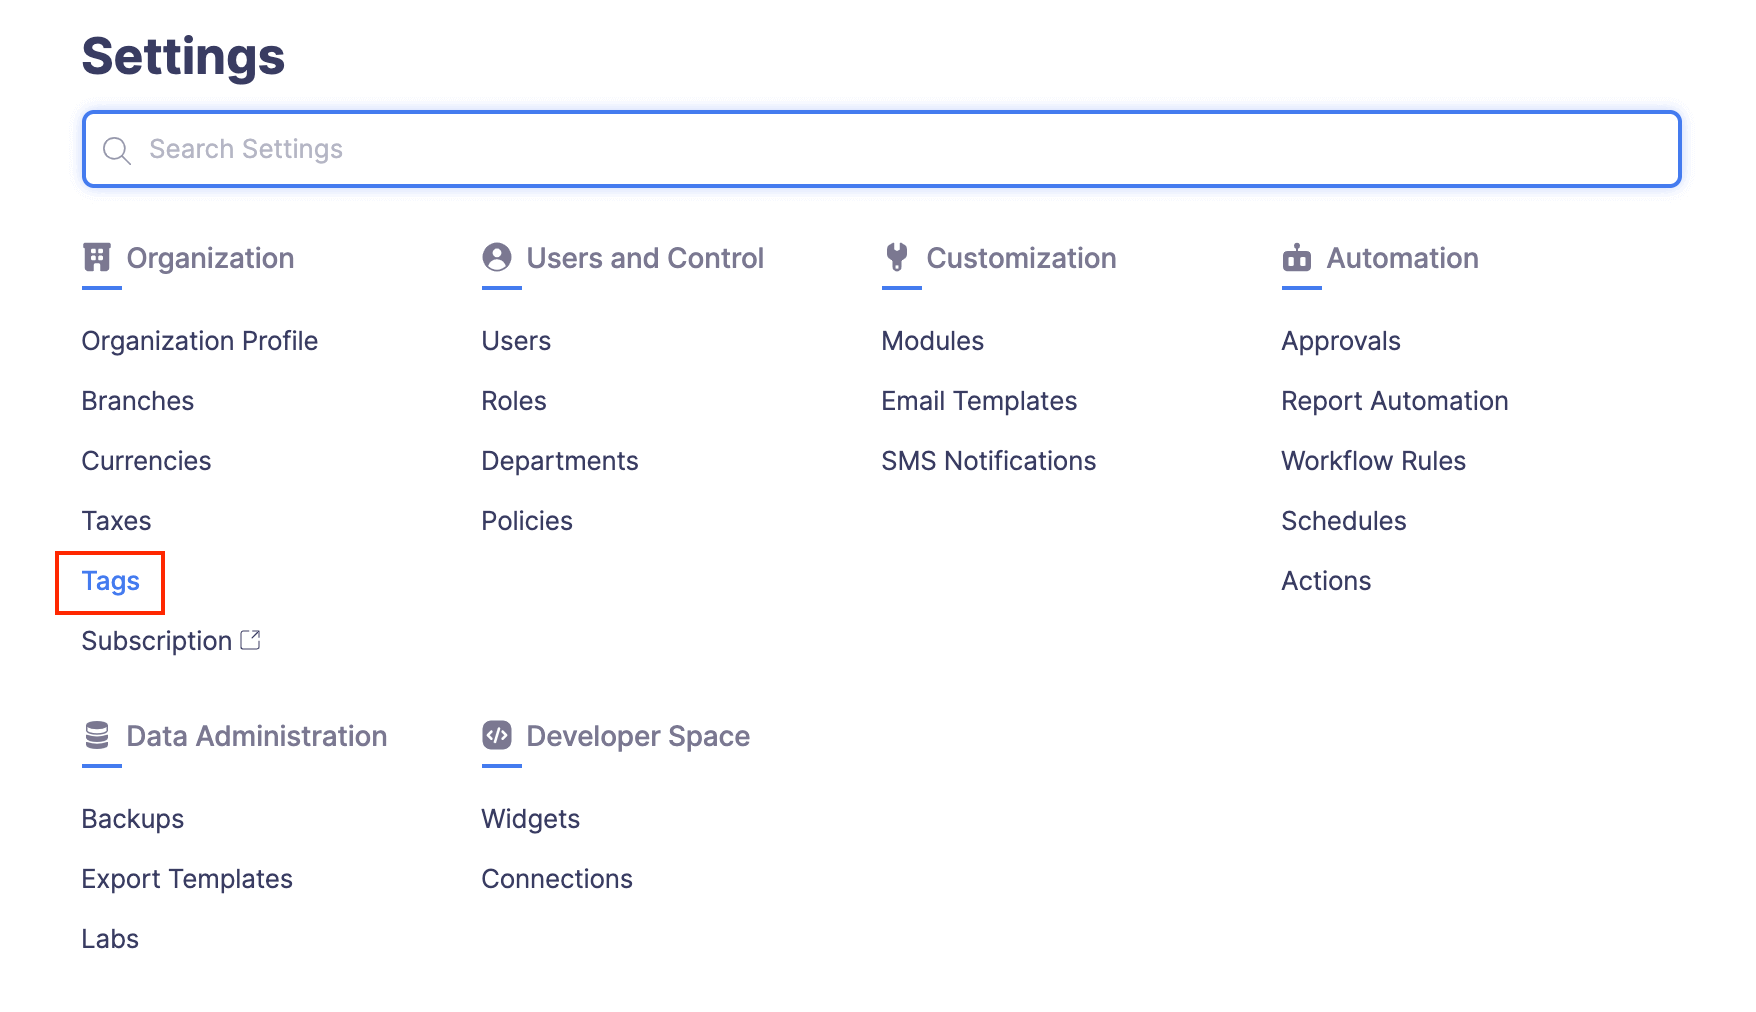
- Navigate to Organization Settings.
- Click Tags under Customization.
- Click the Enable button.
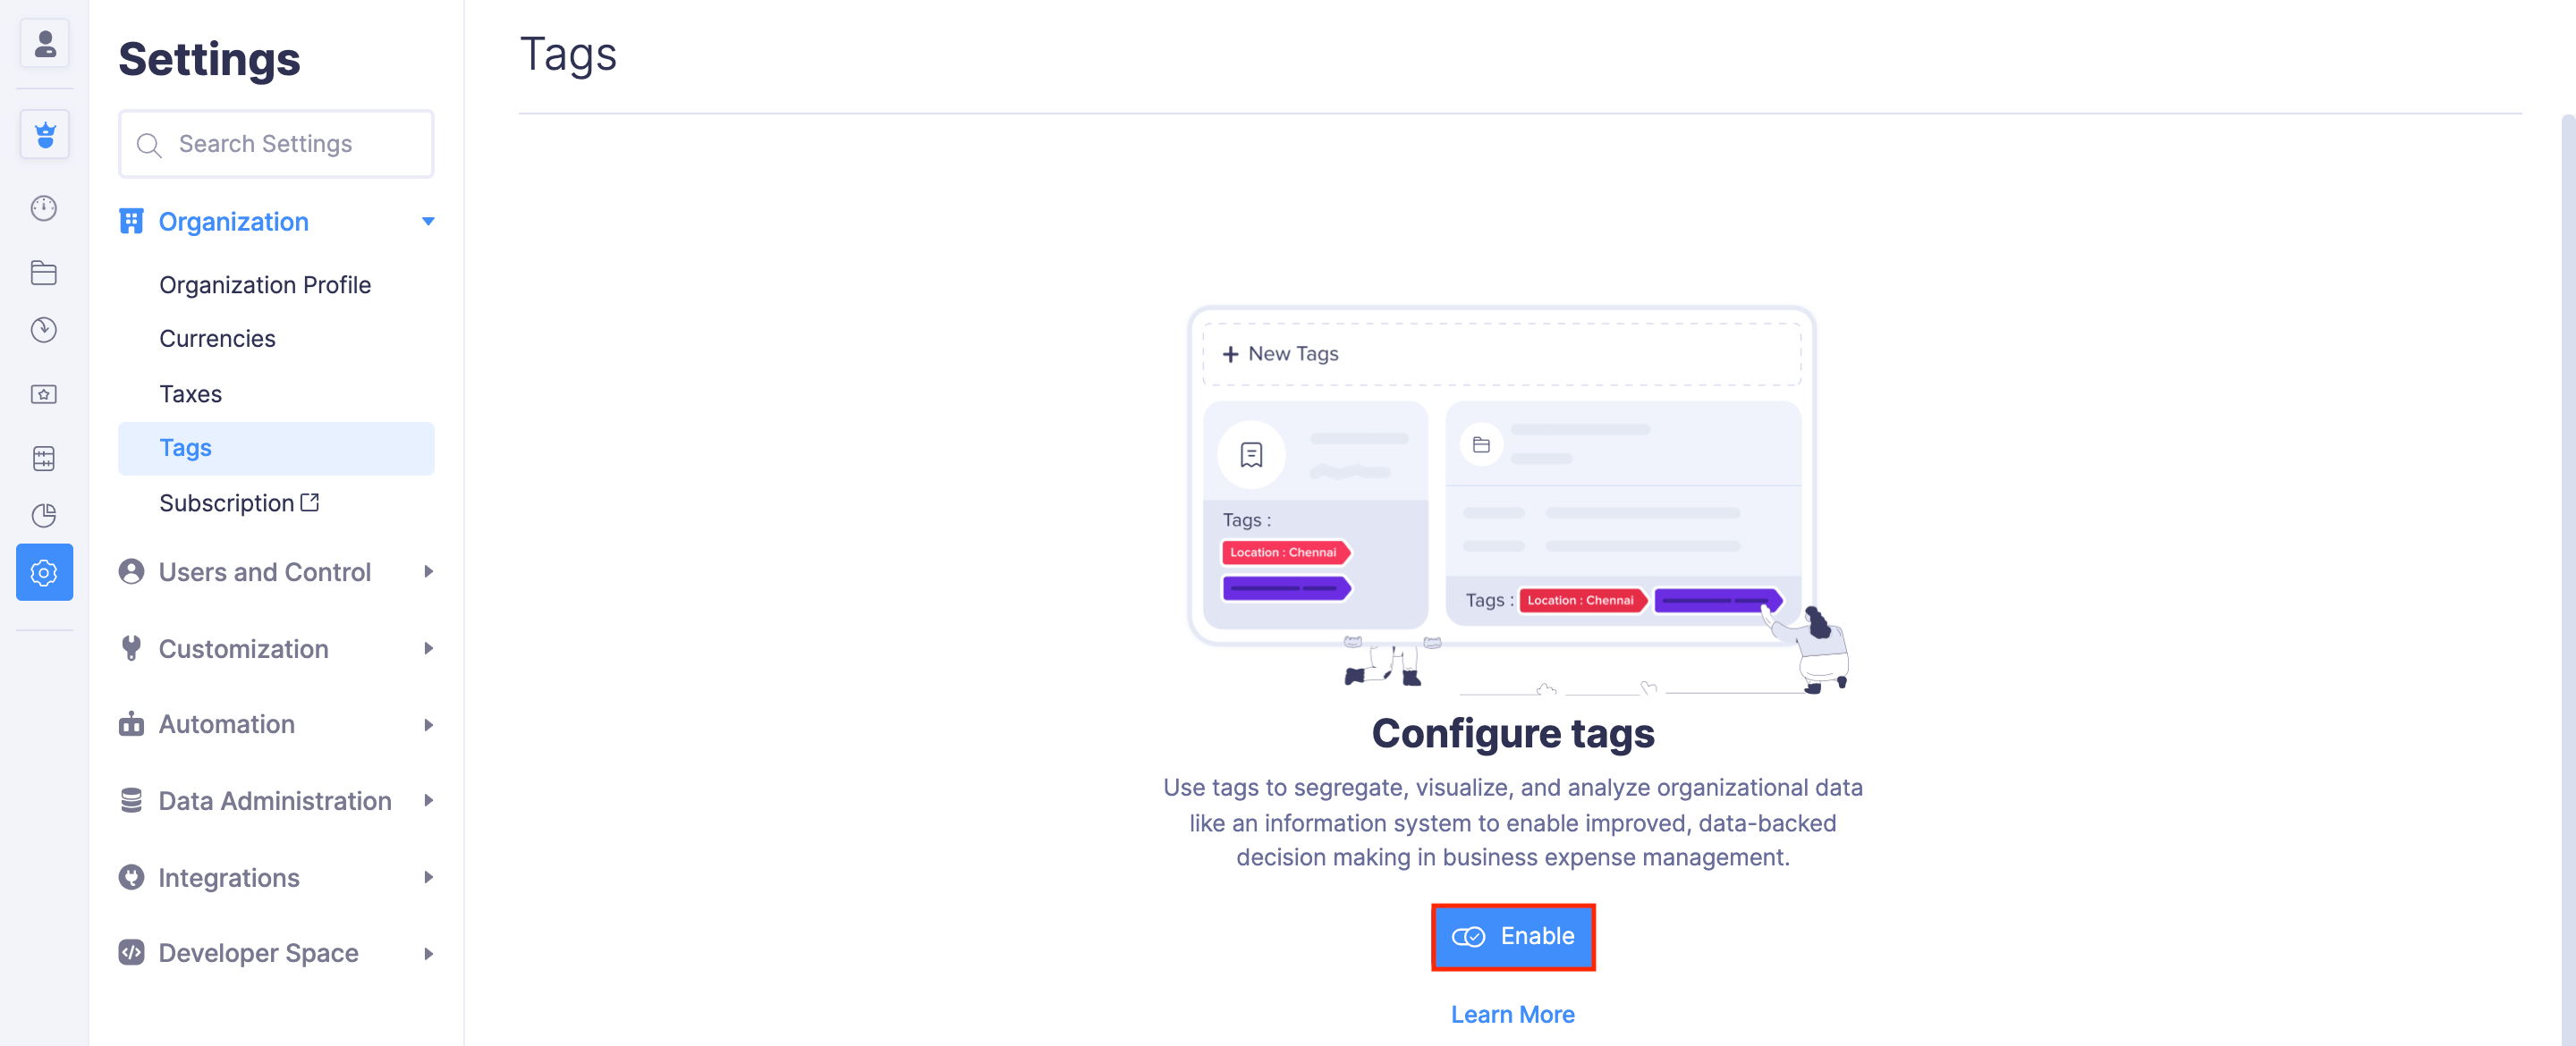
- Once you enable tags, a pop-up will appear to select your preferences. Select Tag expenses individually to associate tags to individual expenses or select Associate the same tag with all the expenses in a report to associate the same tag to all the expenses of a report.
- Click Save.

Note: To edit your preference later, click the Gear icon in the top right corner of the Tags module.
Creating Tags
To create tags:
- Click Admin View.
- Go to Settings on the left sidebar.
(OR)
Click Settings in the top right corner of the page.
- Navigate to Organization Settings.
- Click Tags under Customization.
- Click + New Tag.
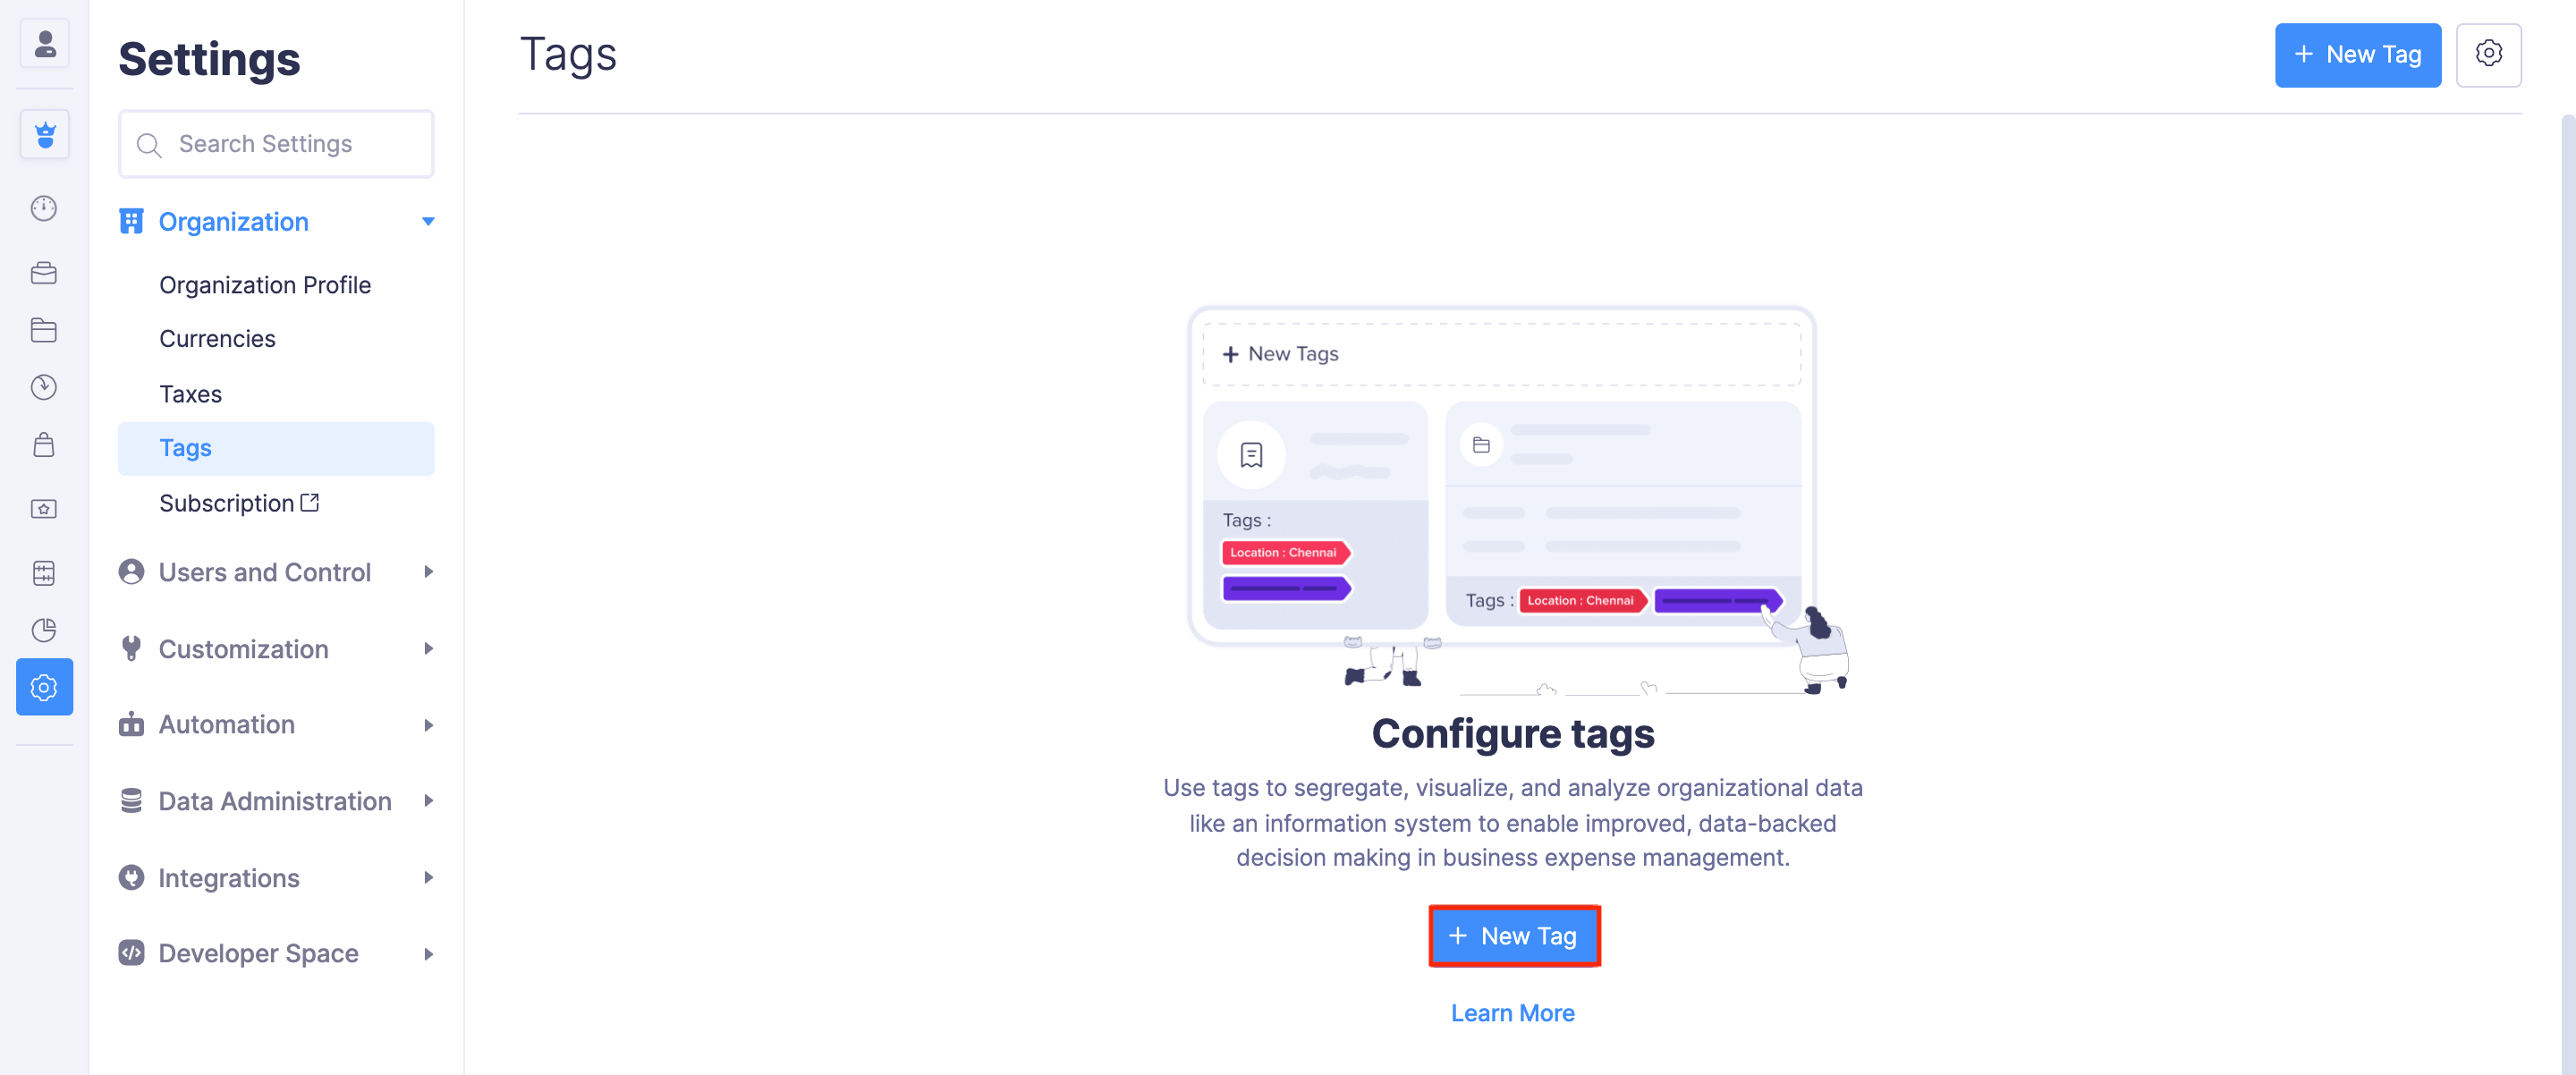
- Enter the Tag Name.
- Select whether you would like to associate tags to your expenses mandatorily.
- Enter the Options.
- Click the + Add Option button to add more options.
- Click Save. A new tag will be created.
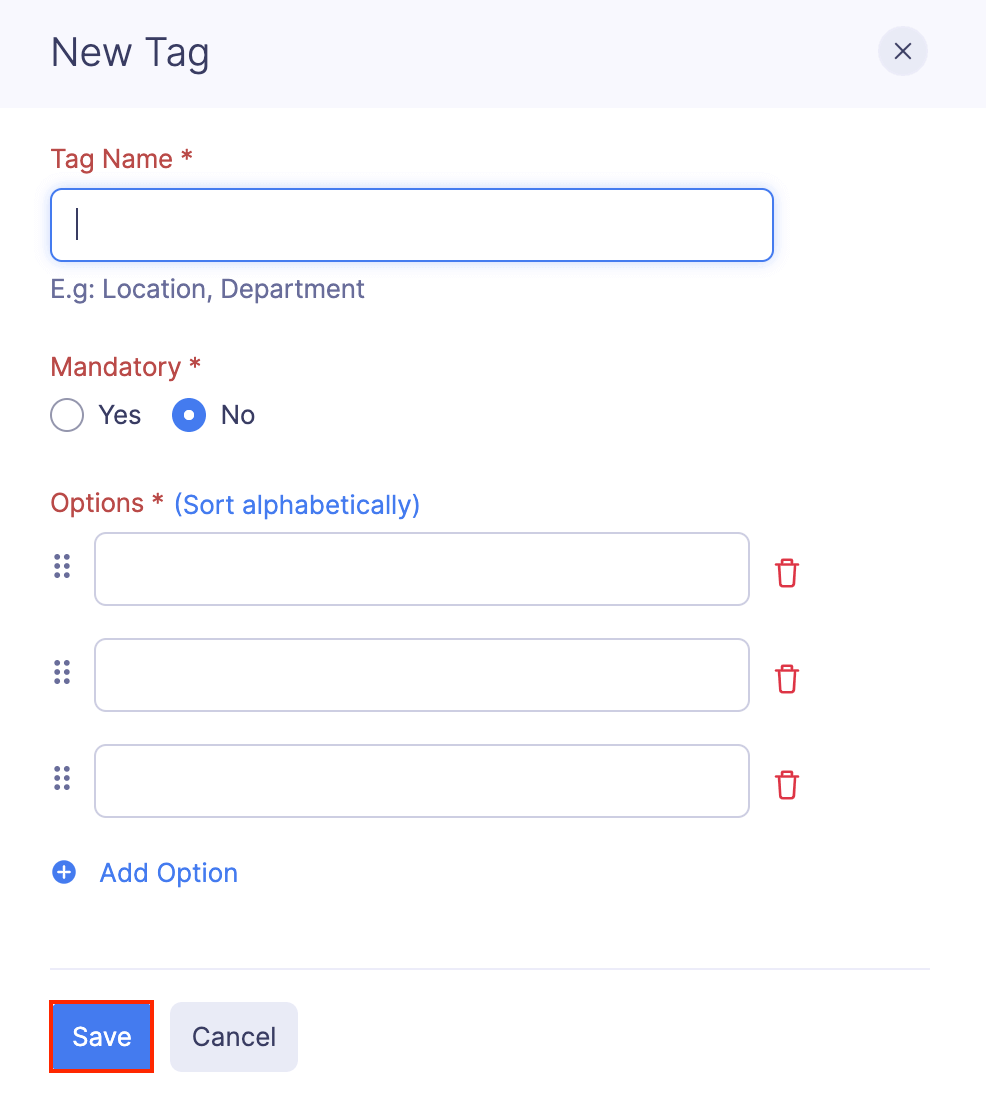
Note: You can create a maximum of 10 tags.
After creating the tags, you can associate them with your expenses and expense reports as per your configuration. Once created, all the users in the organization can associate tags with their expenses and expense reports.
Associating Tags to Expenses
Note: You can associate tags to individual expenses only if you select the Tag expenses individually preference.
Associating Tags to New Expenses
To associate tags to new expenses:
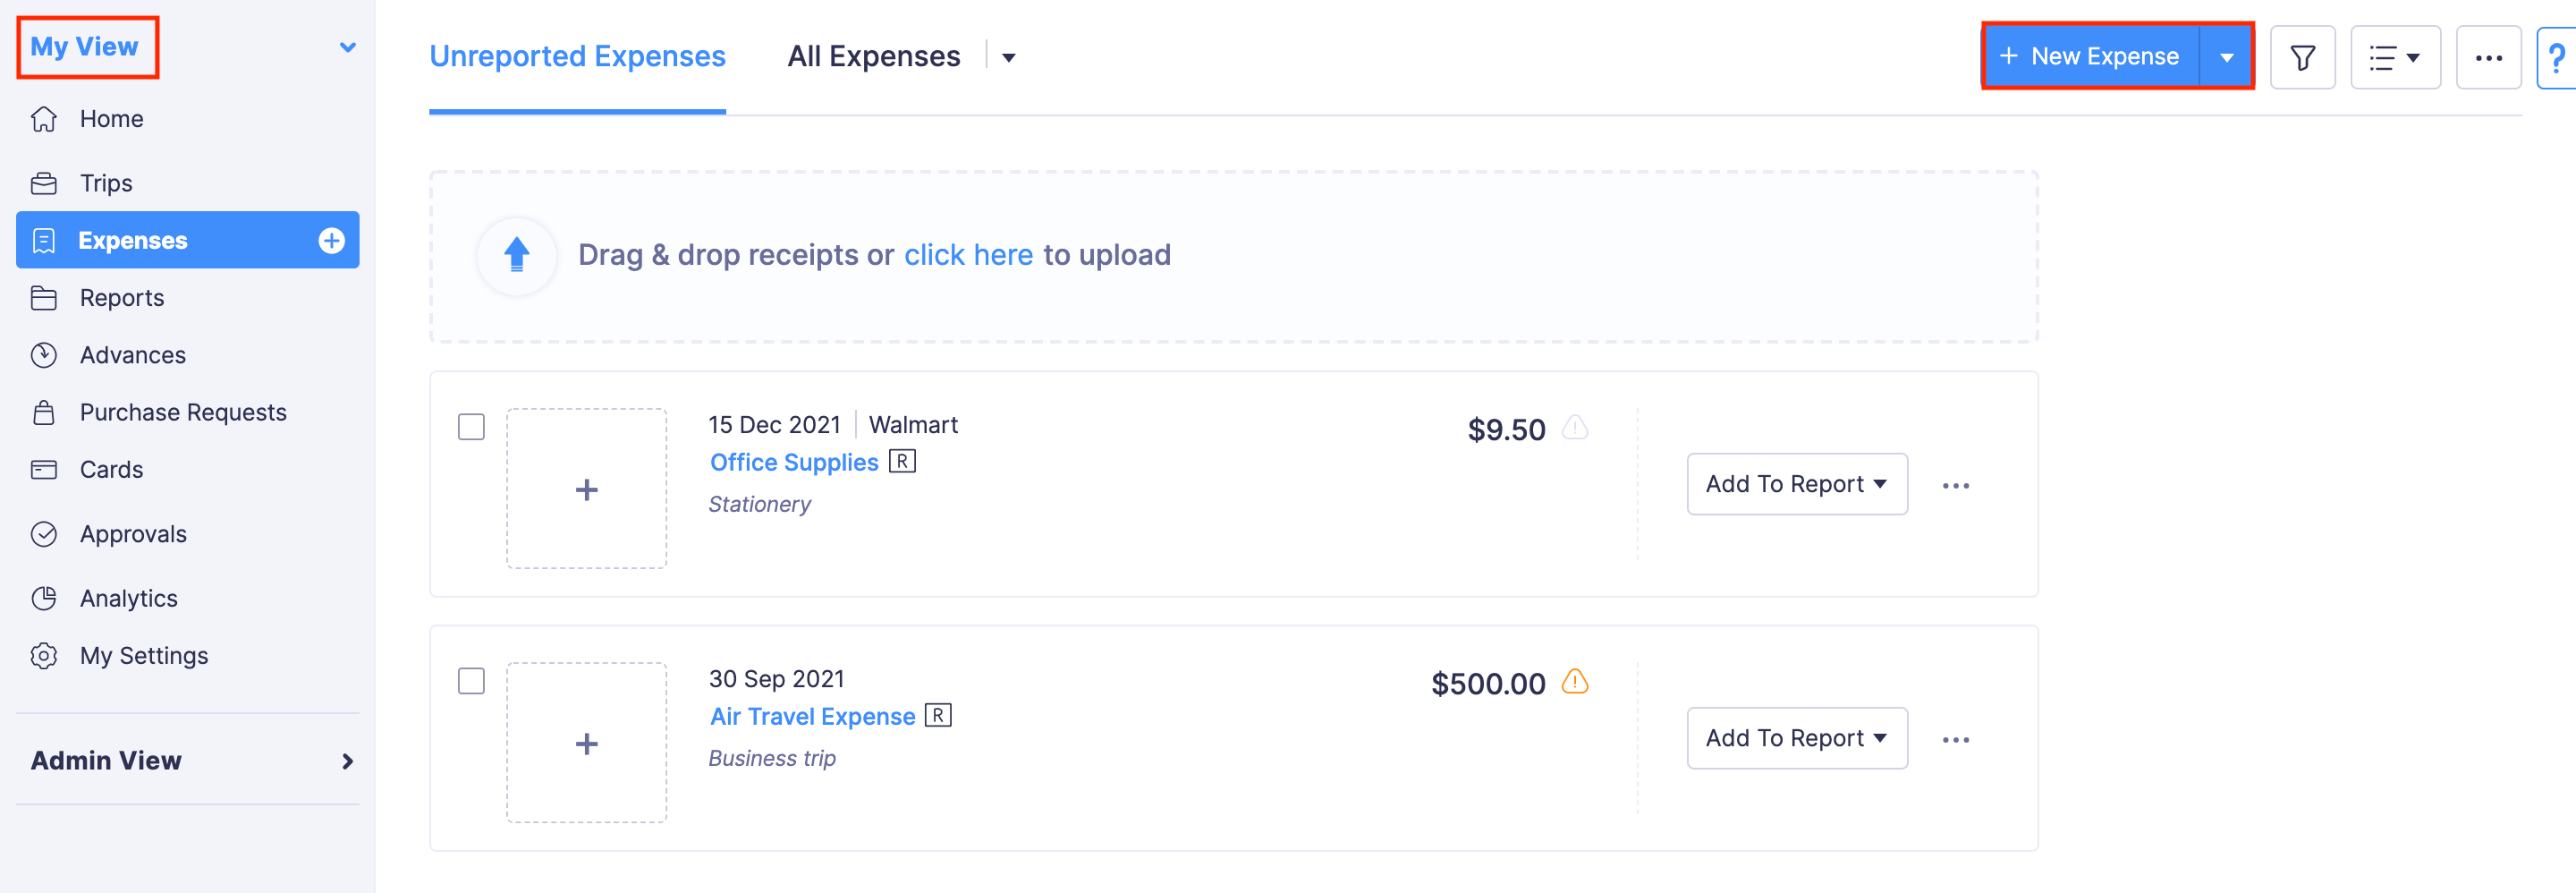
- Click My View and go to Expenses on the left sidebar.
- Click + New Expense.
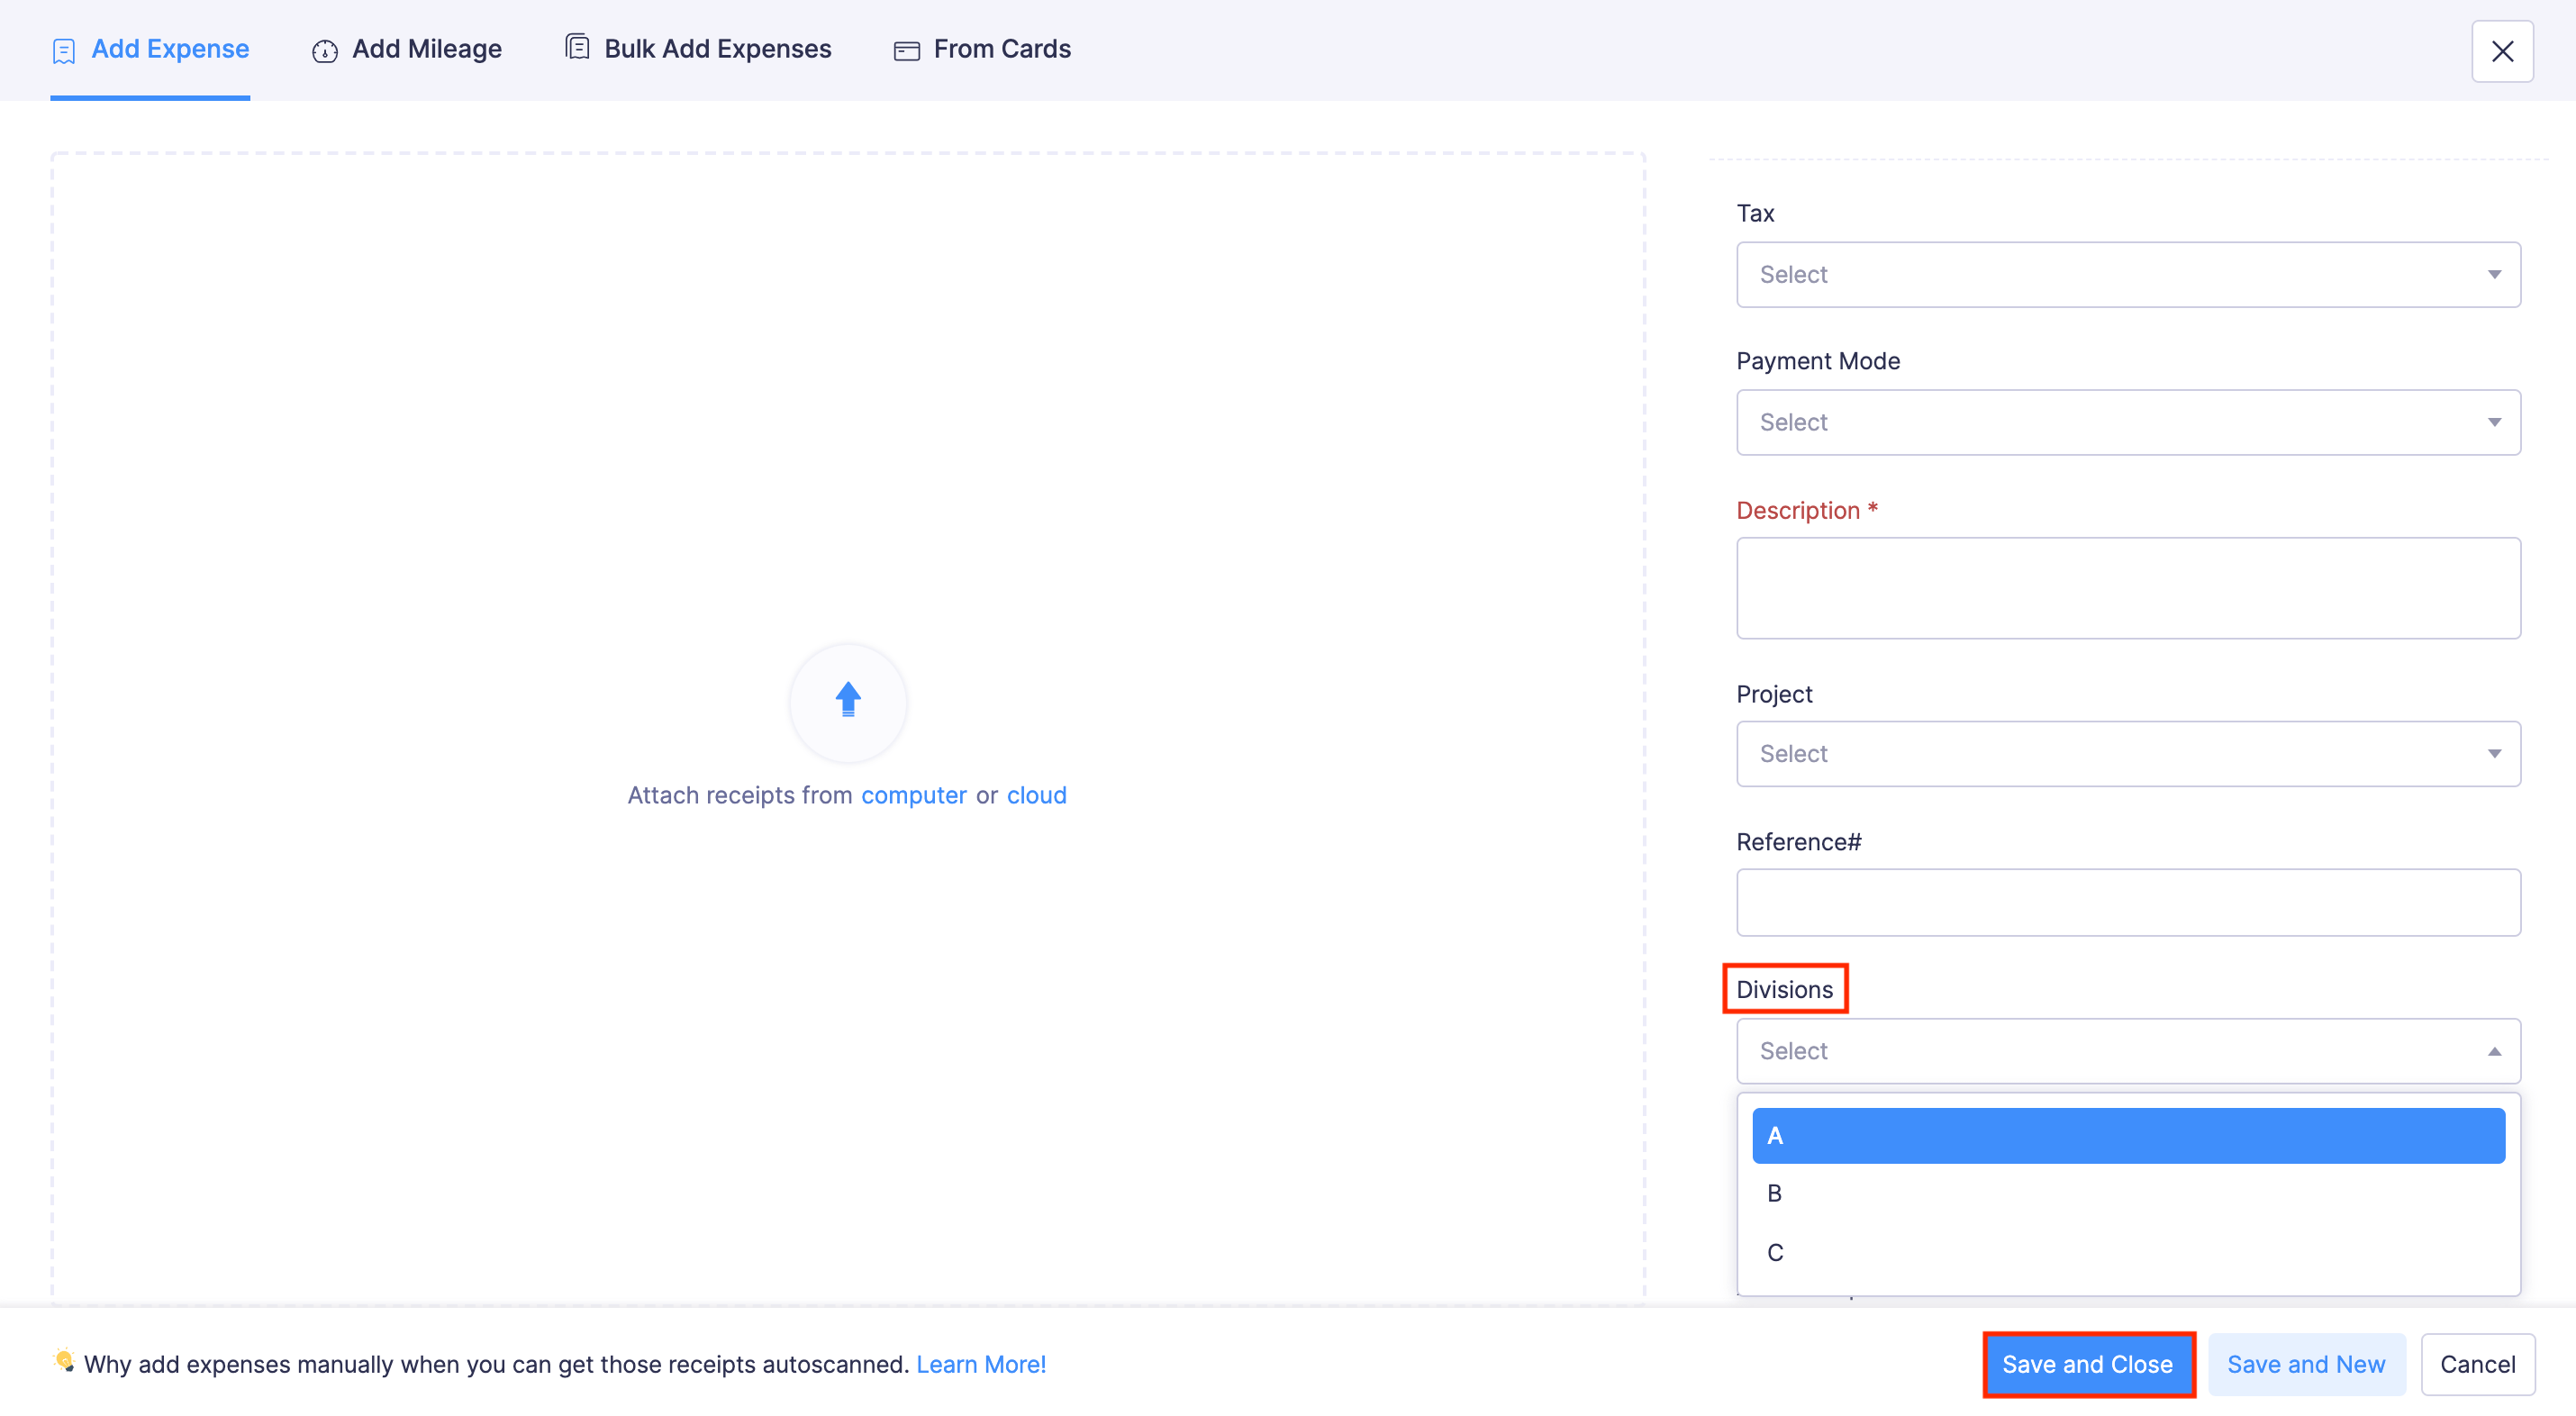
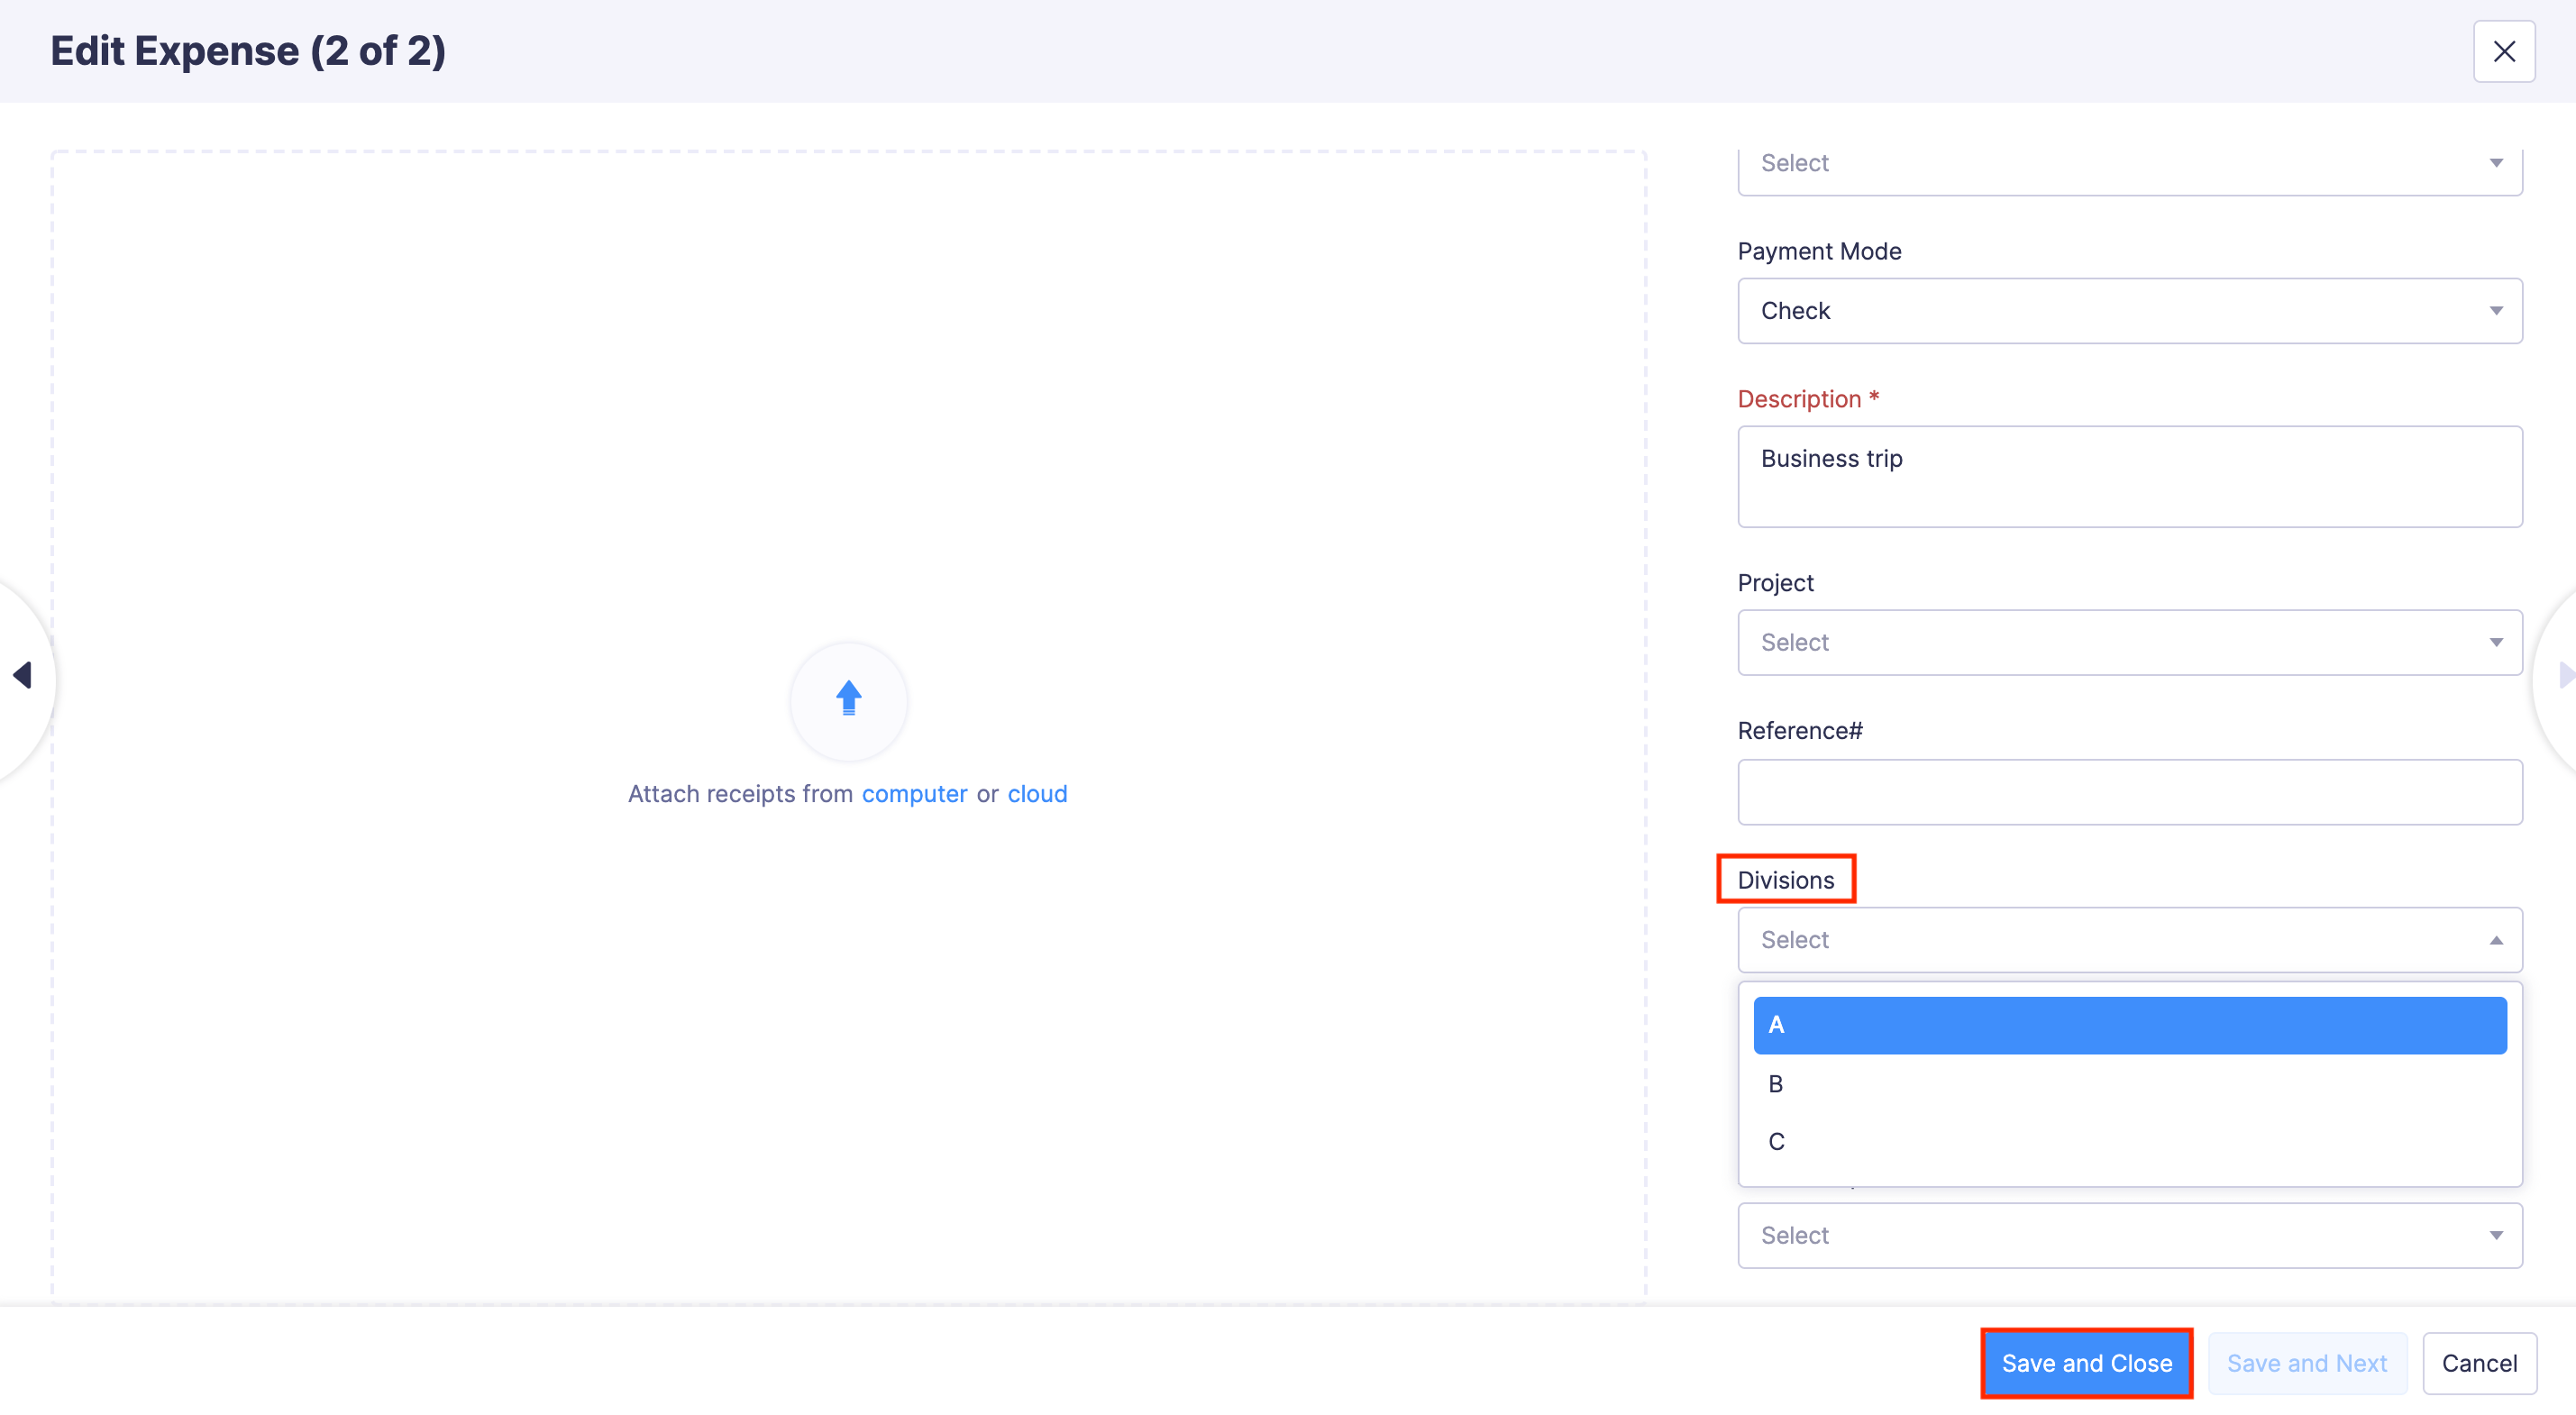
- Enter the required details. Navigate to the bottom of the page and select an option from the tag that was created.
- Click Save and Close.
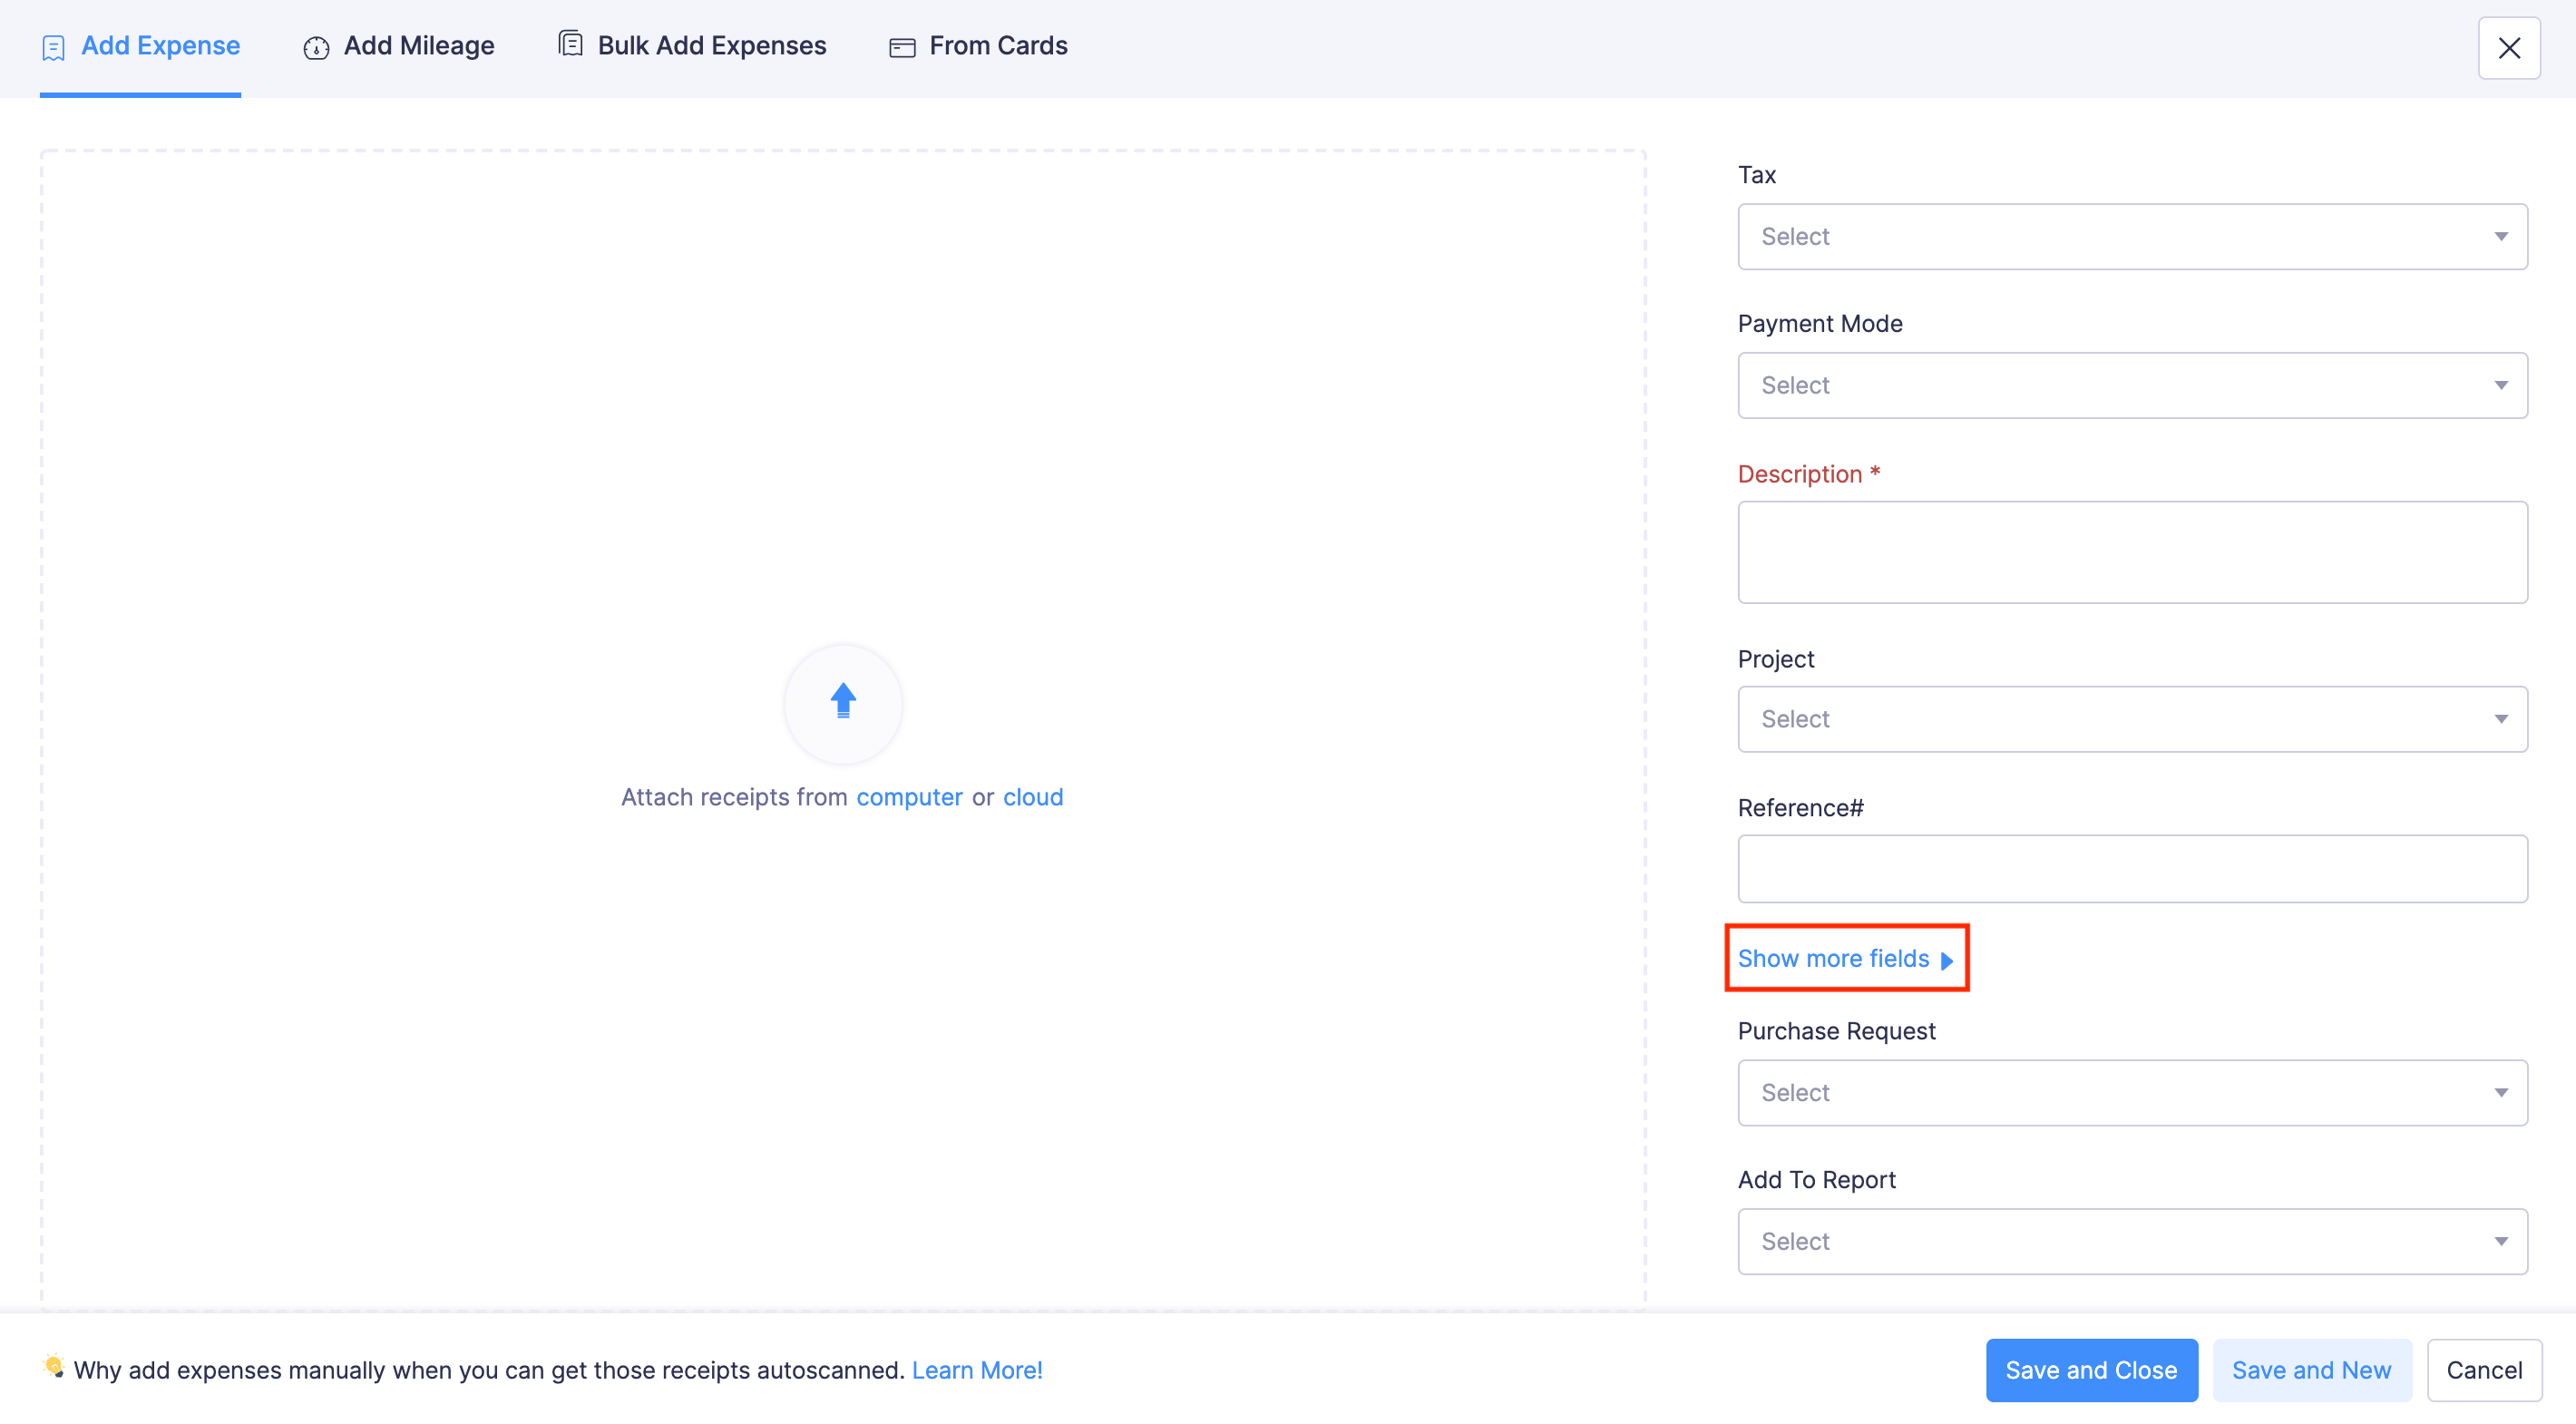
- If you can’t find the tag field, click Show more fields. Select an option for your tag and click Save and Close. Once this is done, your expense will be tagged.
Associating Tags to existing Expenses
Prerequisite: When you try to associate tags to existing expenses, you will have to edit them. However, you can edit only Unreported and Unsubmitted expenses.
To associate tags to expenses that were already created:
- Click My View and go to Expenses on the left sidebar.
- Click the expense for which you would like to associate a tag.
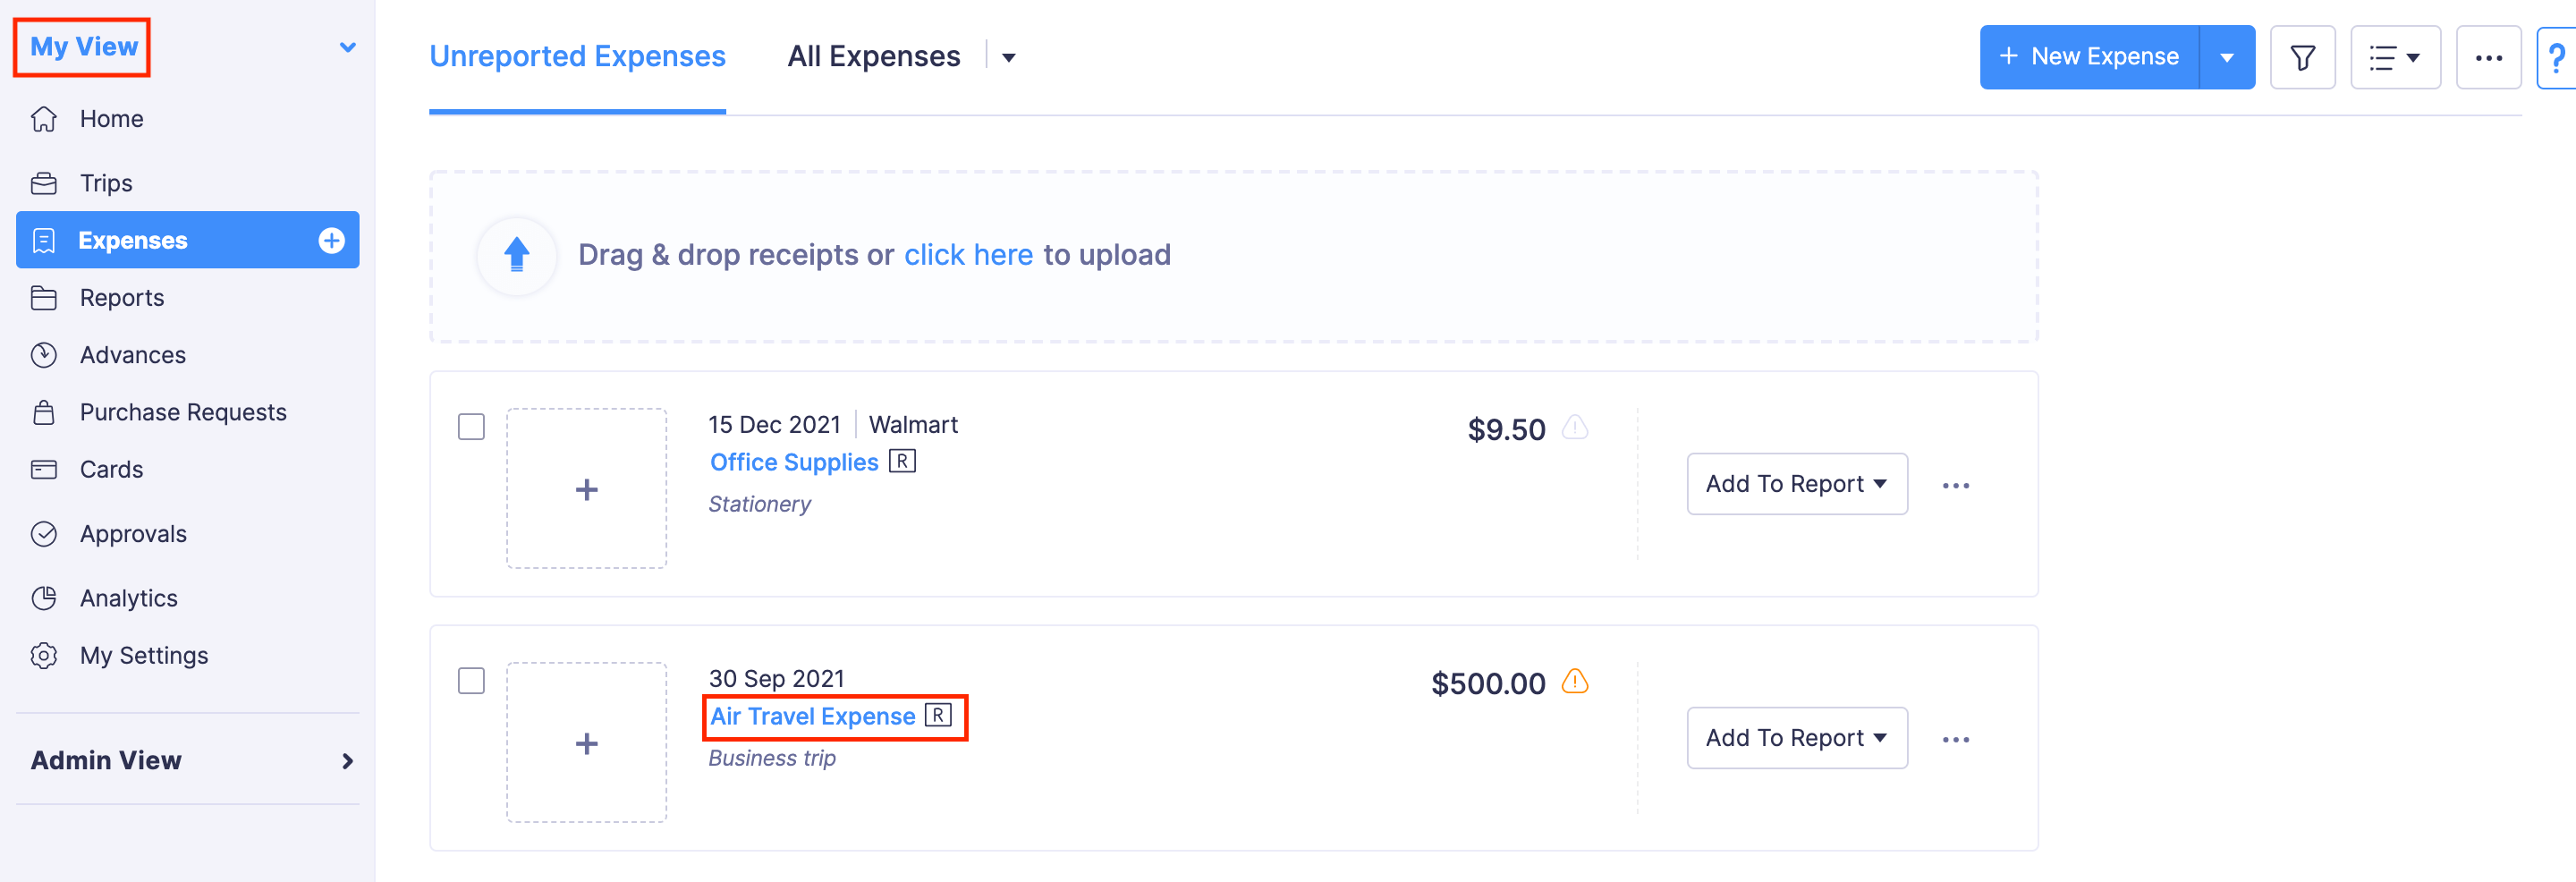
- Navigate to the bottom of the page and select an option from the tag you’ve created.
- Click Save and Close.
To change the tag that had already been associated with an expense, follow the same steps that are mentioned above.
Associating Tags to Reports
Note: You can associate tags to reports only if you select the Associate the same tag with all the expenses in a report preference.
Associating Tags to New Reports
To associate tags to new reports:
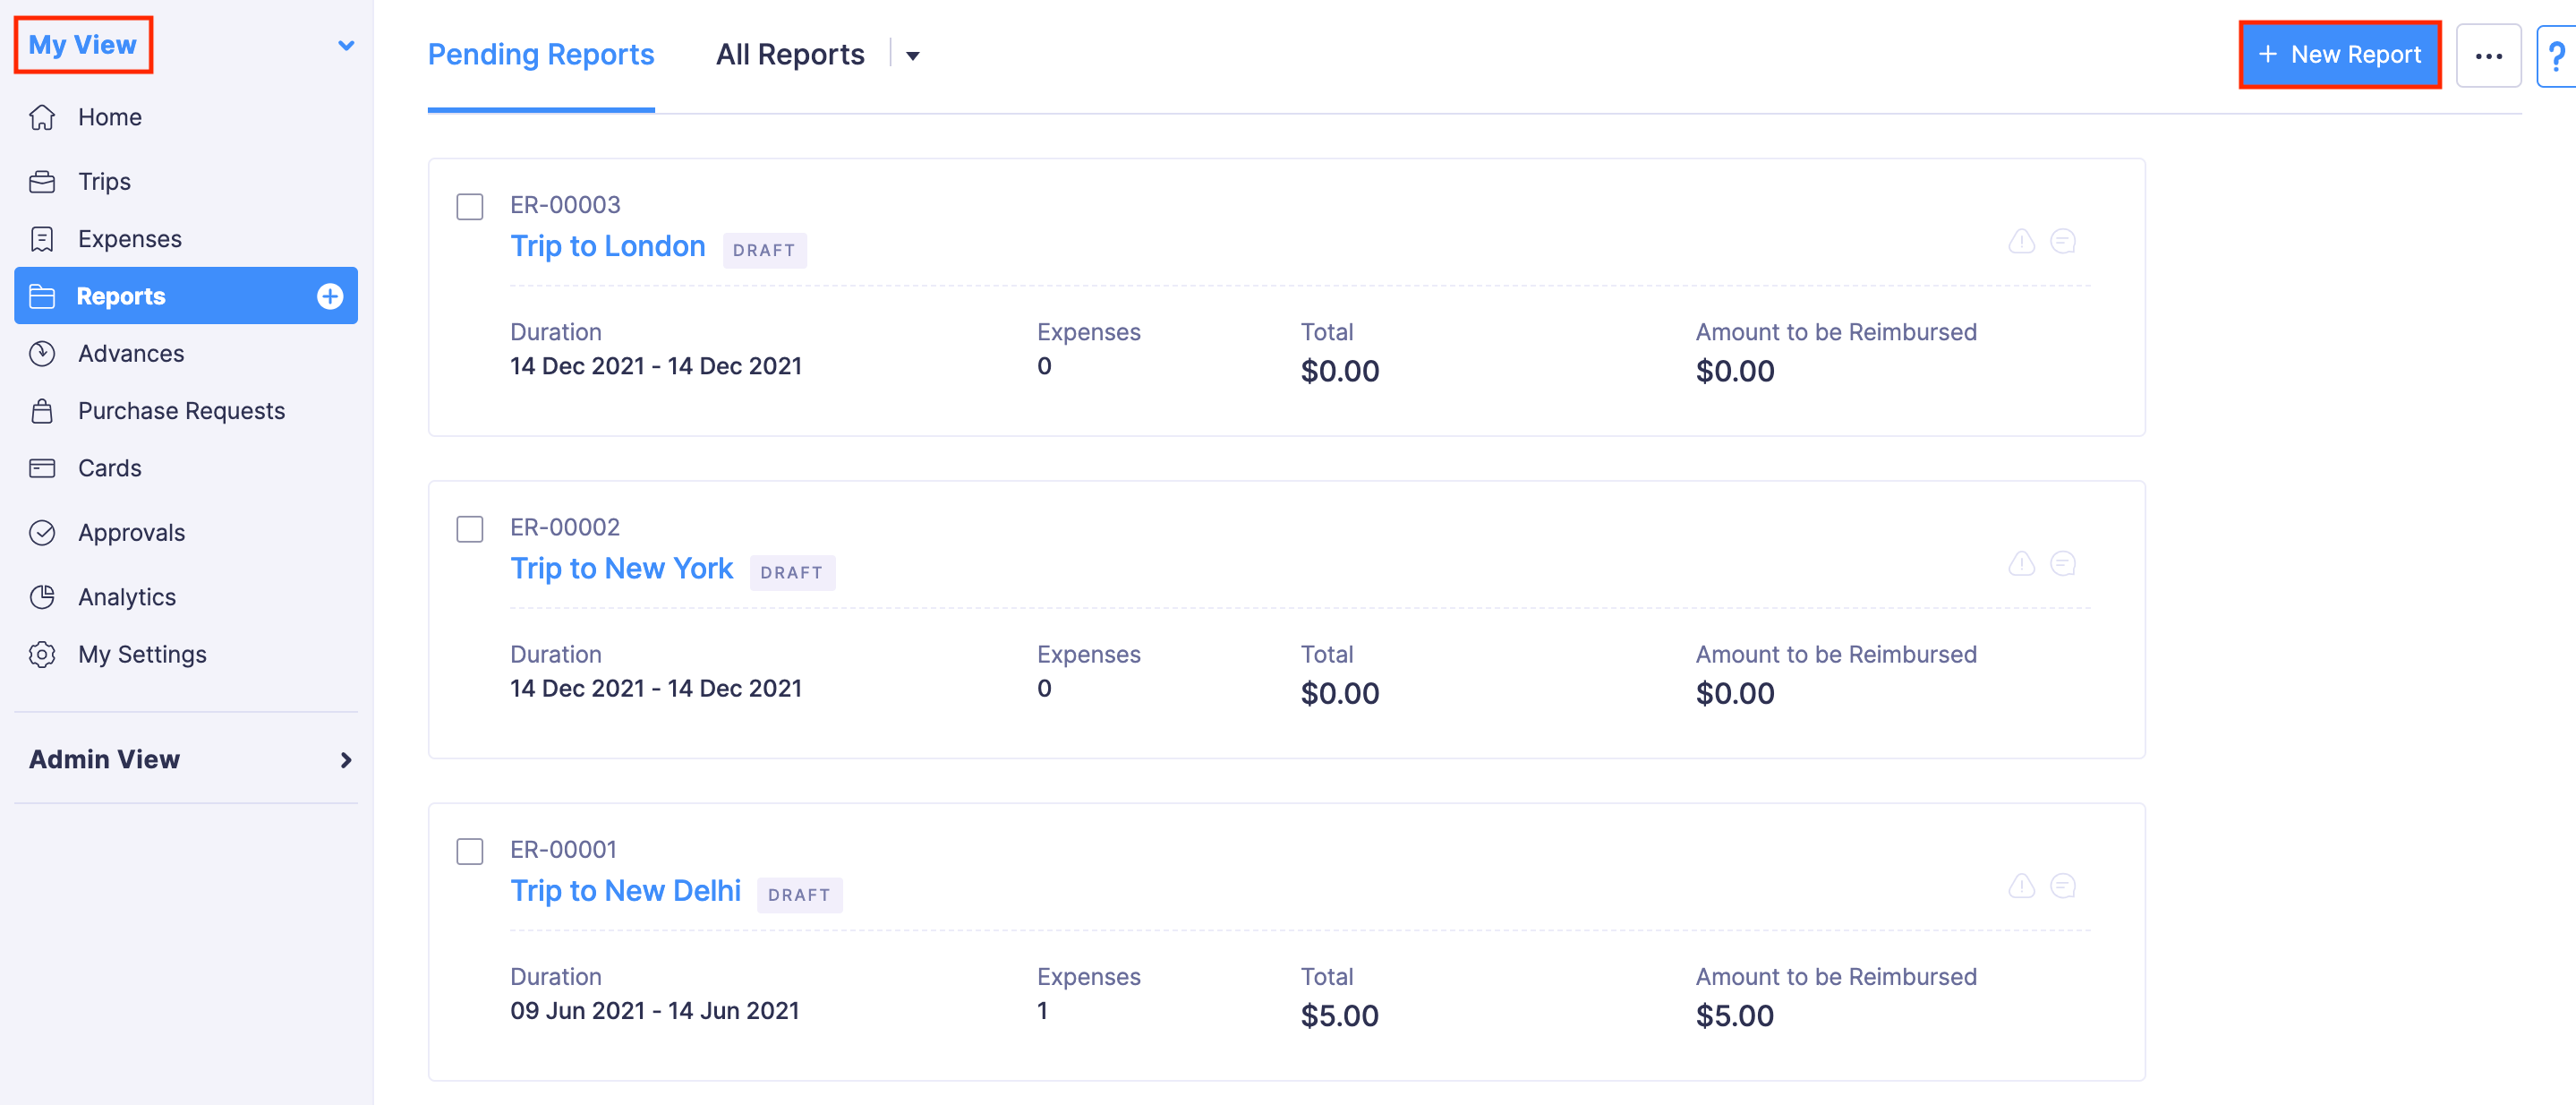
- Click My View and navigate to Reports on the left sidebar.
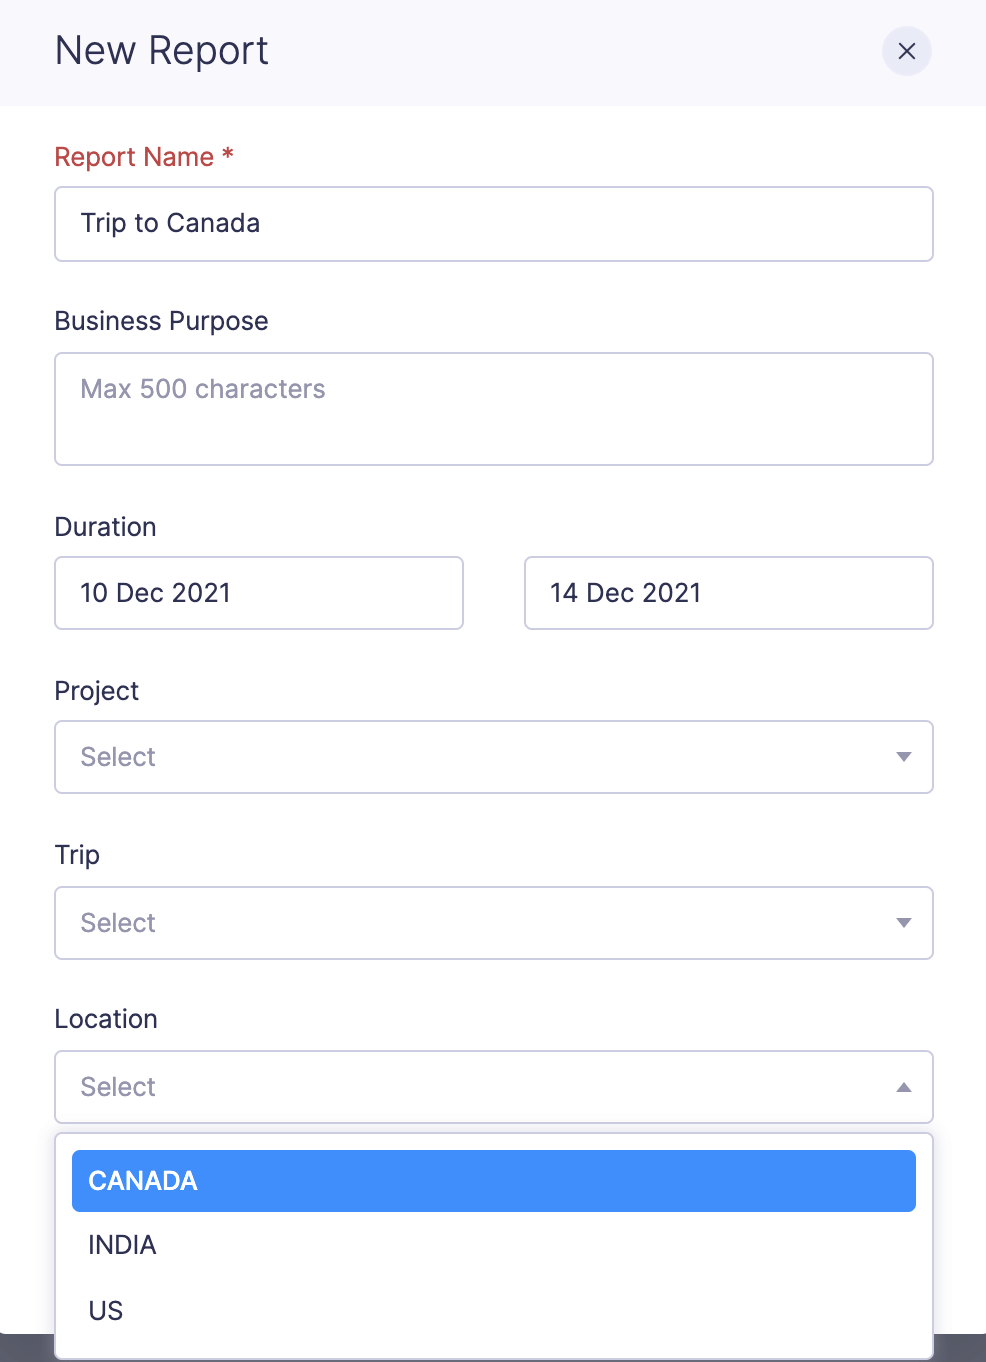
- Click + New Report.
- Enter the required details. Select an option from the tag that was created.
- Click Save.
Associating Tags to Existing Reports
Prerequisite: When you try to associate tags to existing reports, you will have to edit them. However, you cannot edit the reports in Awaiting Approval, Approved or Reimbursed statuses.
To associate tags to the reports that were already created:
- Click My View and navigate to Reports on the left sidebar.
- Click the report for which you would like to associate a tag.
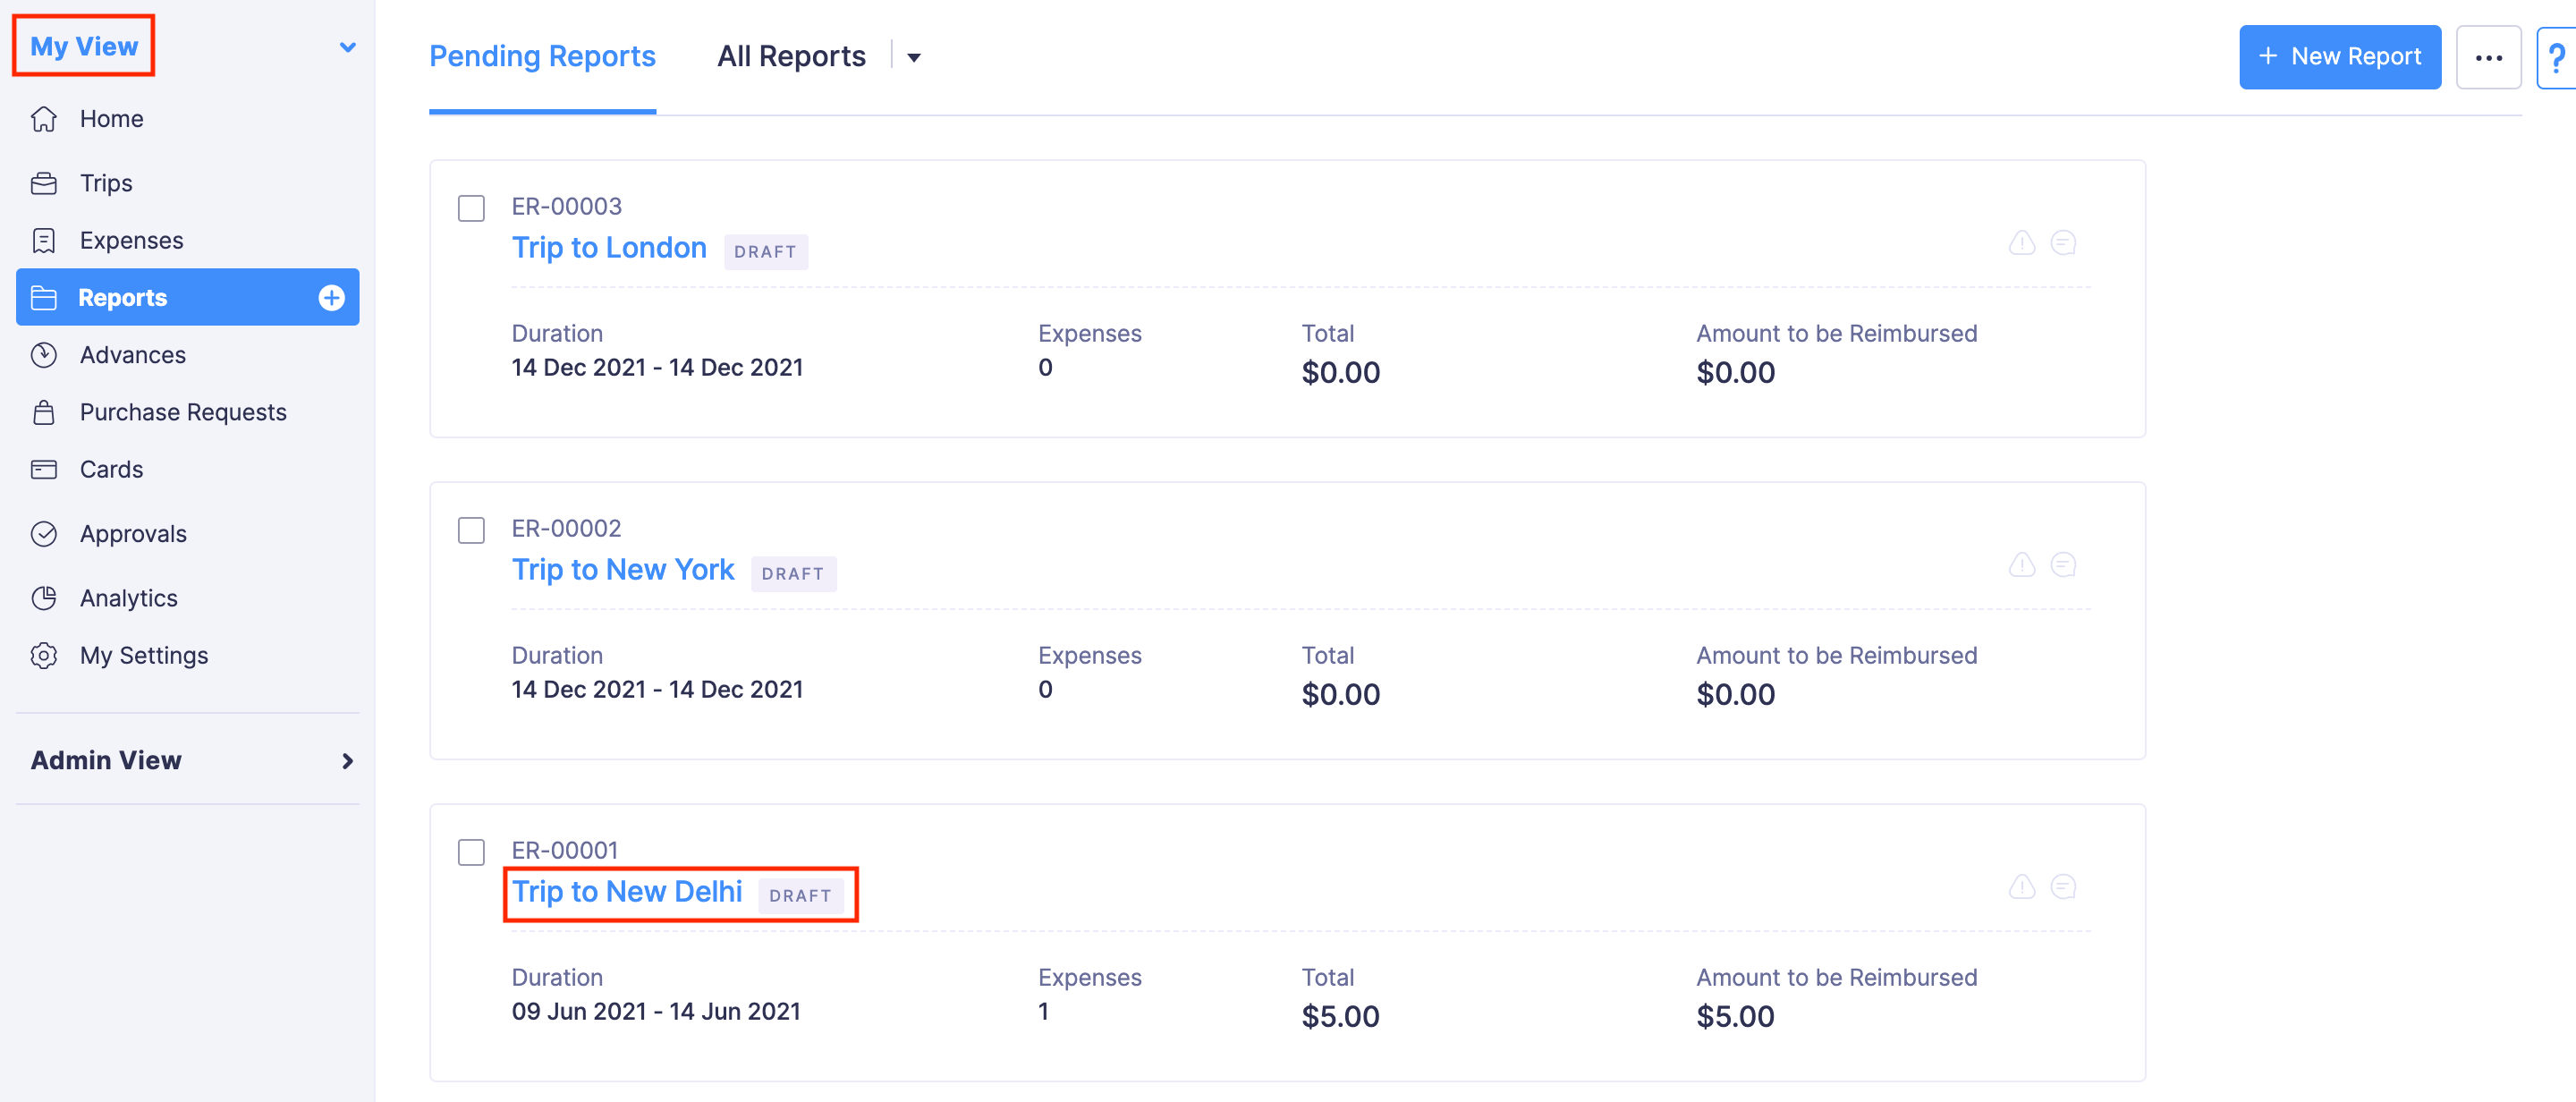
- Click the Edit icon on the top right corner.
- Select an option from the tag you’ve created and click Save. Once this is done, your report will be tagged.
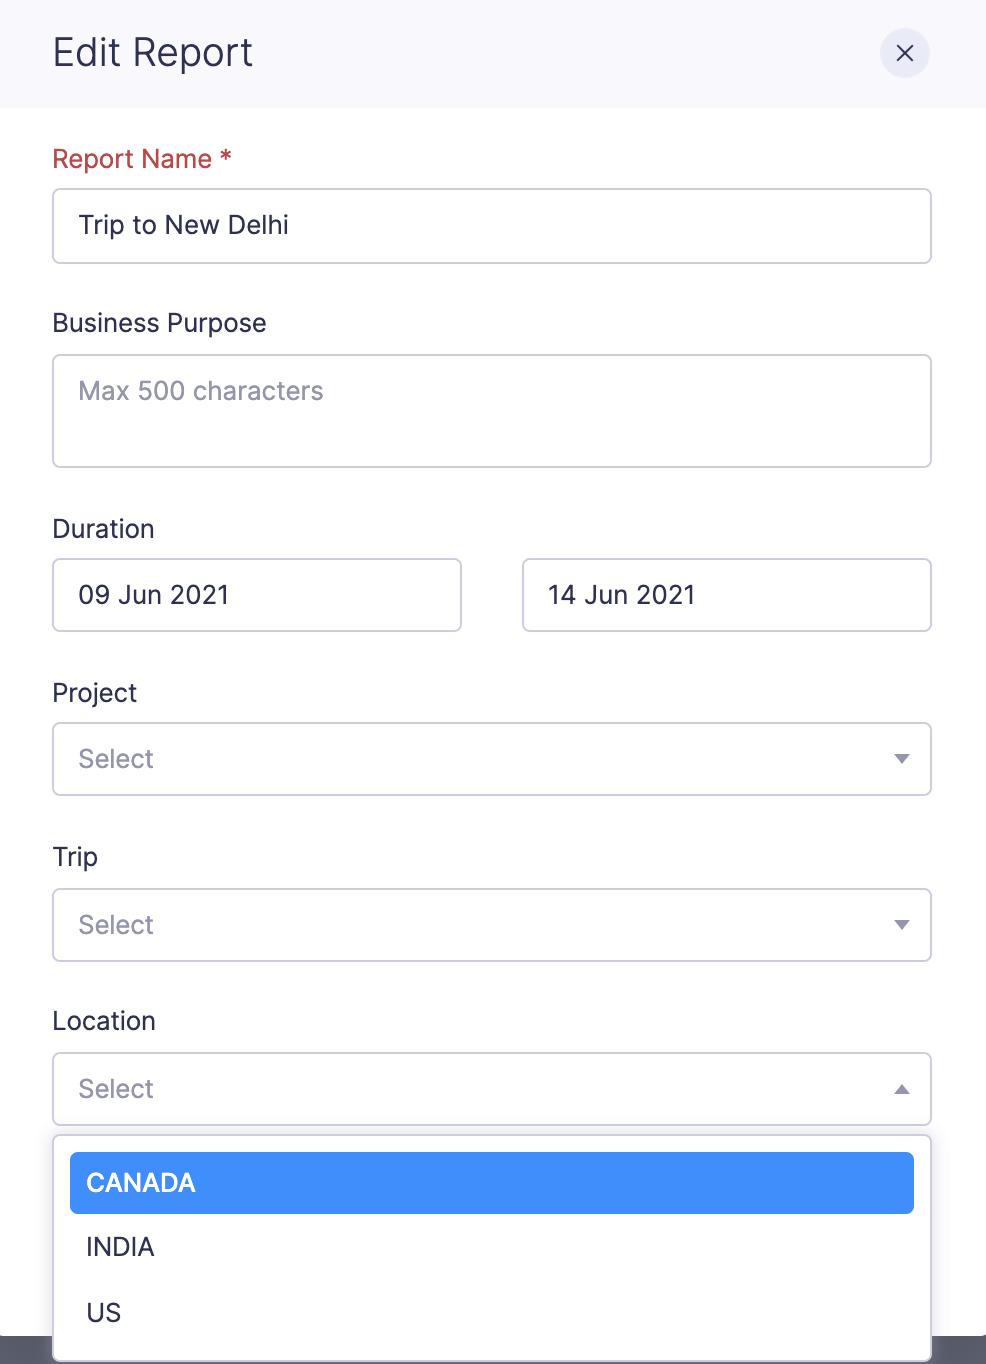
To change the tag that had already been associated with a report, you can follow the same steps that are mentioned above.
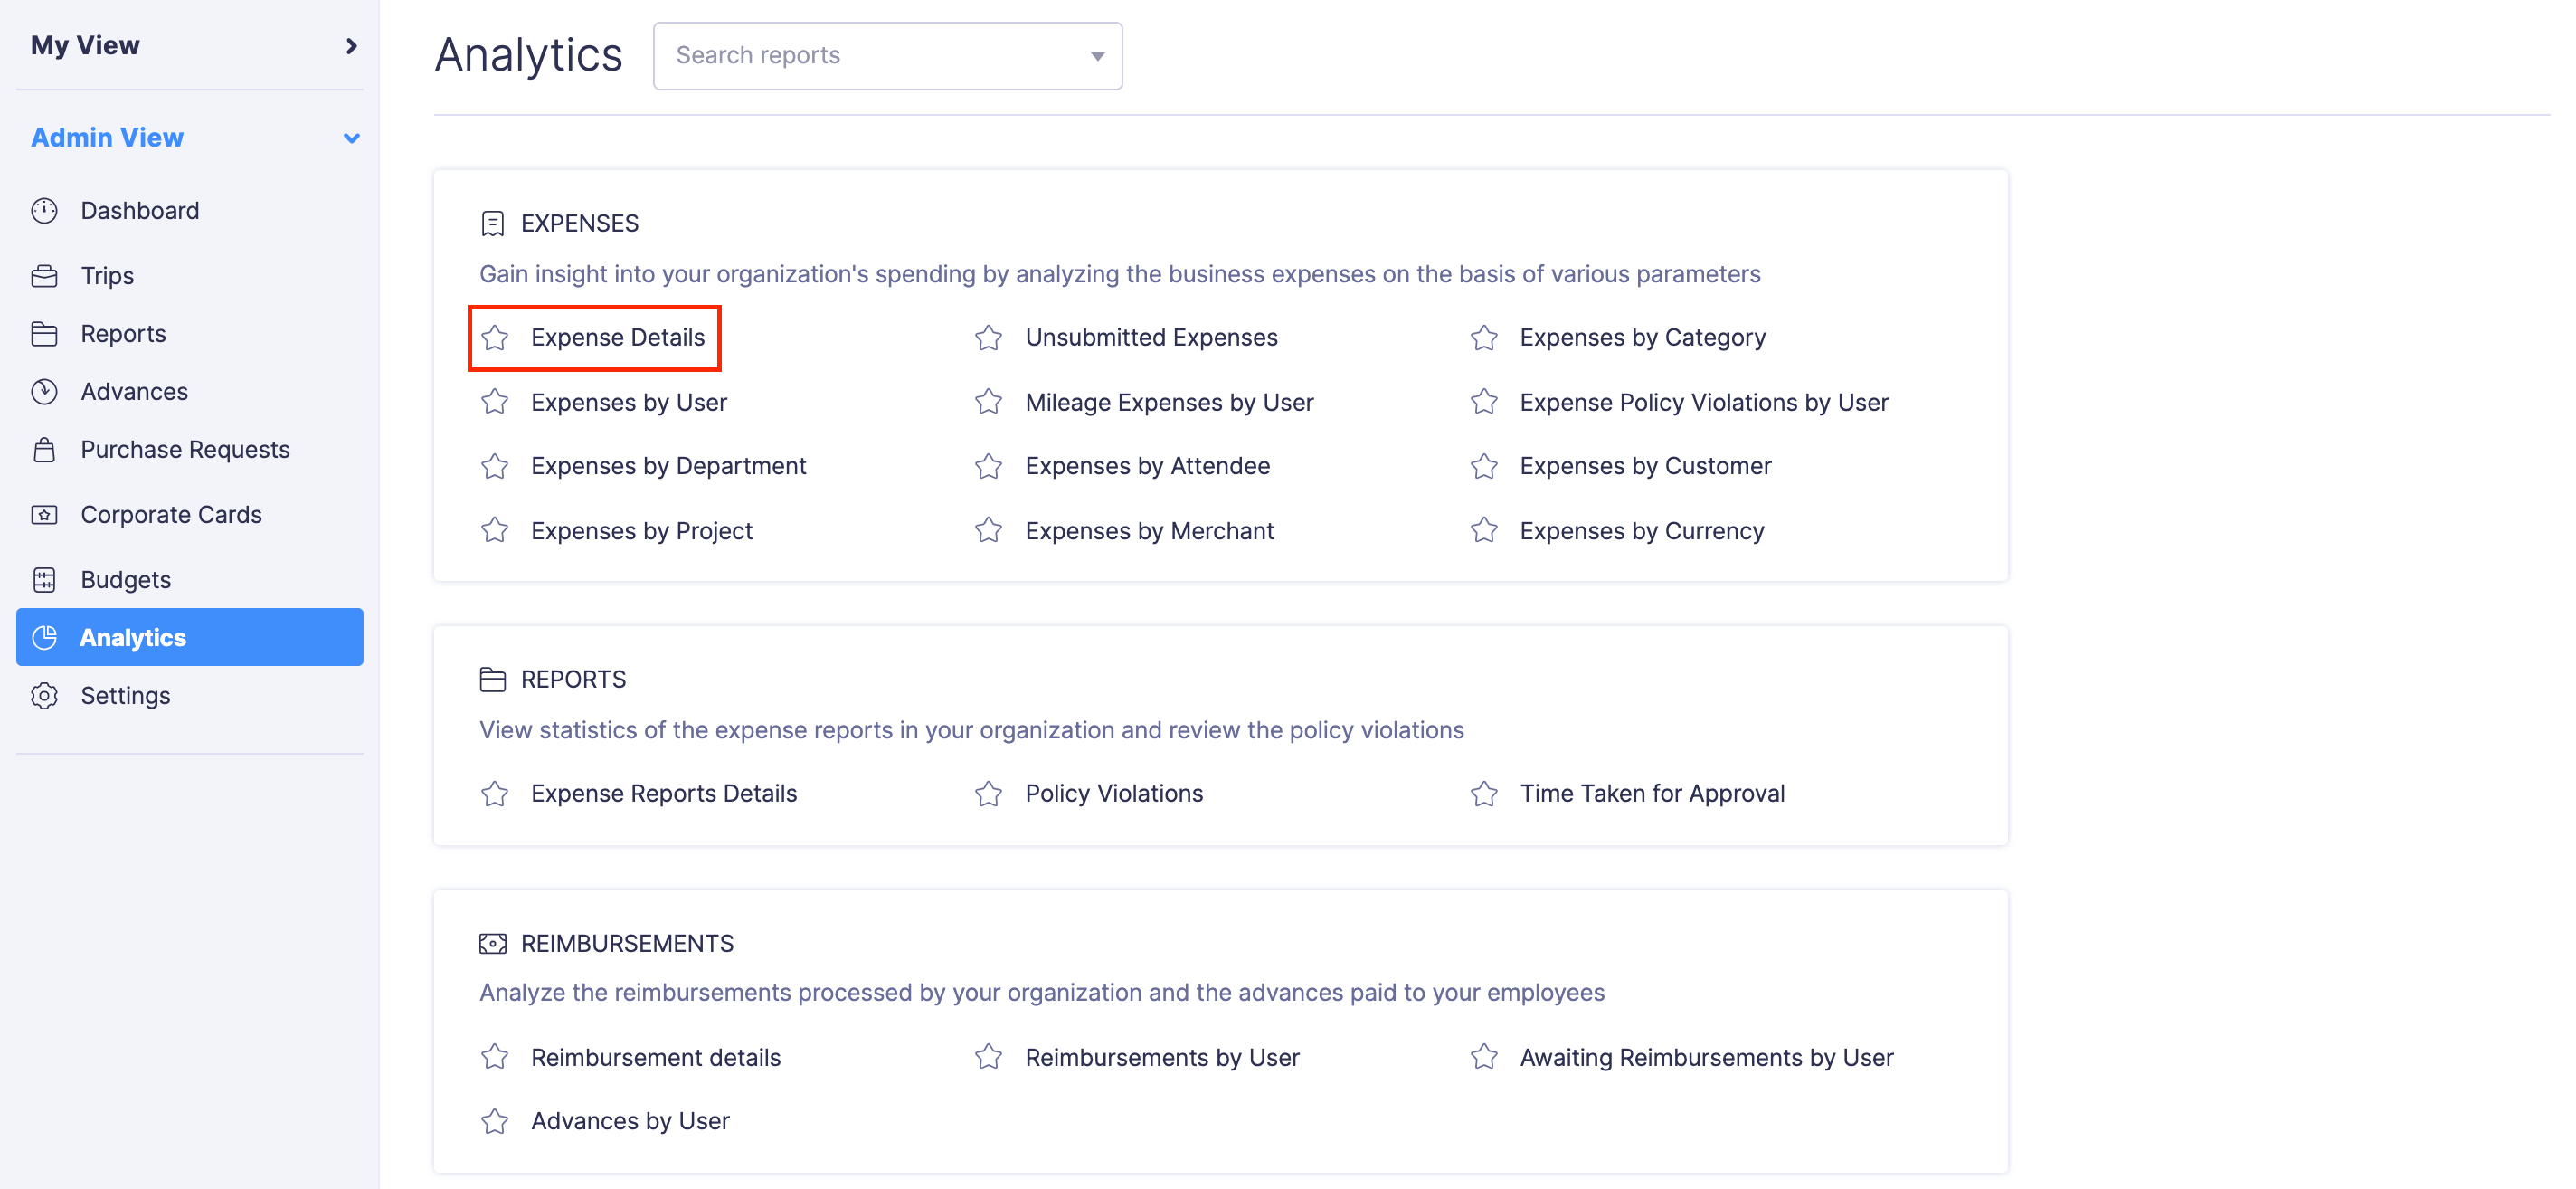
Generate Analytic Reports
After creating and associating tags to your expenses and expense reports, you can generate analytic reports using the tags filter. To generate an analytic report:
- Navigate to Analytics and click Expense Details under the Expenses section.
- Click the Customize Report option in the top left corner.
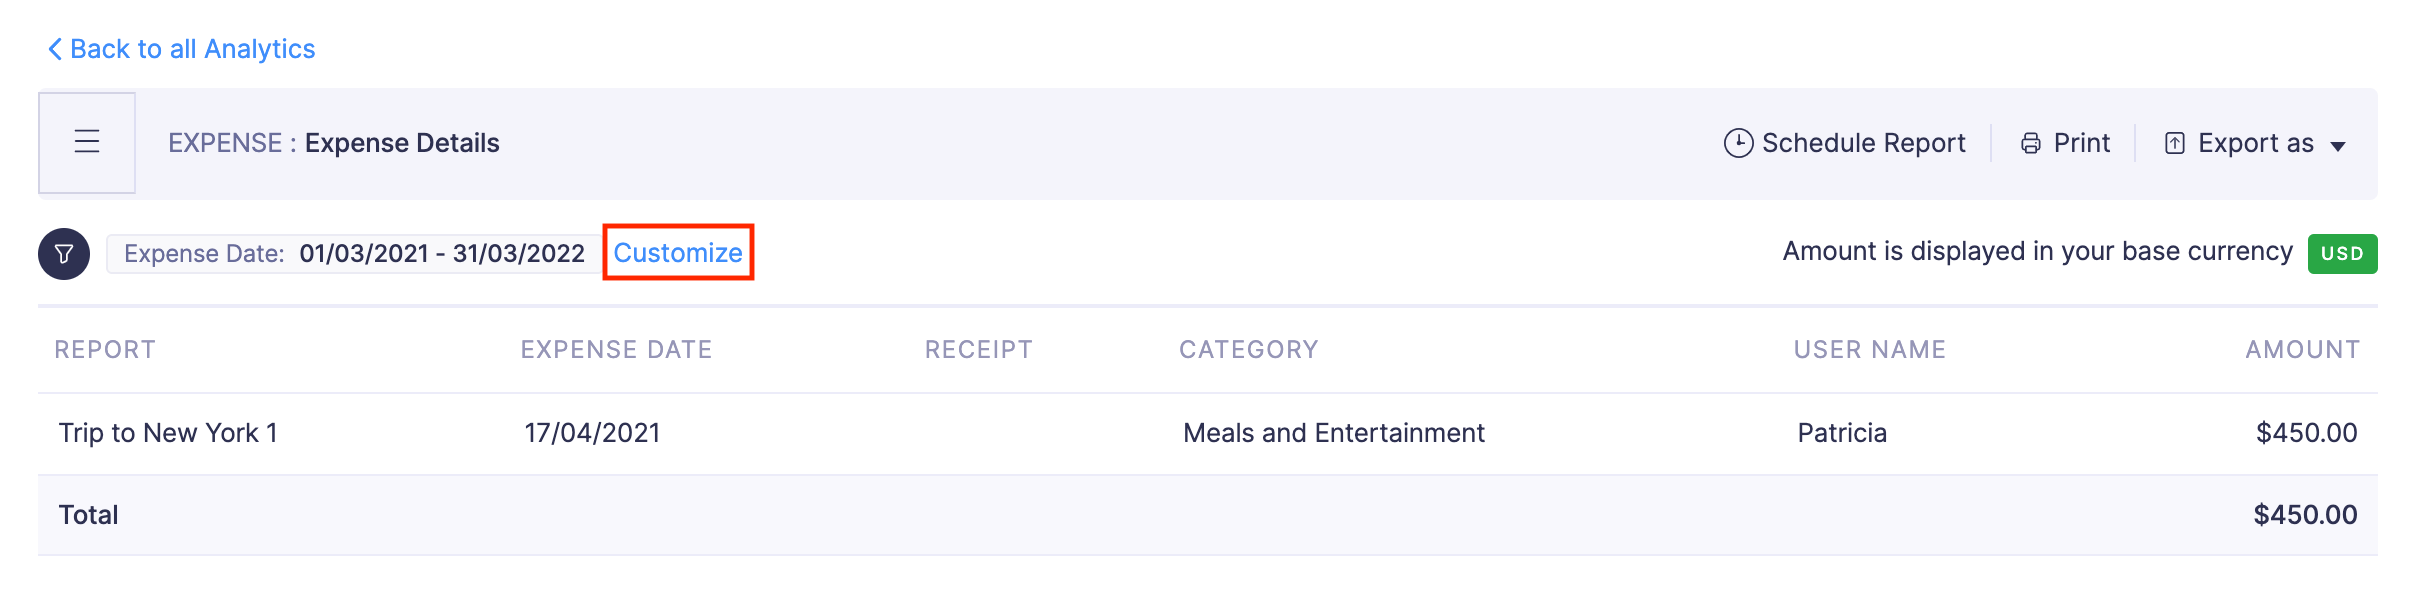
- Select the tags from the dropdown and click Run Report to generate a report based on the selected tags.

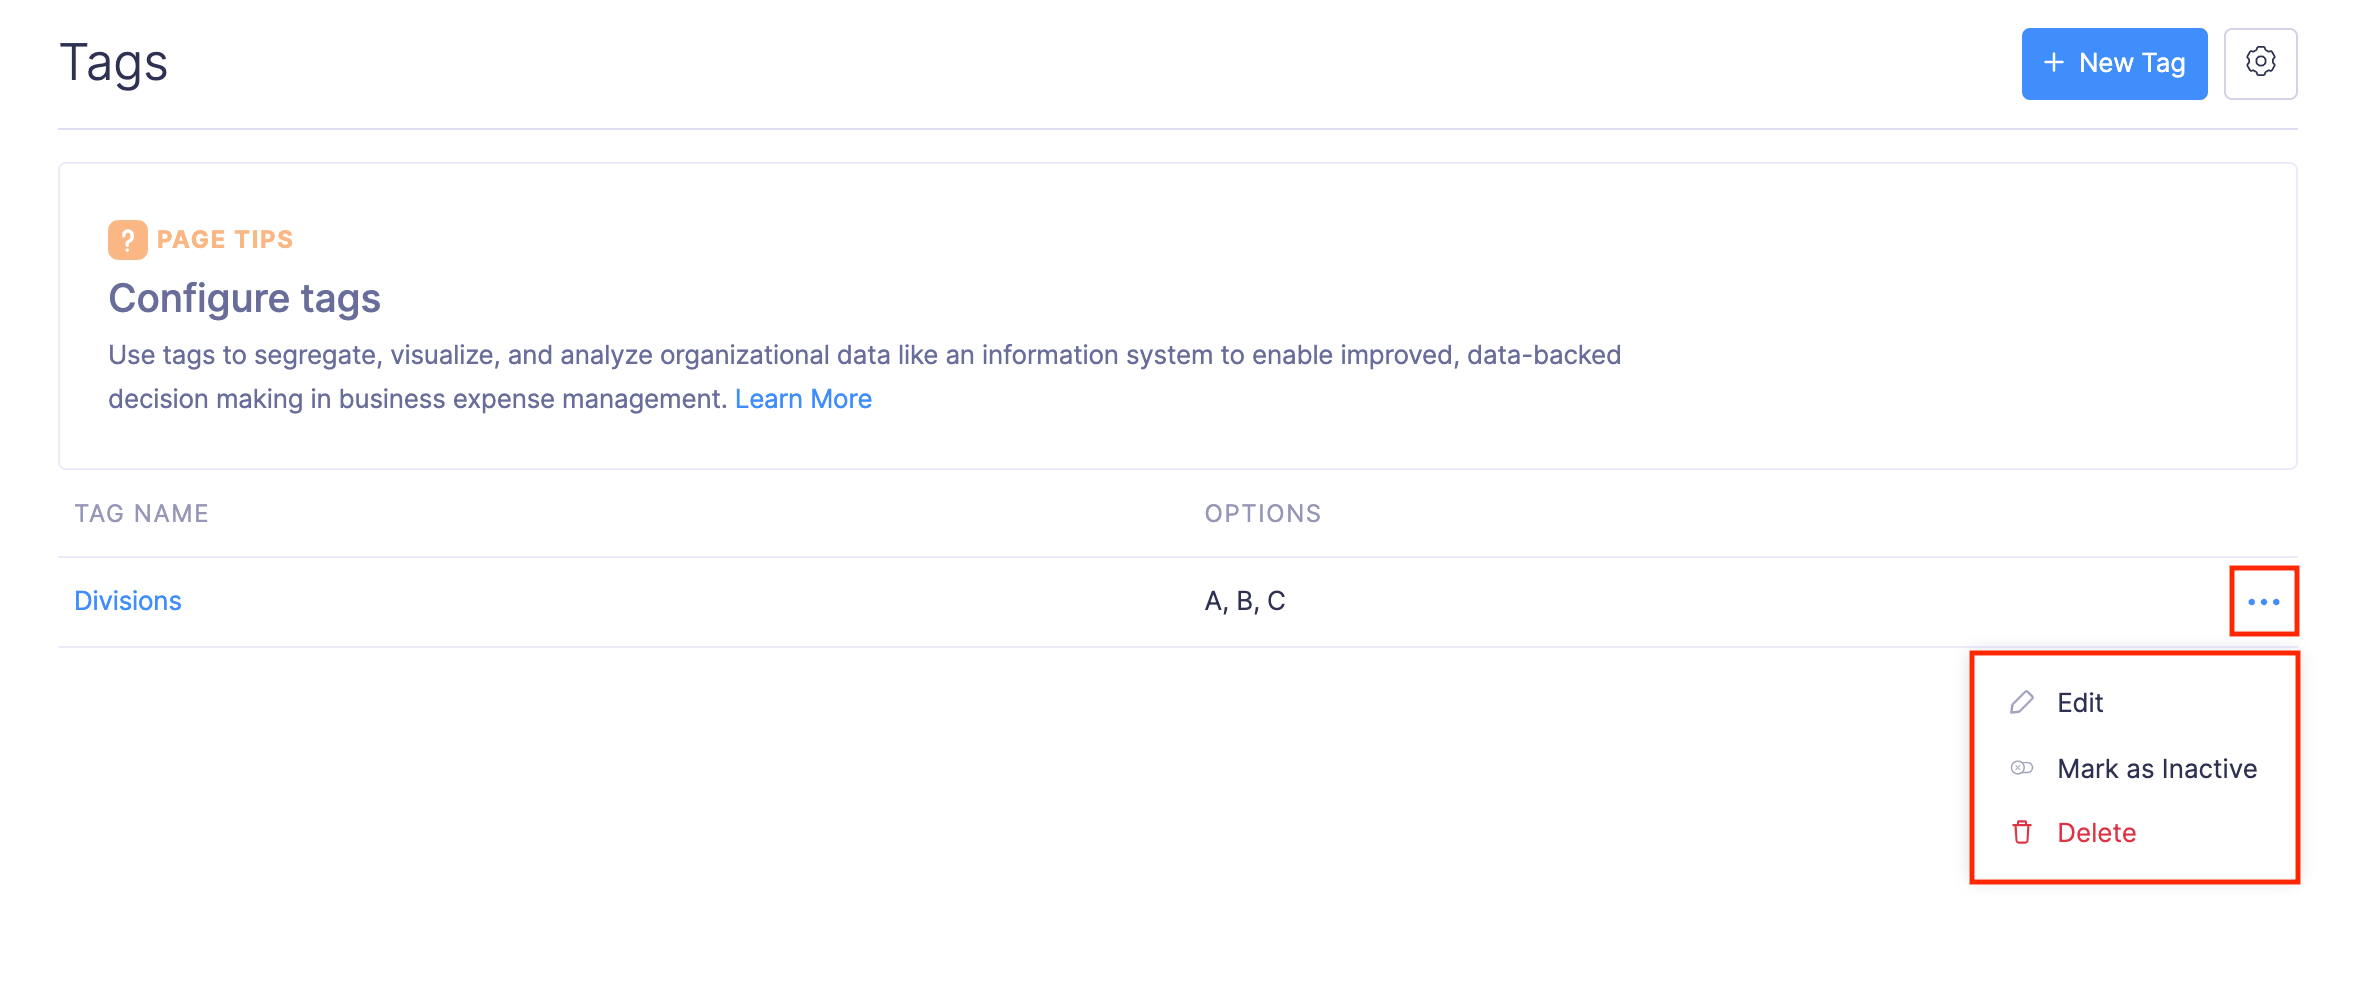
Edit, Delete, and Mark Tags as Inactive
If you would like to edit, delete, or mark a tag as inactive:
- Click Admin View.
- Go to Settings on the left sidebar.
(OR)
Click Settings in the top right corner of the page.
- Navigate to Organization Settings.
- Click Tags under Customization.
Hover over a particular tag and click the More icon at the right corner of the tag.
Select Edit, Mark as Inactive or Delete.
Edit: You can edit the tag name and options. If you would like to make the tags mandatory in expenses or expense reports select Yes, else No.
Mark as Inactive: Once you select this option, the tag will become inactive.You can also mark a few options as inactive in a tag by unchecking the box near an option in the edit page.
Delete: You can delete a tag by clicking the trash icon next to it. However, if the tags are already associated to expenses or expense reports, they cannot be deleted.