
Integrate Zoho Expense With Bolt Business
Bolt is a ride-booking app that helps users book rides for their business travel at affordable prices.
If you integrate with Bolt Business, every time a user books a work ride using the Bolt app, the receipt for the ride will be fetched into Zoho Expense and expenses will be created automatically, thereby saving the time and effort of your employees. Also, with this integration, you can keep your travel expenses ready for reporting, on time, every time.
Benefits
Fetch ride receipts easily: You or your employees need not import or record ride expenses manually anymore. Once a user completes a work ride in Bolt, the receipt will be fetched into Zoho Expense along with the ride details and an expense will be created automatically.
Report travel expenses promptly: Real-time fetching of ride receipts into Zoho Expense ensures that expenses are readily available for reporting. You can automate report creation by setting up report automation so that the work ride expenses that are created will be consolidated into a report on a timely basis.
Prerequisites
- A Zoho Expense account and a Bolt Work profile.
- The email address used for creating your Zoho Expense account and your Bolt Work profile should be the same.
- Every user must create a Bolt Work profile and add Zoho Expense as their expense provider to fetch their ride receipts as this is a user-level integration.
Create Bolt Work Profile and Enable Integration
Users are required to set up a Bolt Work Profile to fetch their work ride receipts. To set up:
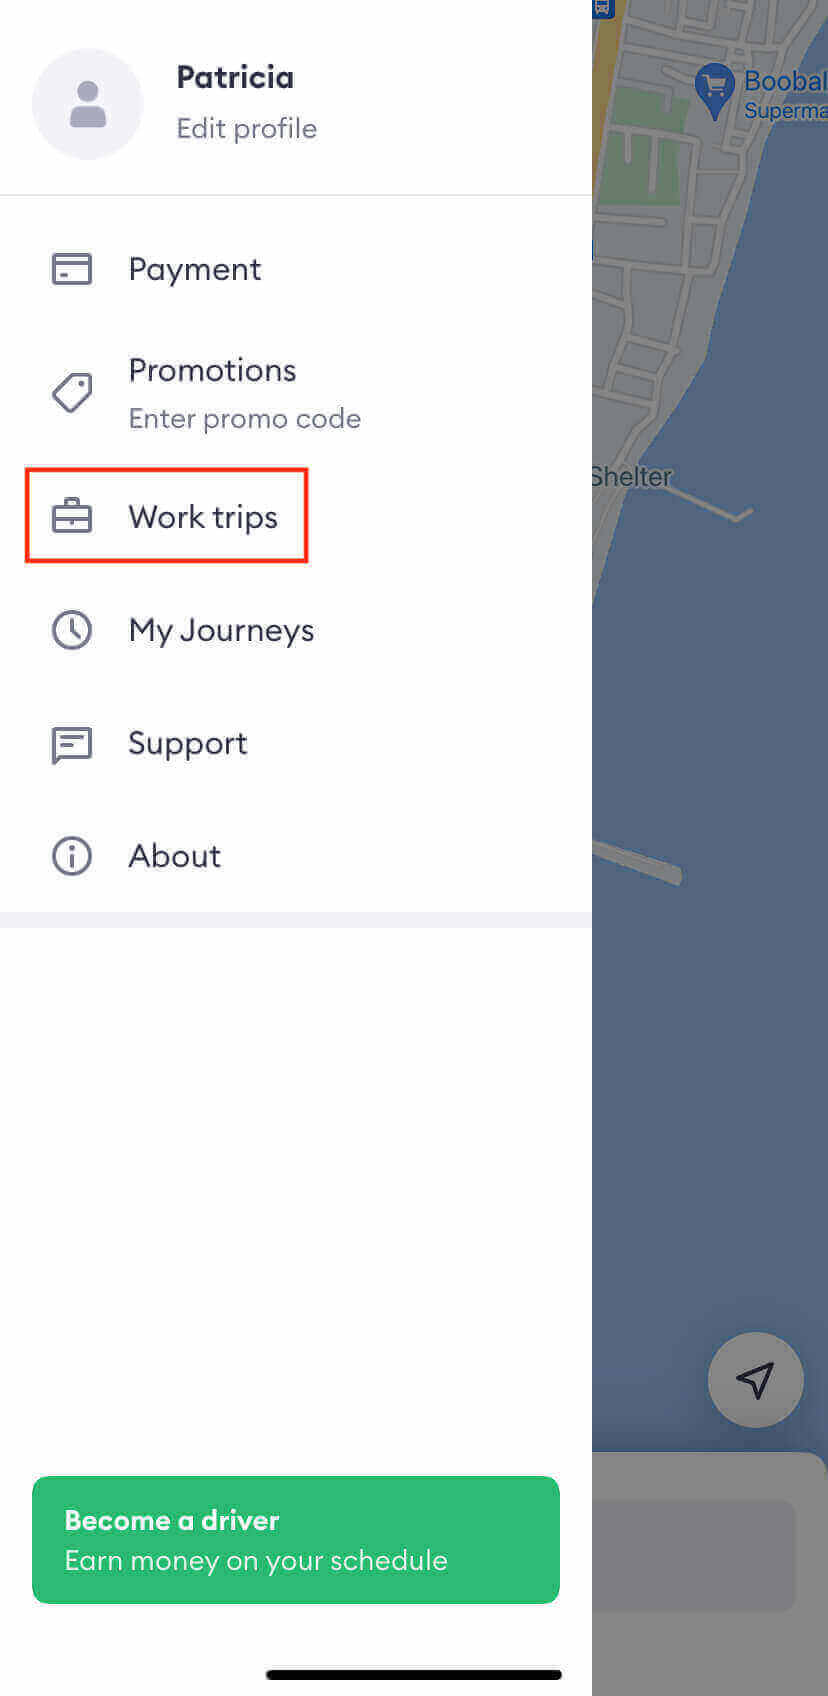
- Open the Bolt app and click the Hamburger icon on the top left corner.
- Select Work trips.
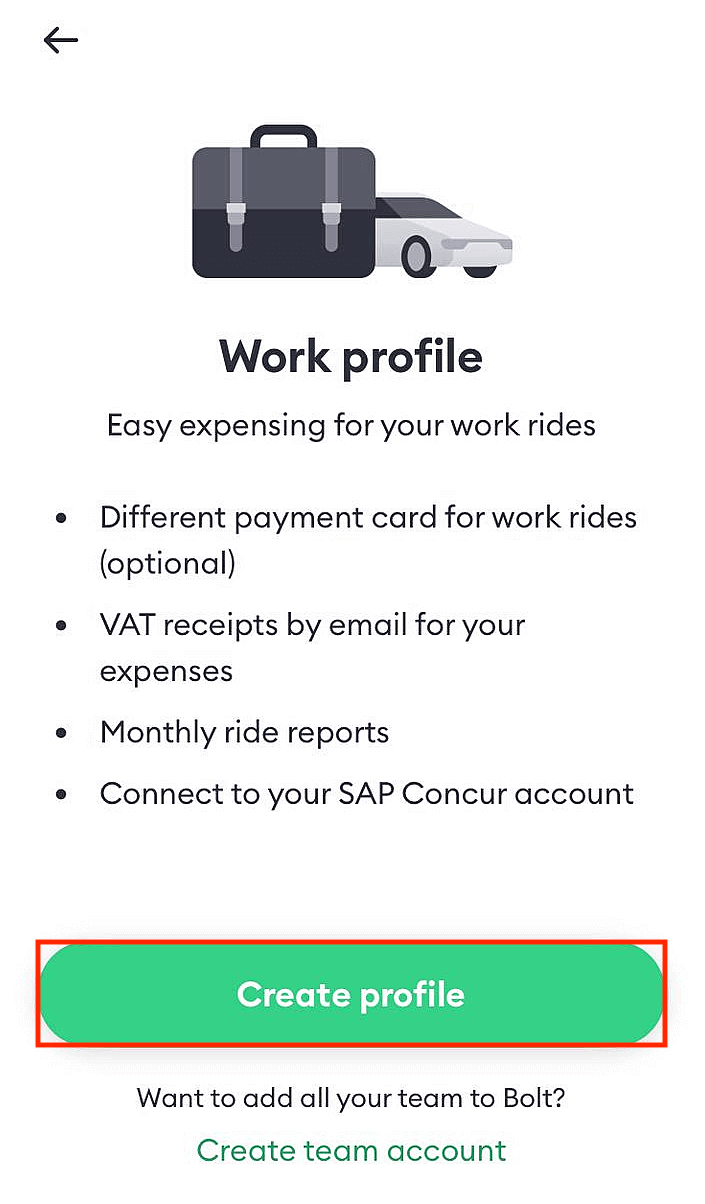
- In the page that opens, click Create profile to create your Bolt Work profile.
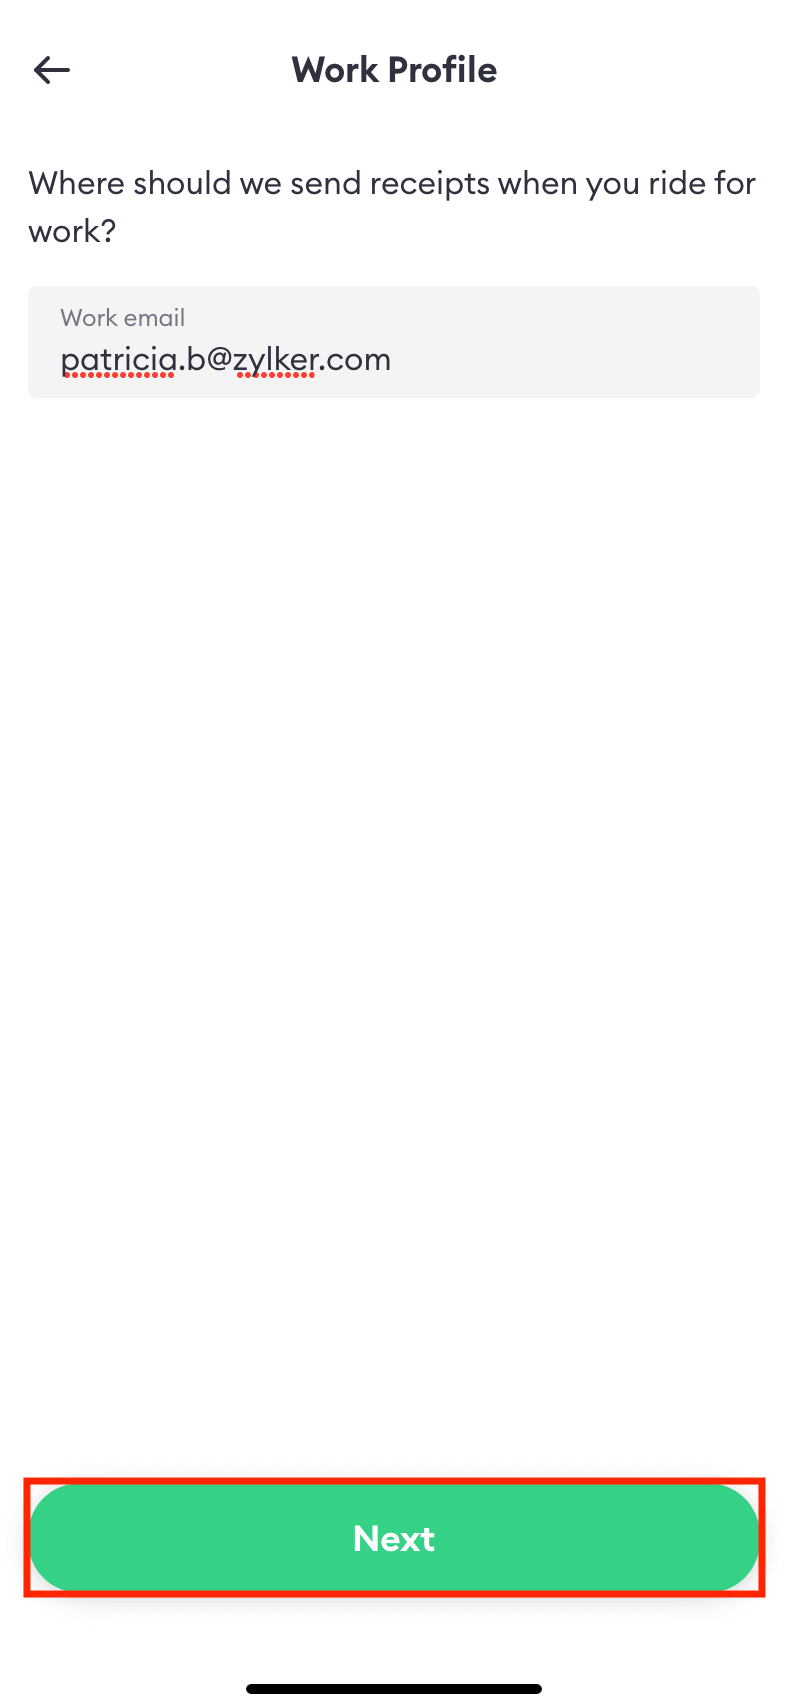
- Enter the email address that you used to create your Zoho Expense account so that receipts can be sent to the entered email address. Click Next.
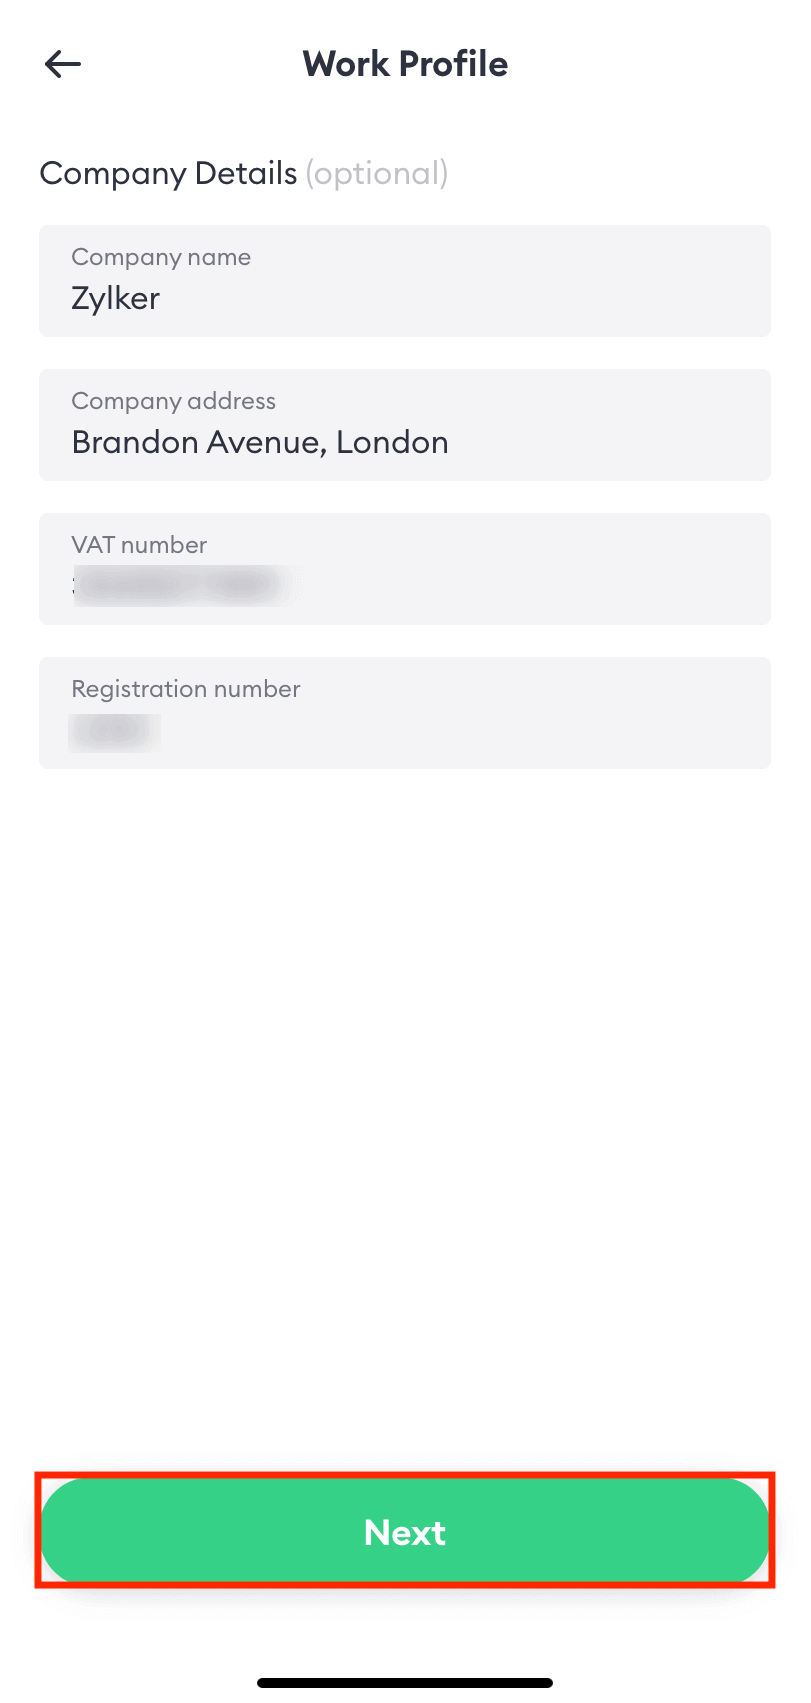
- Enter your company details. Click Next.
- Choose a payment method for your work trips. If you don’t want to use the existing payment methods, you can create a new one by clicking + Add Payment Method. Once you’ve added a payment method, click Next.
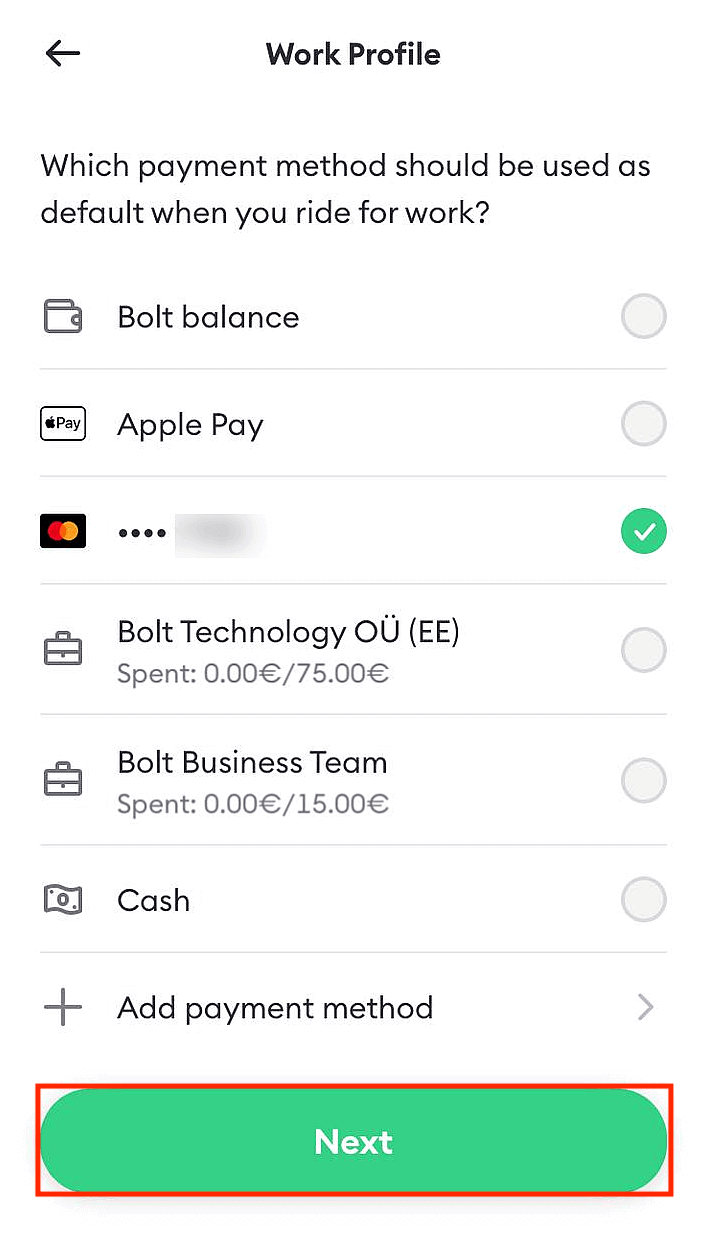
- Click Done. Your Bolt Work profile has been set up and you can now choose Zoho Expense as your expense provider.
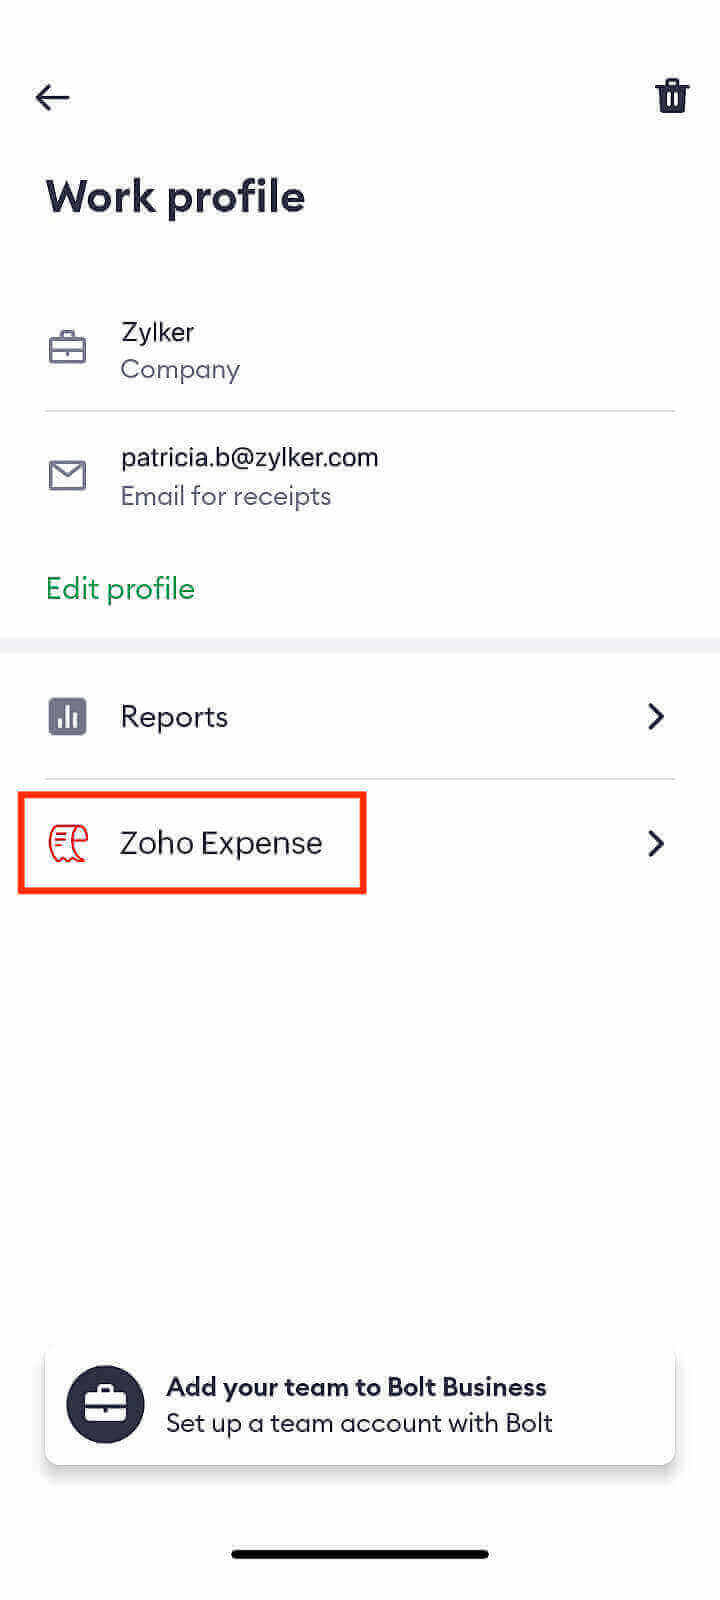
- Next, click Add expense provider.
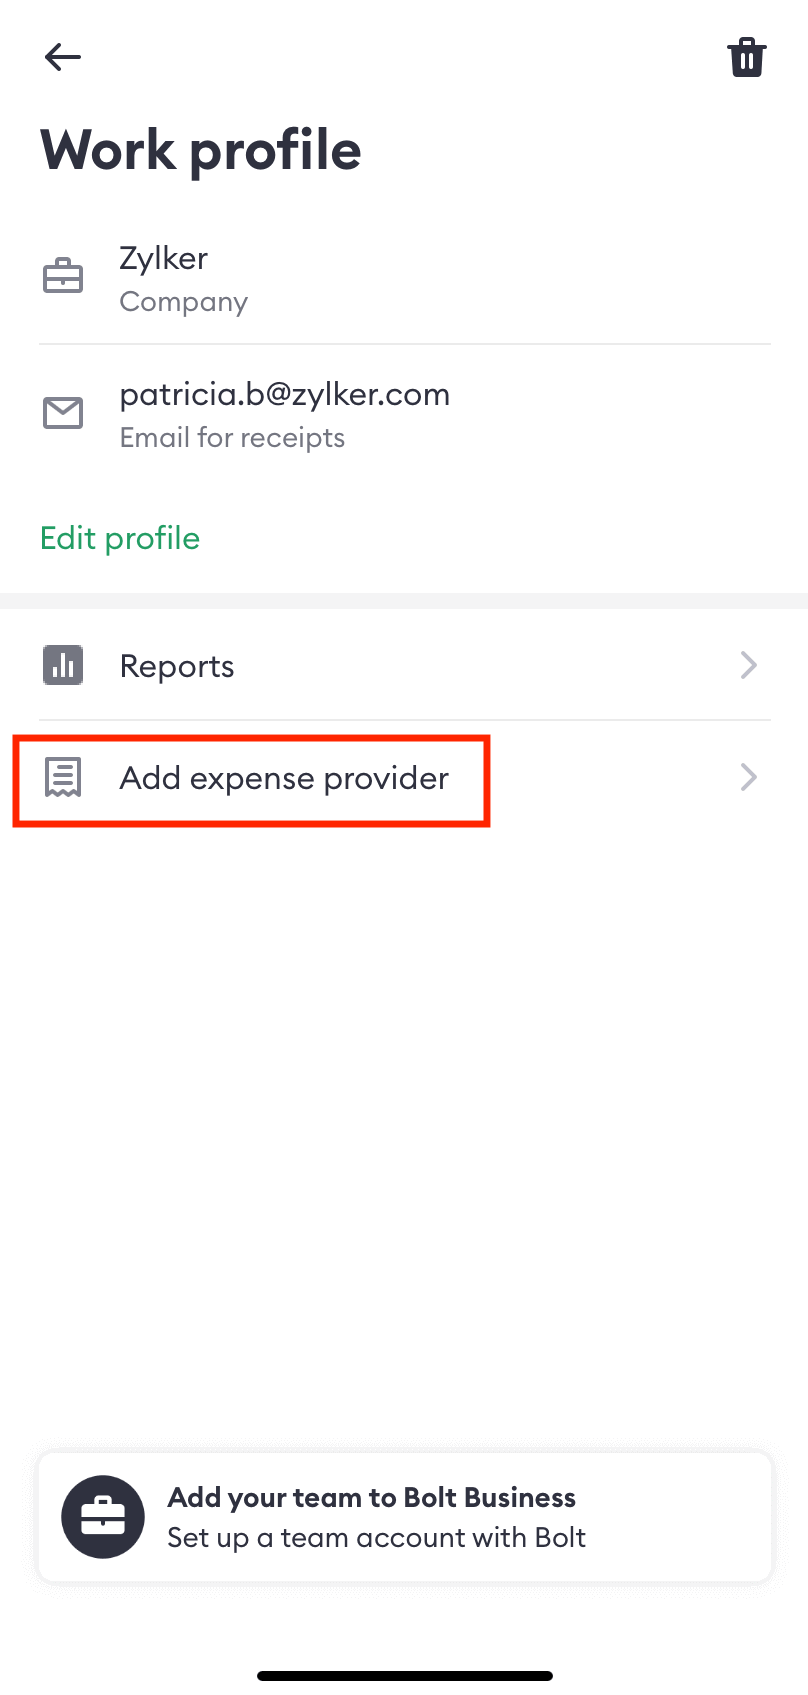
- Select Zoho Expense.
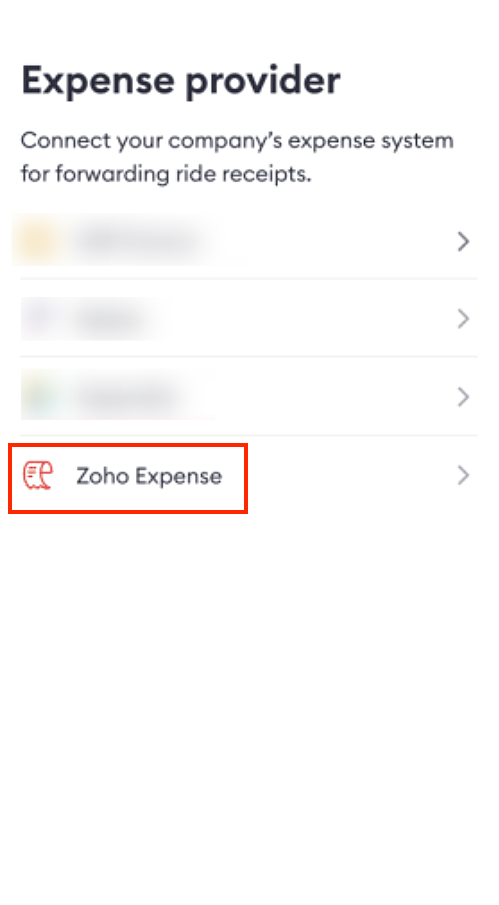
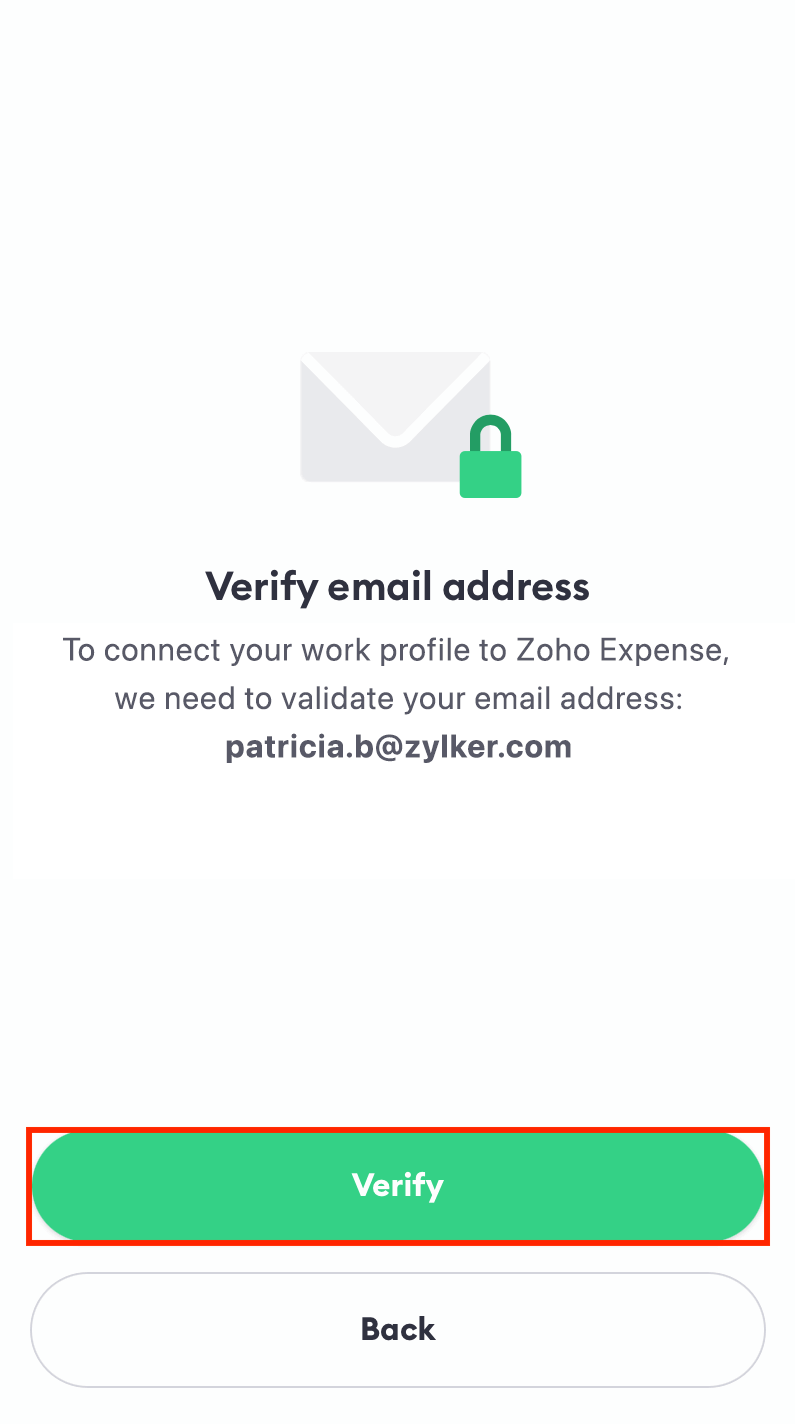
- In the page that opens, click Verify. An email will be sent to your email address to verify.
- Once you verify, open the Bolt app, click the Hamburger icon on the top left corner and click Work trips.
- Click Add expense provider and select Zoho Expense again. Your accounts will be integrated and every time an employee takes a work ride in Bolt, the receipt details will be sent to Zoho Expense.
Create a Bolt Work Ride
Users can create a work ride in Bolt. Here’s how:
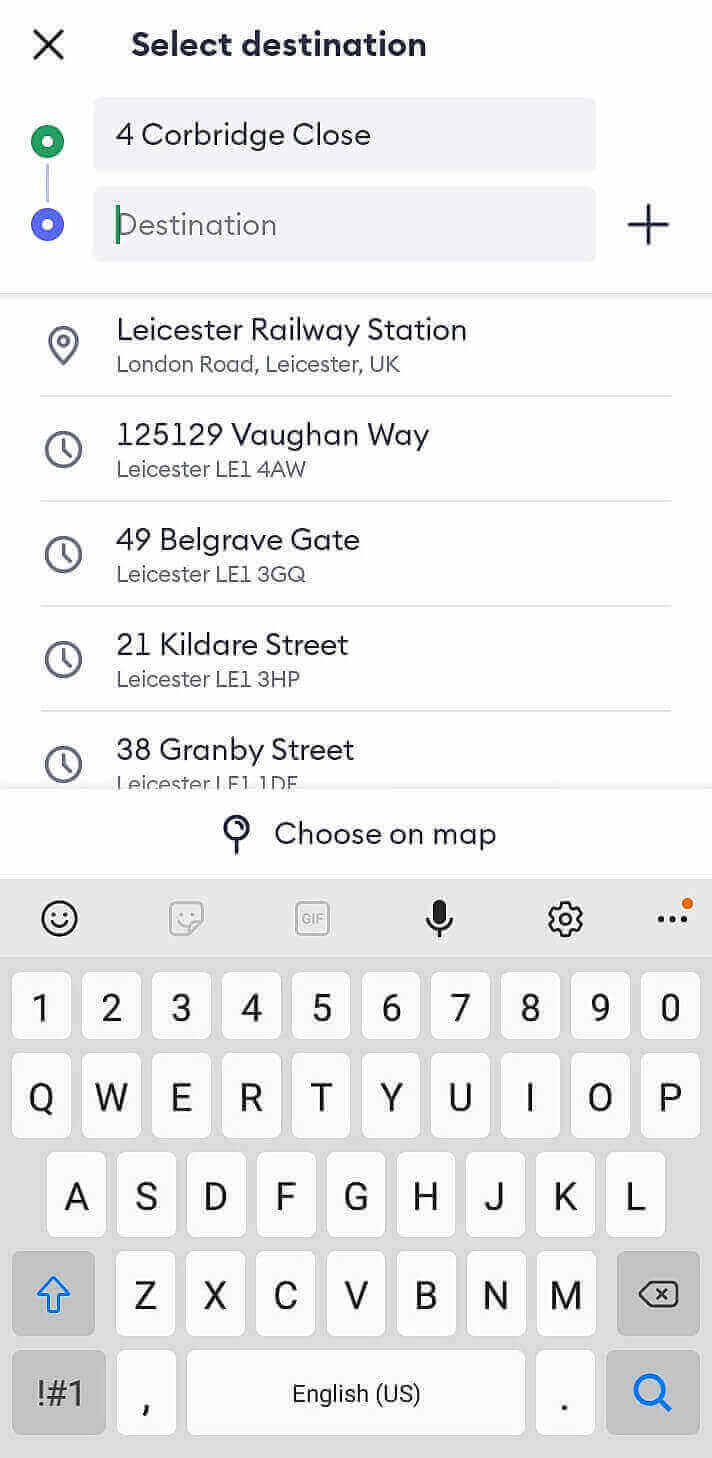
- Open the Bolt app.
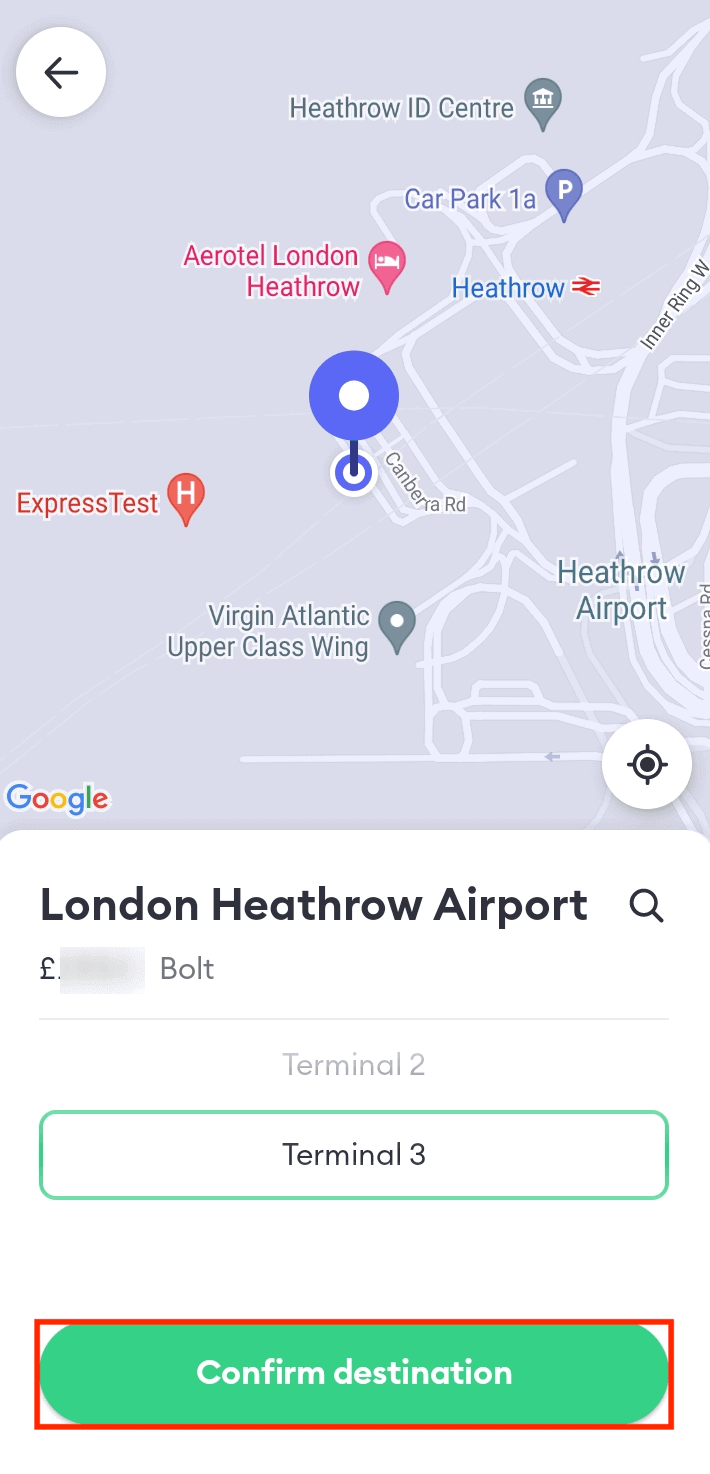
- Enter your destination address in the “Where to?” field.
- Click Confirm Destination to confirm the place you want to travel to.
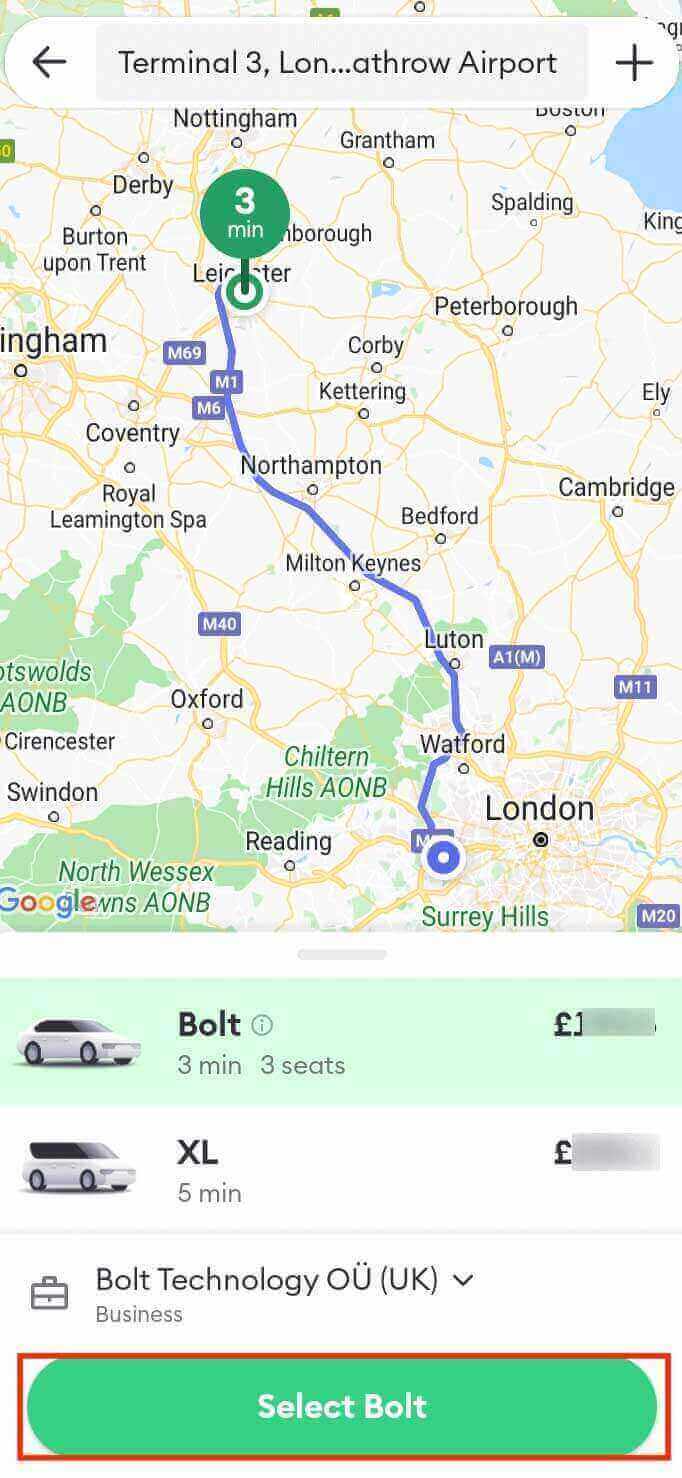
- Choose one of the vehicle options available for you.
- Select the payment method you’ve set up for your work rides.
- Click Select Bolt. Your work ride will be created and the ride receipt will be sent to Zoho Expense once you complete the ride.
Disconnect Integration
Once you disconnect the integration, your Bolt ride receipts will no longer be sent to Zoho Expense. To disconnect:
- Open the Bolt app and click the Hamburger icon on the top left corner.
- Select Work trips.
- Click Zoho Expense.
- In the page that opens, click the Trash icon next to Zoho Expense.
- Click Disconnect.

- A pop-up will appear on the screen. Click Confirm to disconnect the integration.