
Custom Fields
When creating an expense record or recording a transaction in Zoho Expense, you will be prompted to enter data in several fields. These fields might not be required or sufficient for your organization. In order to make your expense reporting experience more efficient, Zoho Expense provides you with the ability to customize existing fields or add more fields based on your organization’s needs.
You can add more fields by creating custom fields to receive additional information and choose the input fields your users would view. You can also choose to make these fields mandatory and add them to the report PDF.
Create Custom Field
To create a new custom field:
- Click Admin View on the left sidebar.
- Go to Settings on the left sidebar.
(OR)
Click Settings in the top right corner of the page. - Select Modules under Customization.
- Select the module for which you want to create a new custom field.
- Go to the Fields tab of the respective module.
- Click + New Field in the top right corner of the page.
- Enter the Label Name and select the Data Type. After selecting an appropriate data type, a preview of the custom field will be displayed.
- Provide any Help Text to let your users know the function of the custom field, if necessary.
- If the field contains sensitive information, you can choose to secure the information by selecting PII/ePHI to protect the information entered.
Insight: Encryption is the process of securing the entered information. This process will convert original information into cypher text, thereby preventing the data from being stolen.
PII - Any information that can potentially identify an individual will fall under Personally Identifiable Information (PII). These are classified into two types: direct (e.g., name, email, phone number, etc) and indirect (e.g., date of birth, gender, etc).
ePHI - If the user has to enter medical information that can be used to identify a person, select Electronic Protected Health Information (ePHI). An electronic copy of medical report will be ePHI. You can only mark the Text, Email, URL, Phone, and Date fields as ePHI.

Zoho Expense provides you with three options to store PII and ePHI:
| PII Option | Description |
|---|---|
| Yes, it’s PII. Encrypt and store it. | The data in the field will be encrypted and stored. Only the users who have permission to access PII can view this data. |
| Yes, it’s PII but not sensitive. Store it without encryption. | The data will be stored and not encrypted. Only the users who have permission to access PII can view this data. |
| Yes, it’s ePHI and PII. Encrypt and store it. | The data in the field will be encrypted and stored. Only users with access to PII and ePHI will be able to view the details. |
- Click Yes for Restrict Duplicate Values if you want to prevent the users from entering the same value for this custom field in multiple records within a module.
- Click No for Restrict Duplicate Values to display the Default Value field. The value you enter in this field will appear by default when creating records in the module.
- Click Yes for Is Mandatory if you want to make the custom field a mandatory field. Records cannot be saved or edited without entering a value in this field.
- Click Yes for Show in all PDF if you want the custom field to be available in PDFs.

- Click Save.
Custom Field Data Types
Depending on the module, you can create custom fields using the following data types:
| Data Type | Description |
|---|---|
| Text Box (Single Line) | Record any additional information. You can enter a short text, numerical value, or a combination of both up to 200 characters. Only A-Z, 0-9, and special characters are supported. |
| Record additional email addresses. For example, patricia.boyle@zylker.com. | |
| URL | Record website URLs. For example, https://www.zoho.com/expense. |
| Phone | Record additional mobile numbers. For example, (123)-456-7890. |
| Number | Store whole numbers and negative numbers. For example, 7 or -7. |
| Decimal | Store positive or negative decimals. For example, 7.1 or -15.67. |
| Amount | Record the amount along with the default currency code of your organization. For example, USD 50, GBP 100, INR 150, etc. |
| Percent | Record values in percentage. For example, 100%. |
| Date | Choose a date from the calendar to record and track it. For example, 01/08/2024. |
| Date and Time | Choose a date and time to record and track it. For example, 01/08/2024 13:00. |
| Check Box | Confirm an action or a fact, or enable an option. You can also choose to have the check box checked by default if required. |
| Auto-Generate Number | Auto-generate values with prefixes or suffixes, and a starting number of your choice. For example, AGN-00001. |
| Dropdown | Select an option from a list of options provided. You can enter options of your choice or choose from the pre-defined options. Also, you can add options in bulk. |
| Multi-select | Select one or more options from a list of options provided. |
| Lookup | Pull data from one module in Zoho Expense and display it in another module. |
| Text Box (Multi-line) | Enter text, numerical value, or a combination of both up to 36,000 characters. Only A-Z, 0-9, and special characters are supported. |
| Attachment | Add files such as documents, PDFs, and images. |
| External Lookup | Select one of the available Zoho apps and lookup data from one of its fields. |
Edit Custom Field
You can make changes to the custom field you created. Here’s how:
- Click Admin View on the left sidebar.
- Go to Settings on the left sidebar.
(OR)
Click Settings in the top right corner of the page. - Select Modules under Customization.
- Select the respective module and go to the Fields tab.
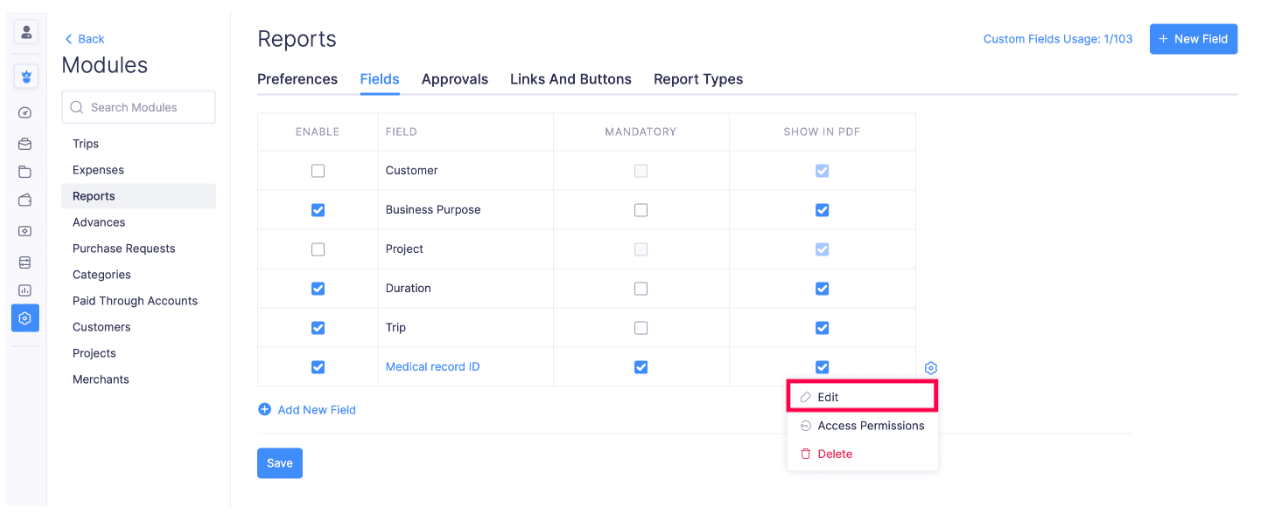
- Click the Gear icon next to the custom field you want to edit.
- Click Edit from the dropdown.
- Make the necessary changes and click Save.
Disable a Custom Field
If you don’t want to delete a custom field but also don’t want to use it in records, you can disable it. Here’s how:
- Click Admin View on the left sidebar.
- Go to Settings on the left sidebar.
(OR) - Click Settings in the top right corner of the page.
- Click Modules under Customization.
- Click the respective module and go to the Fields tab.
- Uncheck the checkbox next to the custom field you want to disable.
- Click Save.
Enable a Custom Field
You can enable a disabled custom field. Here’s how:
- Click Admin View on the left sidebar.
- Go to Settings on the left sidebar.
(OR) - Click Settings in the top right corner of the page.
- Click Modules under Customization.
- Click the respective module and go to the Fields tab.
- Check the checkbox next to the disabled custom field.
- Click Save.
Delete Custom Field
Here’s how you can delete the custom field:
- Click Admin View on the left sidebar.
- Go to Settings on the left sidebar.
(OR)
Click Settings in the top right corner of the page. - Select Modules under Customization.
- Select the respective module and go to the Fields tab.
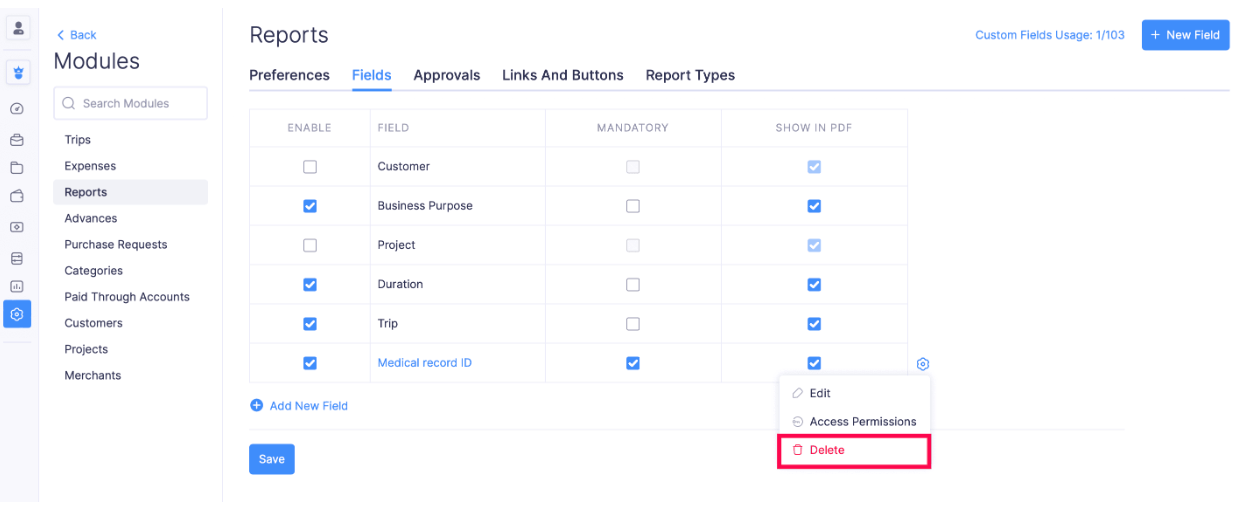
- Click the Gear icon next to the custom field you want to delete.
- Click Delete from dropdown.
- Confirm your action by clicking Delete again to delete the custom field in the pop-up that appears.
Provide Users Access Permission to Custom Fields
Here’s how you can provide access permission for your users to the custom fields:
- Click Admin View on the left sidebar.
- Go to Settings on the left sidebar.
(OR)
Click Settings in the top right corner of the page. - Select Modules under Customization.
- Select the respective module and go to the Fields tab.
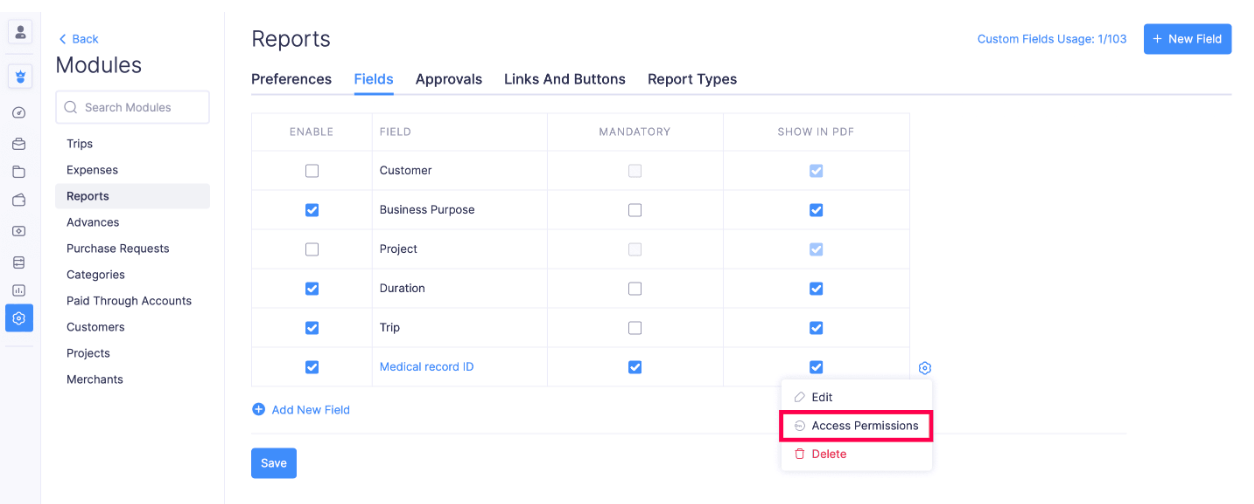
- Click the Gear icon next to the custom field for which you want to provide access permission to users.
- Click Access Permissions from the dropdown.
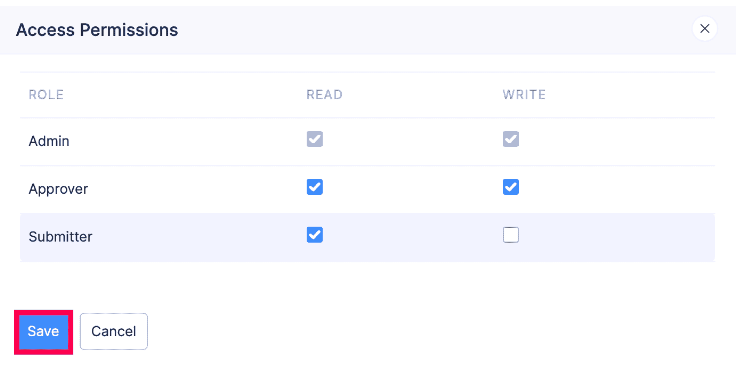
- Choose the level of access you want to provide to each role. By default, the admin role has unrestricted access to all modules.
- Click Save in the Access Permissions pop-up.
- Click Save.
With this, users of the role will be able to view or update data in the custom field based on the access you’ve provided.