
Advances
Preferences
To set up advance preferences:
- Click Admin View on the left sidebar.
- Go to Settings on the left sidebar.
(OR)
Click Settings in the top right corner of the page. - Navigate to Module Settings.
- Click Advances under Travel and Expense.
- Under the Preferences tab, you can configure the following:
Custom Status
If you want to provide an intermediate status specifically for approved or rejected advances, you can add a custom status. For example, your organization might have multiple stages after an advance has been approved such as partially paid, pending, paid, etc. You can create new custom statuses for these stages and update the approved or rejected advance accordingly.
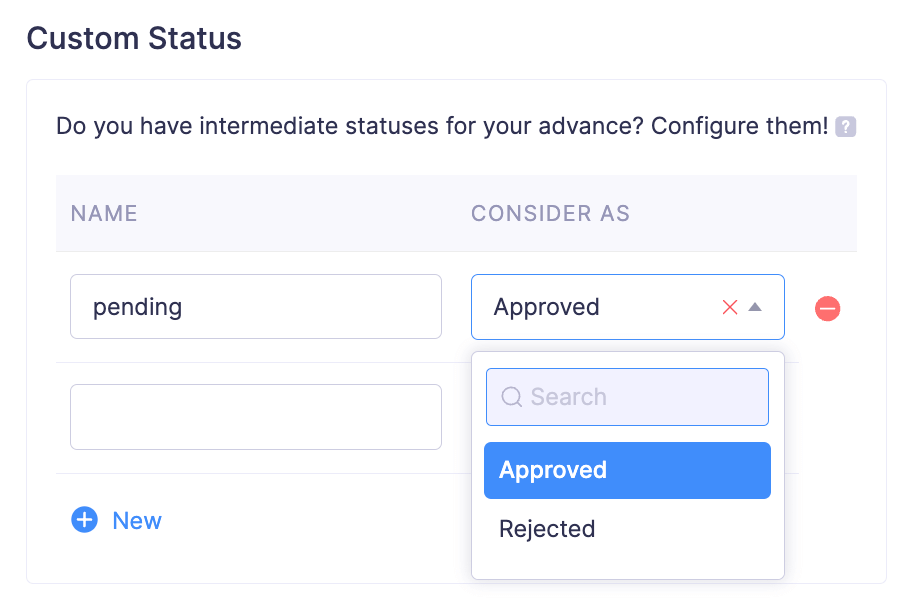
Click + New to add more custom status and click - to delete a custom status.
Apply Custom Status to Advances
To change the status of the advances:
Note: Changing the status of the advance will only change the status name, and the advances will still be considered as Approved or Rejected.
- Go to Admin View and click Advances on the left sidebar to view all the advances that are submitted across the organization.
(OR)
Go to My View and click Approvals on the left sidebar and click Advances to view the list of advances that are submitted to you for approval. - Select the Approved or Rejected advance for which you would like to change the status.
- Click the Change Status dropdown at the top right corner and select the “Custom Status Name”.
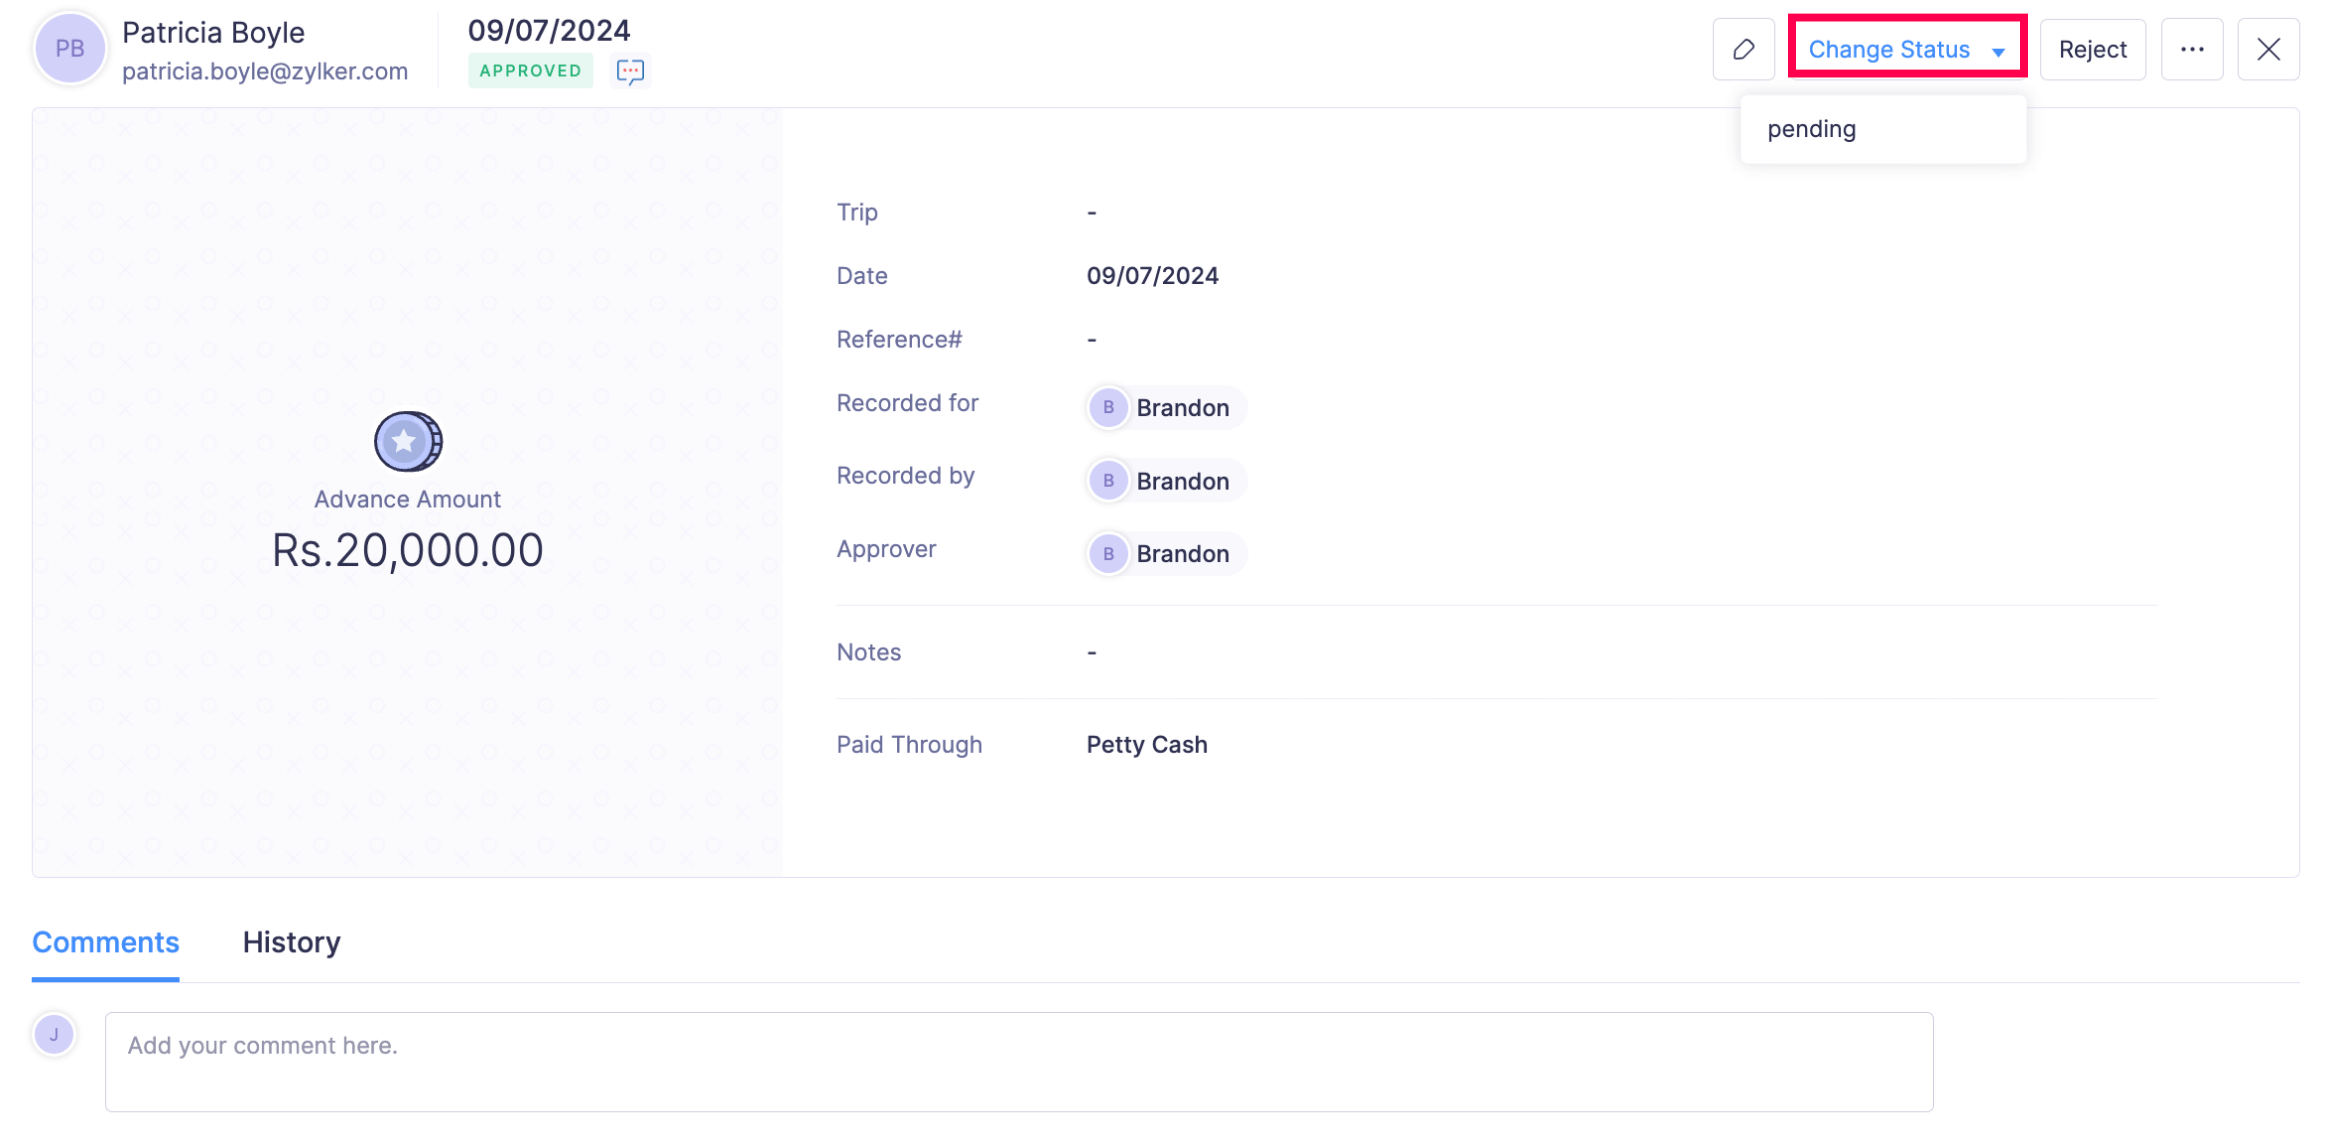
- Confirm your action by clicking Confirm in the Change Advance Status pop-up.
The advance will be marked with the custom status and will be considered as Approved or Rejected based on your configuration.
Revert Custom Status
If you would like to change the applied custom status back to the corresponding status in Zoho Expense, you can revert it. To do this:
- Go to Admin View and click Advances on the left sidebar to view all the advances that are submitted across the organization.
(OR)
Go to My View and click Approvals on the left sidebar and click Advances to view the list of advances that are submitted to you for approval. - Select the advance for which you want to revert the custom status.
- Click the Change Status dropdown at the top right corner and select Revert Status to “Status Name”.
The advance’s custom status will be reverted to the status you’ve configured.
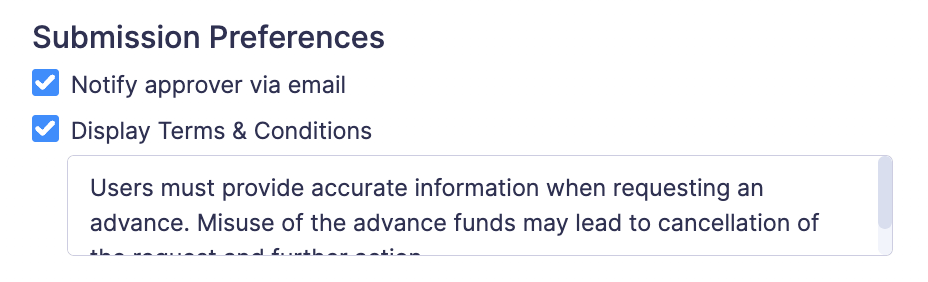
Submission Preferences
Notify approver via email - If you mark this checkbox, an email will be sent to the approver when an advance request is submitted for their approval. You can perform this action only if you have set custom approval as the approval type for advances.
Display Terms & Conditions - You can add the terms and conditions for the submission of advance requests. This will be displayed in the Request Advance page when a user tries to submit an advance request.
Chatlet Preferences
Chatlet enables you to initiate discussions with other users in Zoho Expense. This feature is powered by Zoho Cliq, an application that makes collaboration and communication easy for teams.
Note: Chatlet feature is available only for the Premium plan in Zoho Expense.
Choose the users for whom you want to enable Chatlet.

- Click Save.
Fields
When creating an advance in Zoho Expense, you may be prompted to enter data in several fields. These fields might not be required or sufficient for your organization. In order to make your expense reporting experience more efficient, Zoho Expense provides you with the ability to customise existing fields or add more fields based on your organization’s needs.
You can add more fields by creating custom fields to receive additional information and choose the input fields your users would view. You can also choose to make these fields mandatory and add them to the report PDF.
Approvals
You can set up no approval, simple approval, or custom approval based on the approval process for advances in your organization.
Links and Buttons
In Zoho Expense, there are default buttons that are used to execute pre-defined functions. If you want to create a new button apart from the default buttons provided in Zoho Expense, you can create a new custom button and define a set of custom actions that can be executed when you click the custom button.
Custom links are external links that you can configure in Zoho Expense, which when clicked, will take you to external websites or resources in a new tab. You can also add placeholders in these links to redirect users to a specific record or page.