
Manage Booking Process
Do employees in your organization undertake business trips? Does your Travel Desk book tickets for your employees’ travel? Do your employees find it difficult to track the Travel Desk’s booking process? If the answer is yes to any of these questions, then Trip Options in Zoho Expense will help you manage them easily.
Trip Options are the different options that a Travel Desk (this can be a person who is doing the booking of tickets for the trip) provides for flights, hotels, trains, or buses to the employees, for their business trip.
The travel desk of your organization can provide the travelers with multiple options for flight and hotel based on the trip date, schedule of meetings, etc. Once the traveler selects an option, the travel desk can book the tickets and upload the booking information to Zoho Expense. This enables the travel desk to handle the entire booking process and the traveler can stay up-to-date about the booking status using Zoho Expense.
Now let’s take a look at how the travel desk can manage the booking process in Zoho Expense.
Add Trip Options
Once the trip request is approved, you (travel desk) can add options for flight, train, bus, and hotel.
Note: This feature is currently available in early access. Write to us at support@zohoexpense.com to enable it for your organization.
Let’s take a look at the different types of trips and learn how to add options for each trip:
One-way trip
John is a salesperson at Mathew & Co. He has been transferred from New Delhi to Kuala Lampur. In this case, you can add options for this itinerary (i.e) the itinerary from New Delhi to Kuala Lampur.
Round trip
John wants to take a round trip between New Delhi and Kuala Lampur. In this case, there are 2 itineraries for which a single ticket can be booked. The 2 itineraries are:
- New Delhi to Kuala Lampur
- Kuala Lampur to New Delhi
So you can bulk add options by selecting both the itineraries.
Multi-city trip
Say John has traveled from New Delhi to Kuala Lampur. From Kuala Lampur, he wants to go to Layang Island and travel back to New Delhi from Layang Island. If this is the case, then you can bulk add options to the 3 itineraries for which a single ticket can be booked. The 3 itineraries are:
- New Delhi to Kuala Lampur
- Kuala Lampur to Layang Island
- Layang Island to New Delhi
Add Options
To add options for an itinerary:
- Click Admin View.
- Go to Trips.
- Click the trip for which you would like to add options.
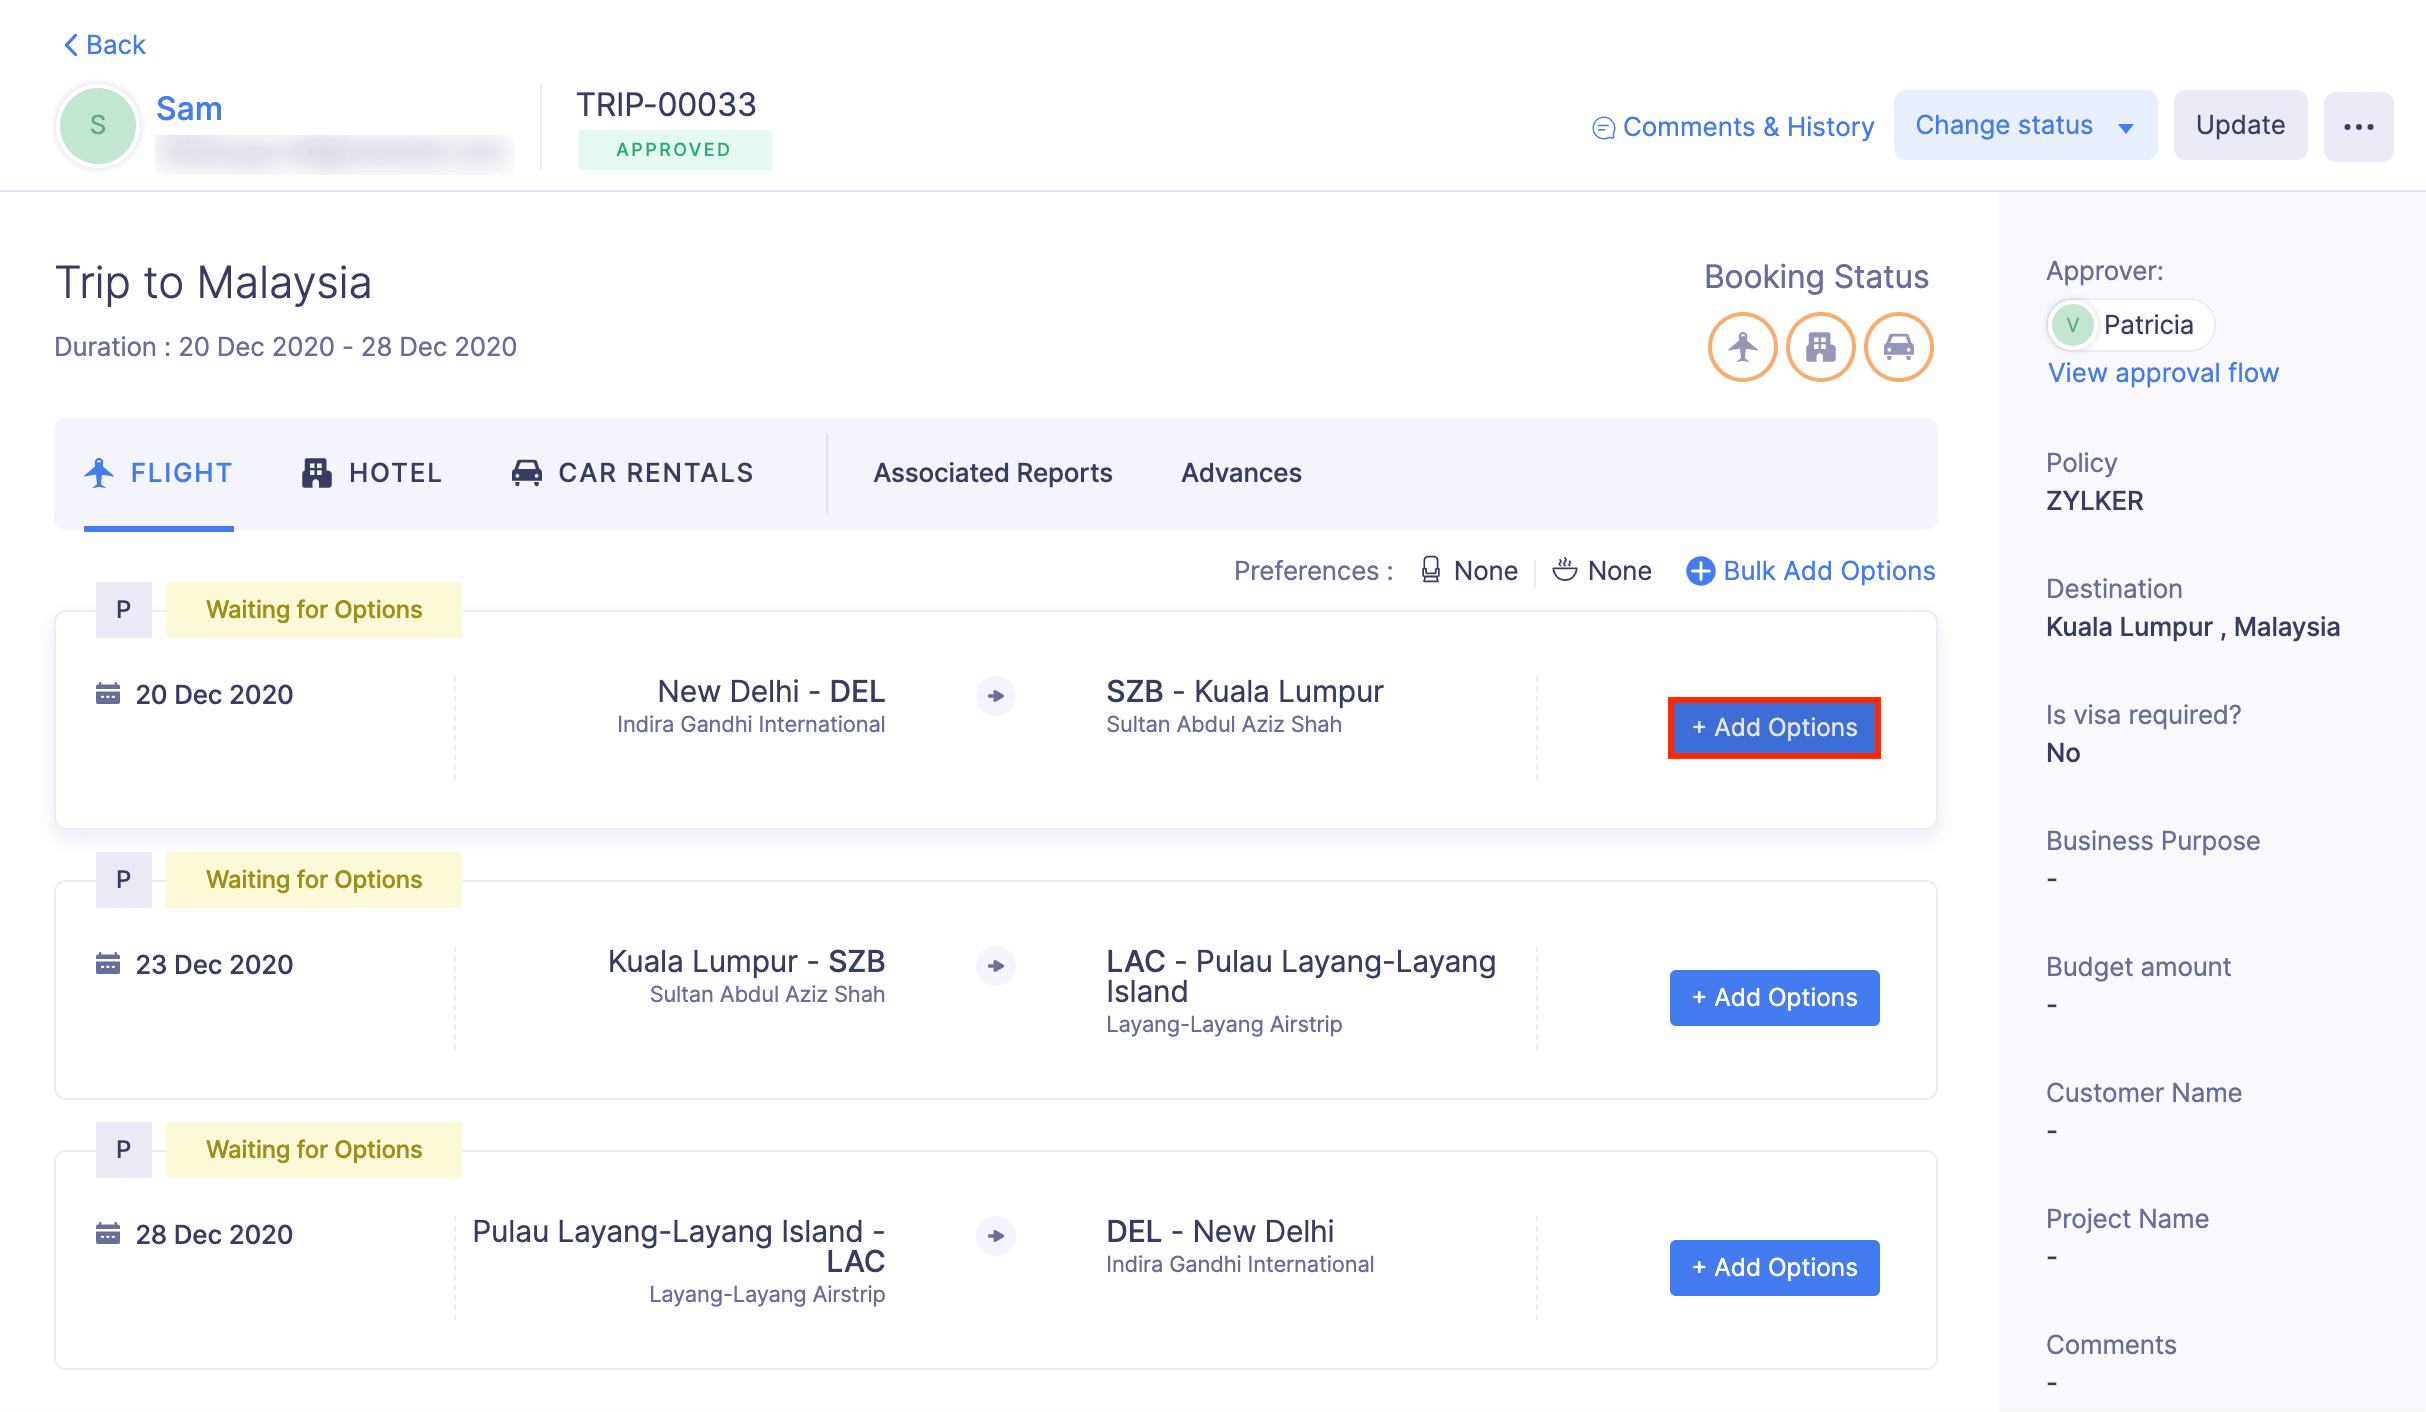
- If you want to add options for flight, navigate to Flight tab. Click + Add Options at the right corner of the itinerary for which you want to add options.
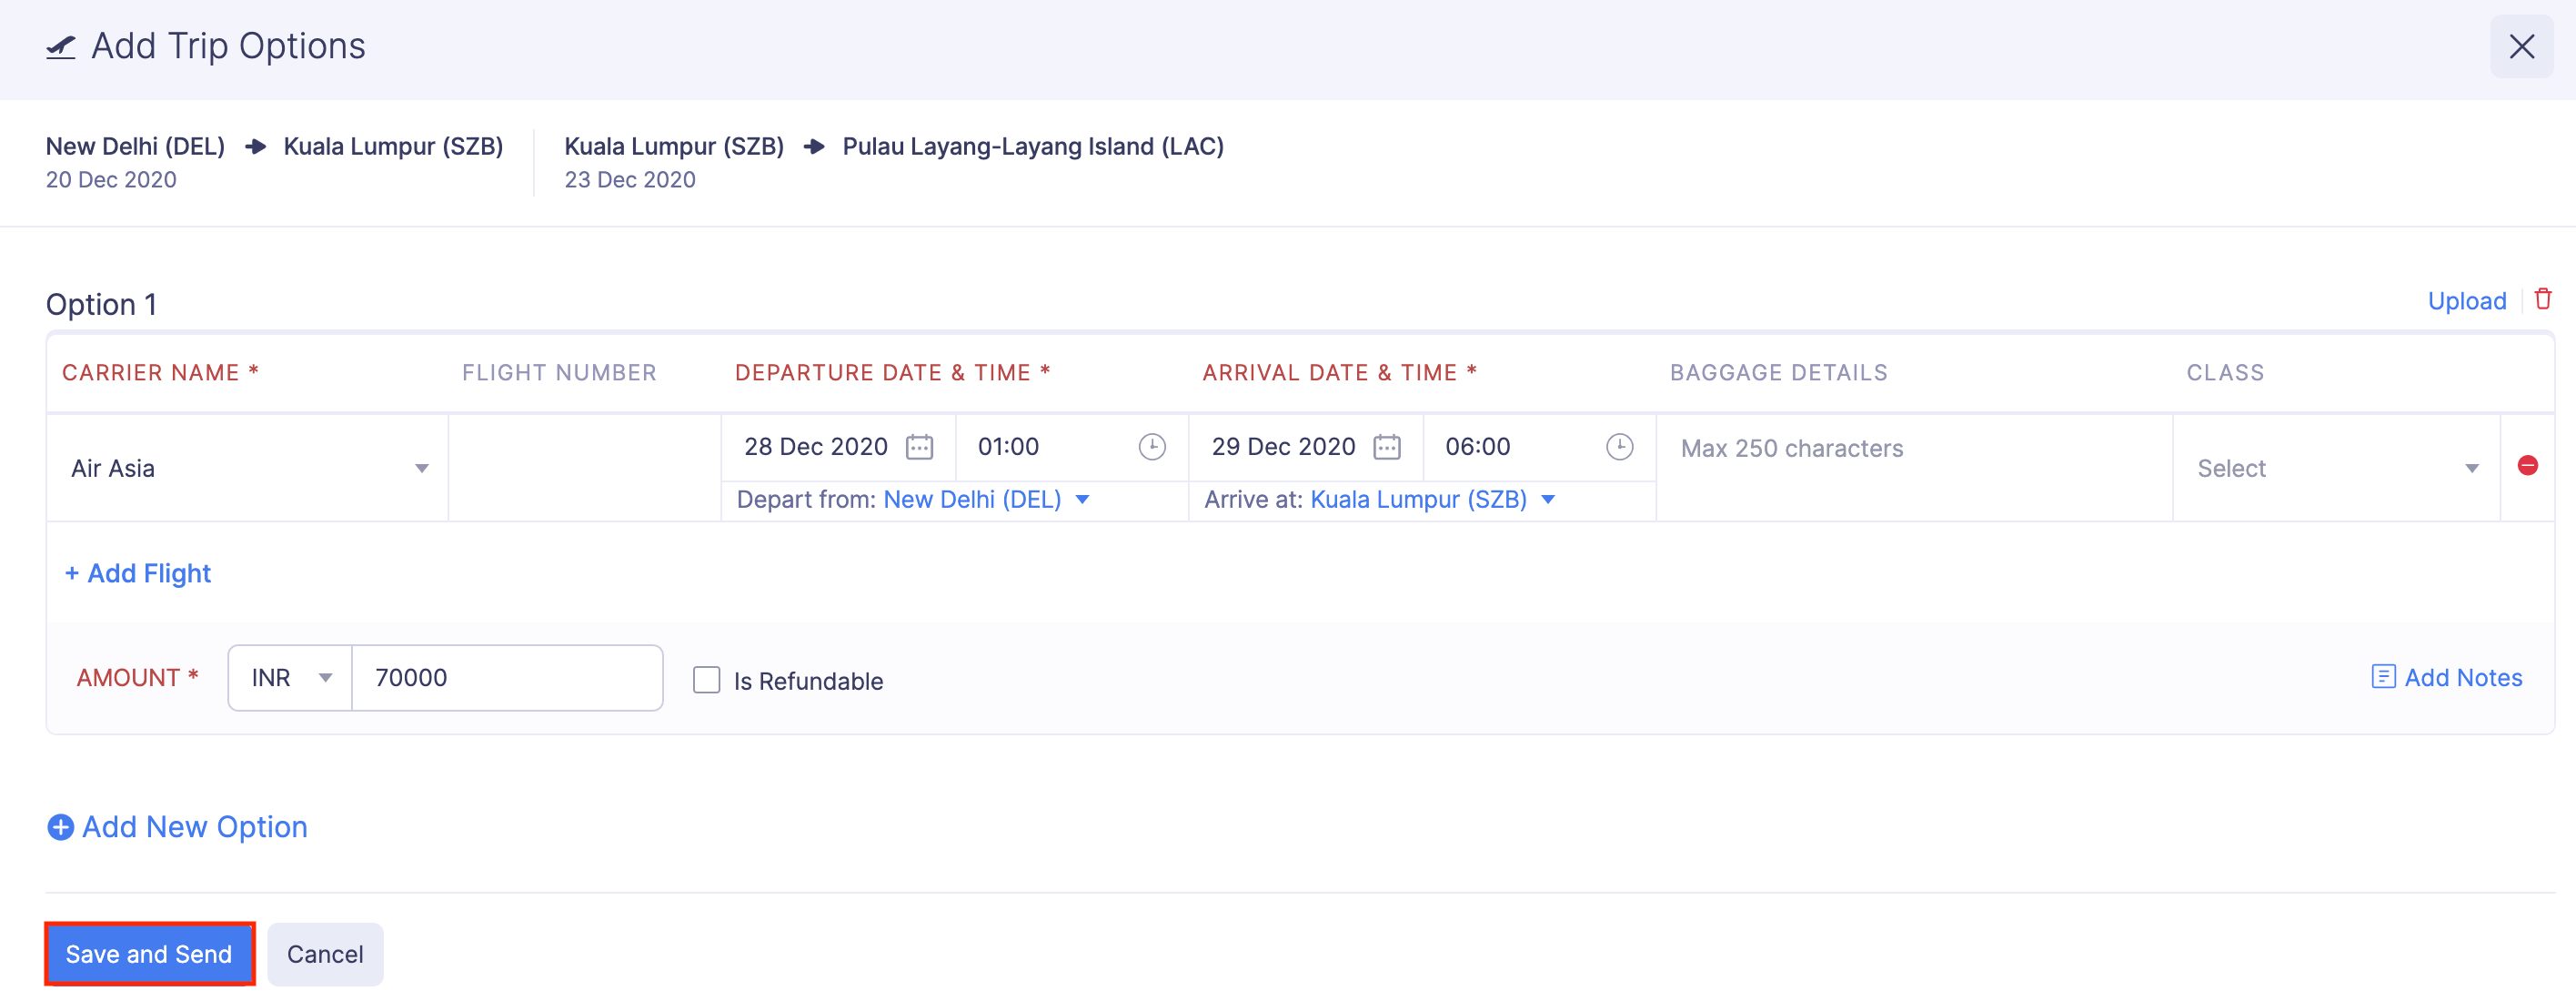
- Fill the following details for flight in the Add Options page:
- Carrier Name
- Flight Number
- Departure Date & Time
- Depart from
- Arrival Date & Time
- Arrive at
- Baggage Details
- Class
- Amount

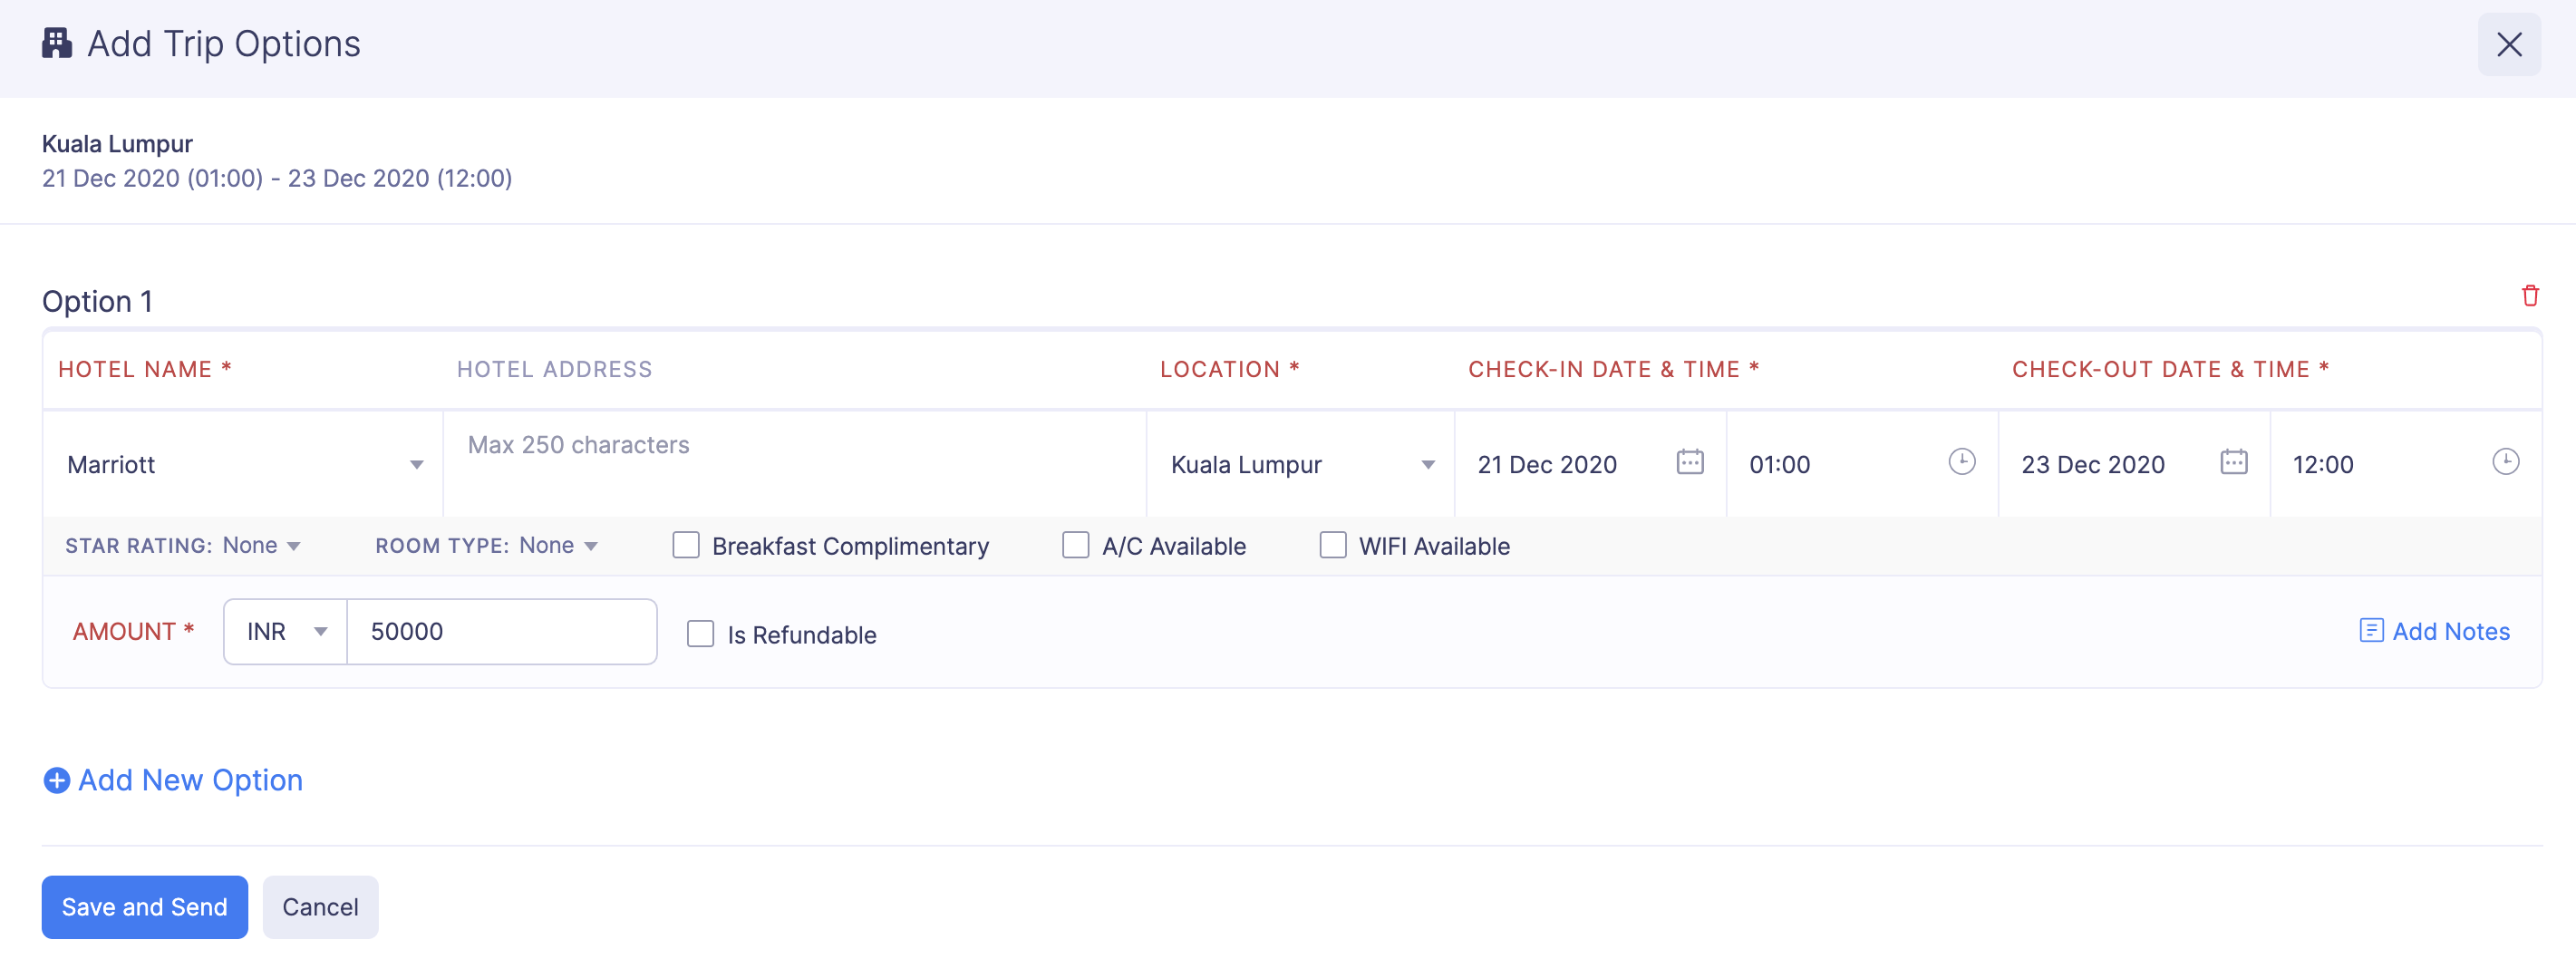
- If you want to add options for hotel, navigate to Hotel tab. Click + Add Options at the right corner of the itinerary for which you want to add options. Fill the following details for hotel in the Add Options page:
- Hotel Name
- Hotel Address
- Location
- Check-in Date & Time
- Check-out Date & Time
- Star Rating
- Room Type
- Amount
- If you want to add options for car rental, navigate to Car Rental tab. Click + Add Options at the right corner of the itinerary for which you want to add options. Fill the following details for car rentals in the Add Options page:
- Car Name
- Departure Date & Time
- Depart from
- Arrival Date & Time
- Arrive at
- Car Type
- Amount

- If you want to add options for bus, train, or ferry, navigate to the respective tab. Click + Add Options at the right corner of the itinerary for which you want to add options. Fill the following details for bus, train, and ferry in the Add Options page:
- Carrier Name
- Flight Number
- Departure Date & Time
- Depart from
- Arrival Date & Time
- Arrive at
- Amount

- To add a new option, click + Add New Option and fill in the required fields.
- Click Save and Send.
Note: Check the Is Refundable box if the booking cost can be refunded on cancelation.
Bulk Add Options
Prerequisite: You can bulk add options only for itineraries that have the same travel mode.
To add options in bulk to more than one itinerary that are in the same travel mode:
- Click Admin View.
- Go to Trips.
- Click the trip for which you would like to bulk add options.
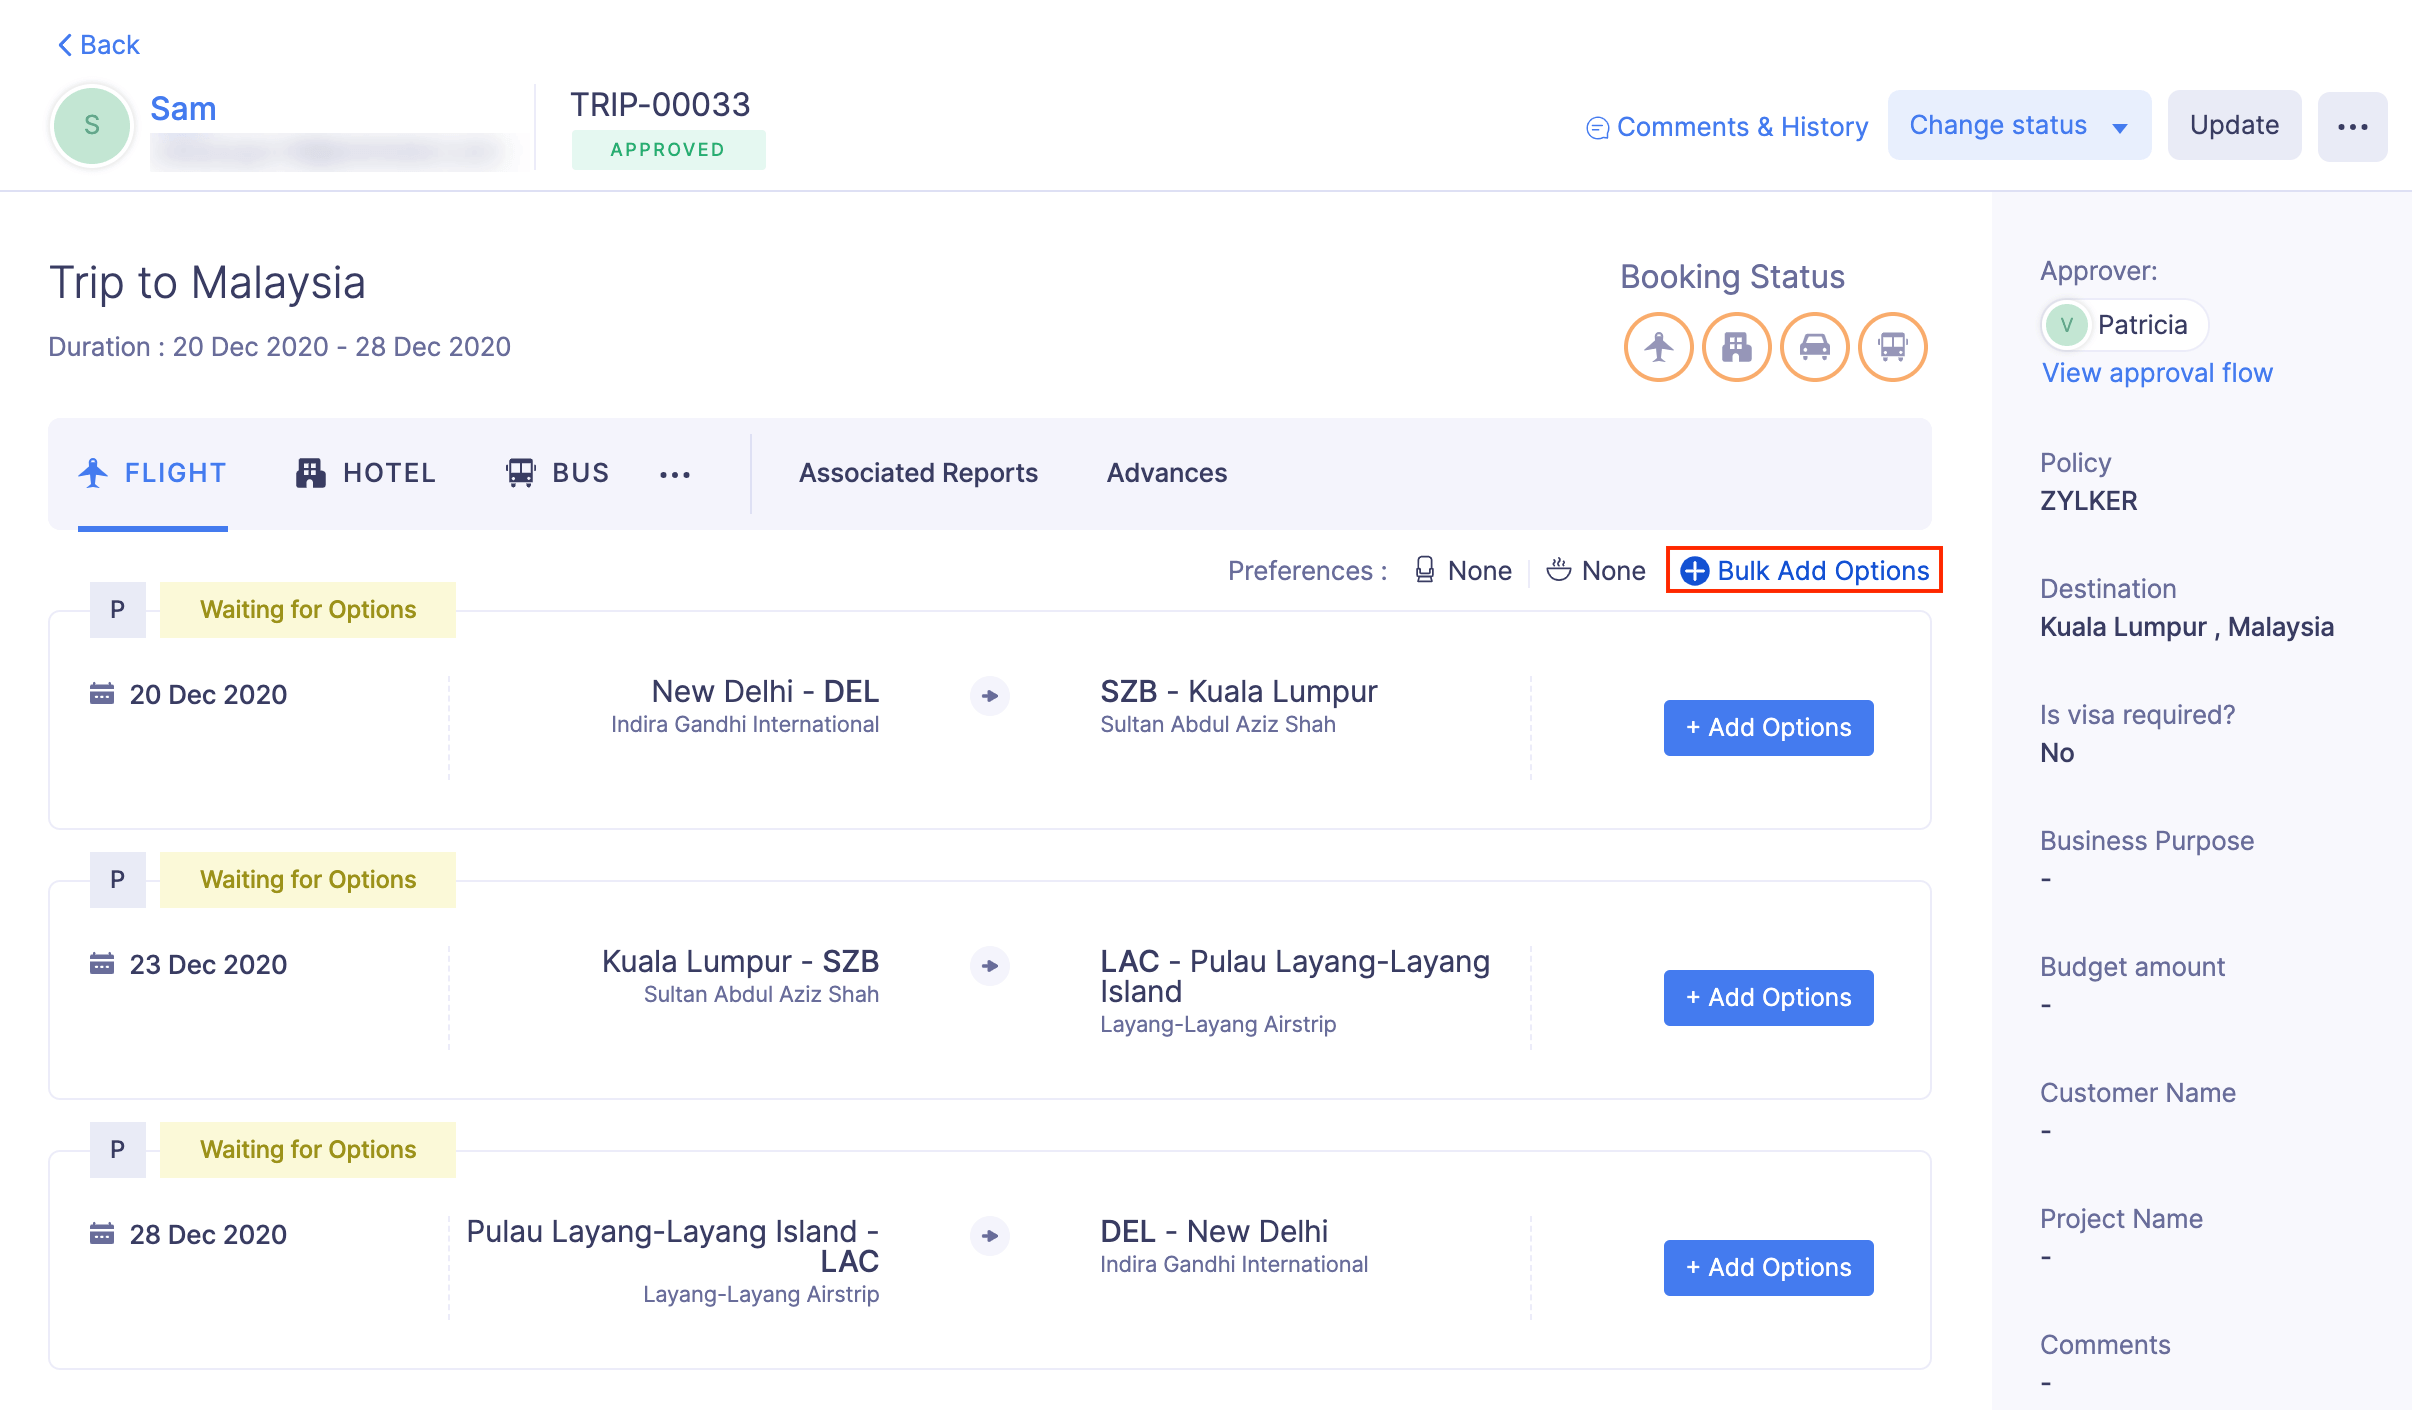
- Click the + Bulk Add Options in the top right corner of the itinerary.
- Select the itineraries for which you want to bulk add options and click Next.

- Fill the relevant details.
- Click Save and Send.
- Once this is done, the trip options that you’ve added will be sent to the traveler and they can select the preferred option from them.
Edit Options
If you (travel desk) would like to make any changes to the options added, you can choose to edit them. To edit an option:
- Click Admin View.
- Go to Trips.
- Click the trip request for which you would like to edit the options.
- Navigate to the itinerary for which you want to edit the options and click the Edit Options button.
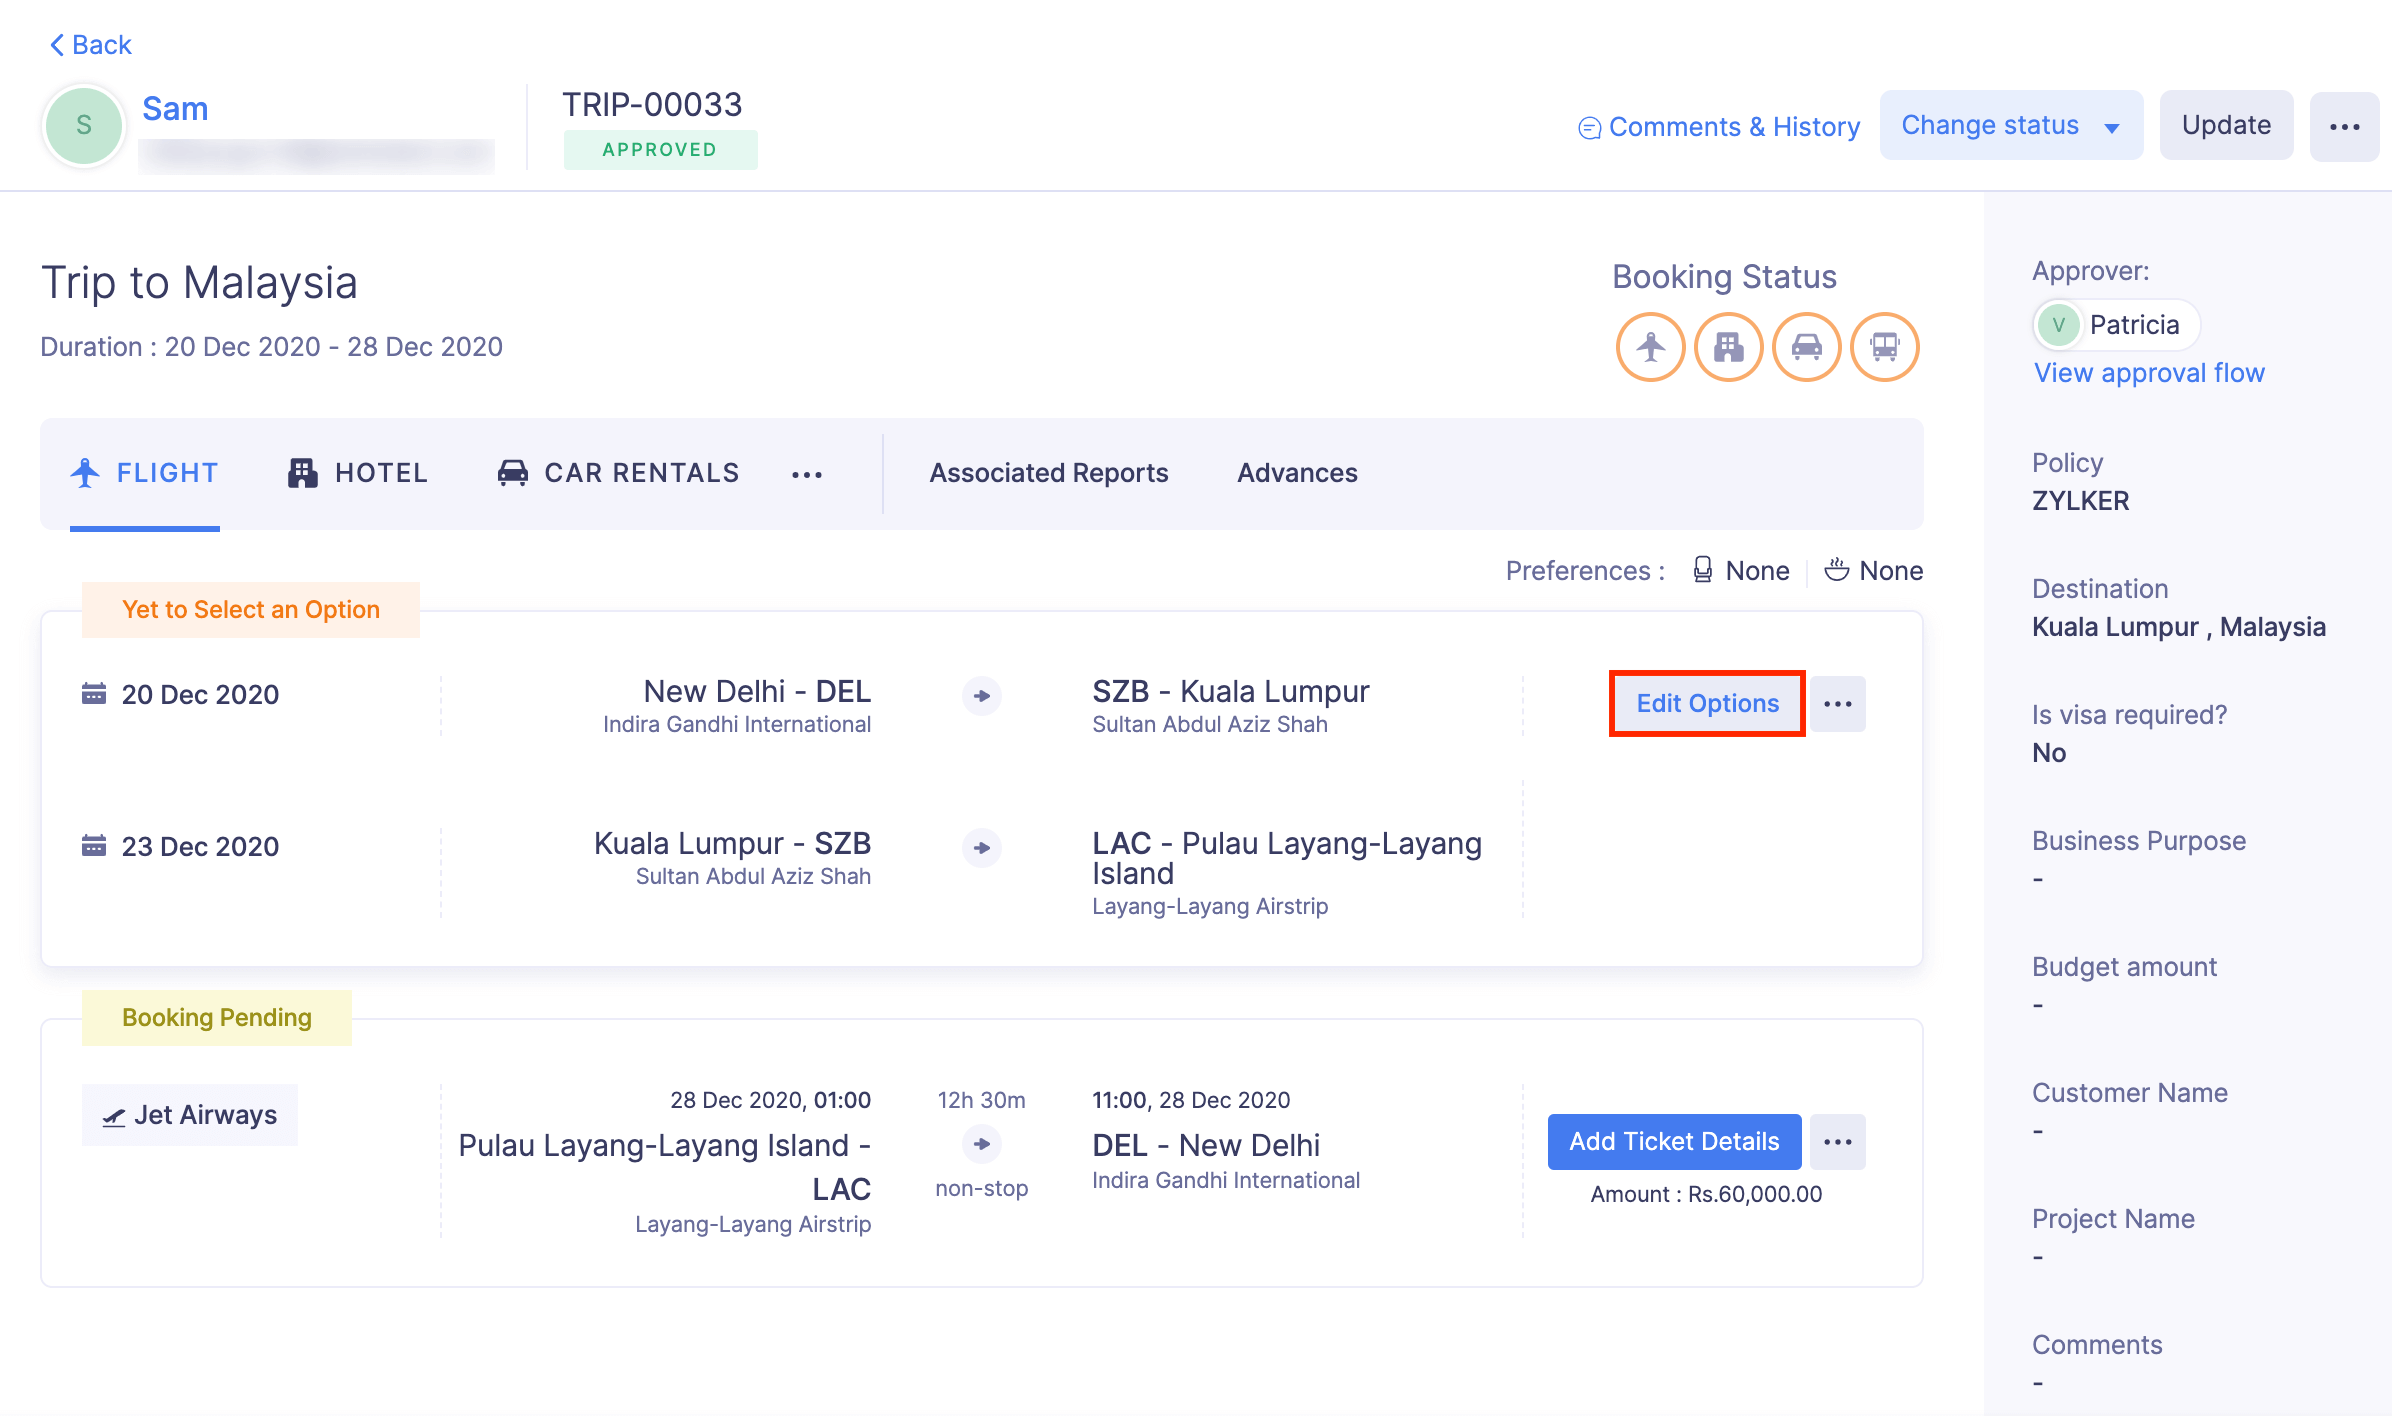
- Edit the required details.
- If you(travel desk) want to edit the options after the traveler has selected an option, you have to click the More icon at the right corner of the itinerary and select Edit Options. Also, you must provide a reason for editing the options in the Reason for Editing box.
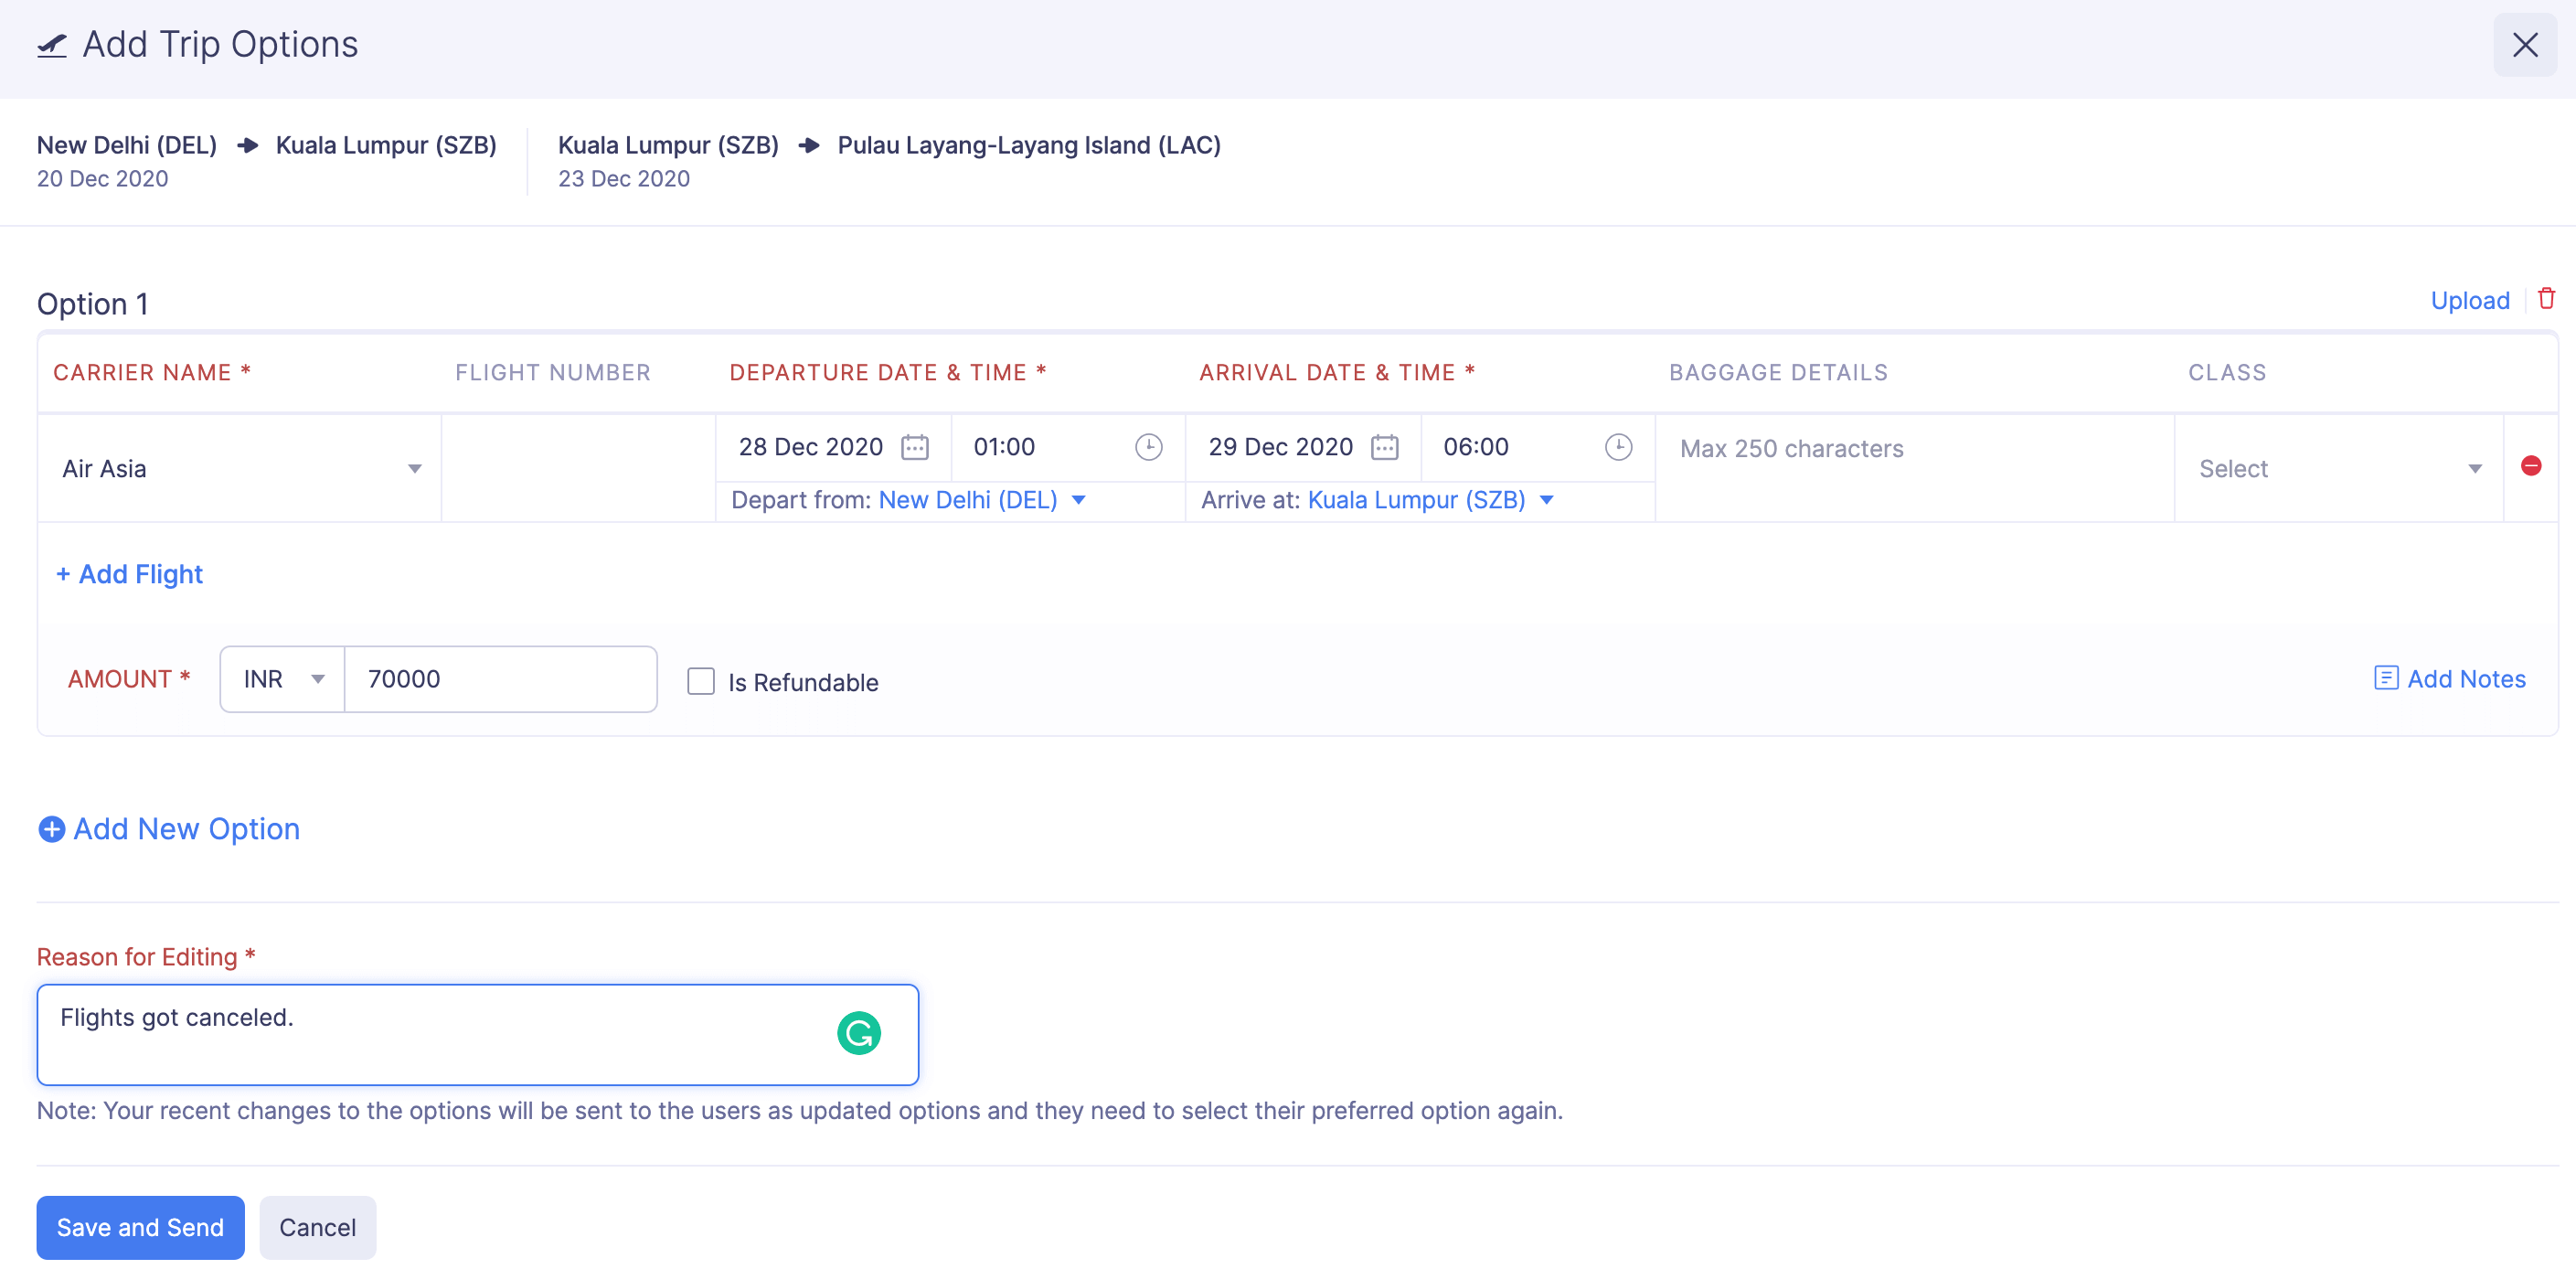
- Click Save and Send.
- Once this is done, the changes will be updated in the traveler’s trip itinerary. If you’ve provided a reason for editing, it will be shown when the traveler hovers over the Options Updated status in their trip itinerary.
Add More Options or Resend Same Options
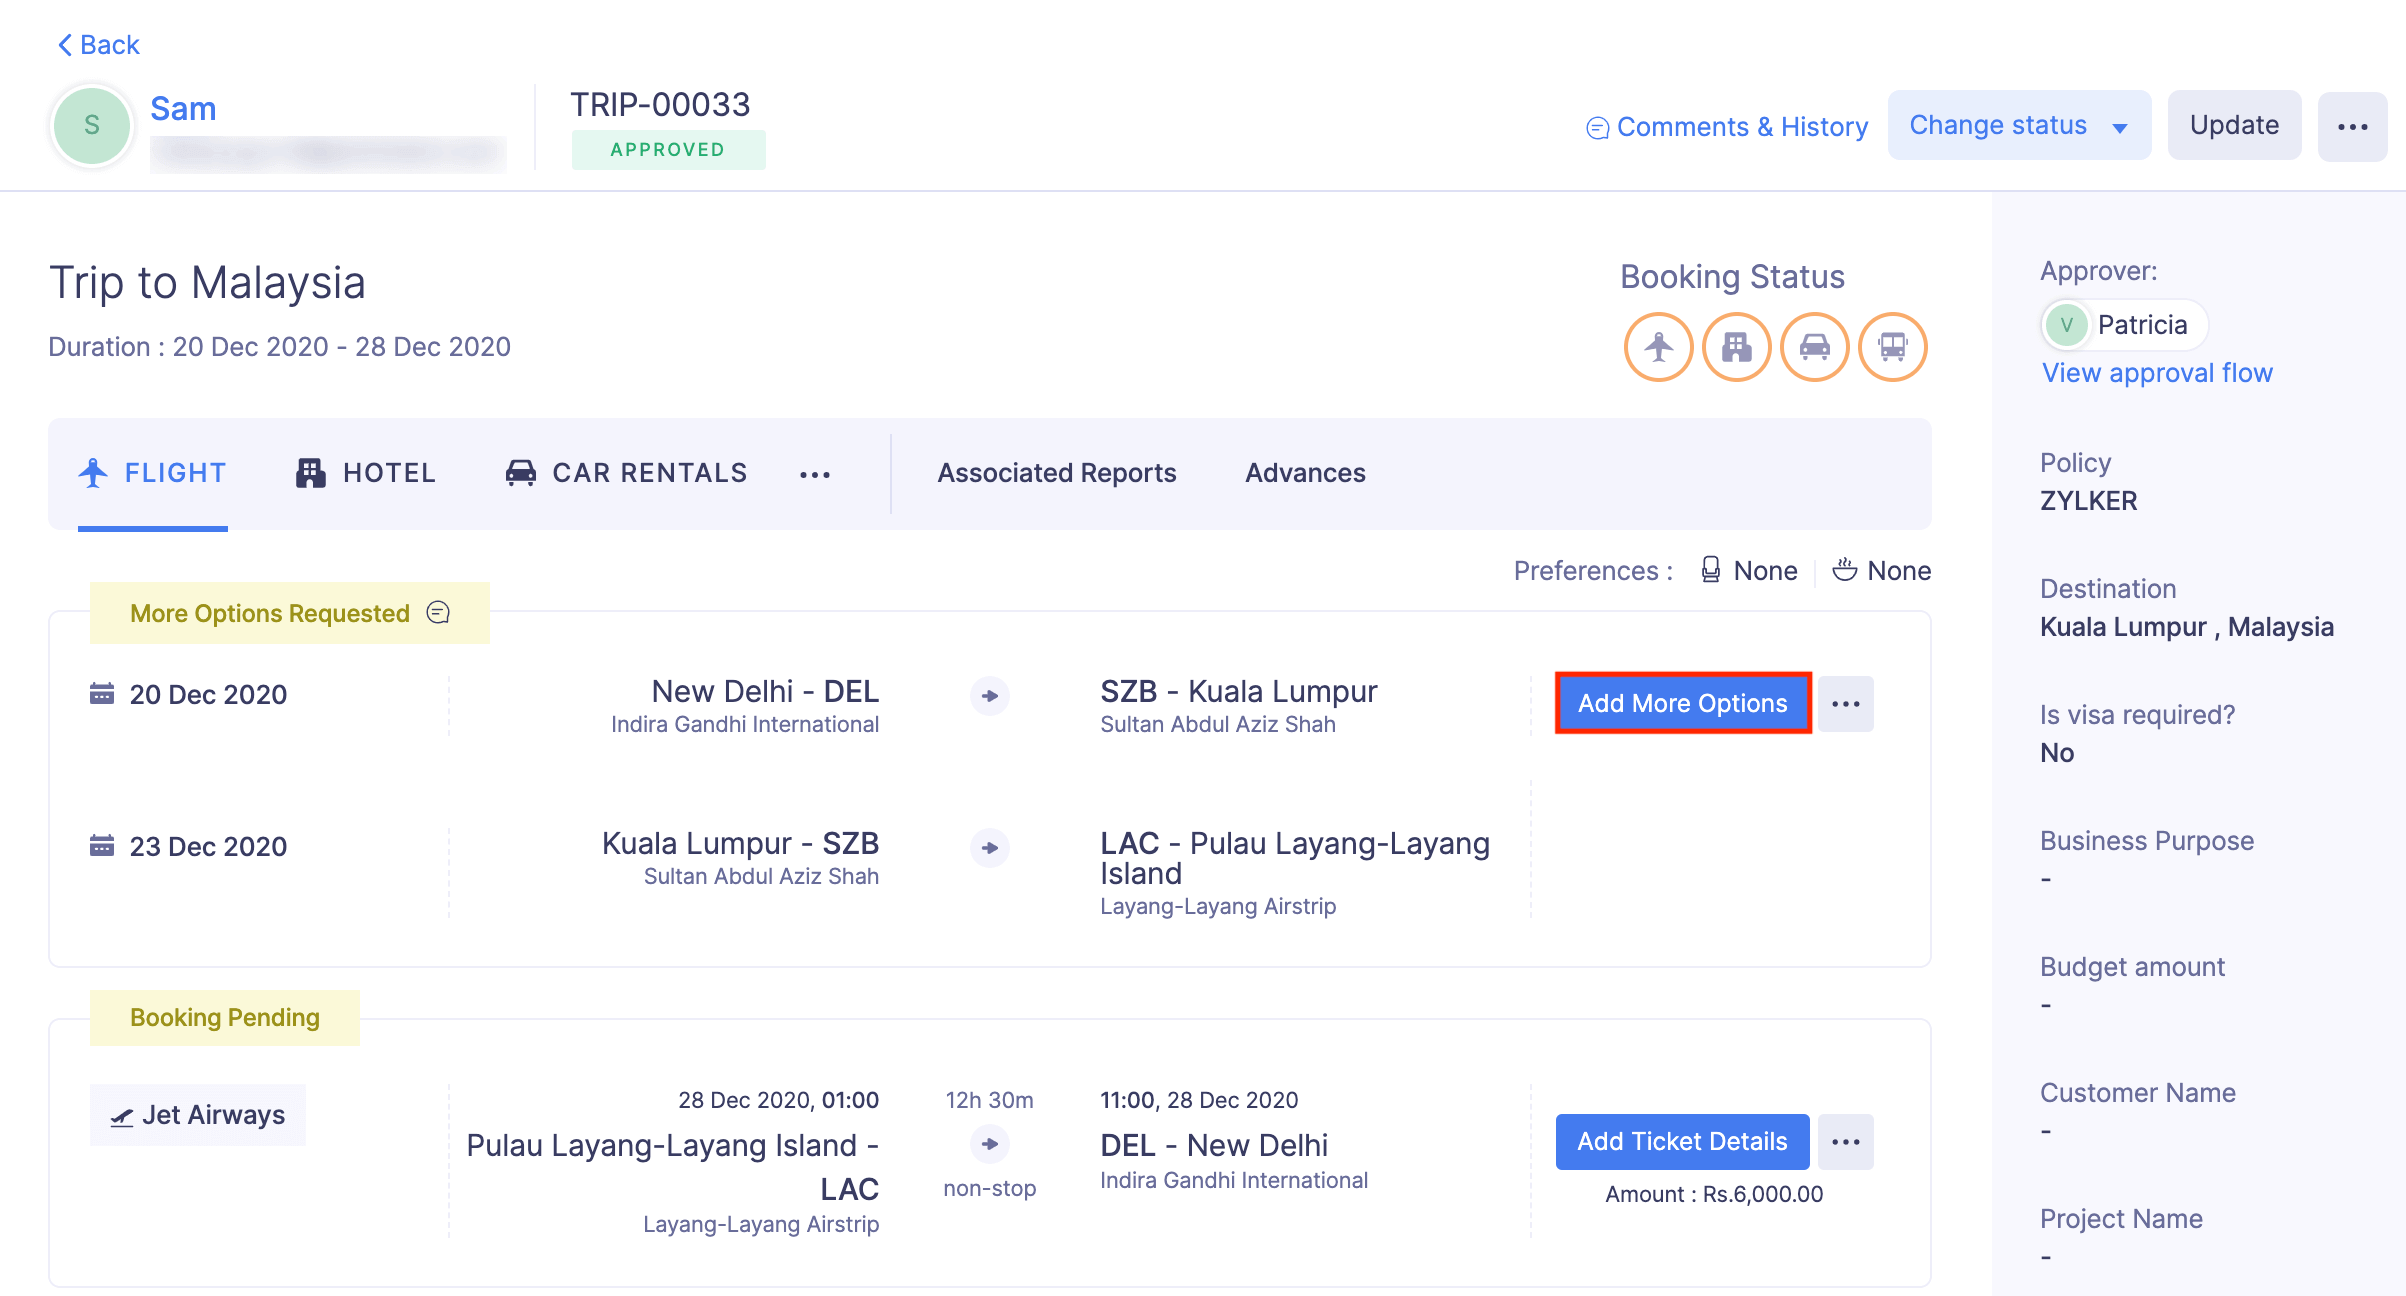
If a traveler requests more options, the trip itinerary will be labeled as More Options Requested. You (travel desk) can add more options or resend the same options, after which the traveler can select the preferred option. To add more options:
- Click Admin View.
- Go to Trips.
- Click the trip request for which the traveler has requested more options.
- Click Add More Options button in the right corner of the itinerary.
- Click the + Add New Option and add the new options.
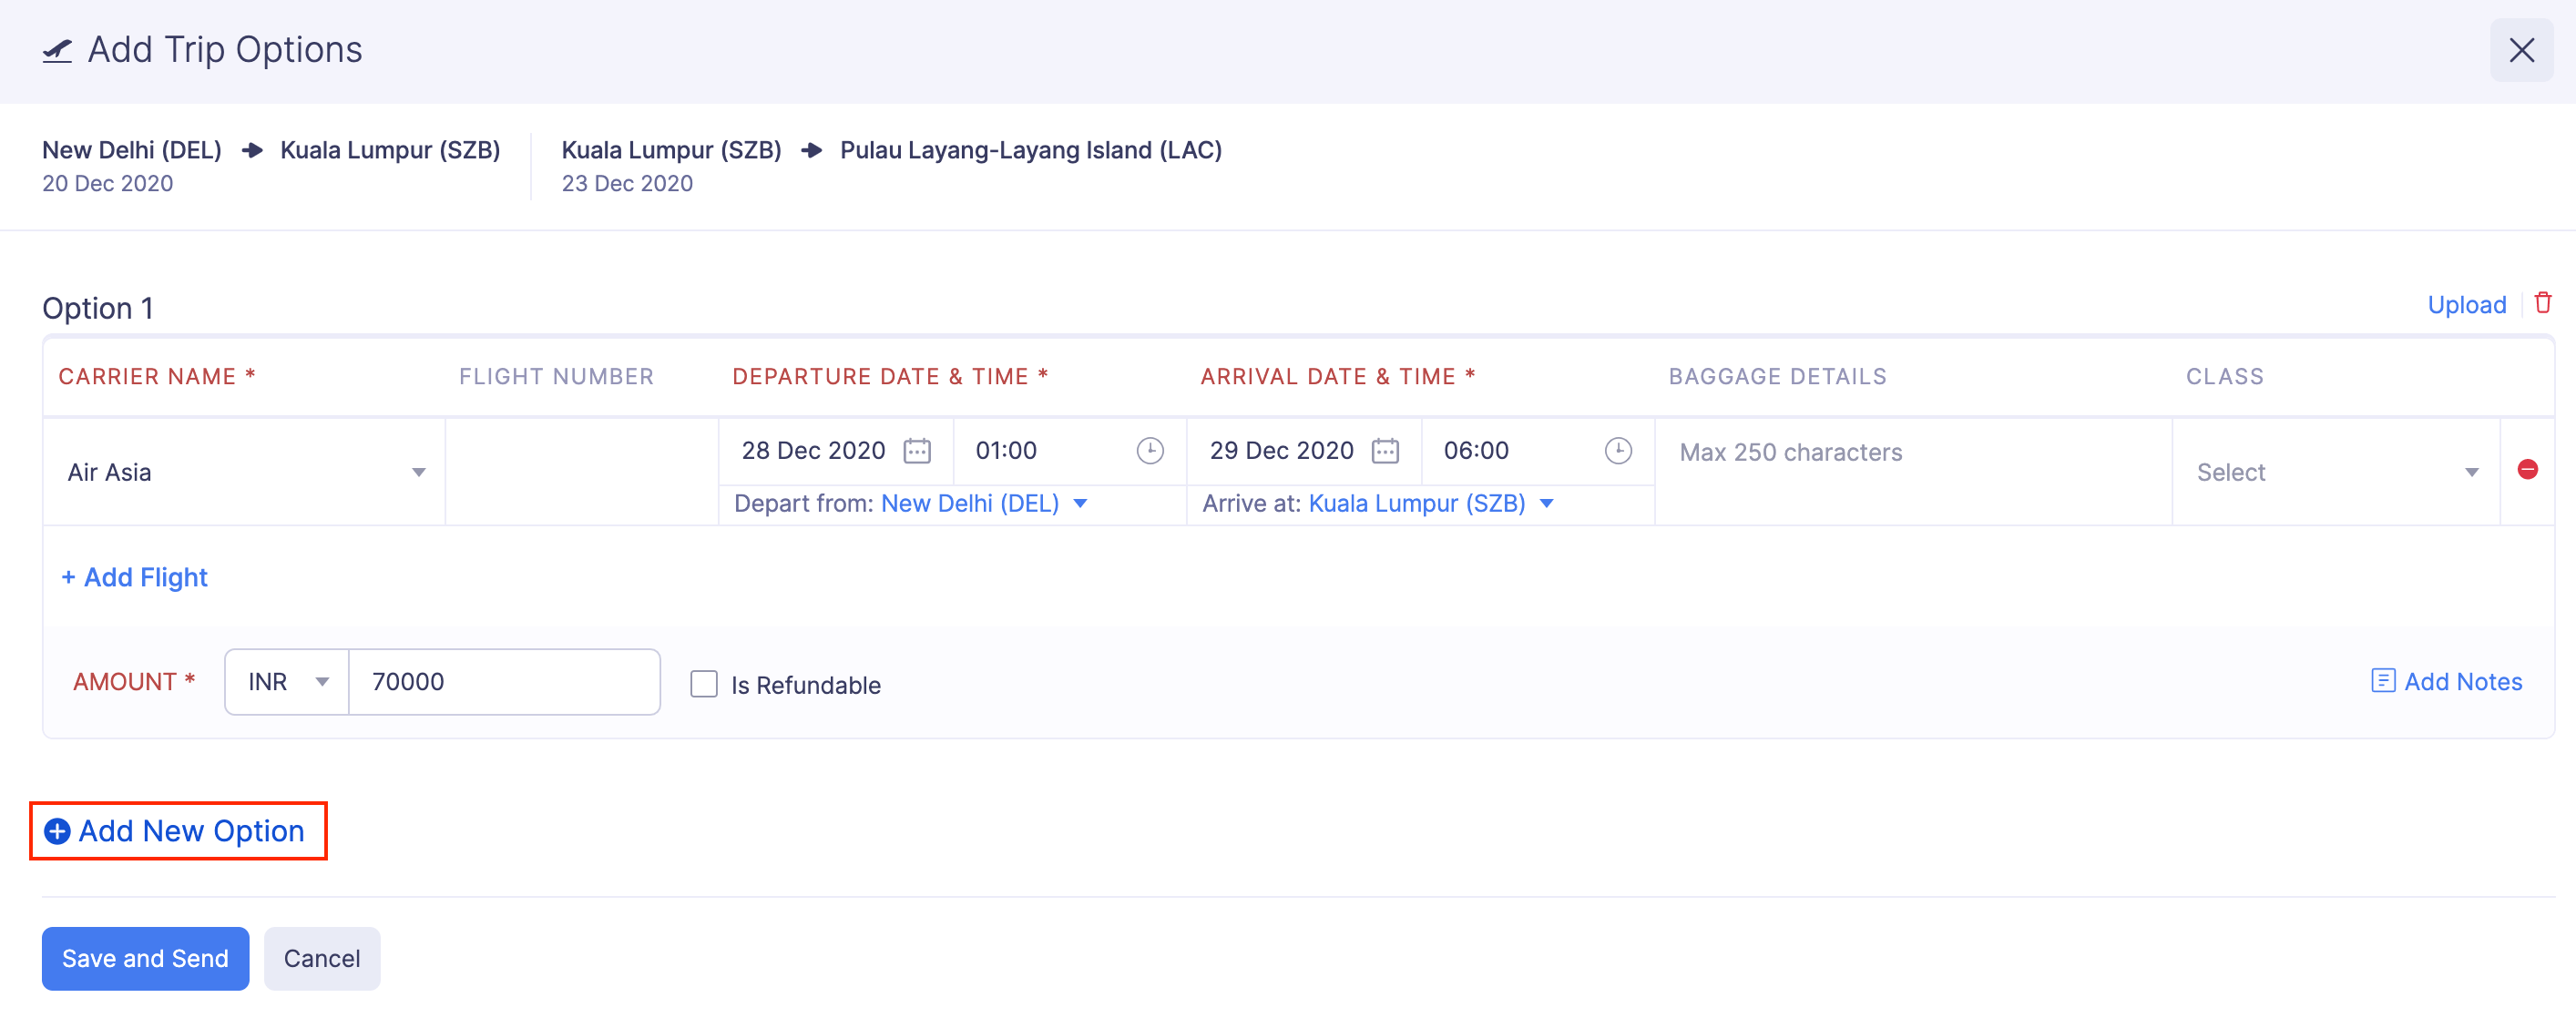
- Click Save and Send.
If the travel desk doesn’t have more options, they can resend the same options. To resend the same options:
- Click Admin View.
- Go to Trips.
- Click the trip request for which the traveler has requested more options.
- Click the More icon and select Resend Same Options.
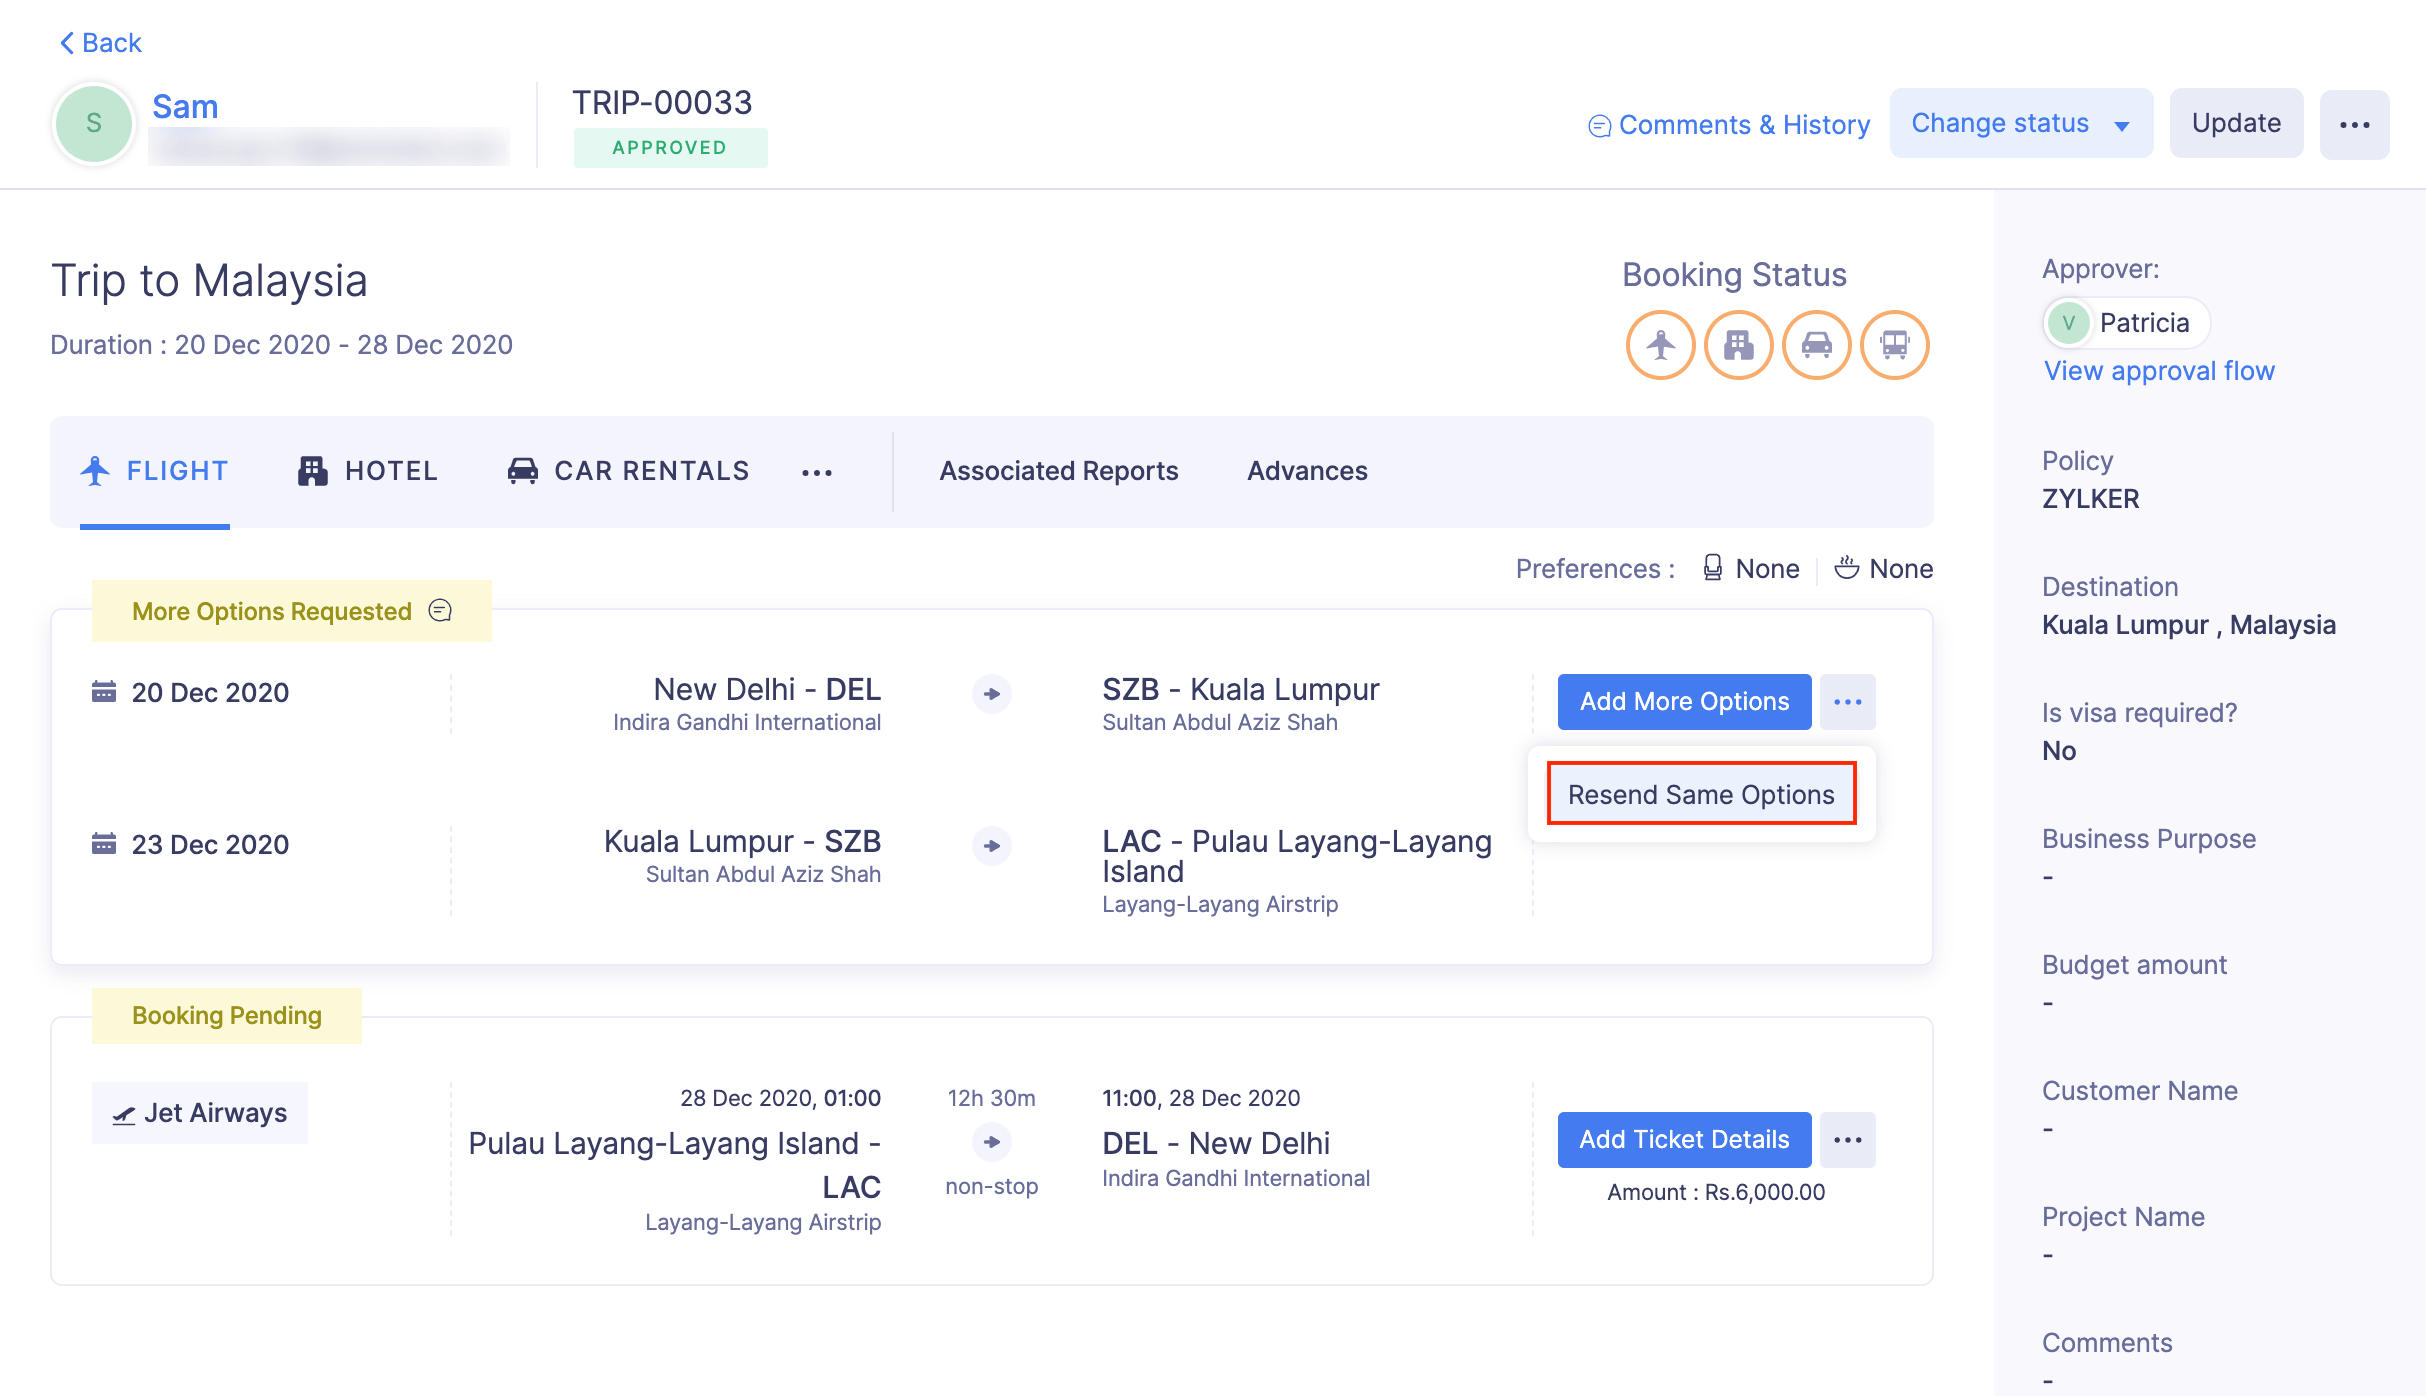
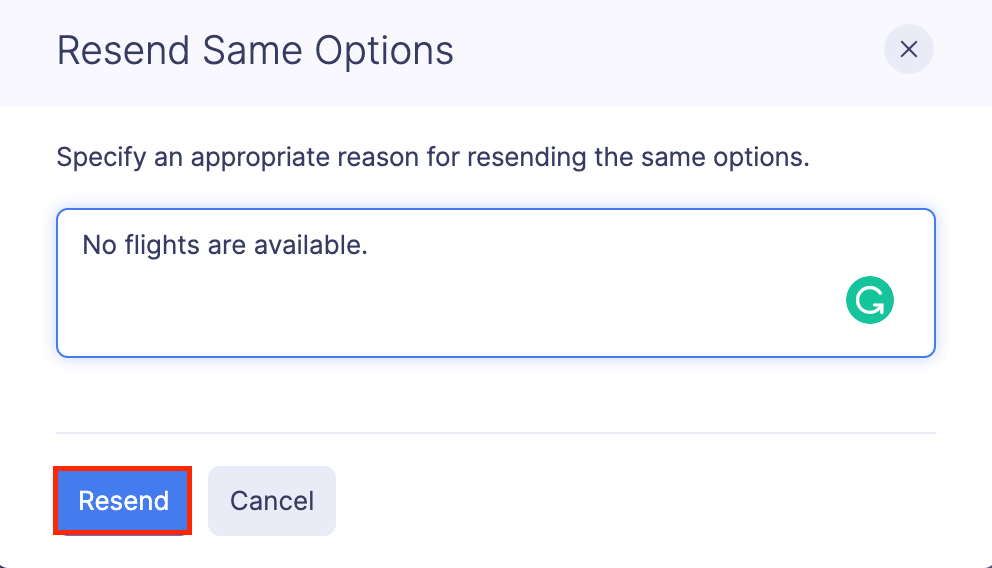
- Provide a reason for resending the options in the Resend Same Options box.
- Click Resend.
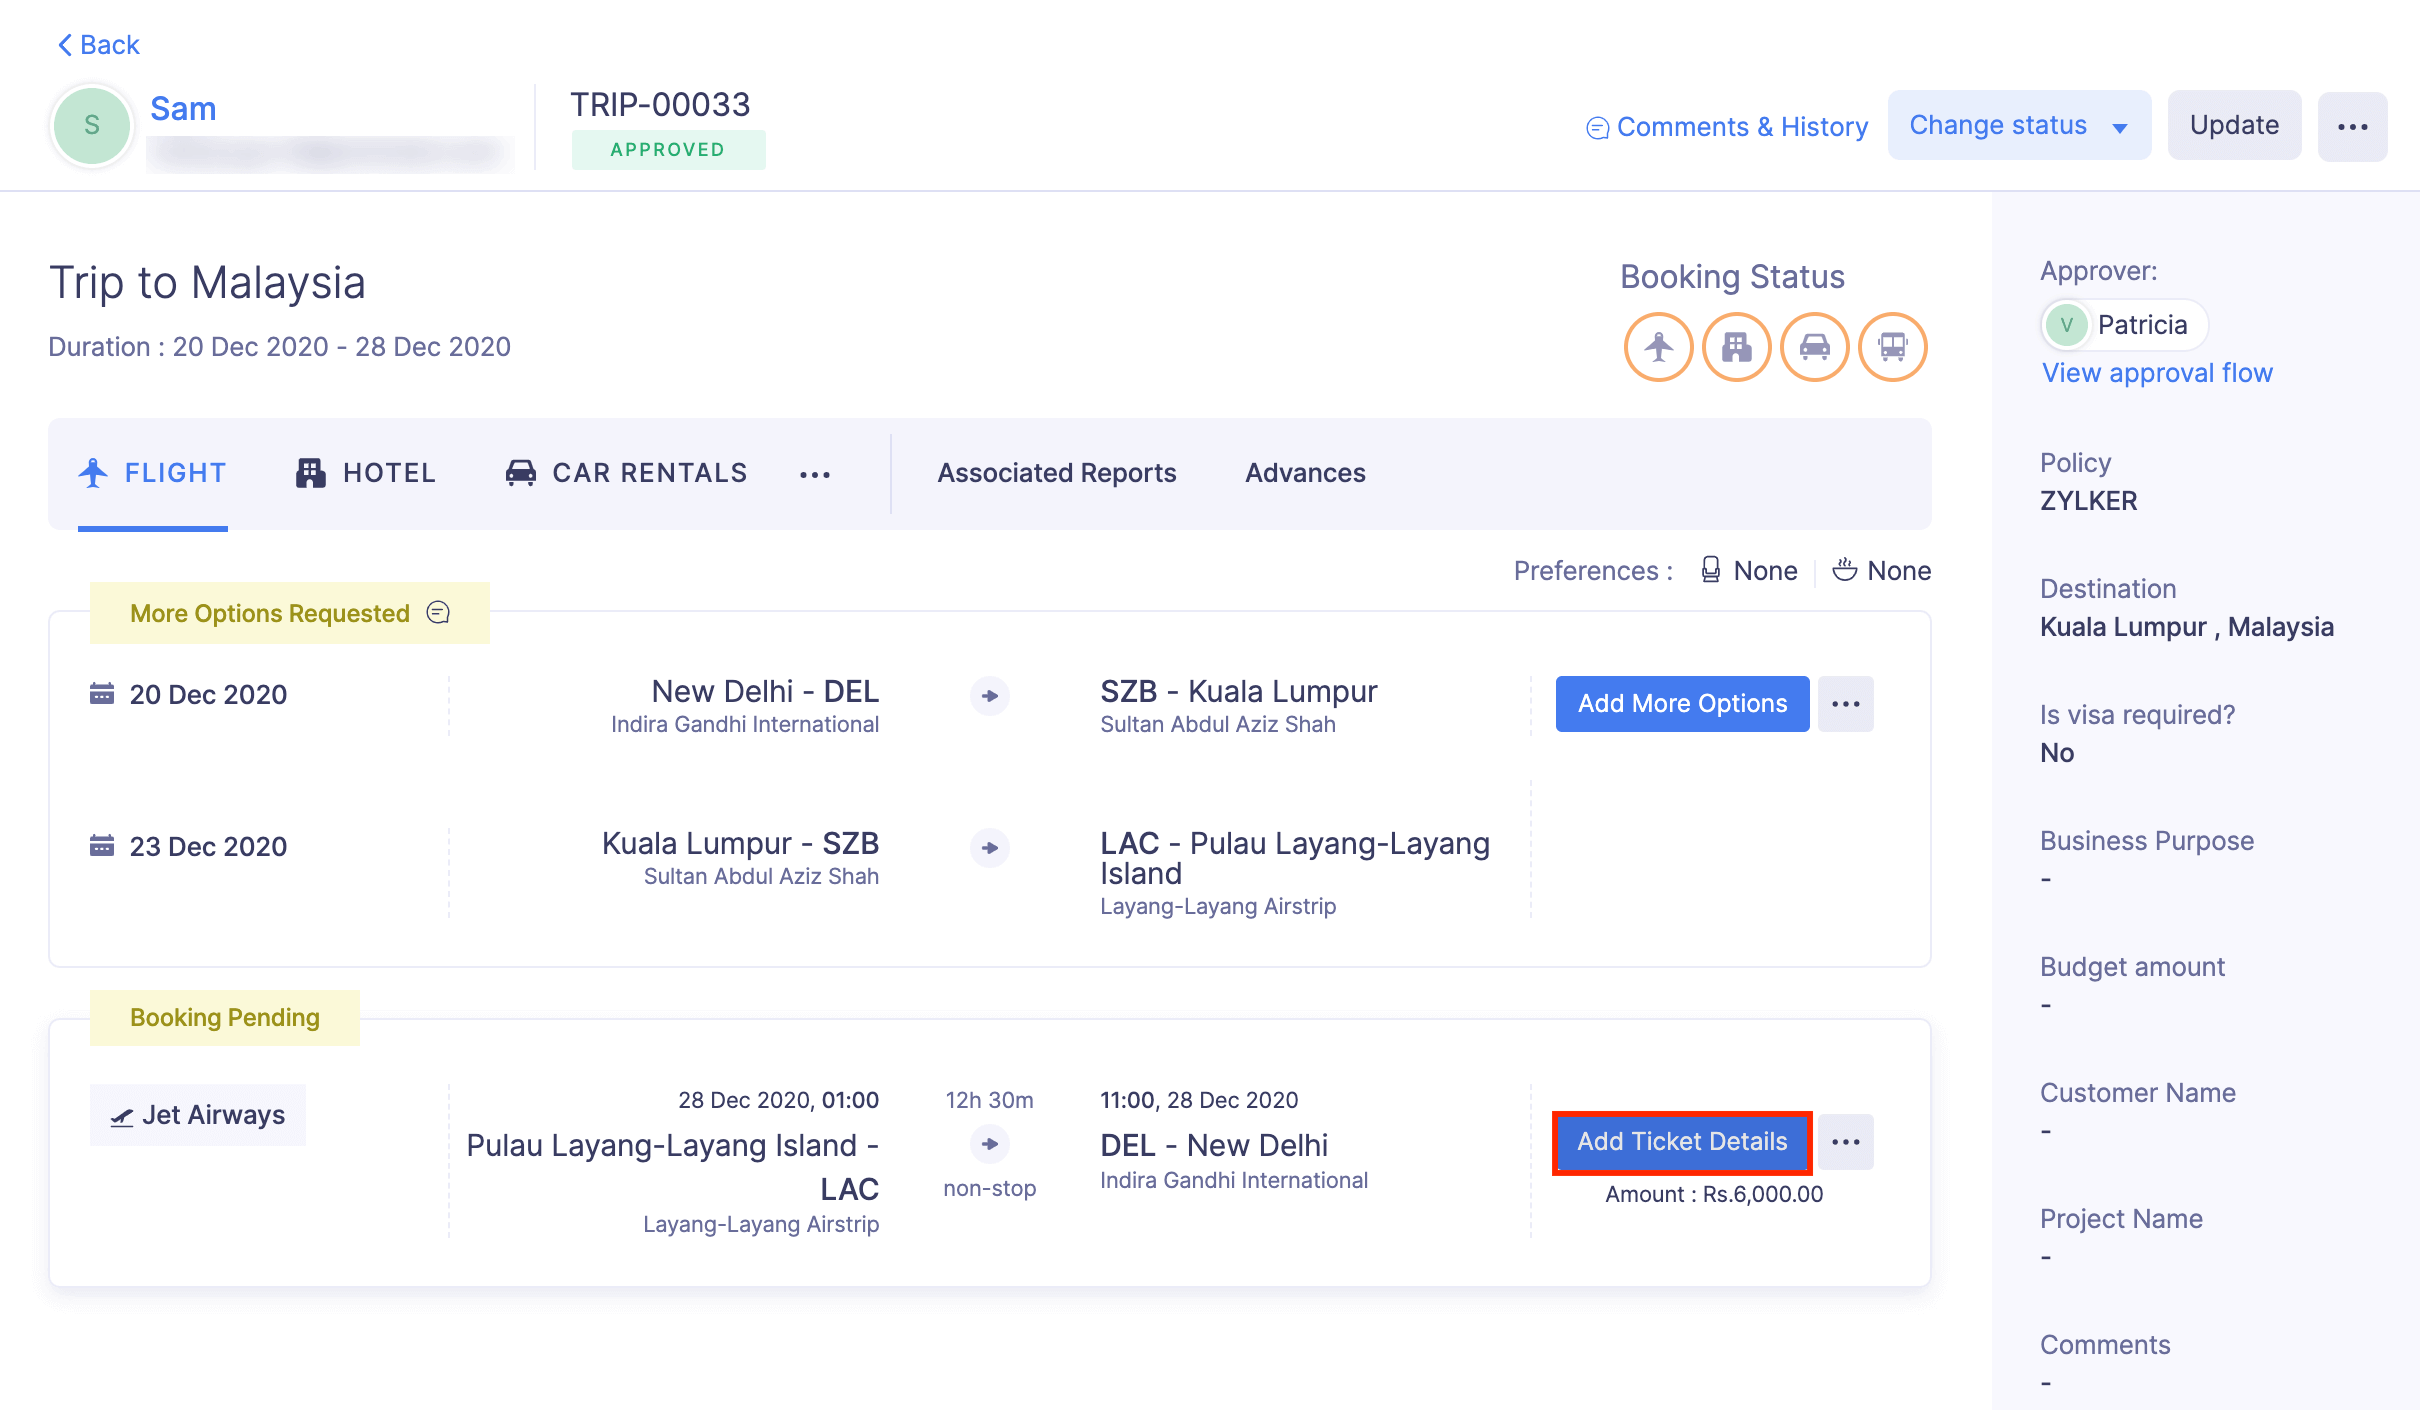
Add Ticket or Booking Confirmation
Once the option is selected, you (travel desk) can make the bookings and add the booking details to Zoho Expense. To add ticket or booking details:
- Click Admin View.
- Go to Trips.
- Click the trip request with the selected option to add ticket or booking details.
- Click the Add Ticket Details or Add Booking Details in the right corner of the itinerary.
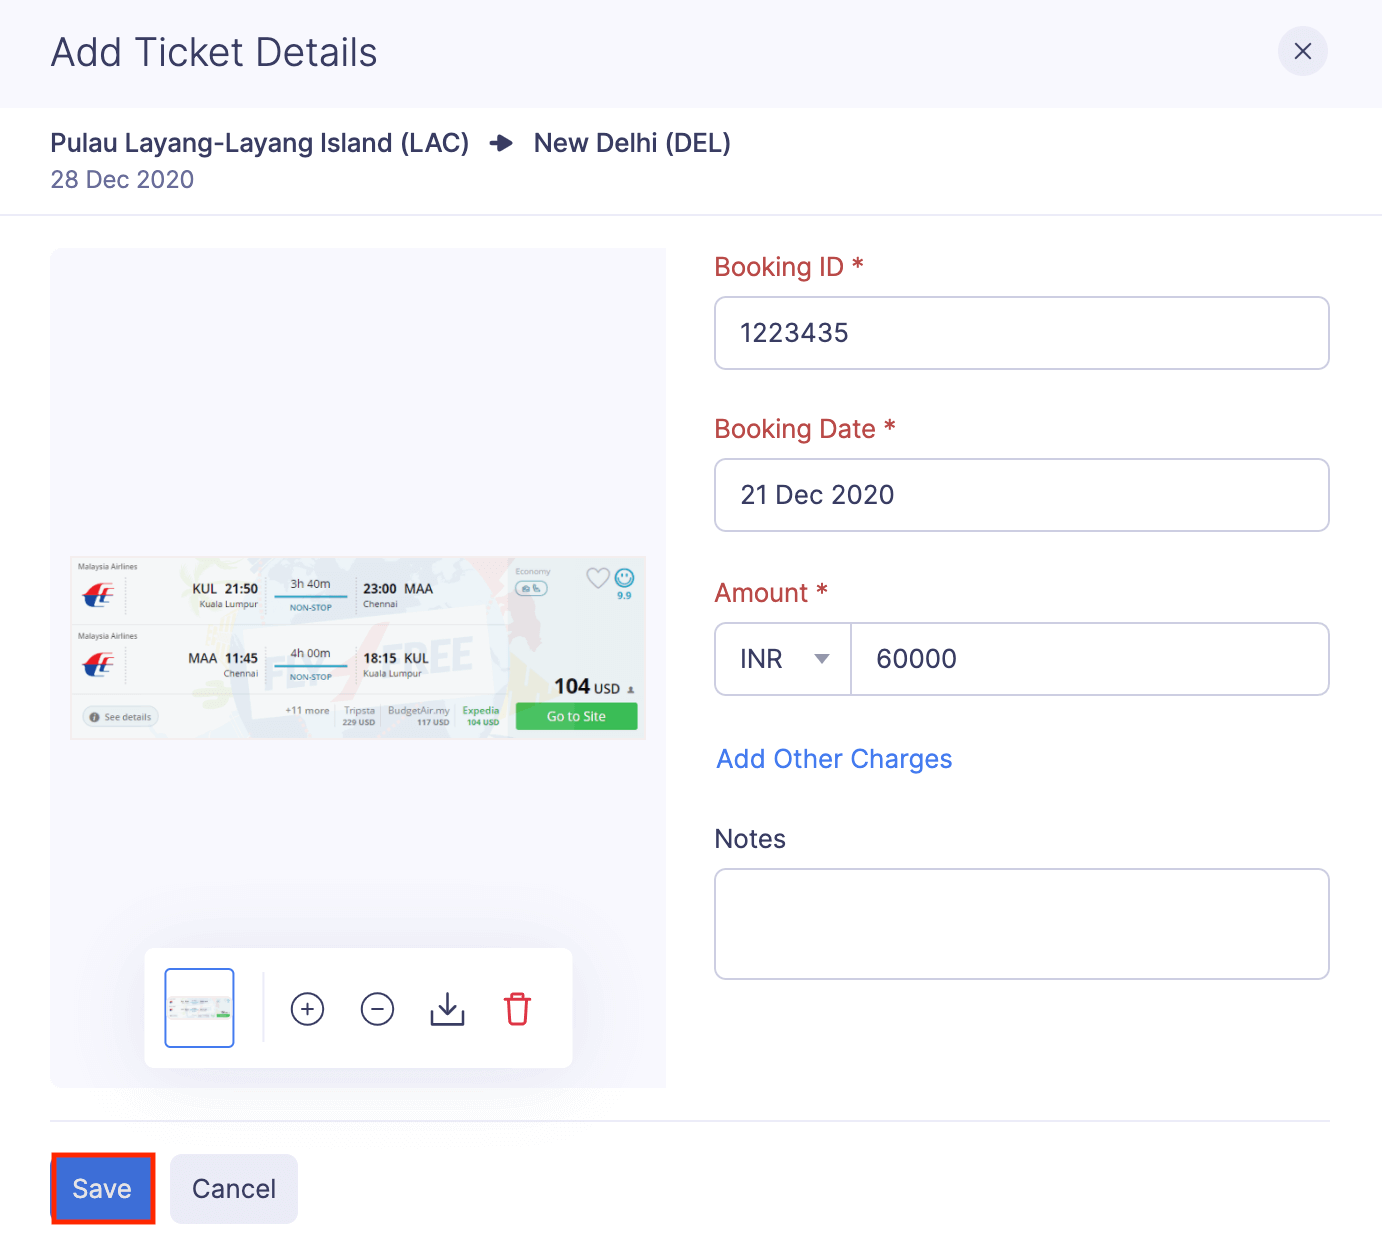
- Enter the following details in the Add Ticket Details or Add Booking Details:
- Booking ID
- Booking Date
- Amount
- Notes
- Click Attach documents from computer and upload the ticket or booking confirmation.
- Click Save.
- Once you enter these details, the booking process will be completed and the traveler can download the ticket or the booking confirmation.
Note: If the admin or the policy admin has configured cost approval for bookings, the selected option will be sent for approval. After the selected option is approved, you (travel desk) can make the bookings.