Connections
Connections enable you to connect Zoho Expense with third party services and access their data securely. In Zoho Expense, you can create connections and use them in custom functions, custom buttons, and schedules to access data from third party services.
Create a Connection
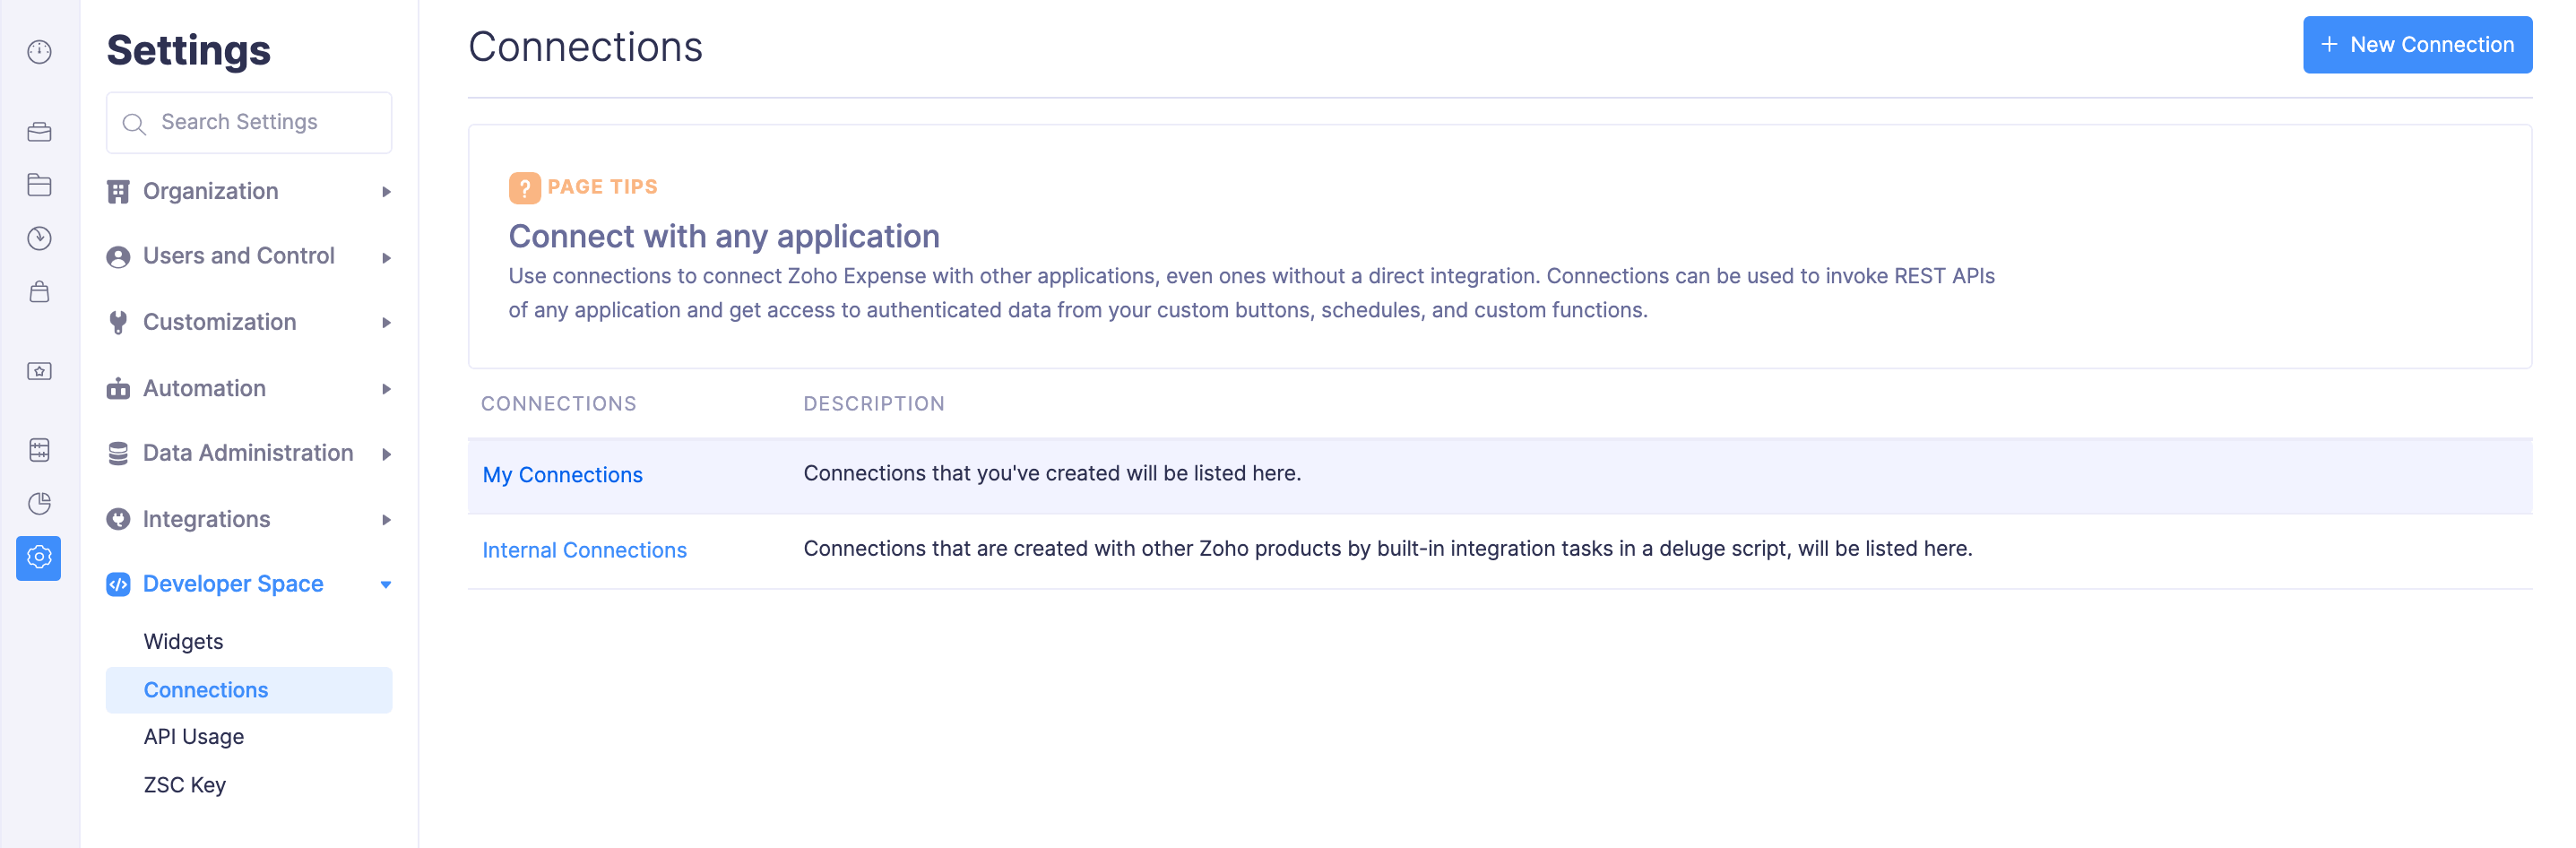
- Click Admin View.
- Go to Settings on the left sidebar.
(OR)
Click the Gear icon at the top right corner of the screen.
- Click Connections under Developer Space.

- Click + New Connection at the top right corner.
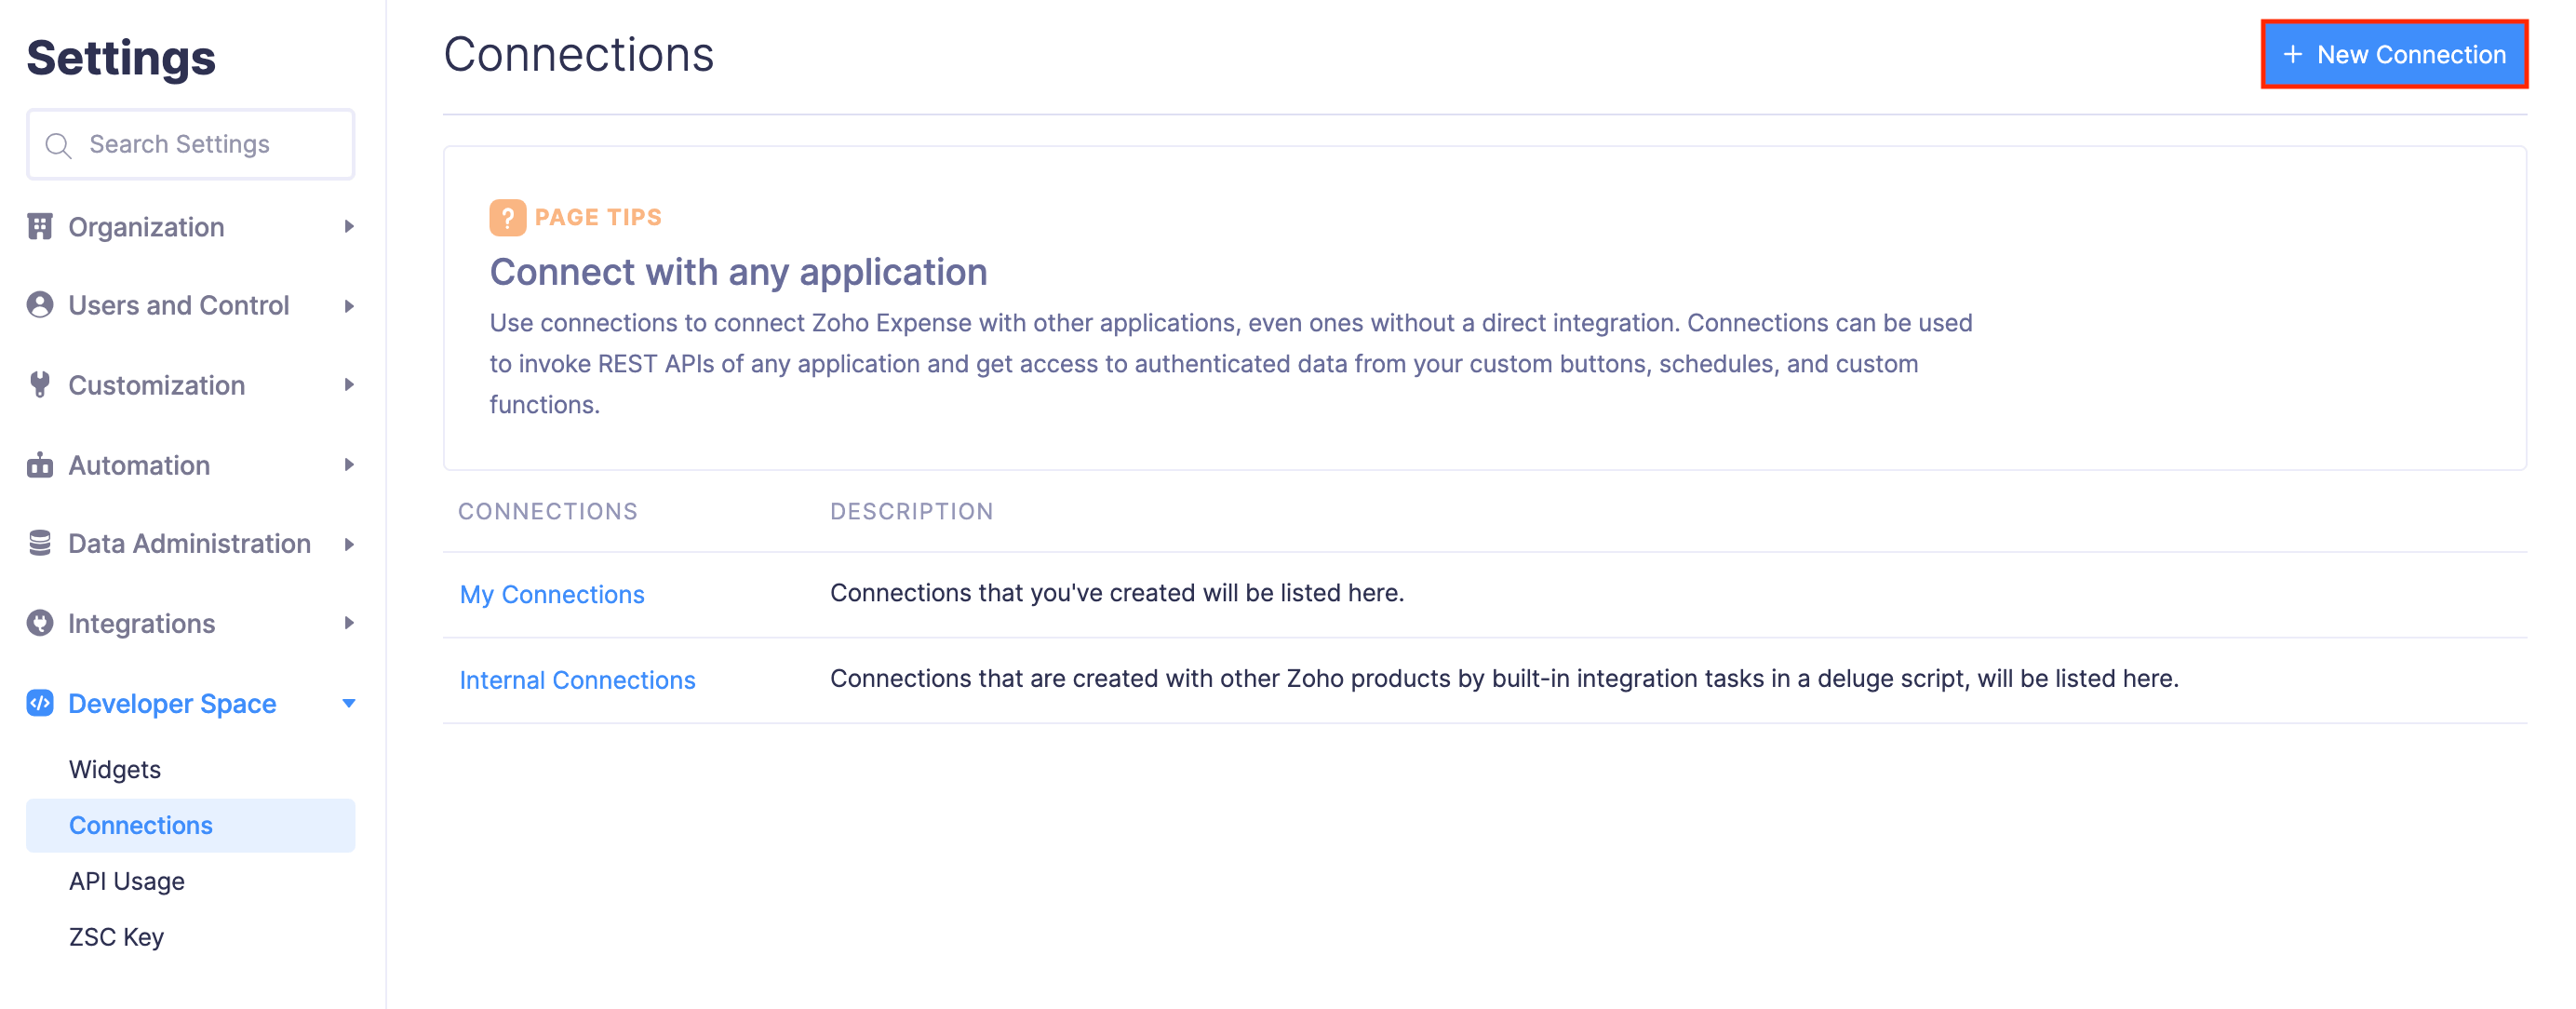
- Under Pick Your Service, you can select the type of connection you want to create.
- Select a Predefined Service if you want to connect with an app that Zoho Expense has pre-configured for you or navigate to the Custom Services tab to connect with other third party services.

- Enter the connection details based on the service you’ve selected.
- Click Create And Connect. A connection will be created with the third party app. Once you create the connection, you can make changes to the connection’s name and its scope only.
Once you create a connection, it will be listed under My Connections. My Connections will also list the connections that are created across the organization by other users.
If a connection was created using built-in integration tasks in custom functions, custom buttons, or schedules, they will be listed as a connection under Internal Connections.
Note: You cannot edit or delete Internal Connections.
Types of Connections
There are two types of connections in the create connections page:
- Predefined Service
- Custom Services
Predefined Service
Predefined services are the Zoho apps and the third party services that Zoho Expense has pre-configured for you. You will have to enter only the basic details required to set up the connection.
To create a predefined connection:
- Click Admin View.
- Go to Settings on the left sidebar.
(OR) Click the Gear icon at the top right corner of the screen.
- Click Connections under Developer Space.
- Click + New Connection in the top right corner.
- Under Pick Your Service, select a Predefined Service.
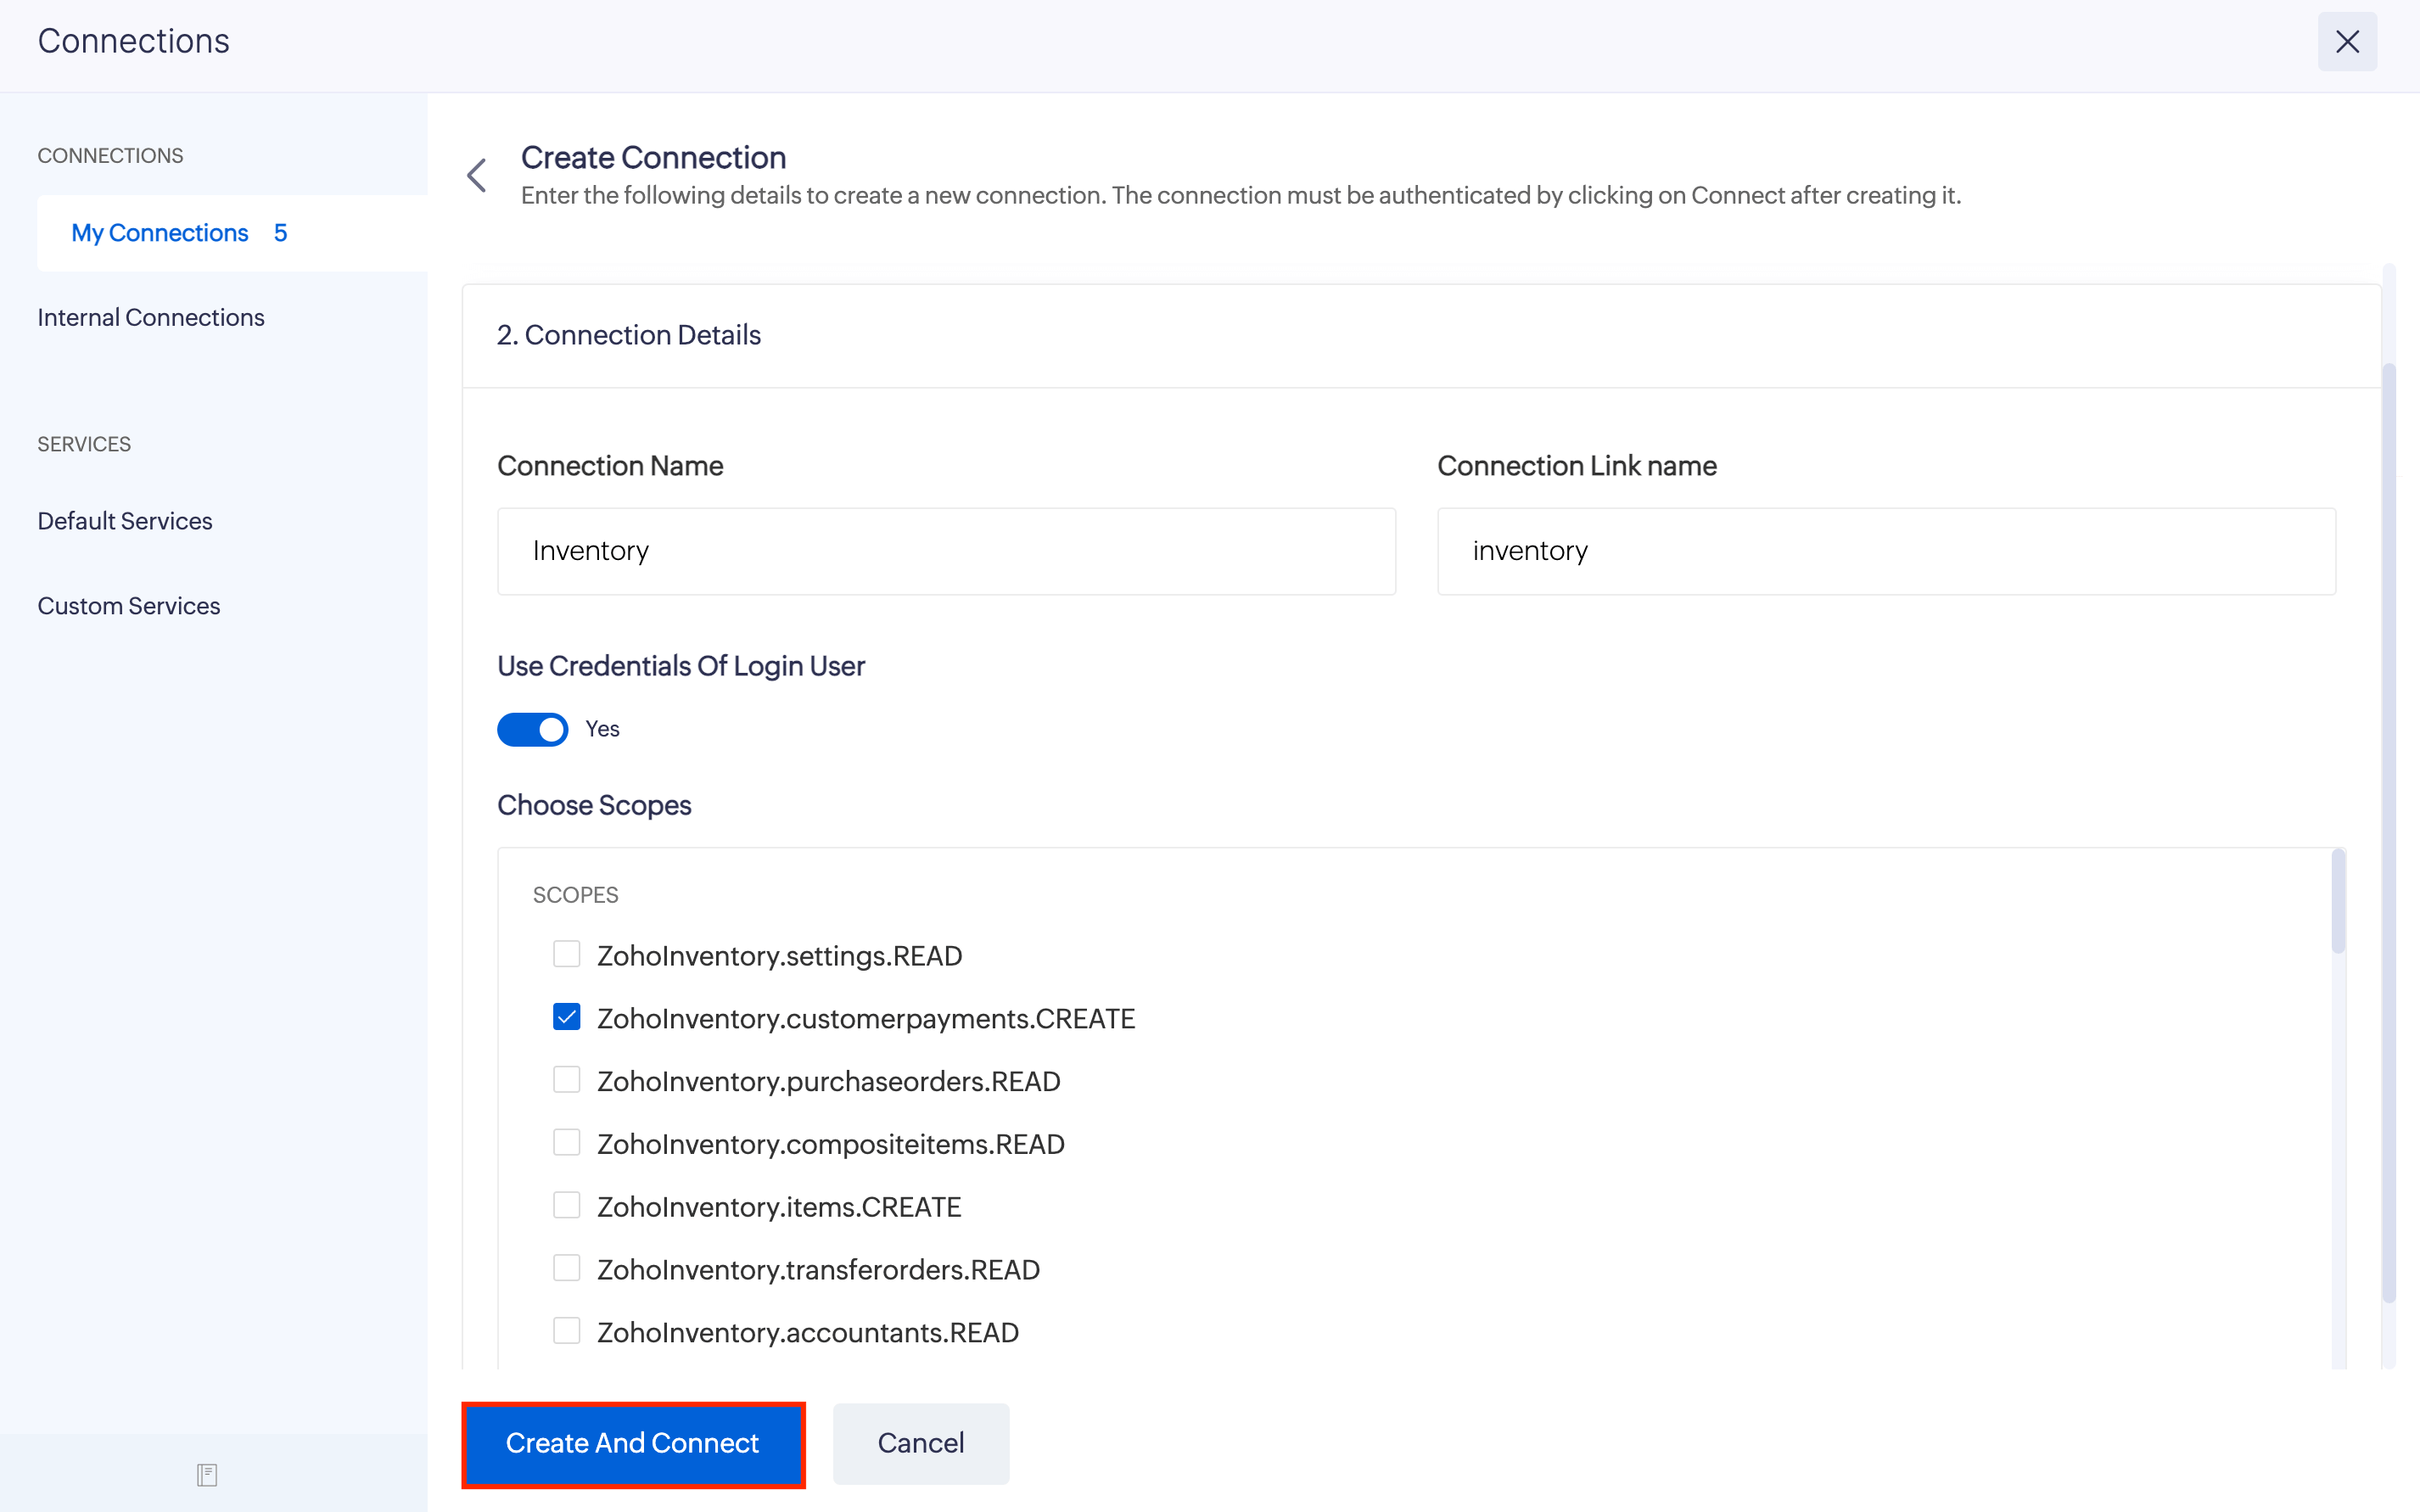
- Enter the Connection Name you want to have.
- Select the Scope if required, depending on the application’s prerequisites.
- If you require a connection to have a user’s own login credential while executing the deluge script, mark the Use credentials of login user option. Unmark this option, if you require all the connections to execute the deluge script with the same credentials of the user who created and authenticated the connection.
- Click Create and Connect. A page requesting for further details will appear.
- Grant access for the connection to take place.
Custom Services
Custom Service connections can be found in the Custom Services tab. You can connect with other third party services that are not listed under the Predefined Service section. You will have to enter specific details such as the Authentication Type, Authentication specific details, and Scope name.
The Authentication Type to create a custom service connection varies from one application to another. Here, let’s learn how to create a custom service connection with OAuth 2 as the authentication protocol. You need to do the following (assuming OAuth 2 as the authentication protocol):
- Register an OAuth client with the third party app.
- Create a connection using details from the newly registered client
Register an OAuth client
For Zoho apps, you can register a new OAuth client from the developer console. While registering the client, you will be asked for a redirect URL. Copy-paste the following URL: https://deluge.zoho.com/delugeauth/callback. For other applications, you can register the OAuth client from the respective application’s developer console.
Create a connection
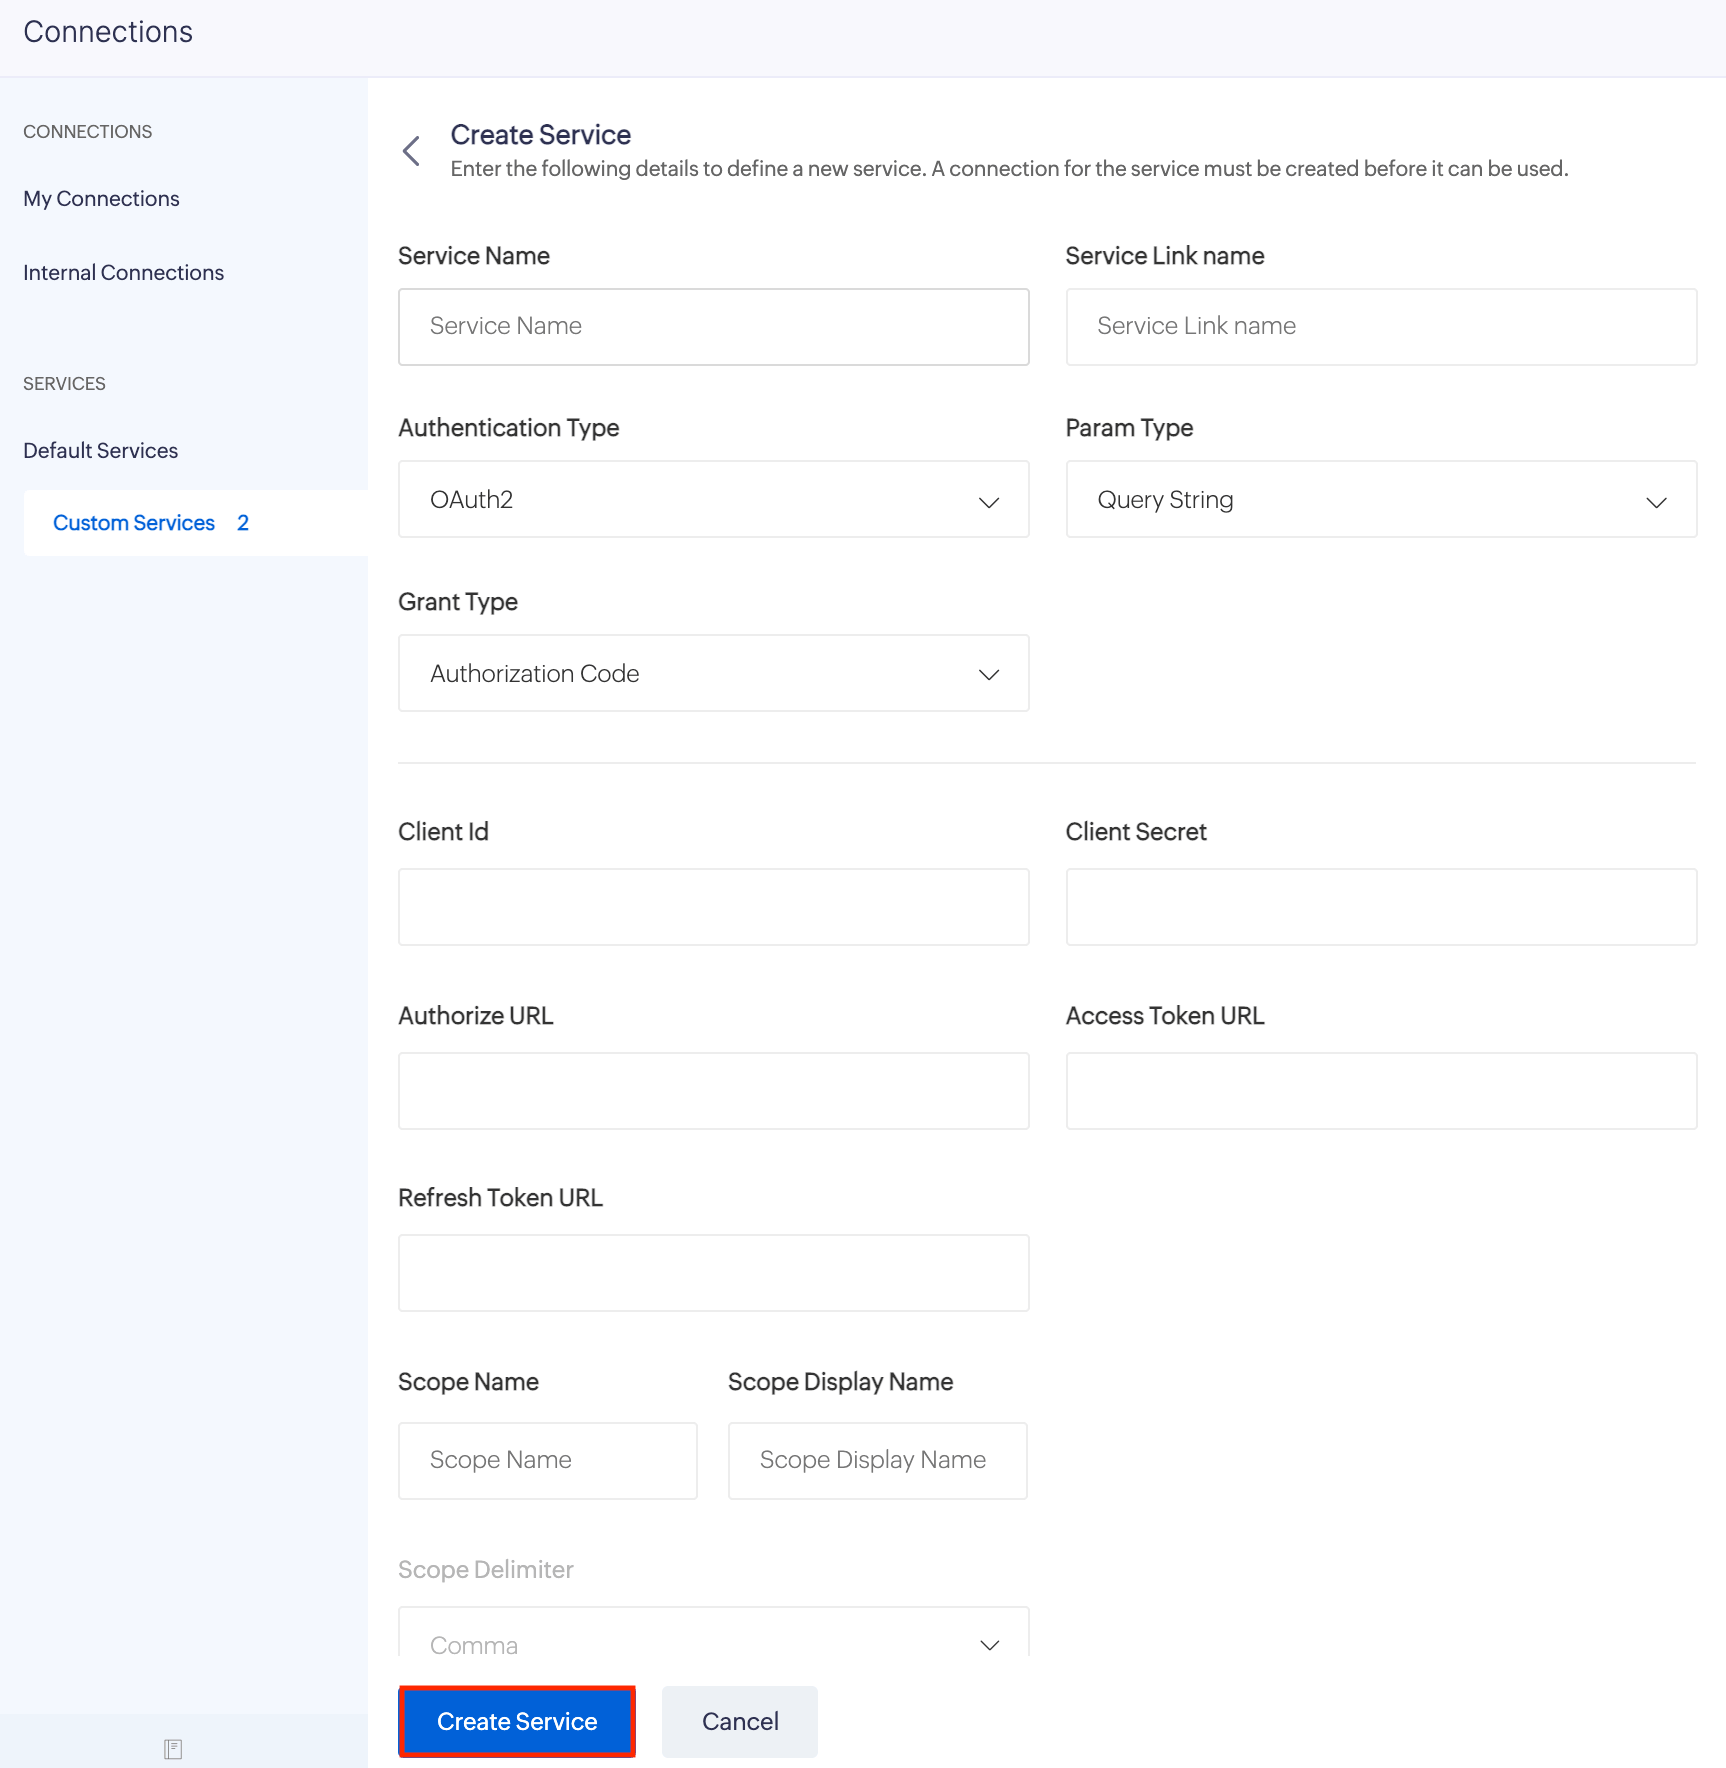
- Once a client has been registered, you will have to go to the Custom Services tab and click + Create New Service.

A new page will open.
- Fill in the following details to create the connection:
Fields Description Service Name Name of the service to which you wish to connect. Authentication Type The protocol used for authentication. Param Type The authentication parameter that is added during API calls while making a connection. Grant Type You can choose the Grant type that the desired service uses to perform authorization. You can choose from the supported grant types: authorization code and client credentials. Client ID The unique identification code of the client. This can be obtained when registering the client. Client Secret It is a secret code used by the OAuth Client to authenticate the Authorization Server. If you had registered the client, you would’ve generated the client secret in the Console page. If you haven’t registered, you can register and generate it. Authorize URL The Authorize URL that’s specified in the API documentation of the desired service. Access token URL URL to fetch the access token as specified in the API documentation of the desired service. Refresh token URL URL to fetch the refresh token as specified in the API documentation of the desired service. Scope Name You will have to provide a list of OAuth scopes of the third-party app as specified in their API documentation. It’s the list of actions you wish to access. Scope Display Name Enter the name with which you would like to display the scopes. Scope Delimiter Delimiter with which the desired service API expects the scopes to be separated. For example, comma, space, or plus. Mark the Use credentials of login user option if you want every user to have their own login credential to execute the script. Unmark this option, if you want all your organization users to use the same credentials of the user who created and authenticated the connection.
Scenario
Patricia creates a connection and authenticates it. If Patricia does not want the users to use this connection with her credentials, she will have to mark the Use credentials of login user checkbox. By doing this, other users will have to run the script by authenticating the connection with their own credentials.
- After entering all the details, click Create Service.
- A pop-up window with Authorize URL specified in the connection will open and request access permissions from the third-party app as per the scopes you’ve specified.
- Click Connect to authorize.
Once this is done, the connection will be established and you can access the app’s data securely.
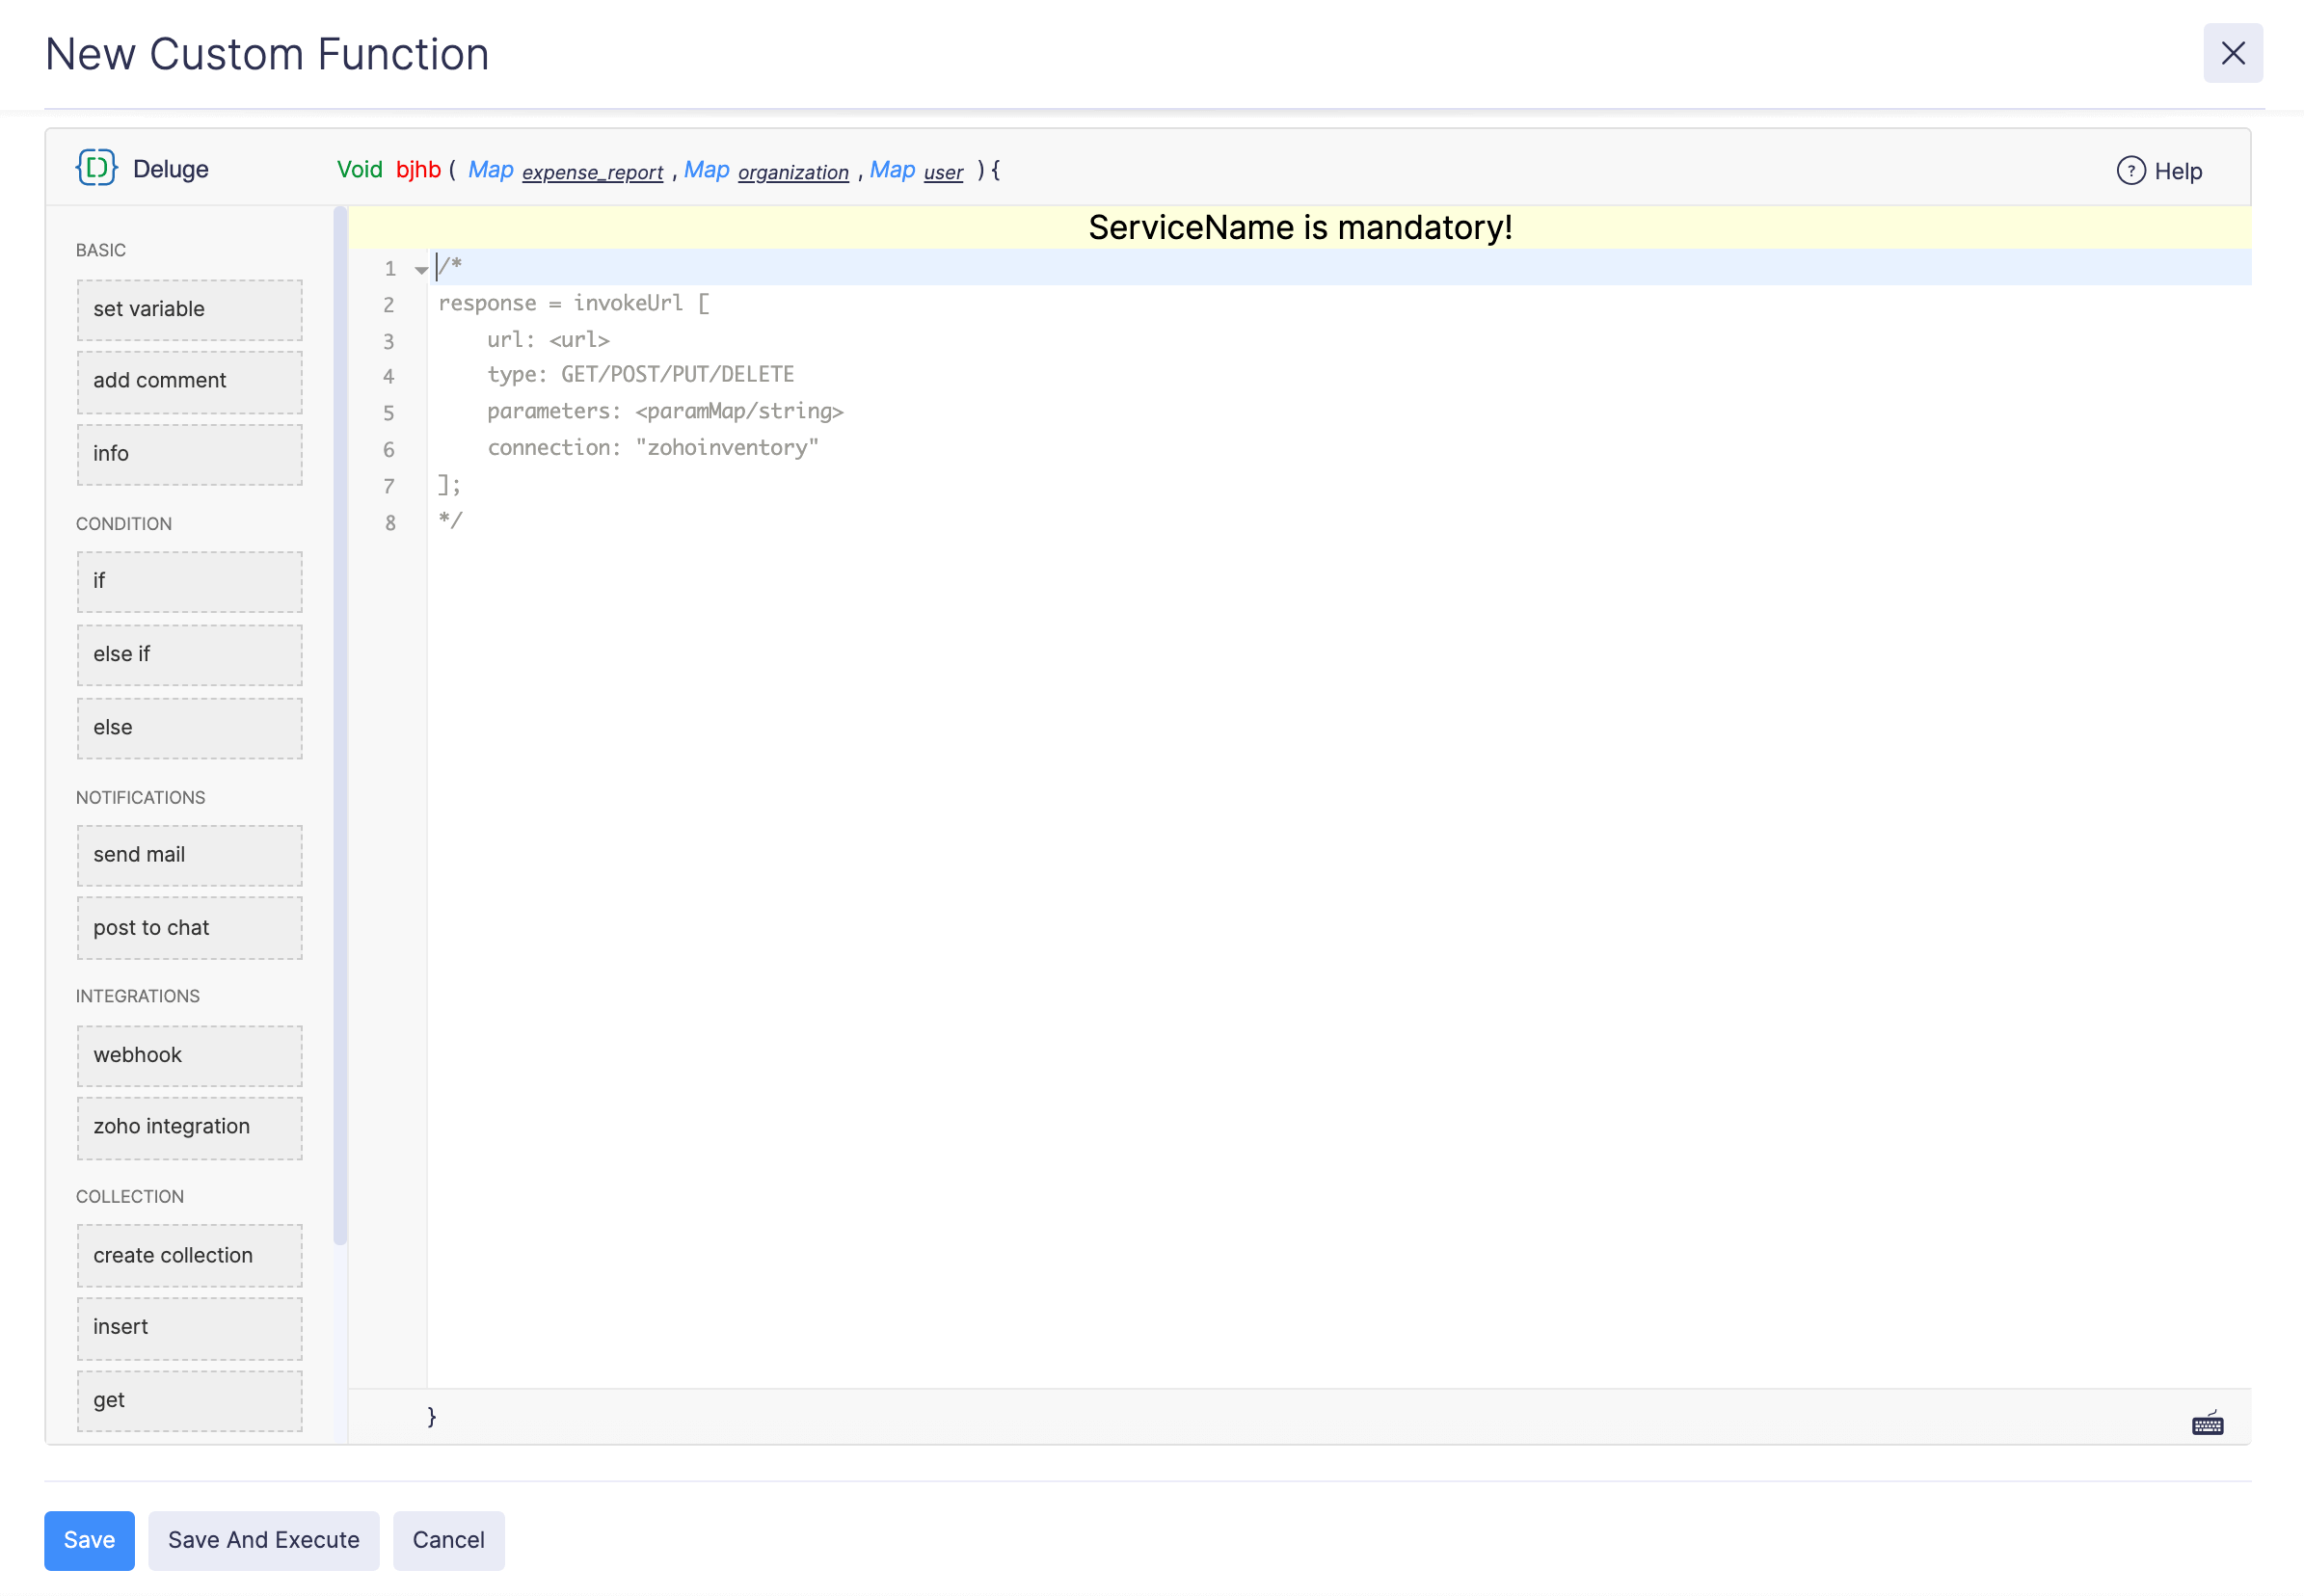
Use Connections
Once a connection has been authenticated by the user, it can be used in custom functions, custom buttons, and schedules. In the connection details page where the connections were created, you will find a code snippet that shows how to use that connection to communicate with the third-party service.
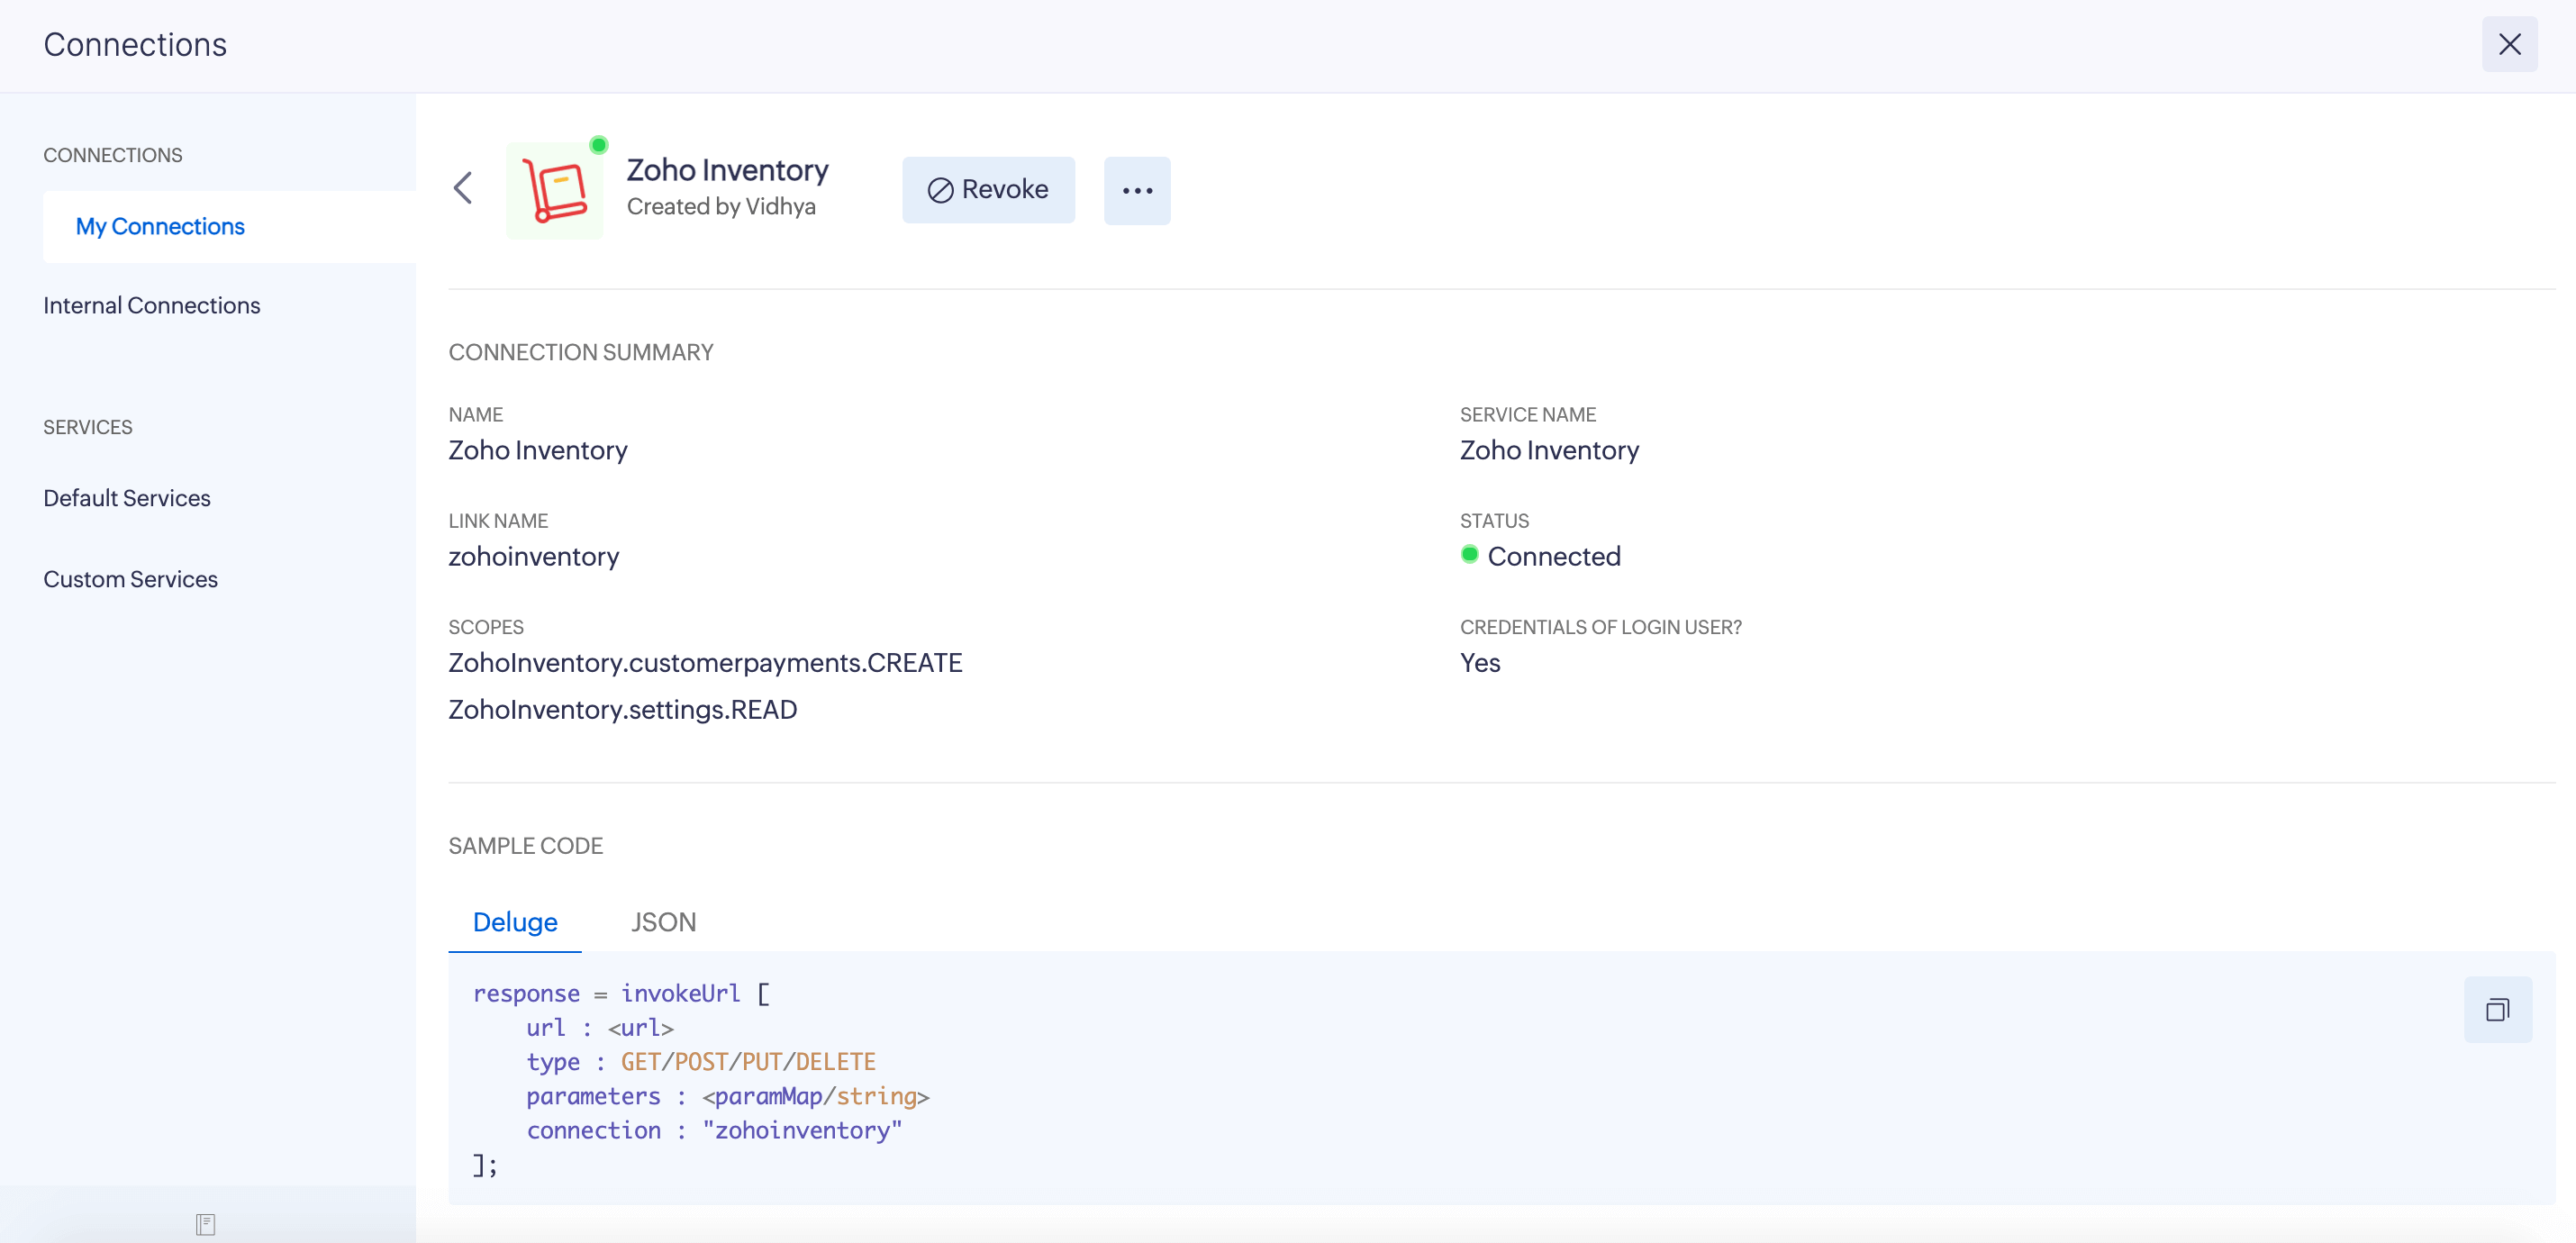
You can copy and paste this code snippet in the required places of the deluge script.
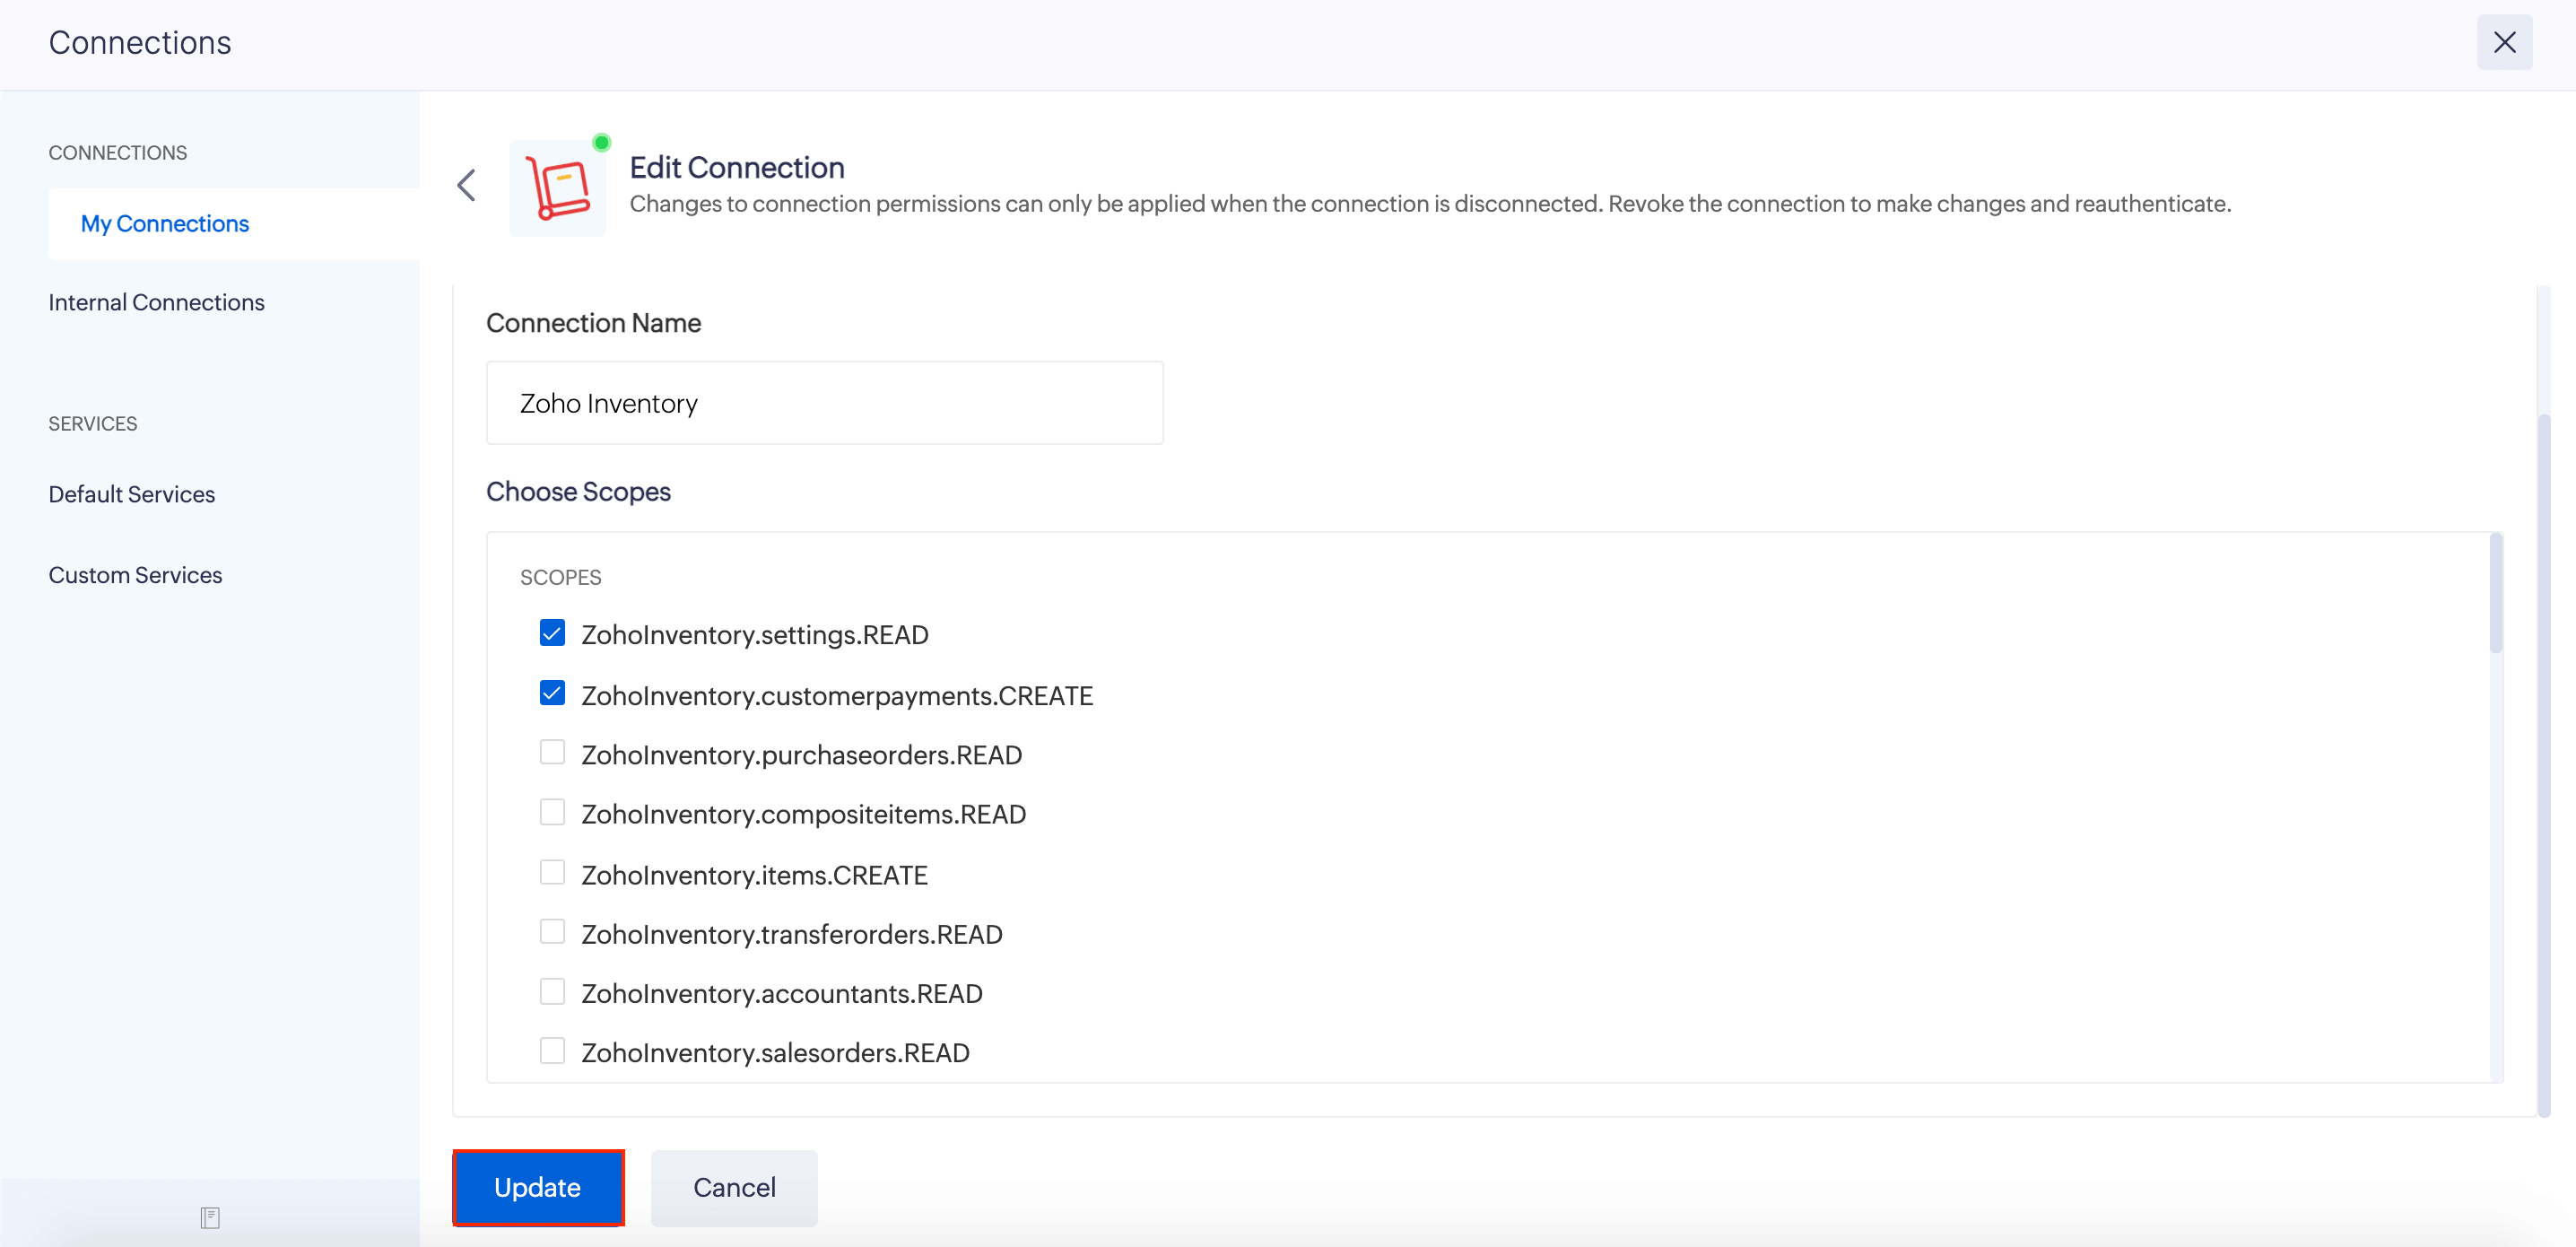
Edit Connection
If you want to make changes to the connection’s name or its scope, you can edit it. To edit a connection:
- Click Admin View.
- Go to Settings on the left sidebar.
(OR)
Click the Gear icon at the top right corner of the screen. - Click Connections under Developer Space.
- Click My Connections.
- Hover over the connection you want to edit and click the Edit icon.
- In the page that opens, make the necessary changes and click Update. The connection name and scopes will be updated.
Revoke Connection
If you want to disable a connection temporarily, you can revoke it and enable it later when required. If you revoke a connection, users will not be able to execute the connections in the deluge scripts. To revoke a connection:
- Click Admin View.
- Go to Settings on the left sidebar.
(OR)
Click the Gear icon at the top right corner of the screen. - Click Connections under Developer Space.
- Click My Connections or Internal Connections.
- Hover over the connection you want to revoke and click Revoke.
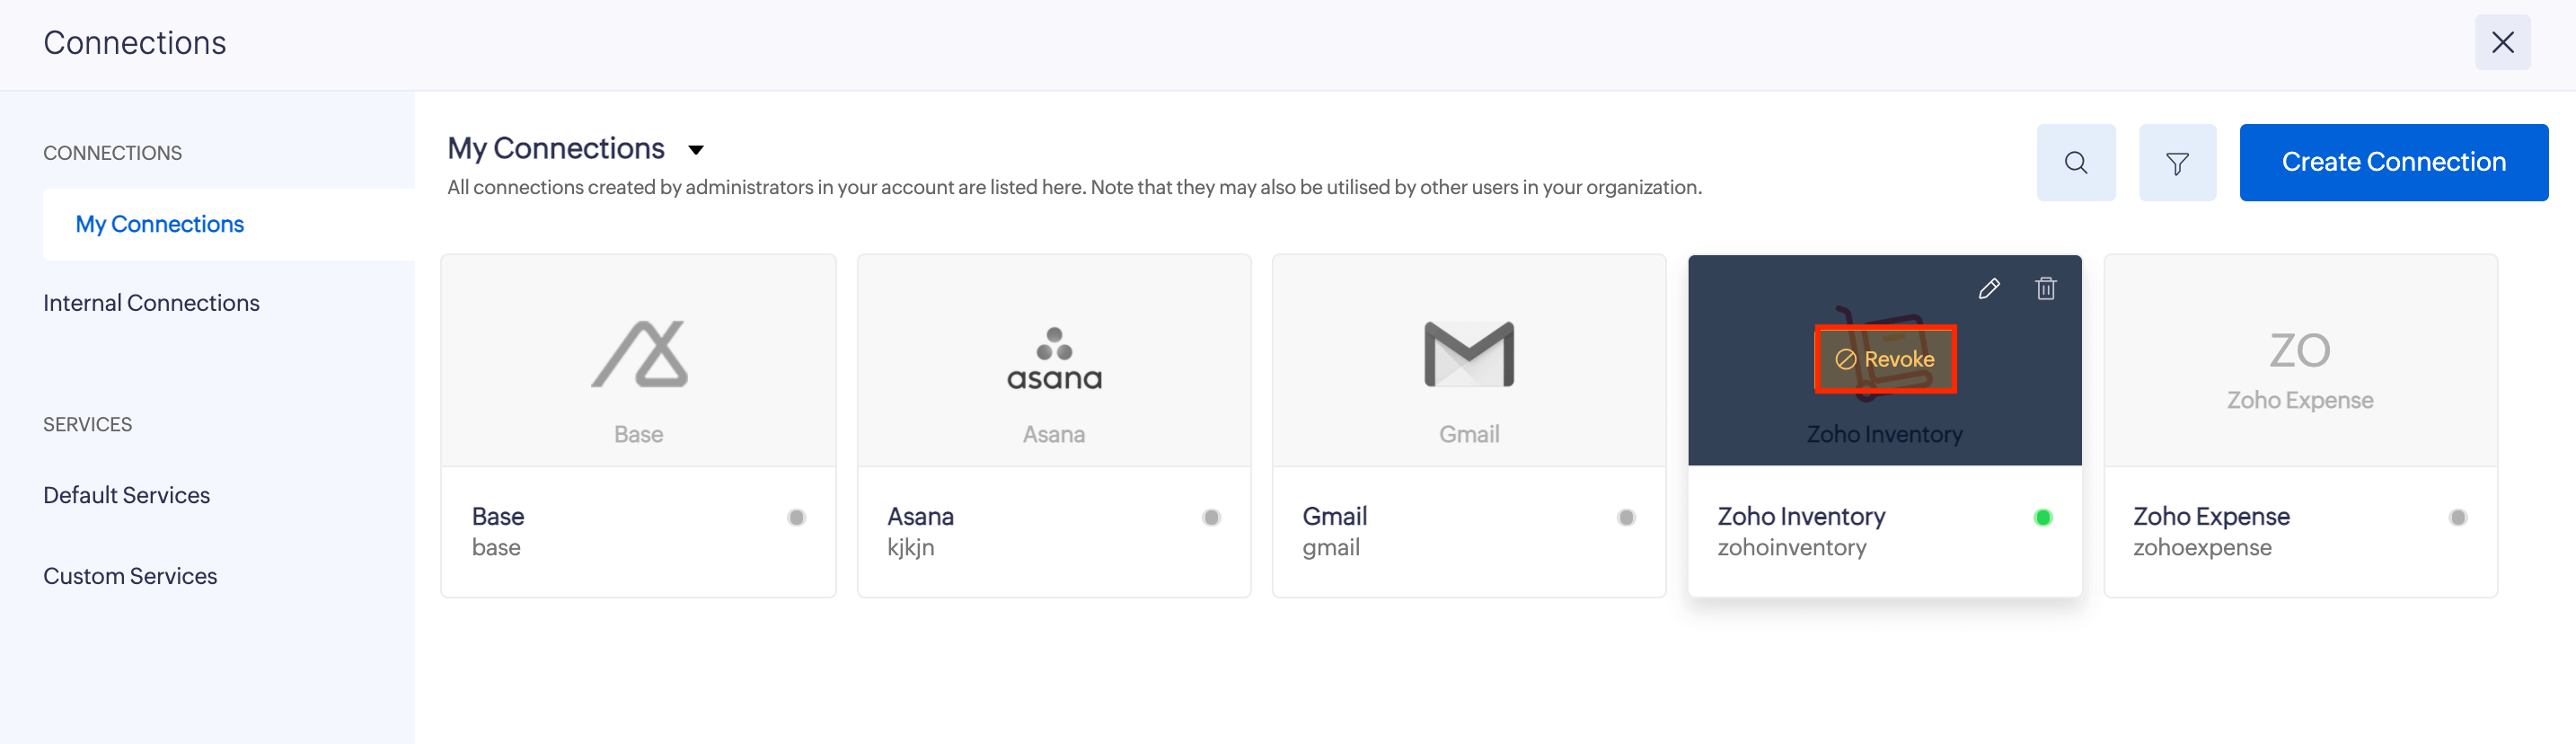
- In the pop-up that opens, click Revoke again to revoke the connection.
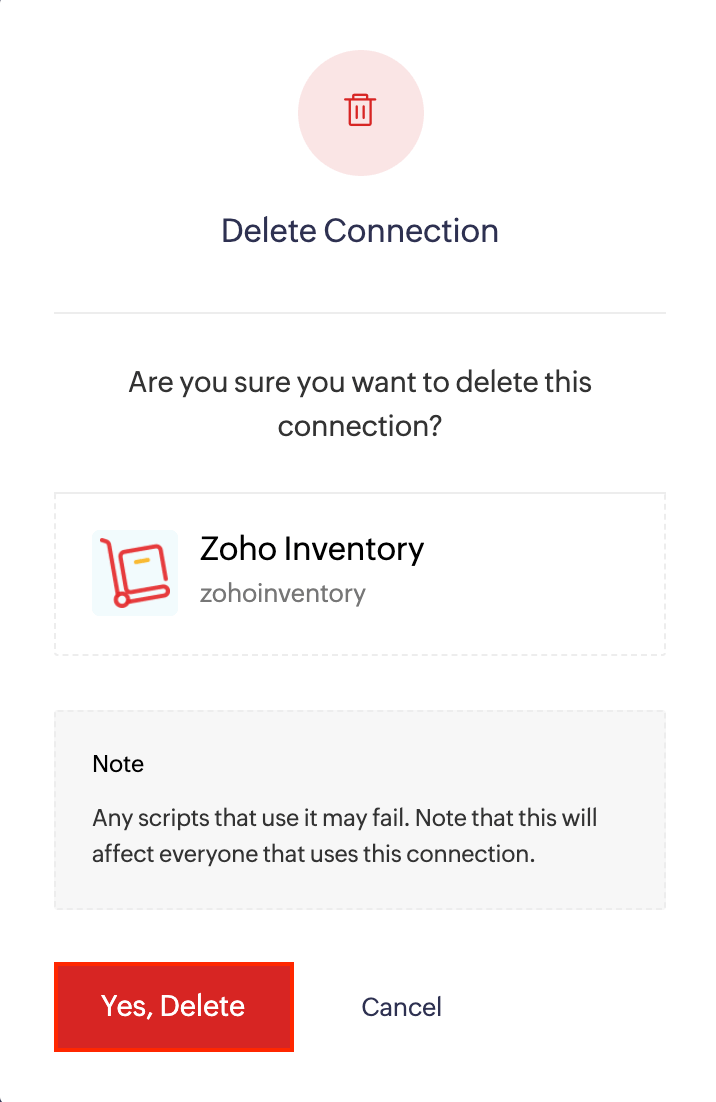
Delete Connection
If you’re no longer using a connection, you can delete it. Here’s how:
- Click Admin View.
- Go to Settings on the left sidebar.
(OR)
Click the Gear icon at the top right corner of the screen. - Click Connections under Developer Space.
- Click My Connections or Internal Connections.
- Hover over the connection you want to delete and click the Trash icon.
- In the pop-up that opens, click Yes, Delete to delete the connection.