
Policy Settings
Under Policy Settings, you can configure the policy currency, assign a policy admin, upload travel policy, configure surcharge on foreign currency expenses, and set trip options preferences.
To configure Policy Settings:
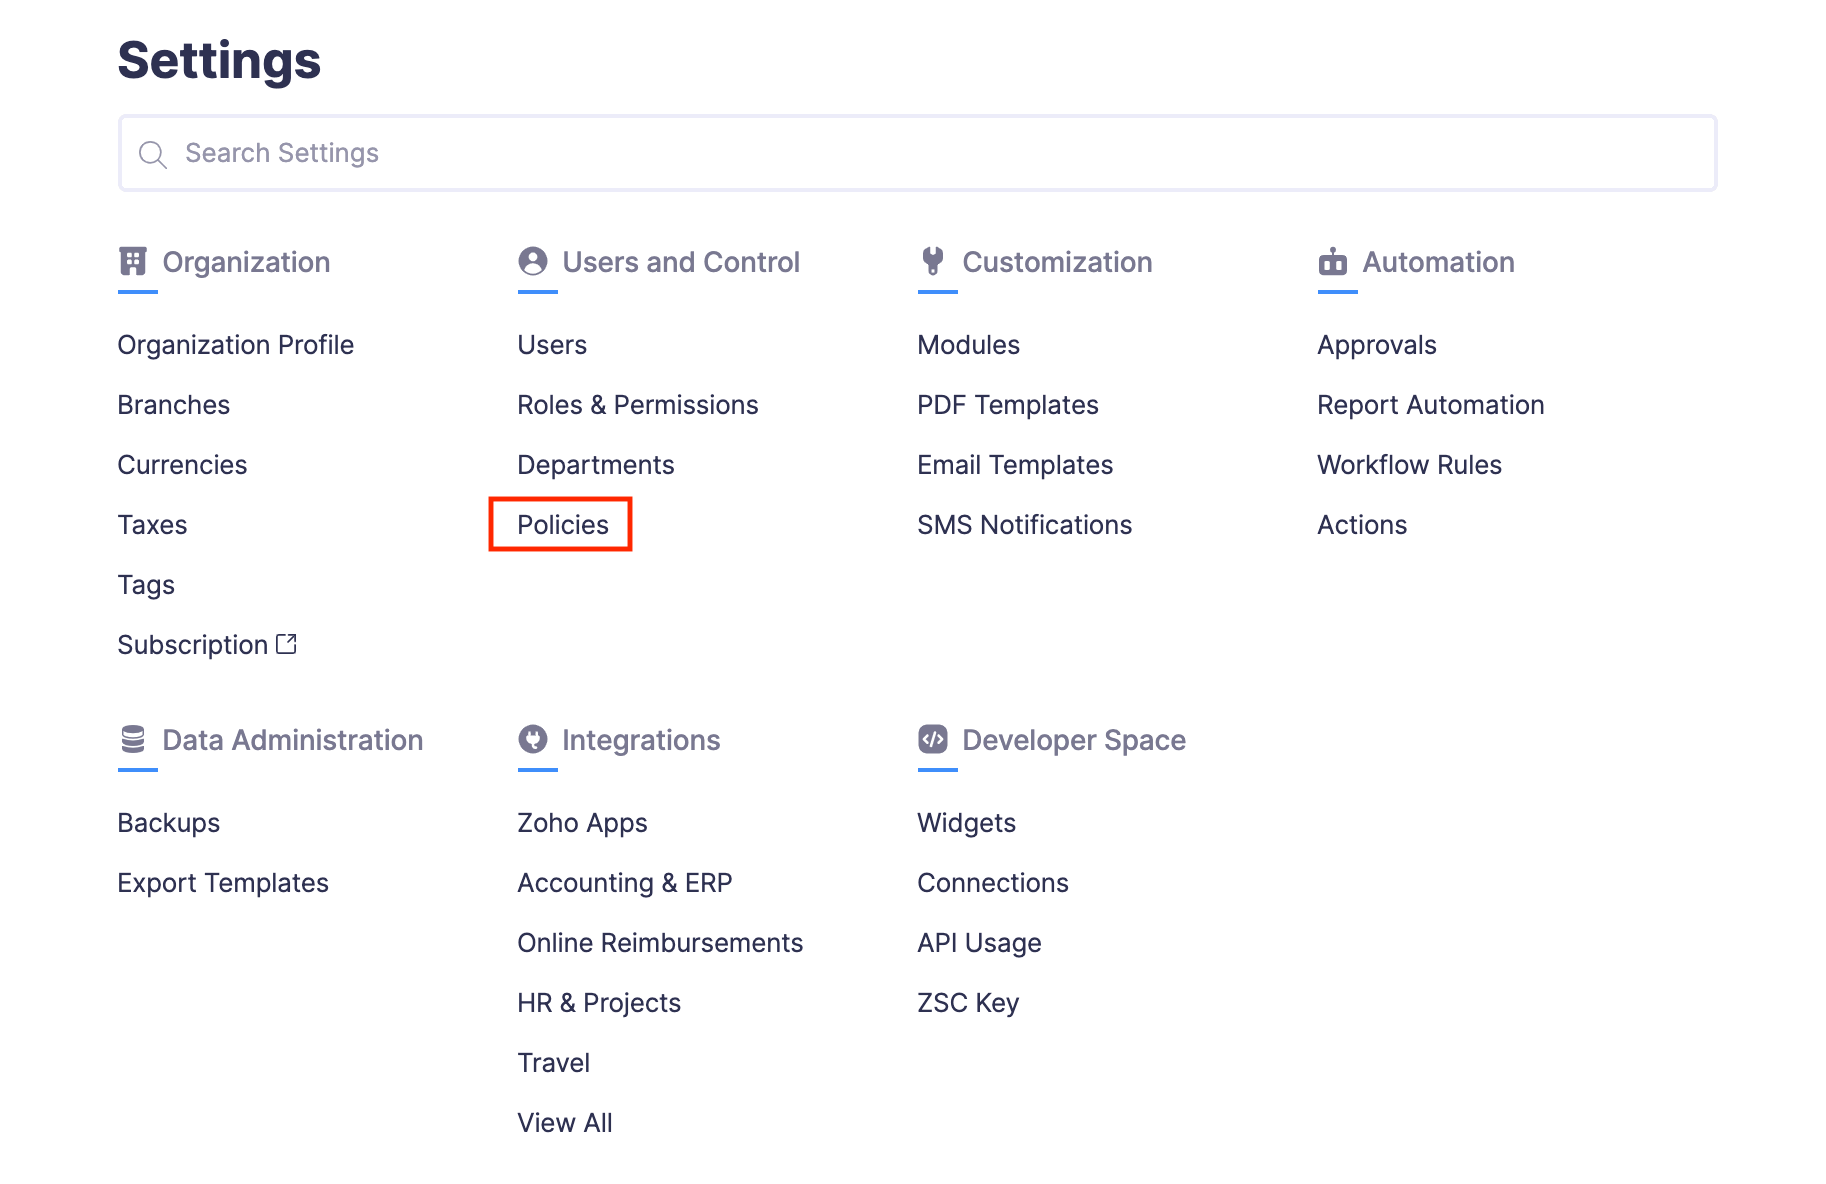
- Click Admin View.
- Go to Settings on the left sidebar.
(OR)
Click Settings in the top right corner of the page.
- Navigate to Organization Settings.
- Click Policies under Setup & Configurations.
- Click + New Policy.
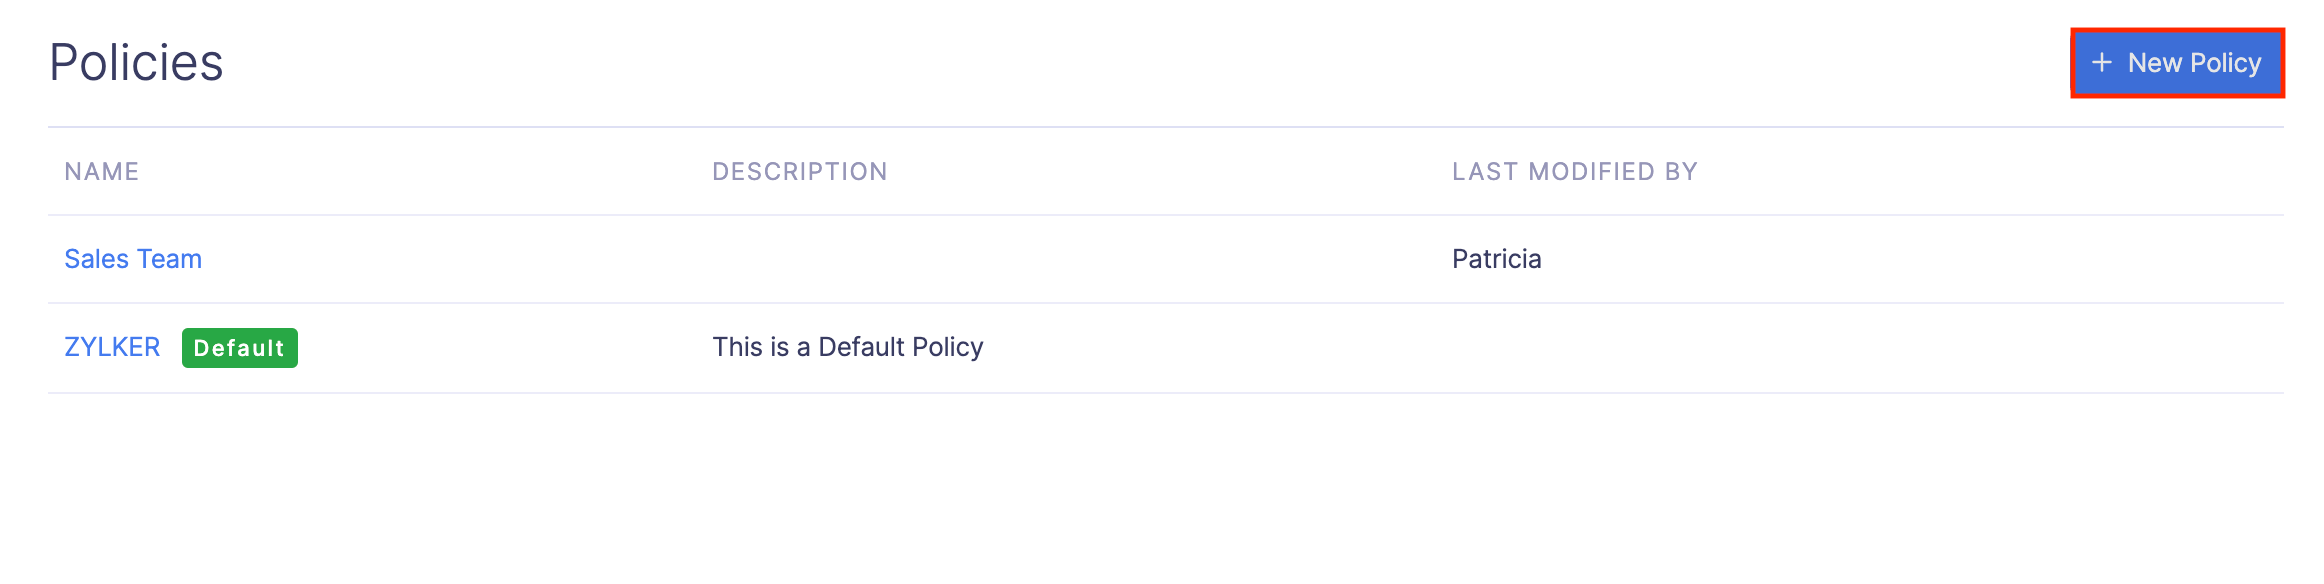
- The following are the options available under Policy Settings:
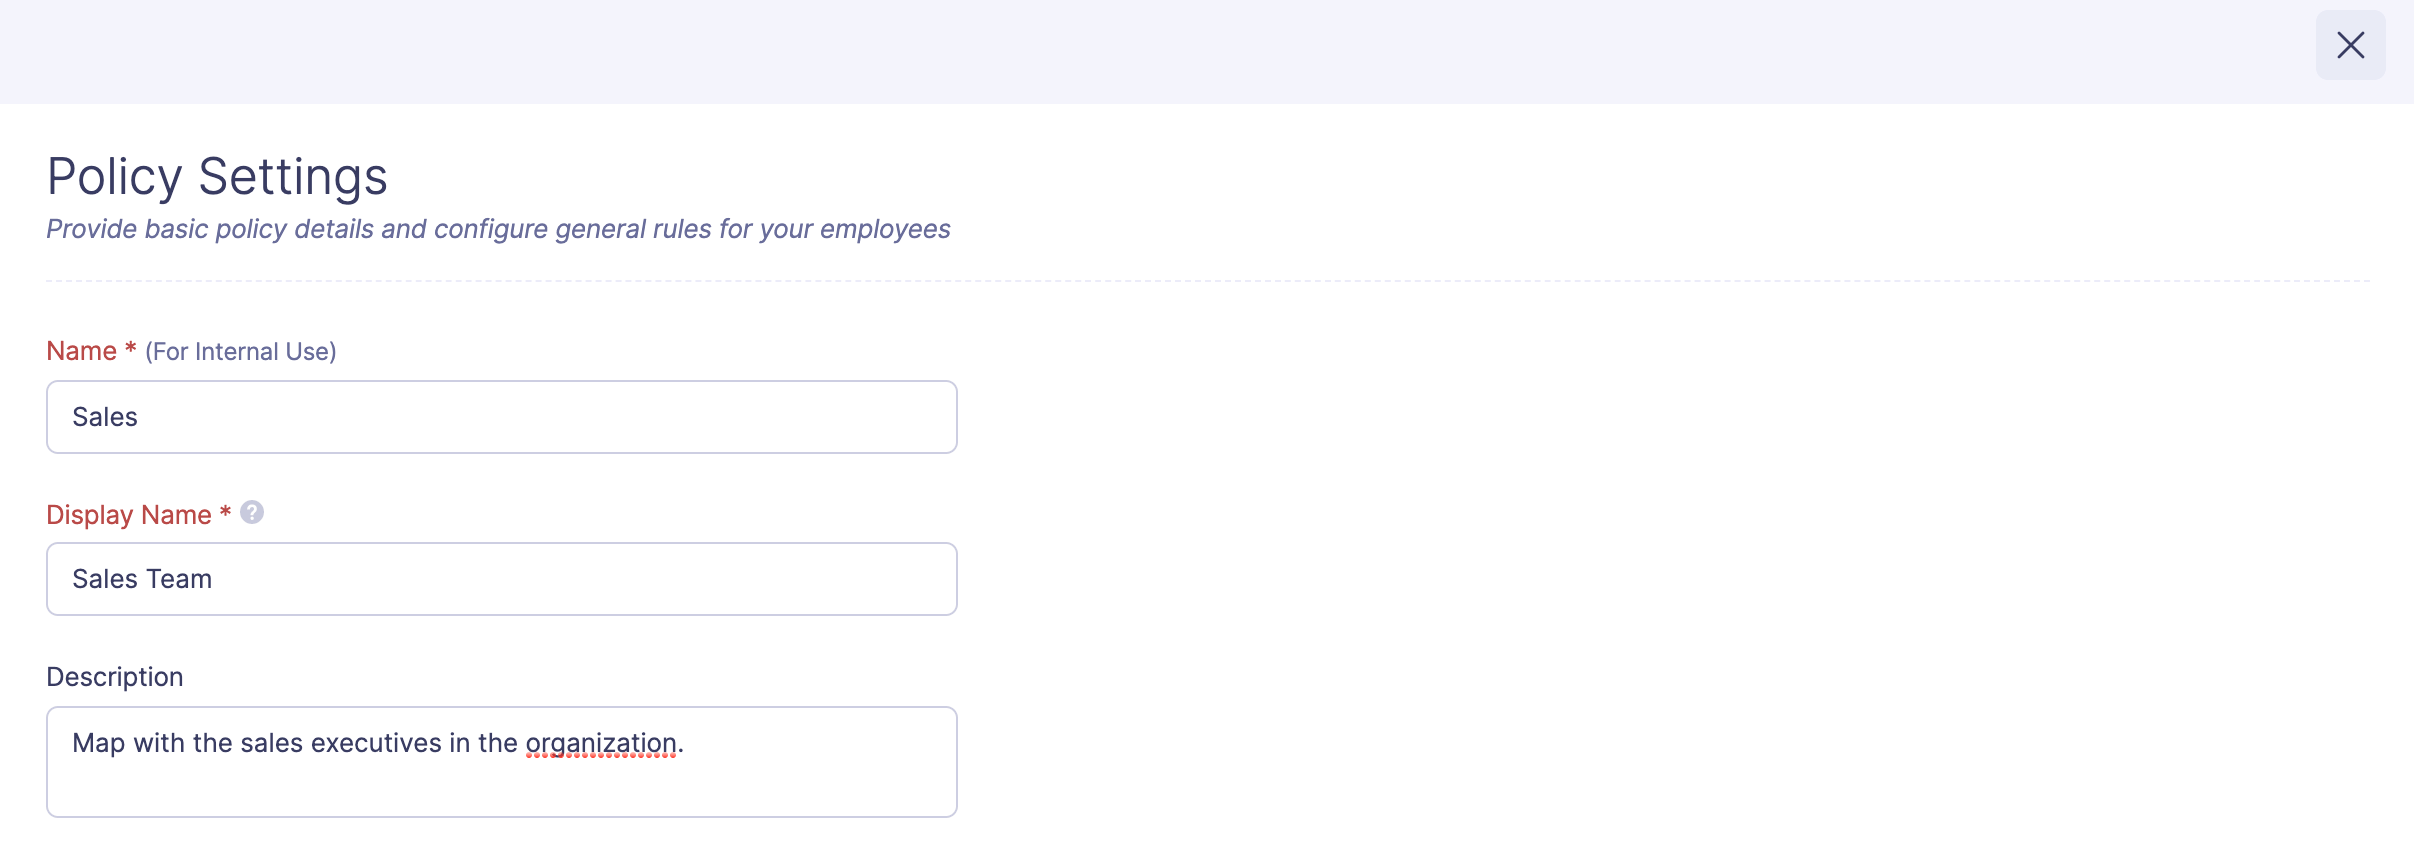
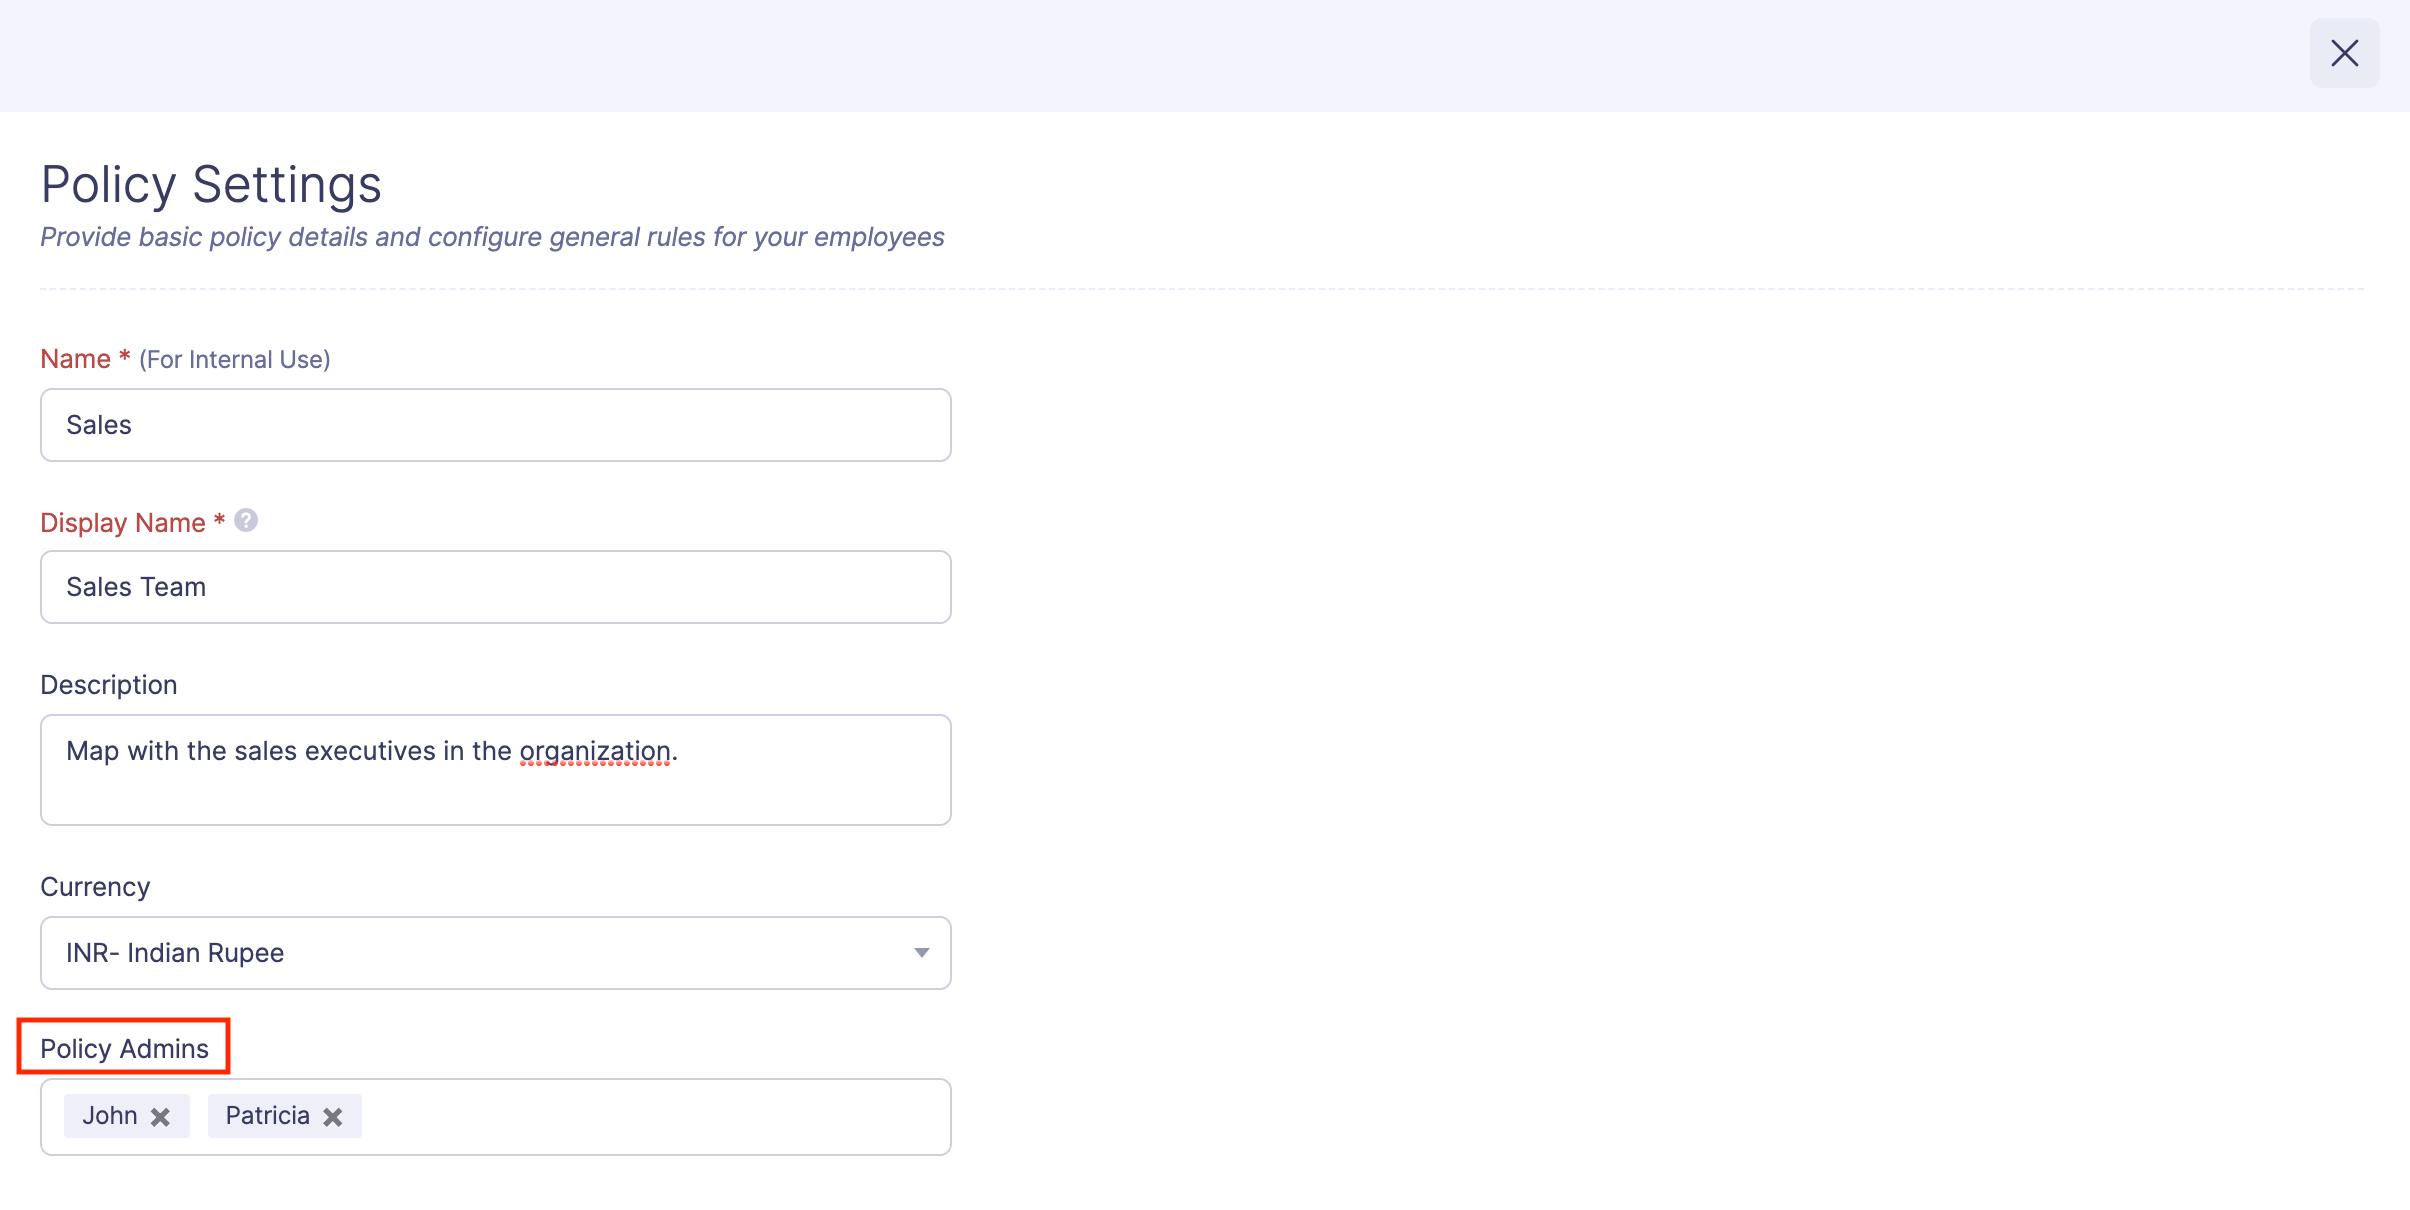
Provide a Name and Description For the Policy
Enter a name for your policy in the Name Field. The name given in this field will be visible in this page and used for internal purposes only.
The Display Name is the name by which a policy will be visible to all the users in your organization. If you don’t want the policy name to be visible to all users or if you want to track the policy with another name, you can provide another name under Display Name.
In the Description field, you can add a description of the policy along with the designations and user roles to which this policy can be associated.
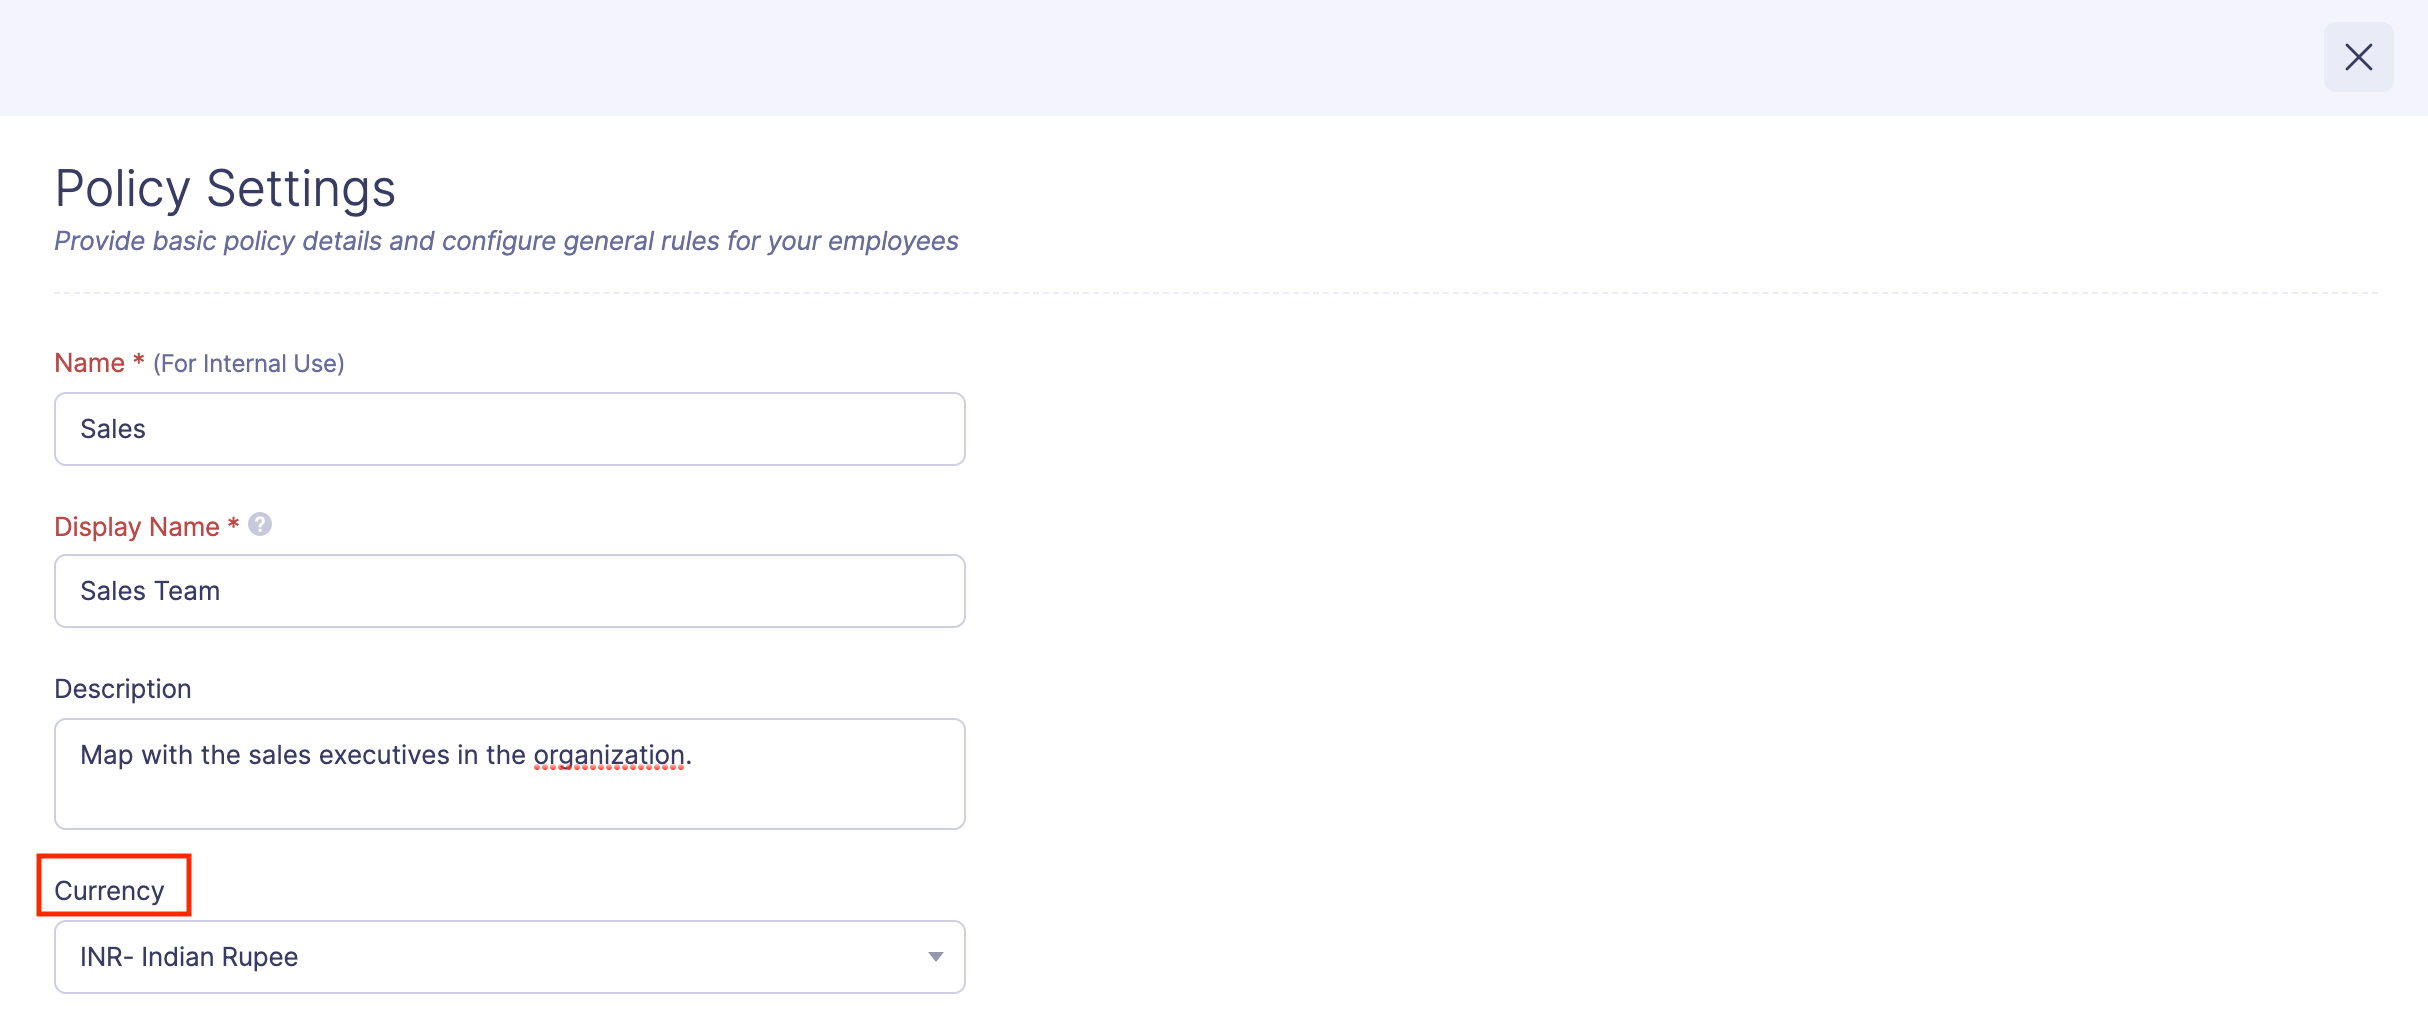
Configure Policy Currency
Policy currency allows you to reimburse an employee in the currency configured in their associated policy. If you configure the policy currency and associate that policy with an employee, they can create reports only in that policy currency. You can then reimburse the employees in the same currency, with which they had created the report.
Let’s understand this better with an example:
John owns ABC Private Limited, a product-based company in the United States. The company has its branches spread throughout various countries, with India being one among them. The base currency of the organization created by John is, USD. If John wants to reimburse the business expenses of the employees in India, he can create a policy, configure the policy currency as INR and associate it to the corresponding employees. Once this is done, the employees in India can create reports with INR only, after which John will be able to reimburse them in INR.
To configure policy currency, select a currency from the Currency dropdown under Policy Settings and click Save.
Note: This feature is still in early access. Please contact support@zohoexpense.com to enable this feature.
Warning: You cannot change the policy currency in the default policy.
Assign Policy Admins
Policy admins are the users to whom you can give access to view all the corporate cards, trips, reports, and advances that were created under a policy.
You can create a new role with policy based permissions, assign that role to a user, and make that user a policy admin. Once a user with policy based permission is added as a policy admin, they will be able to view all the transactions related to the policy by switching to the Admin View.
You can assign policy admins under the Policy Admins dropdown.
Note:
- Only policy admins can be given the policy based permissions.
- You can assign more than one policy admin.
Let us take a look at a couple of scenarios where this feature will be handy.
Scenario 1:
Case: Mark Ryan runs a construction company which has branches in France, Canada, and Egypt. He has a finance team for each of his branches. He wants each finance team to be able to view expense reports from their respective branches only.
Solution: He can create three policies, namely France, Canada, Egypt and add the finance team members as policy admins to their respective policies. This will ensure that they can view only the expense reports submitted by the users from their policy.
Scenario 2:
Case: Rupa Ved is a member of the logistics department of Silver Spoon firm. She wants to view the expense reports, trip requests, and advance requests of her department members.
Solution: The Admin can create a policy with Rupa as the policy admin. This would ensure that she can view all the expense reports, trip requests, and advance requests of her department members.
Quick Links:
- Create a role with policy based permissions
- Associate the role with a user
- Add the user with policy based permission as a policy admin
- View policy transactions
Create a role with policy based permissions
To create a role:
- Click Admin View.
- Go to Settings on the left sidebar.
(OR)
Click Settings in the top right corner of the page.
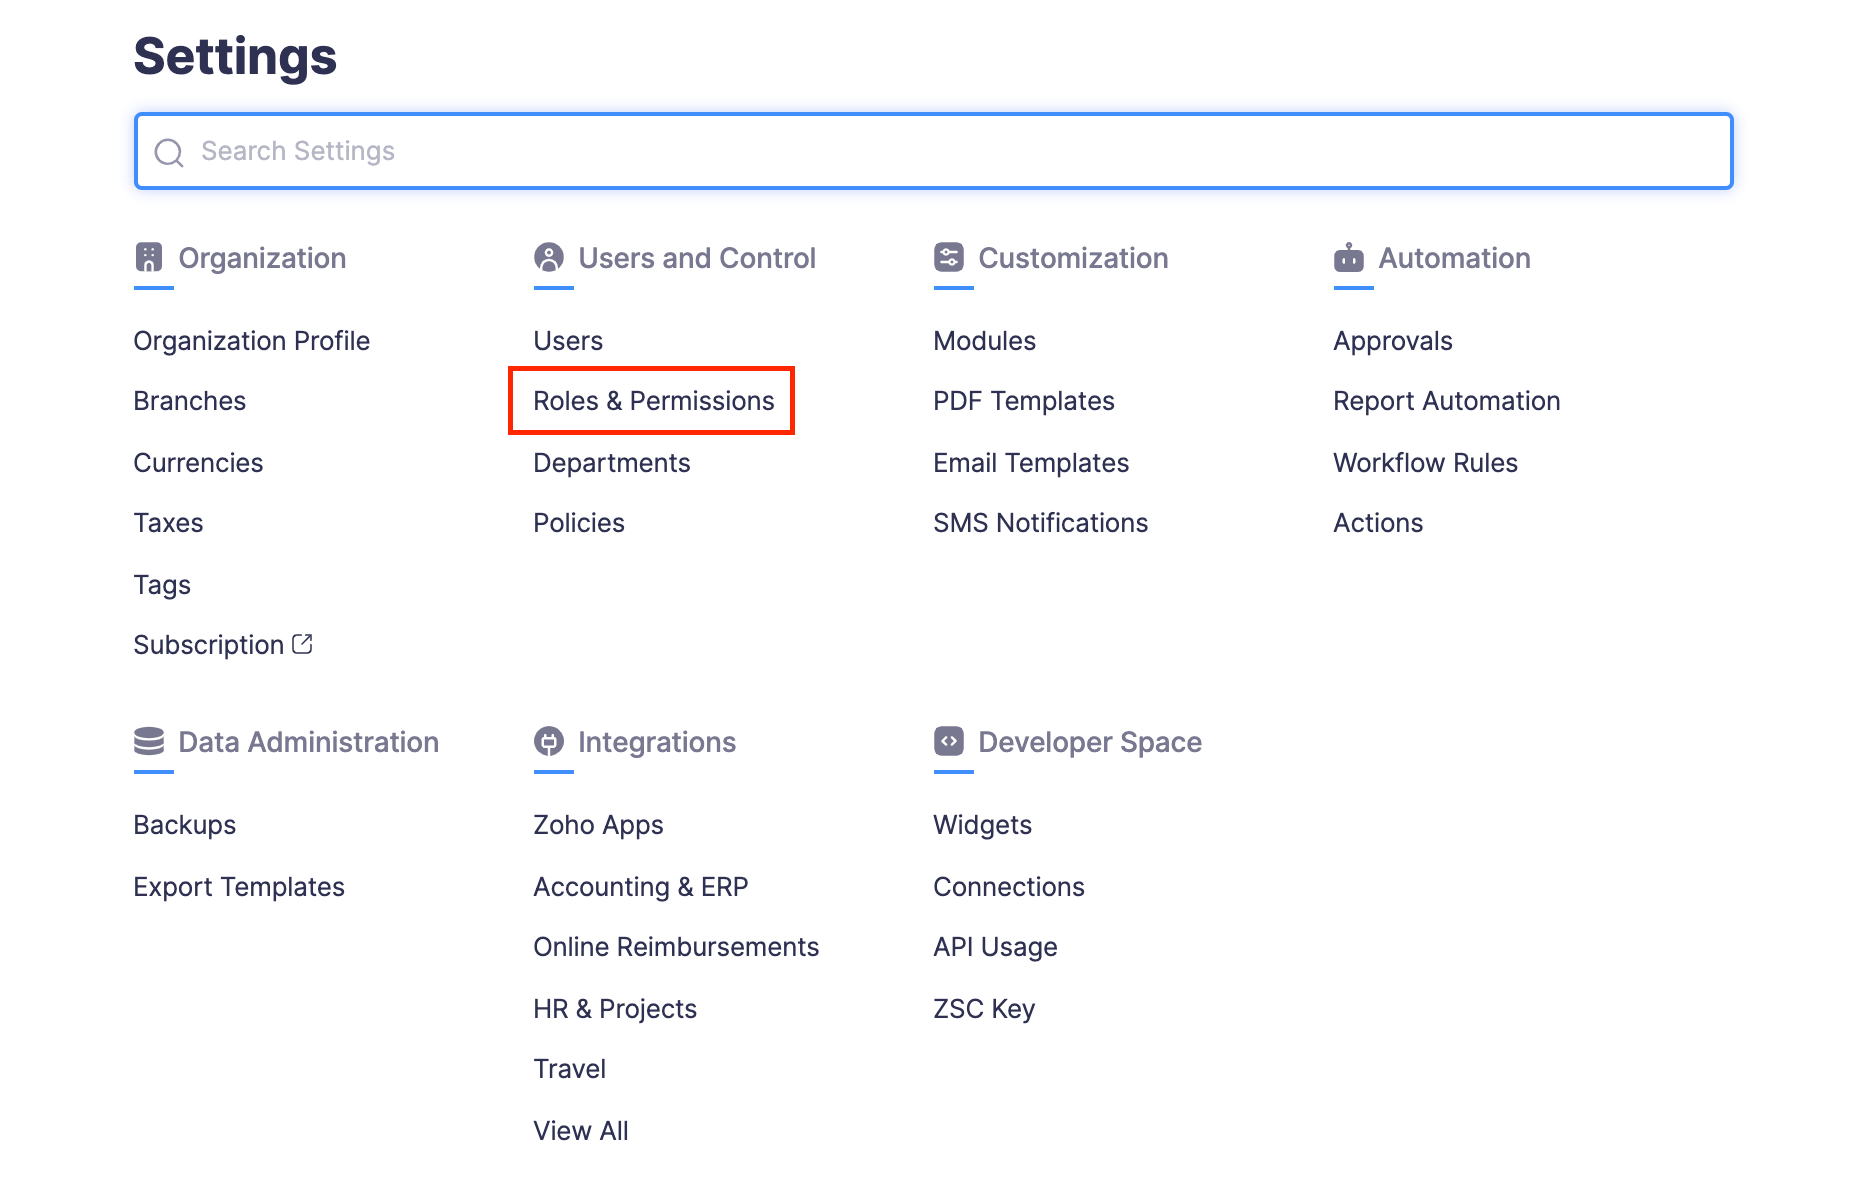
- Navigate to Organization Settings.
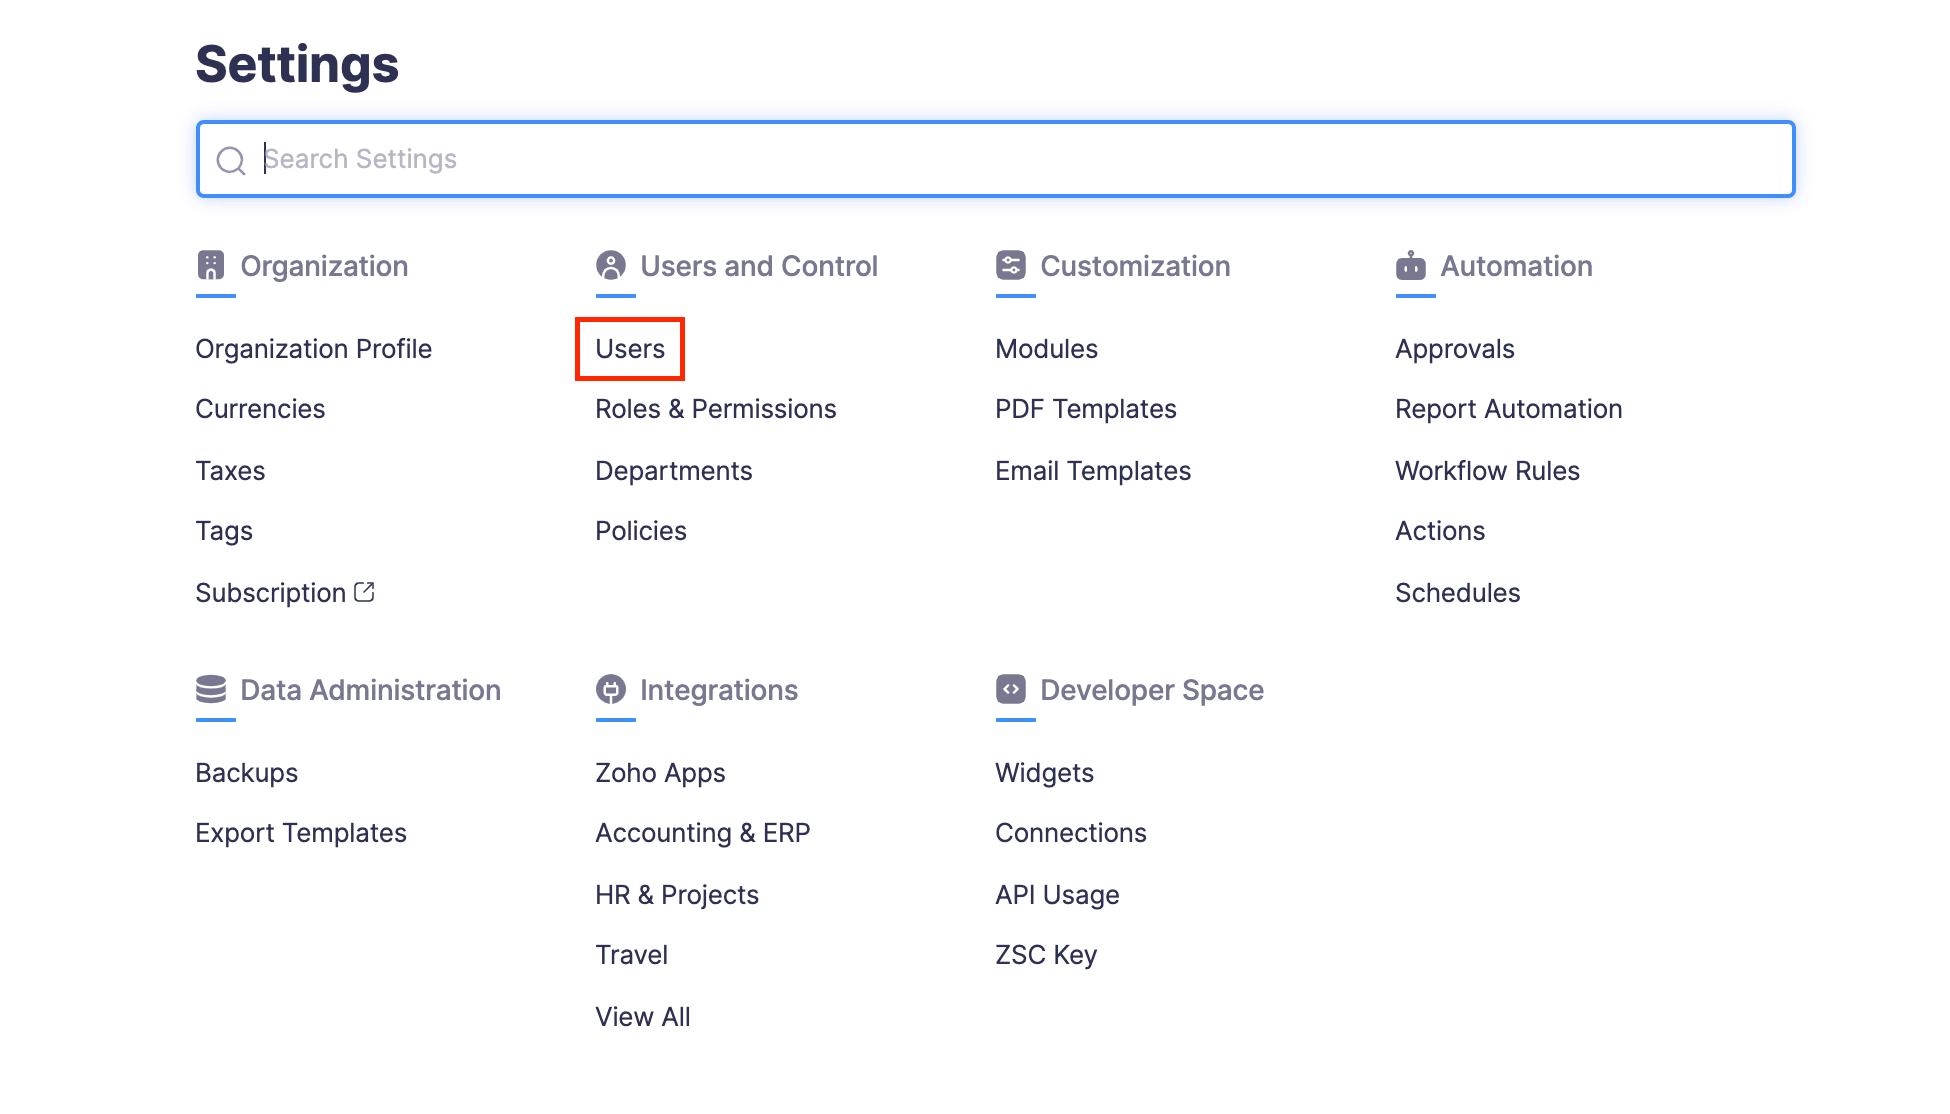
- Click Users under Users and Roles.
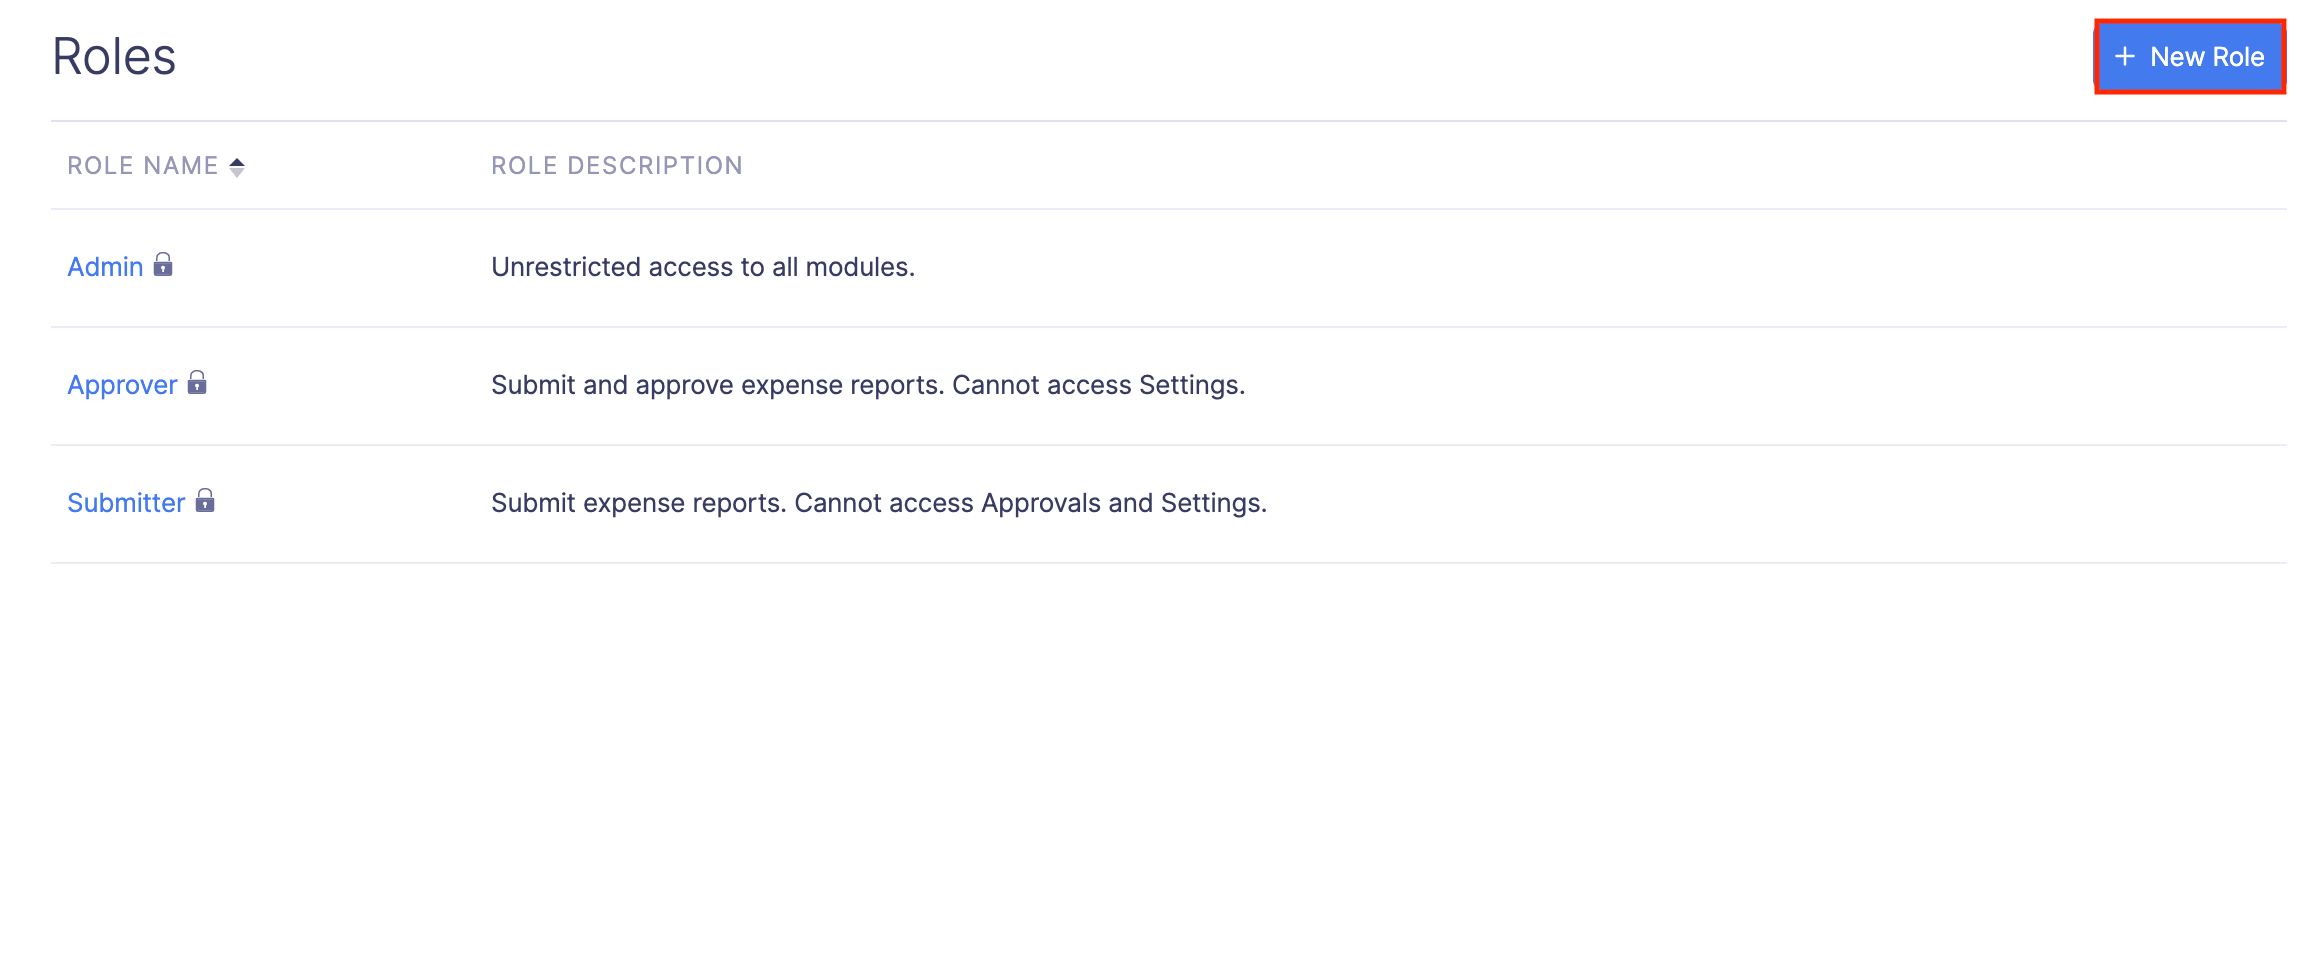
- Click the + New Role button at the top right corner.
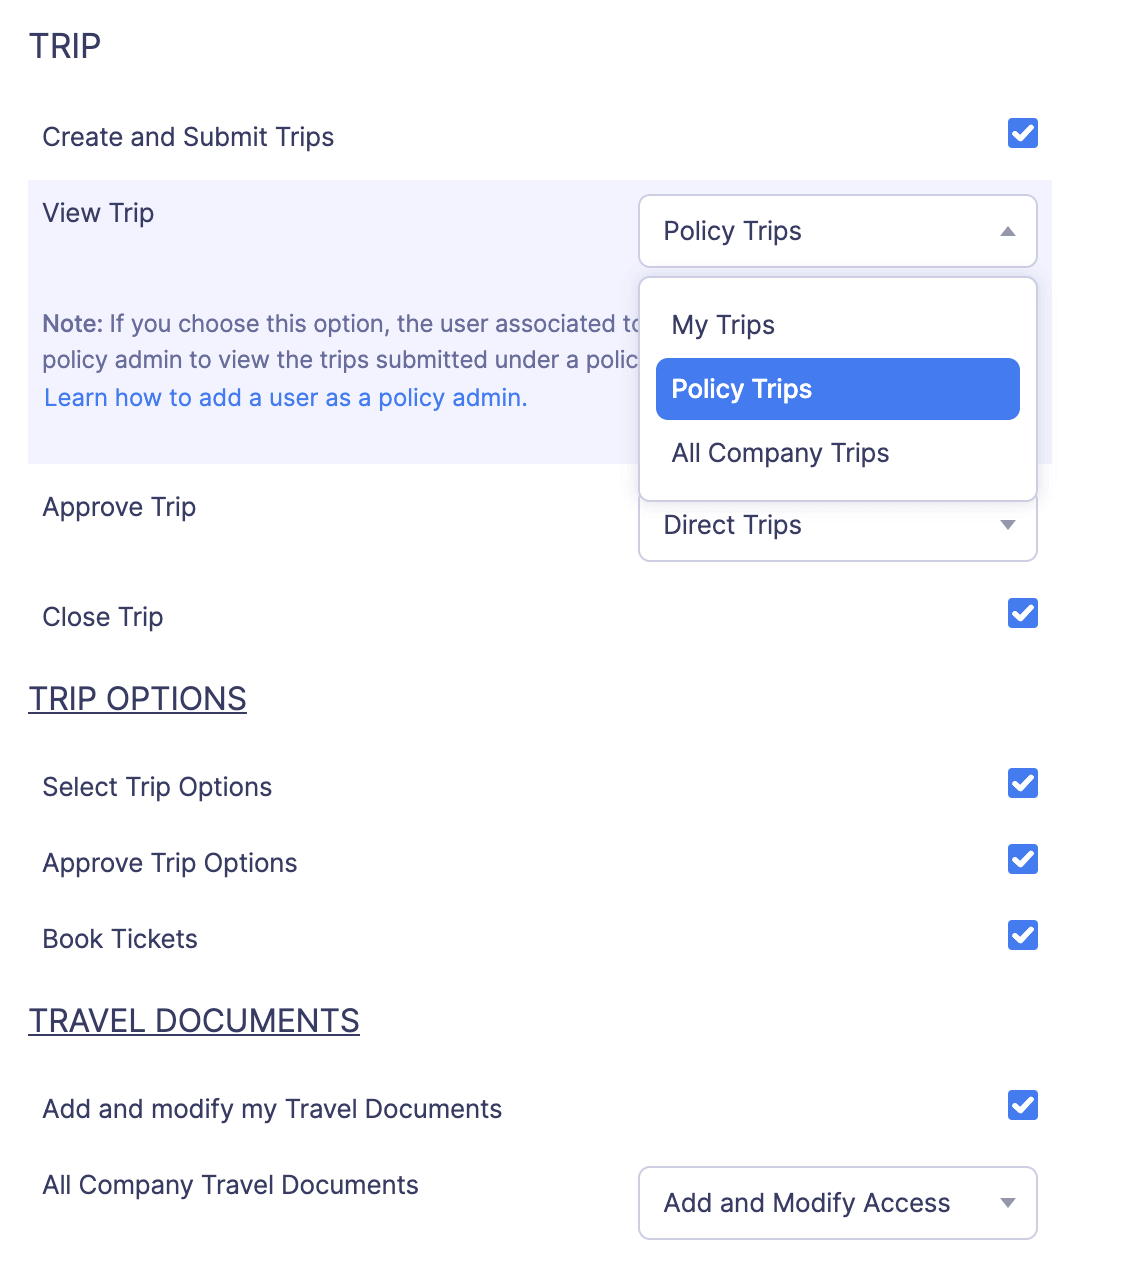
- For trips: Under Trip, click the View Trip dropdown and select Policy Trips.
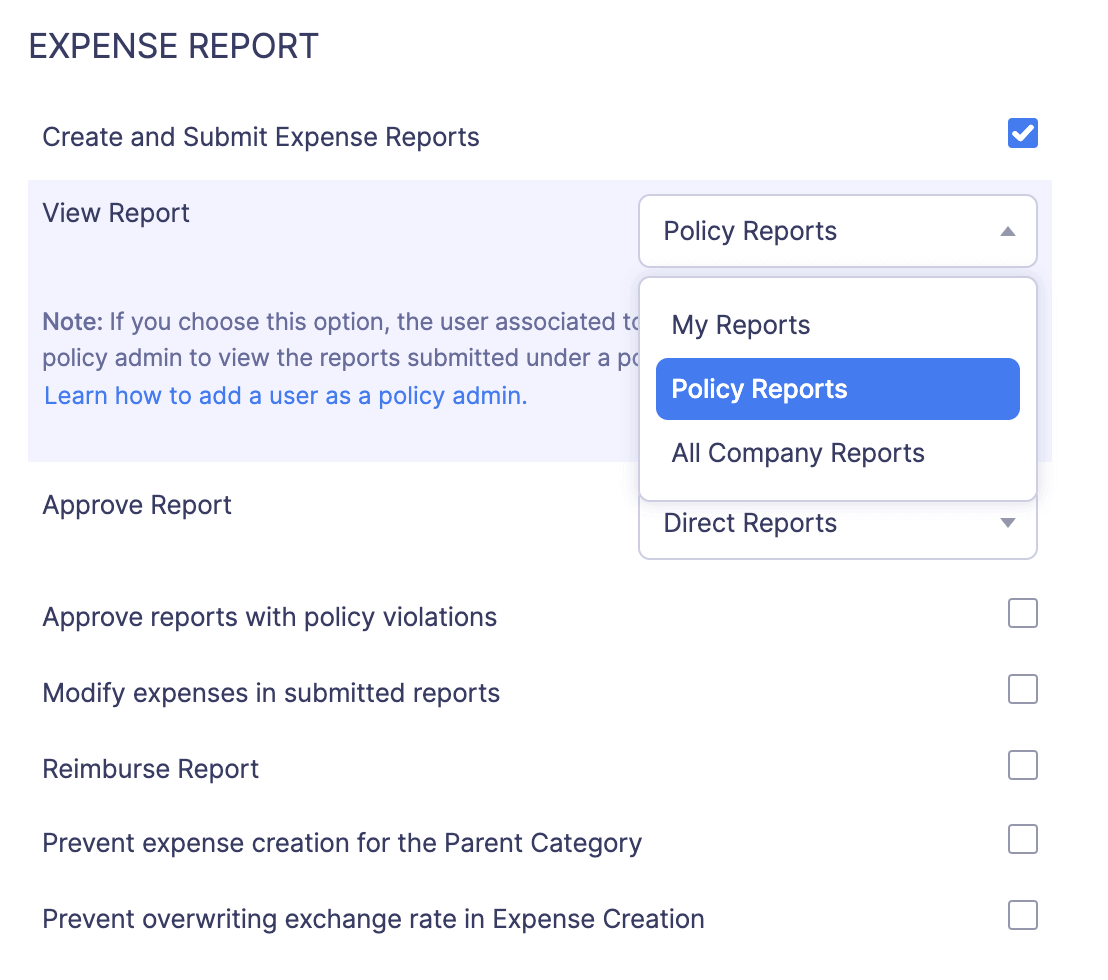
- For reports: Under Expense Report, click the View Report dropdown and select Policy Reports.
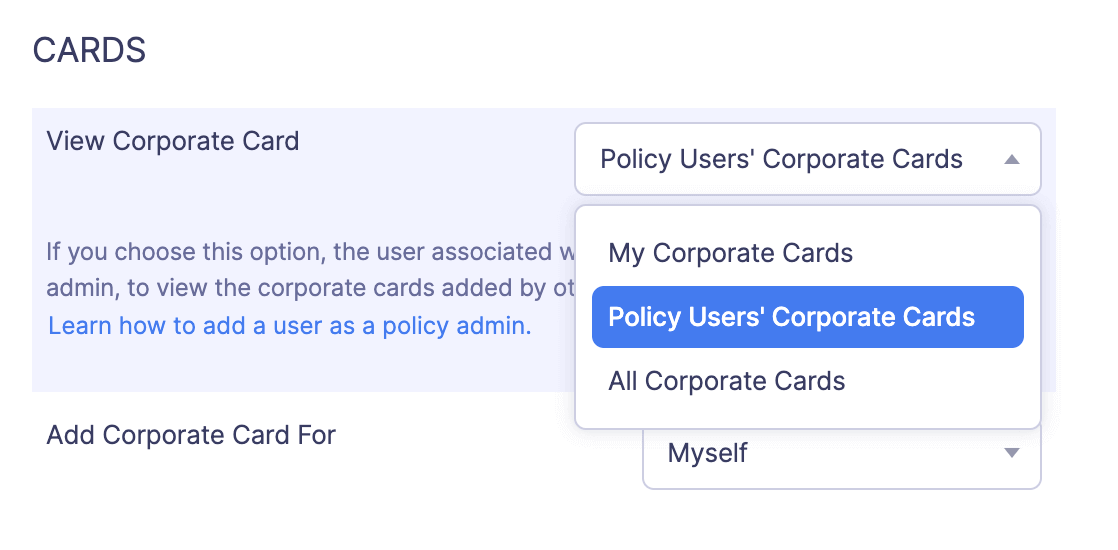
- For cards: Under Cards, click the View Corporate Card dropdown and select Policy Users’ Corporate Cards.
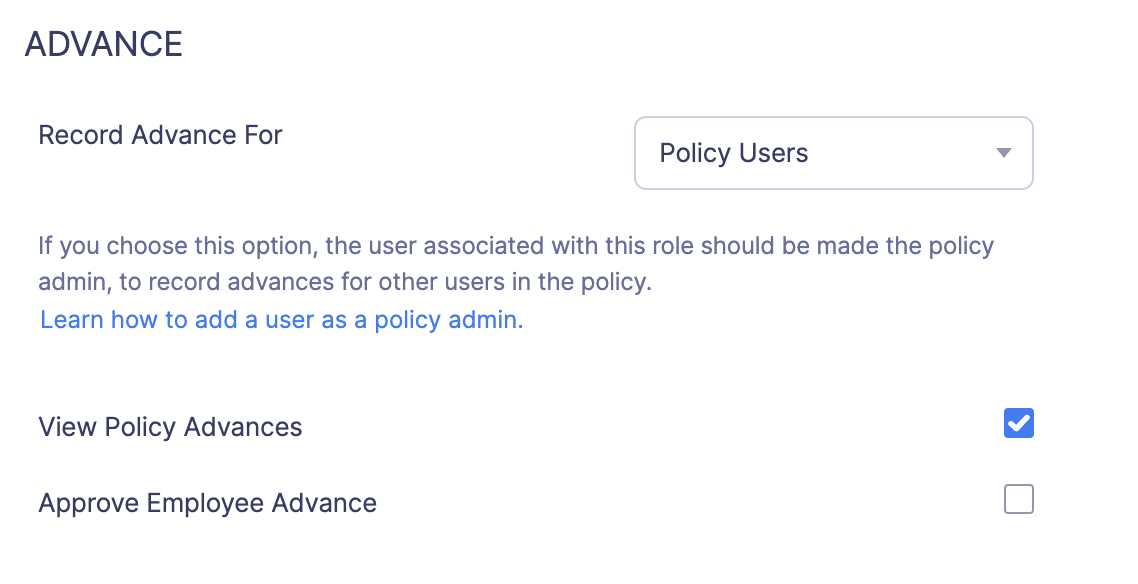
- For advances: Under Advance, click the Record Advance For dropdown and select Policy Users. Mark the View Policy Advances option.
- Scroll down and click Save.
Associate a role with a user
- Click Admin View.
- Go to Settings on the left sidebar.
(OR)
Click Settings in the top right corner of the page.
- Navigate to Organization Settings.
- Click Users under Users and Roles.
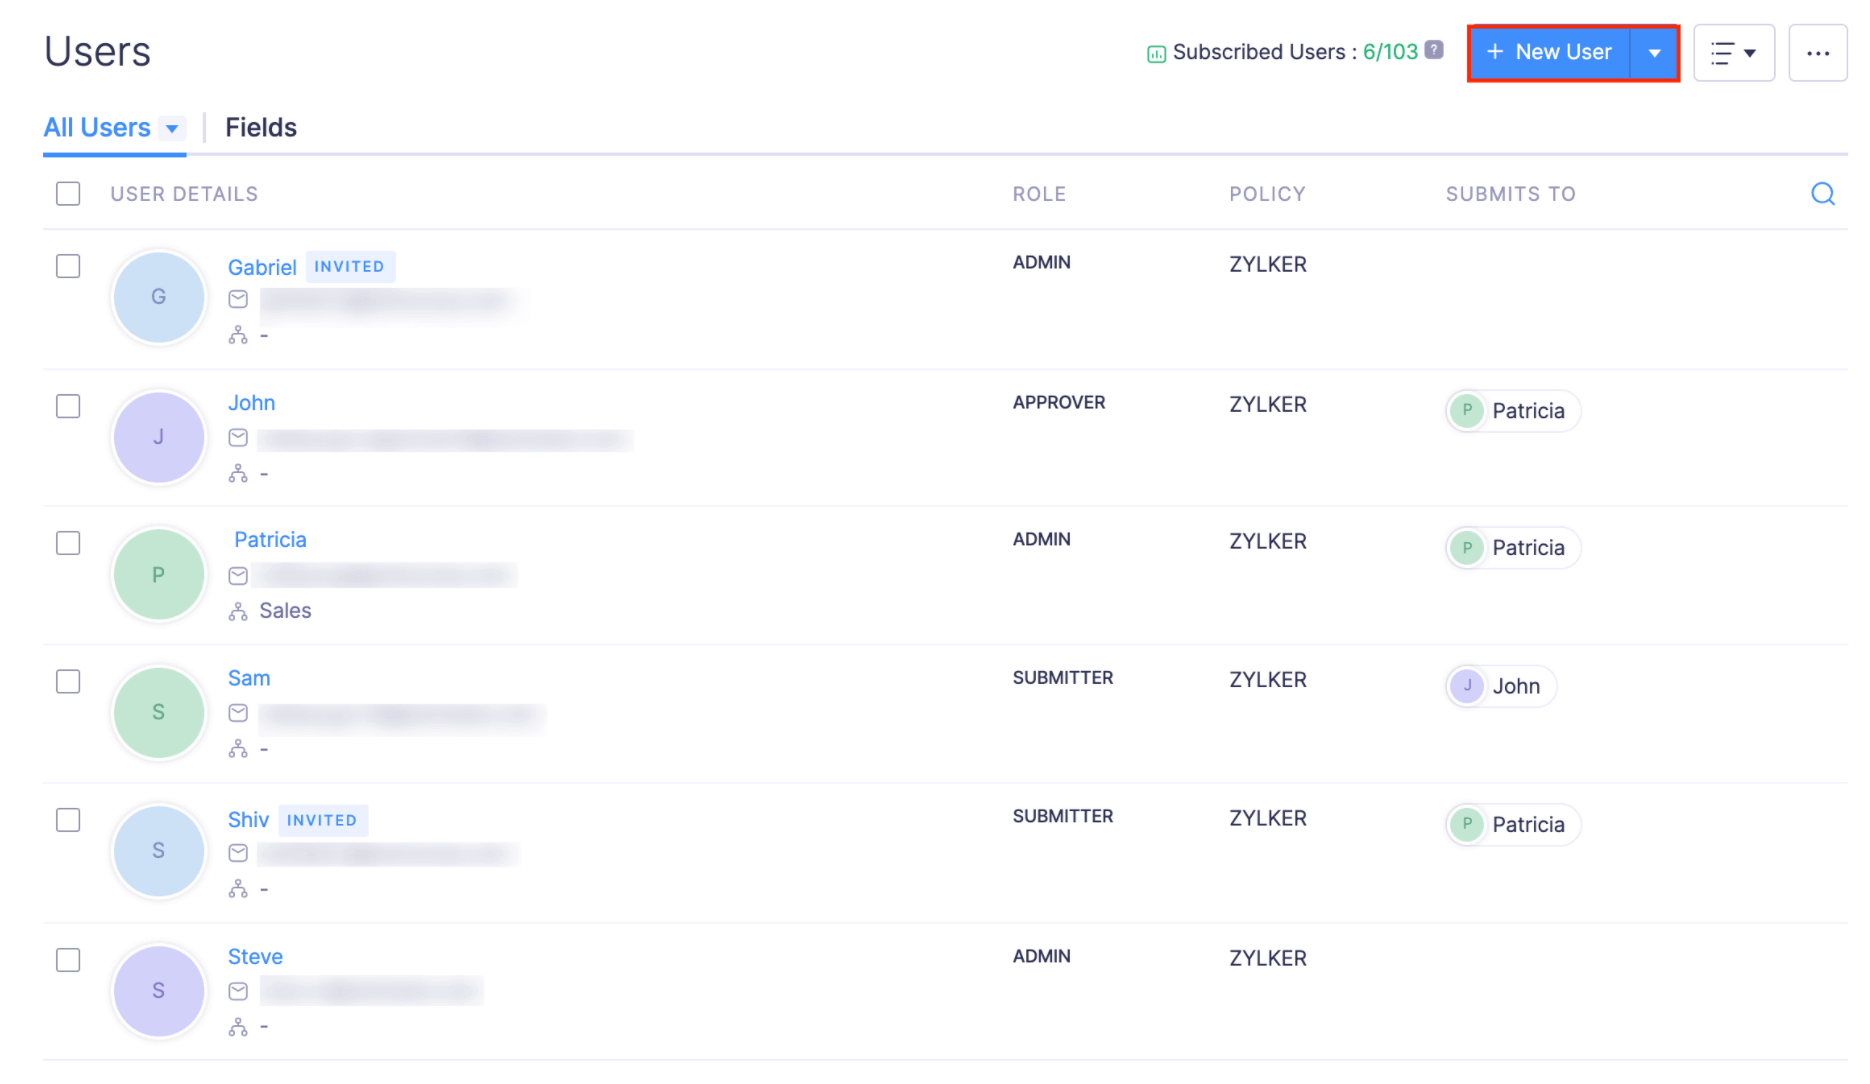
- If you want to assign a custom role with policy permission to a new user, click + New User at the top right corner.
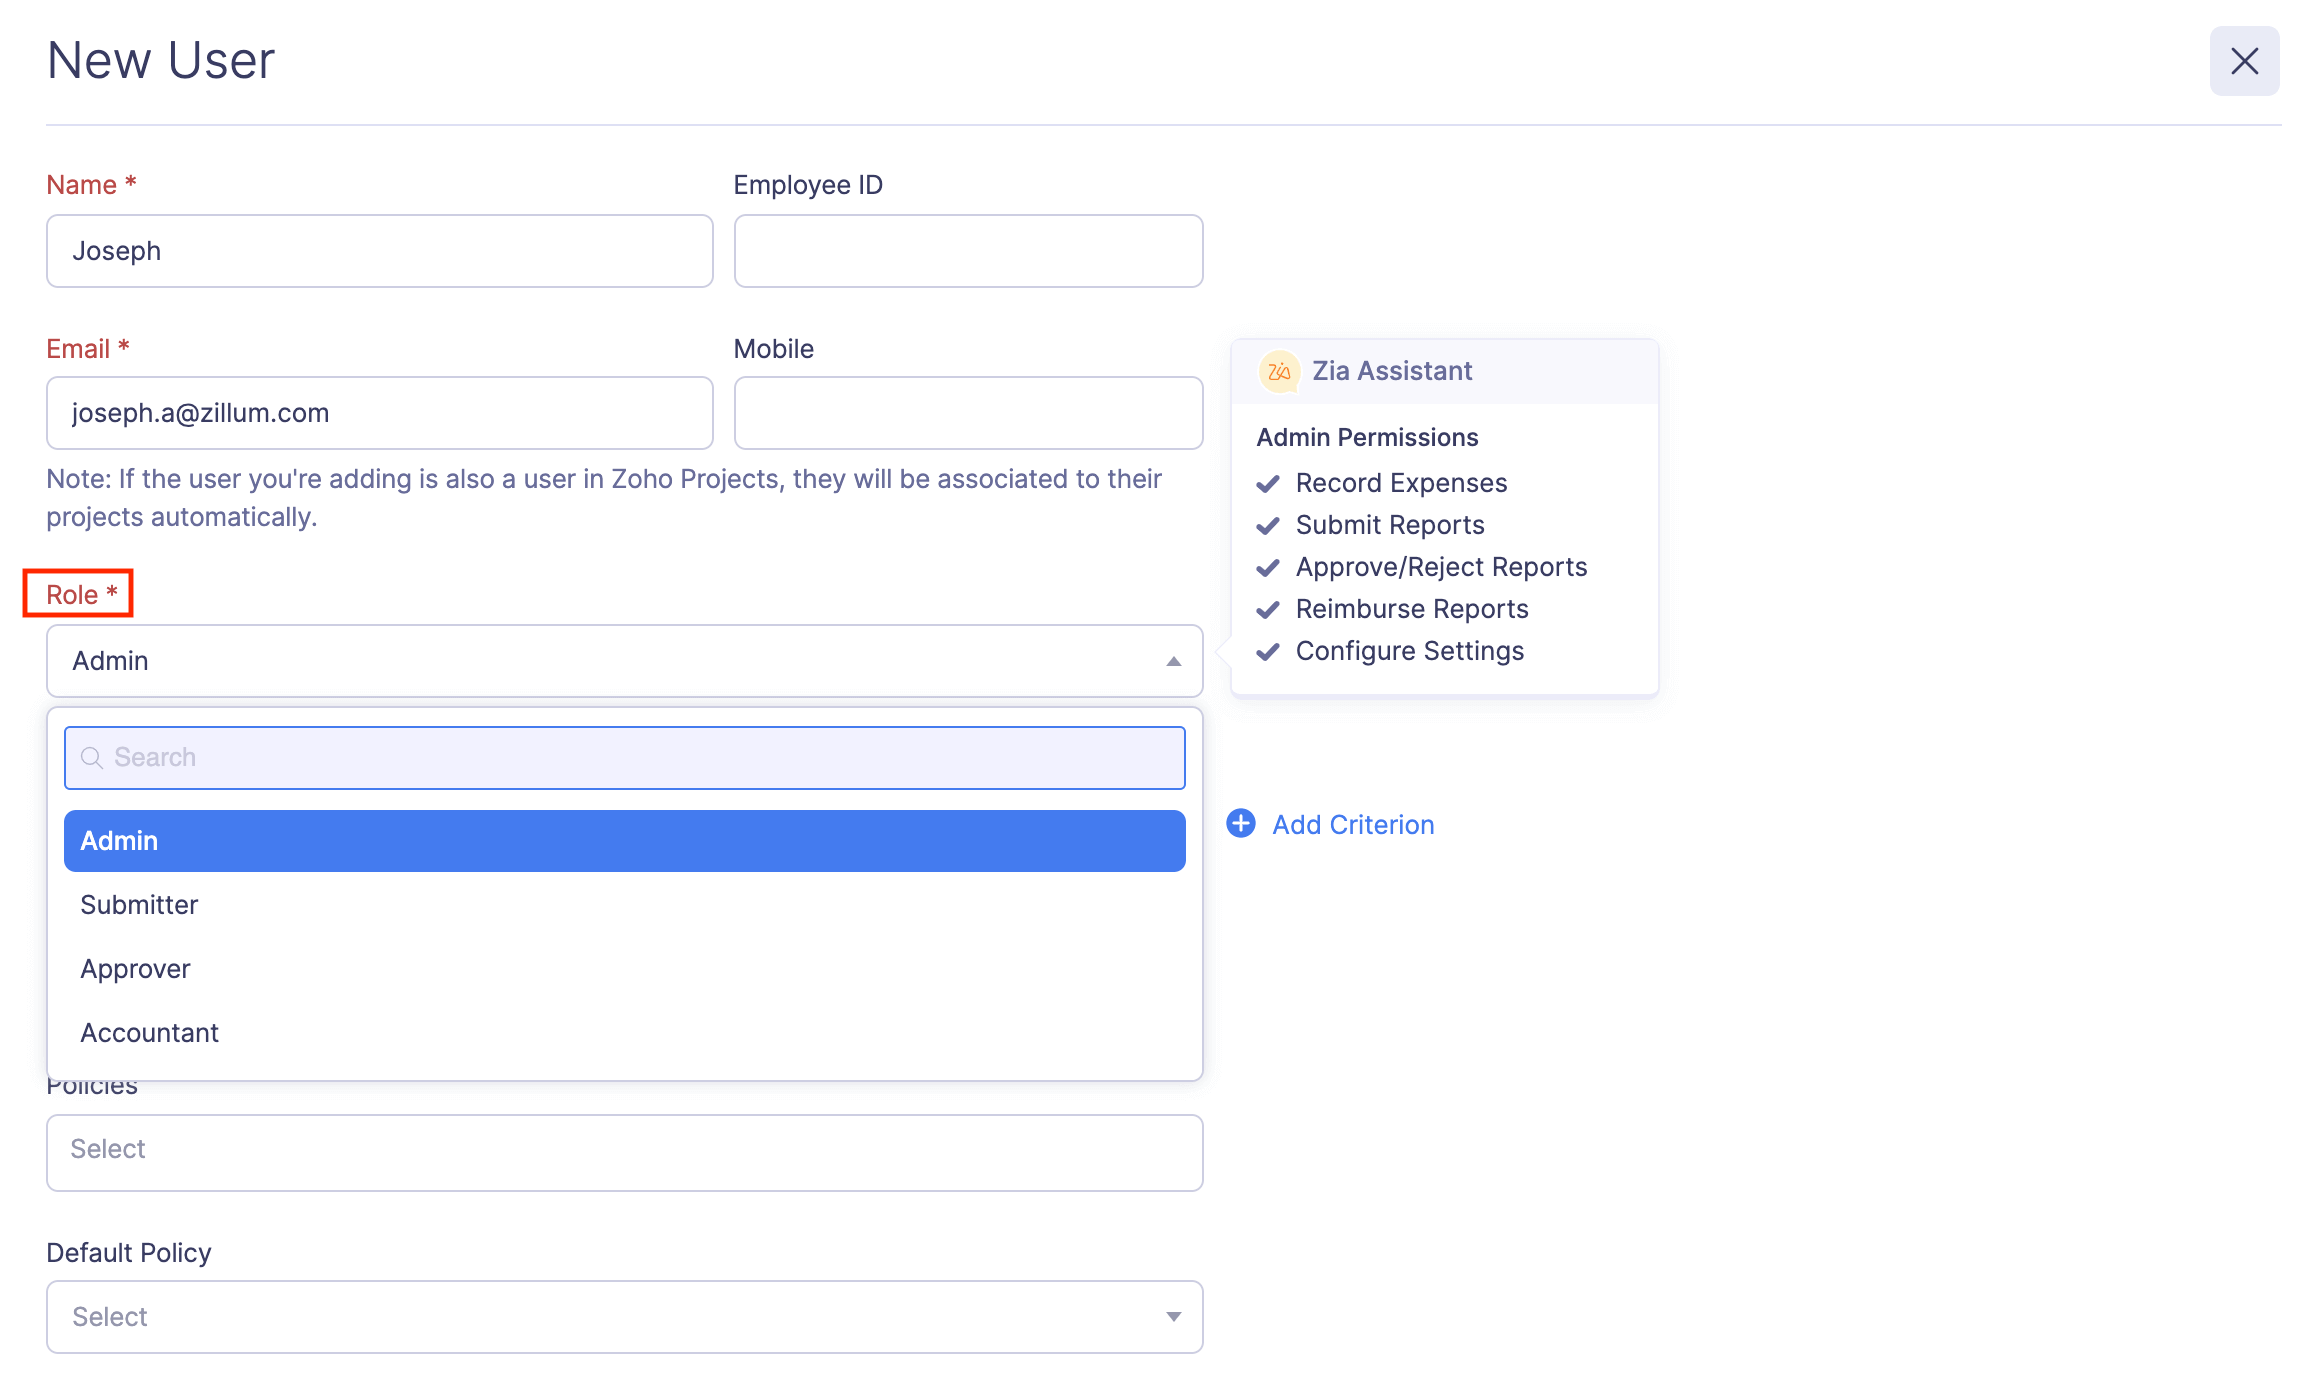
- Enter the Name, Employee ID, and Email Address of the user. Select the role from the Role dropdown. Click the Add button. An invitation will be sent to the user’s email address.
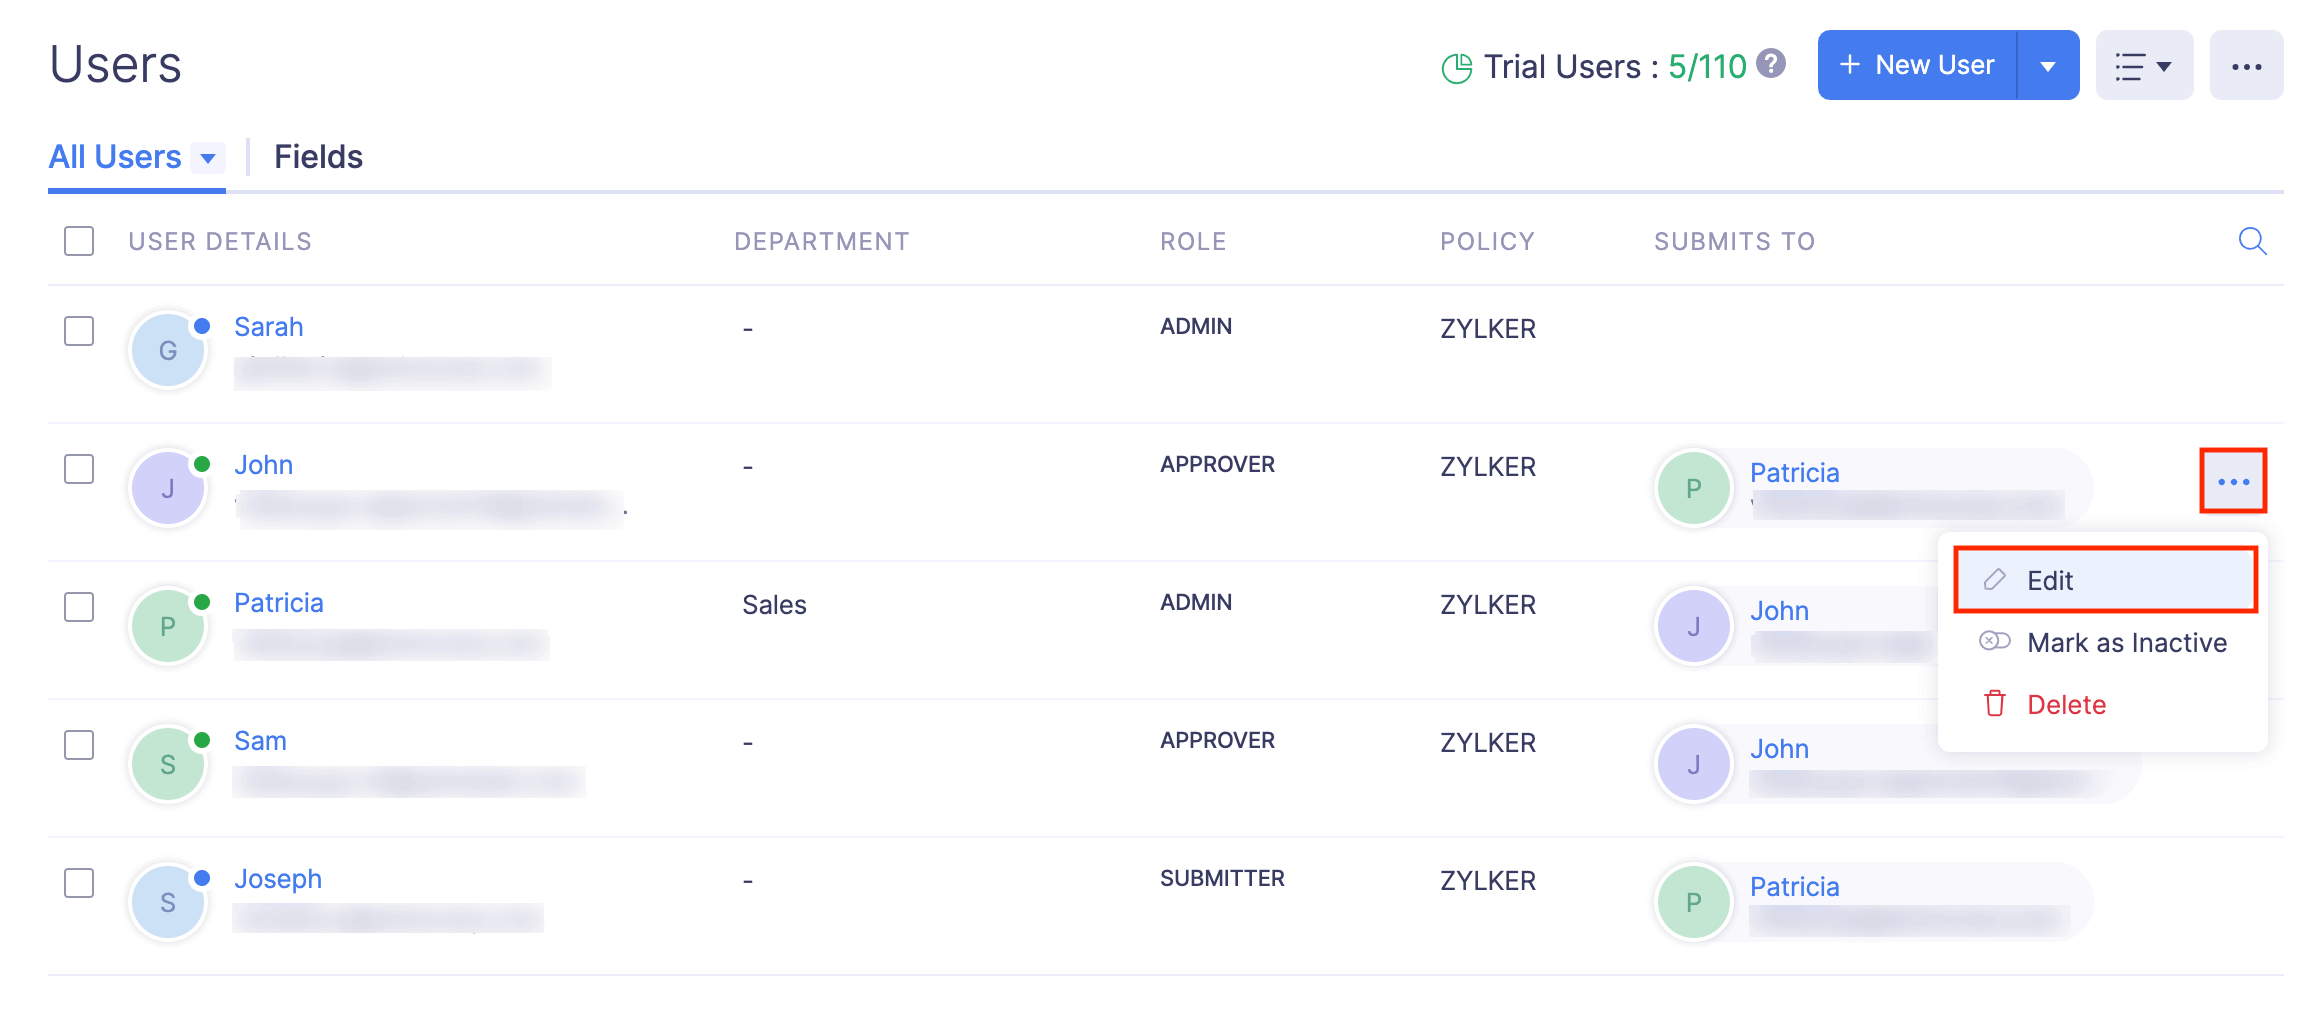
- If you want to assign the role to a user who has already been invited, click the More icon at the right corner of the user for whom you want to assign the role.
- Select Edit.
- Assign the role from the Role dropdown.
- Click Save. The user will be assigned to the selected role.
Add the user with policy based permission as a policy admin
To add a policy admin:
- Click Admin View.
- Go to Settings on the left sidebar.
(OR)
Click Settings in the top right corner of the page.
- Navigate to Organization Settings.
- Click Policies under Setup & Configurations.
- Click the policy for which you want to assign a policy admin.

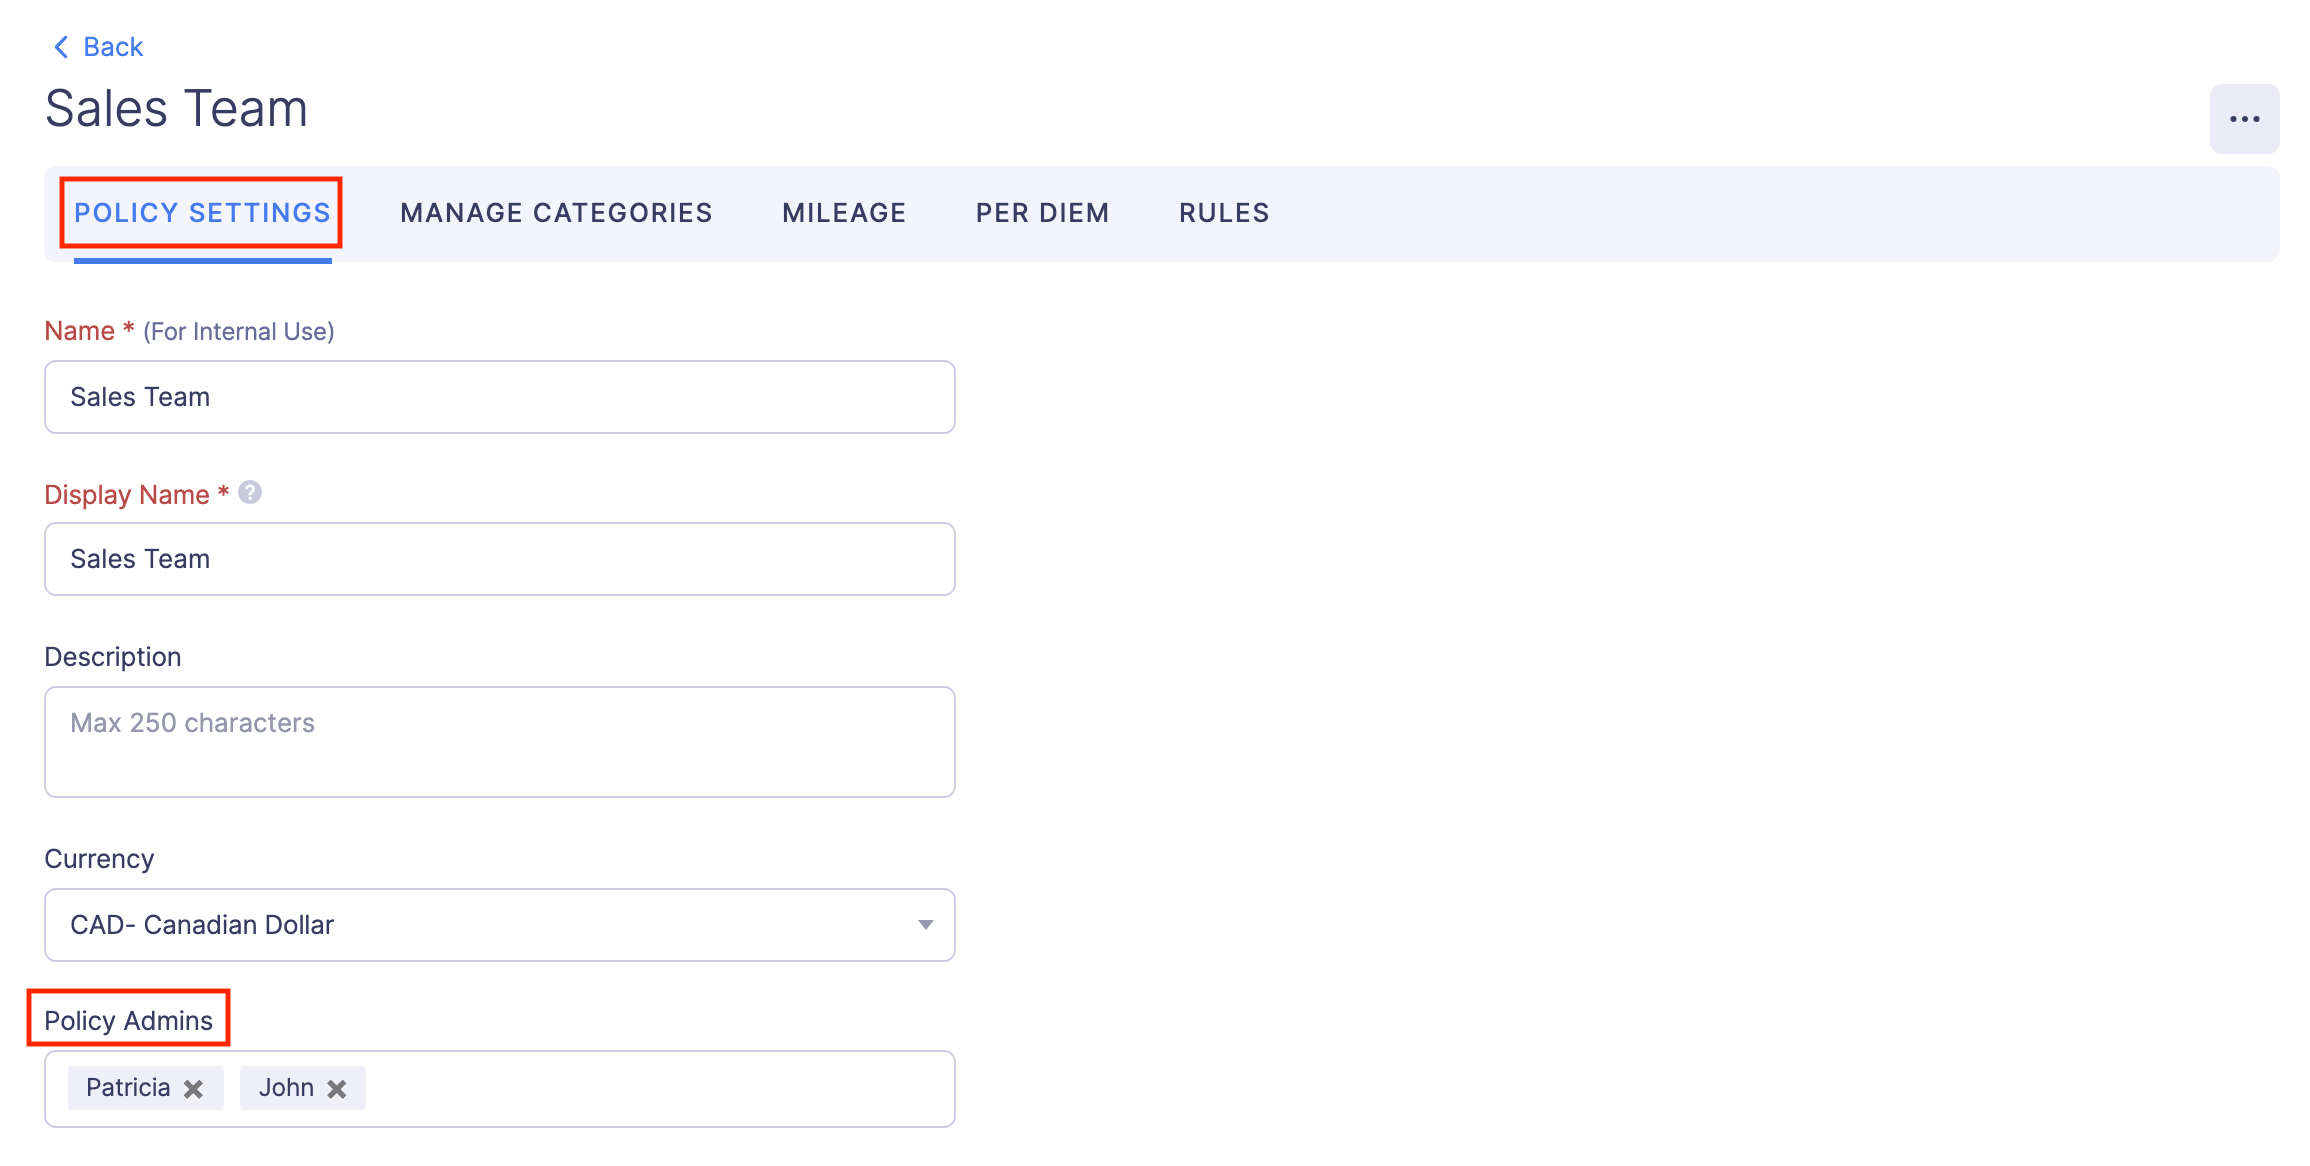
- Under Policy Settings, navigate to the field Policy Admins and select the users you want to add as policy admins.
- Click Save.
Now the selected users will be able to view all the trips, reports, corporate cards, and advances from the policy for which they are an admin.
View policy transactions
Once you’ve set up everything, the policy admins can view the policy based expense reports, trips, corporate cards, and advances by switching to the Admin View. All the policy based transactions will be listed under the respective modules in the admin’s view.
Allow Uncategorized Expenses to Be Part of Reports
Few expenses may be uncategorized, as the receipts or the corporate card transactions that were fetched into Zoho Expense do not have merchant or expense category details. However, if you enable this option, you can include these expenses in the reports. If you disable this option, users will not be able to add these expenses to a report until they manually associate a catagory to these expenses.
Upload Travel Policy
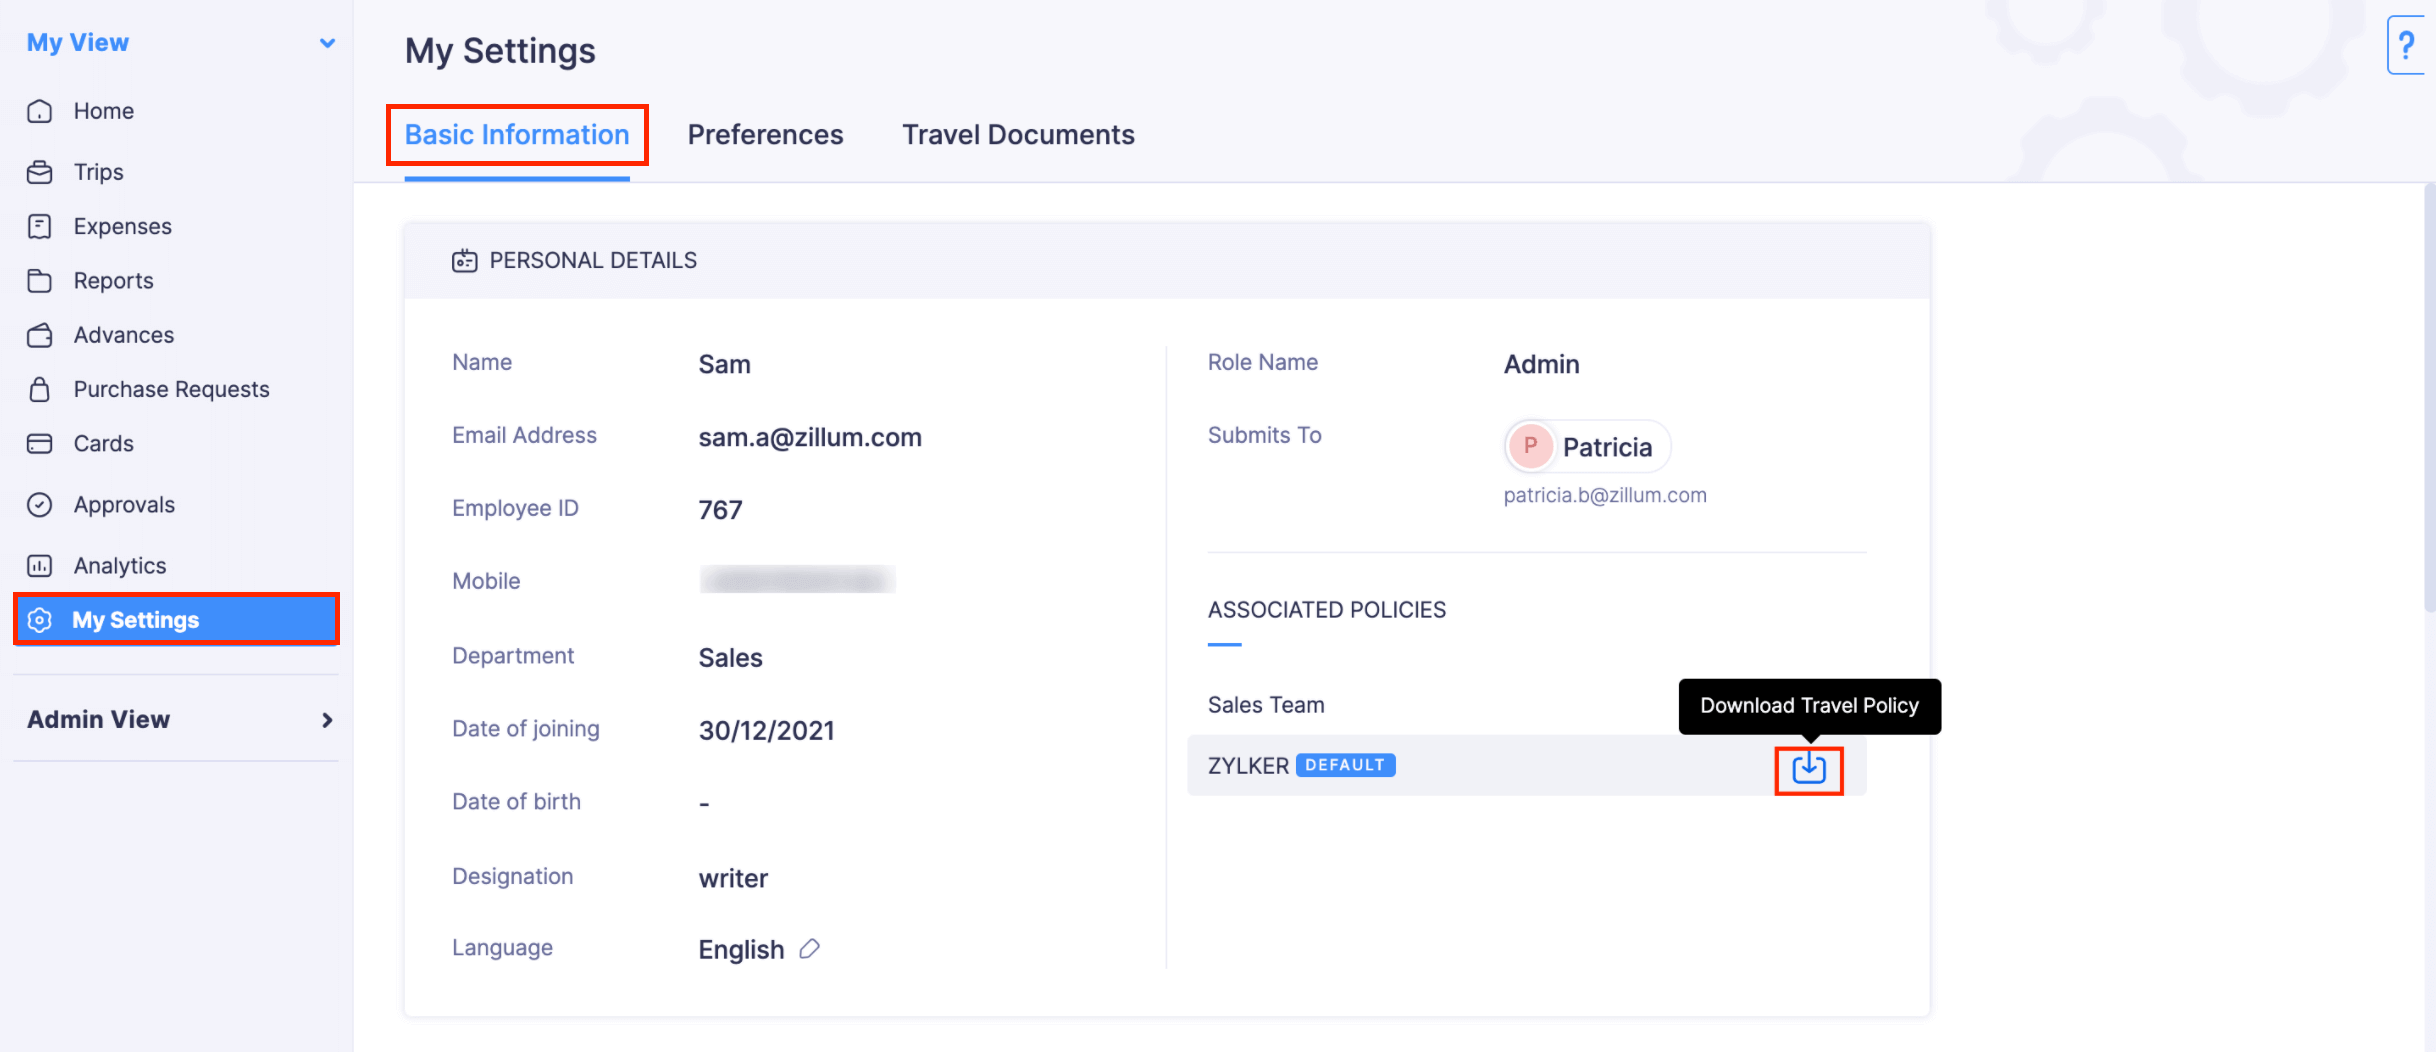
Apart from the expense rules and limits, companies will have a travel policy with rules on corporate card usage, list of allowable expenses, time frame on submission, approval, and reimbursements of expenses, and so on. You can upload the soft copy of this travel policy for easy reference. Your employees will be able to download the travel policy in their My Settings section by hovering over the associated policies. Ensure that the file size is less than 7MB.
You can upload the travel policy in any one of the following formats:
- png
- jpg/jpeg
- doc/docx
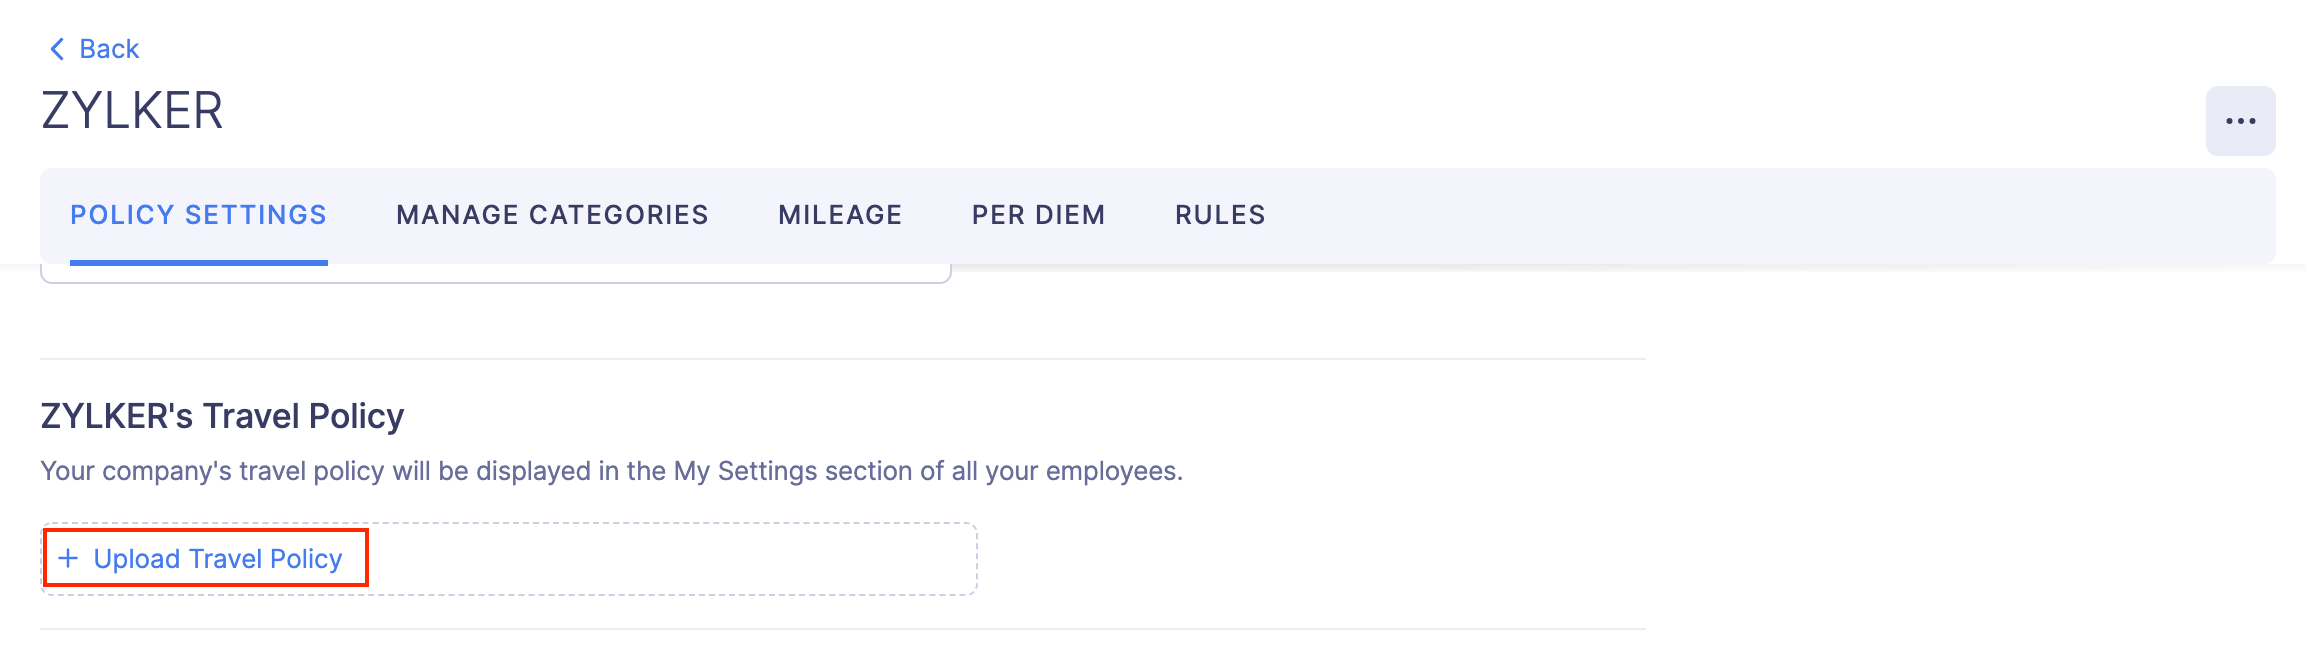
To upload the travel policy:
- Click + Upload Travel Policy.
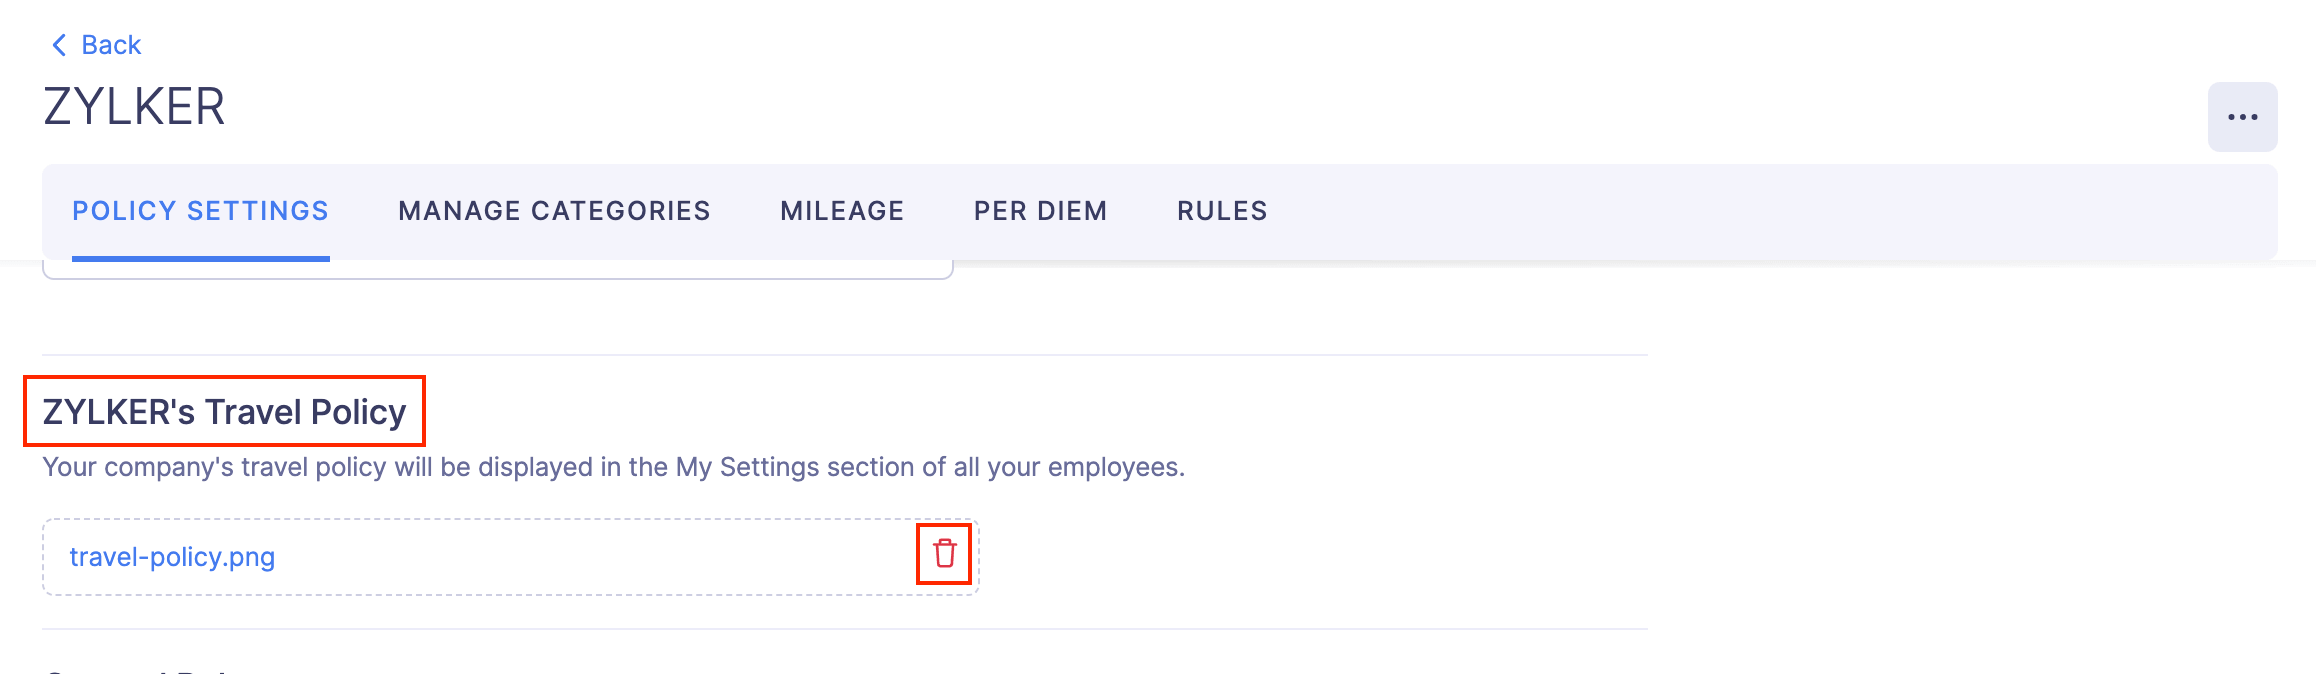
- Select a file from your computer and click Open. Your travel policy will be uploaded. If you would like to remove the uploaded file, click the Trash icon under Travel Policy. The uploaded file will be removed and you will be able to upload a new file.
- Click Save.
Configure Surcharge on Foreign Currency Expenses
Surcharge is an amount that organizations give to their employees for the additional fee charged while exchanging a foreign currency.
To understand this better, let us take a look at an example.
Bailey Miles, an employee from the USA goes on a business trip to Canada. Her employer, John, has configured a surcharge of 5% to be applied when an employee records an expense in any currency other than the base currency. John gives her cash advance in USD. When she converts the cash advance from USD to CAD, the currency exchange charges the exchange fee and gives her the remaining amount. Later, when she records the expenses incurred in CAD, a surcharge of 5% will be added to the expenses automatically to compensate for the exchange fee charged while exchanging the currency.
Note: This feature is available for early access. Email us at support@zohoexpense.com to get access.
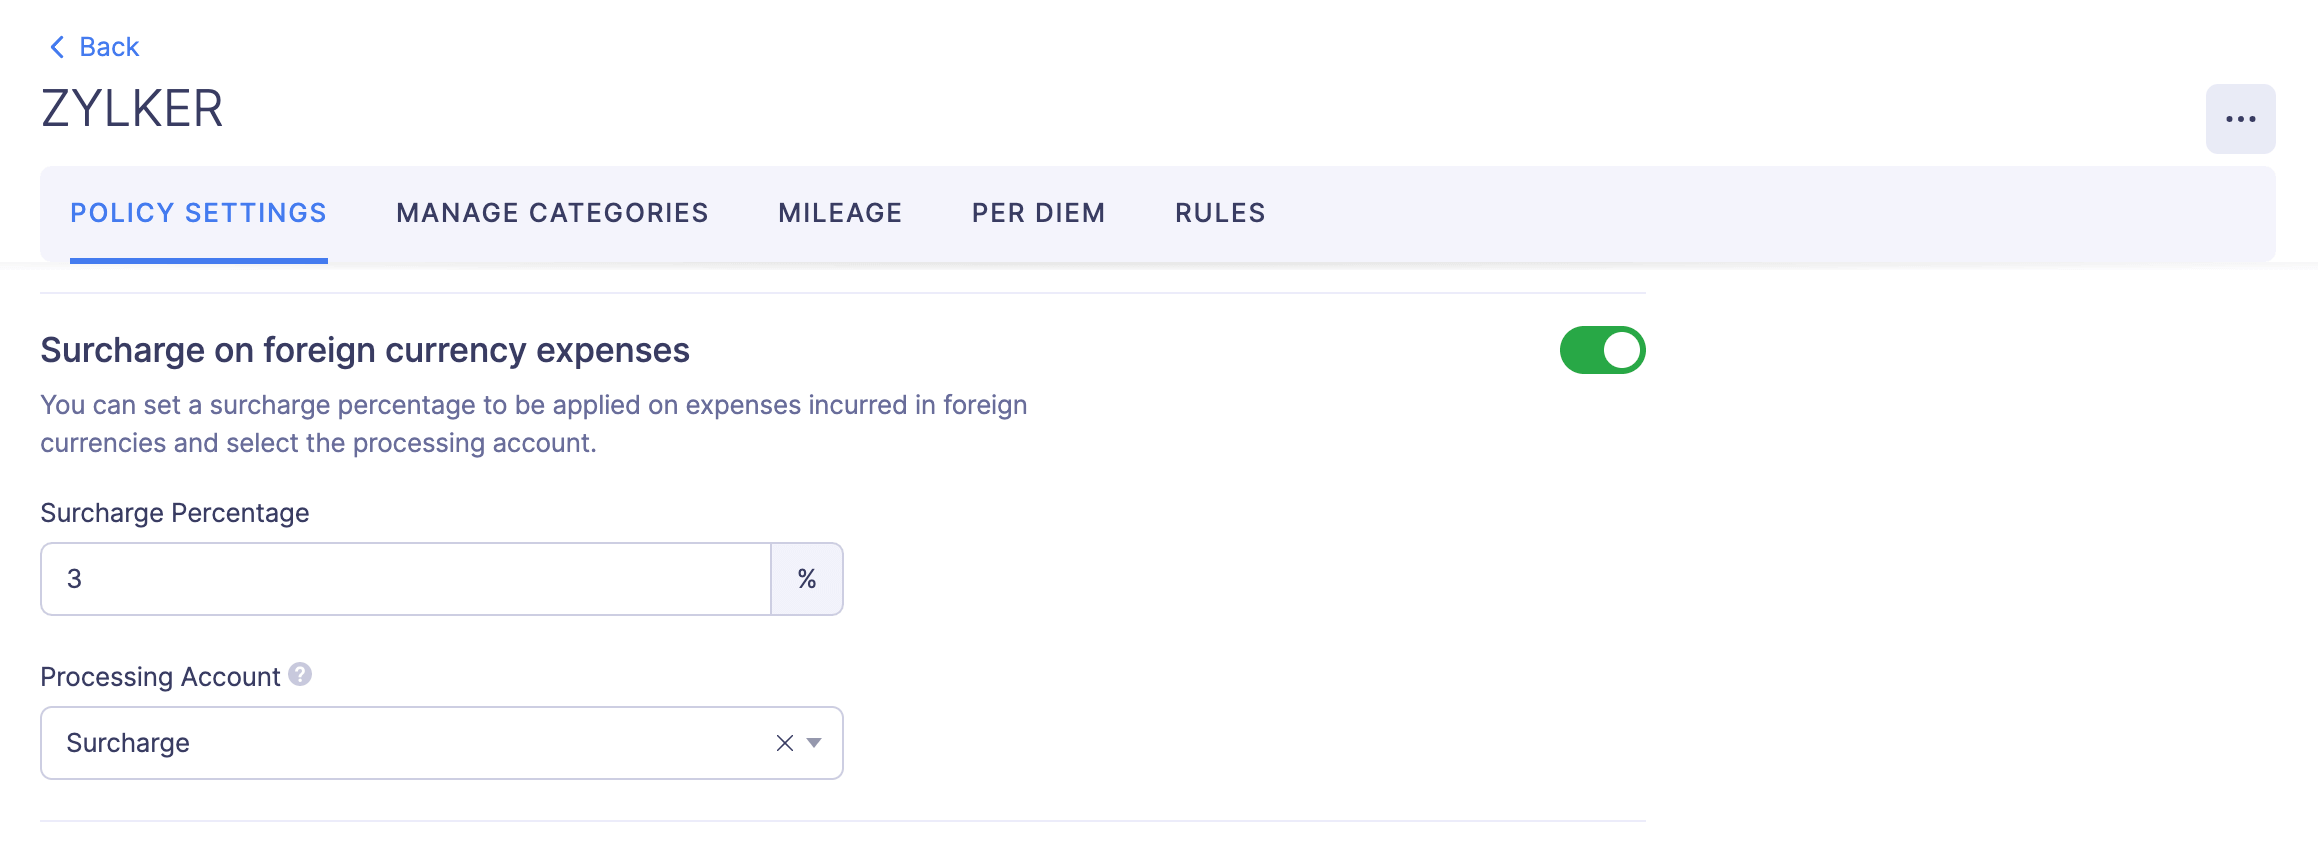
Admins can set up a surcharge percentage to be applied to expenses when employees incur expenses in foreign currencies. To set a surcharge percentage:
- Navigate to Surcharge on foreign currency expenses section and enable this option.
- Enter the surcharge percentage for the expenses incurred in foreign currencies.
- If you have integrated with Zoho Books, you can select a category from the Processing Account dropdown to track the surcharge amount. Note that the surcharge amount will not be tracked under the category of the expense for which the surcharge is applied.
- Click Save.
Once the admin enables this option, the surcharge amount is automatically calculated when employees record expenses in foreign currencies.
For example, if Bailey Miles records an expense of $100 and the policy allows a surcharge of 5%, surcharge will be recorded as $5, that is, 5% of $100.
Enable Trip Options
To enable trip options:
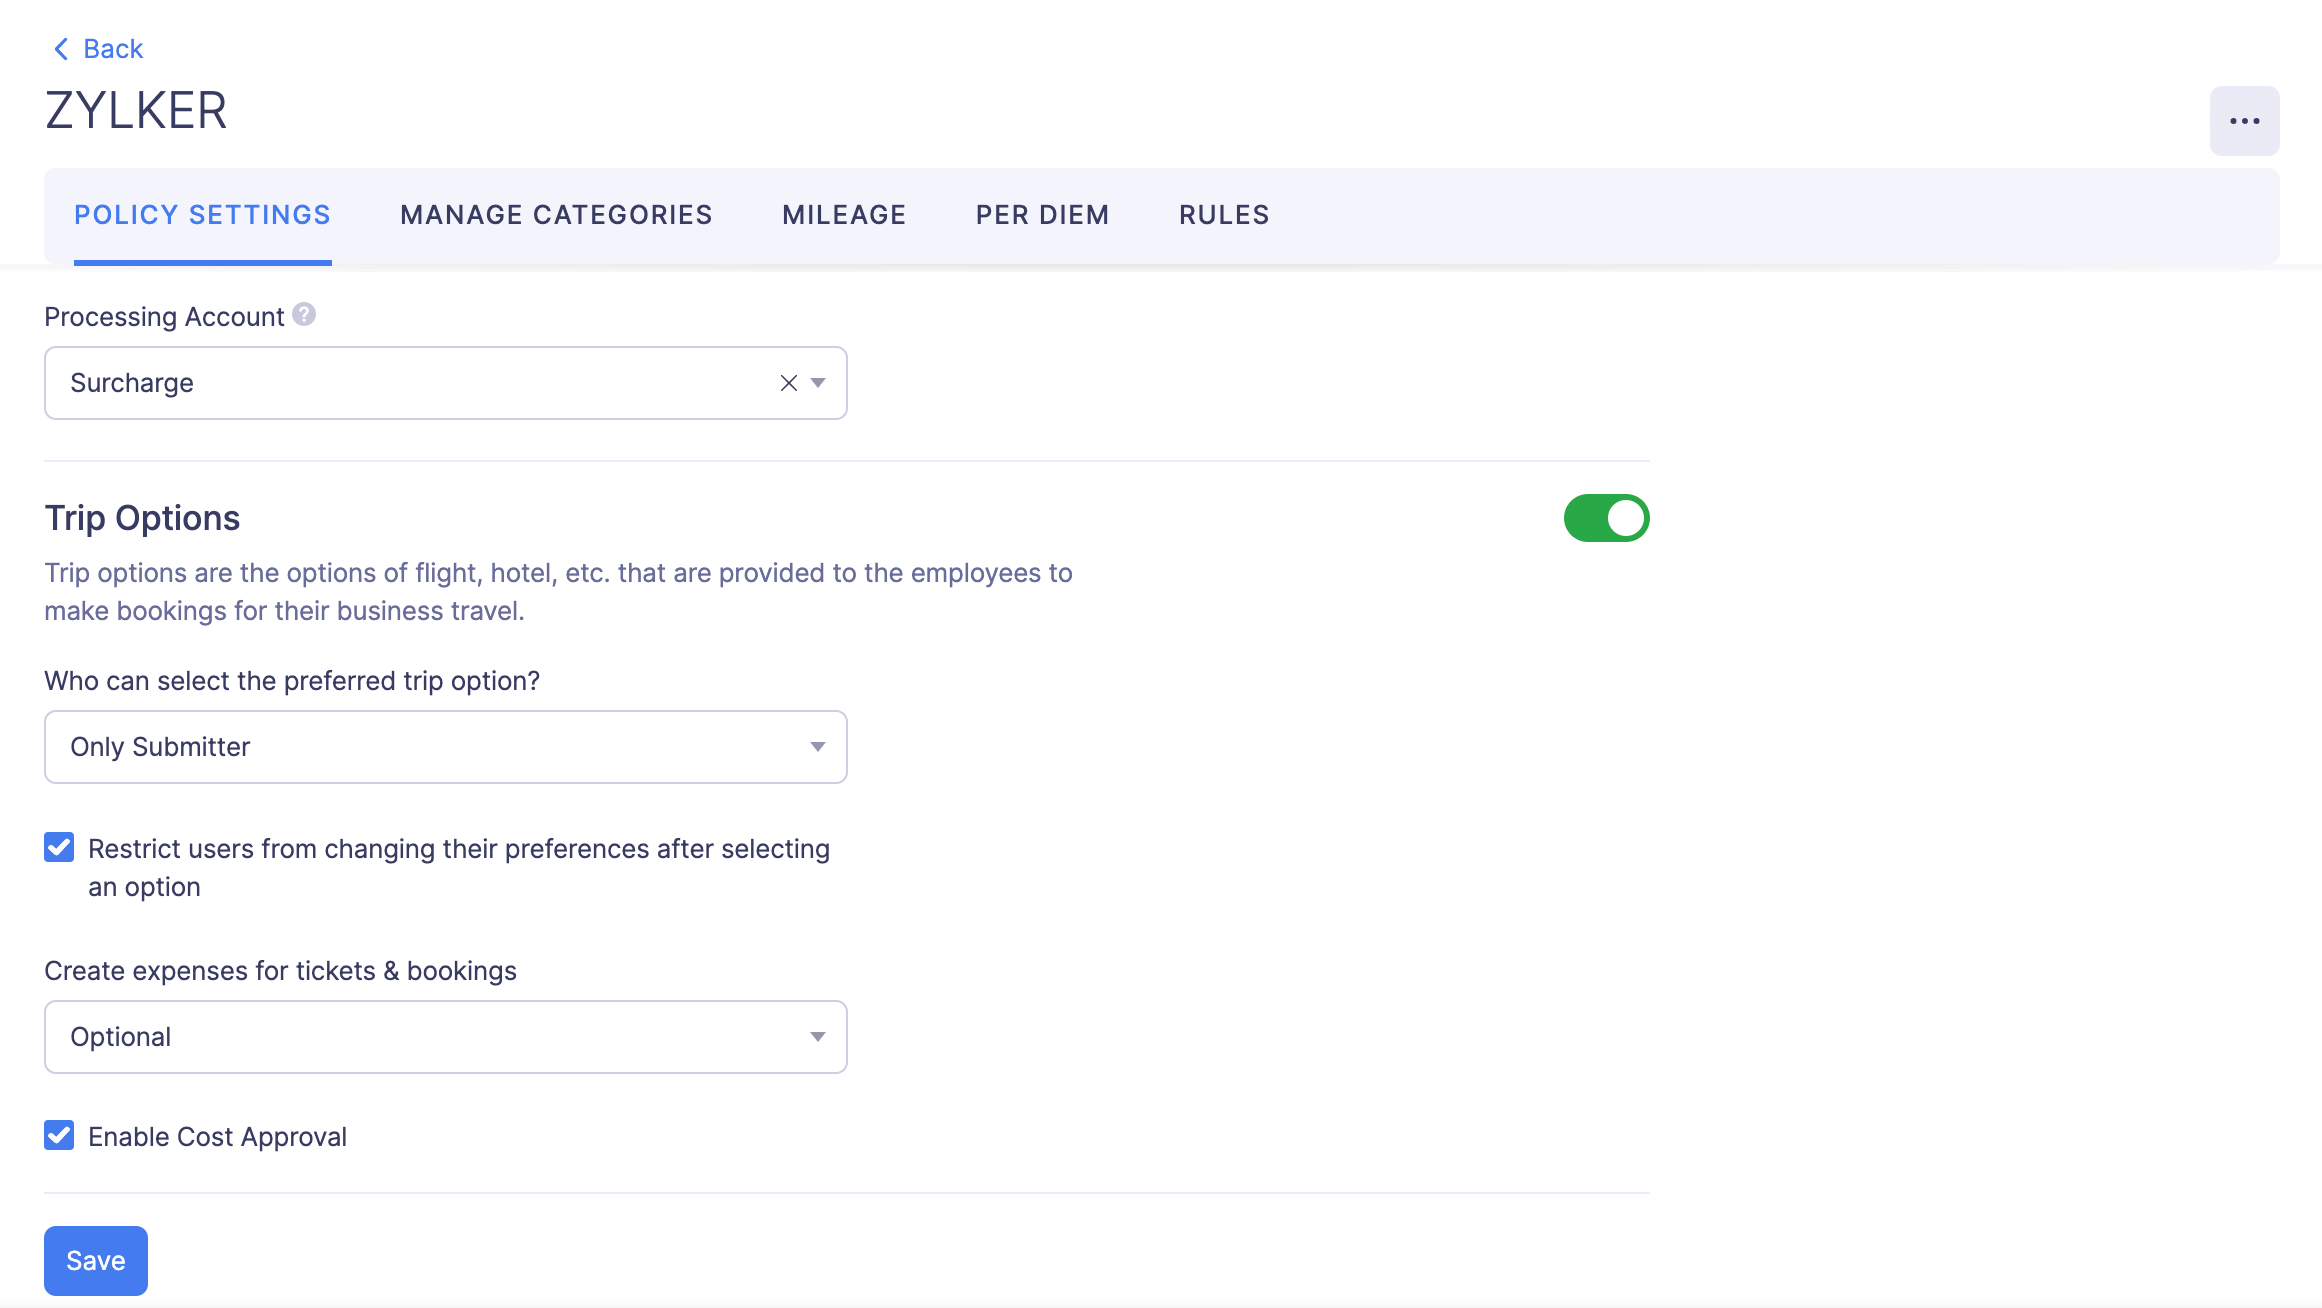
- Under Policy Settings, navigate to the Trip Options section and enable this option.
- You can then configure the following preferences:
- Who can select the preferred trip option?: You can select a user role who can be permitted to select the trip options.
Note: Admins will have permission to select trip options, irrespective of the user role you choose here.
* **Restrict users from changing their preferences after selecting an option:** You can mark this option if you want to restrict the users from switching to another option after selecting one.
**Create expenses for tickets & bookings:** You can choose whether the expense creation for tickets and bookings in the traveller's account be optional, mandatory, or not required. If you choose:
    * **Optional**: When you add the ticket details, you can check or uncheck the **create an expense for this ticket** **or booking** option, thus making expense creation optional.
    * **Mandatory**: An expense will be created in the expenses section of the traveller's account.
    * **Not Required**: No expense will be created.

* **Enable Cost Approval:** If you want an approver to approve the selected booking option, you can check this option. The trip itinerary with the selected option, will be sent for approval to the approvers who have access to the trip.
- Click Save.
Note: The default user roles Approver and Submitter have permissions to select booking options whereas the admin has permissions to select, approve booking options, and to book tickets. The permissions provided to the default user roles cannot be changed. However, you can create new roles and configure permissions for booking options based on your needs.