Category Limits
You can configure general limits for all your categories or set up limits for the specific categories of your choice.
Configure General Limits
General limits are applicable to all the expense categories by default. These limits will be applied only to users who are associated with the policy. To configure general limits:
- Click Admin View.
- Go to Settings on the left sidebar.
(OR)
Click Settings in the top right corner of the page.
- Navigate to Organization Settings.
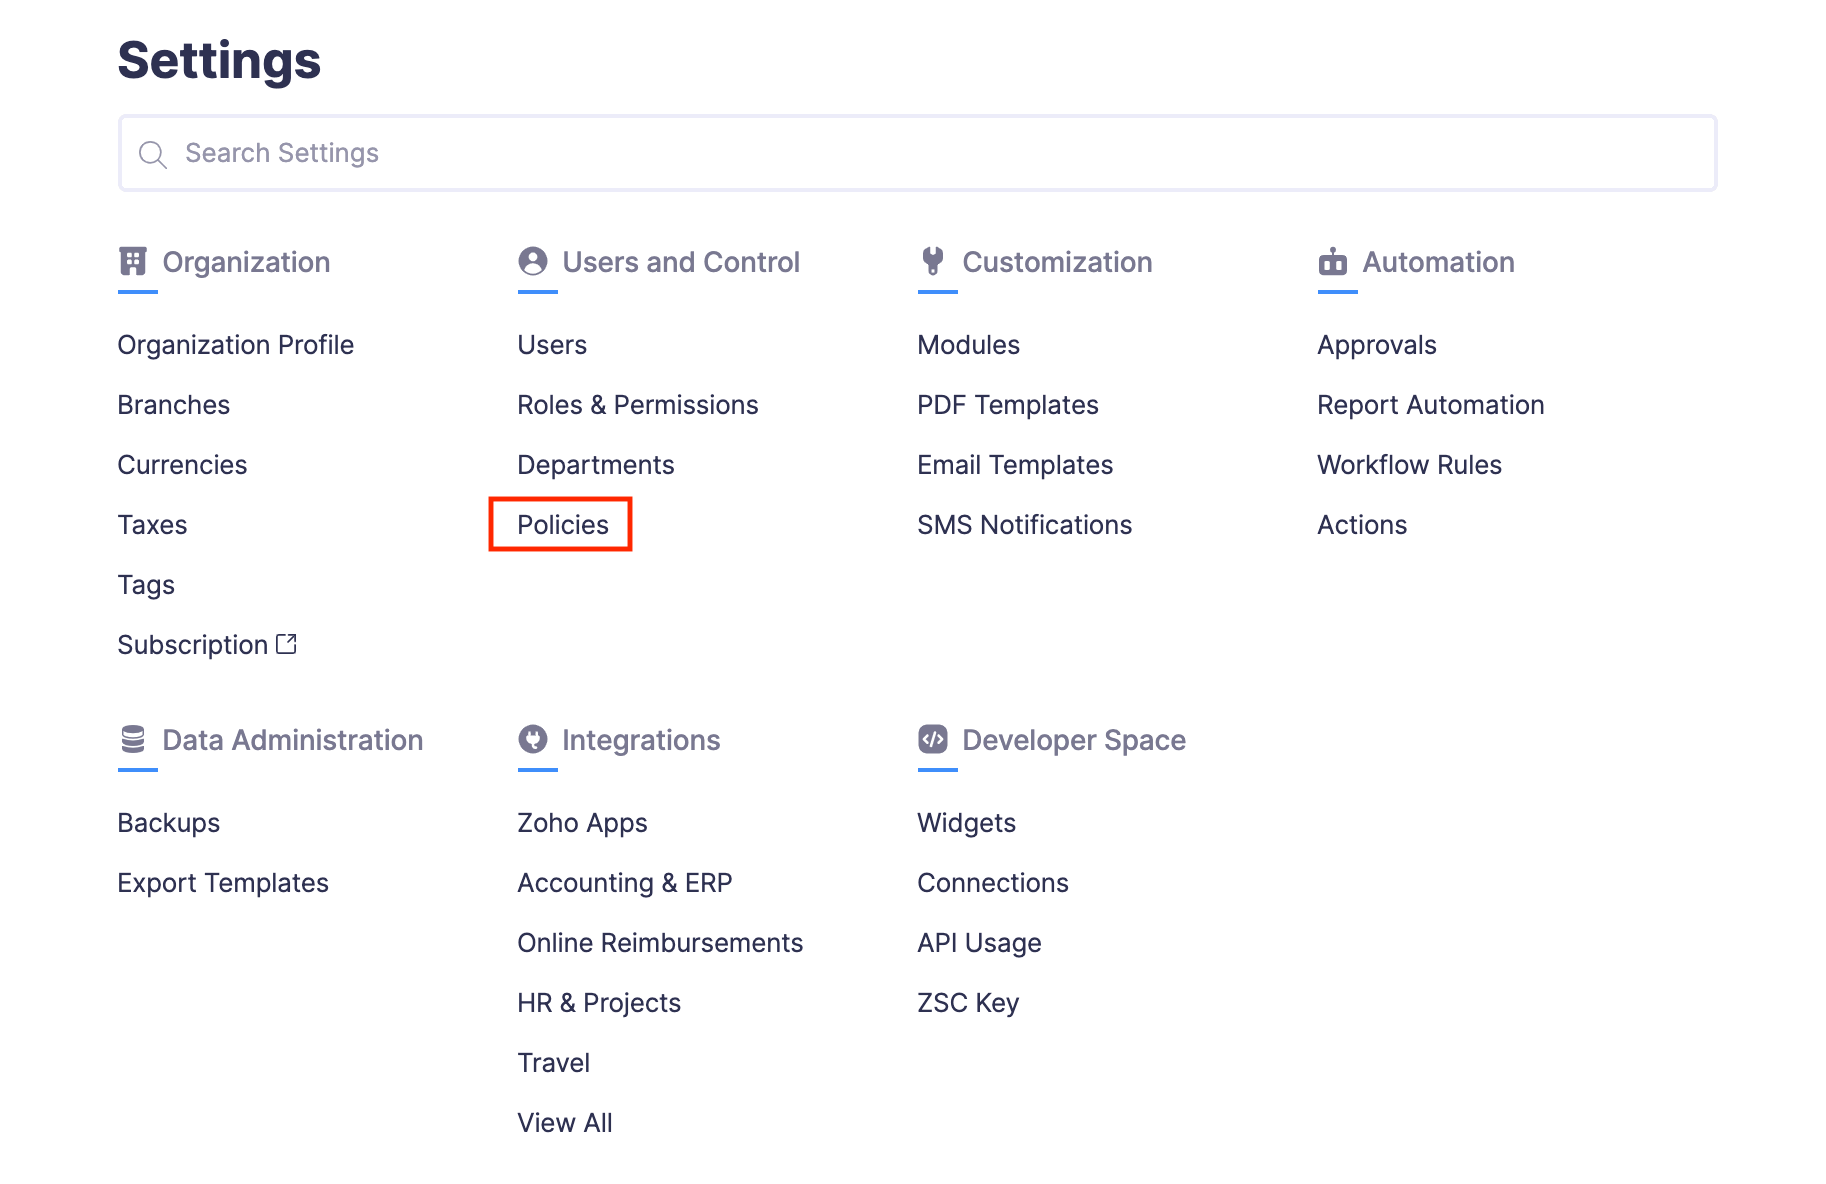
- Click Policies under Setup & Configurations.
- Click the policy for which you want to set up general limits.

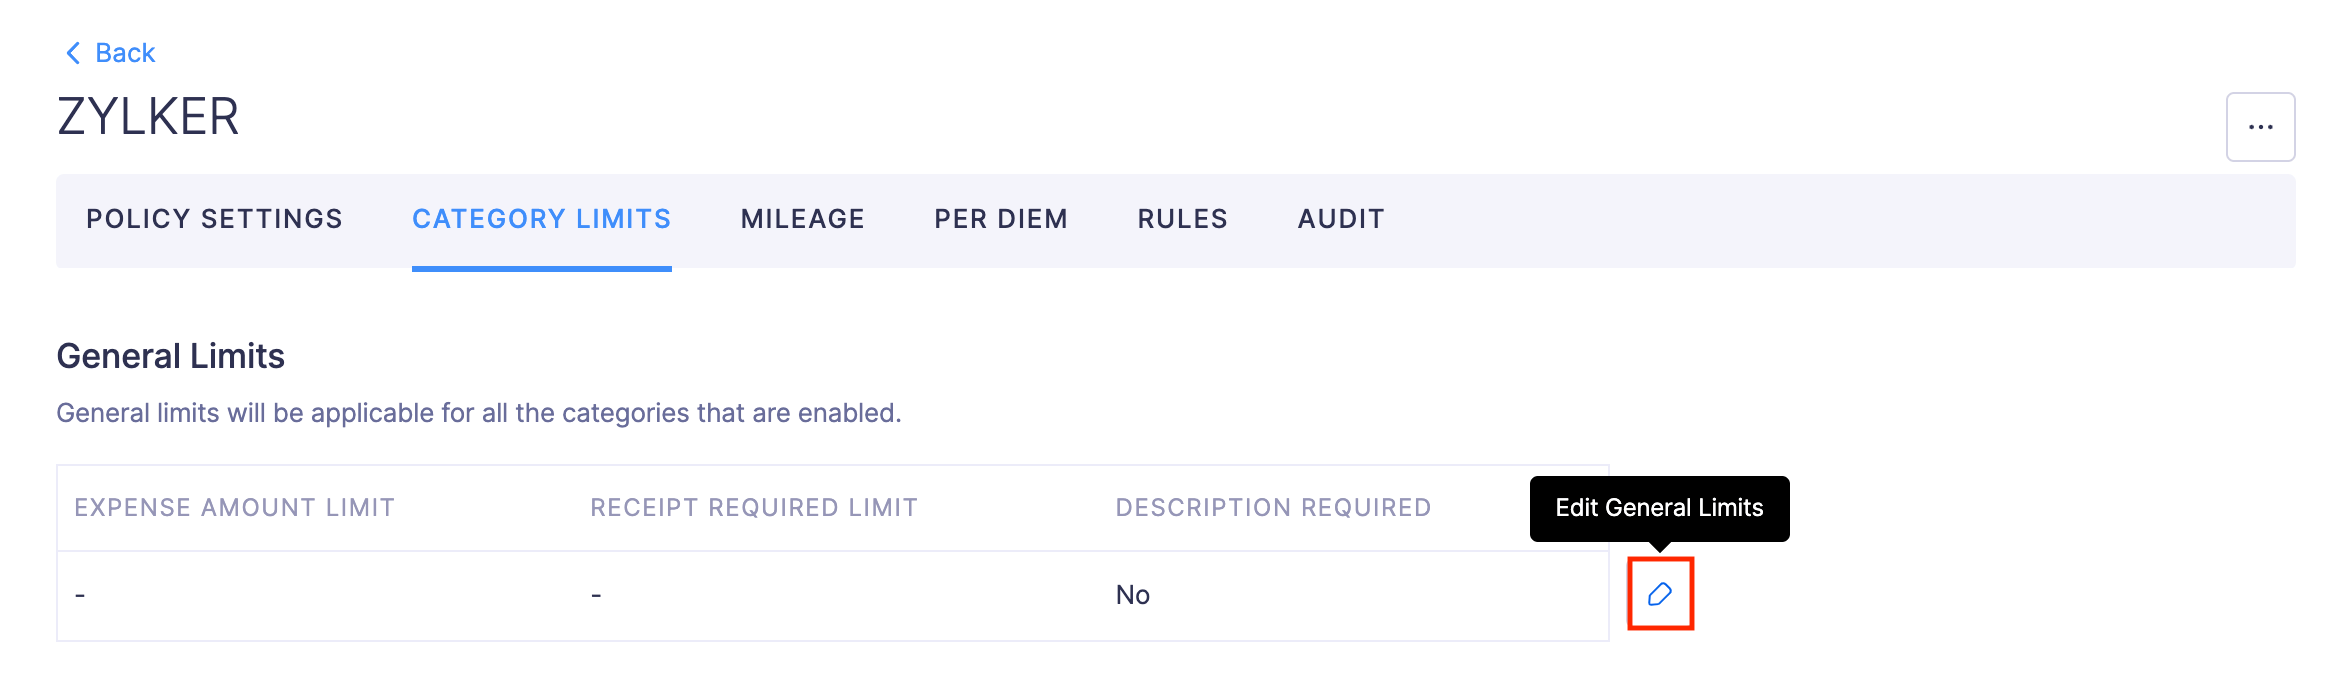
- Navigate to Category Limits.
- Click the Edit icon at the right corner of the General Limits.
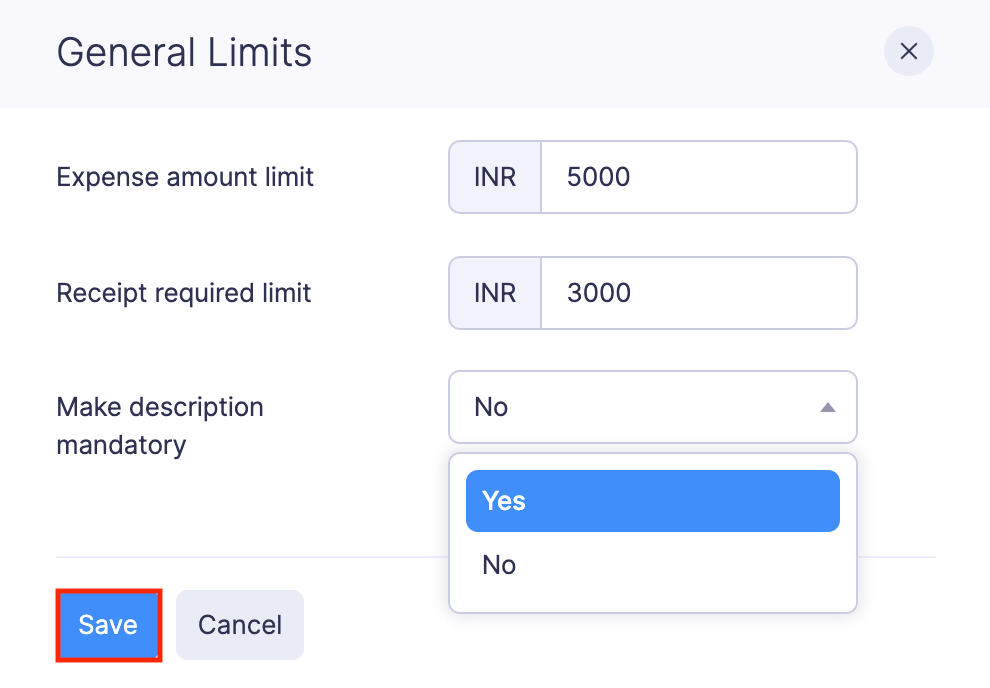
- In the popup that opens, you can set up the following general limits.
- Expense amount limit: You can enter the maximum amount with which an expense should be created. Any expense which exceeds the configured limit will be considered a policy violation.
- Receipt required limit: You can set up an amount limit and any expense that exceeds the receipt required limit will require an attachment of a receipt as a proof of expenditure. Failure to attach receipt will be flagged as a policy violation.
- Make description mandatory: You can make description mandatory for all expenses.
- Click Save.
Configure Category-specific Limits
Here, you can set individual limits for each expense category, that is, override the general limits that were configured for all the expense categories in the General Limits and make them category specific.
You can enable or disable the categories with which your employees can create expenses. If you have integrated with Zoho Books or QuickBooks Online, the imported accounts will also be available in the list.
To set up the category-specific limits:
- Click Admin View.
- Go to Settings on the left sidebar.
(OR).
Click Settings in the top right corner of the page.
- Navigate to Organization Settings.
- Click Policies under Setup & Configurations.
- Click the policy for which you want to set up limits for specific categories.
- Navigate to Category Limits.
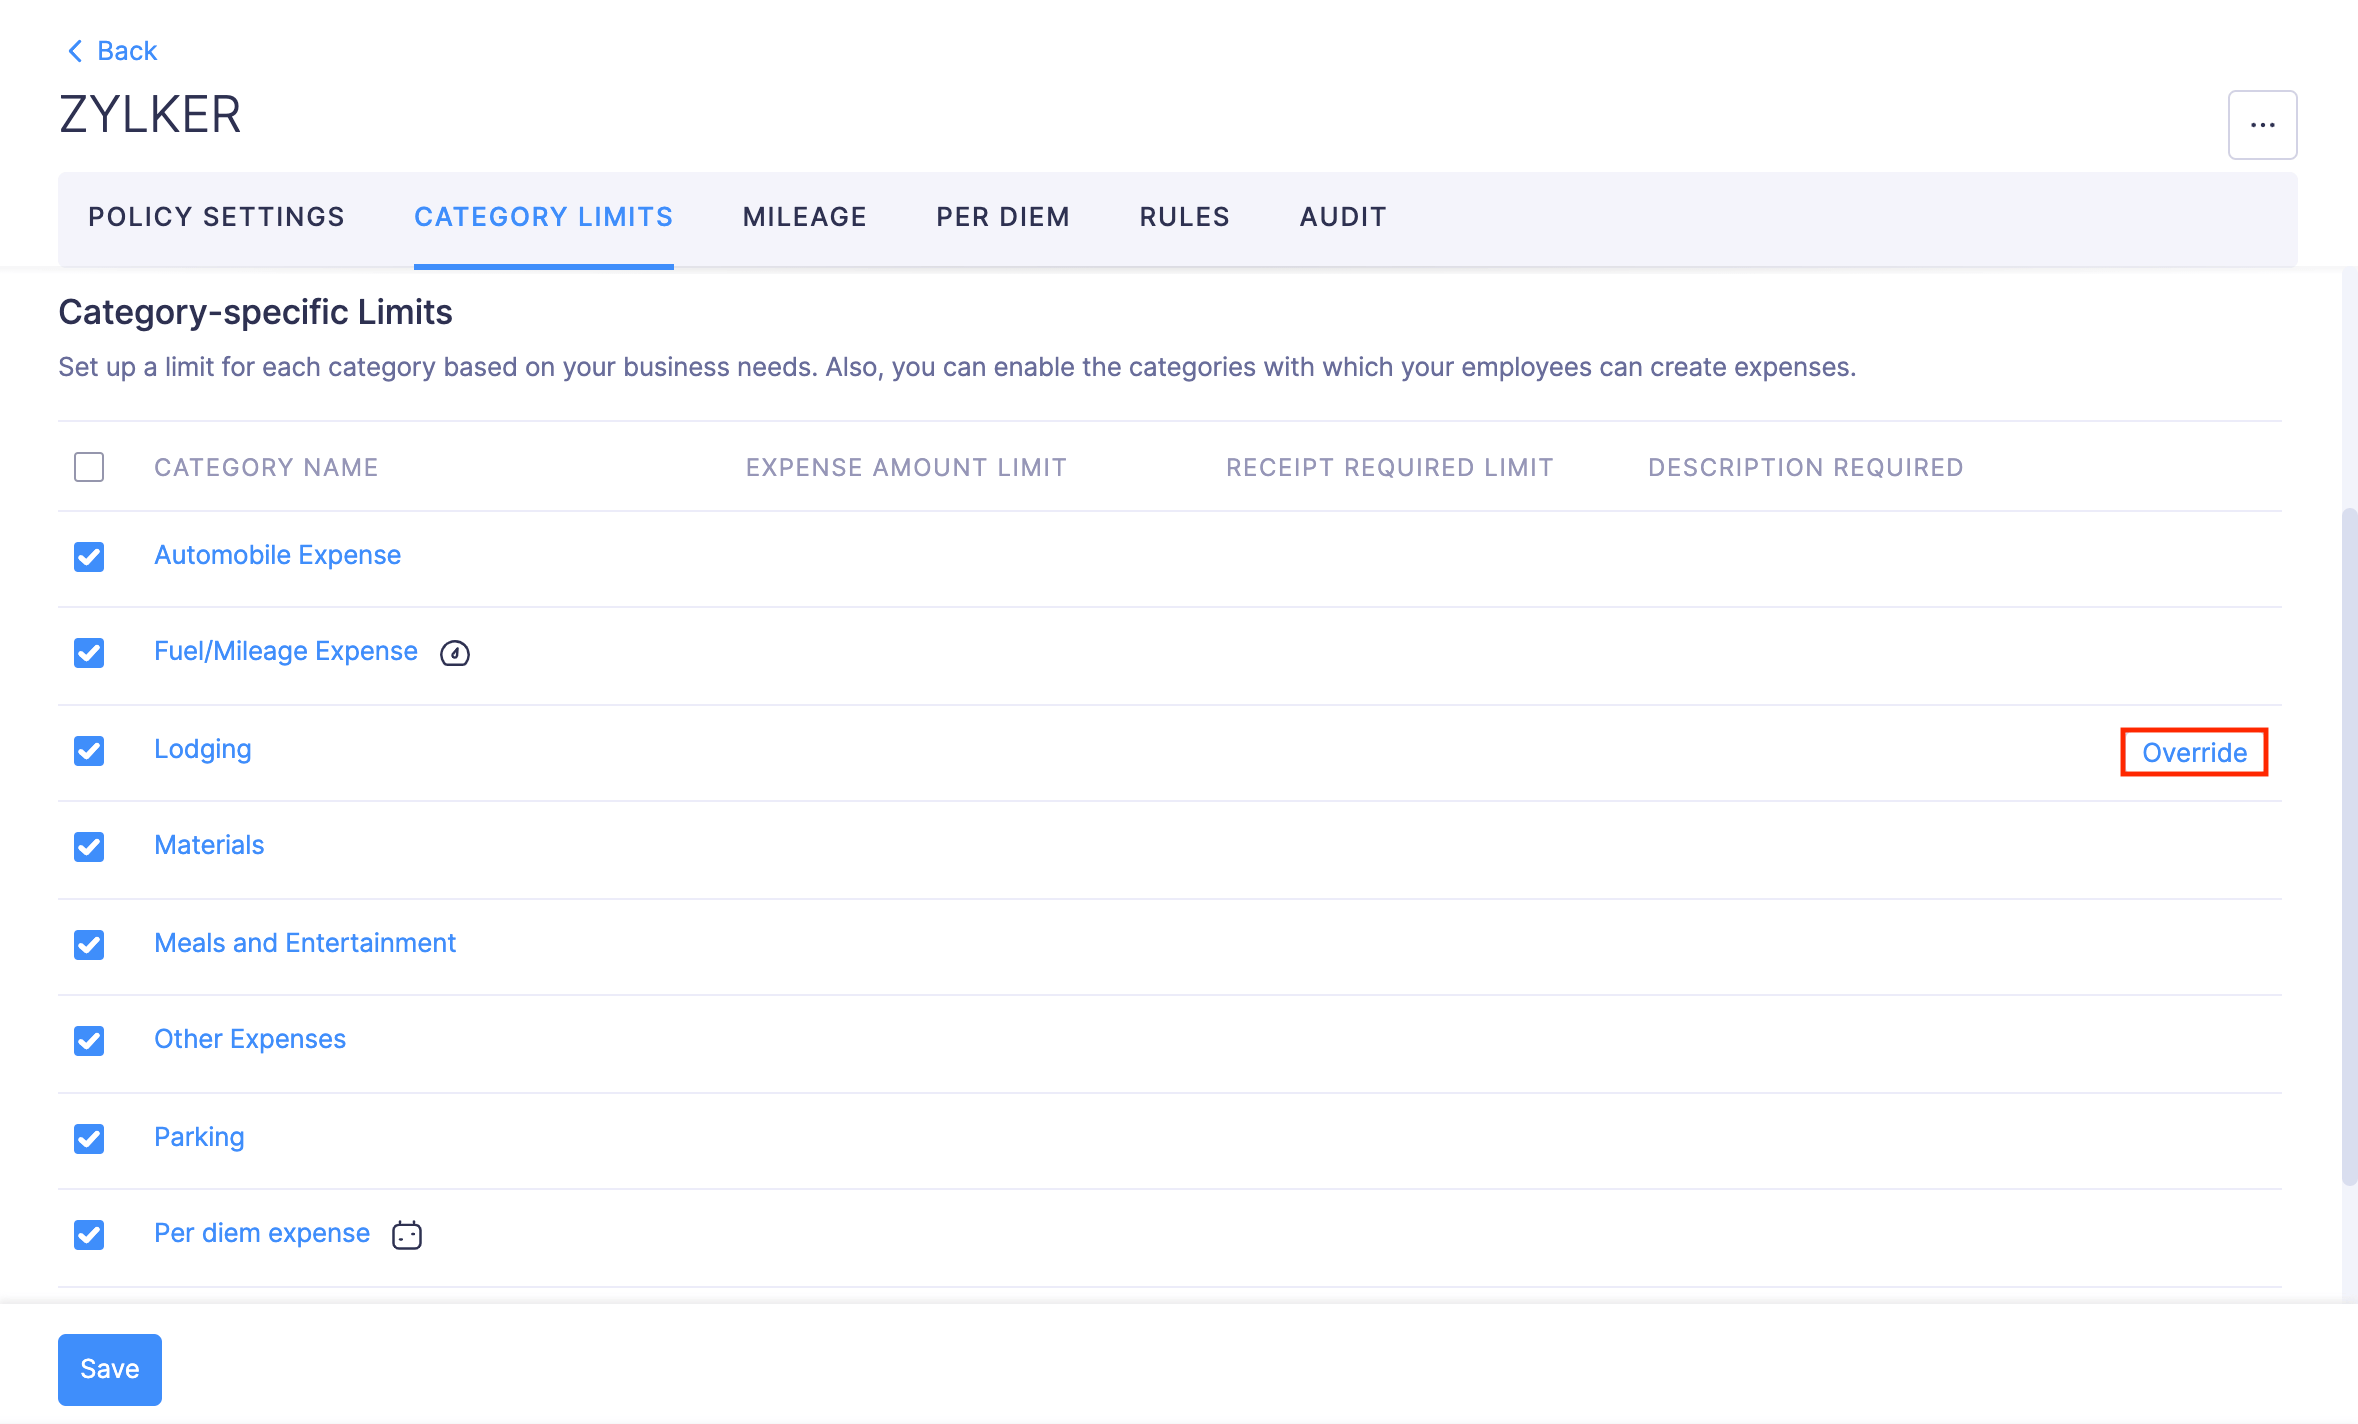
- Enable or disable the categories with which your users can create expenses.
- Hover over the category for which you would like to set a limit.
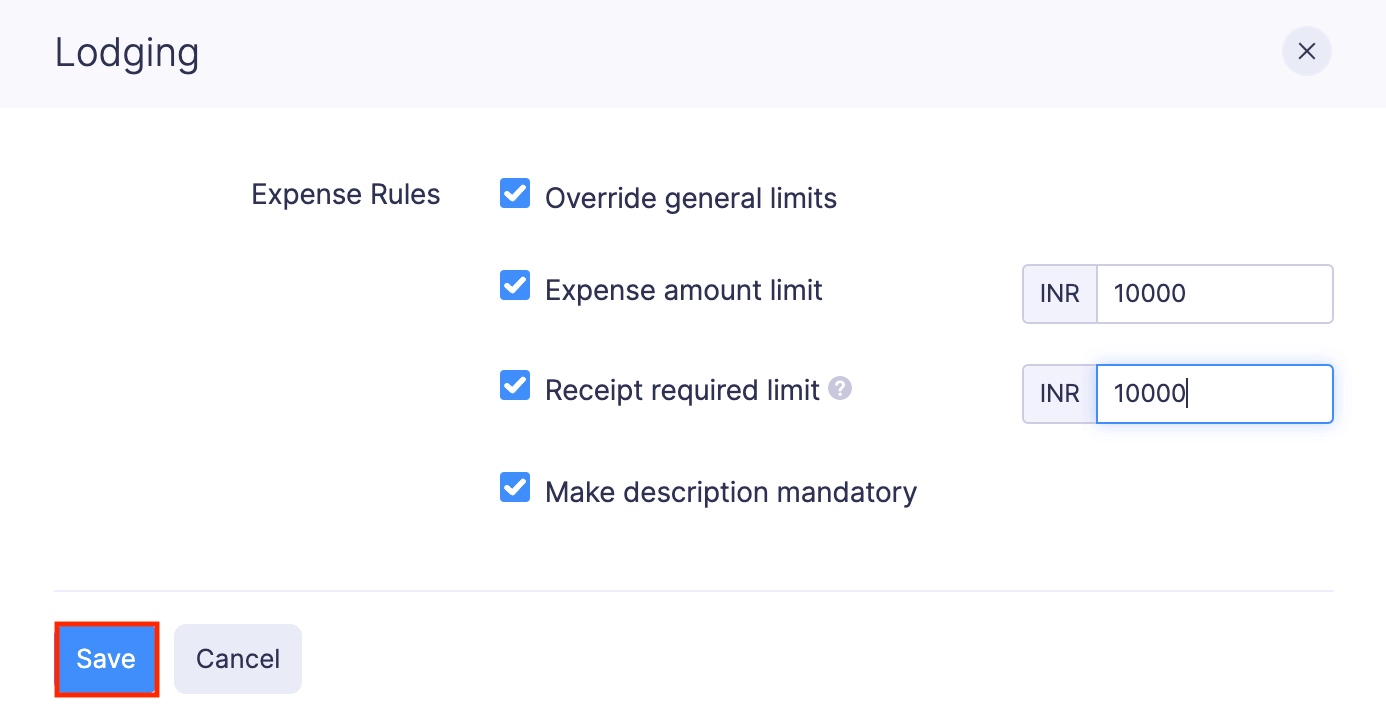
- Click the Override option at the right corner of the category.
- Mark Expense amount limit option and provide the expense amount limit.
- Mark Receipt required limit option and receipt required limit specific to that category.
- Choose whether you want to Make description mandatory.
- Click Save.