
Integrate Zoho Expense With Zoho Projects
Zoho Projects is an online project management tool that helps you plan and track your work efficiently. By integrating Zoho Expense with Zoho Projects, you can fetch your projects and customers from Zoho Projects to record the related expenses in Zoho Expense.
Benefits of the Integration:
- Fetch projects from Zoho Projects and record the project related expenses in Zoho Expense.
- Import all the clients associated with projects as customers and record the project expenses in Zoho Expense.
- Import all the users associated with projects to help them report expenses in Zoho Expense.
- Access Zoho Expense from Zoho Projects. View and record expenses, and create expense reports without switching apps.
Setup Zoho Projects Integration
Here’s how you can integrate Zoho Projects with Zoho Expense:
- Click Admin View on the left sidebar.
- Go to Settings on the left sidebar.
(OR)
Click Settings in the top right corner of the page. - Select HR & Projects under Integrations.
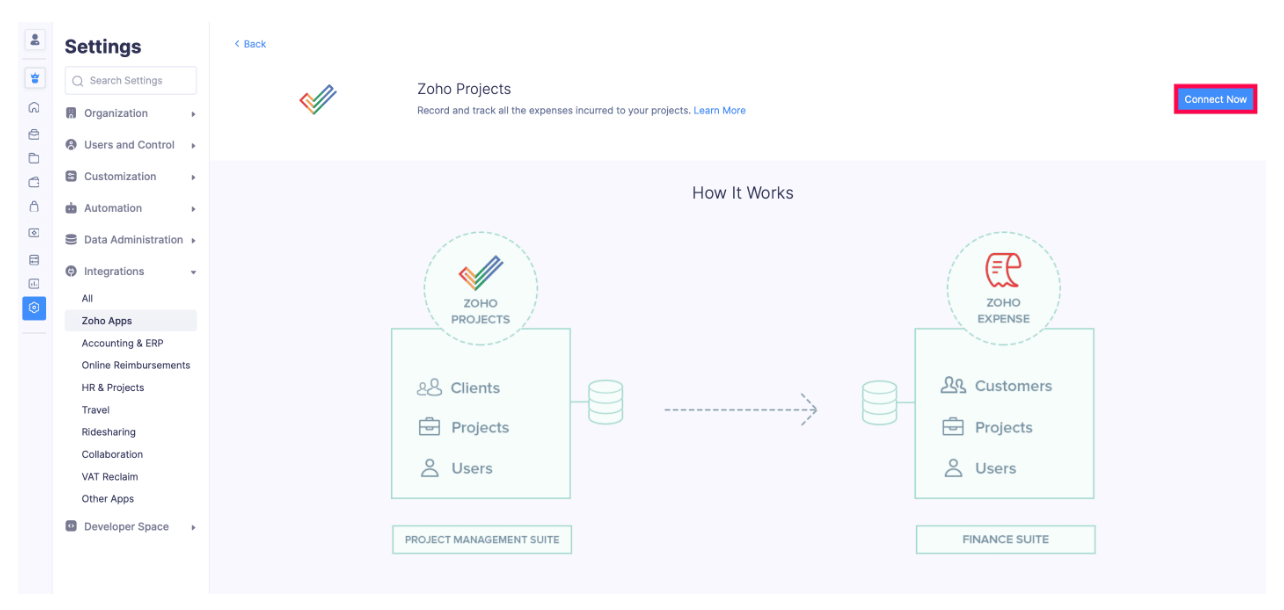
- Click Zoho Projects.
- Click Connect Now to initiate the setup.
- Select the Portal from the dropdown.
Note: If you have integrated any of the Zoho finance apps with a portal from Zoho Projects, you cannot change the portal that is auto-populated, and this portal will be common to all Zoho finance apps.
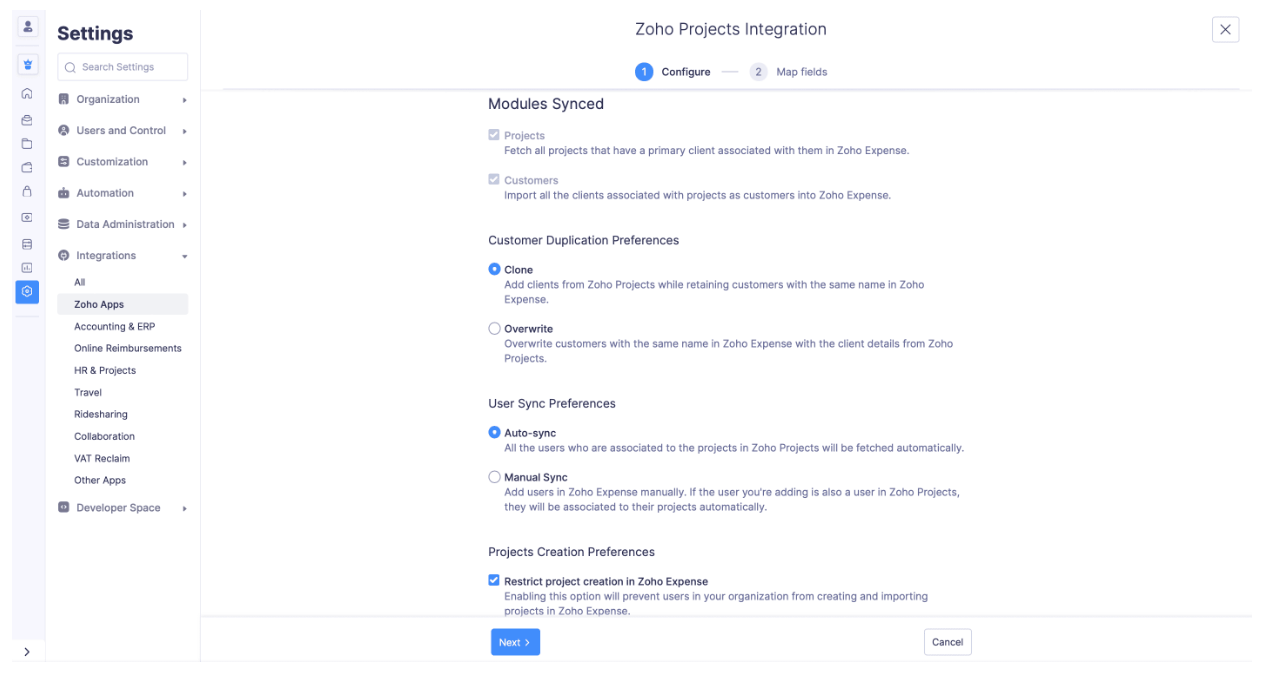
- Choose the Customer Duplication Preferences. You can either clone or overwrite the duplicate customers.
- Clone: Select Clone if you want to add the clients from Zoho Projects while retaining customers with the same name in Zoho Expense.
- Overwrite: Select Overwrite if you want to overwrite customers with the same name in Zoho Expense with the client details from Zoho Projects.
- Choose the User Sync Preferences. You can sync users either automatically or manually. The synced users will be added as Submitters in Zoho Expense.
- Auto-sync: All the users who are associated with the projects in Zoho Projects will be fetched automatically.
- Manual Sync: Select this option to add the users in Zoho Expense manually. If the user you add is already an user in Zoho Projects, they will be automatically associated with their projects.
Note: If the number of auto-synced users exceeds the plan limit of your Zoho Expense organization, the additional users will be added as inactive users in Zoho Expense. You can either mark the existing users as inactive and mark the newly added users as active or upgrade the plan.
- Choose the Projects Creation Preferences. You can choose whether to restrict users from creating projects in Zoho Expense.
Note: The preferences you set here will be applicable to all the Zoho finance apps.
- Click Next.
- In the Map fields page, the fields to be synced from Zoho Projects to Zoho Expense will be displayed. You can map the custom fields in the Projects module of Zoho Expense to the fields in Zoho Projects, provided they are of the same data type.
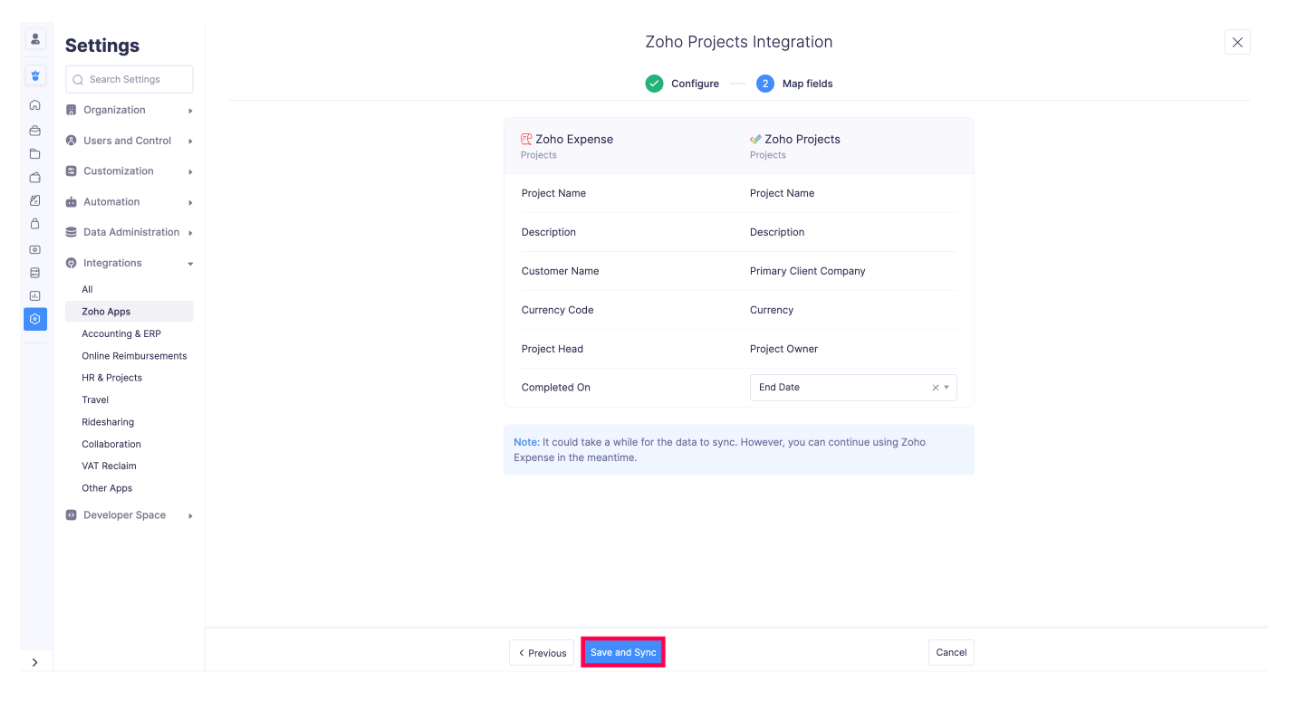
- Click Save and Sync.
Note:
- Projects that do not have any primary clients associated with them will not be fetched.
- Customers and users are imported only if they are associated with any project.
Other Actions in Zoho Projects Integration
Manage Preferences
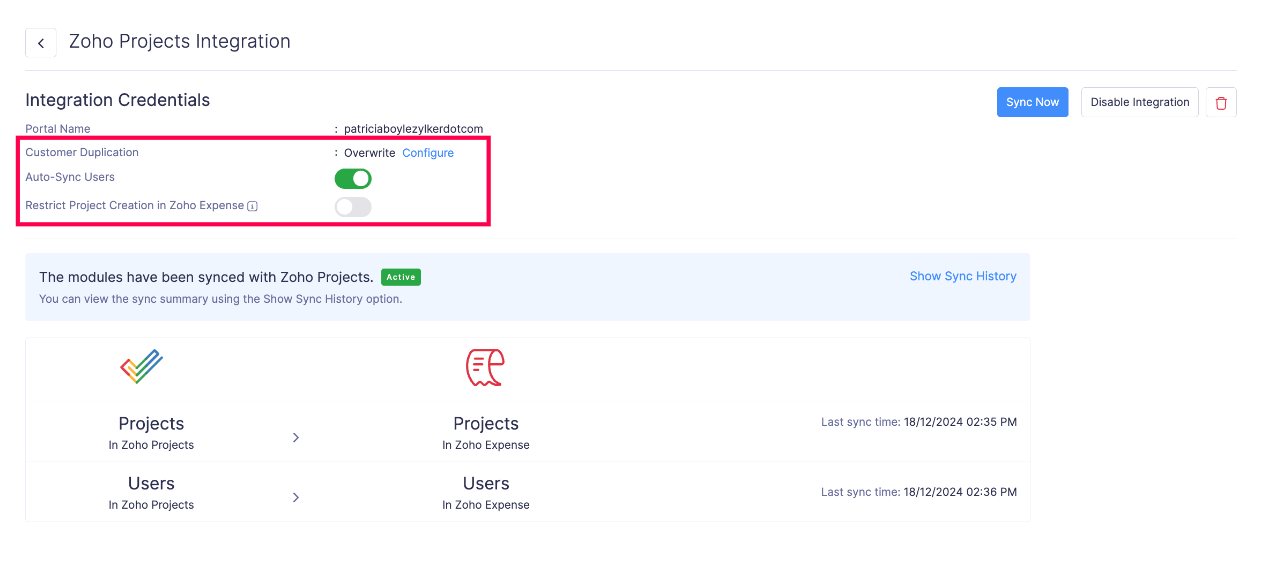
You can configure the Customer Duplication Preference by clicking Configure under Integration Credentials. You can also click the toggle bar to auto-sync users or restrict project creation in Zoho Expense.
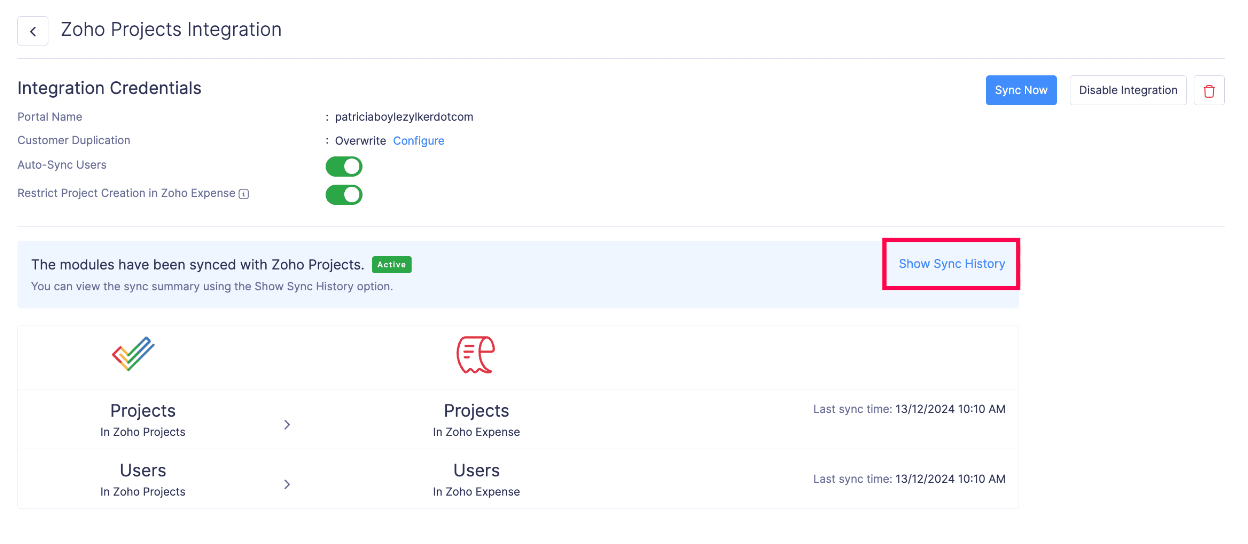
Show Sync History
Once the data is synced, you can view the sync history by clicking Show Sync History.
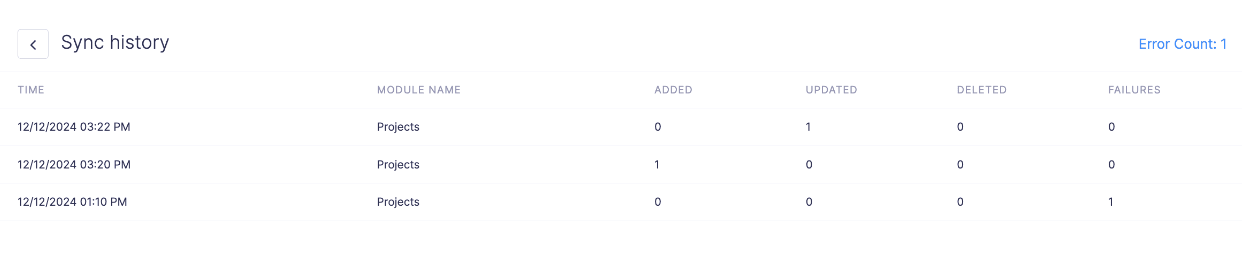
Once you click Show Sync History, you will be able to view the synced modules, number of records added, updated, deleted, and the time of sync. If there are any sync failures, you can click Error Count in the top right corner to view the reason for failure.
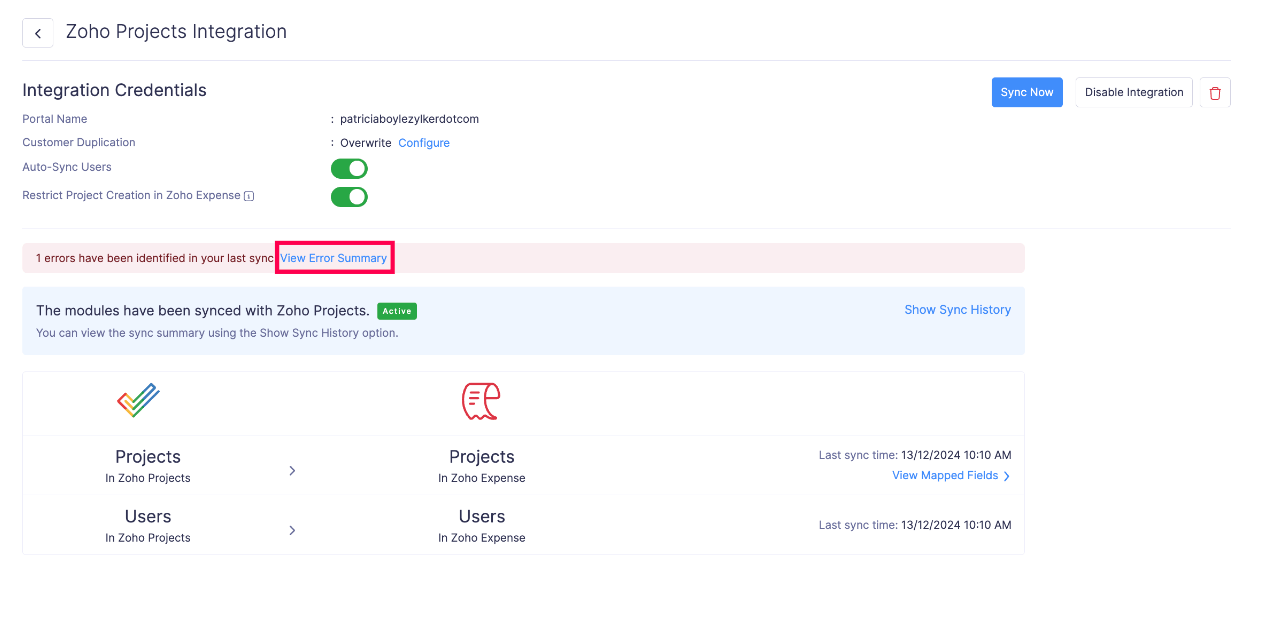
View Error Summary
If the records being synced have any errors or if there are any failures while syncing, you can view them by clicking View Error Summary. After resolving the errors, click Sync Now to ensure all unsynced projects, customers, and users are synced.
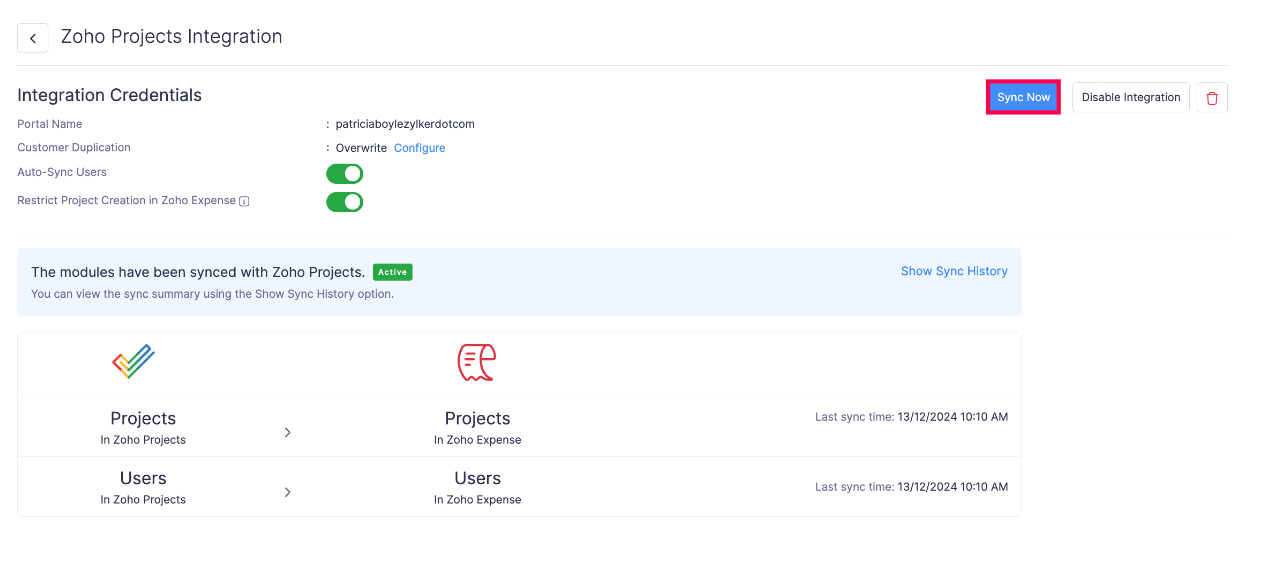
Sync Now
If you’ve created records after the last sync and want them to reflect in Zoho Expense, you can click Sync Now to ensure all projects, customers, and users created after the last auto-sync are synced.
View Mapped Fields
Click View Mapped Fields to view all the fields in Zoho Expense that are mapped with their respective field in Zoho Projects. You can map the custom fields in the Projects module of Zoho Expense to the fields in Zoho Projects, provided they are of the same data type and click Save.

Add Client Company to a Project in Zoho Projects
To record the project related expenses from within Zoho Projects, you should associate a client company with the projects in Zoho Projects. Here’s how:
- Go to Zoho Projects.
- Click Projects on the left sidebar and select the project for which you want to create expenses.
- Click Users on the top bar.
- Click the Users dropdown in the top left corner and select Client Users.
- Click Add Client Company and add the details of the customer for whom you will incur the project expenses.
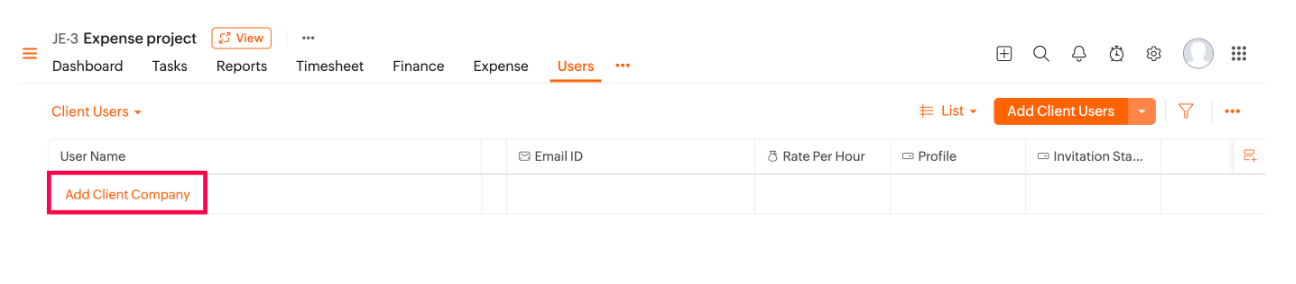
- Click Add. The client company will be added to the project, and you can now record expenses for that project from Zoho Projects.
Note: Even after adding the client company details in Zoho Projects, you might not be able to create expenses for projects if there are any failures during sync in Zoho Expense. In that case, you can check by clicking View Error Summary. After resolving the errors, try creating expenses again.
Create Expenses from Zoho Projects
You can create expenses and reports for your projects from within Zoho Projects. Here’s how:
- Go to Zoho Projects.
- Click Projects on the left sidebar and select the project for which you want to create expenses.
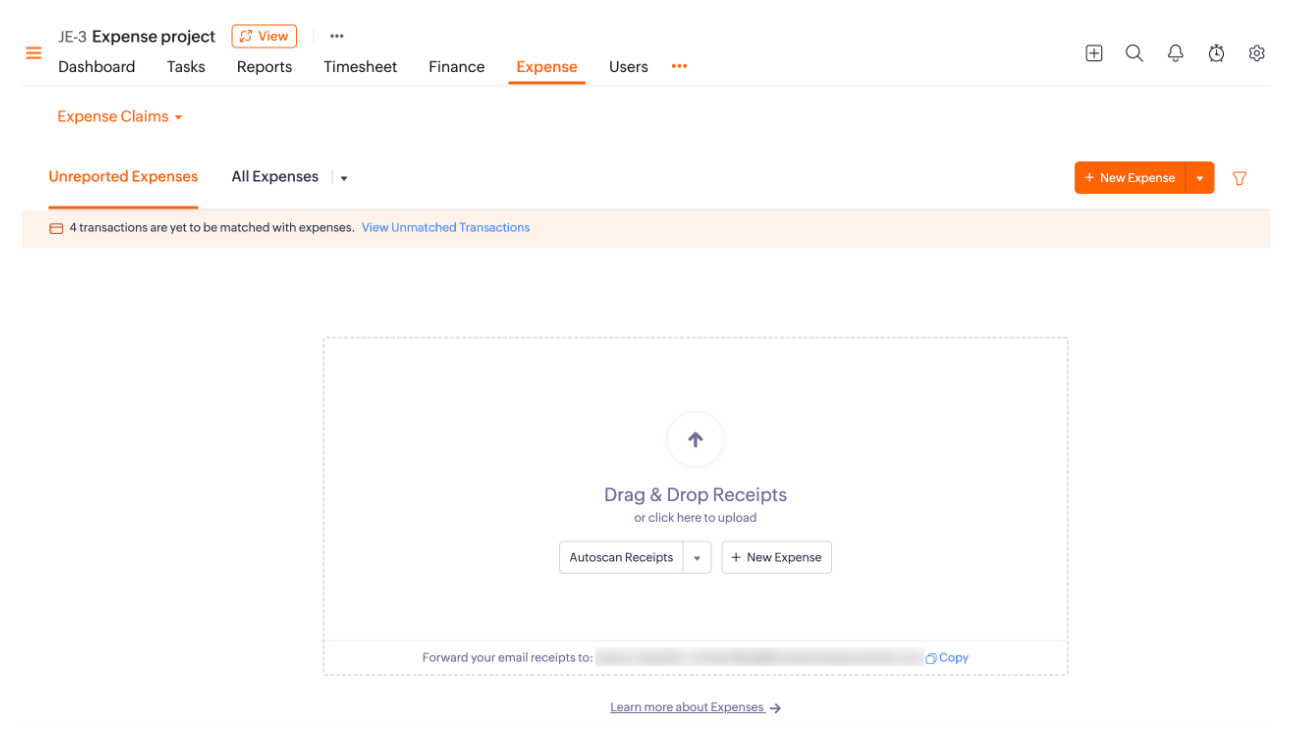
- Click the More icon on the top bar and select Expense.
- You can view the expenses and reports that were created in Zoho Expense for the project you’ve selected. You can also create new expenses and reports for this project.
Pro Tip: If you want to view all the expenses and reports within Zoho Projects, click the Expenses tab on the left sidebar.
Disable Zoho Projects Integration
You can disable the Zoho Projects integration if you do not want to sync the projects and customers between Zoho Expense and Zoho Projects. Here’s how:
- Click Admin View on the left sidebar.
- Go to Settings on the left sidebar.
(OR)
Click Settings in the top right corner of the page. - Select HR & Projects under Integrations.
- Click Zoho Projects.
- Click Show Details in the top right corner of the page.
- Click Disable Integration.

- Confirm your action by clicking Disable in the Disable Integration pop-up.
Note: Once you disable the integration, the sync between Zoho Expense and Zoho Projects will be paused. If you re-enable the integration, any unsynced data will be synced.
Re-Enable Zoho Projects Integration
You can re-enable the Zoho Projects integration and sync the data that might have been un-synced while the Zoho Projects integration was disabled. Here’s how:
- Click Admin View on the left sidebar.
- Go to Settings on the left sidebar.
(OR)
Click Settings in the top right corner of the page. - Select HR & Projects under Integrations.
- Click Zoho Projects.
- Click Show Details in the top right corner of the page.
- Click Enable Integration.
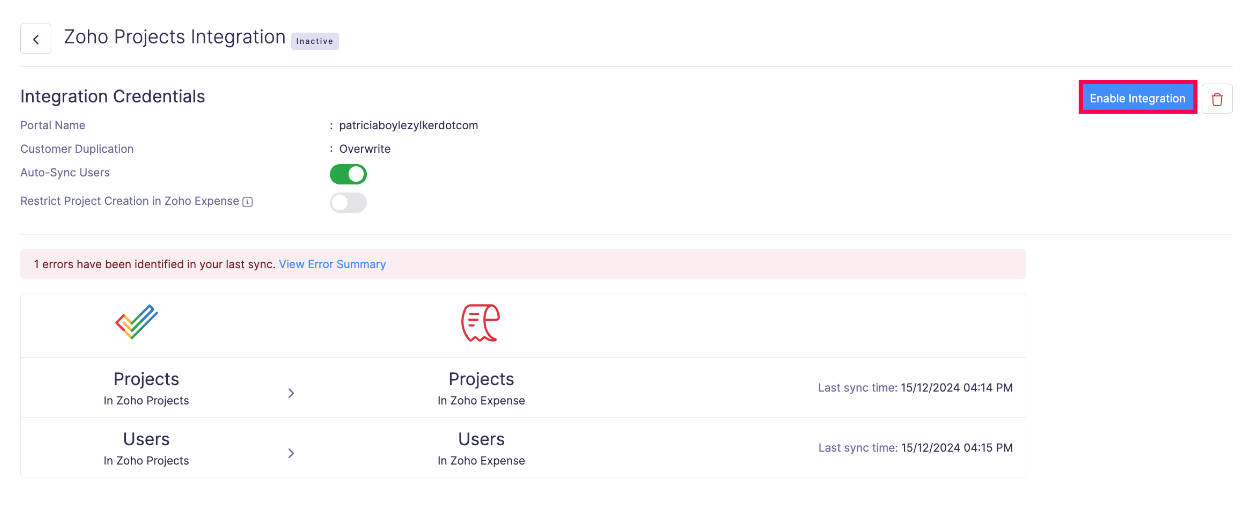
Integration status will now be Active and any unsynced data will be synced.
Delete Zoho Projects Integration
Warning: Once you delete the Zoho Projects integration, the integration will also be deleted in the same organization of other Zoho Finance apps. This action cannot be undone.
You can delete the Zoho Projects integration if you no longer want to integrate the Zoho Projects portal with this Zoho Expense organization or if you want to integrate the Zoho Projects portal with another Zoho Expense organization. Here’s how:
- Click Admin View on the left sidebar.
- Go to Settings on the left sidebar.
(OR)
Click Settings in the top right corner of the page. - Select HR & Projects under Integrations.
- Click Zoho Projects.
- Click Show Details in the top right corner of the page.
- Click the Delete icon in the top right corner.
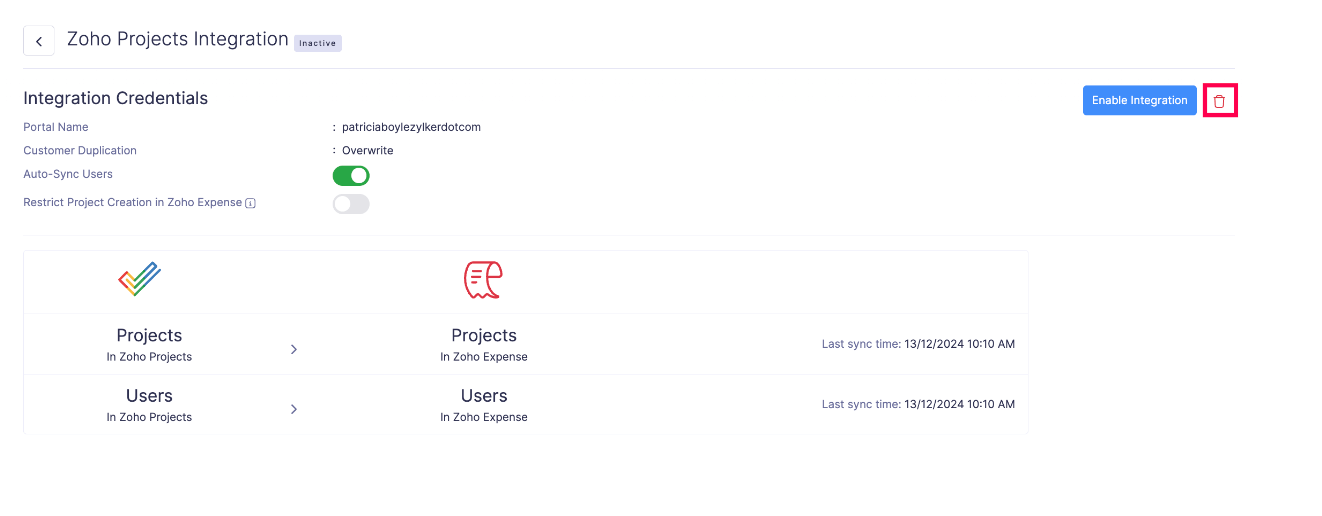
- Confirm your action by clicking Delete in the Delete Integration pop-up.
Note: Once you delete the integration:
- The projects synced from Zoho Projects will remain in Zoho Expense as Zoho Expense Projects.
- If you reintegrate the same Zoho Projects portal with this organization, the records synced during the previous integration will be synced again, leading to duplication of records in Zoho Expense.
- The integration will also be deleted in the same organization of other Zoho Finance apps.