
Webhooks
Webhooks are user-defined HTTP & HTTPS callbacks that are triggered when a particular event occurs at the source site. When the event occurs, the source site makes a HTTP or HTTPS request to the specified URL.
In simple words, Webhooks lets you perform actions on another application based on the changes happening to the transactions and records in Zoho Expense. A webhook is used to send out an event notification to another application.
Once you have configured the URL, Zoho Expense will post the event as a JSON to your webhook URL.
For example, if a report is reimbursed in Zoho Expense, then a notification is sent to the specified URL.
Create a Webhook
You can create a webhook for any change in the transaction status or when a transaction is created or modified.
To create a webhook:
- Click Admin View on the left sidebar.
- Go to Settings on the left sidebar.
(OR)
Click Settings in the top right corner of the page. - Select Actions under Automation.
- Click the Webhooks tab.
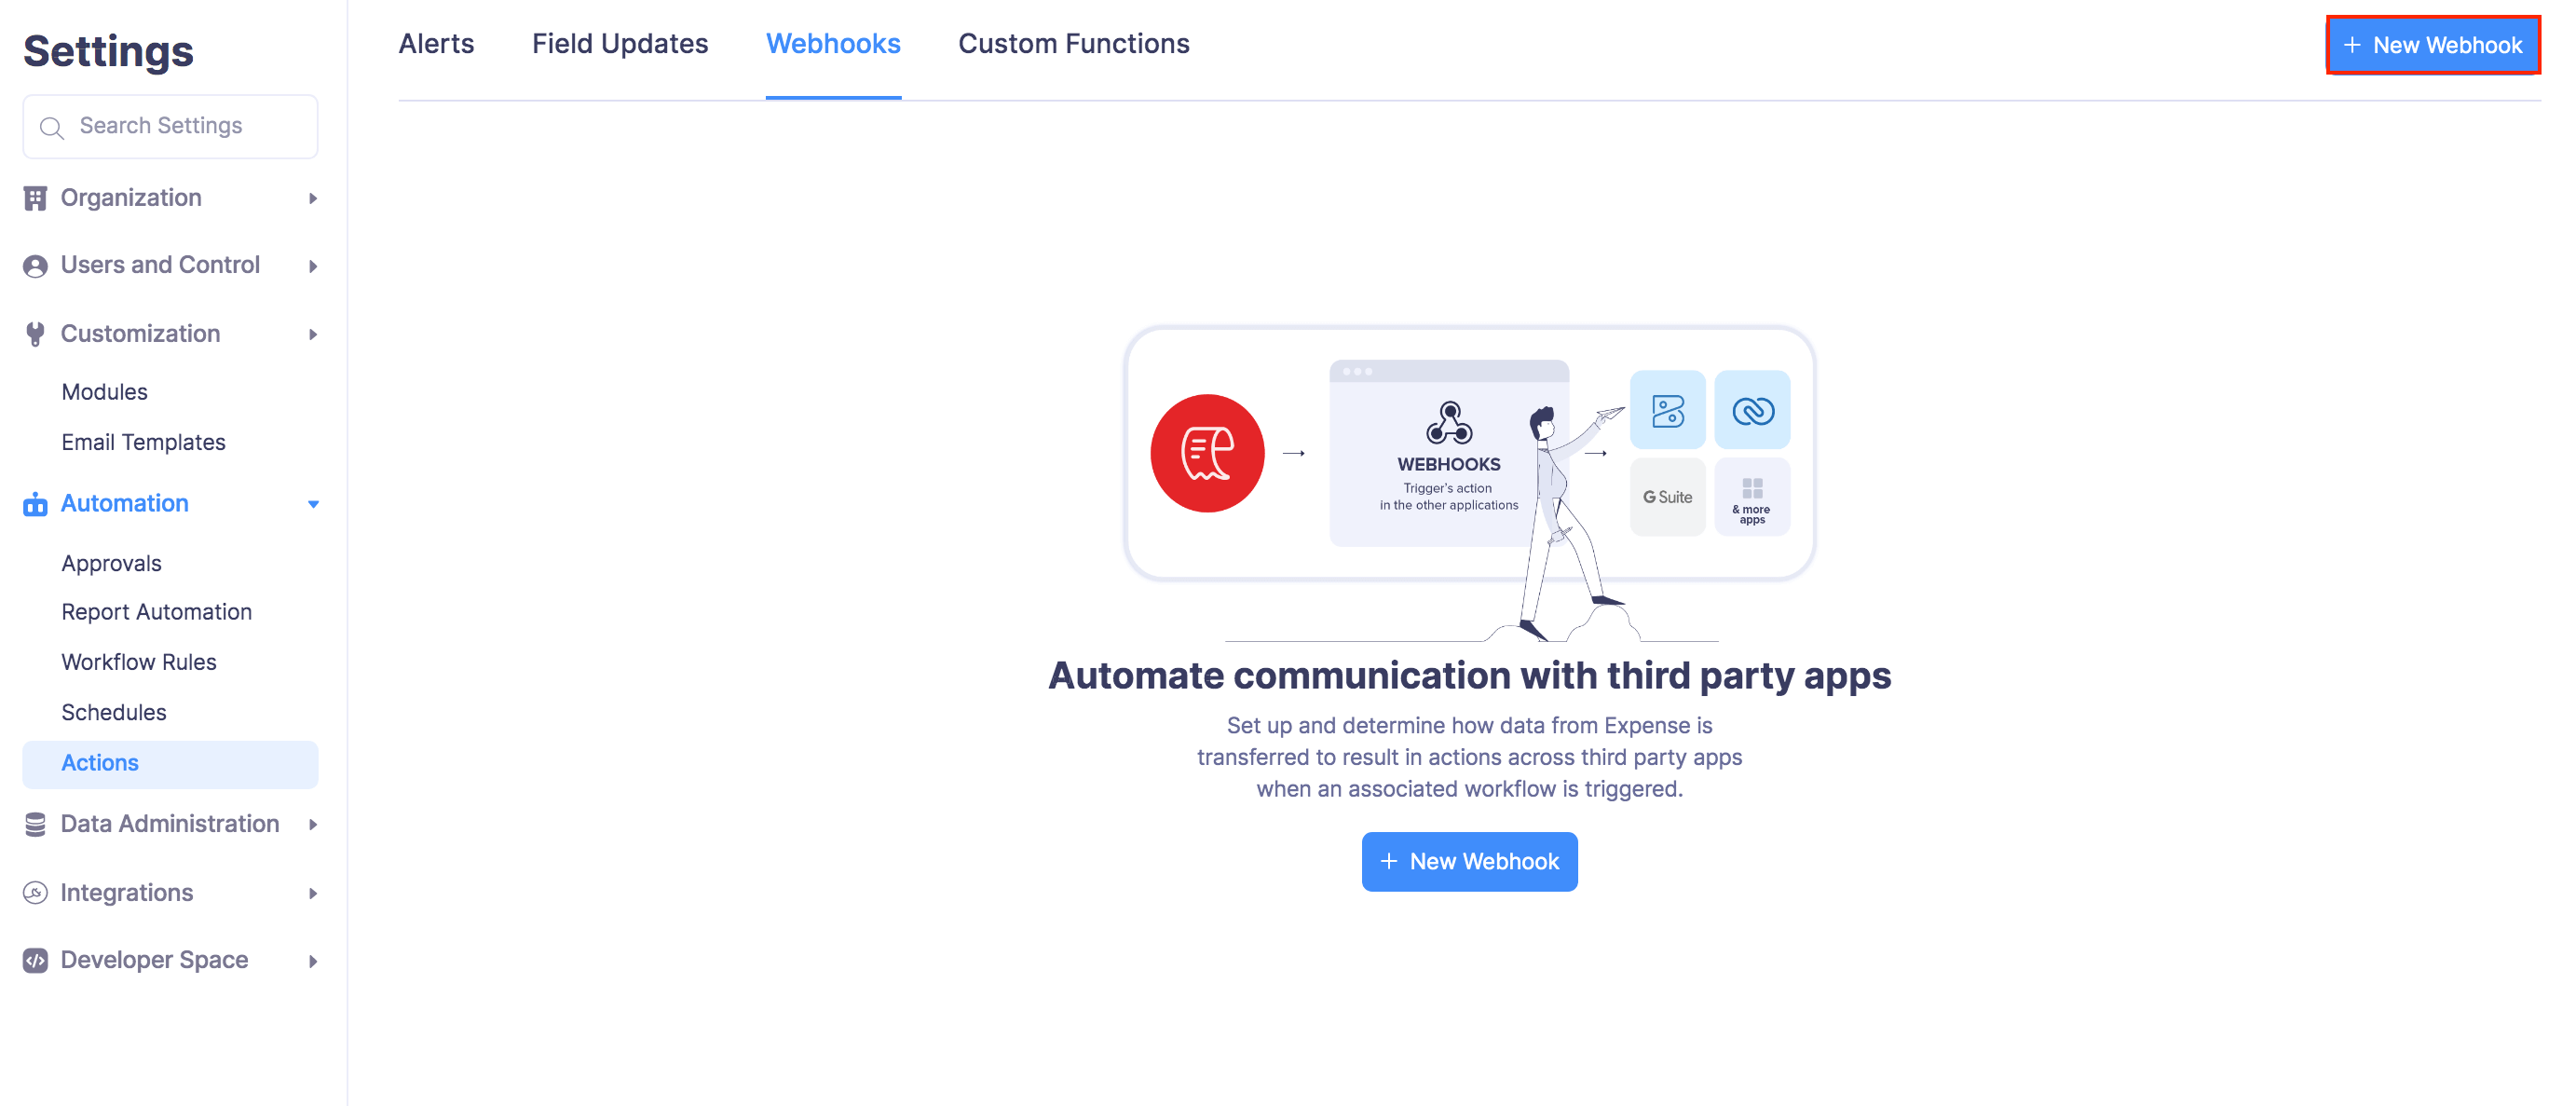
Click + New Webhook in the top right corner of the page.
Enter a Name and select the Module for your webhook.
Provide a Description for the webhook if required.
Fill in the necessary details for the following fields:
The fields are described below:
Field Name Description URL and Parameters Enter the URL (URL of the external service provider’s API) and select the type of event for which the webhook has to be triggered. You can also insert placeholders by clicking the + New Placeholder button.
Select the type of API method: PUT, POST, or DELETE. By default, the system selects the POST method.
POST: Requests that the data sent must be considered as new.
PUT: Requests that the data sent must be considered as the modified version of the existing version.
DELETE: Requests that the data must be deleted.
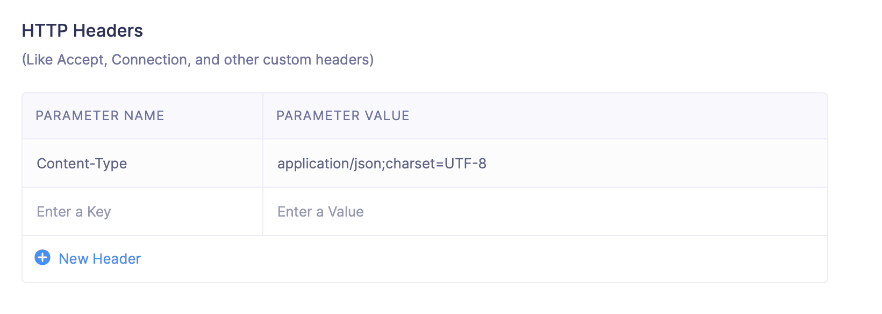
Custom Parameters | You can add custom parameters in the webhook such as AuthToken, Security Token, API Key, etc., based on which the URL will be appended. Enter the required parameter under Parameter Name and the corresponding value under Parameter Value. If you want to add multiple parameters, click + New Parameter. HTTP Headers | In the HTTP Header section, you can include any additional information that you want to be included in the HTTP request. Enter a key under Parameter Name and enter a value under Parameter Value. Click + New Header if you want to add additional headers.
Security Preferences | Select how you want to authorize access to the external service provider’s URL.
General: Select this type if you want to create this webhook with basic authorization, API authorization, or without any authorization.
Connections: Select this type if you want to use a connection that was created between Zoho Expense and a third-party application to authorize this webhook.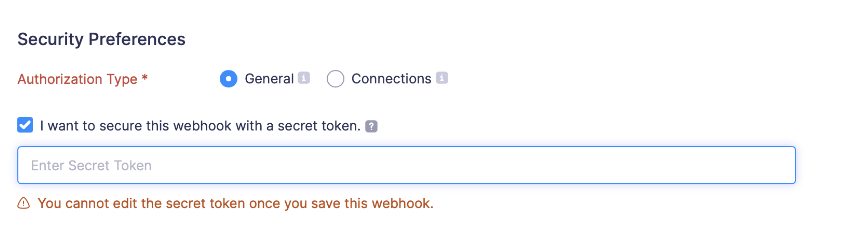
You can also secure the webhook with a secret token, which cannot be edited or viewed once the webhook is created. Check the I want to secure this webhook with a secret token box and enter the secret token in the field below. This will help to verify whether the webhook was sent from Zoho Expense. It should be alphanumeric and range between 12 - 50 characters.
Body | In the Body section, choose how you want to send the data. You can choose from Default Payload, x-www-form-urlencoded, and Raw body parameters.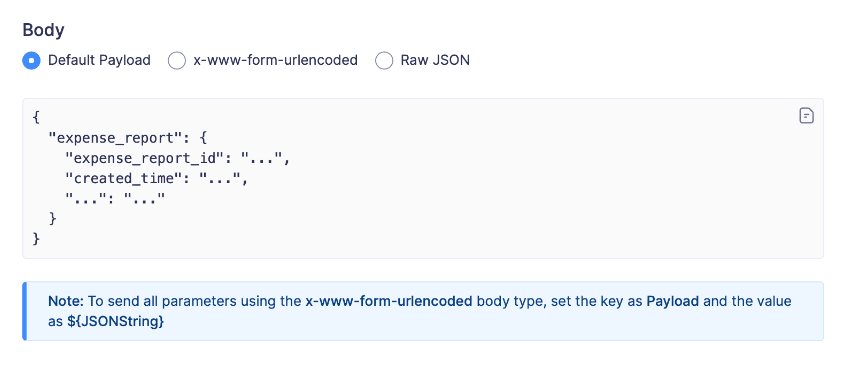
Default Payload: In the default payload format, all the parameters associated with the module will be sent to the request body in the application/JSON format content type.
x-www-form-urlencoded: In the x-www-form-urlencoded format, the data will be encoded and sent to the server.
Raw: In the raw format, you can choose the parameters sent to the request body. The content type will be application/JSON.
- Click Save.
Edit Webhook
You can make changes to an existing webhook. Here’s how:
- Click Admin View on the left sidebar.
- Go to Settings on the left sidebar.
(OR)
Click Settings in the top right corner of the page. - Select Actions under Automation.
- Click the Webhooks tab.
- Hover over the webhook you want to edit and click the More icon.

- Click Edit and make the necessary changes.
- Click Save.
Delete Webhook
Here’s how you can delete a webhook:
- Click Admin View on the left sidebar.
- Go to Settings on the left sidebar.
(OR)
Click Settings in the top right corner of the page. - Select Actions under Automation.
- Click the Webhooks tab.
- Hover over the webhook you want to delete and click the More icon.
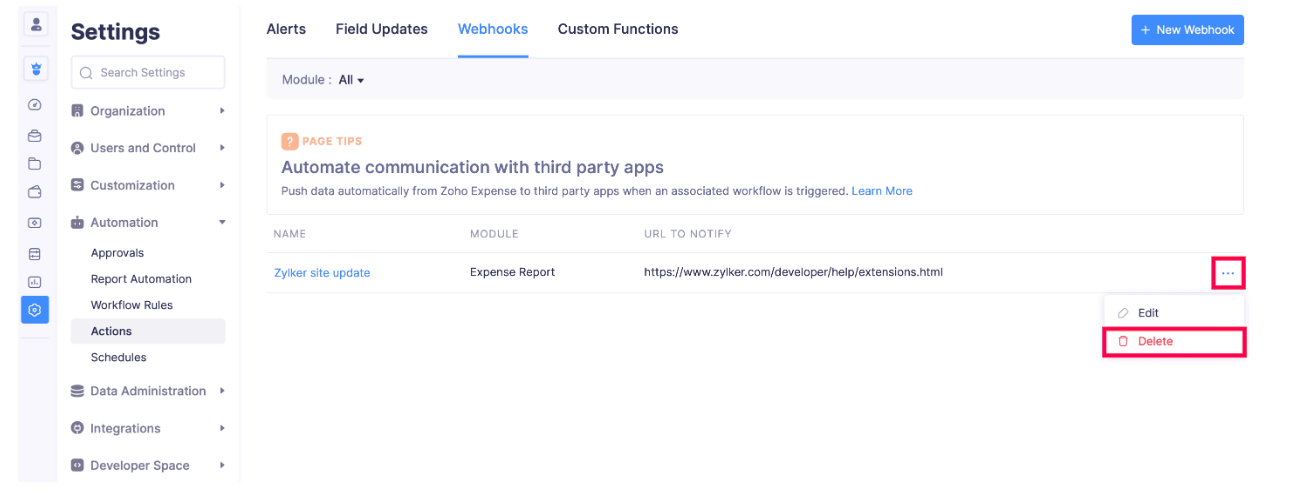
- Click Delete.
- Confirm your action by clicking Delete again to delete the webhook in the pop-up that appears.
Secure Your Webhooks
Securing your webhooks can help verify that the webhooks were sent from Zoho Expense. To do this, you have to set up your server so that it listens for webhooks from Zoho Expense. When your server receives a webhook from Zoho Expense, a hash value must be generated based on the payload and your secret token.
Once done, check if it matches the hash value from Zoho Expense and thereby validate the source of the webhook. This can add a layer of security by enabling your server to disregard third-party webhooks pretending to originate from Zoho Expense.
Validate Webhooks
When your server receives a webhook, a hash value will have to be generated for the payload in the same way Zoho Expense generates it. This is necessary to produce the same hash value to validate the webhook.
The following parameters (if available) are used to generate the hash value:
- Query string parameters.
- Default payload or customized raw JSON payload.
- x-www-form-urlencoded payload (Key-value pairs).
Construct a string by sorting the payload’s key-value pairs in alphabetical order. The pair must be sorted in alphabetical order with respect to their keys.
Note:
- If your webhook contains query string parameters, ensure that those key-value pairs are sorted along with the payload’s key-value pairs.
- There cannot be any spaces between the key-value pairs.
Once you have sorted the key-value pairs and constructed the string, append the raw JSON to the end of the string.
Pro Tip:
- If your payload is in the x-www-form-urlencoded format, the entire string must be decoded before generating the hash value.
- If one of the key value pairs contains spaces, the spaces must also be included in the constructed string.
The hash value is generated by applying the HMAC-SHA256 algorithm on this string, along with the secret token that was used in Zoho Expense.
You can then validate the webhook by checking if the hash value computed from your side matches the one in the header (X-Zoho-Webhook-Signature) of the webhook from Zoho Expense.