
Vendor Portal
As your business grows, it might be difficult to manage all your supplies, keep track of each transaction, collaborate and maintain vendor relations. Which is exactly why Zoho Books has a dedicated portal for your vendors which lets them view and access their transactions.
Once you enable the portal in Zoho Books, your vendors will be able to:
- Upload transaction documents which you can verify and convert to bills in Zoho Books.
- View details of purchase orders, invoices and track payments received.
- Generate a consolidated statement of accounts.
- Add comments to discuss transactions and work jointly.
Insight: You can allow customers to keep track of their transactions, add comments and collaborate using the Customer Portal.
Note: This feature is available only for certain plans of Zoho Books. Visit the pricing page to check if it’s available in your current plan.
Enable Vendor Portal
Prerequisite: Your vendor can upload images and PDFs of the document. The maximum file size for each document is 5MB.
You will have to enable portal access and invite your vendor or their contact persons you’ve added in Zoho Books. To enable the portal:
- Go to Purchases and select Vendors.
- Select the vendor for whom you want to enable the portal.
You can enable portal access to your vendors in three ways:
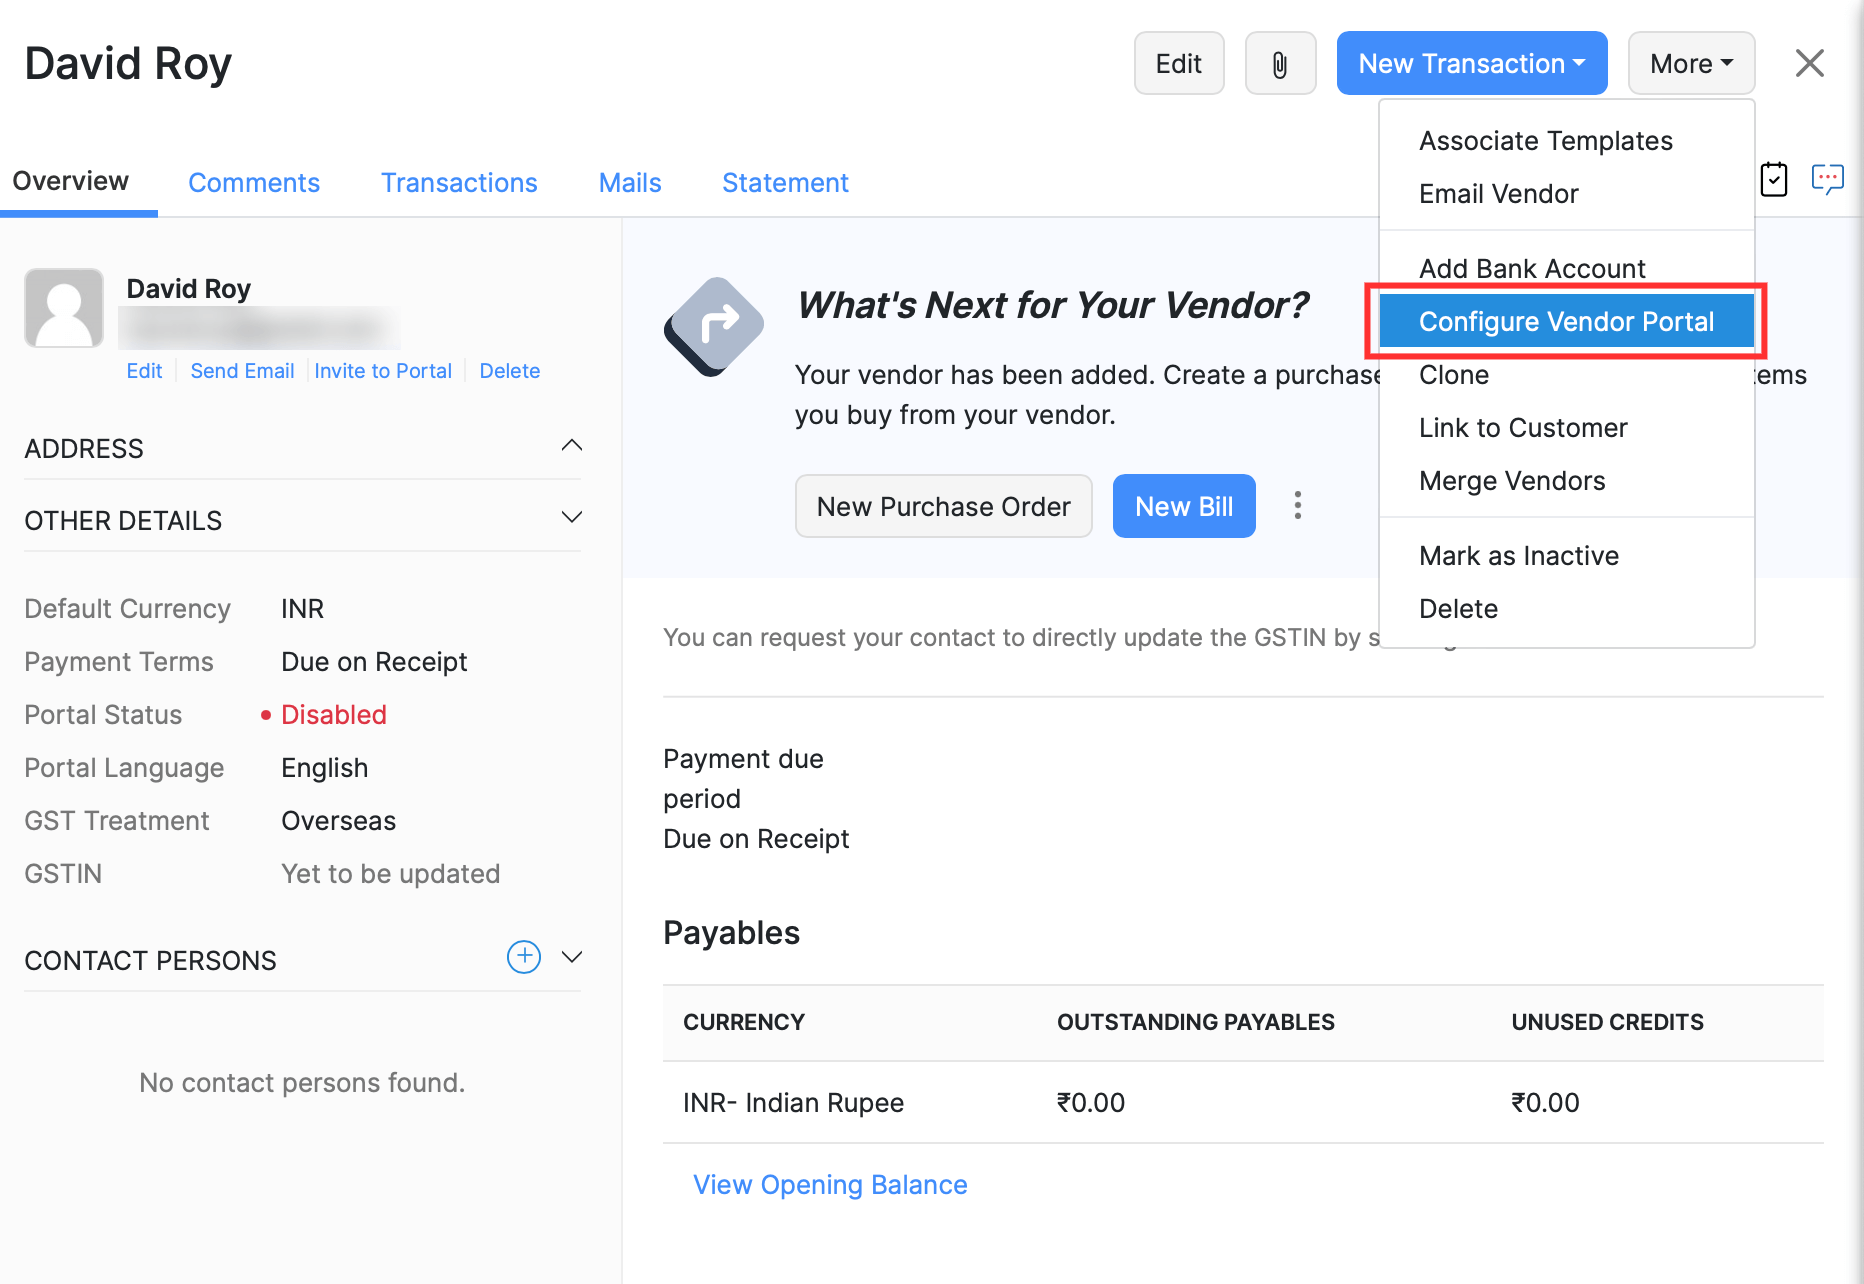
1. Click More on the top right corner of the vendor’s details page and select Configure Vendor Portal from the dropdown.
OR
2. Hover the cursor over the Portal Status under the Other Details section and click the Gear icon.
OR
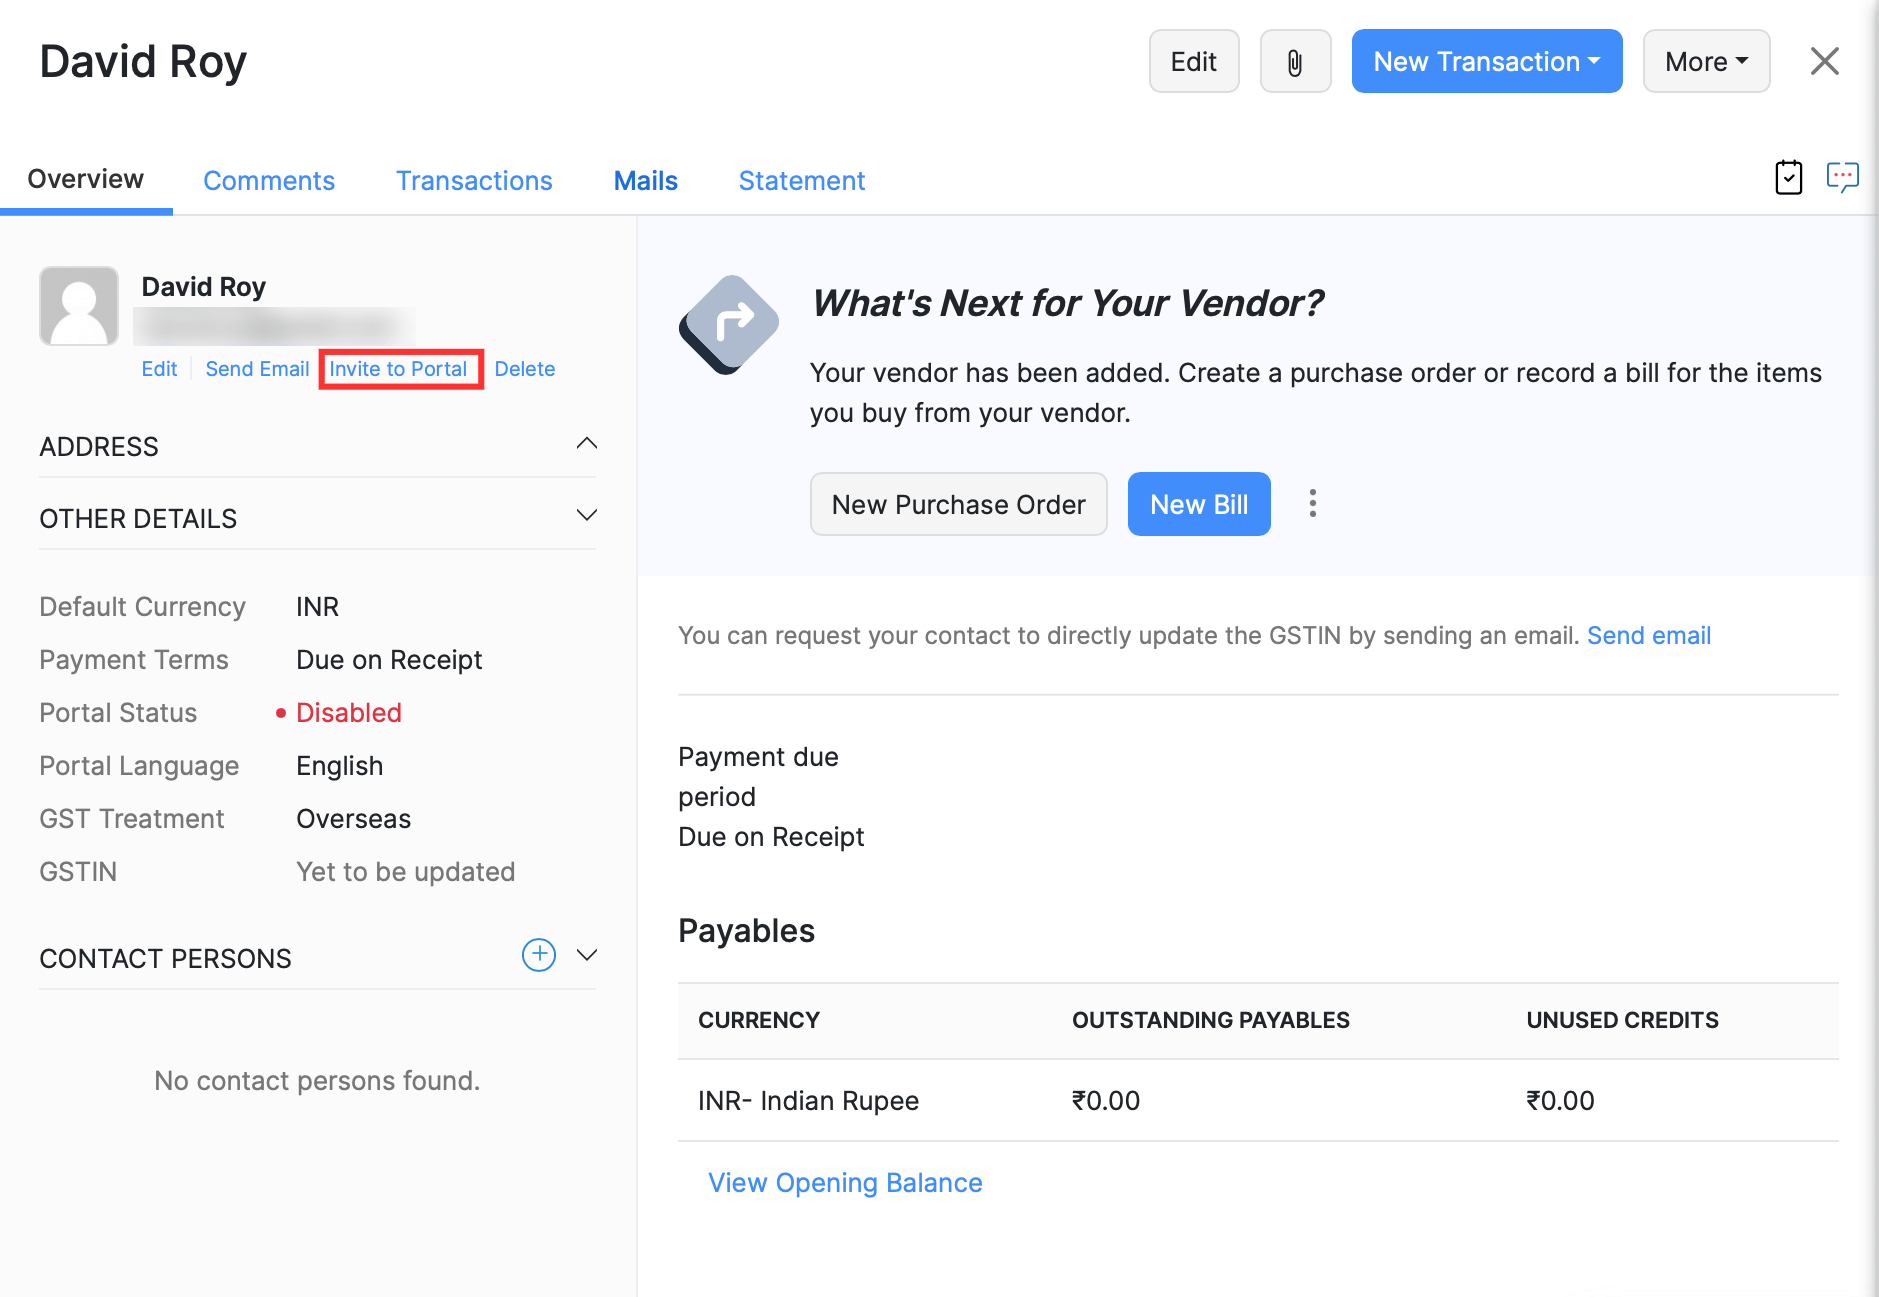
3. Click Invite to Portal below the vendor’s name.
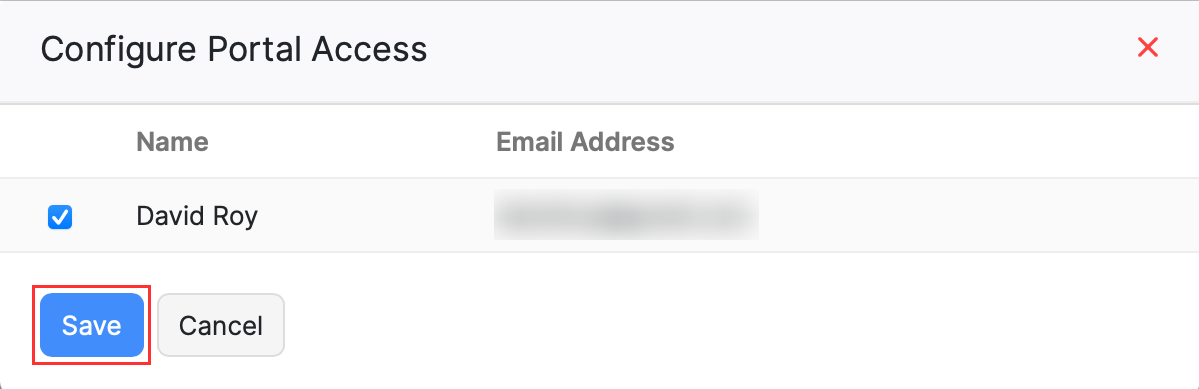
In the pop-up, select the vendor or their contact persons for whom you want to provide the portal access.
Once you click Save, Zoho Books will send an email to your vendors inviting them to the portal. You can customize the email’s content according to your preference.
Sign Up for Vendor Portal
To access the portal, your vendor should:
- Open the email invitation sent to them.
- Click Accept Invitation. They’ll be redirected to the sign up page of the portal.
- Enter the password and click Update.
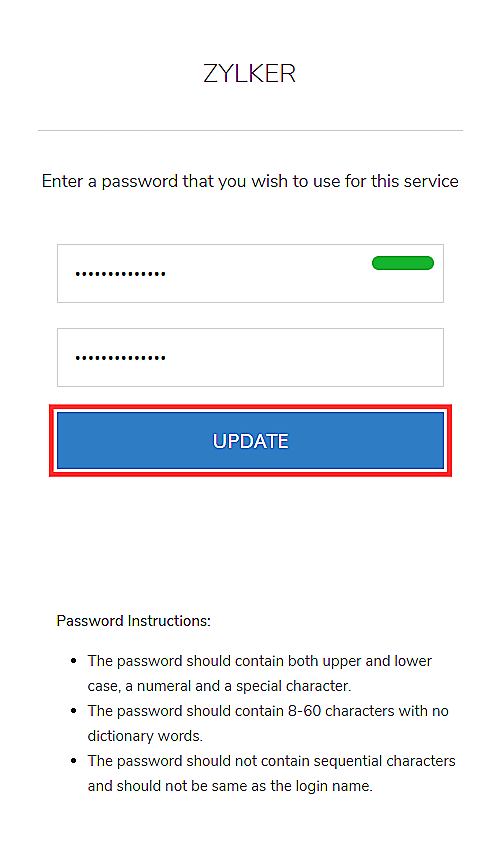
They’ll be taken to the home page of the portal using which they can perform actions like view details of purchase orders, upload invoices of your purchases, track payments received, and much more.
Functions in the Vendor Portal
Let us see the functions that can be performed in the vendor portal.
- Home
- View Purchase Orders
- Accept and Decline Purchase Orders (For Vendors)
- Manage Invoices
- Track Payments Received
- Generate Statement of Accounts
Home
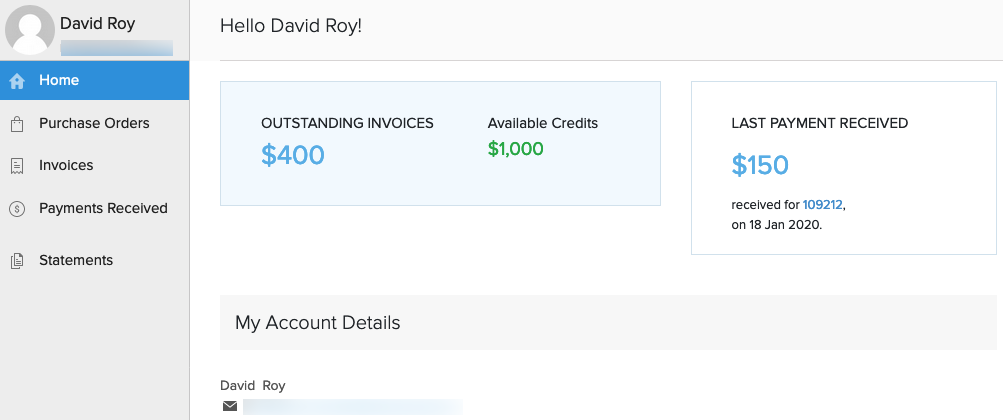
Once your vendor logs in to the portal, the home page/dashboard will give them an overview of all the transactions that took place between you and your vendor. They can view the following details:
- Outstanding Bills: The total bill amount that you owe them for previous transactions.
- Available Credits: Amounts they might have refunded or any amount they owe you (through credit notes) are saved as credits in Zoho Books. These can be applied to transactions and tracked accordingly.
- Last Payment Received: The recent payment you made.
- My Account Details: Vendor’s name and contact details which can be edited.
- Customer’s Contact Details: Your contact information.
View Purchase Orders
Documents created by you in Zoho Books requesting your vendors to supply specific goods along with their prices and quantities are Purchase Orders. Vendors can view the purchase orders and comment on them to negotiate the prices or add their remarks before they create the final invoice. To access the purchase orders, your vendors should:
- Login to the portal and go to Purchase Orders from the left sidebar.
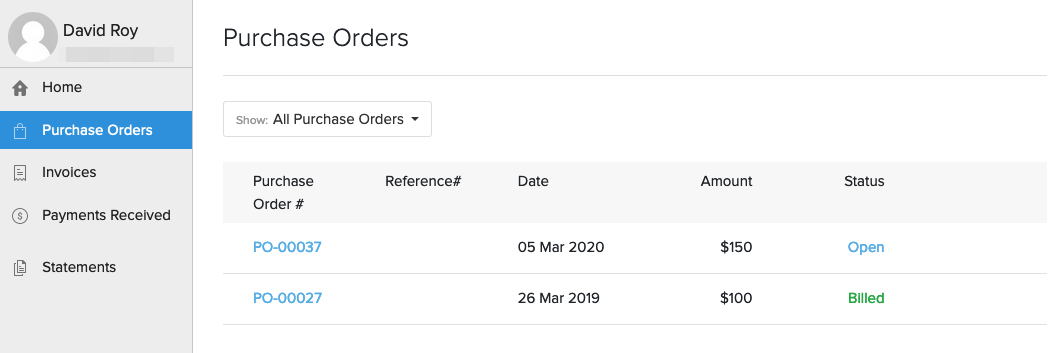
- Click the purchase order and view its details.
- Add comments if necessary to discuss the order.
They will also be able to filter the purchase orders by their statuses by clicking the Show All Purchase Orders dropdown. The available filters are: All, Billed, Partially Billed and Cancelled.
Accept and Decline Purchase Orders (For Vendors)
Vendors can use the portal to accept or decline the purchase orders that were created in Zoho Books. When you create a purchase order in Zoho Books, you can send it to your vendors for review.
Once the vendor accepts your purchase order, you can go ahead and purchase goods from your vendor. If your vendor has rejected your purchase order, you can try creating a new purchase order and submit it for review.
This feature comes in handy when you require the vendor’s consent to purchase goods from the vendor.
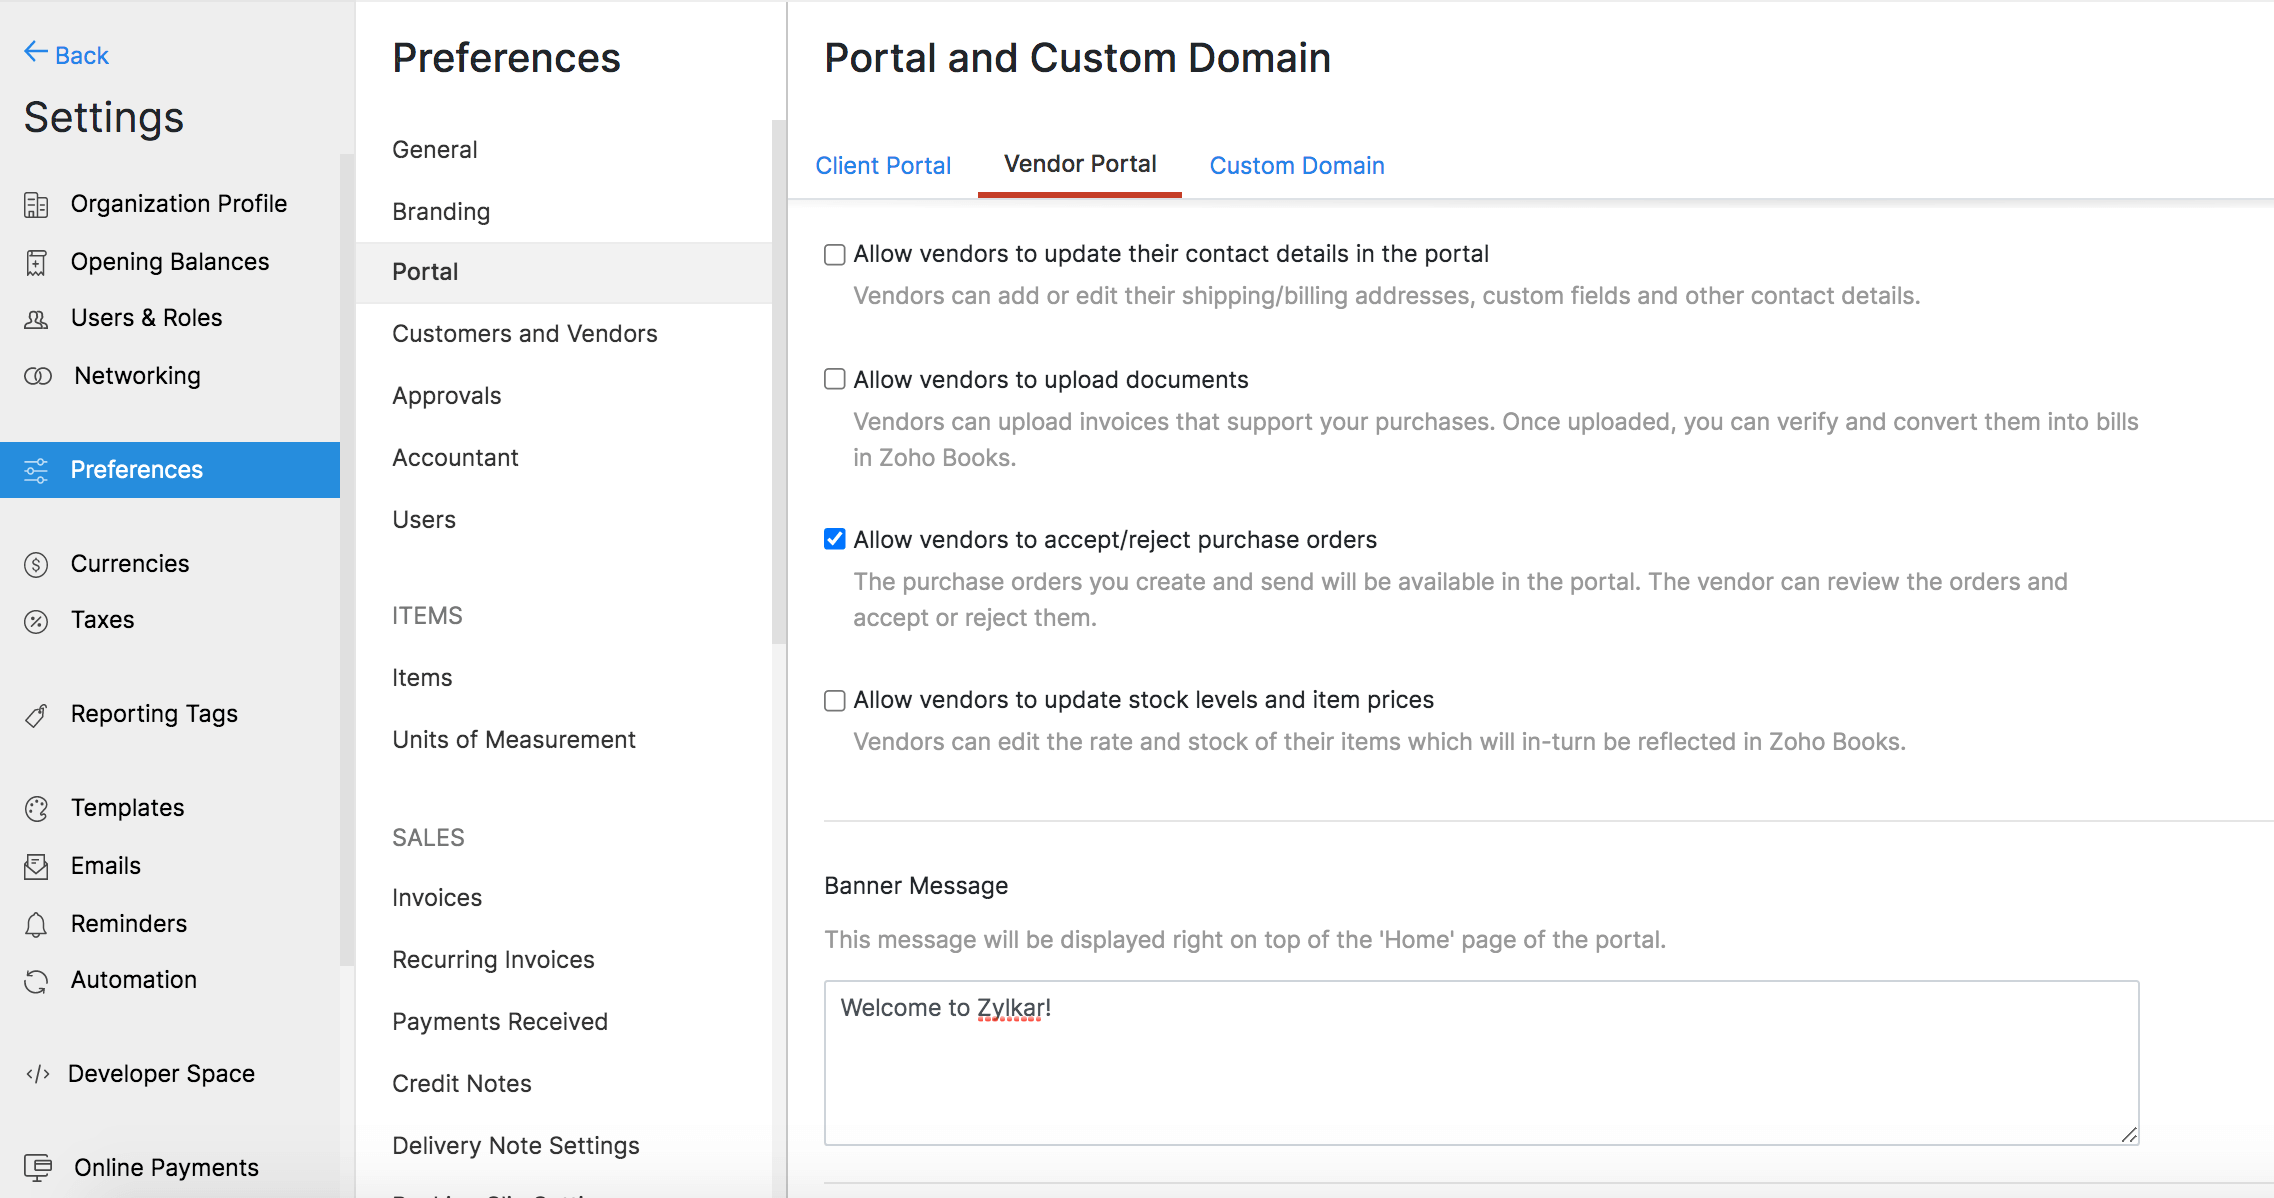
Enable Review for Purchase Orders (For Zoho Books Users)
Admins must enable this feature before the users send purchase orders for review. Here’s how:
- Click the Gear icon in the top right corner and select Preferences from the dropdown.
- Next, click Portal in the left sidebar and select the Vendor Portal tab.
- Scroll down and select the Allow vendors to accept/reject purchase orders option.
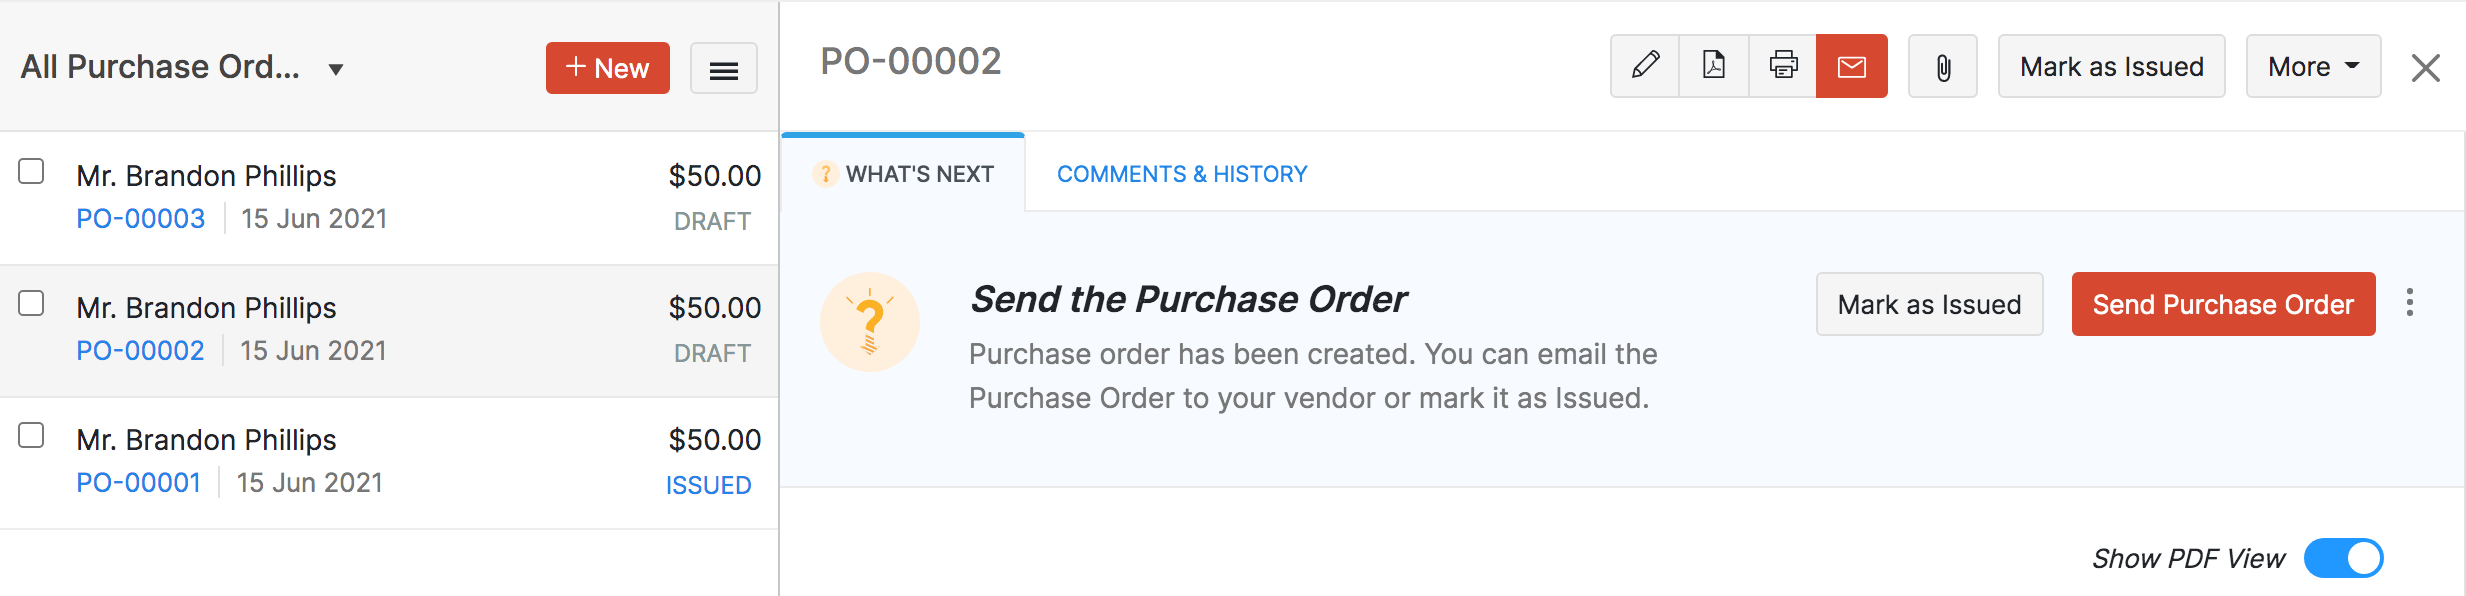
Submit Purchase Orders for Review (For Zoho Books Users)
Once the admins in Zoho Books have enabled the option to approve purchase orders, users will be be able to submit it to their vendors for review. Here’s how:
- Click Purchases in the left sidebar and select Purchase Orders from the dropdown.
- Create + New in the top right corner to create a new purchase order and select the vendor to whom you want to want to submit it for review.
- Enter all the necessary details and click Save and Send or Save as Draft.
- Review the purchase order email and click Send Purchase Order again or click Mark as Issued in the top right corner.
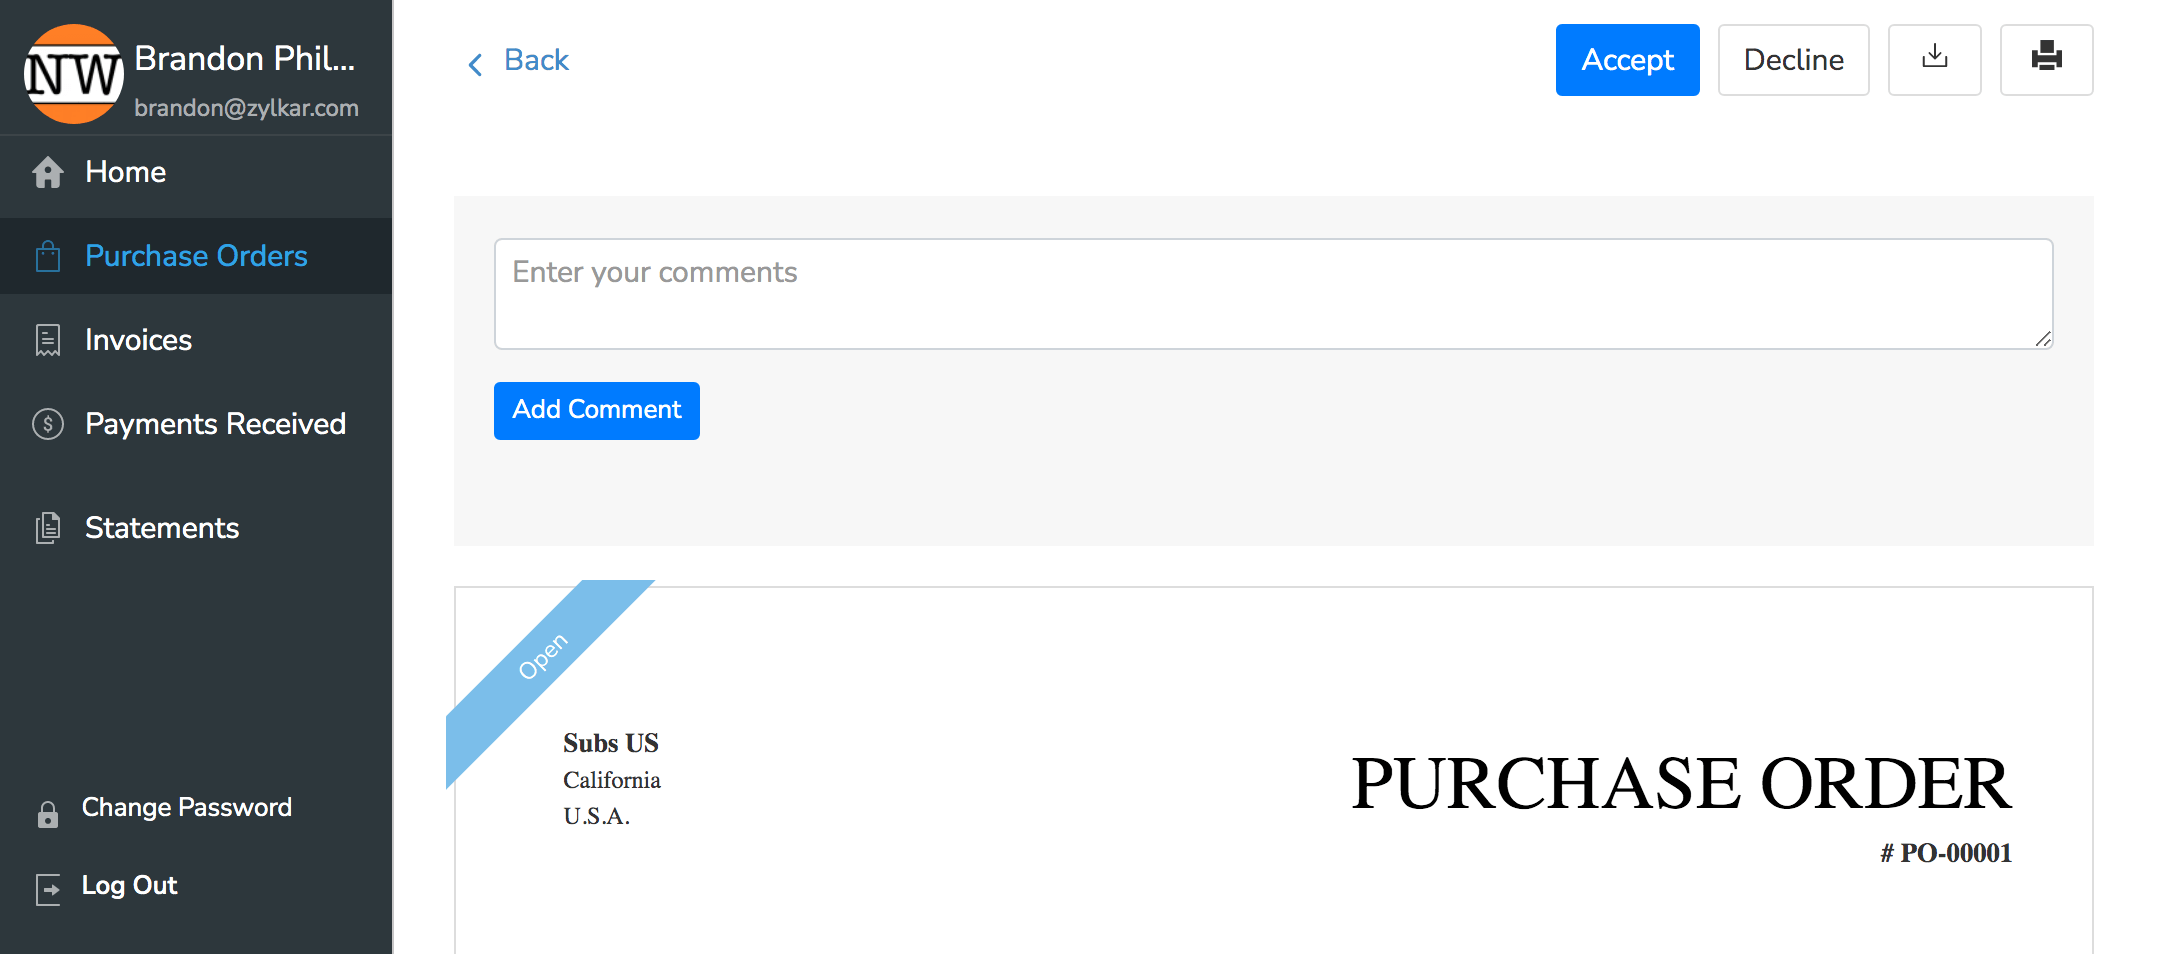
Accept or Decline Purchase Orders (For Vendors)
Vendors can accept or decline the purchase orders that have been sent to them from the users in Zoho Books. Here’s how:
- Log in to the Vendor Portal.
- Click Purchase Orders on the left sidebar and select a purchase order.
- Review the purchase order and click Accept or Decline. If you’re declining the purchase order, enter a reason and click Decline again.
Your customer will be notified in Zoho Books when you have approved the purchase order.
Manage Invoices
When your vendor has shipped goods to you, they can upload a picture of the transaction’s document (invoice) to the portal, you can then verify it and accept or reject them in Zoho Books. Once accepted, it will be created as a bill in Zoho Books.
Upload Documents
To upload a transaction document in the portal, your vendors should:
- Download/Print and take a picture of the transaction’s document.
- Log into the portal using the link provided in the email.
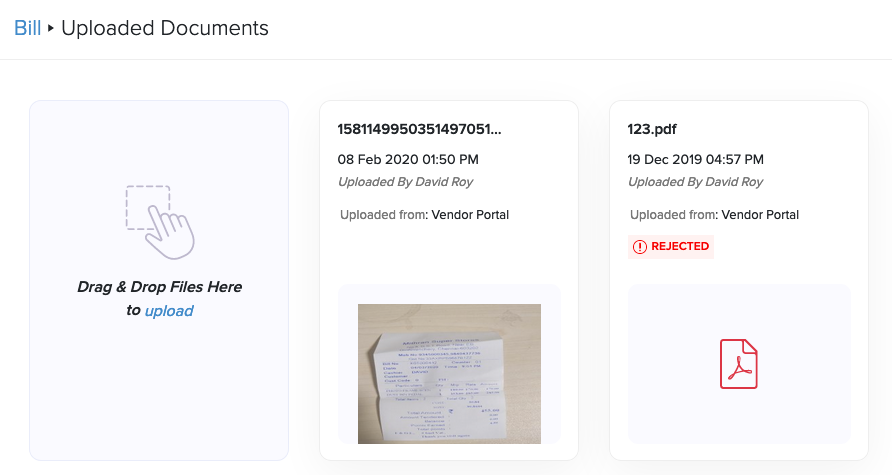
- Go to the Invoices module and stay on the Uploaded Documents tab to add transaction documents.
- Drag and Drop or Upload Documents from the computer.
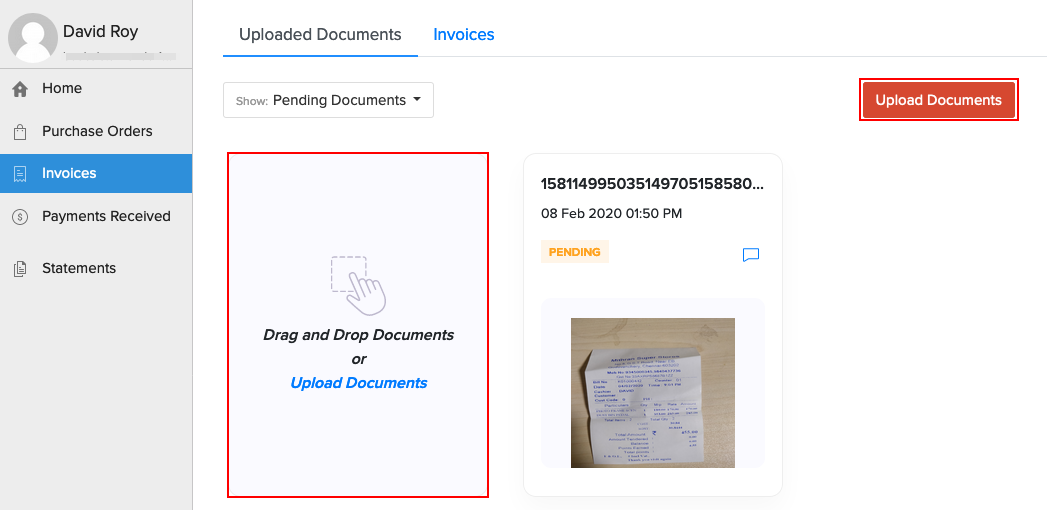
Insight: Your vendor can upload images and PDFs of the document. The maximum file size for each document is 5MB.
The document will be in the Pending state as soon as it is uploaded. If you accept the document in Zoho Books, it will be converted into an invoice in the Vendor Portal. You will be able to add comments to the document by clicking it.
Upload Invoices for Purchase Orders (for Vendors)
Note: This feature is a part of the Zoho BillPay add-on for the Canada, India, and US editions of Zoho Books. Purchase the add-on to enable the feature for your organization.
If the Zoho BillPay add-on is enabled for your organization, your vendors can directly upload invoices for the corresponding purchase orders. Here’s how:
- Click Purchase Orders on the left sidebar of the vendor portal.
- Click the purchase order for which you want to upload the invoice.
- Click Upload Invoice at the top and select the invoice.
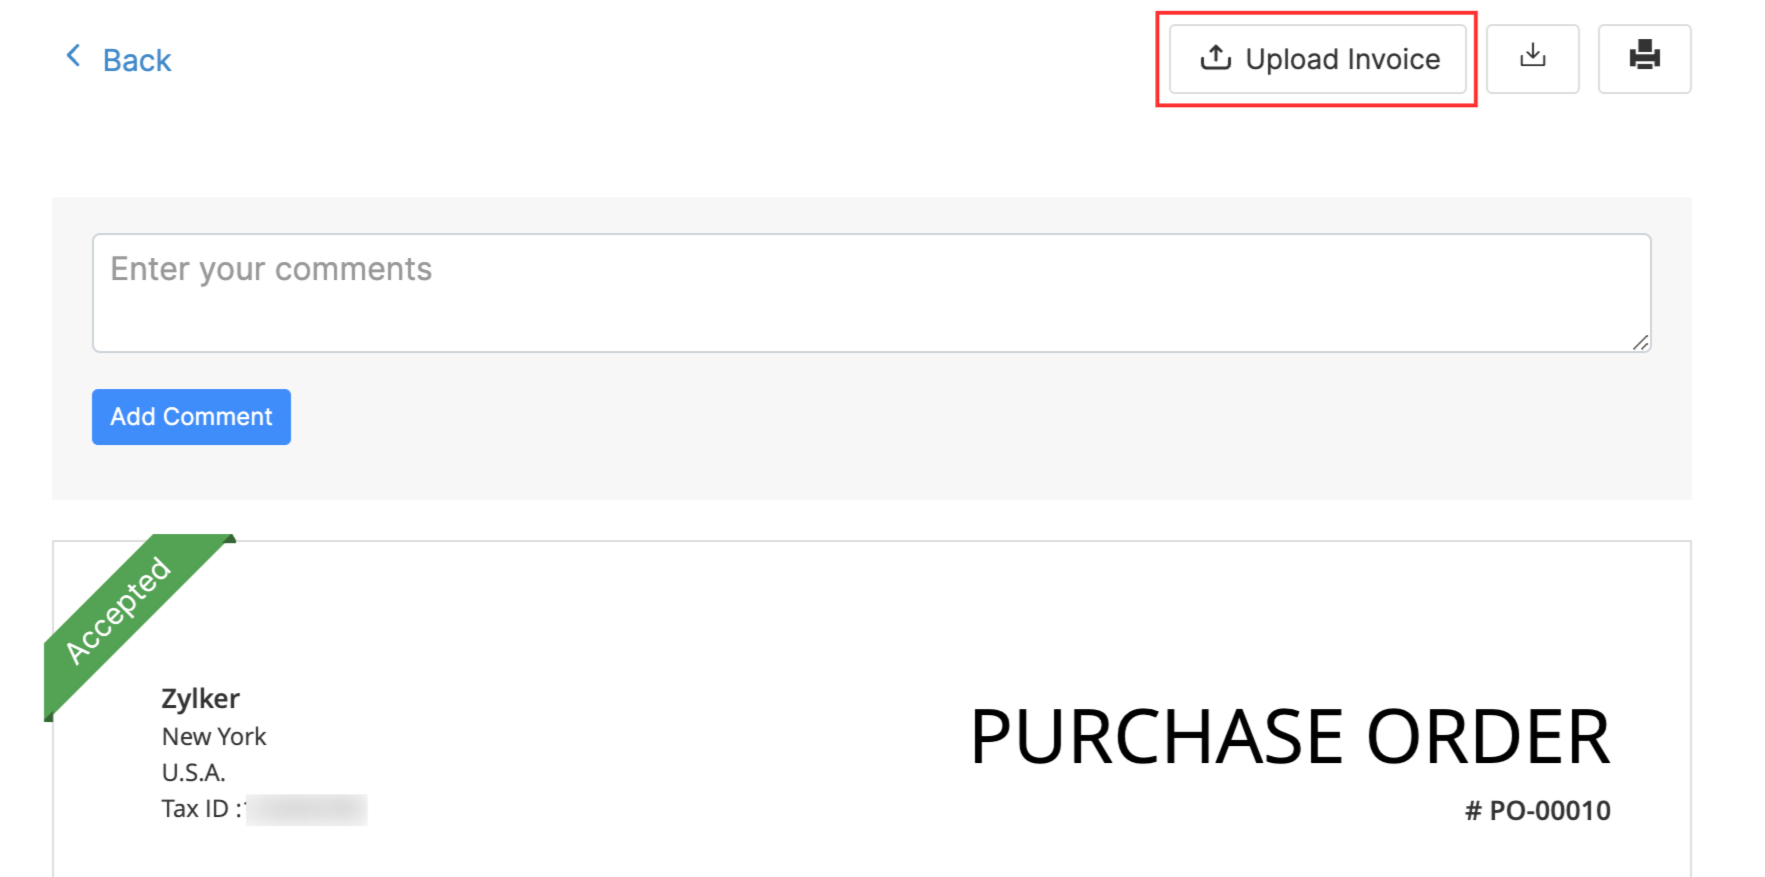
The invoice will be uploaded. You can view it from the Unbilled Documents section of the corresponding purchase order’s Details page and from the Uploaded Documents tab of the Bills module.
View Invoices
Once your vendor uploads a document, you can review and accept/reject the document. If it is accepted, it will be created as an invoice in the portal. Here’s how your vendor can view the invoice in the portal:
- Login to the portal and go to the Invoices module.
- Go to the Invoices tab to view all the accepted documents.
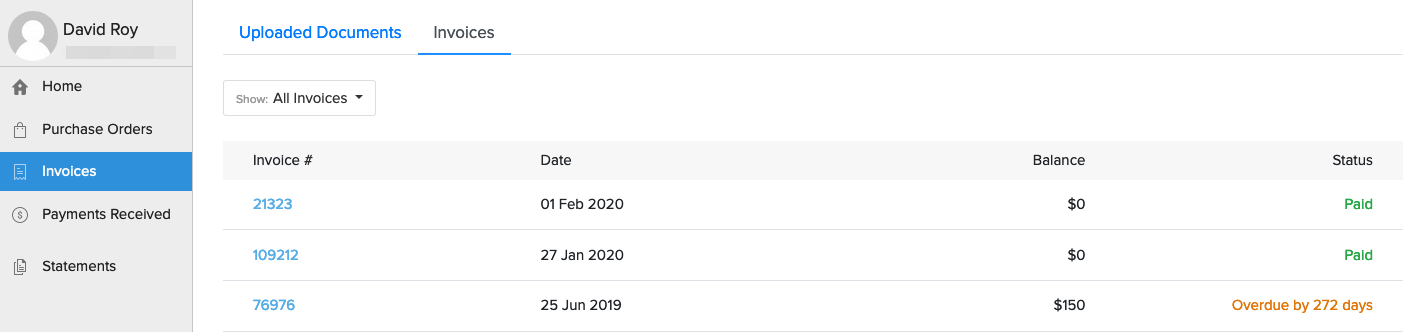
Insight: An invoice created by the vendor will be a bill for you (Zoho Books user).
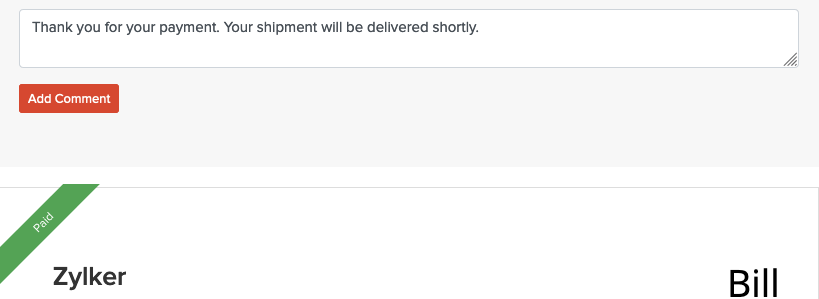
- Click an invoice to view all the details.
- Enter comments and click Add Comment to share them.
Track Payments Received
You might have made an online payment or a cash payment towards the vendor’s invoices. Your vendor will be able to view them once you record the payment manually in Zoho Books. This section will show the details of the amount, the payment mode and the reference transaction. To view this, your vendor should:
- Login to the portal and go to the Payments Received module. This will list all the payments you (Zoho Books user) have made.
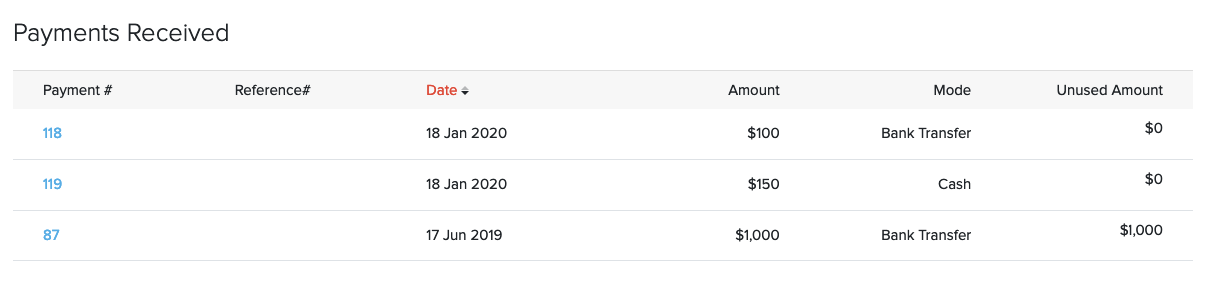
- Click on a payment receipt to drill down the details of the payment.
- Click the Download PDF or Print button to save a copy of the document.
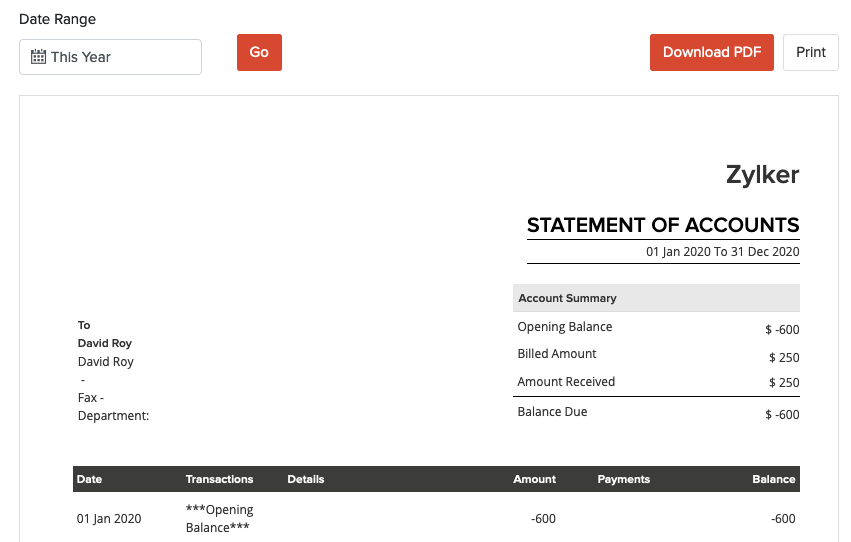
Generate Statement of Accounts
Statement of account shows a consolidated list of all the transactions carried out between your vendor and you. Your vendor can generate this statement for any period and view the payments received and balance due. To view the statement:
- Login to the portal and go to the Statements module.
- Select the Date Range in the top corner.
- Click Go to generate the statement.
- Click the Download PDF or Print button to keep a copy of the statement.
Create Bills (Zoho Books Users)
You will be able to create bills in Zoho Books based on the documents uploaded by the vendor. Furthermore, you can also discuss them in the comments section.
- Click the notification sent to your Zoho Books account when your vendor has uploaded a document.
(Or)
Go to the Vendors module and select the vendor who has uploaded documents. Click the document inbox to view the pending documents.

- All the uploaded documents will be listed. You can click a document to view its details.
- Click Convert to Bill from the top-right corner to accept the document. You can also reject/delete the document, if necessary.

Pro Tip: You can hover over the document and click Convert to Bill to create bills instantly.
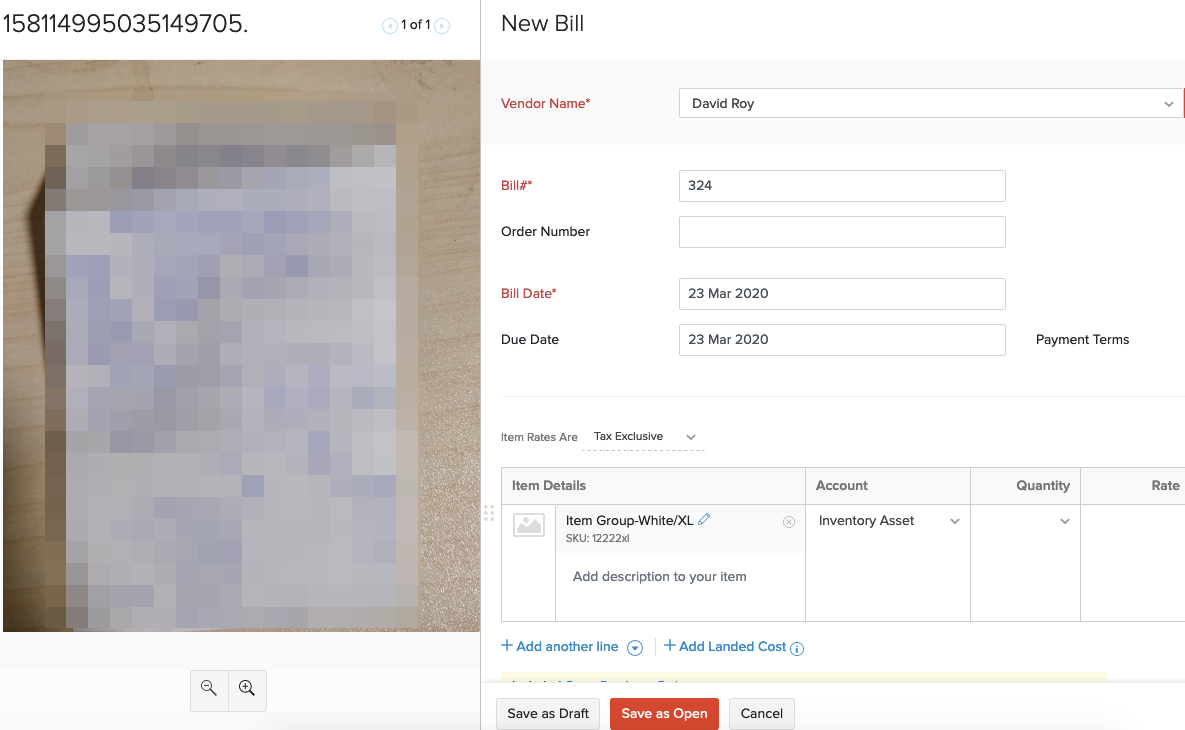
Enter the details by viewing the bill alongside. The vendor’s name will be auto-populated for you.
Click Save as Draft or Save as Open. Only the transactions that are in the Open state will be visible for the vendors.
Enable Autoscan for Uploaded Documents
However, if you’ve enabled the Autoscan feature in the Documents module, vital information of a document such as date, amount, etc., will be automatically captured from documents and populated while creating new transaction documents.
Note: The number of autoscans that can be performed depends on your subscription. You can purchase more autoscan add-ons if necessary.
You must enable the Autoscan feature in the documents module to autoscan the documents uploaded by the vendor.
Here’s how you can enable autoscan for the documents uploaded by the vendor:
- Click the Gear icon in the top right corner and select Preferences from the dropdown.
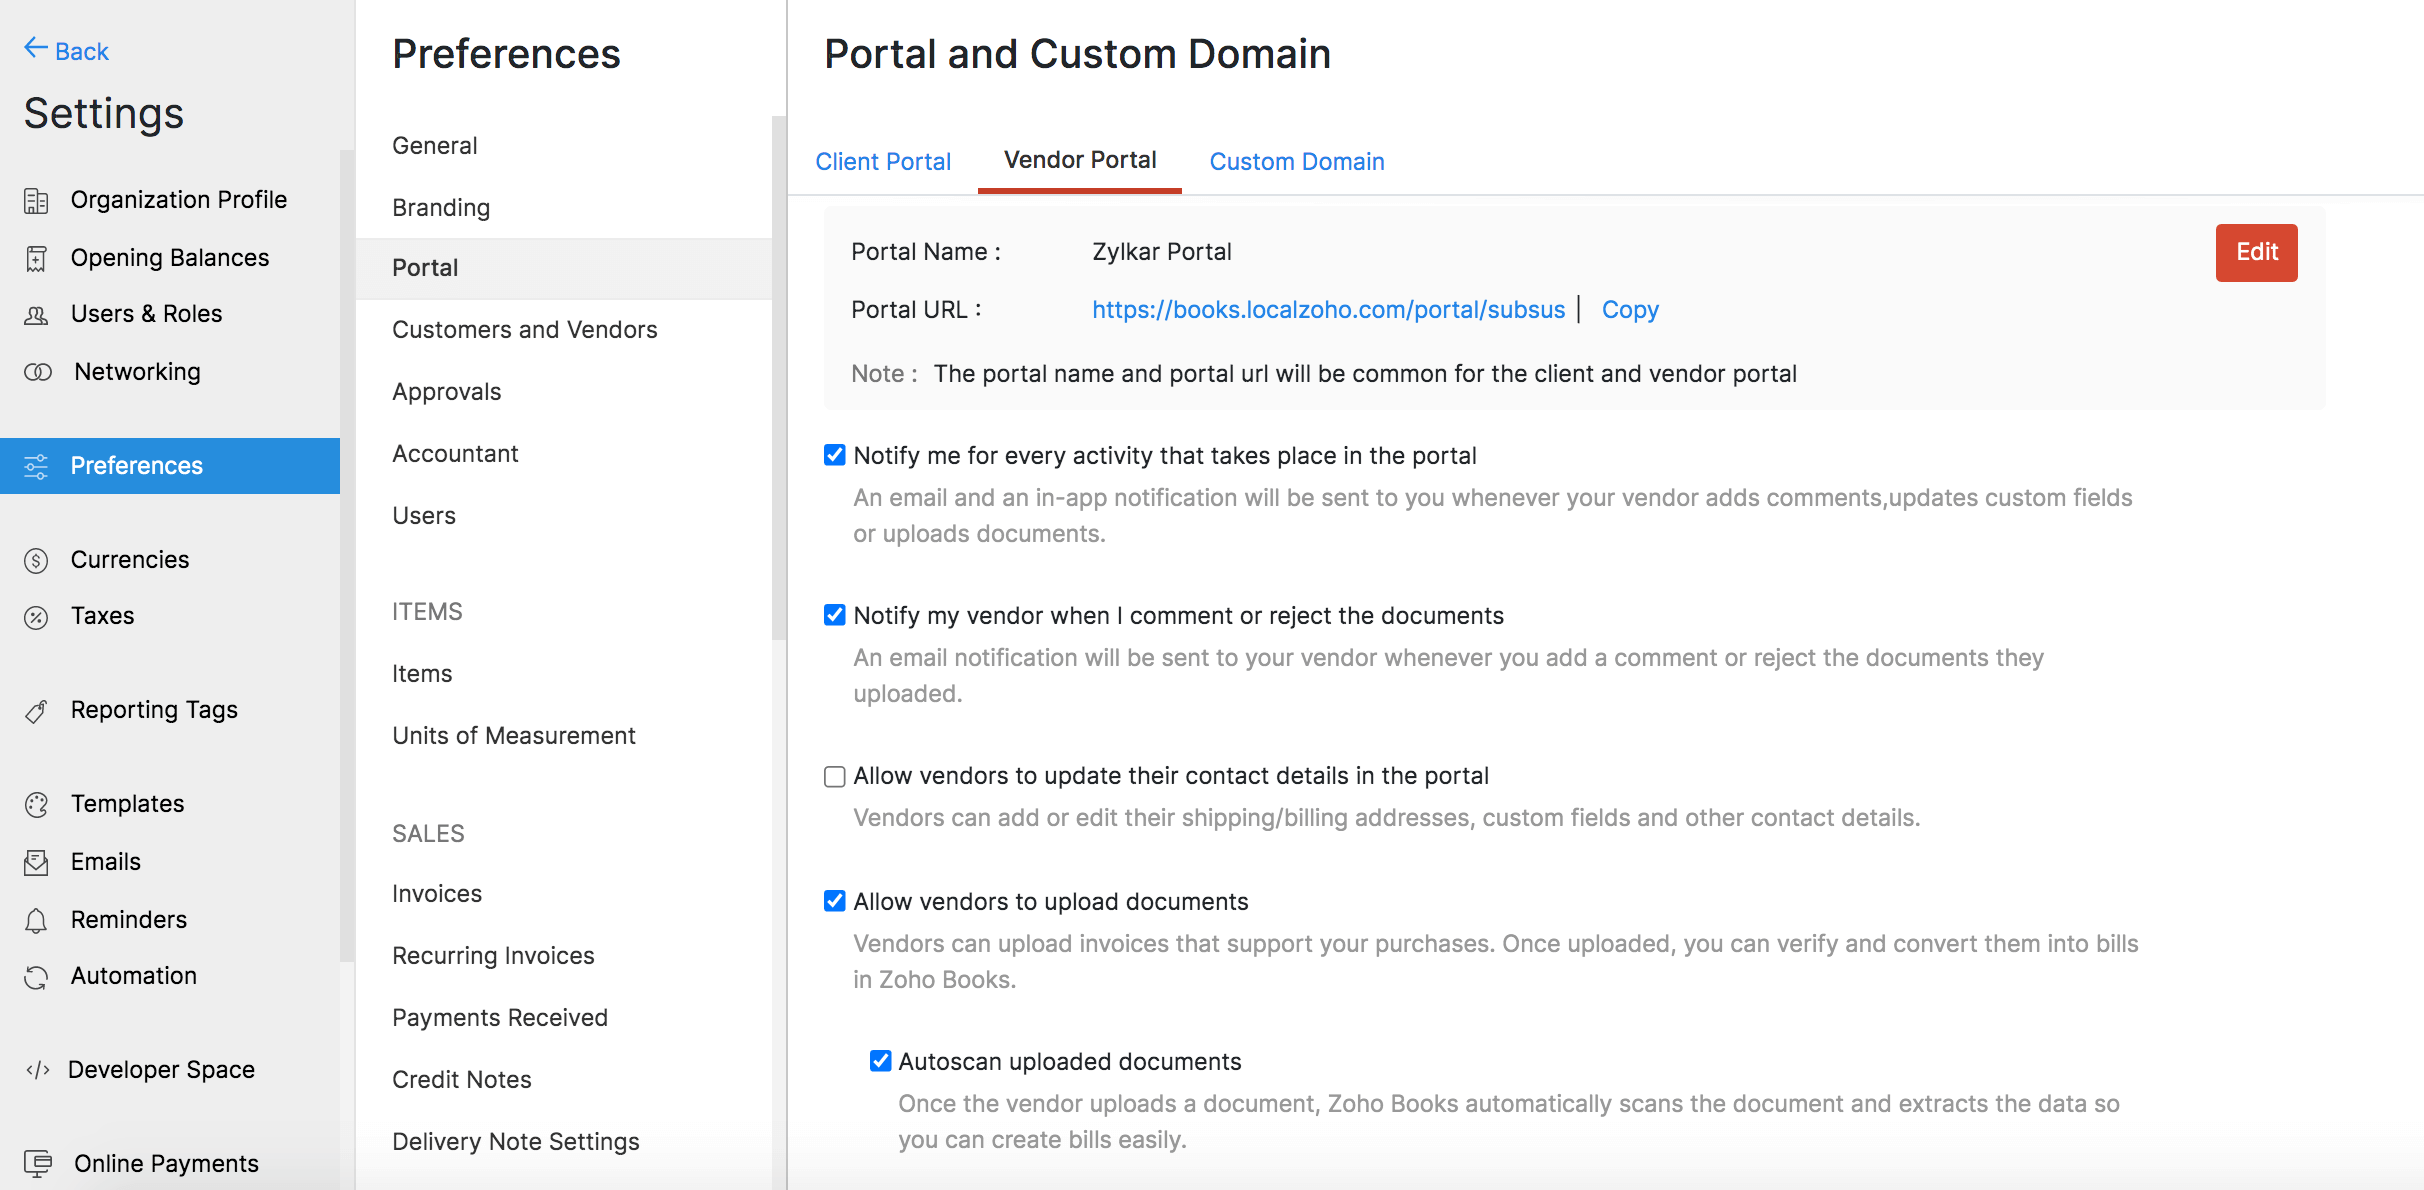
- Next, click Portal on the left sidebar and select the Vendor Portal tab below the Portal and Custom Domain.
- Scroll down and select the Autoscan uploaded documents option.
Insight: Once you’ve enabled autoscan in the preferences section, all the documents that the vendor uploads in the vendor portal will be automatically autoscanned in the Documents tab in Zoho Books.
As the documents get autoscanned, you will be able to observe the following status of the documents:
Scan in progress: The document or receipt is currently being scanned.
Processed: The document or receipt has been scanned and data is captured.
Failed: The autoscan has failed. This may result due to illegible data, images which cannot be interpreted or when the language is not supported.
Once the documents uploaded by your vendor has been autoscanned in Zoho Books, you can convert the scanned documents to a bill manually in the Documents tab.

Warning: The number of documents you can autoscan will reduce when a vendor uploads a document in the portal.
Other Actions (For Vendors)
Edit Address
The address you have stored in Zoho Books will be visible to your vendors. In case they have changed their address, they can edit them in their portal. To do this:
- Login to the portal and go to Home.
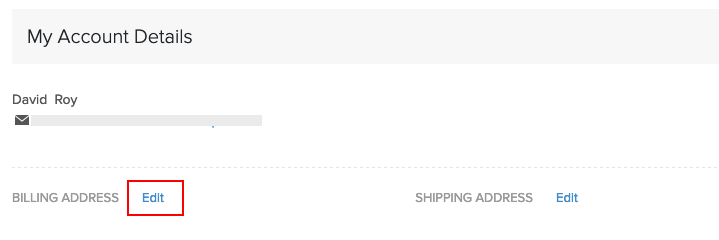
- Go to the My Account Details section and click Edit near the address.
- Update the address in the pop-up and click Save.
Insight: Only the person saved as the primary contact by you in Zoho Books will be able to update the address.
Send Email
Your vendor will be able to contact you directly from the portal by sending an email. Here’s how:
- Log into the portal and go to Home.
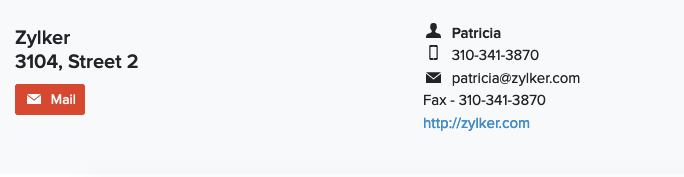
- Scroll down and the organisation details will be listed.
- Click the Mail button and enter the message.
- Click Send.
Change Password
If your vendor’s password is too old or vulnerable, they can an change it easily from the portal. Here’s how:
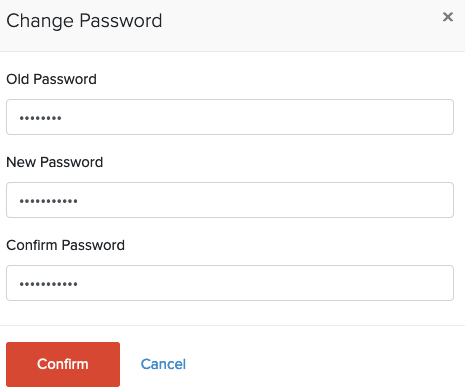
- Login to the portal and click Change Password in the left sidebar.
- Enter the Old Password and enter a New Password based on the password requirements.
- Re-enter the password and click Save to update the password.
Logout
To logout of the portal:
- Go to the portal.
- Click Logout in the left sidebar.
Vendor Portal Preferences (Zoho Books Users)
The preferences section will allow you to configure the portal.
- Go to Settings on the top right corner of the page.
- Select Vendor Portal under Preferences.
The custom options available are:
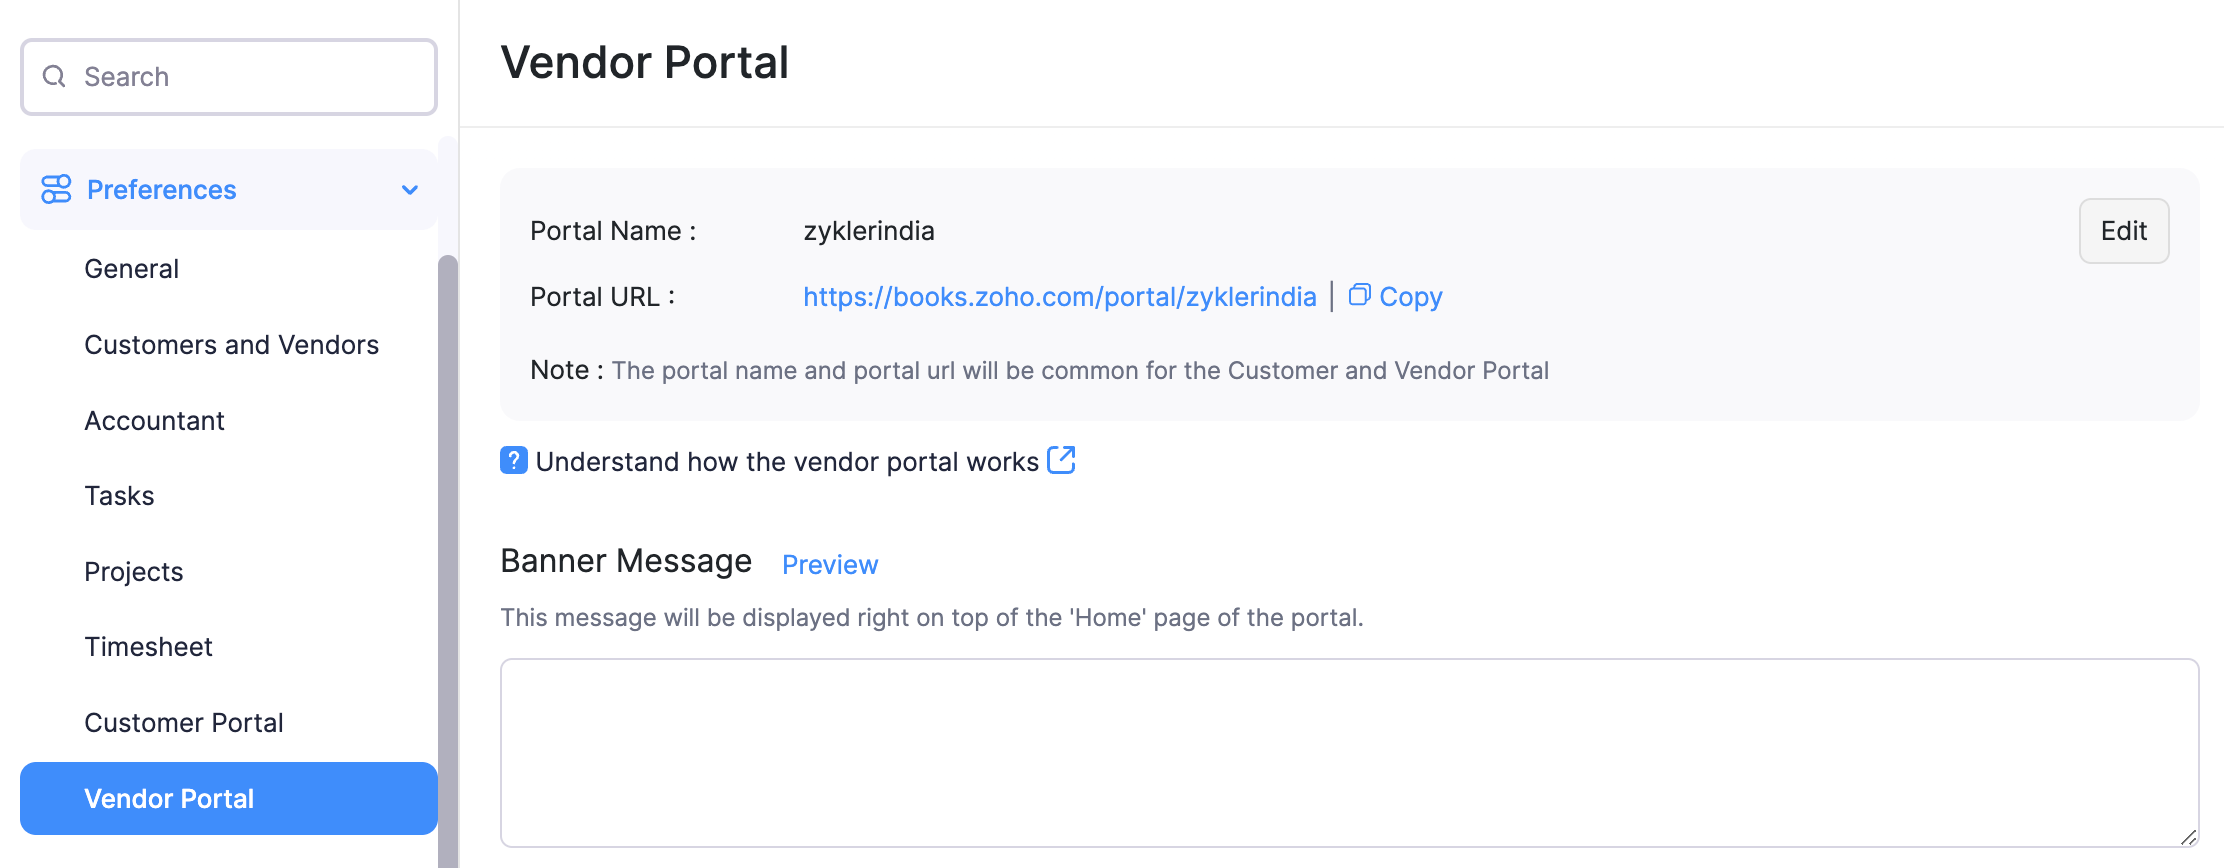
Portal Name
The portal name is unique to your organization and it is used in the URL of the Client and Vendor Portal. This is auto-generated by default. However, you can edit the portal name, and click Save if you want to customize it.
Notify me for every activity that takes place in the portal
Enabling this option notifies you via emails and in-app notifications whenever your vendor uploads documents, adds comments or updates any details.
Notify my vendor when I comment or reject the documents
Enabling this option notifies your vendor via an email whenever you add a comment or reject the documents they had uploaded.
Allow vendors to update their contact details in the portal
Enabling this option allows your customers to add/edit their shipping/billing addresses, custom fields and other contact details in case of any changes.
Collect vendor’s organization details when they sign up for the portal
Note: This feature is a part of the Zoho BillPay add-on for the Canada, India, and US editions of Zoho Books. Purchase the add-on to enable the feature for your organization.
When a vendor accepts the invite and accesses the portal for the first time, an onboarding screen will be shown to enter and submit their organization details. You can view the submitted details in Vendors module and approve it. Once approved, vendor can access the portal. Learn more.
Allow vendors to upload documents
Enabling this option allows vendors to upload PDFs or images of transactions that support your purchase. You can view the document and accept it to create a bill in Zoho Books.
Autoscan uploaded documents
Enabling this option will capture the important data from the documents that are uploaded by the vendor and will be used to create bills easily.
Allow vendors to only upload documents for purchase orders
Note: This feature is a part of the Zoho BillPay add-on for the Canada, India, and US editions of Zoho Books. Purchase the add-on to enable the feature for your organization.
Enable this option if you want vendors to only upload invoices for the corresponding purchase orders. Once uploaded, you can verify and convert them into bills in Zoho Books.
Once you enable this option, vendors will no longer be able to upload documents from the Upload Documents tab in the Invoices module of the vendor portal. They can only upload documents from the Details page of the corresponding purchase order.
Allow vendors to accept/reject purchase orders
Enabling this option provides vendors the ability to accept or decline the purchase orders in the Vendor Portal.
Banner Message
The banner message will be displayed in the Home screen of the vendor portal. For example, you can say “Welcome to Zylker. Have a nice day!”
- Click Save after configuring these settings.