
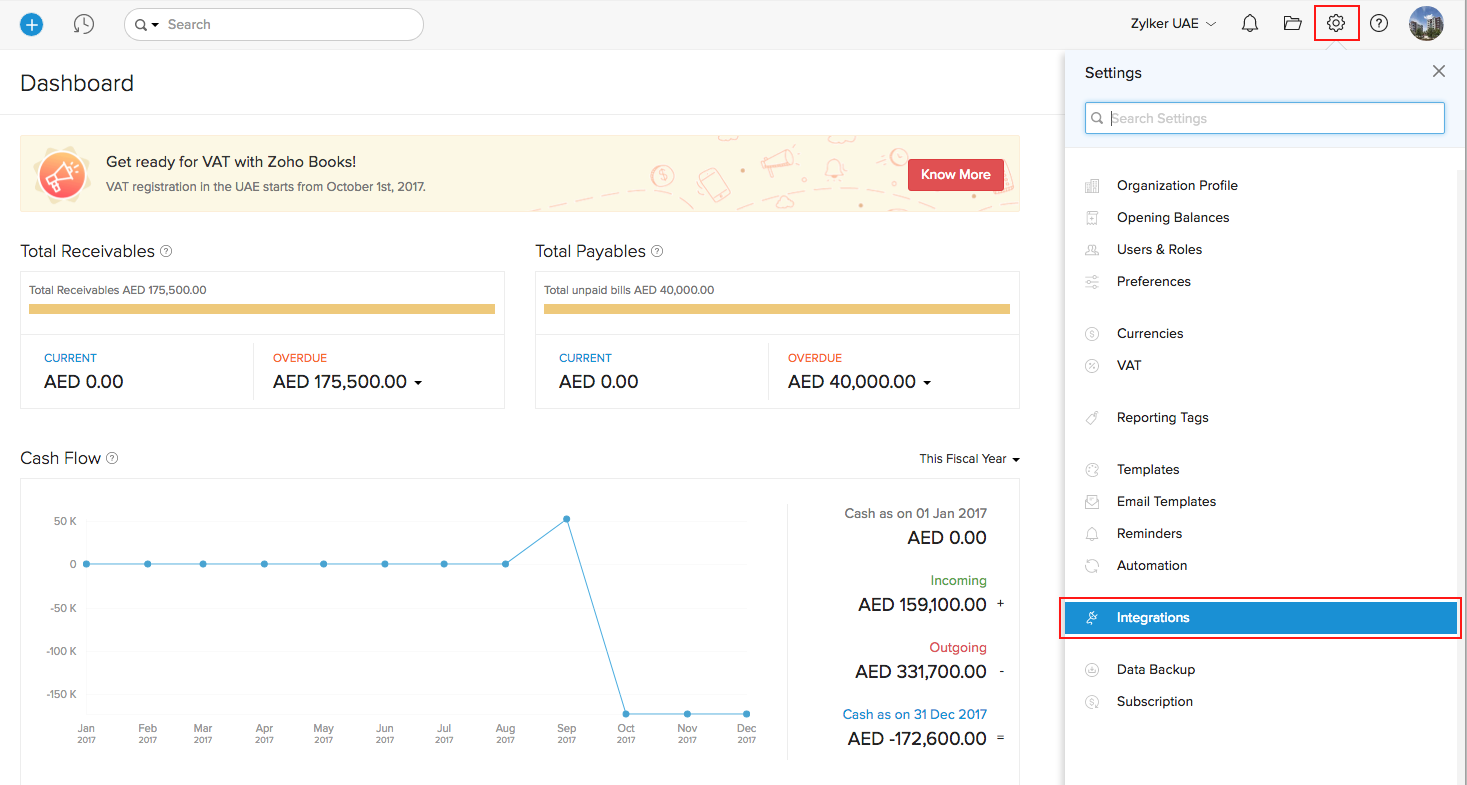
Integrations
Zoho Books can be integrated with different apps and payment gateways. Let us see how this is done.
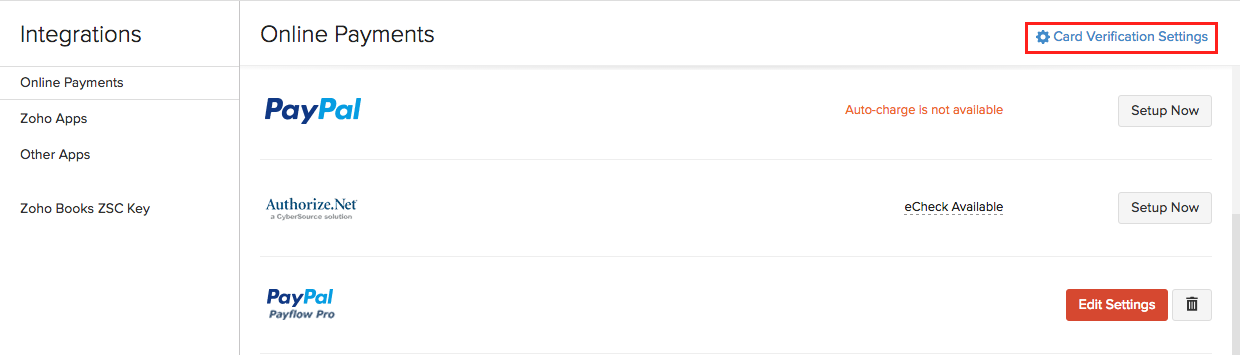
Online Payments
In the Zoho Books app, you can now access Online Payments as a separate section directly under Settings.
Zoho Books is integrated with major online payment gateways to help you receive payments for your invoices online. This ensures faster, hassle-free payment receipt and further automates your cash flow and bookkeeping. To set up a payment gateway:
- Click the Gear icon on the top right corner of the page.
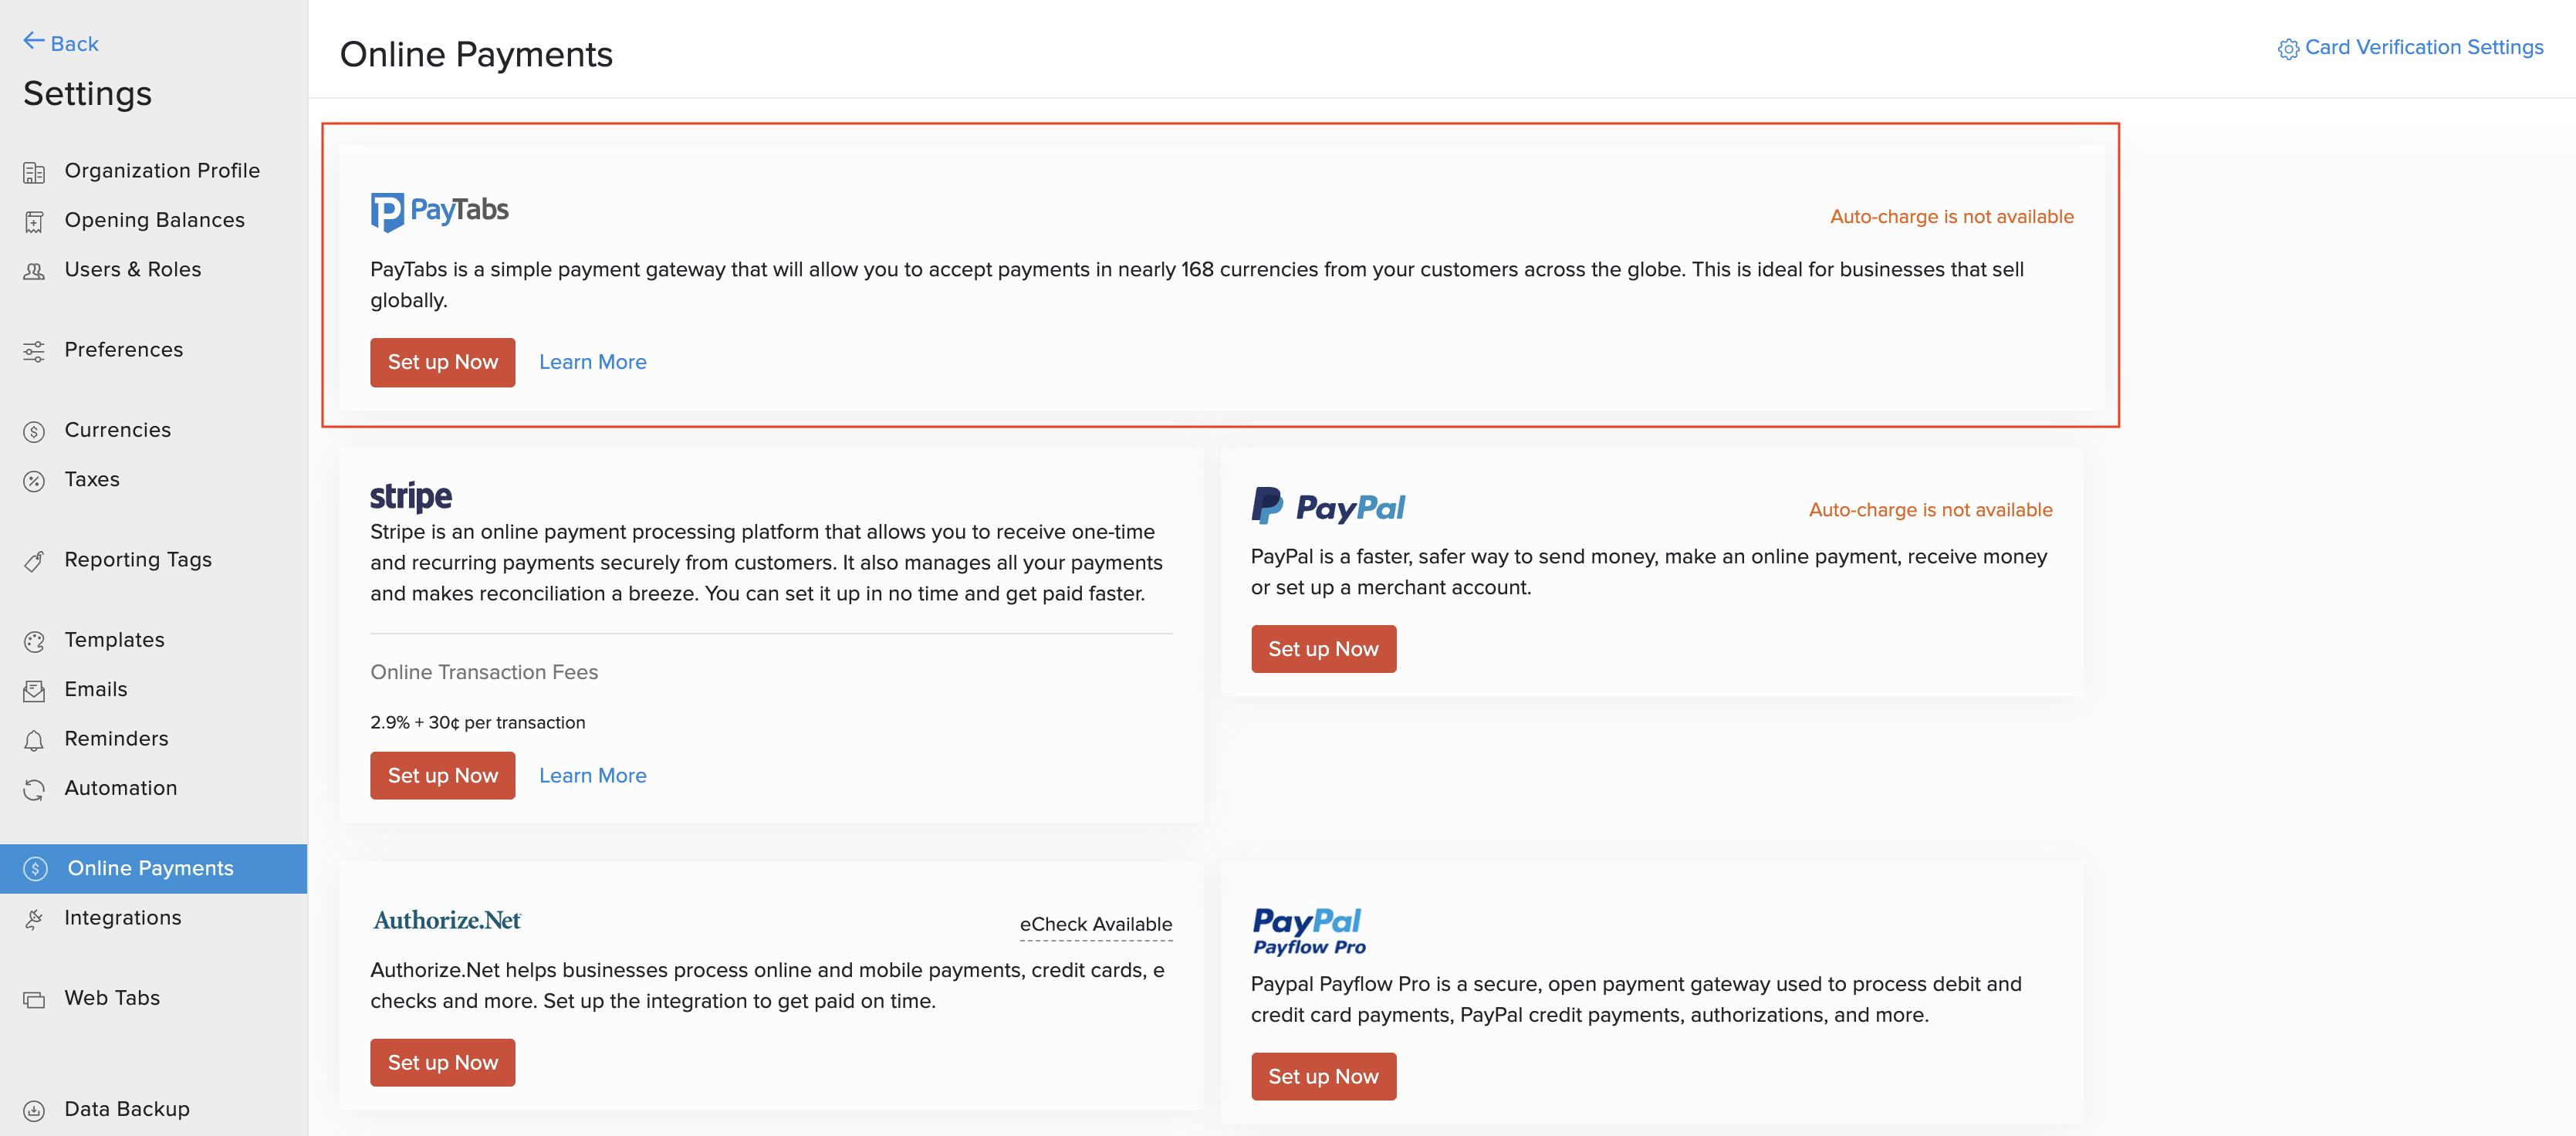
- Select Online Payments. You’ll find the list of payment gateways that Zoho Books supports.
Click a payment gateway to find out how you can use it along with Zoho Books.
| Payment Gateway | Supported Countries |
|---|---|
| Stripe | List of countries supported by Stripe. |
| PayPal | List of countries supported by PayPal. |
| Verifone | Supported in all countries except North Korea, Iran, Sudan, Syria, Cuba, and Myanmar (Burma). |
| Braintree | Works for United States, Canada, Europe, Singapore, Hong Kong, Malaysia, Australia, and New Zealand. |
| PayTabs | United Arab Emirates, Saudi Arabia, Oman, and Kuwait. |
Payflow Pro
Note: The PayPal Payflow Pro integration has been deprecated and is only available for existing users.
To set up Payflow Pro, click on the Gear icon on the top right hand side corner of the screen. Go to Online Payments and click the Set up Now button adjacent to Payflow Pro logo. Enter the following information and click Save.
When you register for Payflow Pro, you will receive an email with information like your Partner ID and Vendor name. Please keep that email at hand while filling the details for Payflow Pro.
Then enter the following information and click Save.
Currency: The currency you set up in your Payflow Pro account. Payflow currently supports transaction in 10 leading currencies.
Partner: The partner ID as mentioned in your Payflow Pro account.
Vendor: Your vendor name as mentioned in your Payflow Pro account.
User: Enter your Payflow Pro username.
Password: Enter your Payflow Pro password.
Bank Account: Enter the Bank Account where money received should reflect.

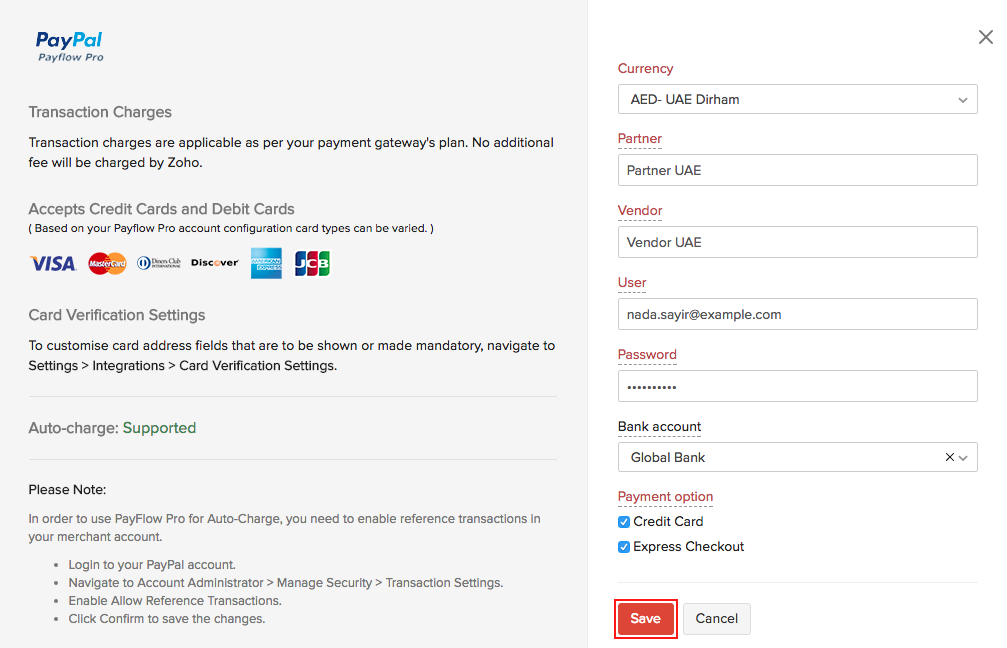
When you setup this integration, the fields mentioned above will be shared with Payflow Pro.
Prerequisites for using with Auto-charge in Zoho Books
In order to use PayFlow Pro for Auto-charge, you need to enable Reference transactions in their merchant account.
- Login to your PayPal account.
- Navigate to Account Administrator.
- Navigate to Manage Security -> Transaction Settings and enable Allow reference transactions.
Configuring Auto-charge Settings
Tip - Countries supported by Payflow Pro: United States, Canada, Australia, and New Zealand.
Transaction charges
The online transaction fees will depend upon the charges specified by Payflow Pro.
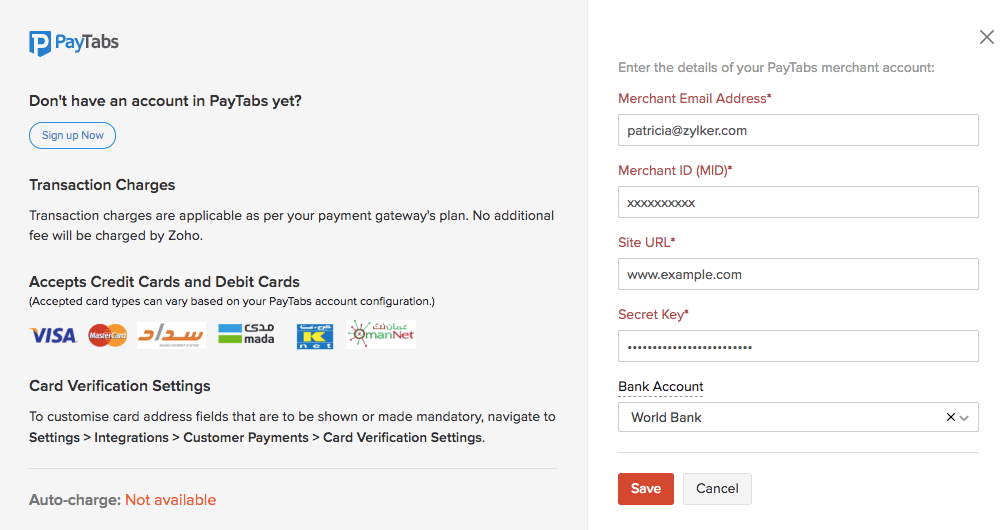
PayTabs
PayTabs is a payment gateway that enables you to receive quick payments from your customers. It supports 160+ currencies and is secured with the PCI DSS certification and anti-fraud protection. You can integrate your Zoho Books organization with PayTabs and receive online payments.
PayTabs supports multiple payment options such as:
- SADAD (Saudi Arabia)
- MADA (Saudi Arabia)
- KNet (Kuwait)
- OmanNet (Oman)
Note: Don’t have a PayTabs account? Create an account and start receiving payments from your customers.
Set up Paytabs
To set up the PayTabs integration in Zoho Books:
- Log in to your Zoho Books organization.
- Go to Settings > Online Payments.
- Click the Set up Now button below PayTabs.
- Enter the credentials of your PayTabs account.
- Select a Bank Account created in Zoho Books in which you would like to track the money you receive through the PayTabs integration (optional).
- Click Save.
Prerequisites for Receiving Payments
Before you receive payments from customers who are going to pay you through PayTabs, you’ll have to ensure that you’ve configured the following:
In the Contacts module, you’ll have to ensure the following details of your customers are filled:
- Contact Email
- Contact Phone
- Billing Address (Country, Address, City, State, Zip Code)
Note: If the country doesn’t have a Zip Code, use the country’s Telephone Code instead.
To update the customer fields:
- Go to the Contacts module in the left sidebar.
- Select the customer for whom you want to update the details.
- Update the details and save the information.
Enable Payment Options in Invoices
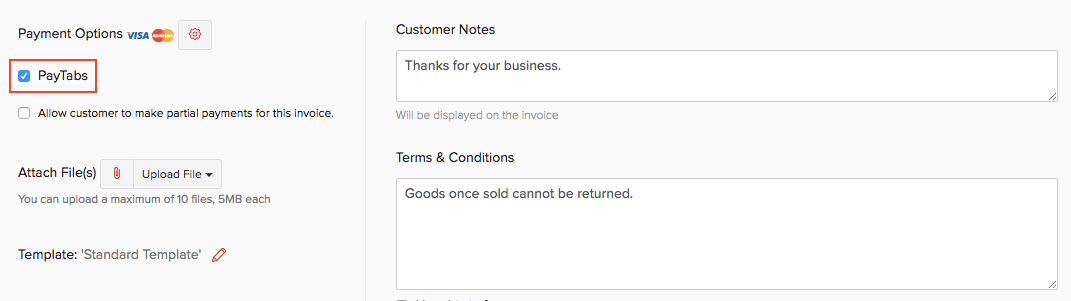
After you have updated the required details of the customer and created an invoice for the same customer, you’ll have to select PayTabs as the payment option in the invoice. Here’s how you can do it:
- Go to Sales > Invoices.
- Create a new invoice or edit an existing one for the customer.
- Mark the PayTabs box under the Payment Options.
- Save the invoice.
After you’ve updated the above changes for your contacts and invoices, your customers can pay you through PayTabs.
Receive Payments
To receive payments through PayTabs for your invoices, make sure you’ve completed the following:
- Set up the PayTabs integration
- Enable the PayTabs payment option in the invoice
After the customer receives the invoice, there are two different ways in which you can receive payments:
1. Customer Portal
You customer can pay directly through the Customer Portal if you’ve enabled portal access for them. Here’s what they should do:
- Log in to the Customer Portal.
- Click the Invoices tab in the left sidebar.
- Select the invoice for which they have to make the payment.
- Click the Pay Now button to the right side of the invoice.

- Click Pay via Card.
- Click the Proceed to Payment button at the bottom of the page.
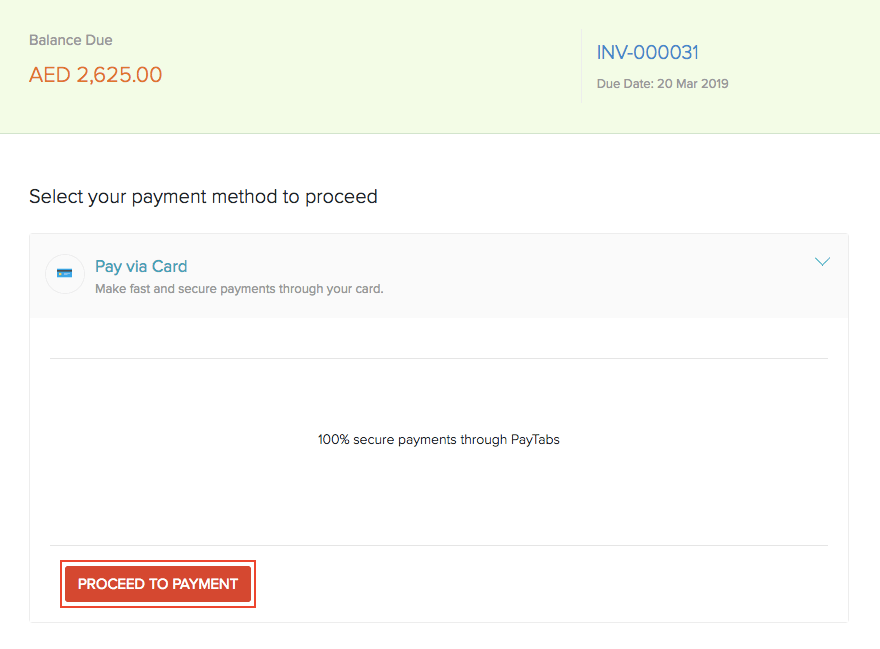
- Enter the card details for payment. You can also edit the personal or billing information from this page.
- Click Pay Now.

2. Email
If you choose to email the invoice to your customer, they can view the invoice you have created for them and directly pay for it. This is what your customer will have to do:
- Log in to their email.
- Select the email containing the invoice and click View Invoice.
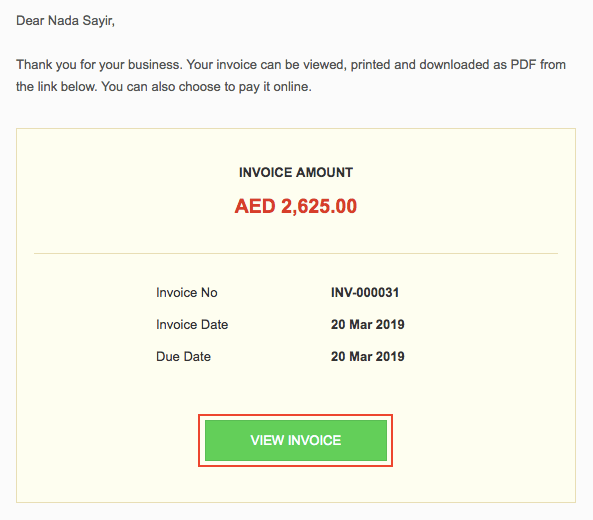
- Click Pay Now.
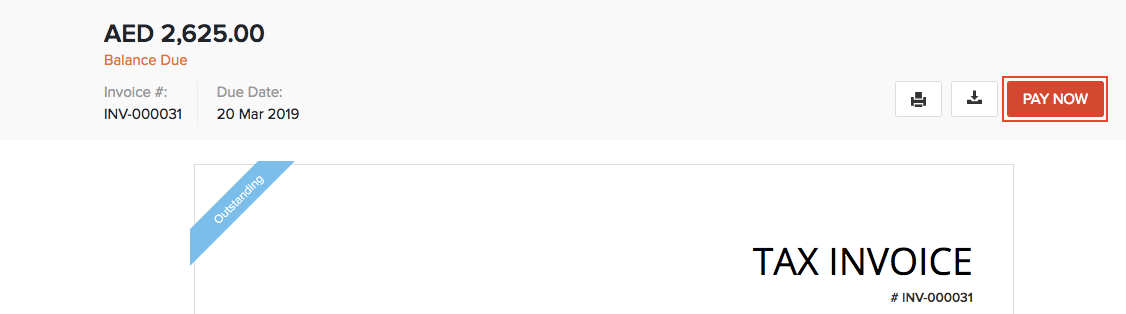
After clicking Pay Now, you’ll be redirected to the payments page from where you can make the payment.
Edit PayTabs Integration
You can change the details of your PayTabs integration that you’ve entered during setup Here’s how:
- Go to Settings > Integrations.
- Select Customer Payments in the left sidebar.
- Click the Edit Settings button to the right of PayTabs.
- After updating the details, click Save.

Note: If you want to change the Merchant Email Address or the Merchant ID (MID), then you would have to delete the integration and enter the details again.
Delete PayTabs Integration
You can delete the PayTabs integration you have set up in Zoho Books. Here’s how:
- Go to Settings > Integrations.
- Select Customer Payments in the left sidebar.
- Click the Trash button to the right of PayTabs.

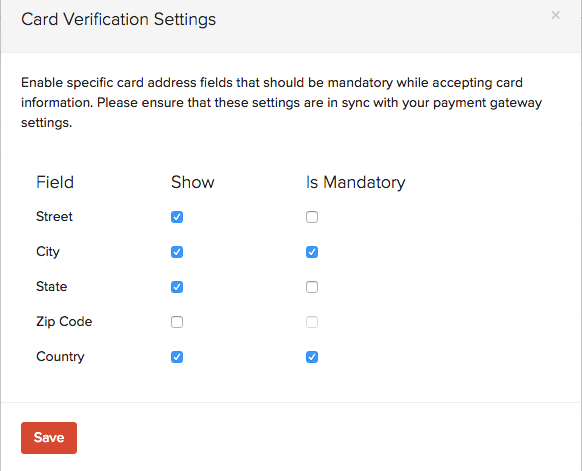
Card Verification Settings
Initially card address was made mandatory in Zoho Books. This was initiated by us to avoid confusions with respect to various payment gateways as different payment gateways have different validations. But now you are given that option to decide on whether the card address needs to be shown or not.
Depending on your choice of gateway you can enable the necessary fields of the card address to be shown or to be made mandatory by making the preferences in Card Verification Settings.
Kindly follow the steps below to make card address related changes:
- Click the Gear icon present at the top right corner of the screen.
- Go to Online Payments and click the Card Verification Settings button.
- Here you can customize card address details accordingly.
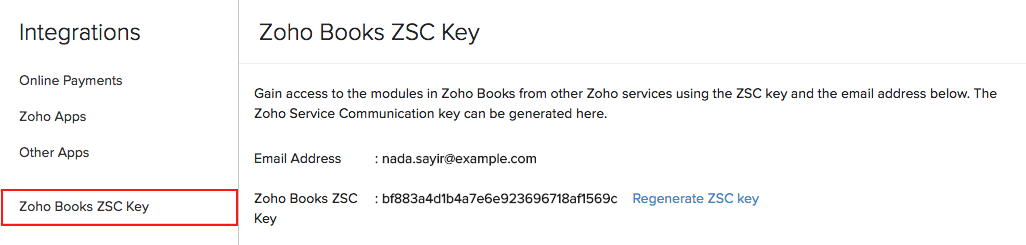
Zoho Service Communication (ZSC) Key
Zoho provides numerous world class apps in addition to Zoho Books, such as Zoho CRM, Zoho Invoice, etc. If you have a Zoho CRM account and would like to integrate with your Zoho Books or Zoho Invoice account, you may use this ZSC key to do so. The ZSC Key is a unique key used to communicate between these apps.
Navigate to Settings > Integrations and select Zoho Books ZSC Key, to get the key or to generate a new one.
Click on the Regenerate ZSC Key link provided on this page, to generate a new ZSC key.
When cards are used for payment, the payer’s card information will be encrypted and passed to the payement gateway. After the payment is processed and confirmed, the last 4 digits of the card along with the month and year of expiry are stored in the payment details section of Zoho Books.
 Yes
No
Yes
No
Thank you for your feedback!