Basic Functions in Expenses
Expenses in Zoho Books can be created and tracked in different accounts.
Create Expense
If you incur expenses in your organization, you can add them in Zoho Books.
To create a new expense:
- Go to Purchases > Expenses (or press shift + x).
- Click the + New button in the top right corner of the page (or press c + x).
- Enter the following details in the New Expense page.
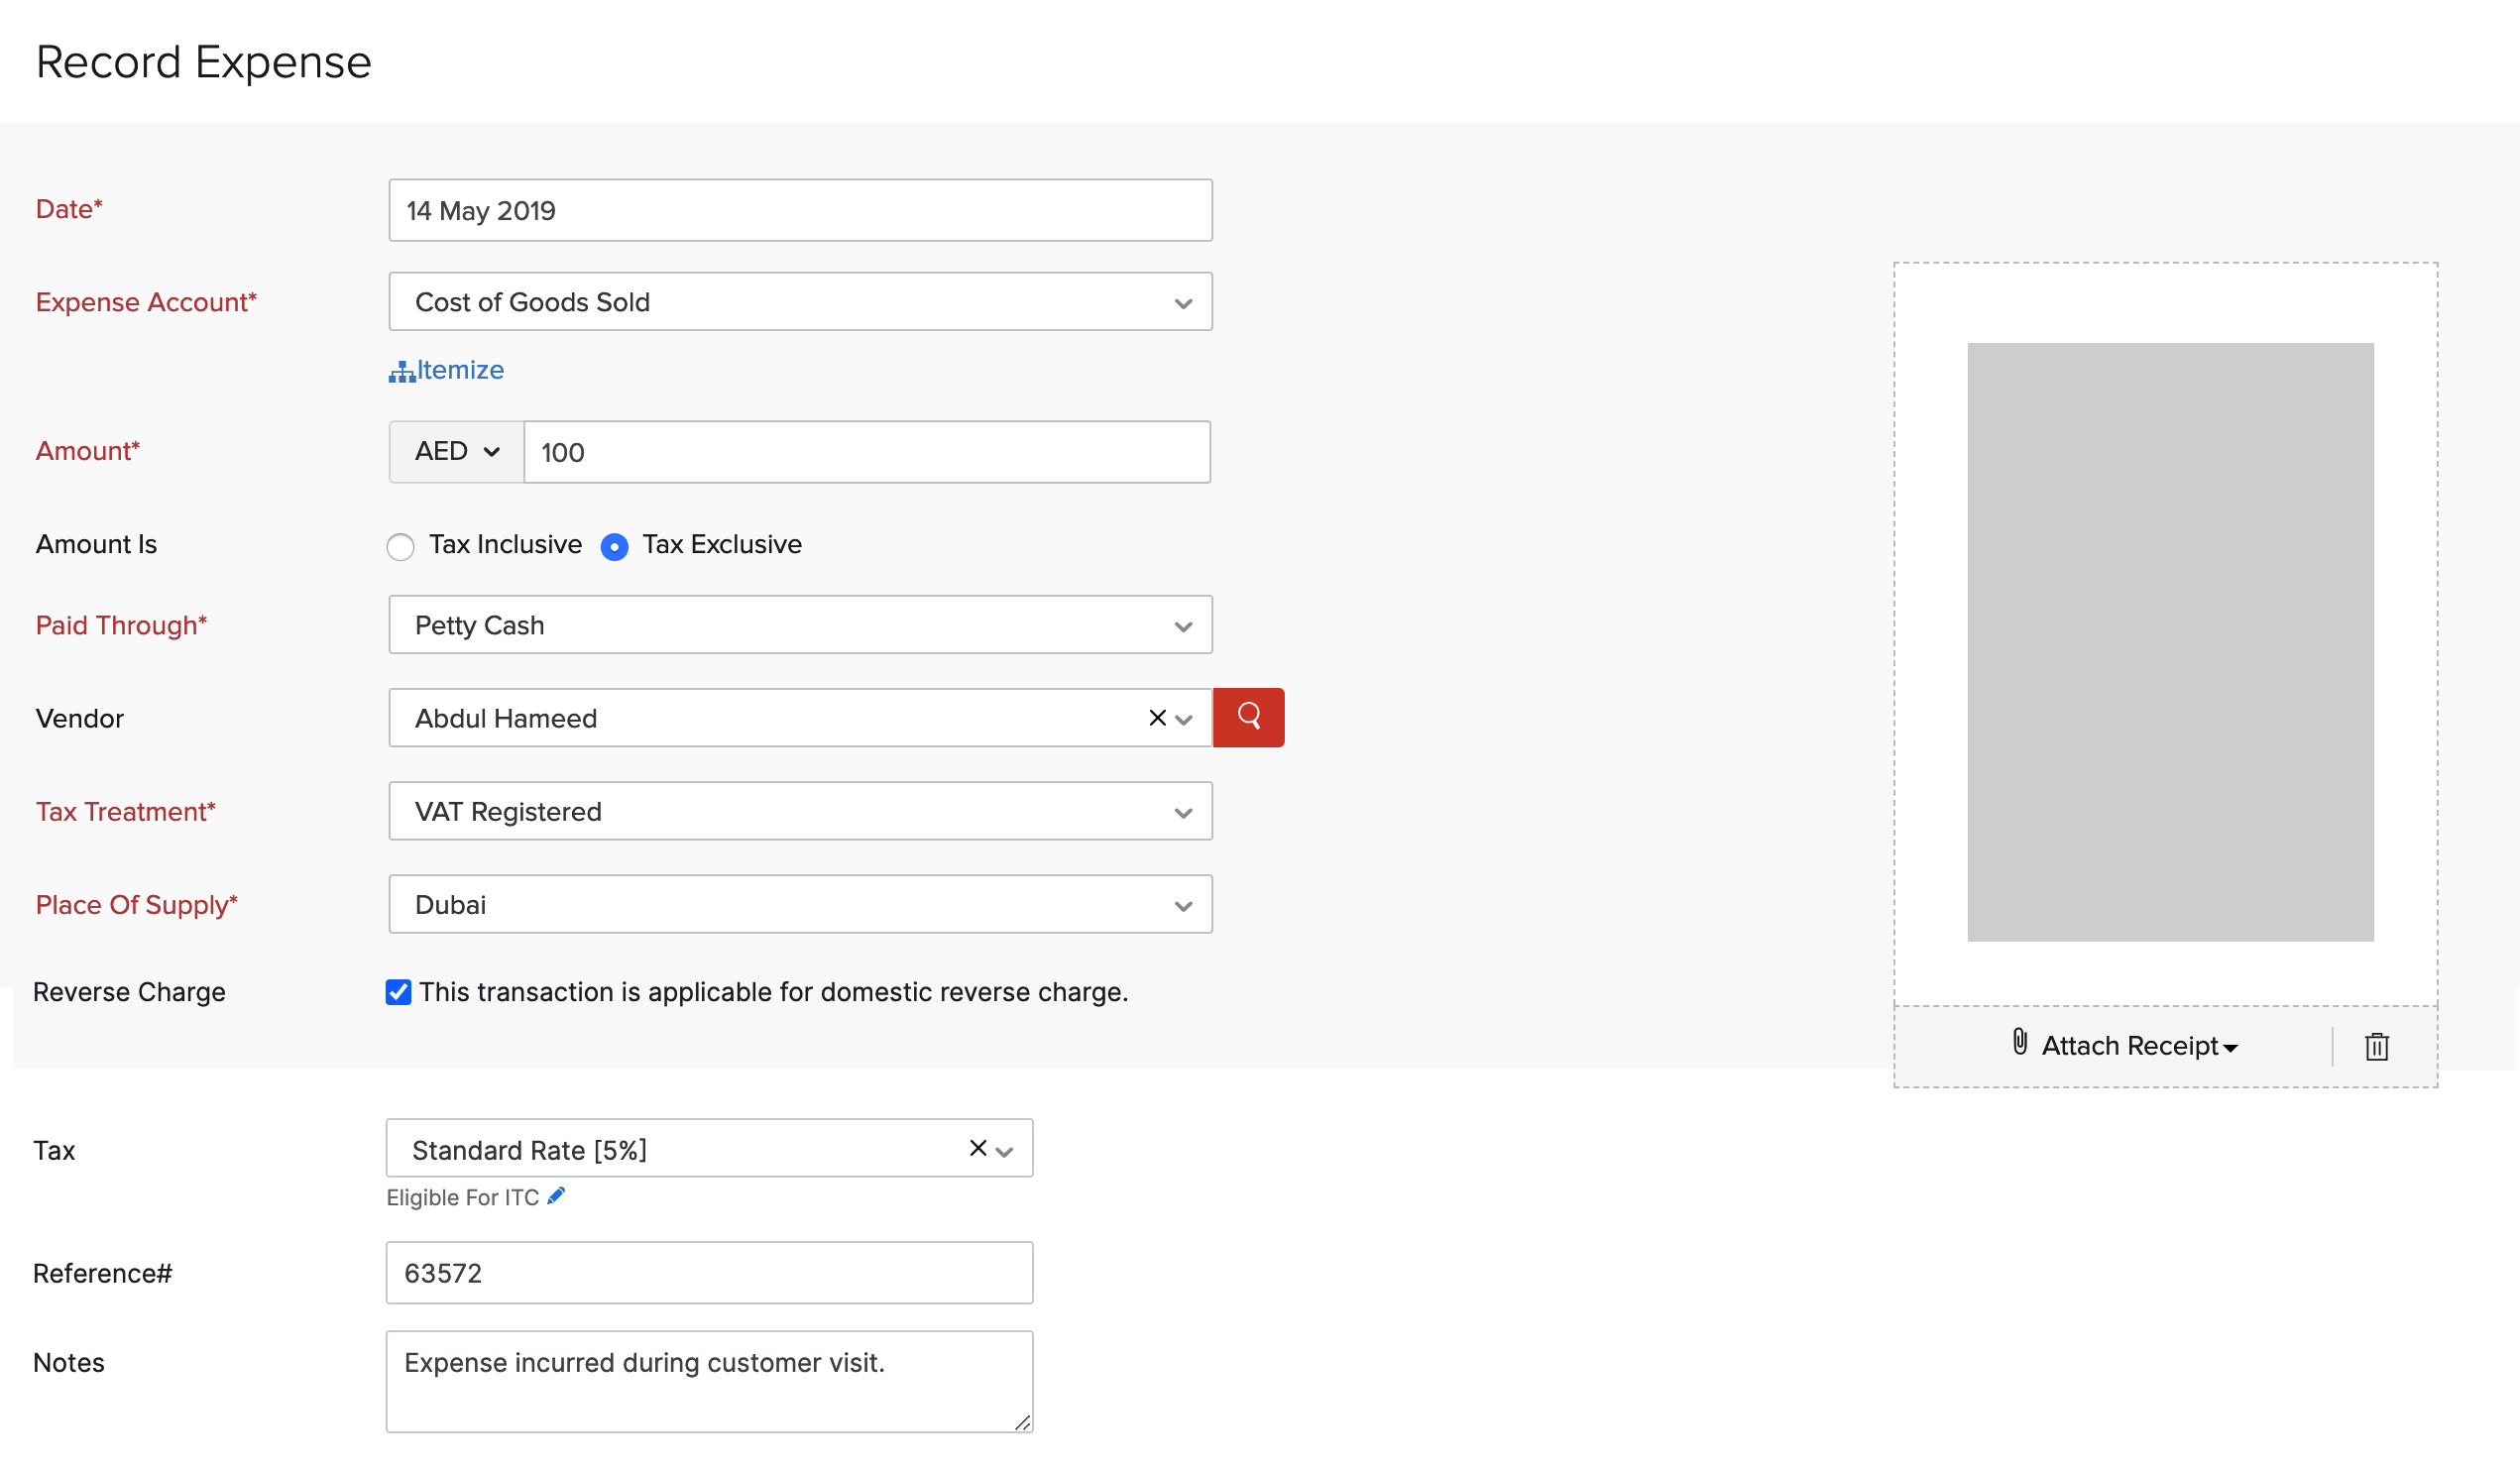
Date
Select the date on which the expense is created.
Expense Account
Select an account to track the expense you’re going to record.
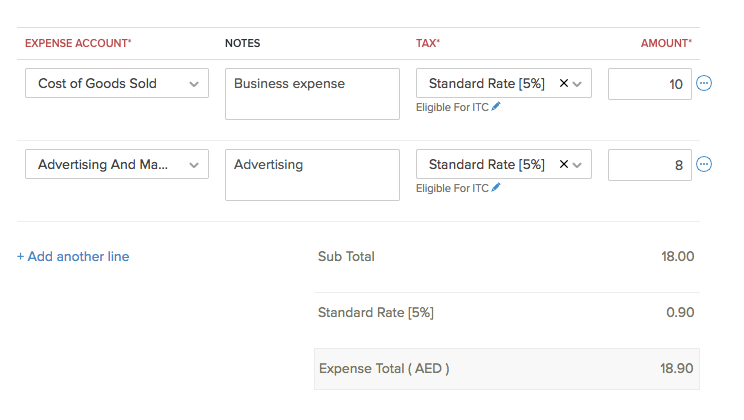
Itemize
Add multiple expense accounts under which you wish to track different expenses by clicking Itemize. These accounts will be debited once the expense is recorded. After saving the bill, click Display Journal at the bottom of the page to view the corresponding journal.
Amount
Enter the expense amount.
Paid Through
Choose the account which tracks the payment for the expense. This account will be credited when the expense is recorded.
Vendor
Select a vendor to whom you wish to associate the expense.
Tax Treatment
Select the tax treatment of the vendor.
Place of Supply
Select the place of supply for the expense.
This transaction is applicable for domestic reverse charge
You will see this option if the vendor you’ve selected has their tax treatment as ‘VAT Registered’ or ‘Non VAT Registered’.
Mark this option if you’re purchasing supplies such as hydrocarbons, crude oil, and natural gas to re-sell or distribute in other forms from a domestic supplier.
Applying domestic reverse charge on a purchase transaction will affect the values in Box #3 under VAT on Sales and all other Outputs and Box #10 under VAT on Expenses and all other Inputs in the VAT return.
Tax
Enter the tax applicable on the expense (if any).
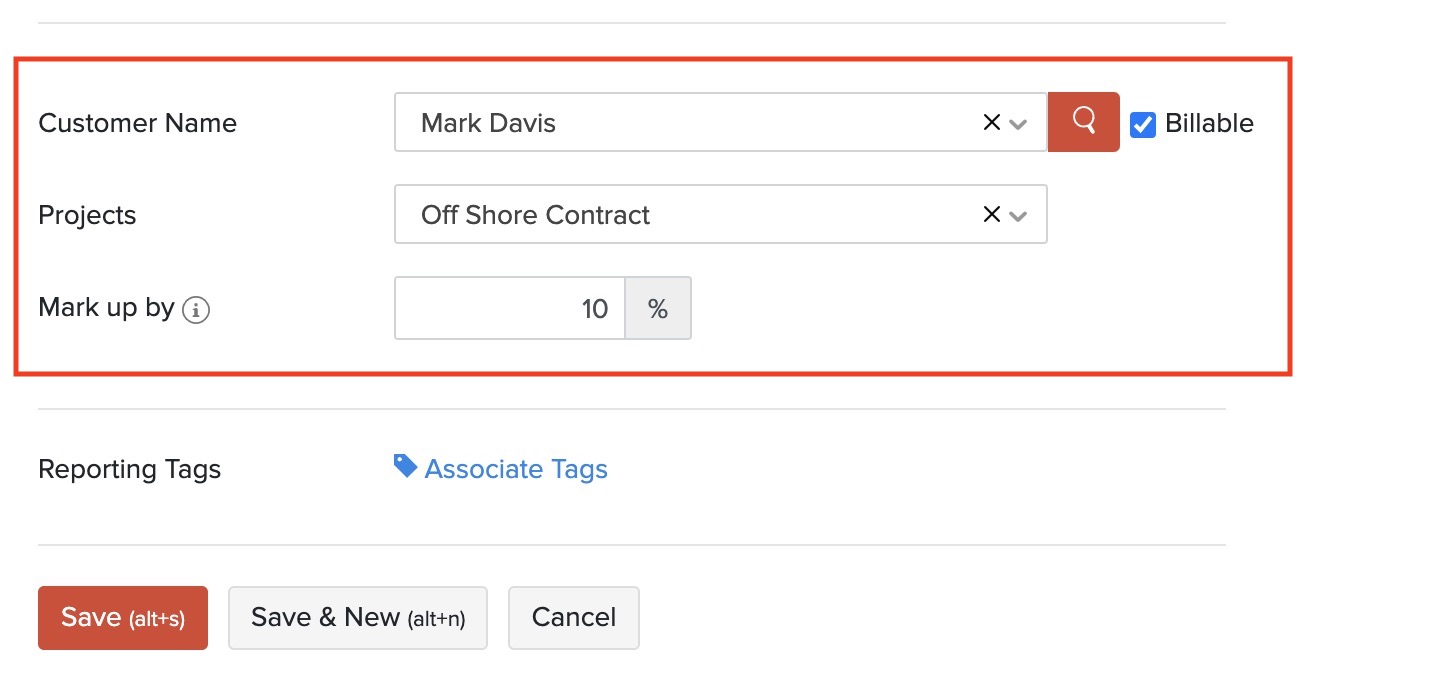
Customer Name
Associate the expense to a customer. You can mark the expense billable to the customer and convert this expense into an invoice to collect payment from the customer.
To make the expense billable:
- Mark the Billable option next to the Customer Name.
- Select a Project to associate with the customer, if this is an expense incurred for the project.
- If you had configured a default markup percentage for billable bills and expenses in Settings, the default percentage will be pre-filled. You can edit and change the markup percentage, if needed.
- Click Save.
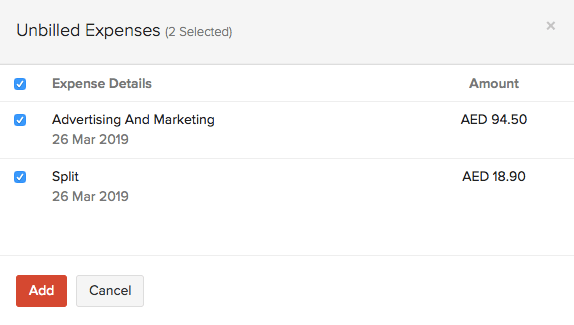
Also, you’re creating an invoice for the associated customer, this expense will be shown as an unbilled item in the invoice to be included as a billable line item.
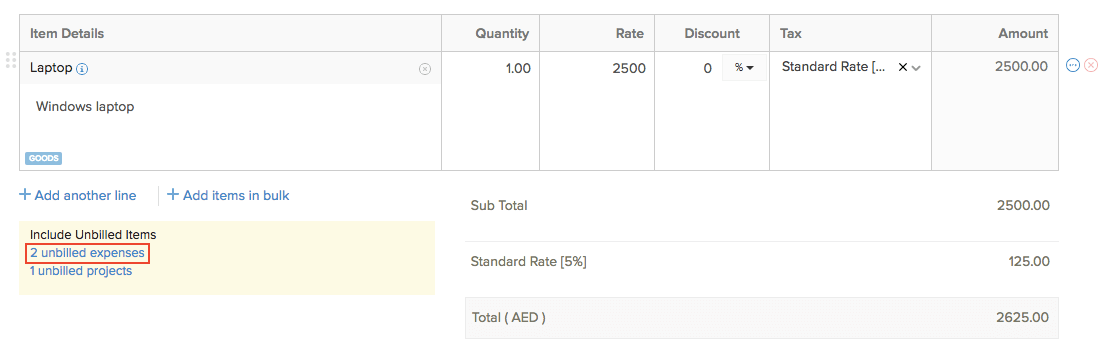
You can select the expenses to be billed to the customer.
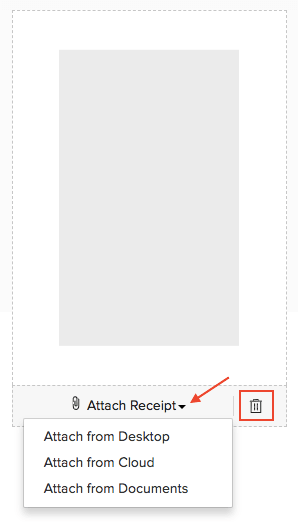
Attach Receipt
Attach the receipt of your expense from your Desktop, Cloud or from your Documents in Zoho Books. You can also delete the receipt by clicking the Delete icon.
Projects
Choose project(s) you wish to associate with the expense. If you associate a project for the customer, then you can bill it while creating an expense for the customer.
Reporting Tags
Associate reporting tags for the expense. Learn more about Reporting Tags.

- After entering the details, click Save (or press alt/option + s) or Save & New (or press alt/option + s).
View Journal
After you have created an expense, you can view its corresponding journal entry in Zoho Books. Here’s how:
- Go to Purchases > Expenses (or press shift + x).
- Select the expense that you have created.
- Click More > View Journal.

The corresponding journal will be displayed.

Pro Tip: To view the journal in the expense details page itself, you can select the expense, scroll down and click Display Journal to view the journal entry.
Import Expenses
You can import a list of expenses you have in CSV, TSV or XLS format. Here’s how:
- Go to Purchases on the left sidebar and select Expenses (or press shift + x).
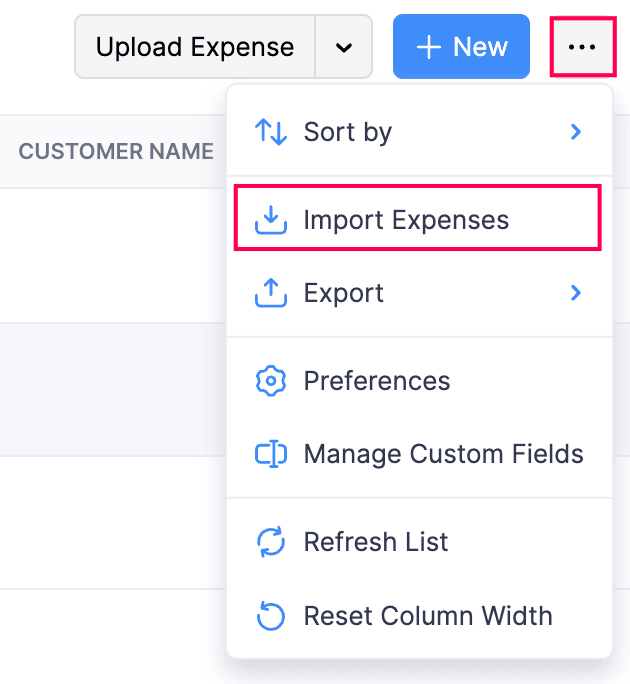
- Click the More icon in the top right corner of the page.
- Select Import Expenses.
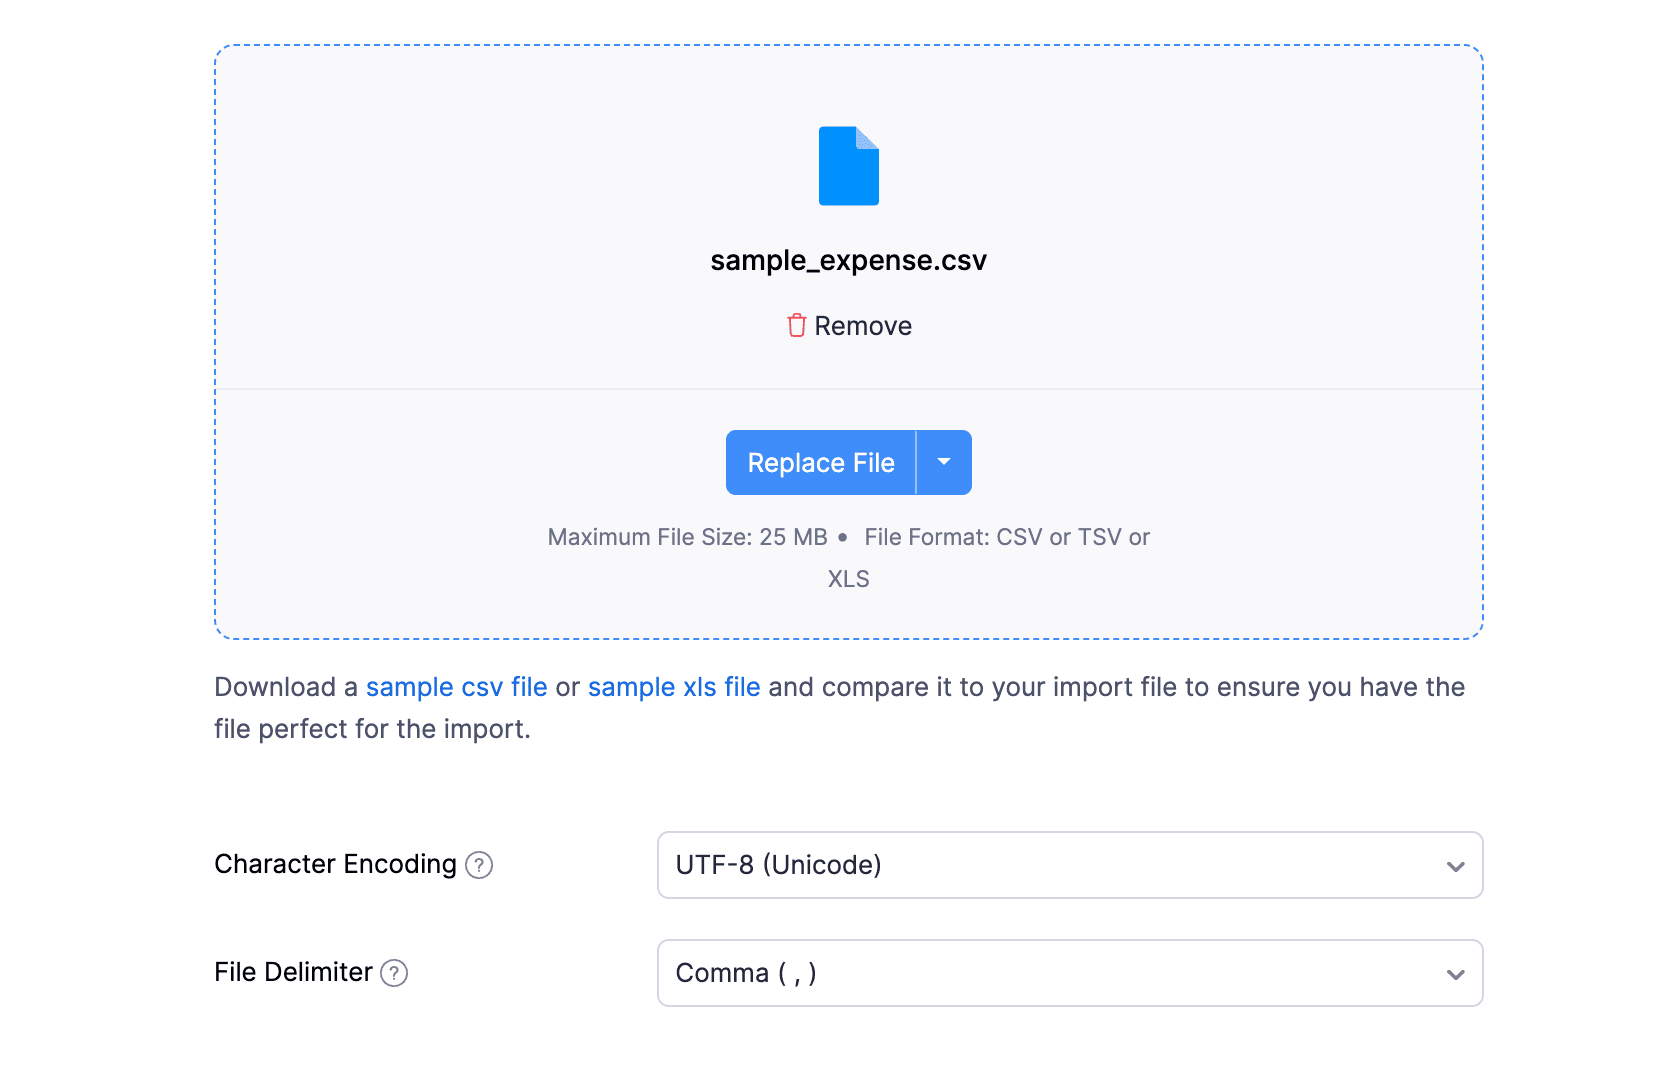
- In the next page, click Choose File to choose the file you would like to upload; you can choose to attach from desktop, cloud, or documents. You can download the sample CSV or XLS file for your reference by clicking sample csv file or sample xls file.
Note: The file size should not exceed 25 MB.
- After uploading your file, choose a Character Encoding and File Delimiter for your file.
Insight: Character Encoding is used to pair numbers with characters. By default, the Unicode Transformation Format (UTF-8) encoding is used, which supports a wide range of characters that go beyond 8 bits.
Insight: The Field Delimiter is used to separate two values in a row. While importing recurring invoices, the default file delimiter is comma (,).
- Click Next.
- Ensure that all the fields are mapped correctly in the Map Fields page.
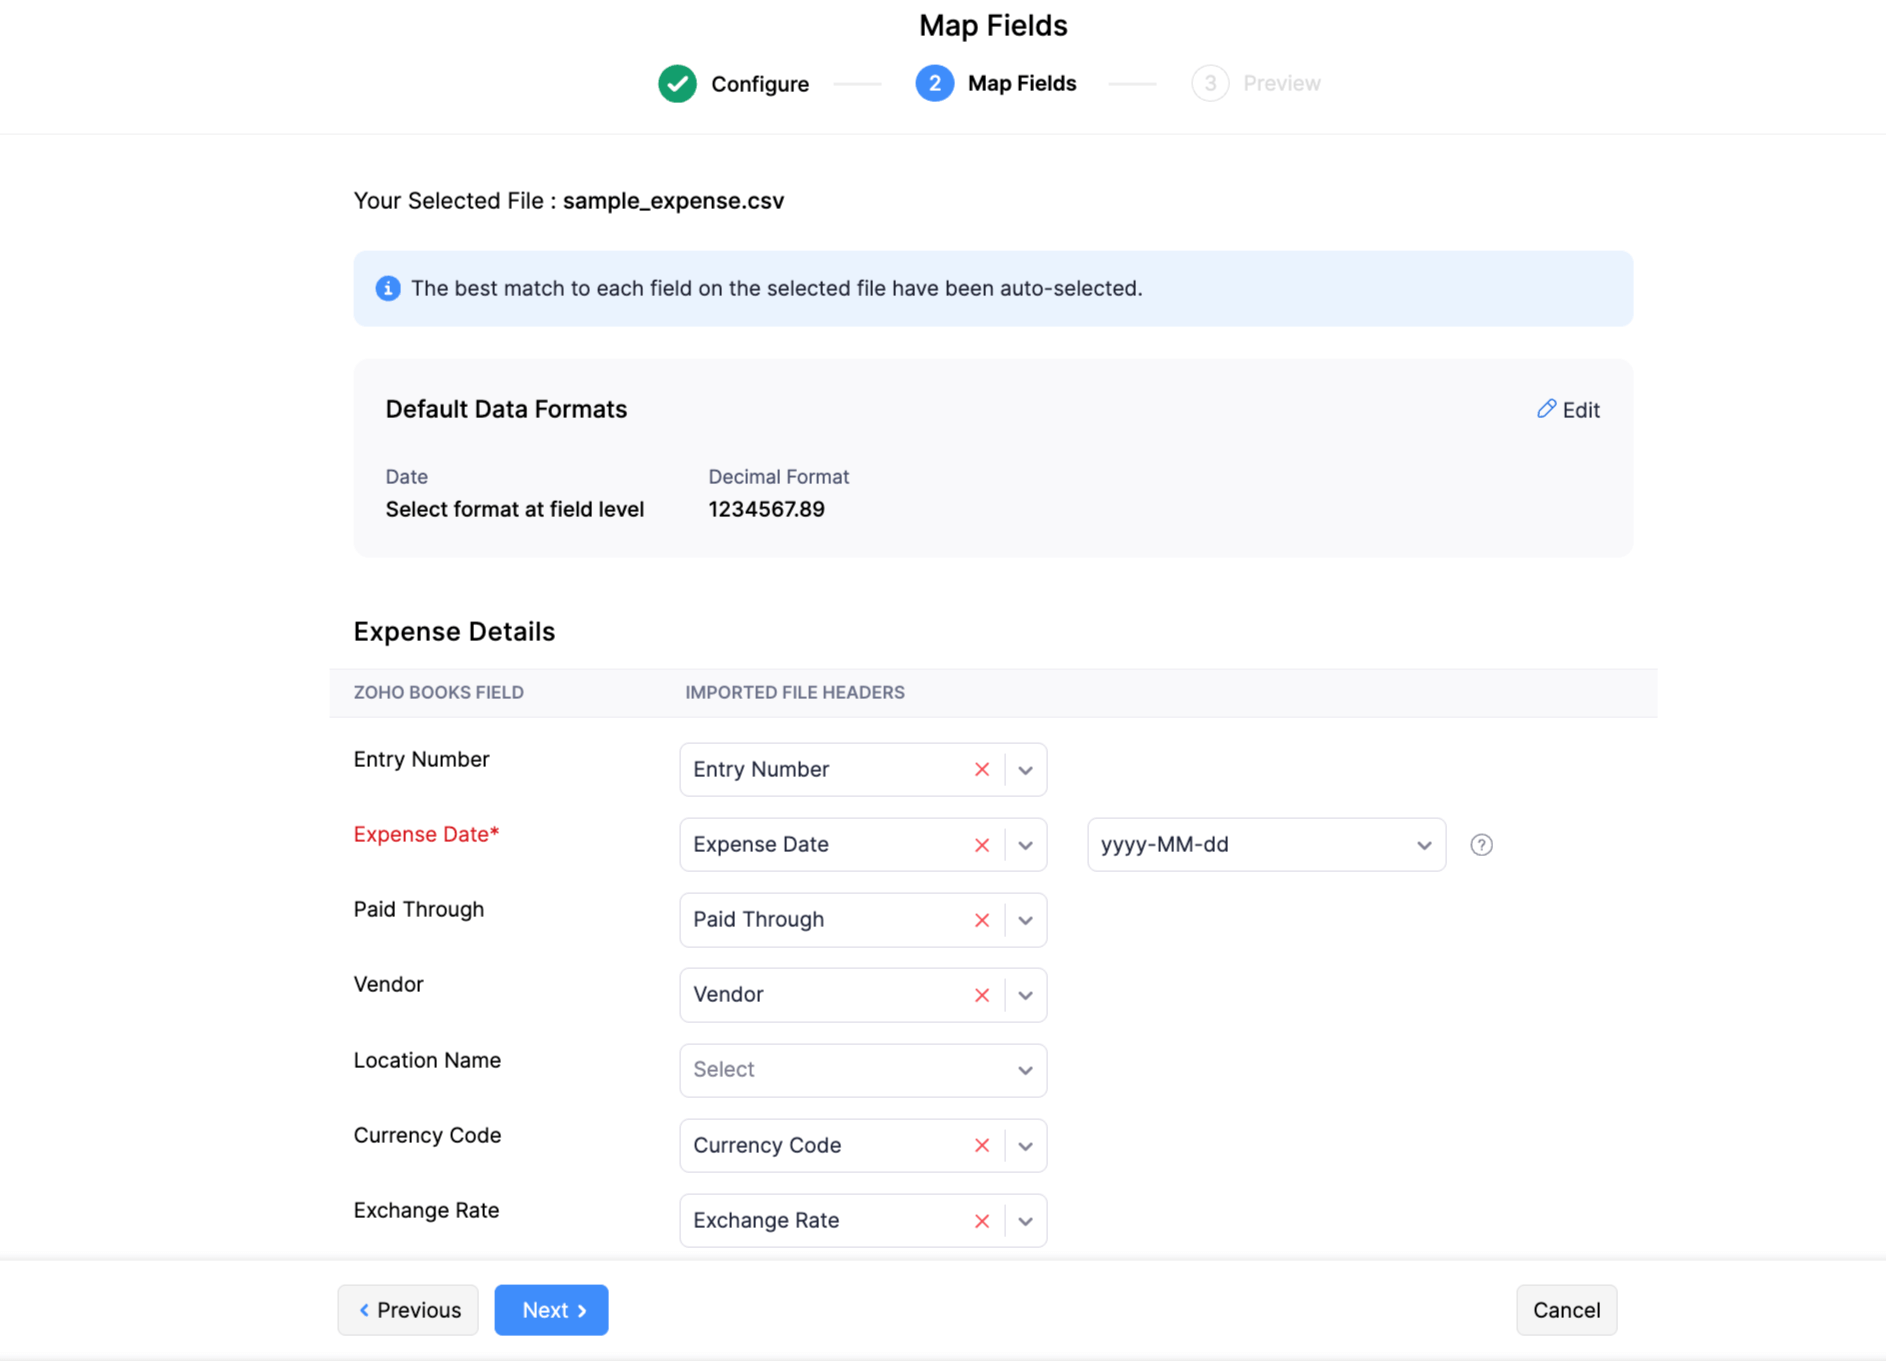
- Mark the box Save these selections for use during future imports if you want to use the similar import format for the next time.
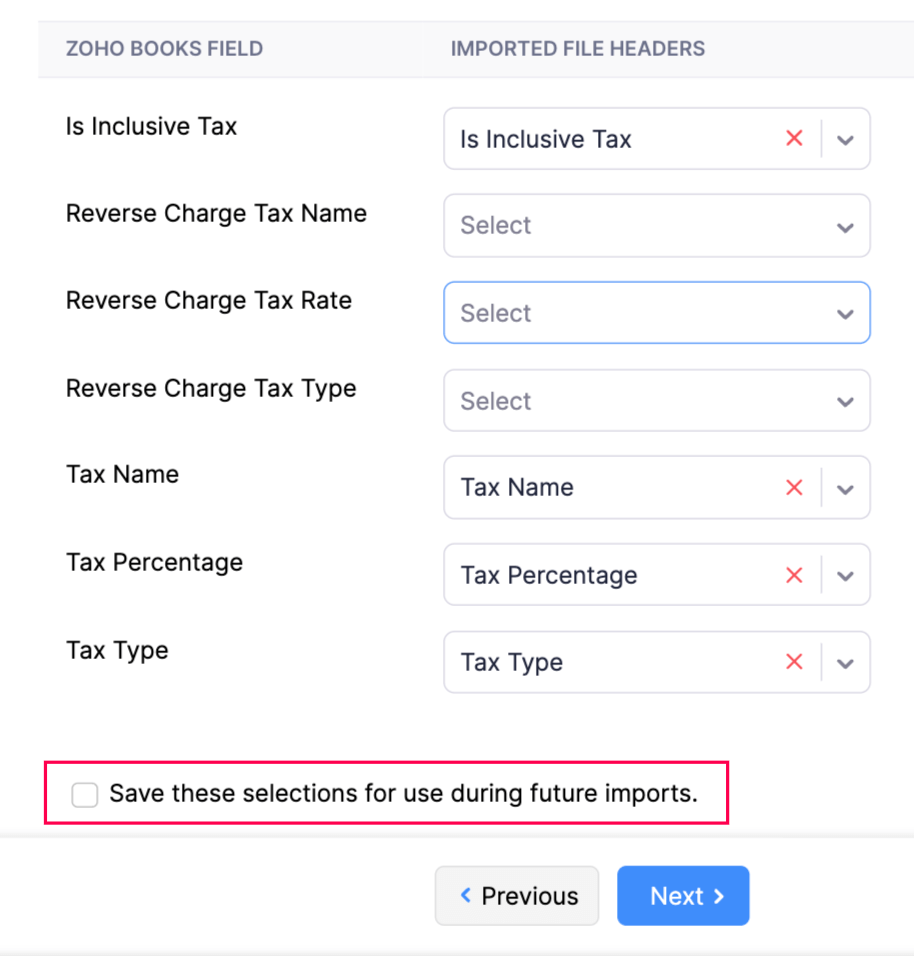
- Click Next.
- Preview and click Import.
Next >
Manage Expenses
Related
 Yes
No
Yes
No
Thank you for your feedback!