Integrate Zoho Expense With Zoho Cliq
With the Zoho Expense - Zoho Cliq integration, you can stay up-to-date with the expenses of your organization. Configure the Zoho Expense Bot and you can receive instant notifications and execute your everyday tasks directly from Zoho Cliq. Also, you can communicate, collaborate and make decisions on your expense reporting easily, anytime and anywhere.
- Integrate Zoho Expense with Zoho Cliq
- Zoho Expense Bot
- Set Up Your Zoho Expense Bot
- Share Expense Reports
- Search Expense Reports
- Invite Users
- Slash Commands
- Instant notifications from Zoho Expense
- Unsubscribe From the Zoho Expense Bot
- Deactivate the Integration
Integrate Zoho Expense with Zoho Cliq
You need to be a Zoho Cliq user to integrate with Zoho Expense. To create an account in Zoho Cliq, sign up.
If you’re already using Zoho Cliq, you can follow the steps below to integrate Zoho Expense with Zoho Cliq.
- Open your Zoho Expense account and click Admin View.
- Click the Gear icon at the top right side.
(OR)
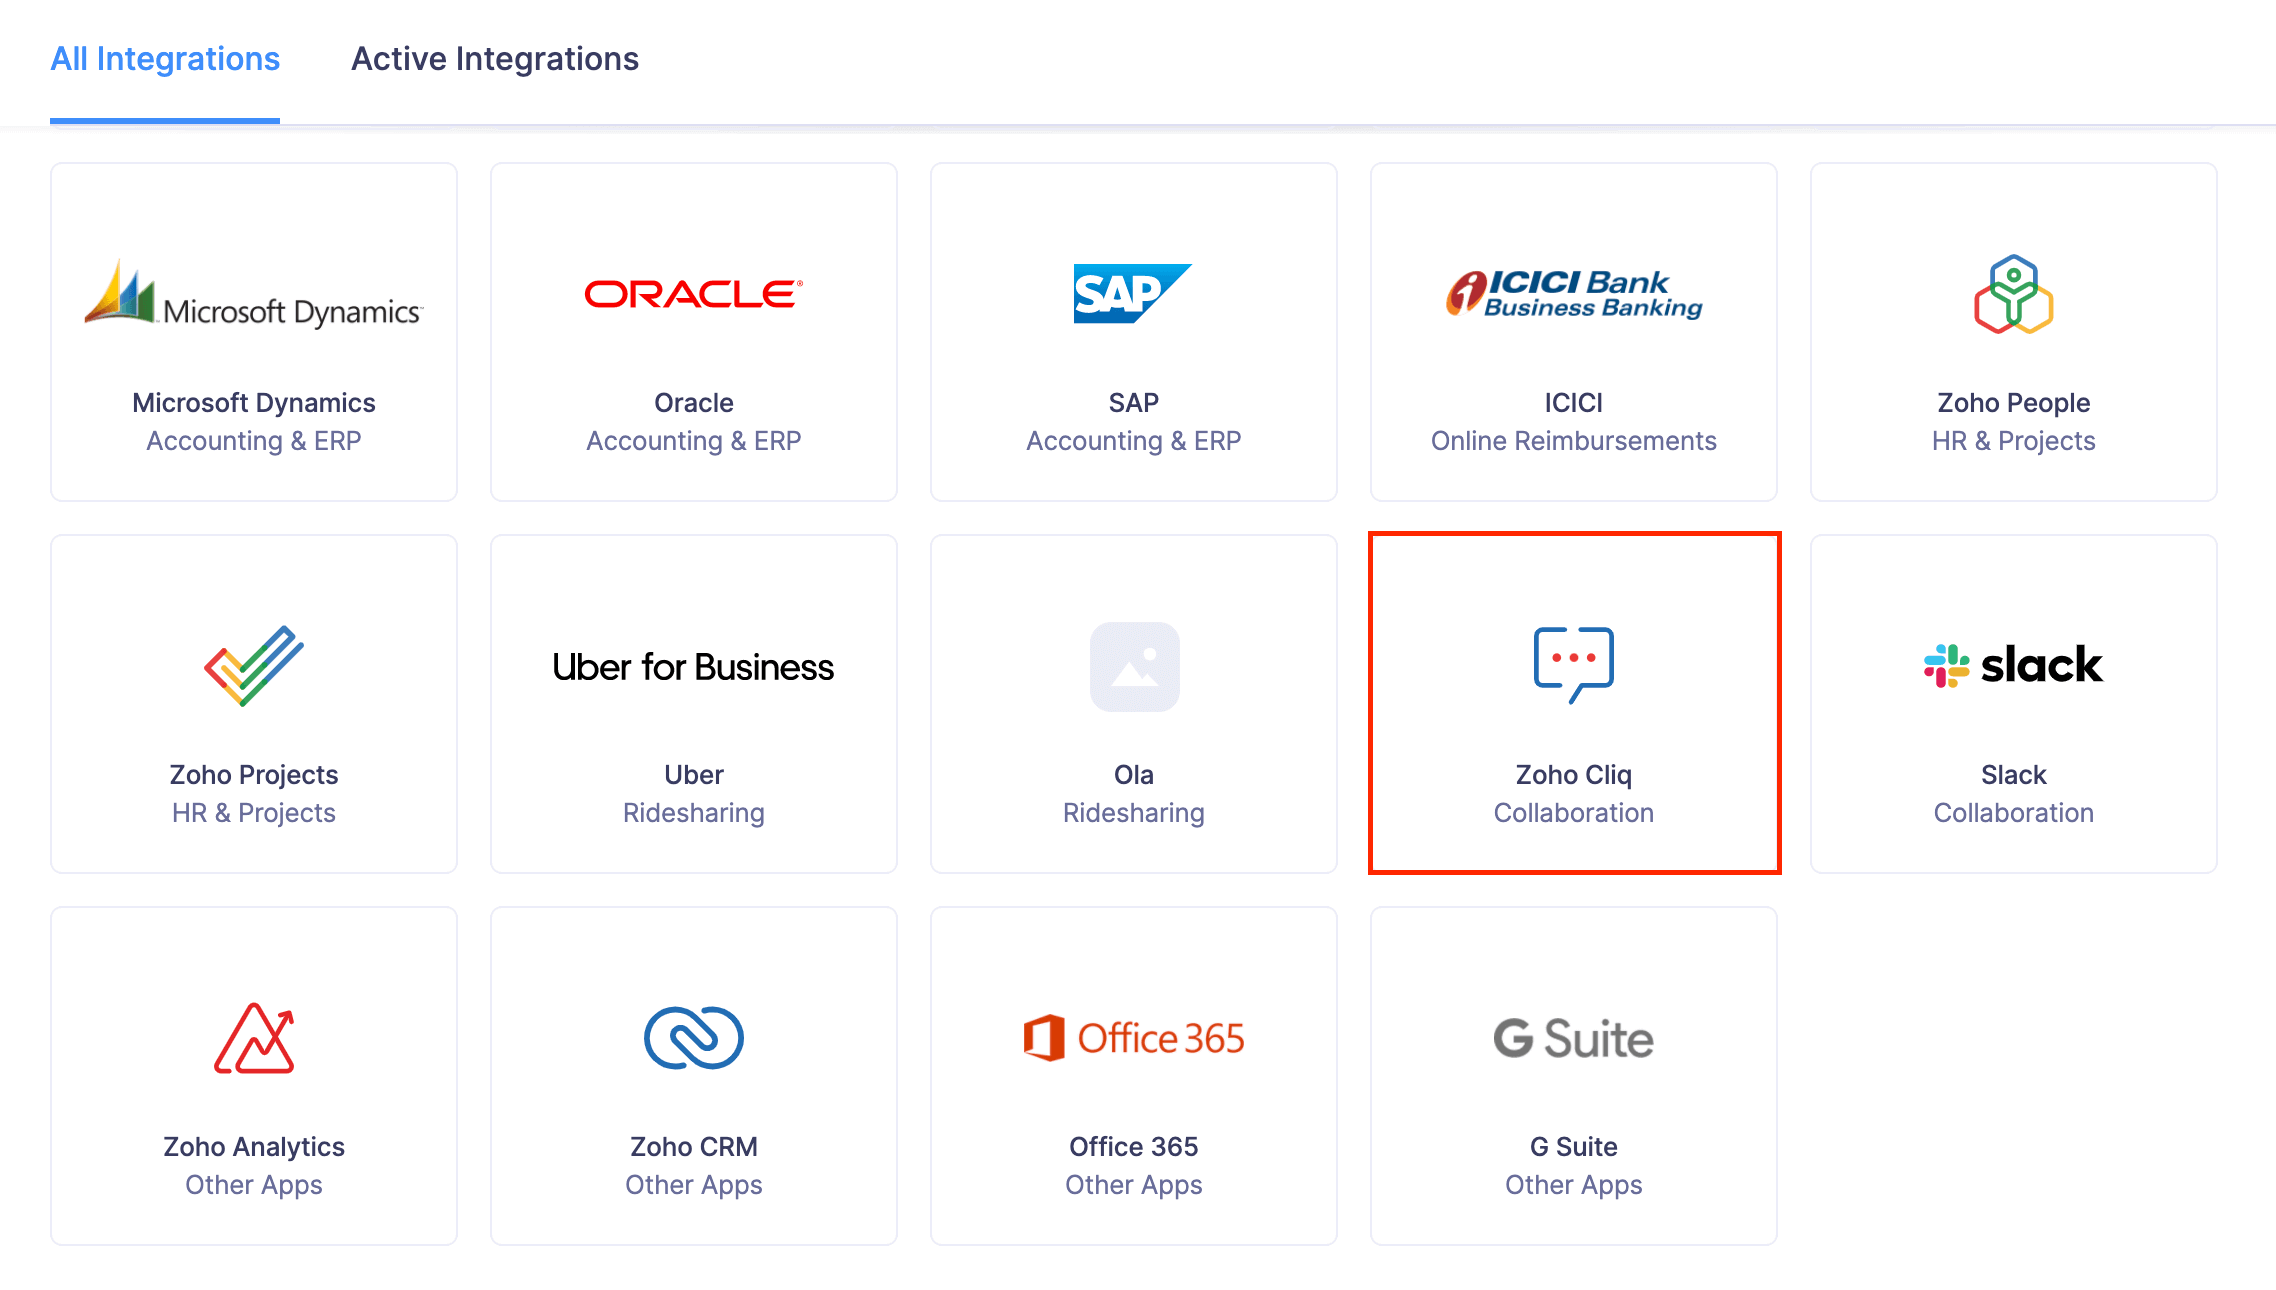
Go to Settings on the left sidebar. - Go to Zoho Apps under Integrations.
- Click Zoho Cliq.
- Click Connect Now to initiate the setup.
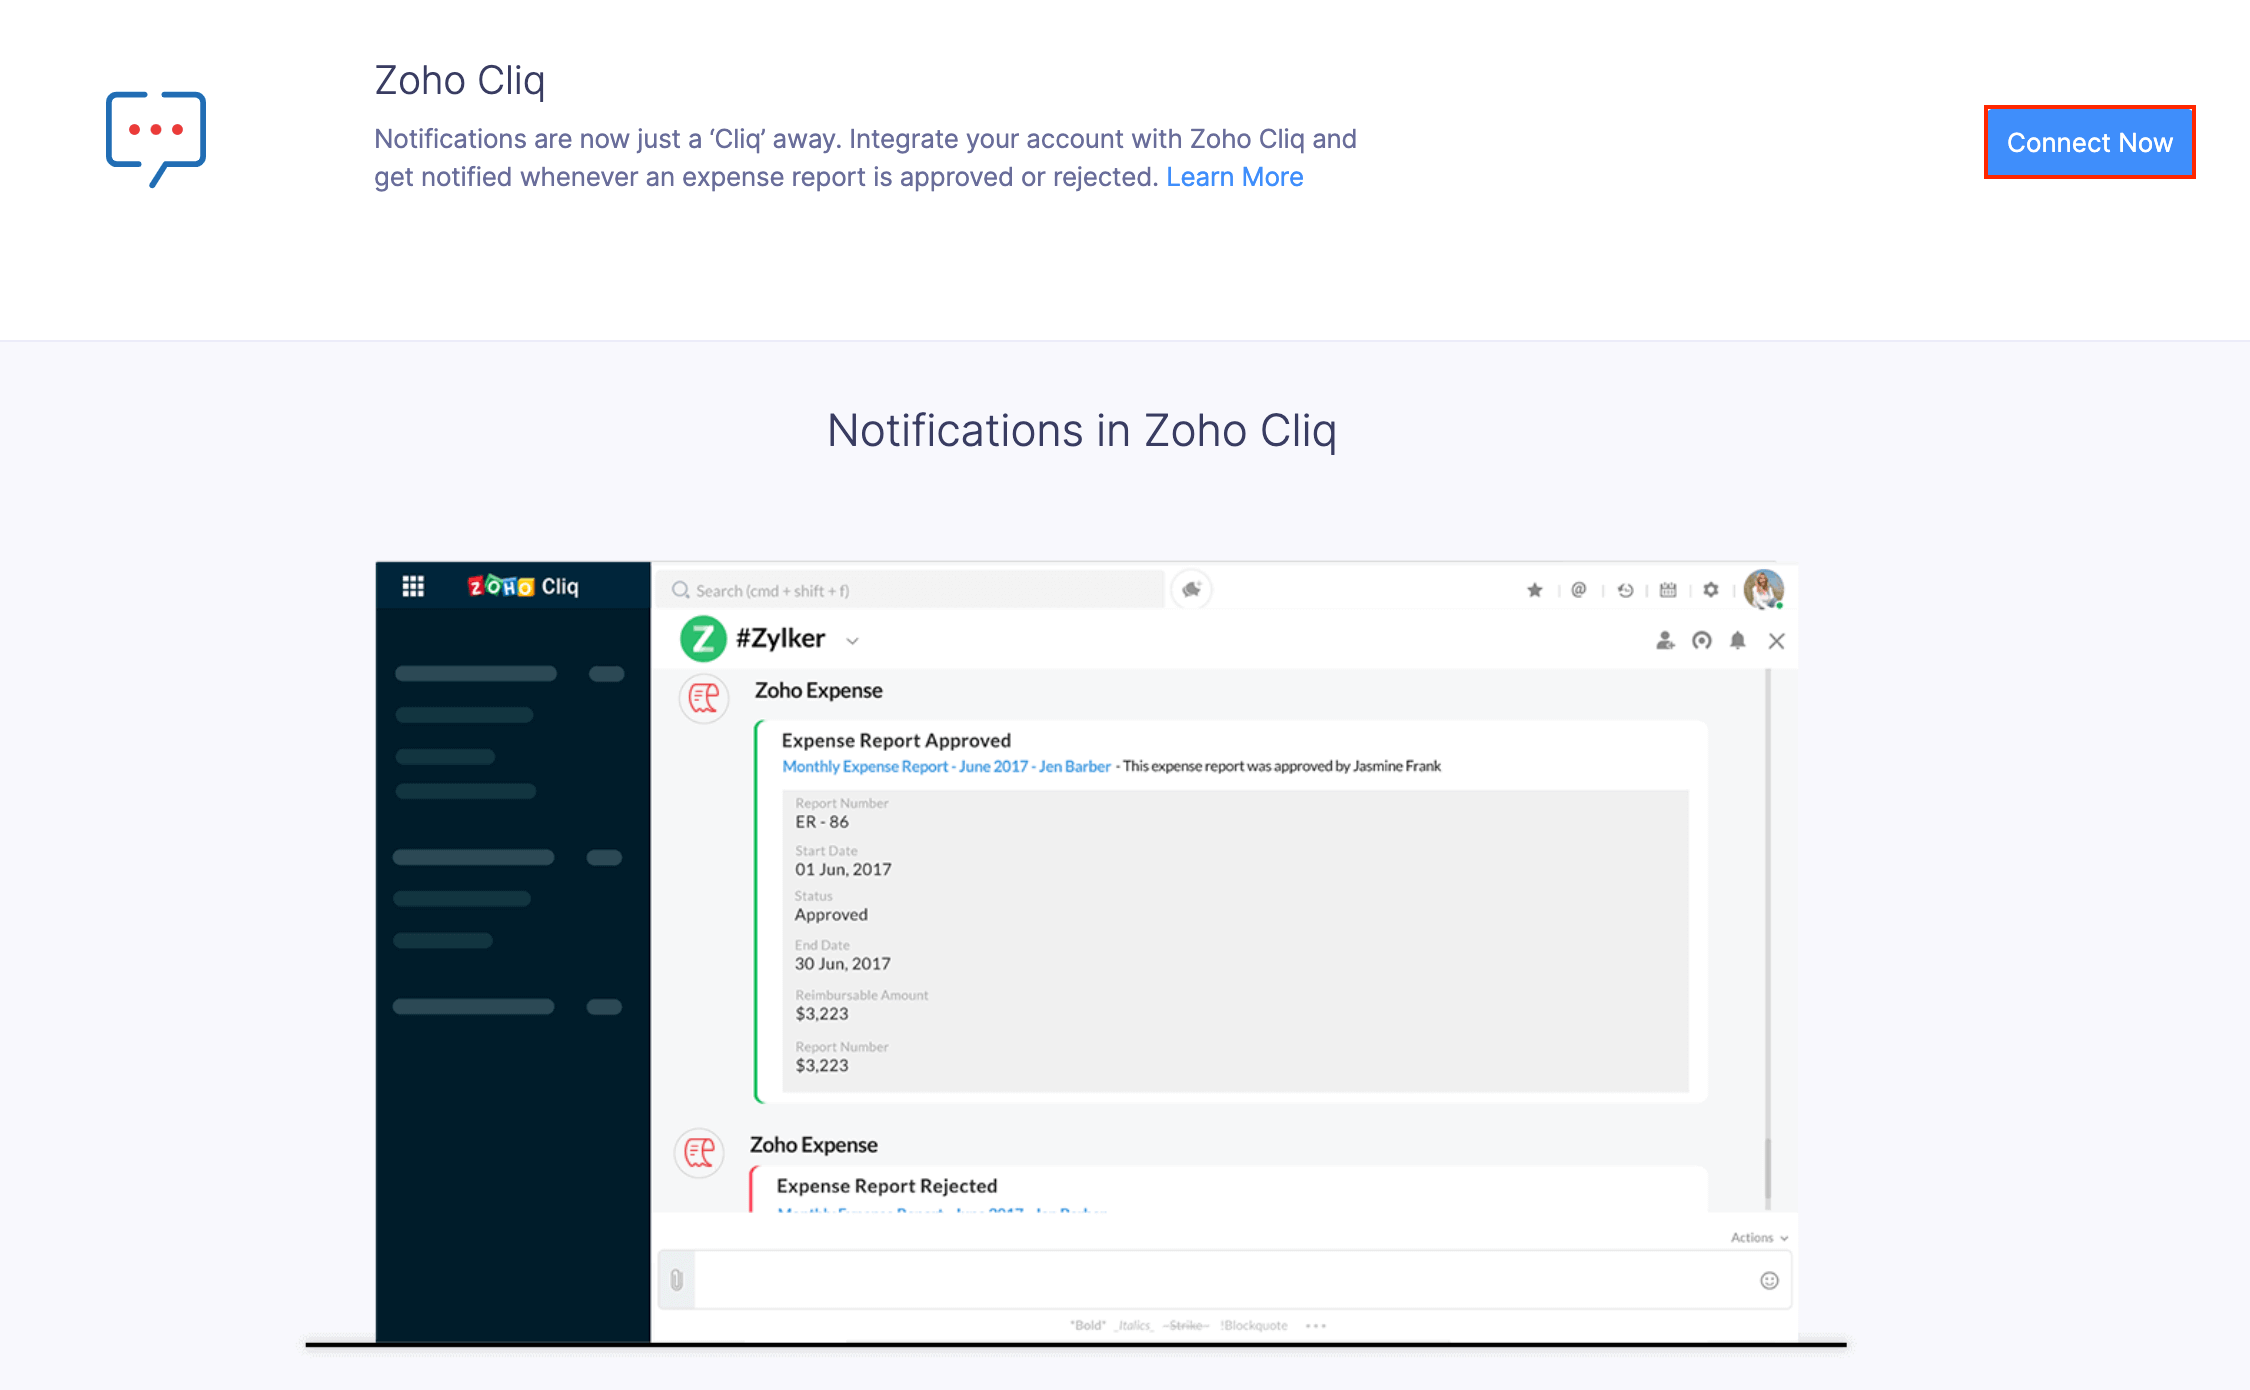
Immediately, your Zoho Expense organization will be integrated with Zoho Cliq.
Note: Only admins will be able to integrate Zoho Expense with Zoho Cliq. Also, if you have multiple organizations in Zoho Expense, only the default organization can be integrated with Zoho Expense Bot.
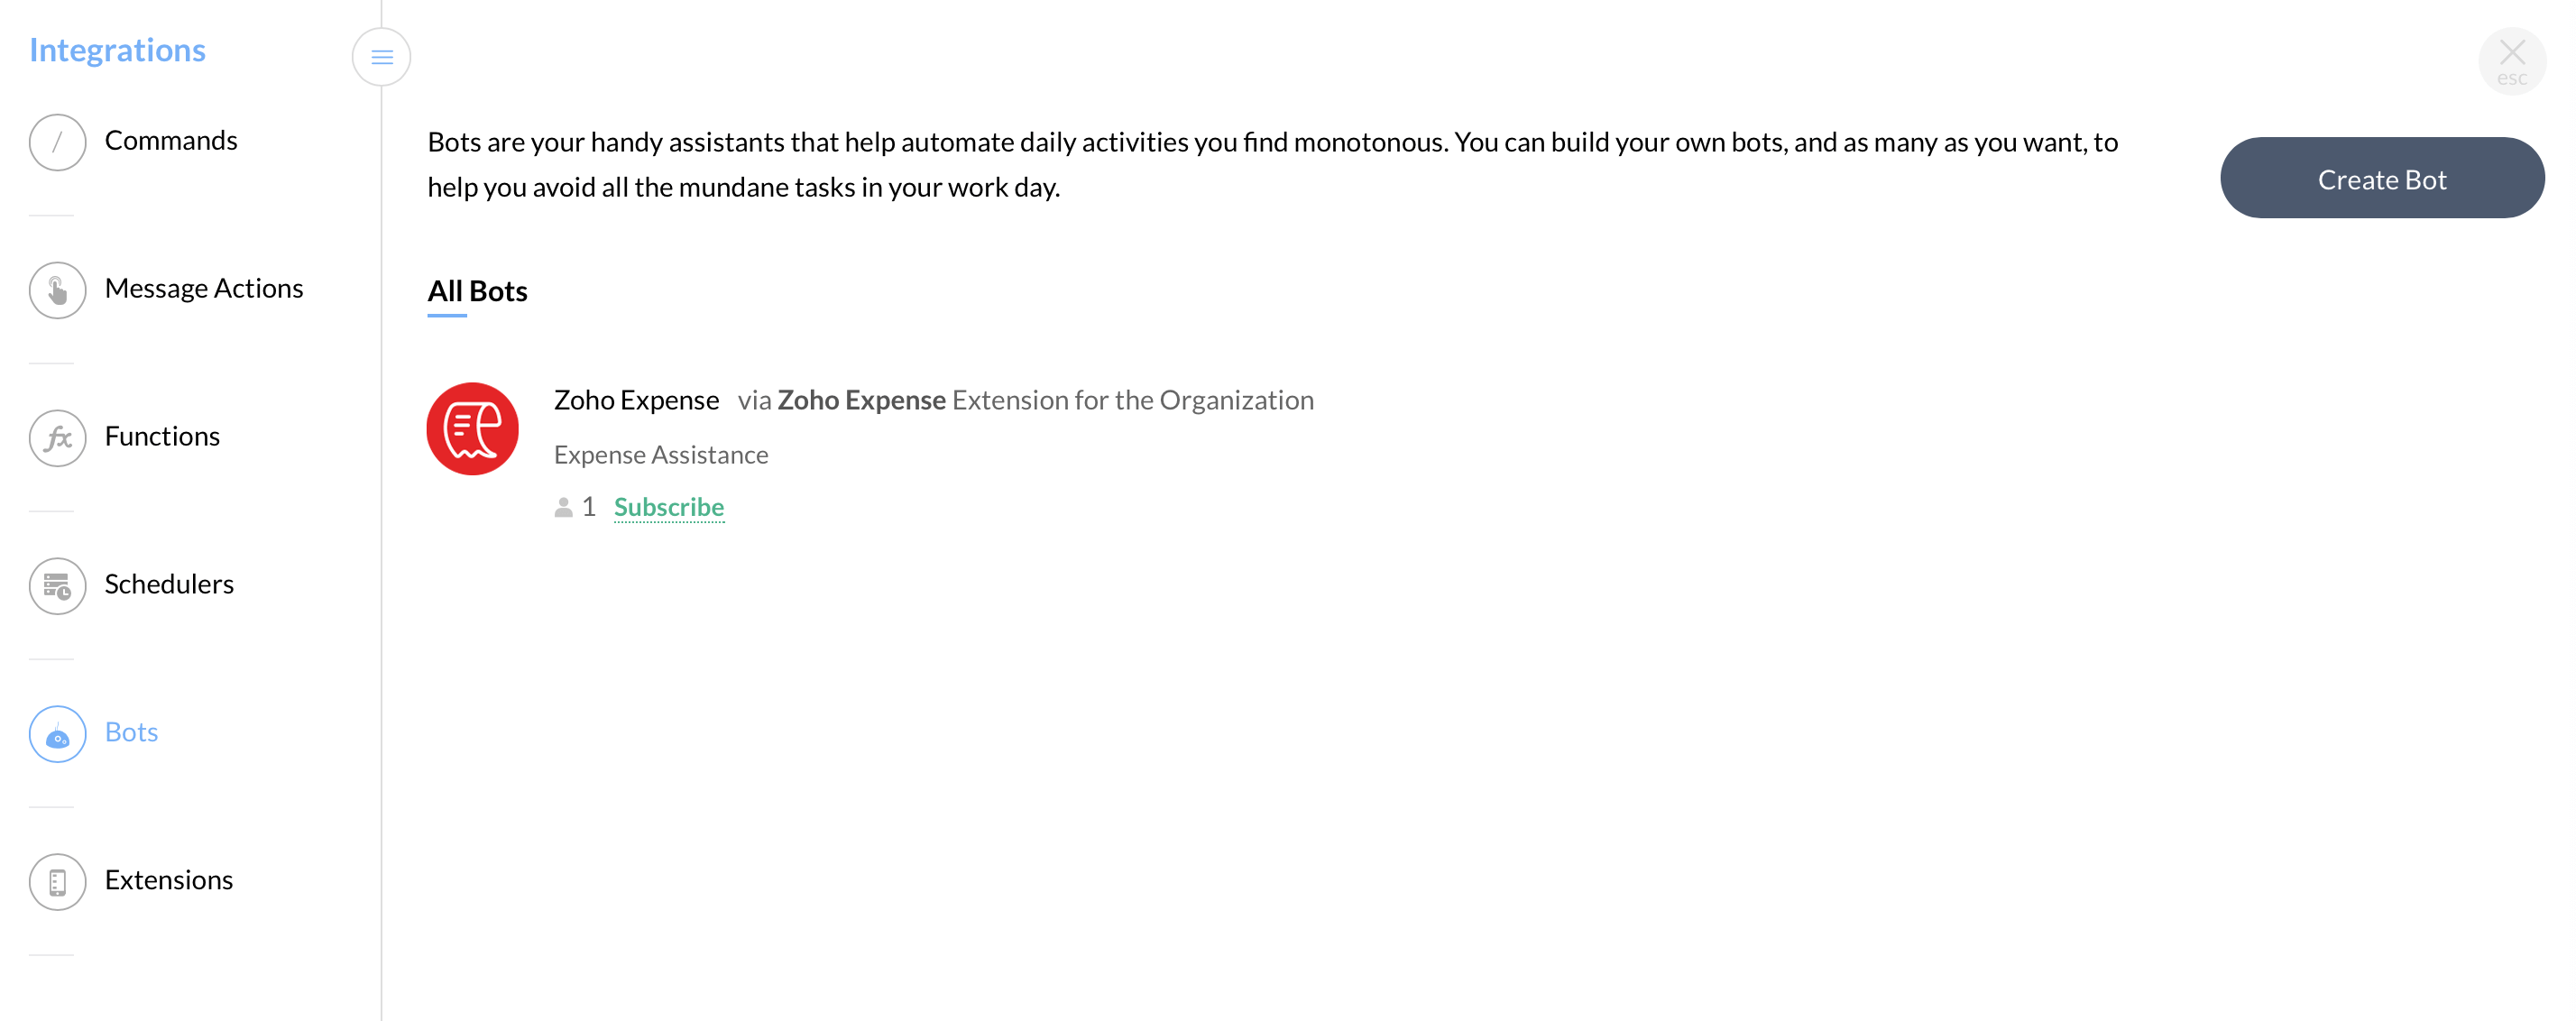
Zoho Expense Bot
After you integrate Zoho Expense with Zoho Cliq, you can subscribe to the Zoho Expense Bot.
It is your virtual assistant that can automate all your actions related to expense reporting. You can add the Zoho Expense Bot to Zoho Cliq to invite users, upload receipts, approve reports and view expense reports effortlessly.
The Zoho Expense Bot can help you to:
- Upload receipts
- Search, approve, and share reports
- Invite a user and assign them a role, and
- Receive instant notifications from Zoho Expense.
Set Up Your Zoho Expense Bot
Before you set up the Zoho Expense Bot, ensure that you’ve integrated Zoho Expense with Zoho Cliq.
After you’ve set up the integration, every member of the Zoho Expense organization can add the Zoho Expense Bot to their Zoho Cliq.
To add the Zoho Expense Bot to your Zoho Cliq:
- Open Zoho Cliq.
- Click the + icon next to the Bot module on the left sidebar.
- Search for the Zoho Expense Bot in the search bar on top.
- Click Subscribe.
Activating the Zoho Expense Bot
After you have added the Zoho Expense Bot, you must activate it to perform actions and receive notifications. You can activate it by typing Hello or Hi in the Zoho Expense Bot.
Roles and Accessibility
| Action | Admin | Approver | Submitter |
|---|---|---|---|
| Uploading Receipts | Yes | Yes | Yes |
| Sharing Expense Reports | Yes | Yes | Yes |
| Searching Expense Reports | Yes | Yes | Yes |
| Inviting Users | Yes | No | No |
| Slash Commands | Yes | Yes | Yes |
Share Expense Reports
You can share your expense reports with Zoho Cliq users who use Zoho Expense. You will be able to share your expense reports on direct messages and channels.
Let’s look at how Yvonne Russell shares her expense report using Zoho Cliq.
Scenario: Yvonne Russell is the head of the sales and marketing division of Jaxer Wealth Management. She needs to share her expense reports with her finance team for accounting purposes. To make things easier, Yvonne shares her expense report with the finance team’s channel on Zoho Cliq.
To share expense reports:
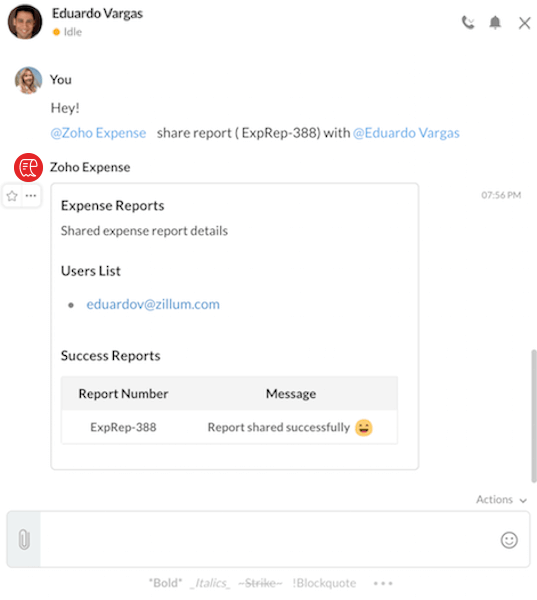
- Type @Zoho Expense share report (report number) with @Recipient in the text field of the Zoho Expense Bot.
Example for sharing a report with a single recipient:
@Zoho Expense Share report (ER-00001) with @DejauanLambert
Example for sharing multiple reports with multiple recipients:
@Zoho Expense Share report (ER-00001, ER-00002) with @DejuanLambert, @ManishPatel
Note: If you don’t mention a recipient while sharing a report in a channel, it will be shared to all the members of the channel.
Search Expense Reports
The Zoho Expense Bot enables you to search and share your individual expense reports.
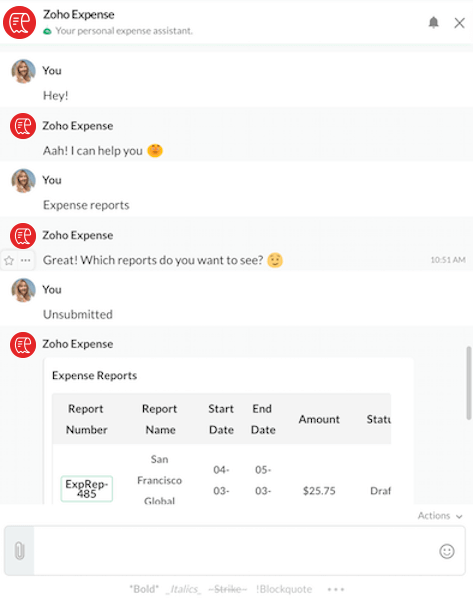
To search expense reports:
- Go to Zoho Cliq and open the Zoho Expense Bot.
- Type hello and press enter.
- Click Expense Reports.
- Choose the report type.
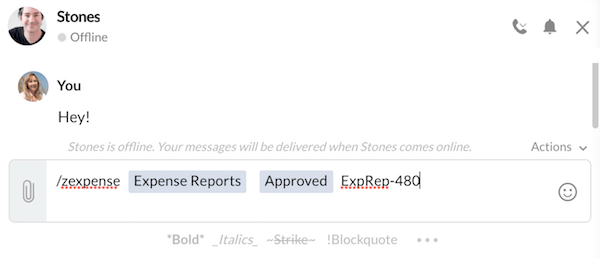
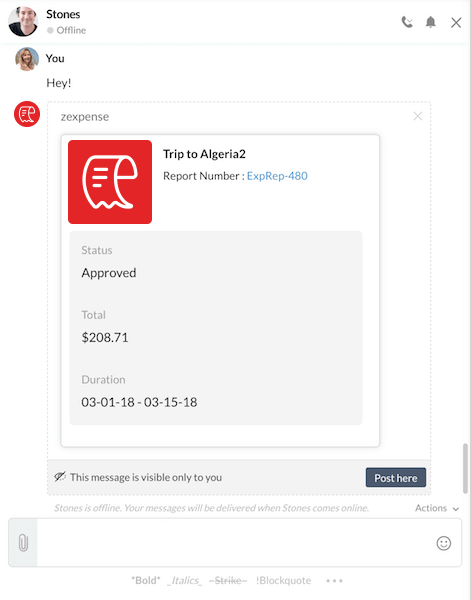
Searching Expense Reports by Using the Slash Commands
To perform the search for expense reports, type the following format in the text field.
Format: “/zexpense Expense Report STATUS_VALUE SEARCH_TEXT”.
where,
The STATUS VALUE can be as All/Expired/Unsubmitted/Approved/Rejected/Reimbursed/Shared.
The SEARCH TEXT can be the report title or report number for reports.
Example for searching for a report:
/zexpense Expense Report Approved ER-00001.
Invite a User
If you’re an admin, you can invite employees to Zoho Expense and assign user roles to them. The admin can designate them as a submitter, approver or as an admin depending on their role in the organization. Let’s look at a scenario to understand this better.
Scenario: Charles Stone is the regional manager for Tealspaces, a realty firm. Charles is having a chat on Zoho Cliq with Eduardo Vargas, a new sales recruit. Charles needs to add Eduardo as a submitter to Zoho Expense. So, he uses the Zoho Expense Bot on Zoho Cliq to invite Eduardo and designates him as an approver.
Similarly, you can add an user to Zoho Expense directly from Zoho Cliq. To invite an employee as a user to Zoho Expense:
Type invite @person followed by their user role (admin/approver/submitter) on the text field of the Zoho Expense Bot and press Enter.
For example,
invite @Eduardo Vargas as an approver.

To invite an employee using their email address
Type invite (email_address) followed by their user role (admin/approver/submitter) and press Enter.
For example,
invite (eduardovargas77@gmail.com) as submitter.
Note: If you have not assigned a user role to an invitee, the invitee will be invited as a submitter, by default.
Slash Commands
Slash commands can be performed in the Zoho Expense Bot as well as in other chats and channels. To perform actions in Zoho Cliq, just type the following format on the text field:
Format: “/zexpense ENTITY_NAME STATUS_VALUE SEARCH_TEXT”
where,
The ENTITY NAME can be expense reports or expenses.
The STATUS VALUE can be as follows:
| Entity | Statuses |
|---|---|
| For Expenses | All / Expired / Uncategorized / Unreported |
| For Reports | All / Expired / Unsubmitted / Approved / Rejected / Reimbursed /Shared |
The SEARCH TEXT can be the report title or report number for reports and category for expenses.
For example,
/zexpense Expense Report Approved ER-00001.
Note: This action can be performed in the Zoho Expense bot, Direct messages and Channels.
Instant notifications from Zoho Expense
You will be able to receive instant notifications on your Zoho Expense Bot when:
- Expense reports are shared with you;
- Your expense reports are approved or rejected;
- Your expense reports are reimbursed;
- You receive expense reports for approval; and
- You have approval reminders.
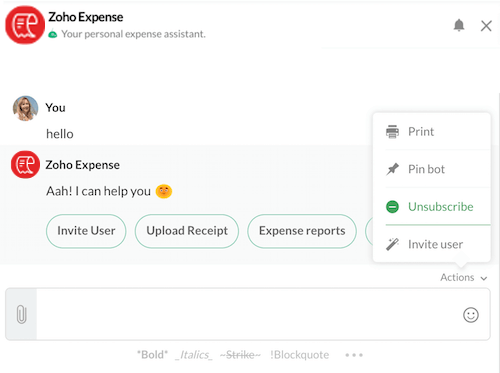
Unsubscribe from the Zoho Expense Bot
If you no longer require the help of an Zoho Expense Bot, there are two ways to unsubscribe the Zoho Expense Bot:
Method 1:
- Open the Zoho Expense Bot in Zoho Cliq.
- Click the Actions dropdown on the top right corner of the text field.
- Choose Unsubscribe.
Method 2:
- Click the + icon next to the Expense Bot module on the left sidebar.
- Click Unsubscribe.
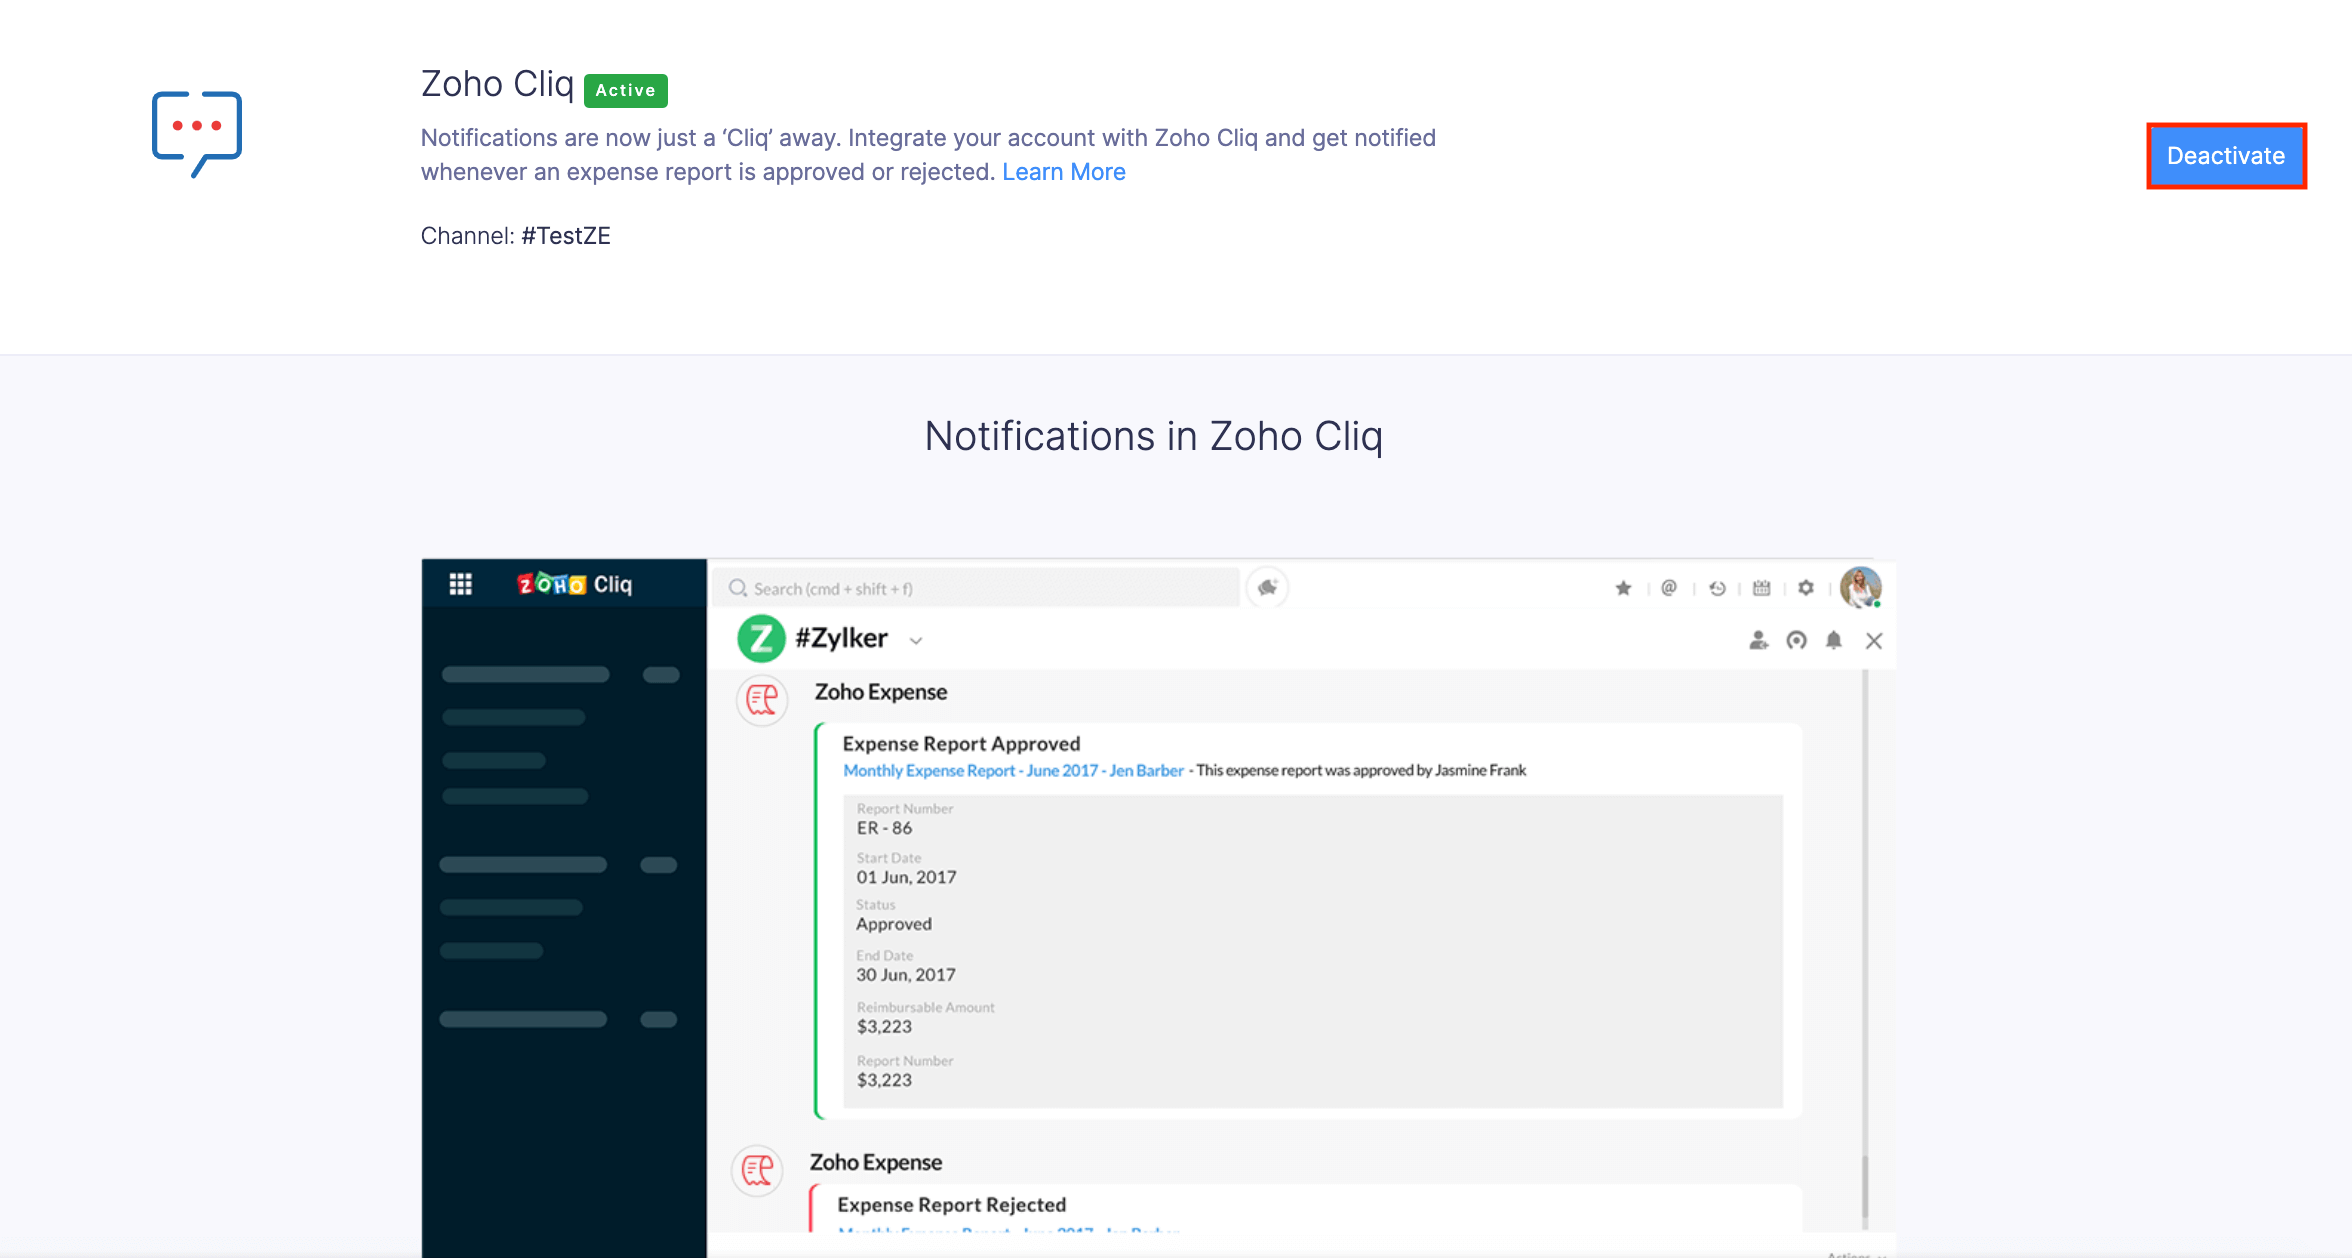
Deactivate the Integration
You can also disconnect the Zoho Expense - Zoho Cliq integration if you no longer wish to use Zoho Expense with your Zoho Cliq. To do that:
- Open your Zoho Expense account and click Admin View.
- Click the Gear icon at the top right side.
(OR)
Go to Settings on the left sidebar. - Go to Zoho Apps under Integrations.
- Click Zoho Cliq.
- Click Deactivate.