Categories
Expense Categories help you to categorize your expenses and explain the nature of your expenses. Based on why and how you’ve incurred an expense, you can associate an expense category with it. For example, if you incur an expense for a client during the business lunch, you can create an expense under the Meals and Entertainment category. Also, categories help give a clear picture of your business expenditures when you run analytic reports.
Note: The expense categories created in Zoho Expense is automatically added under the Chart of Accounts section of Zoho Books. Newly created Chart of accounts will be an active category in Zoho Expense on checking the Show in Zoho Expense as an active account option in Zoho Books. Otherwise it will be visible as an inactive category in Zoho Expense.
Create a New Category
Zoho Expense has a set of default categories. You can create new categories, if required.
To create a new category:
- Click Admin View.
- Go to Settings on the left sidebar.
(OR)
Click the Settings icon at the top right side.
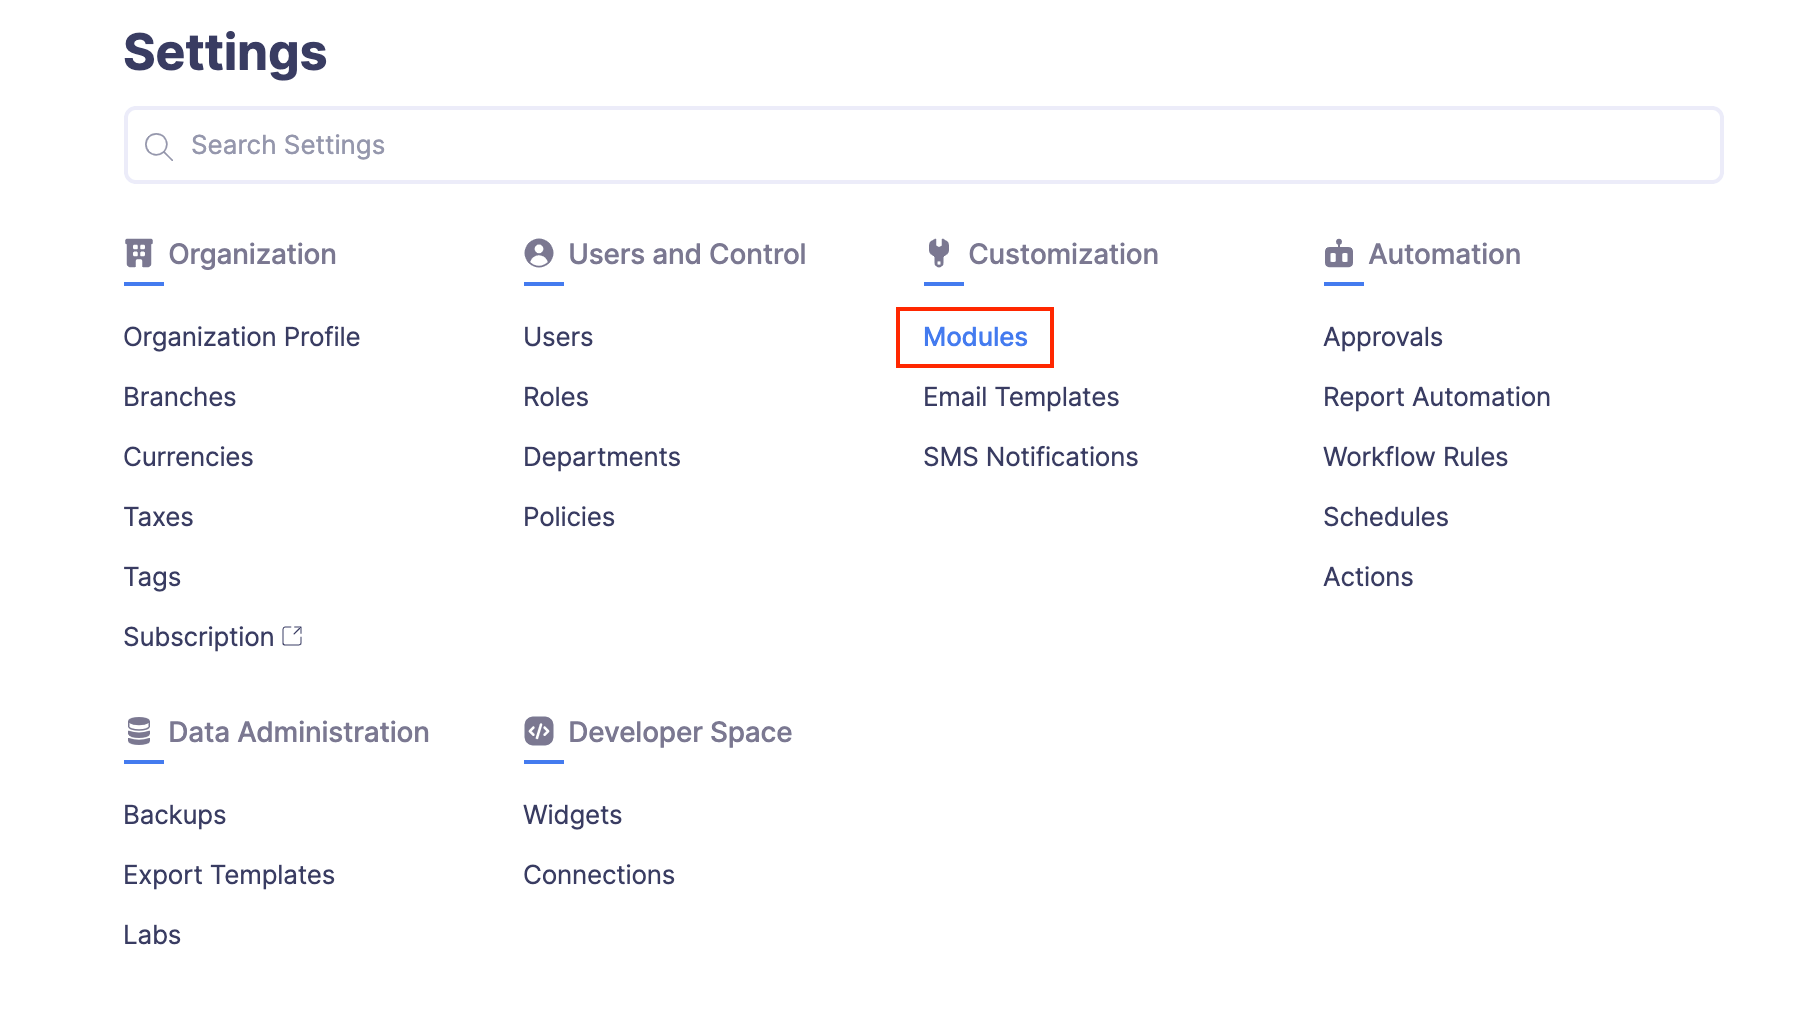
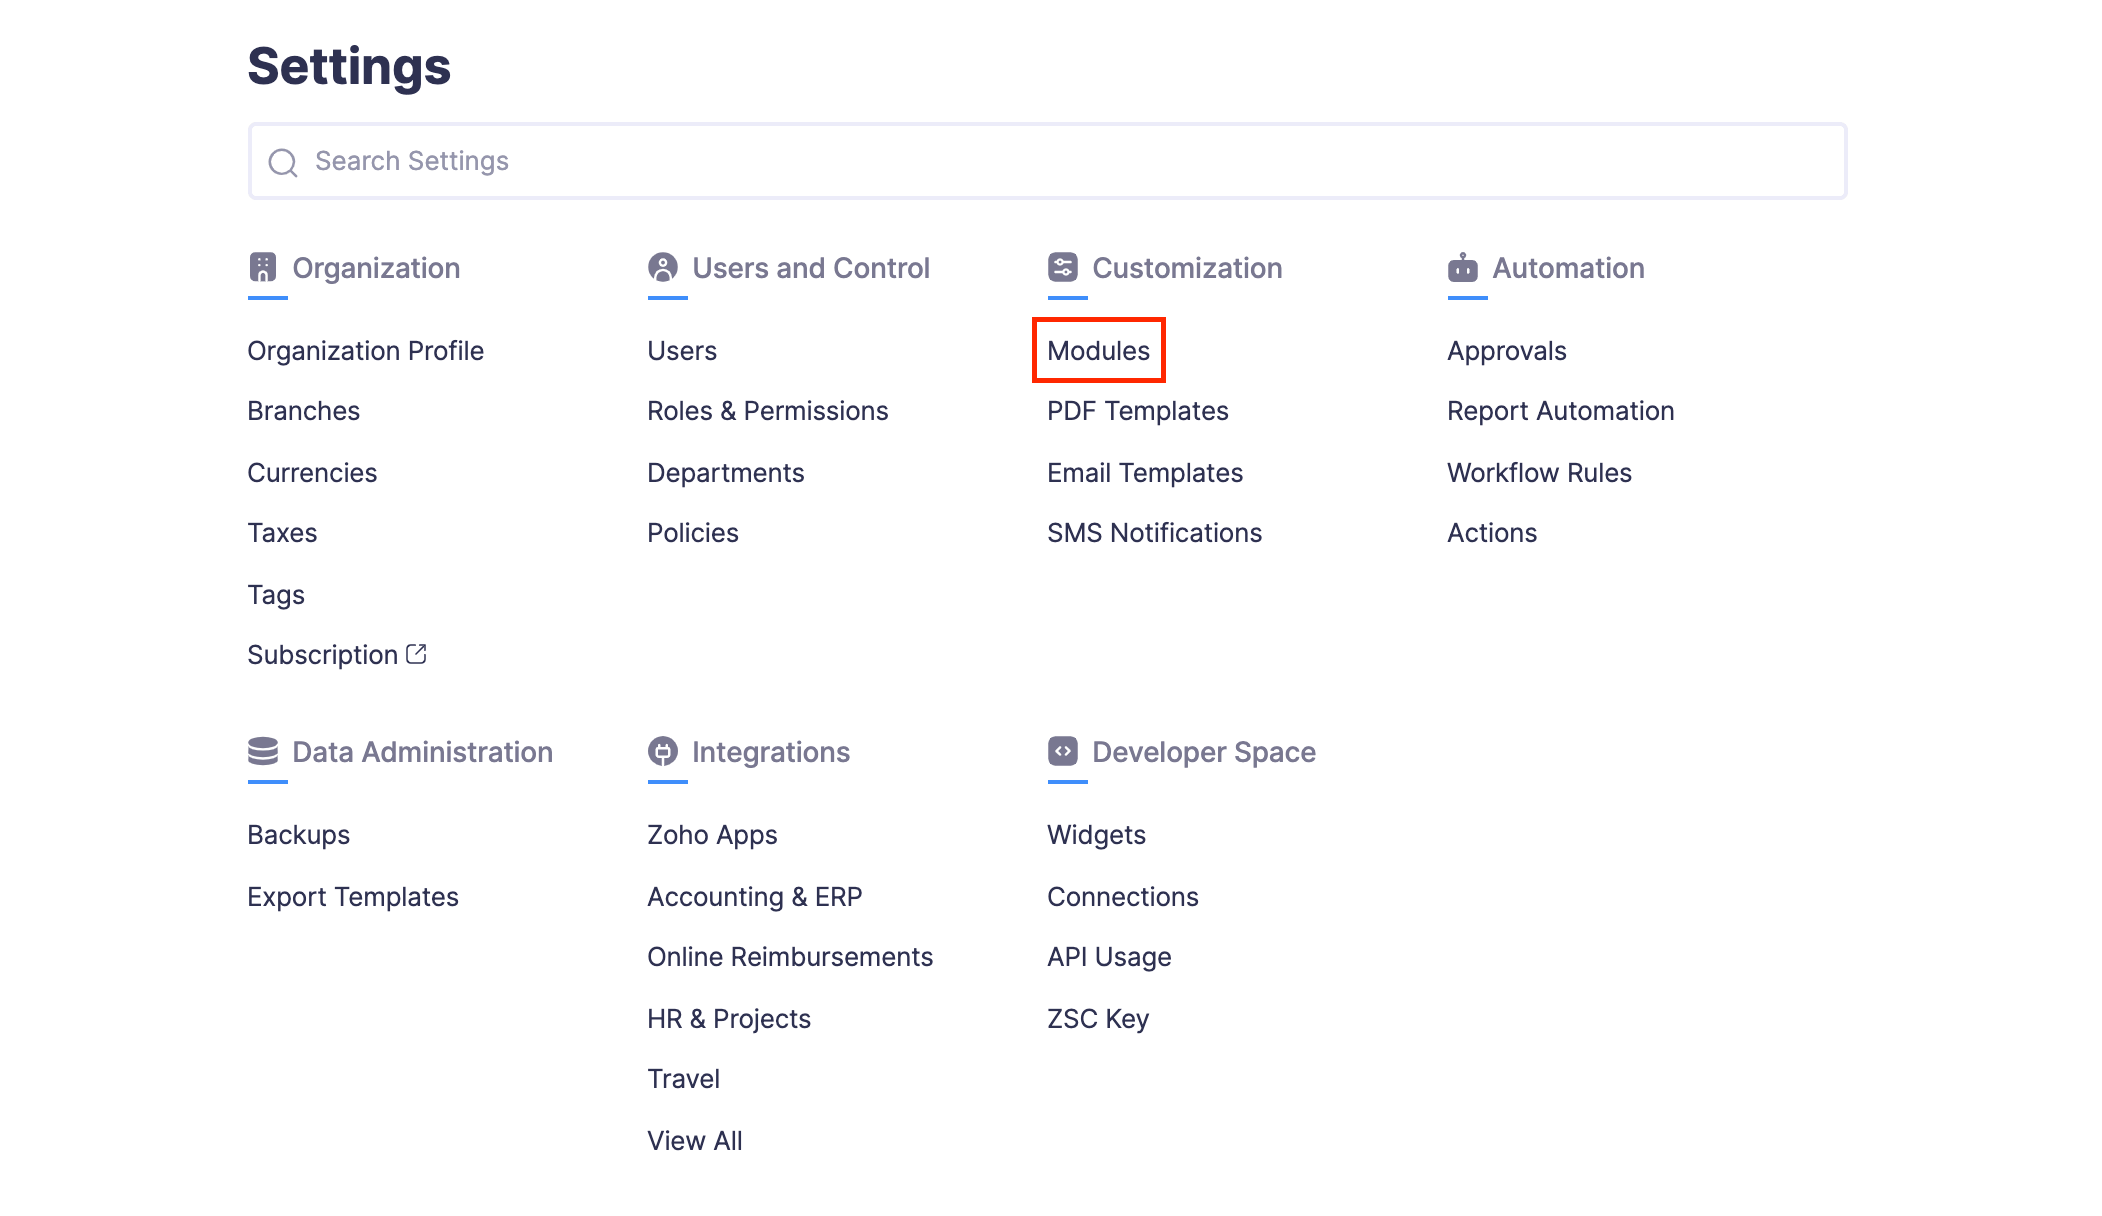
- Navigate to Module Settings.
- Click Categories under General.
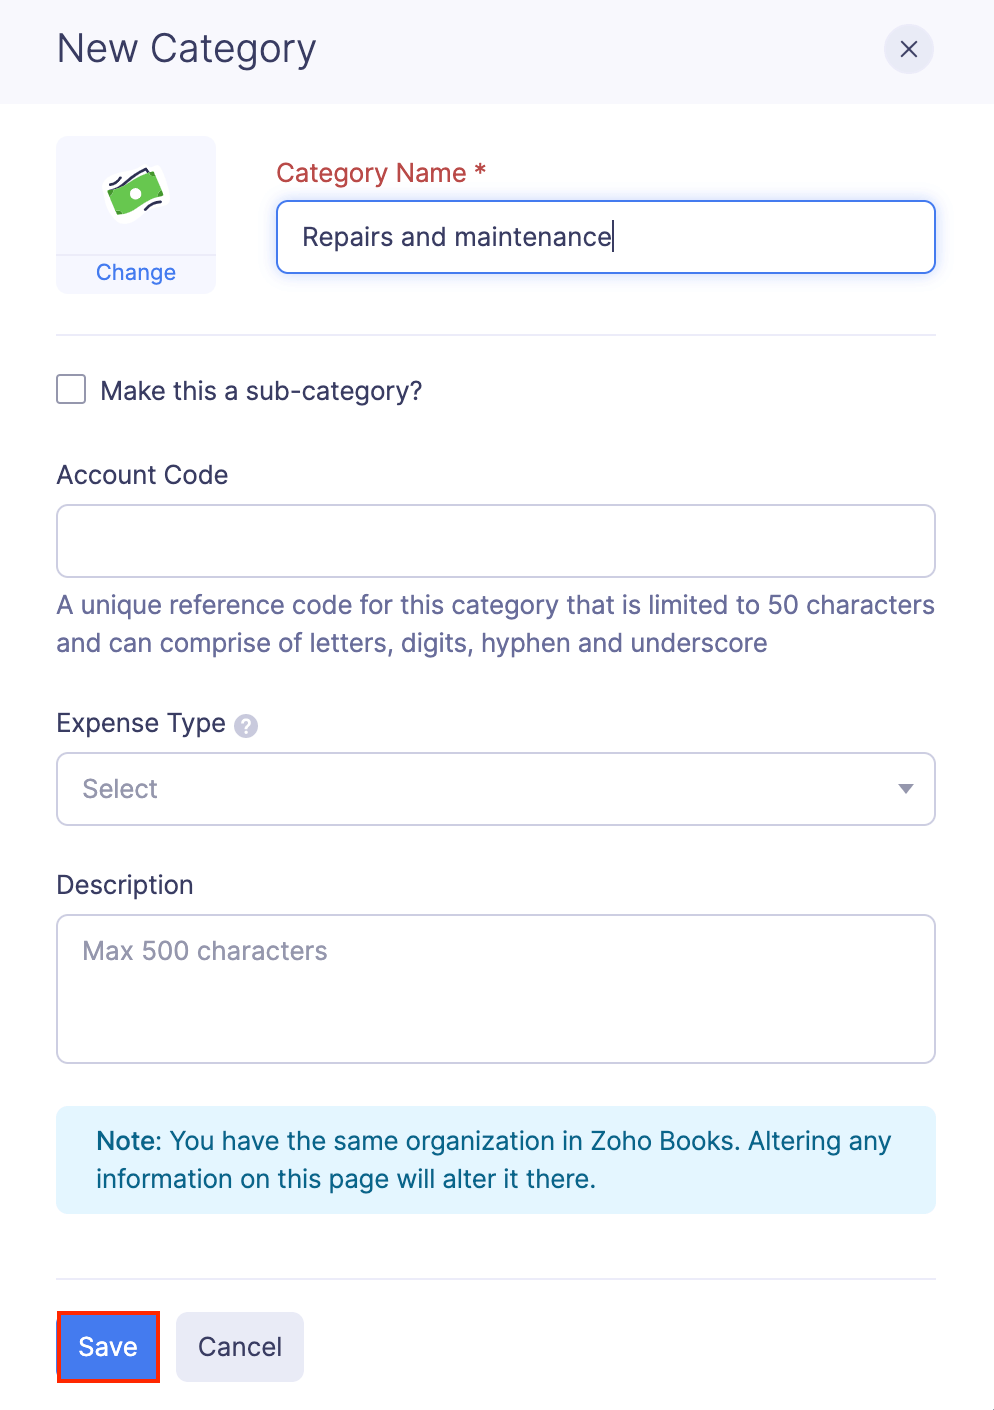
- Click + New Category at the top right corner of the page.

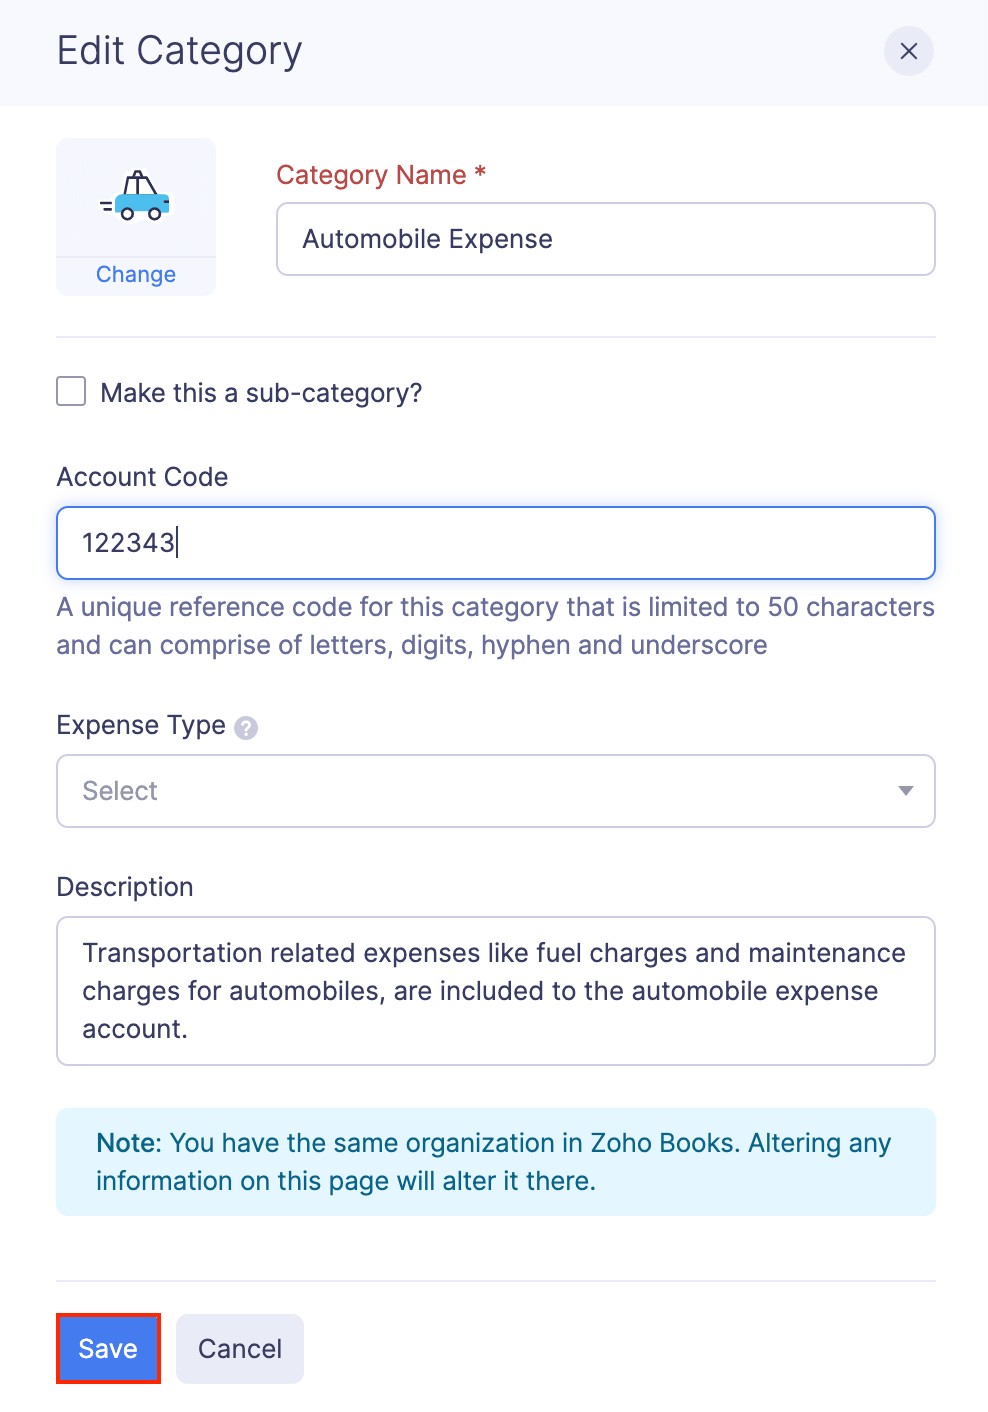
- Mark the Make this a sub-category option, if it’s a sub-category.
- Enter the account name.
- If you’ve enabled expense types, select the expense type with which you would like to associate this category.
- Provide a description for your category, if required.
- Click Save to save your merchant.
- The category you create will be common to all policies. Within a policy, you can override the existing general rules and make rules specific to a particular category.
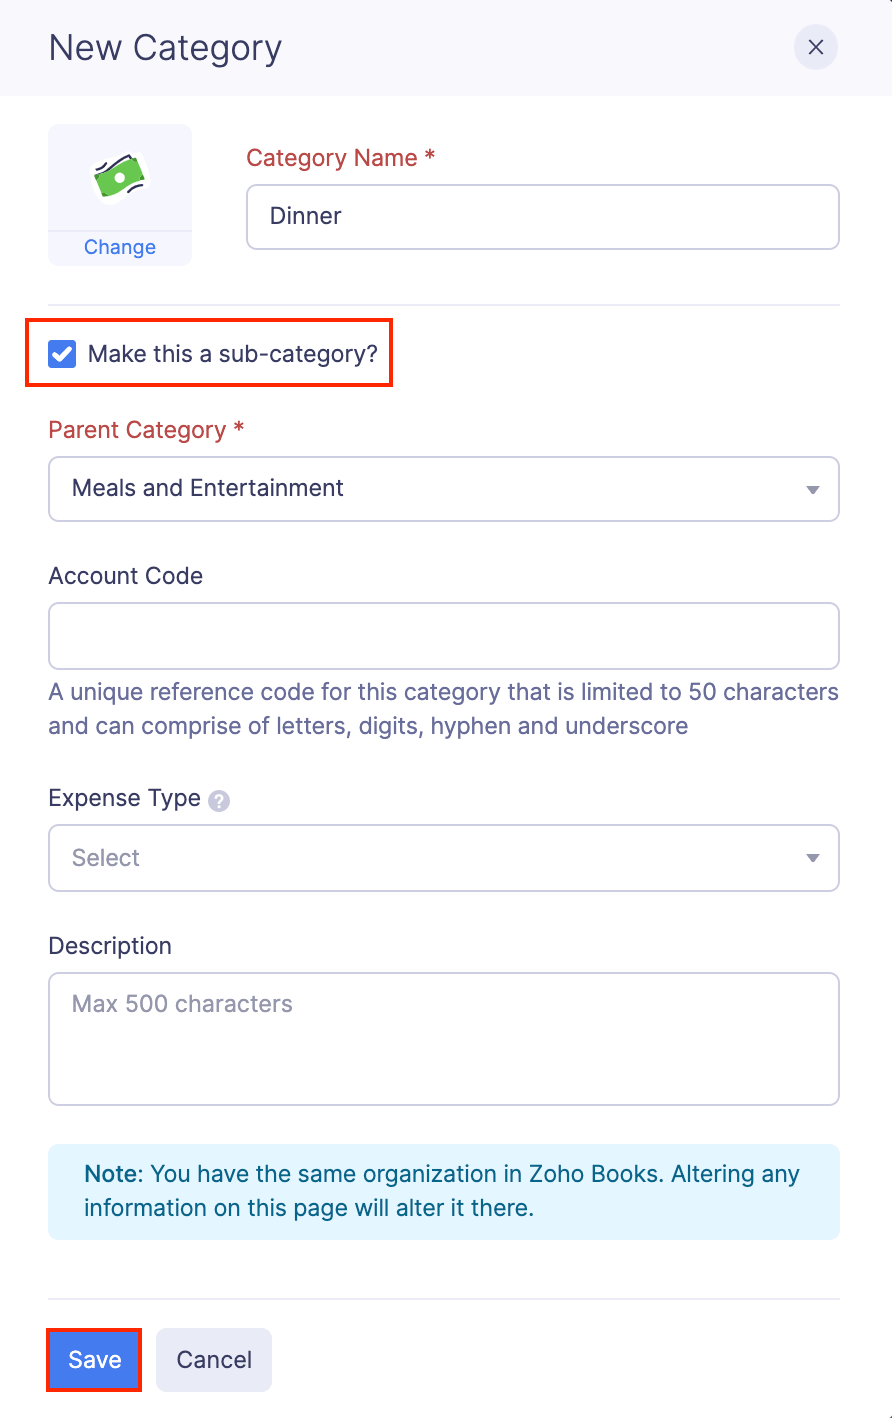
Add a Sub-category
Using sub-categories, you can be further specific about your expenses. For instance, expenses incurred during a business travel include meals, lodging, cab charges, etc. Here, you can add them as sub categories under the parent category ‘Travel’. As a result, you can accurately track the amount spent during business travels.
To add a sub-category:
- Click Admin View.
- Go to Settings on the left sidebar.
(OR)
Click the Settings icon at the top right side.
- Navigate to Module Settings.
- Click Categories under General.
- Click + New Category at the top right corner of the page.
- Enter the category name.
- Mark the Make this a sub-category option.
- Enter the account code if necessary.
- Click Save to save your sub-category. You can now associate it while creating an expense.
Edit a Category
If you would like to change a category’s name or account, or if you would like to change an existing category to a sub-category, you can edit it and make changes.
To edit a category:
- Click Admin View.
- Go to Settings on the left sidebar.
(OR)
Click the Settings icon at the top right side.
- Navigate to Module Settings.
- Click Categories under General.
- Hover over the category you want to edit and click the More icon at the right corner of the category.
- Click Edit.
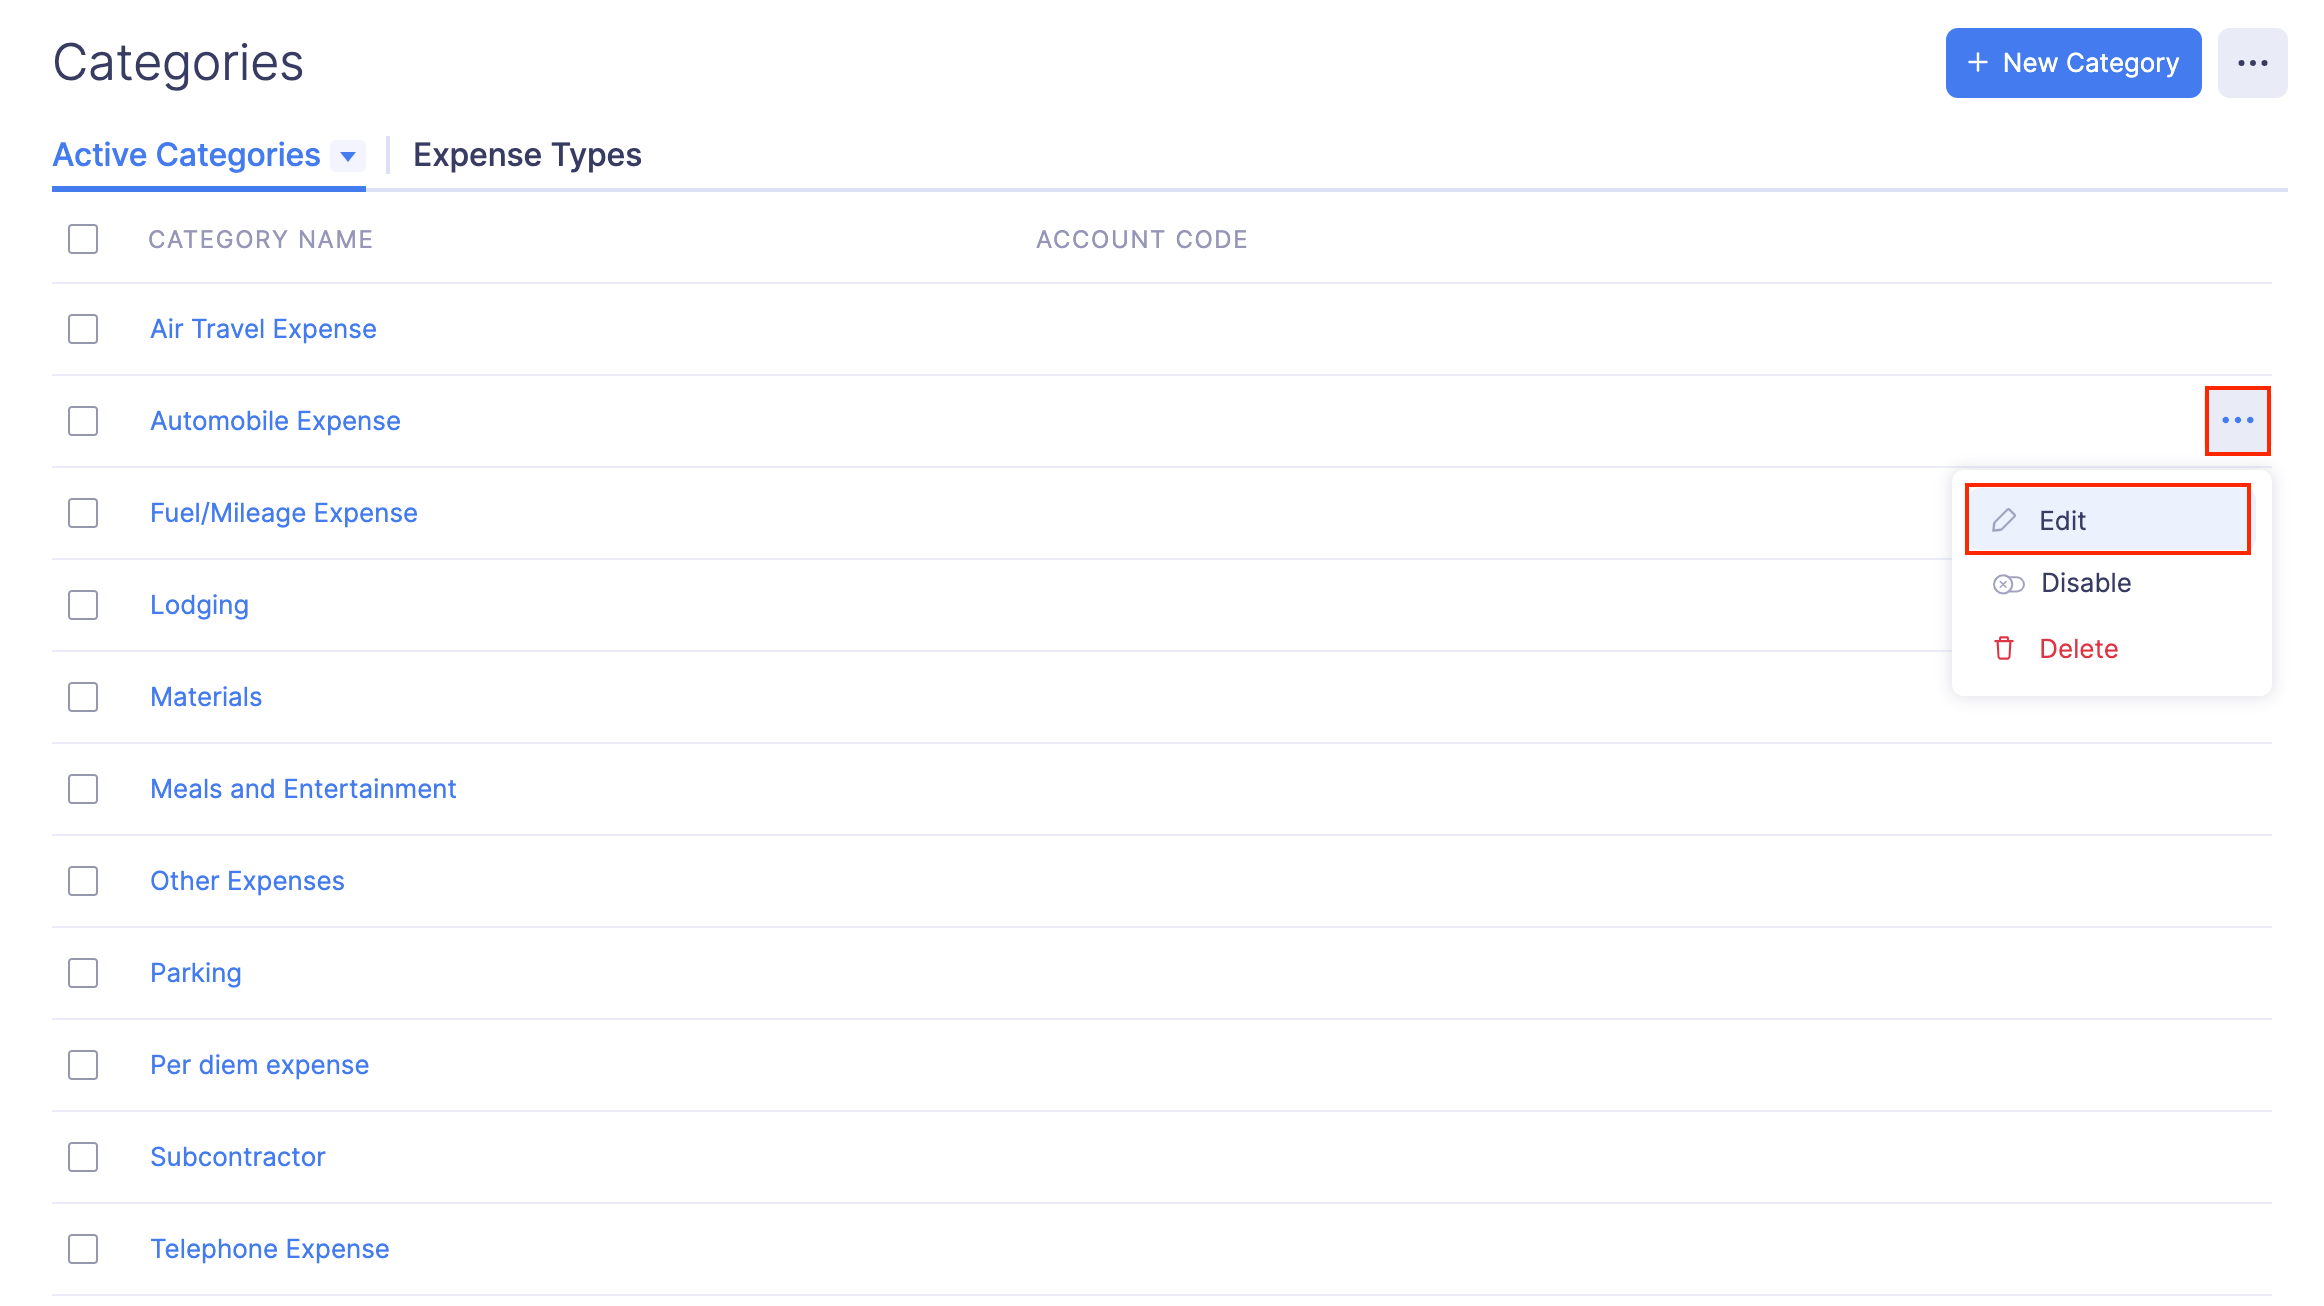
- Make the necessary changes and click Save.
Mark a Category as Active or Inactive
If you mark a category as inactive, users will not be able to associate it with an expense. To mark a category as inactive:
- Click Admin View.
- Go to Settings on the left sidebar.
(OR)
Click the Settings icon at the top right side.
- Navigate to Module Settings.
- Click Categories under General.
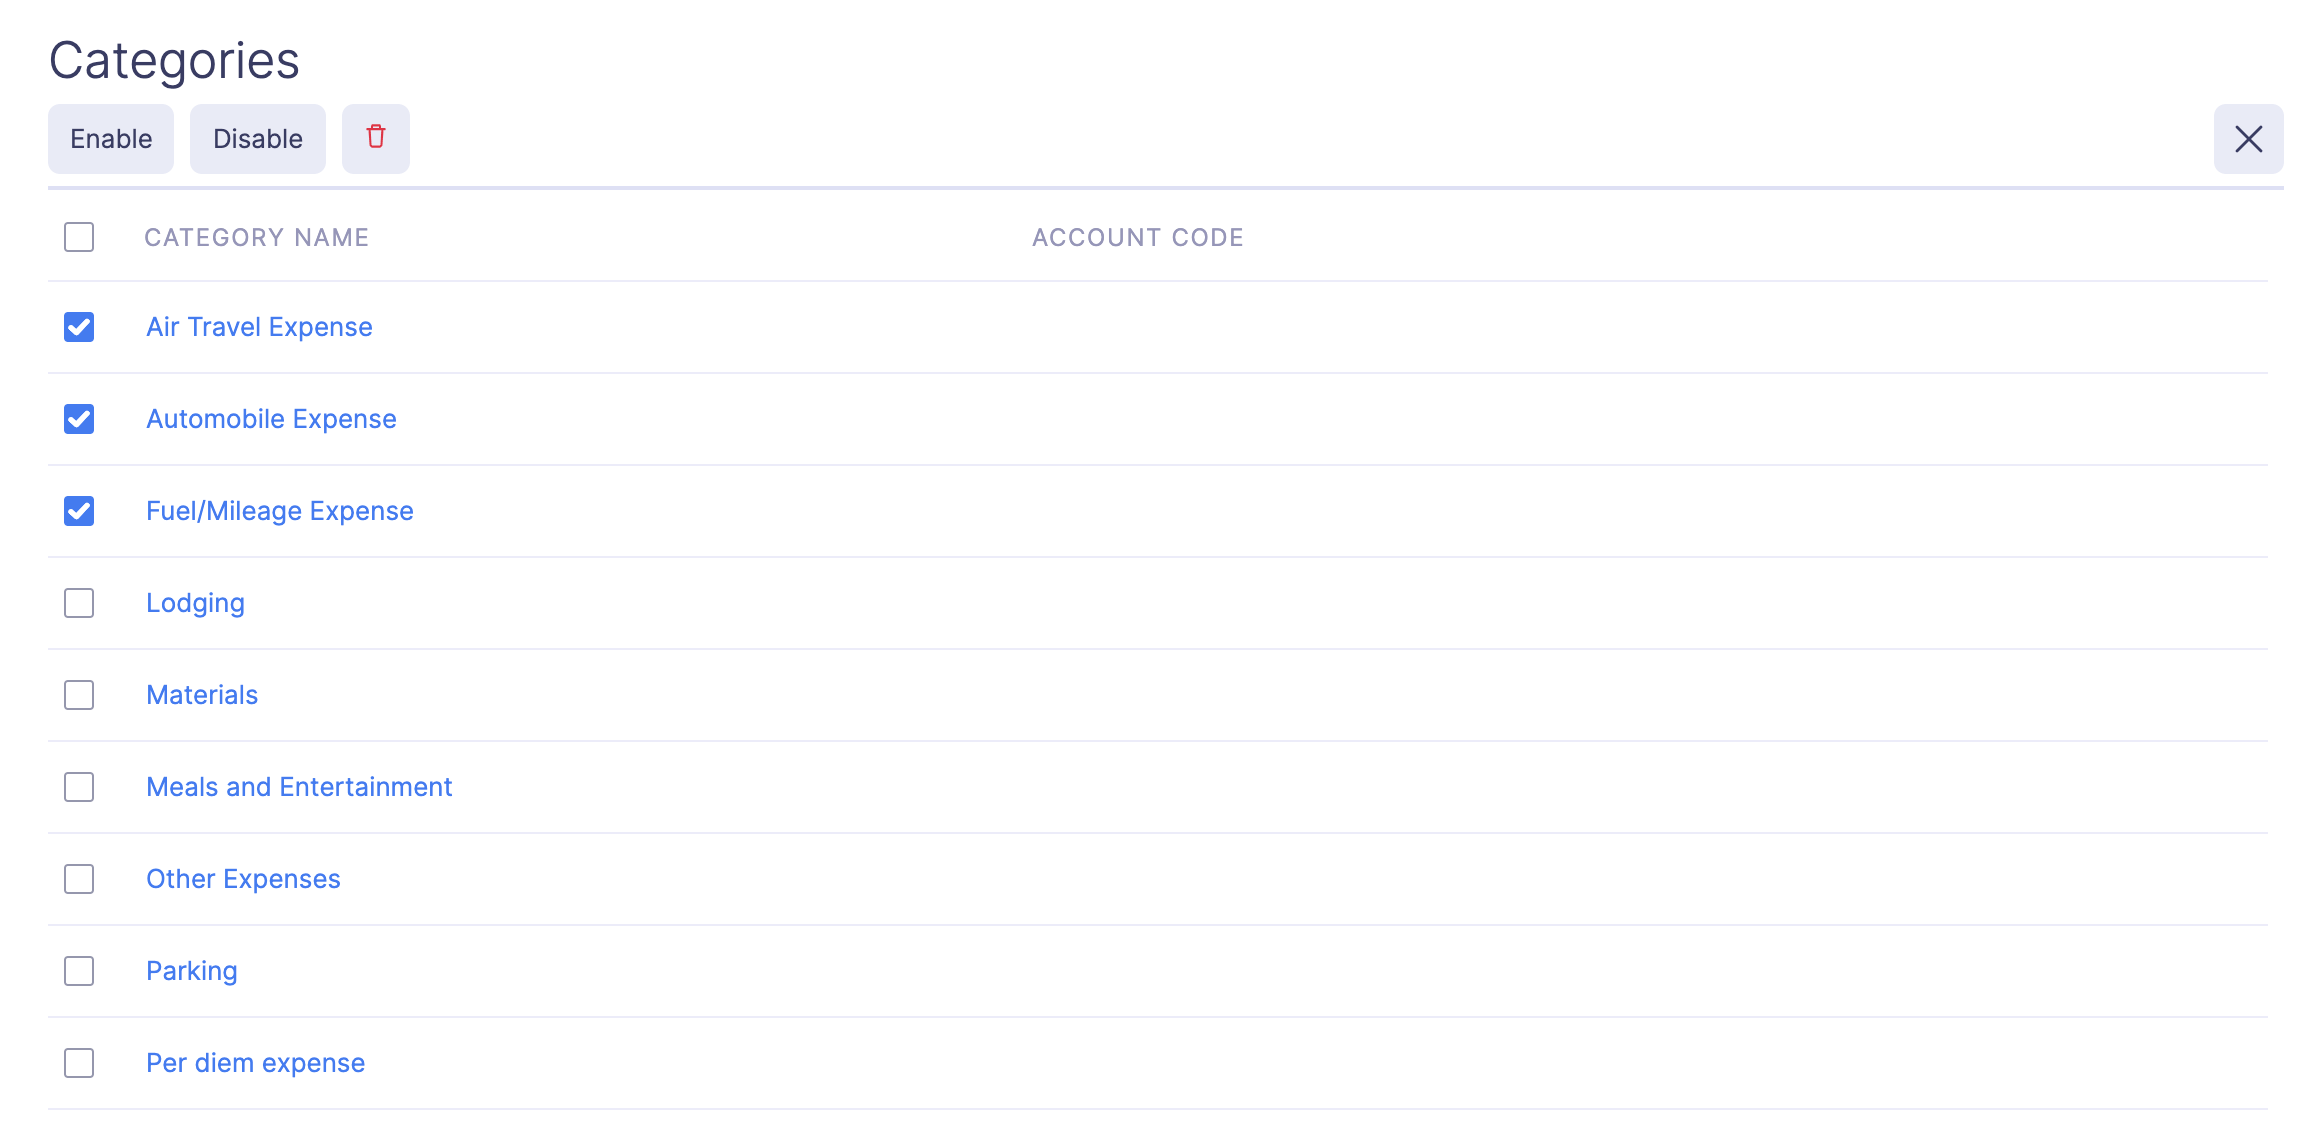
- Select the category you would like to mark as inactive using the check box and click Disable on the top of the page.
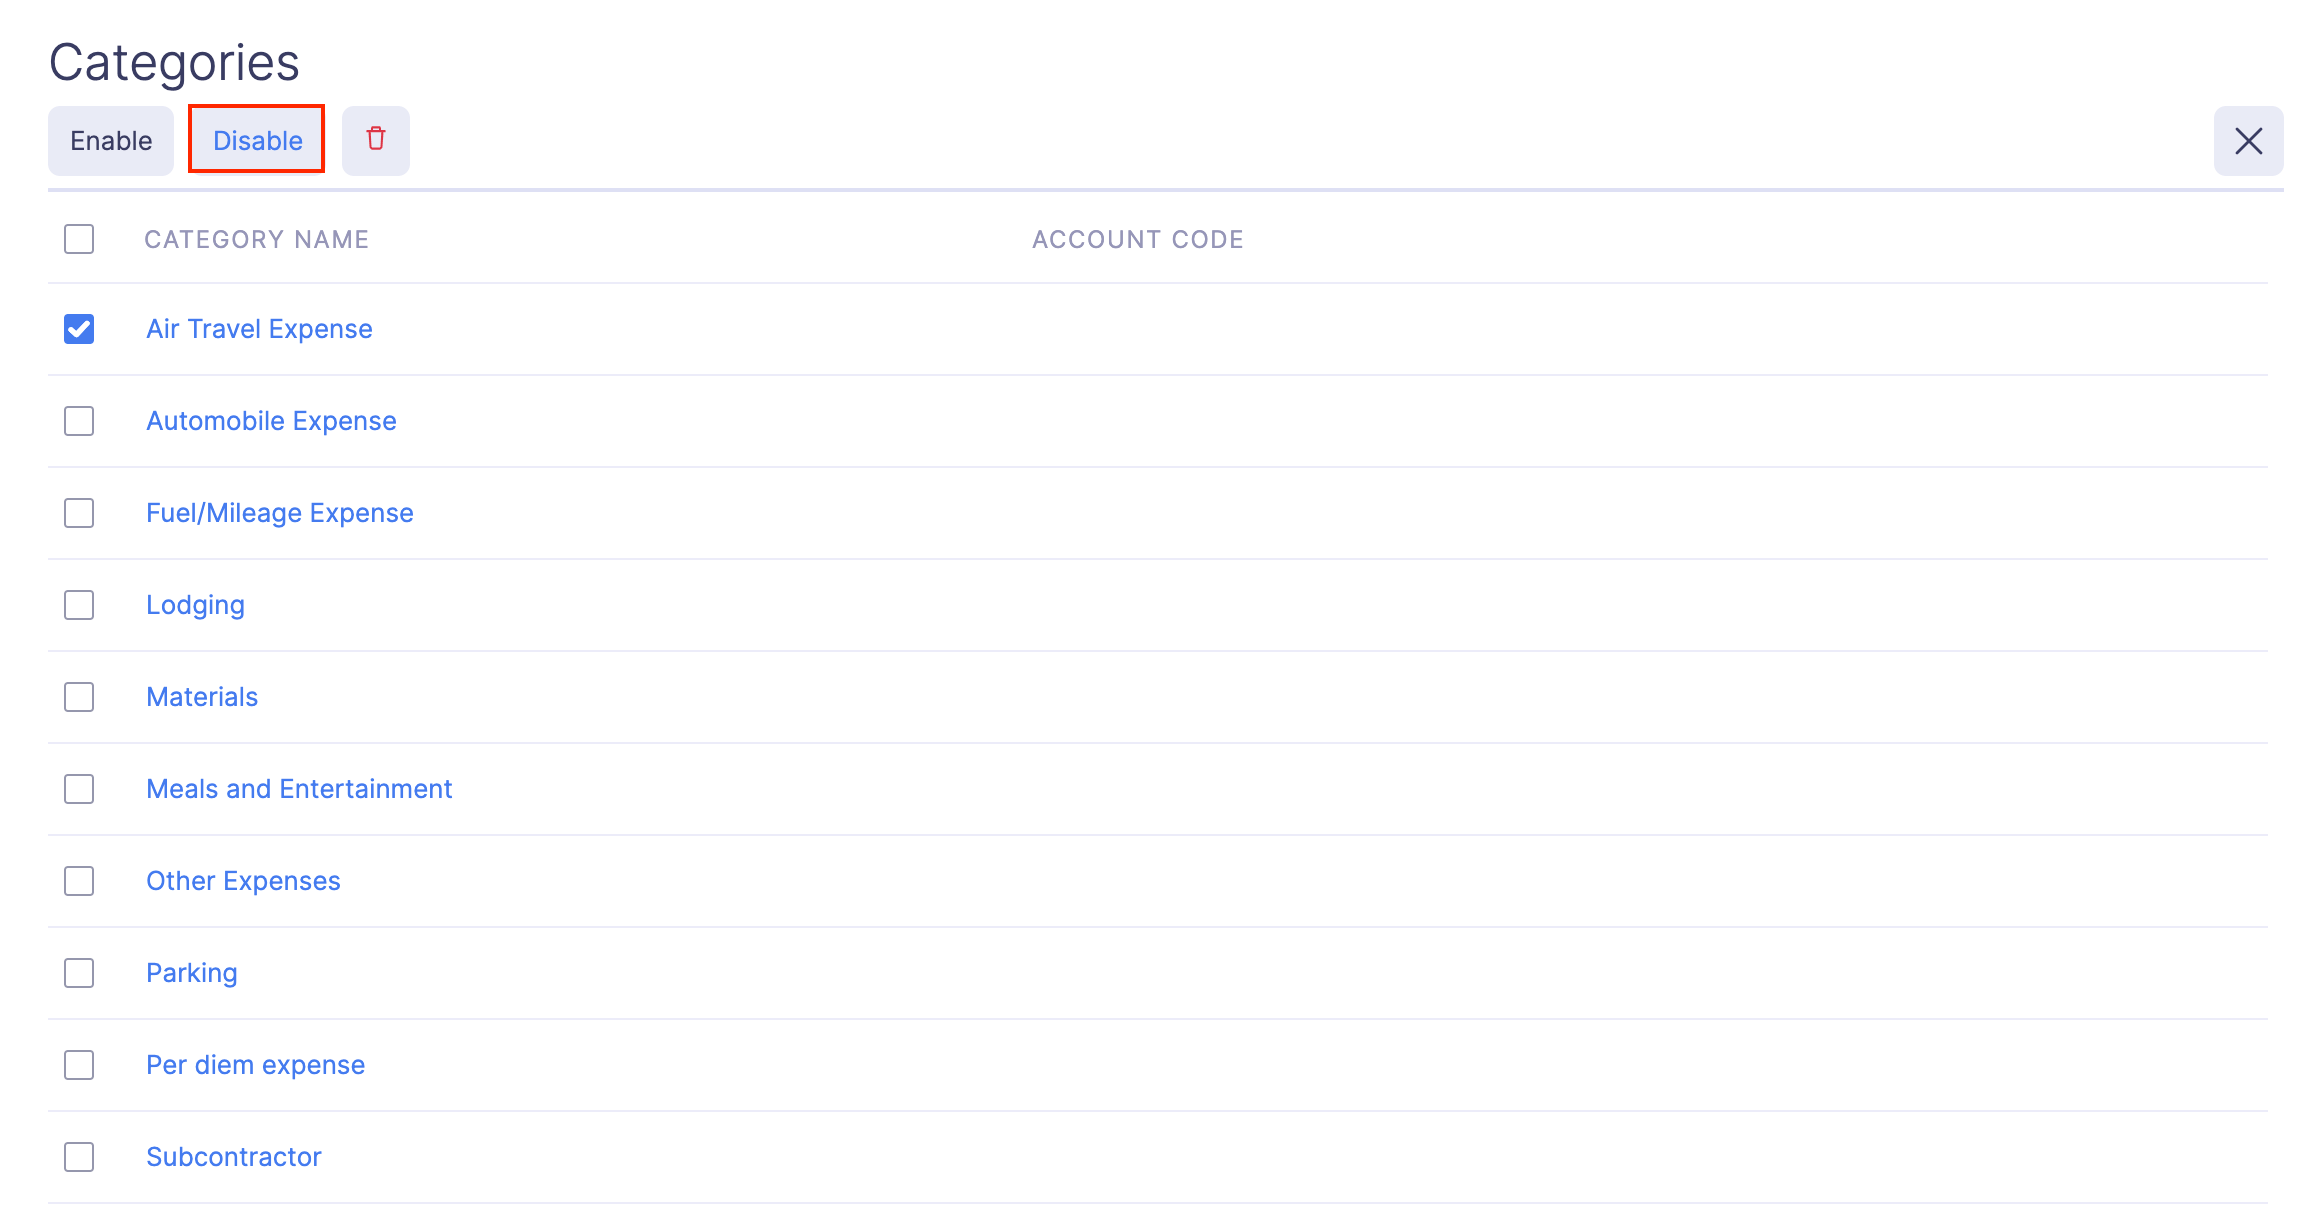
- Once you mark a category as inactive, you will not be able to associate it with expenses.
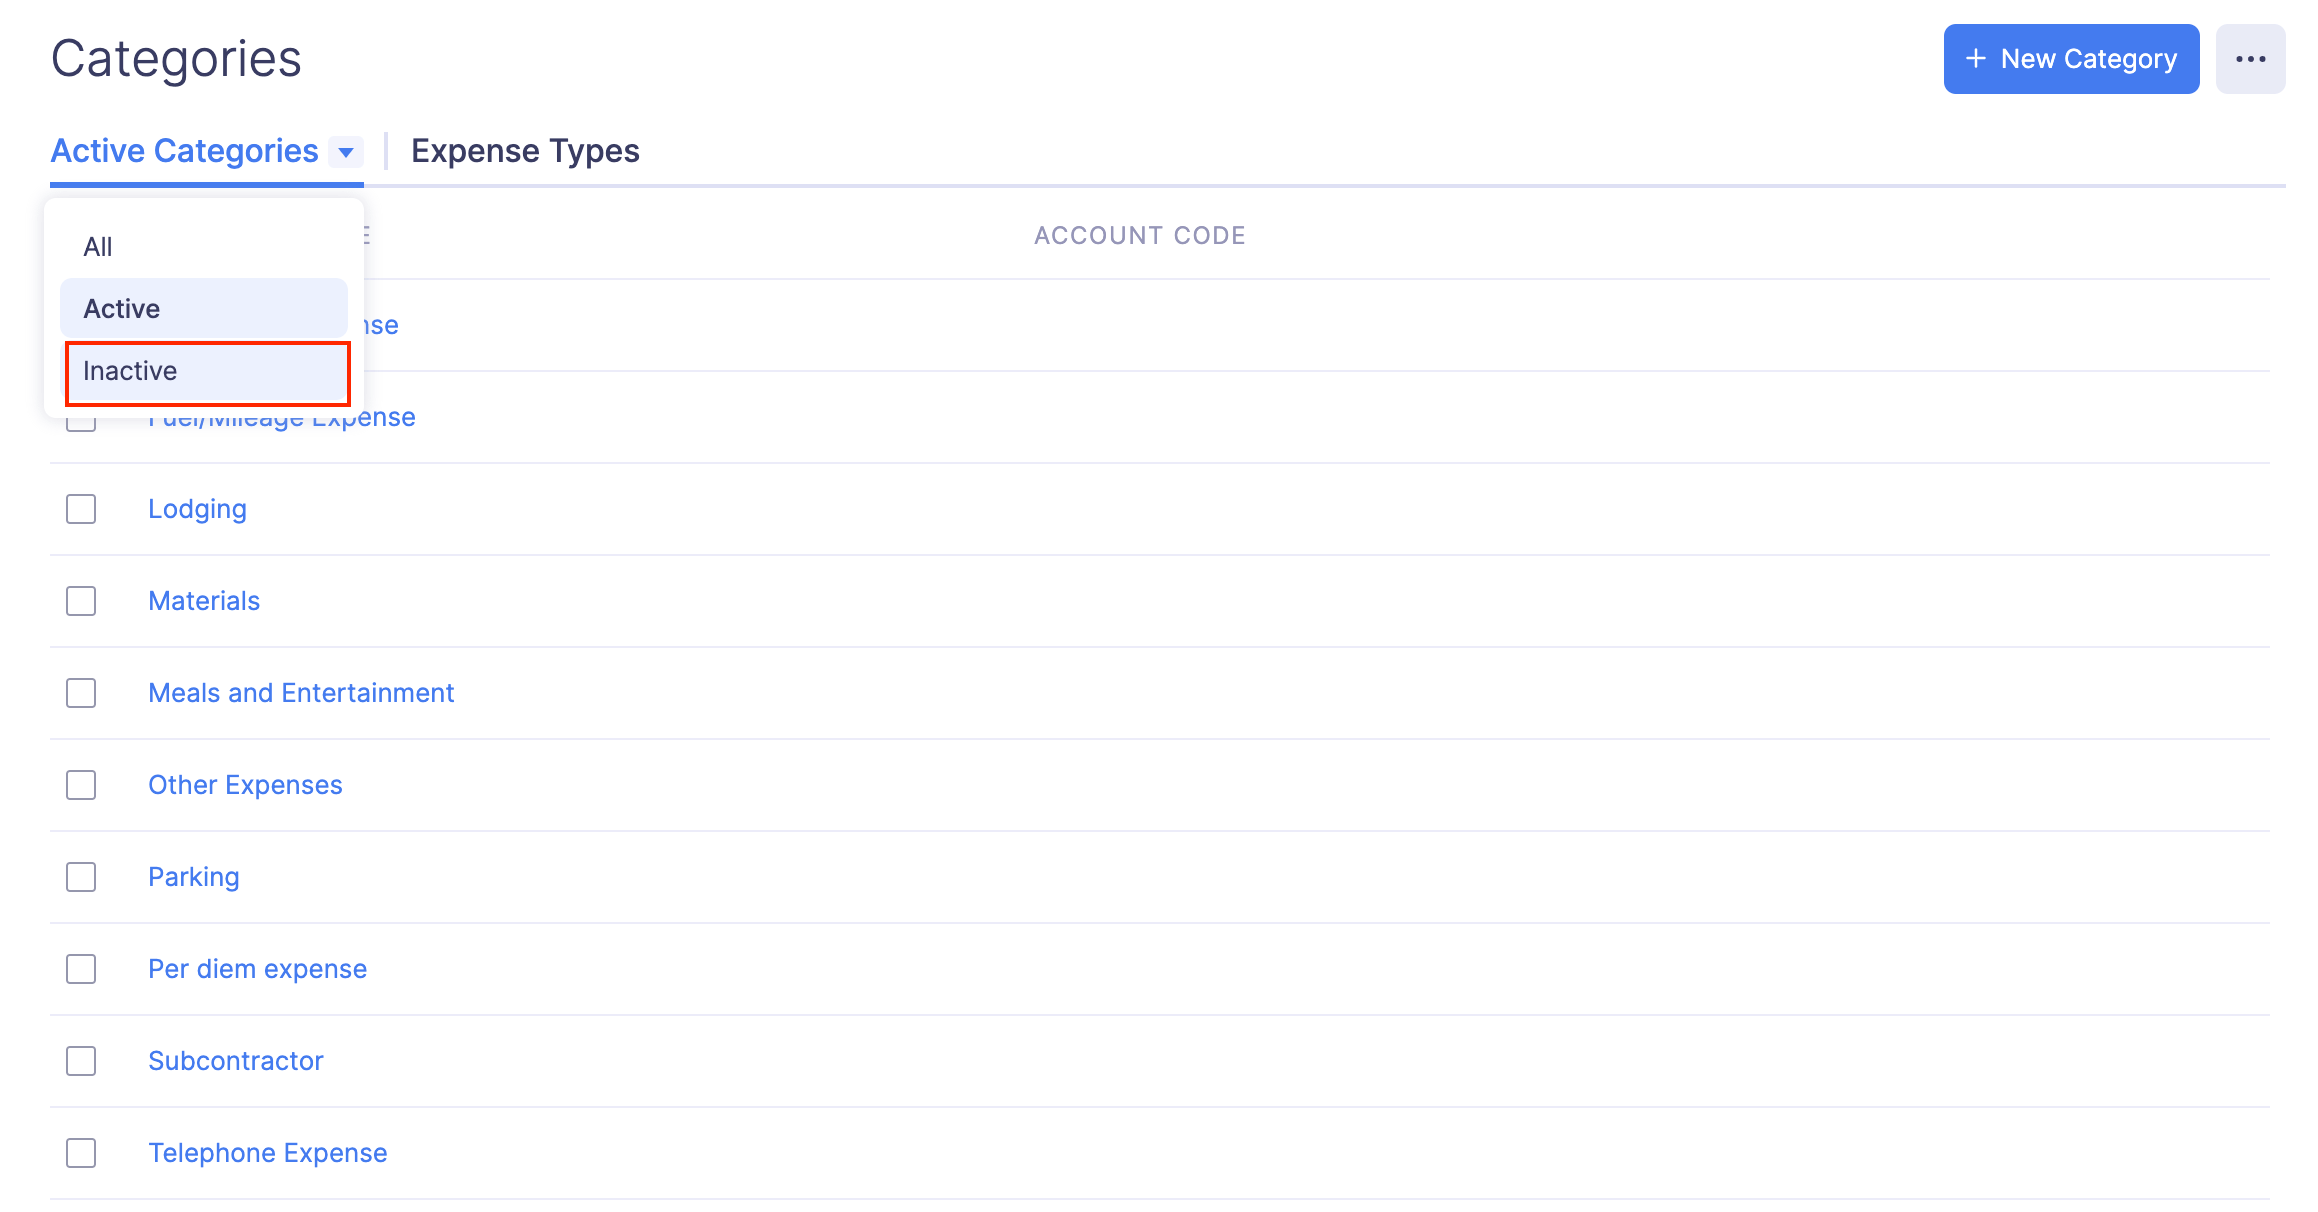
- To view the inactive categories, click the All Categories dropdown on the top of the page and select Inactive.
- Similarly, to mark an inactive category as active again, select the category using the check box and click Enable on top of the page. The category will be enabled.
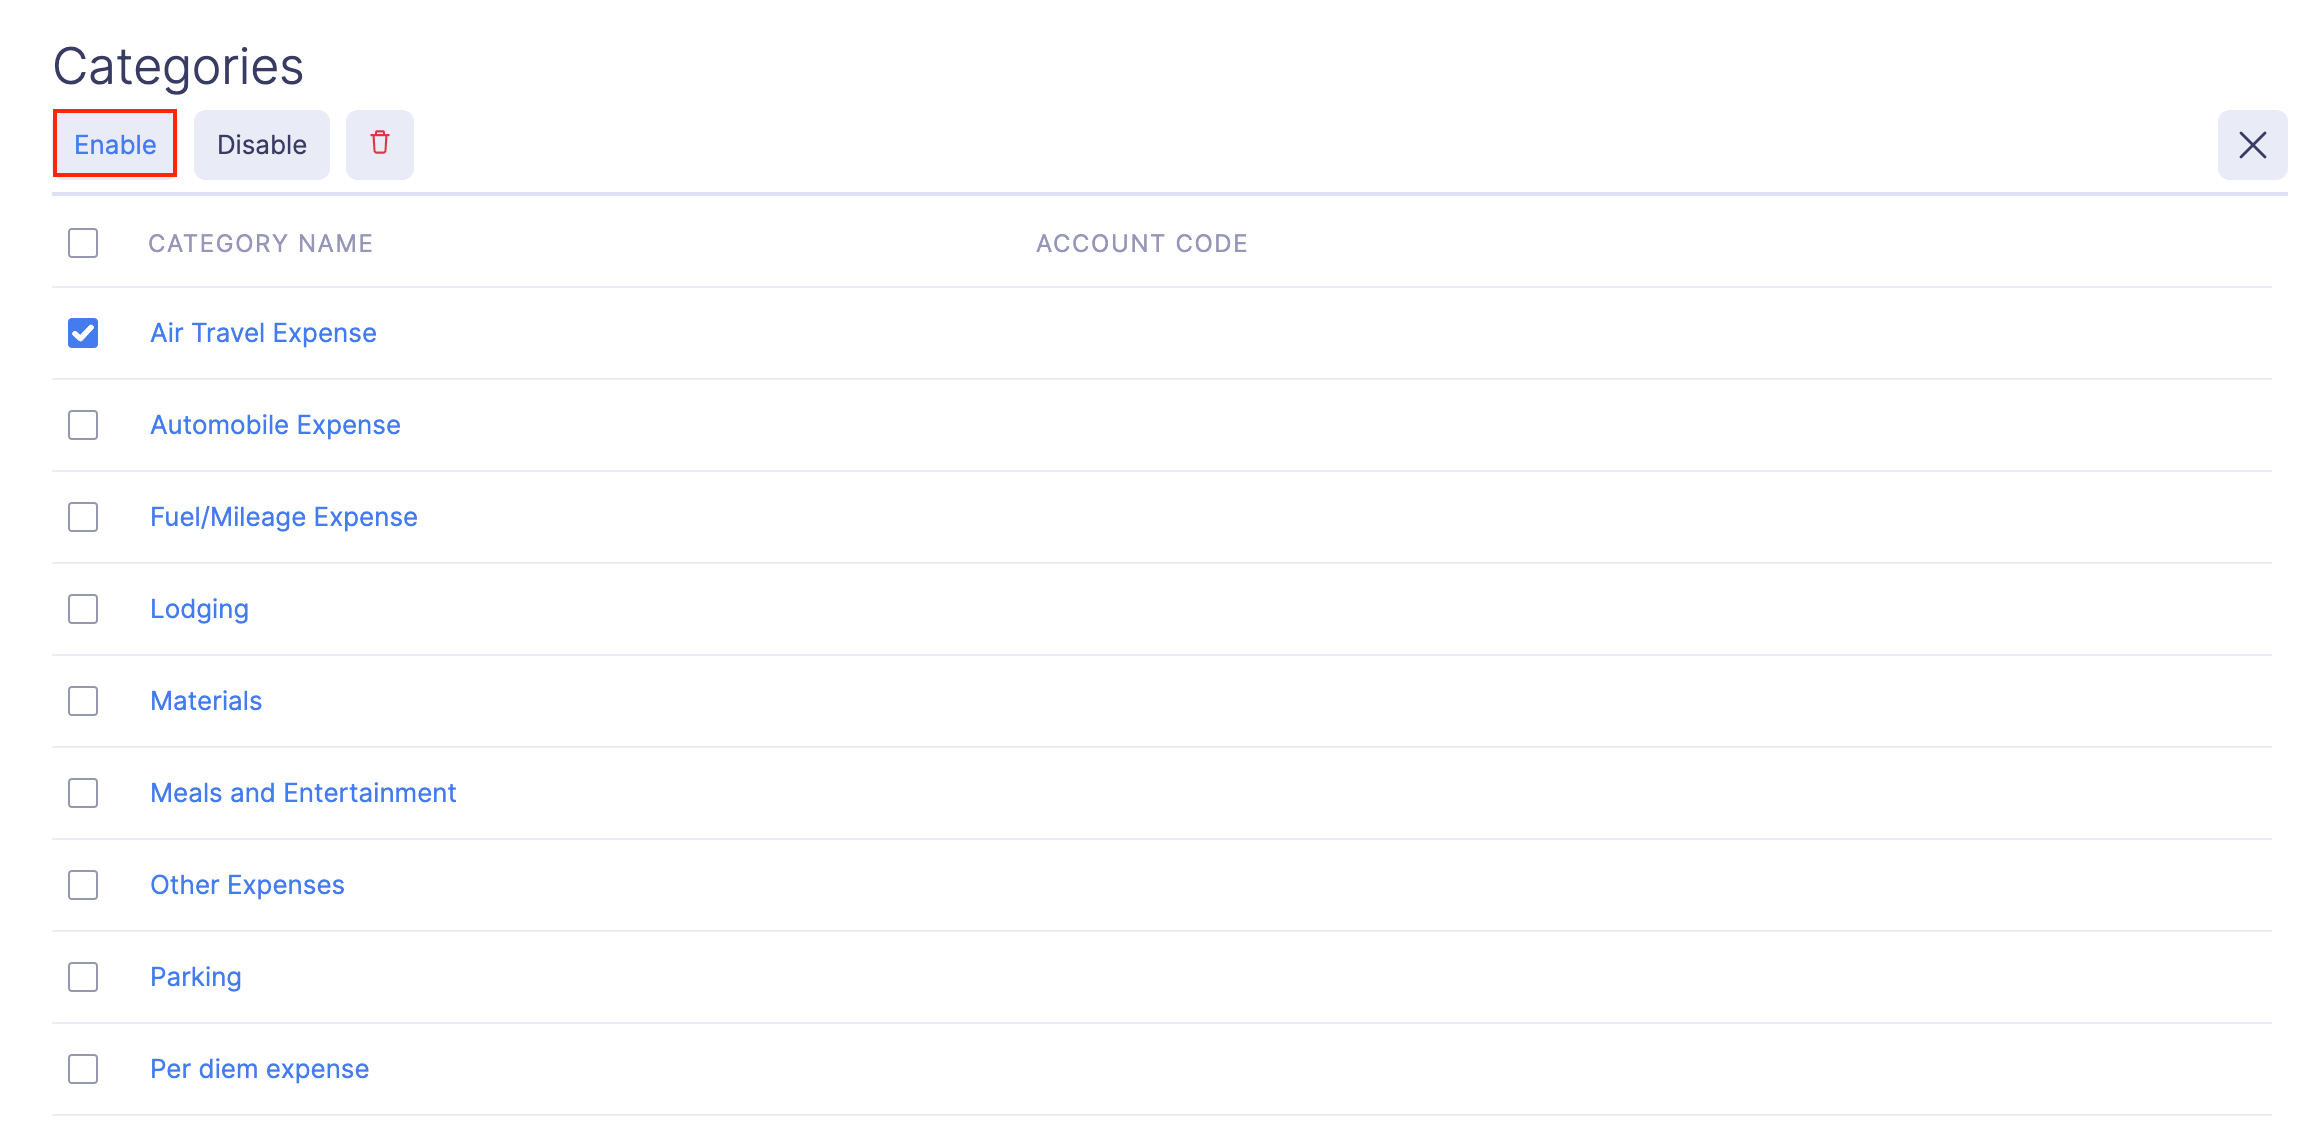
- Also, you can mark the categories as active or inactive in bulk by selecting the categories in bulk and clicking Enable or Disable respectively.
Delete a Category
If you want to remove a category permanently, you can delete it. However, if you do not want to delete a category, you can disable it and enable it later when required.
Prerequisite: You cannot delete a category that is already associated with an expense.
To delete a category:
- Click Admin View.
- Go to Settings on the left sidebar.
(OR)
Click the Settings icon at the top right side.
- Navigate to Module Settings.
- Click Categories under General.
- Hover over the category you want to delete and click the More icon at the right corner of the category.
- Click Delete.
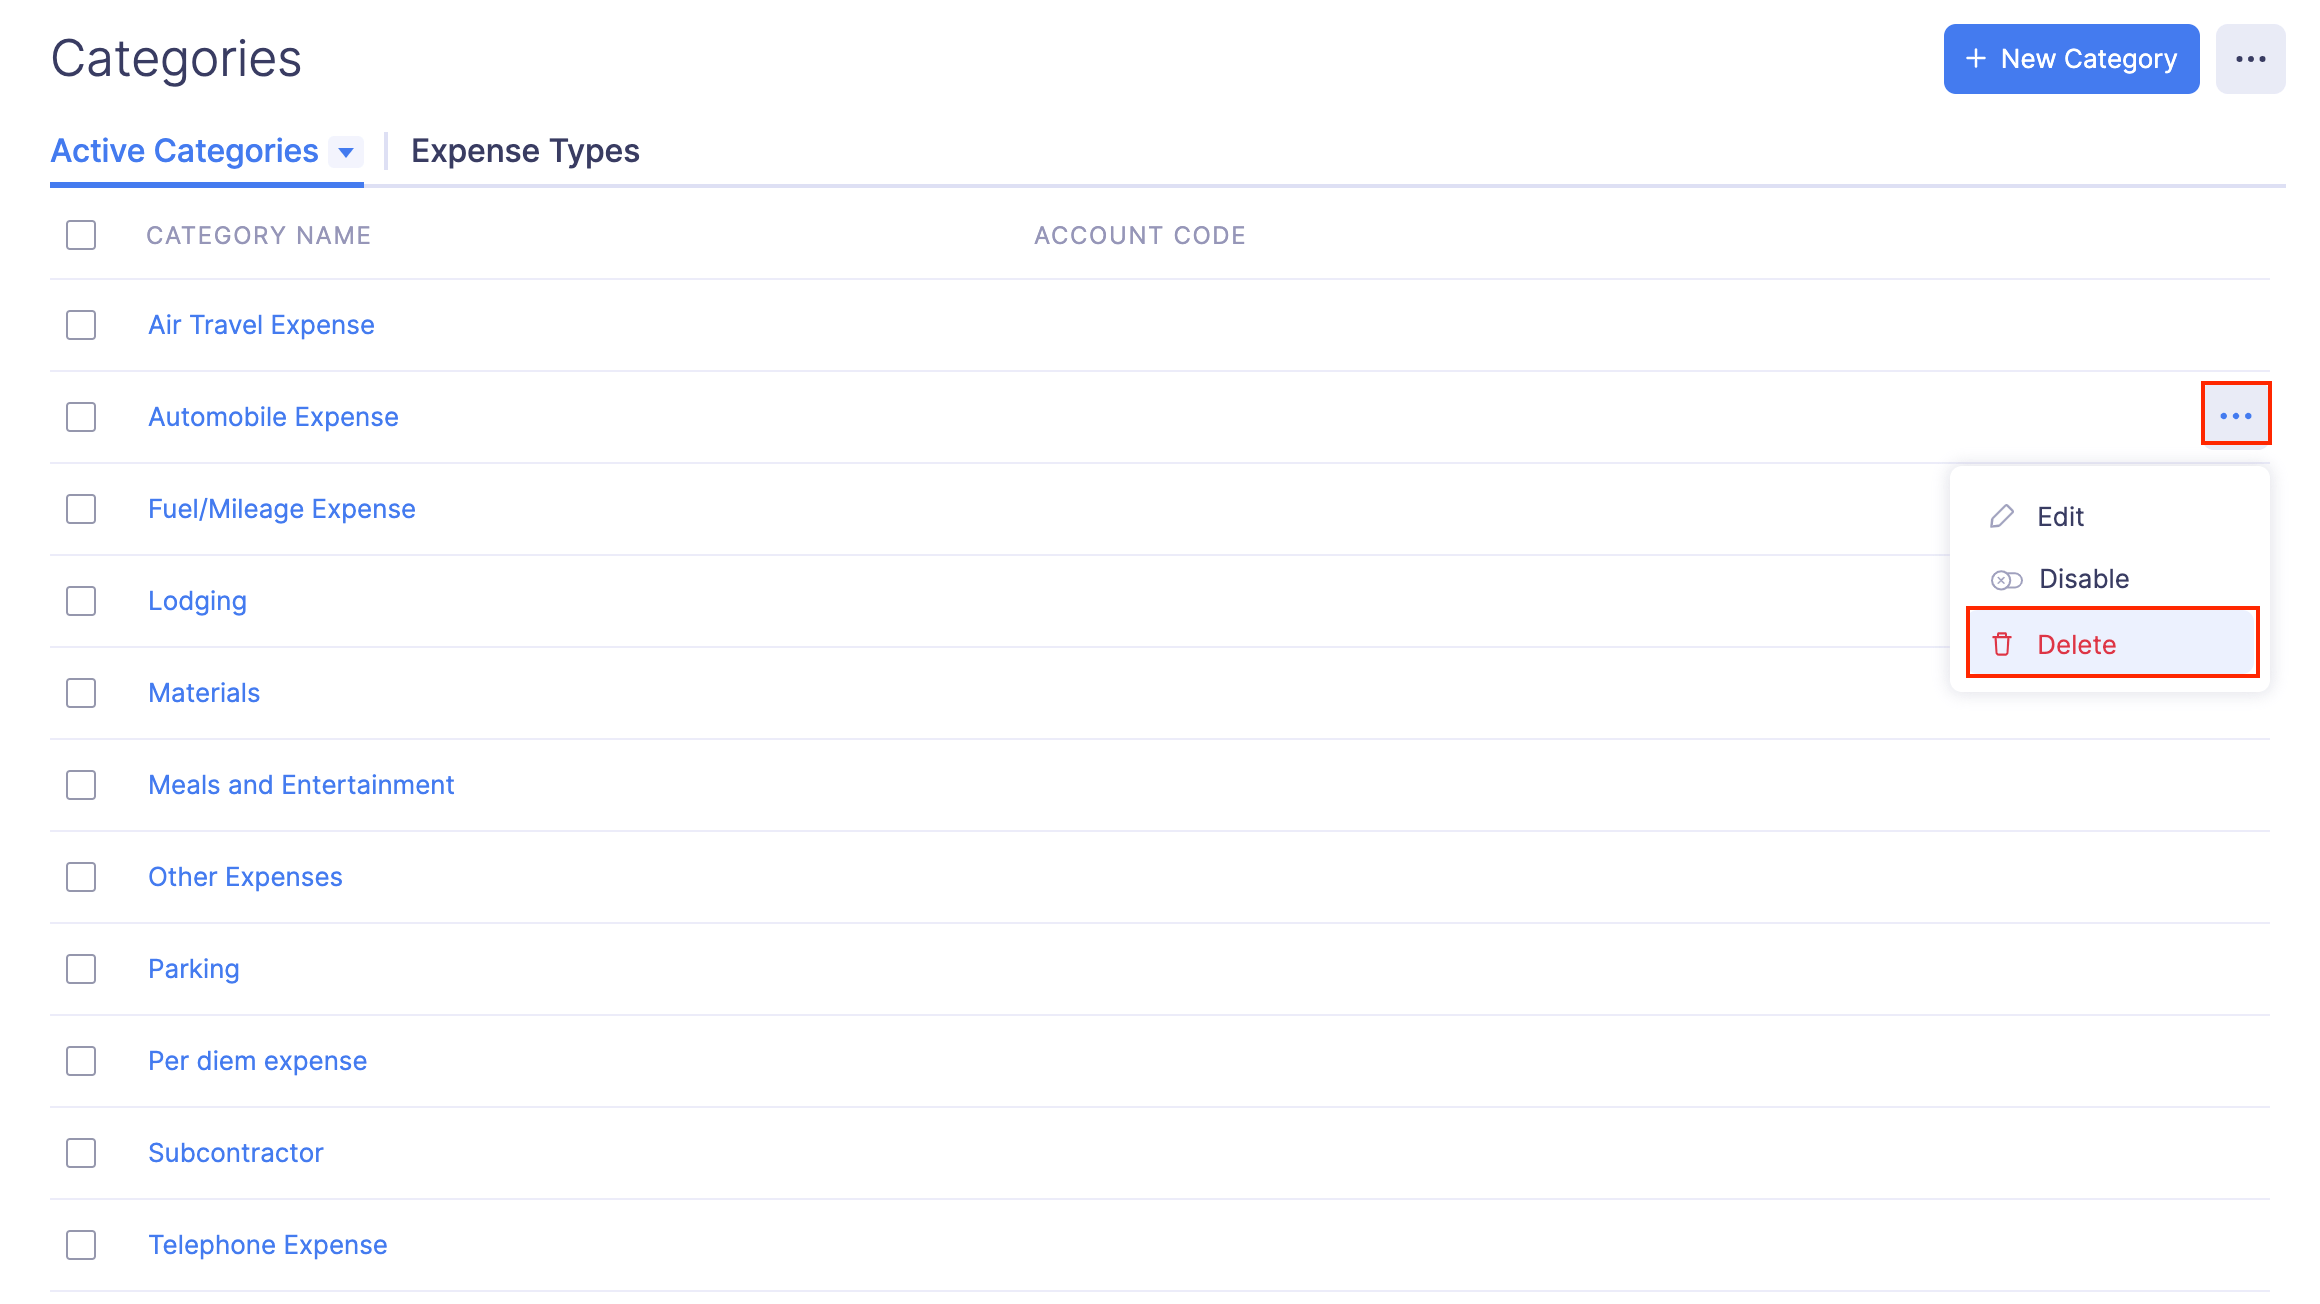
- Click Delete again to delete the category.
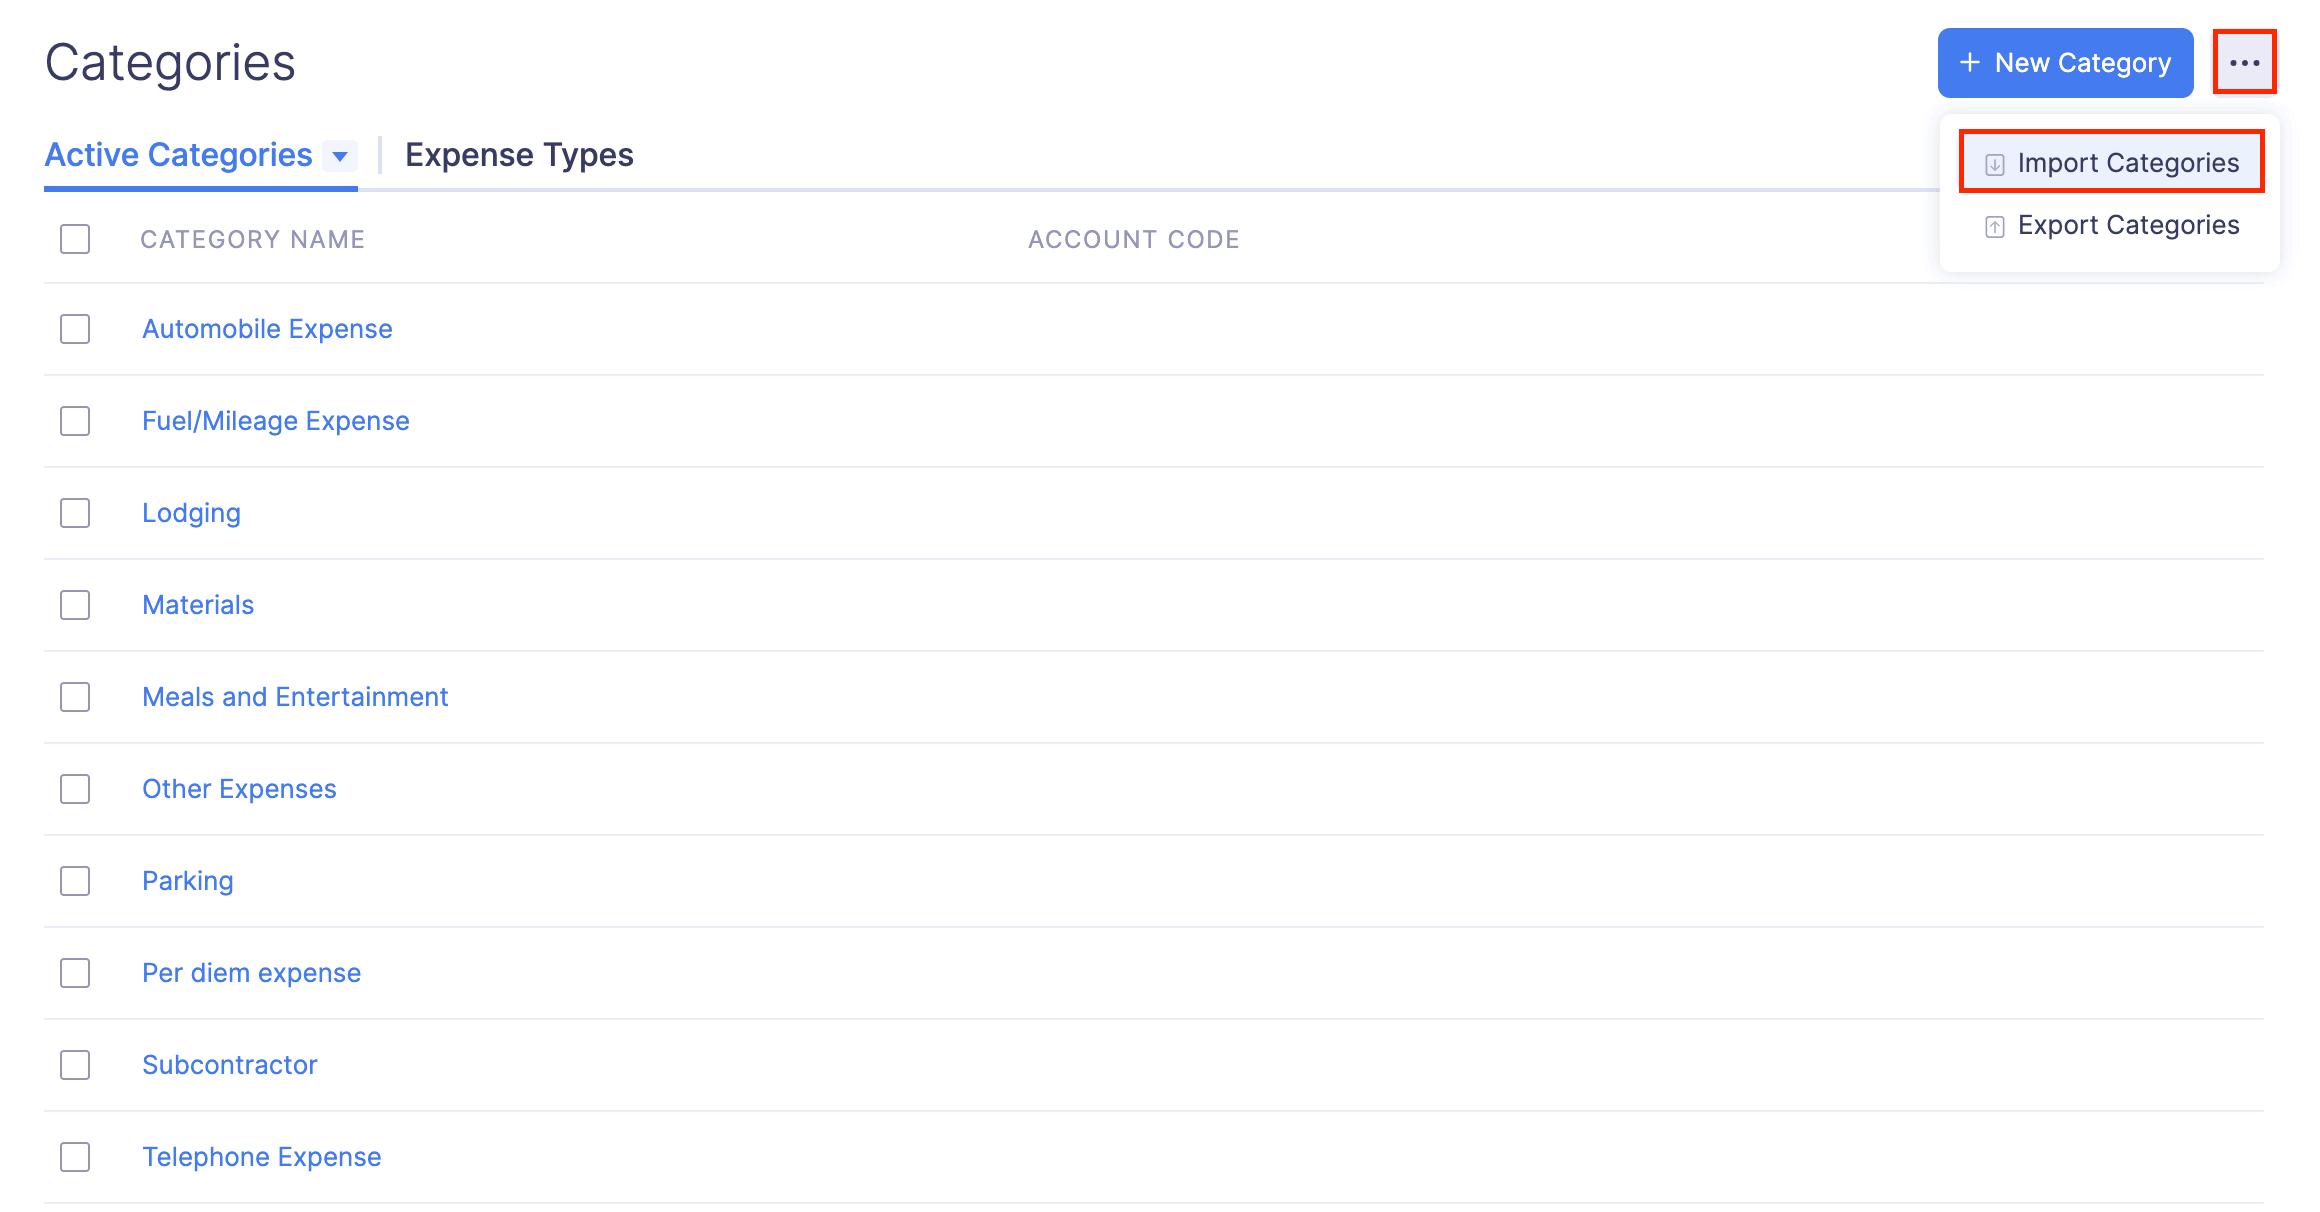
Import Categories
If you’ve categories data elsewhere, you can import it in CSV or TSV format into Zoho Expense.
To import expense categories:
- Click Admin View.
- Go to Settings on the left sidebar.
(OR)
Click the Settings icon at the top right side.
- Navigate to Module Settings.
- Click Categories under General.
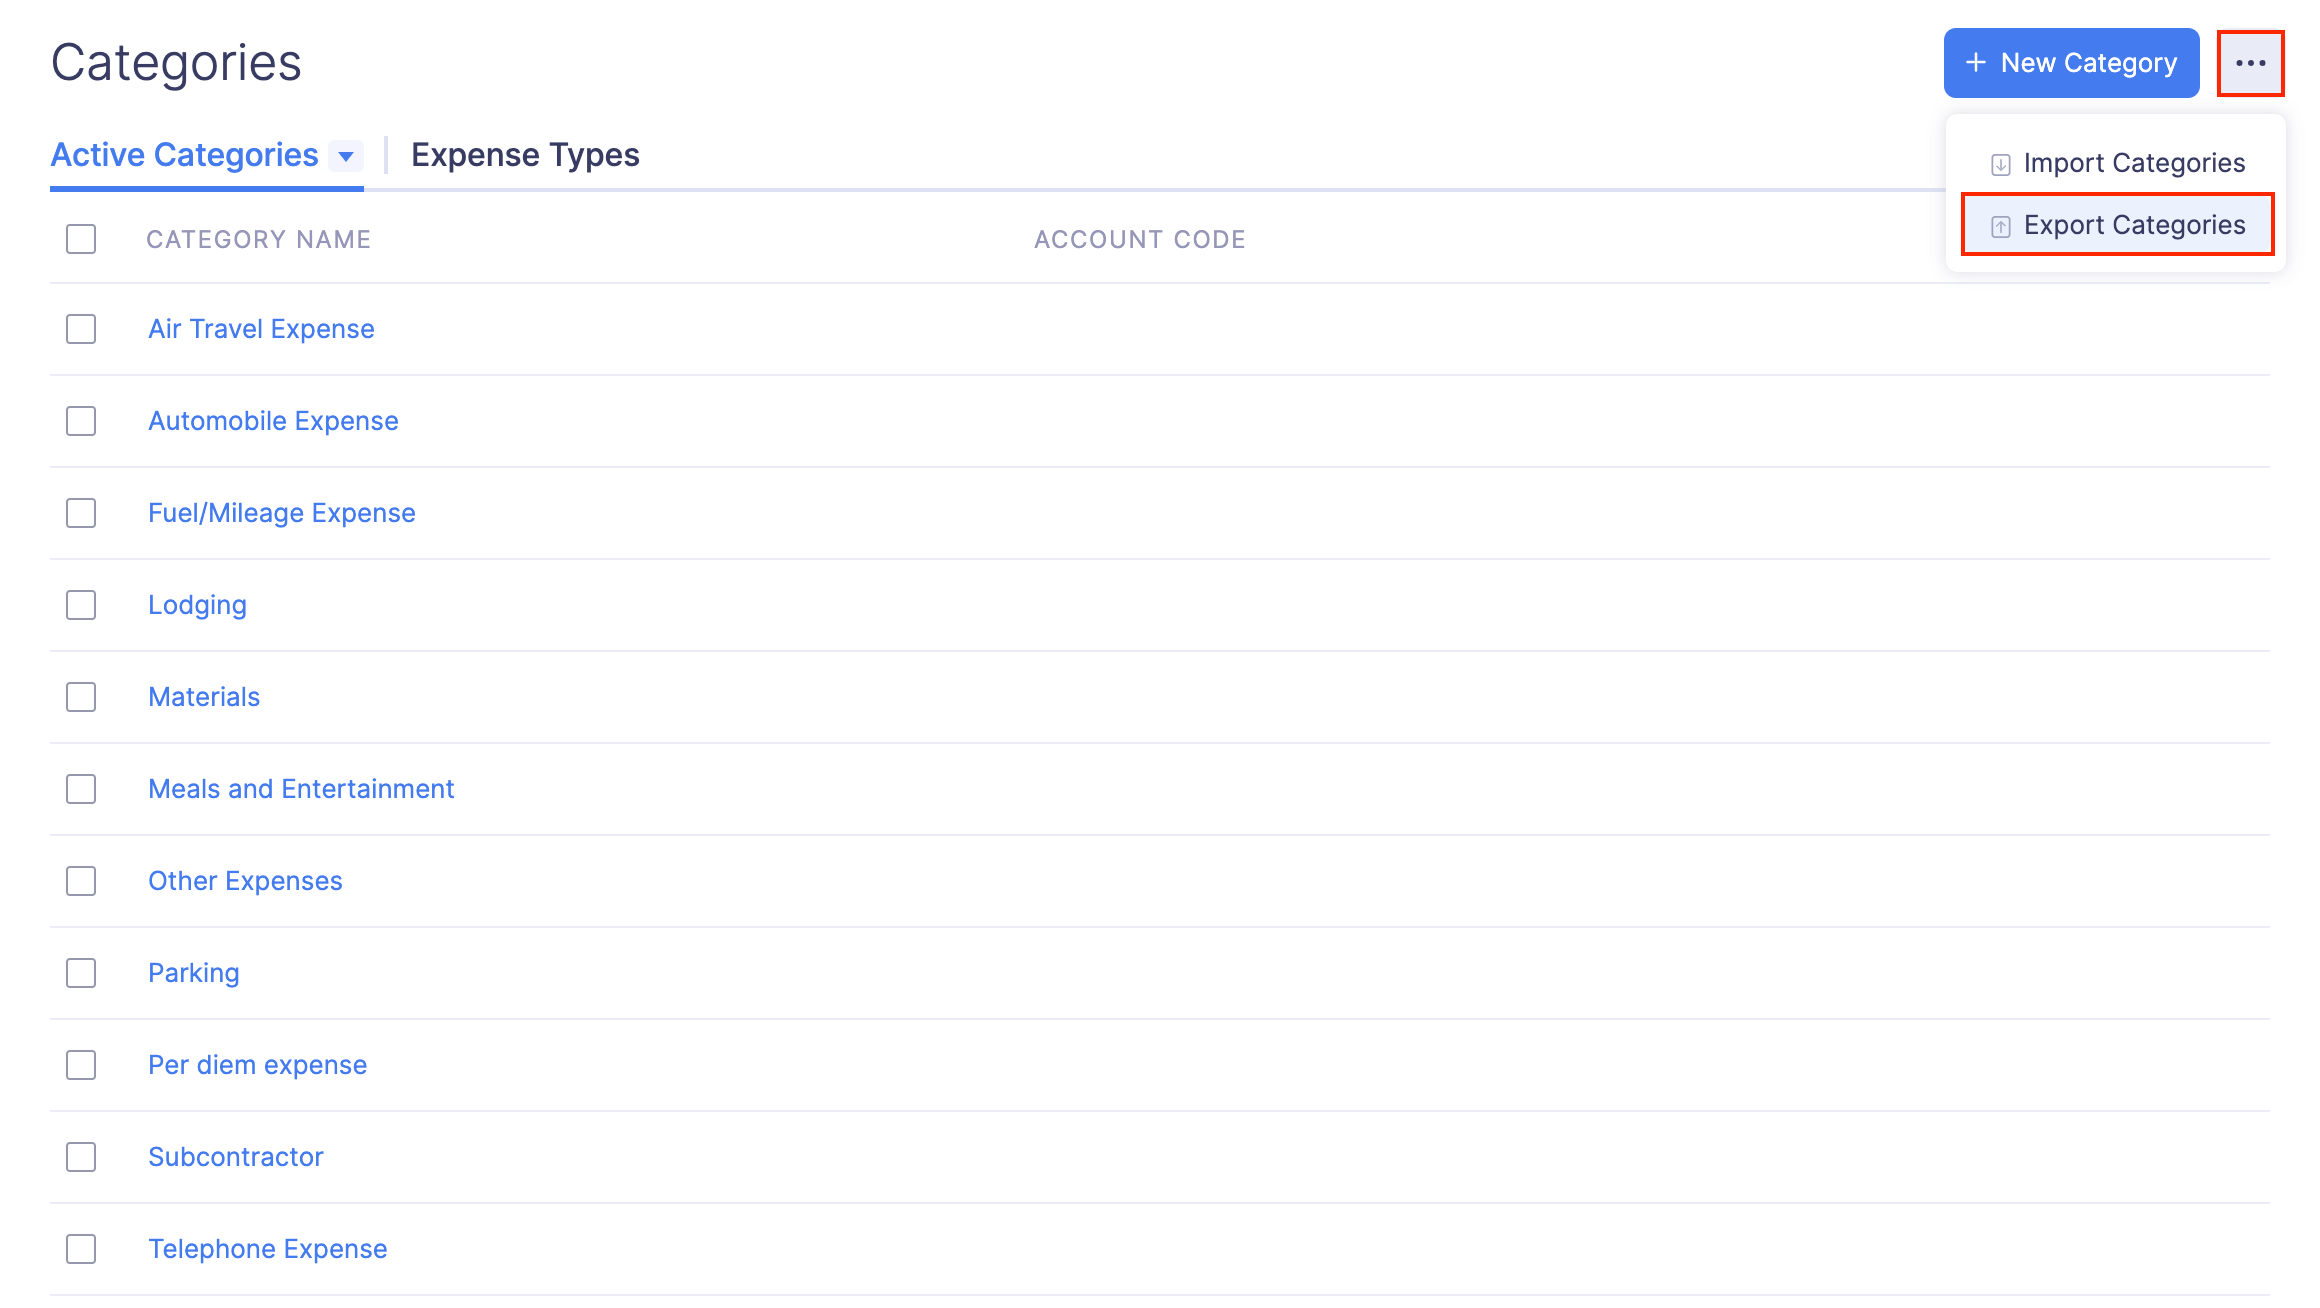
- Click the More icon at the top right corner of the page.
- Select Import Categories.
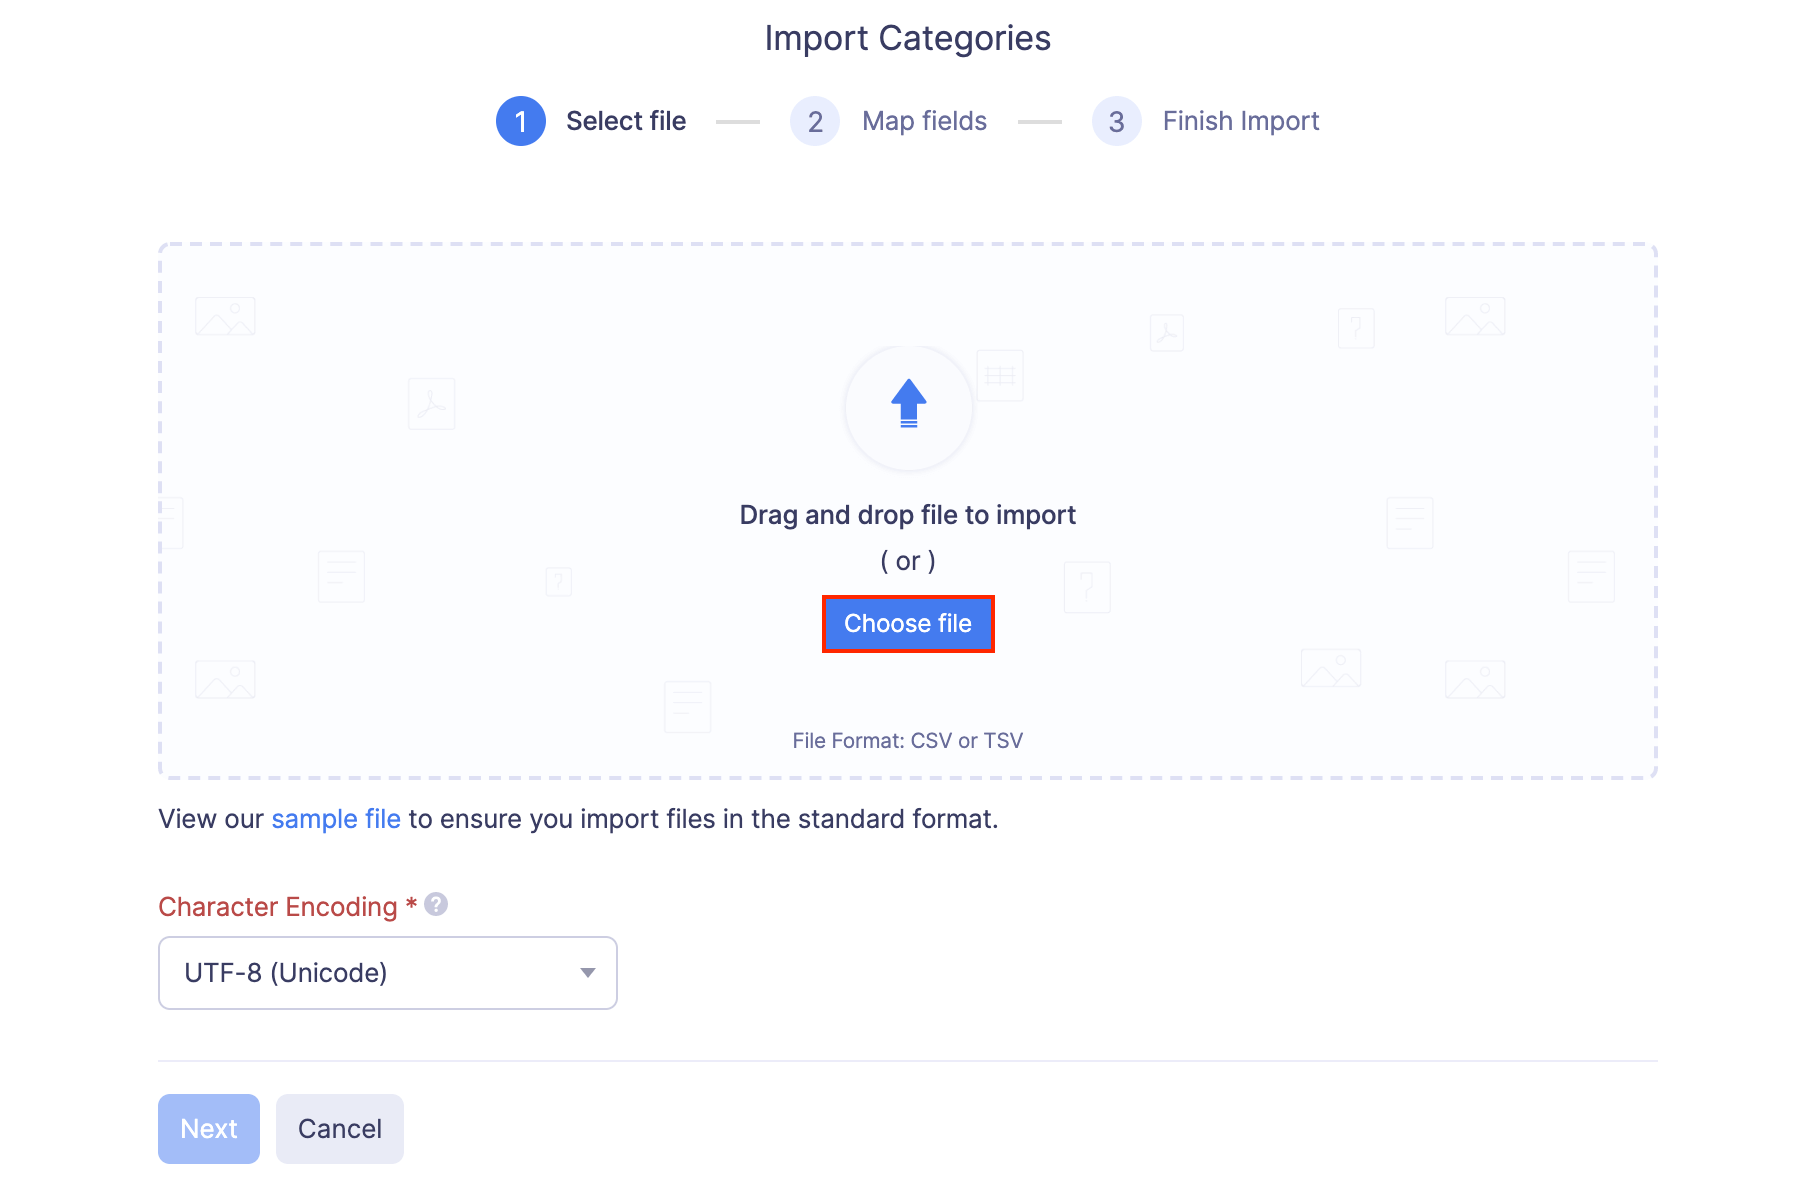
- In the first step, drag and drop a file you want to upload or click Choose File to choose the import file from your desktop or a cloud account. If you want to upload another file instead of the selected file, click Replace File and choose another file.
- Click Next.
- In the next step, the best match to each field in Zoho Expense will be auto-mapped with the fields in the imported file. If there are unmapped fields, you can map them manually. If you want to save the existing mapping for future imports, mark the Save these selections for use during future imports checkbox.
- Click Next.
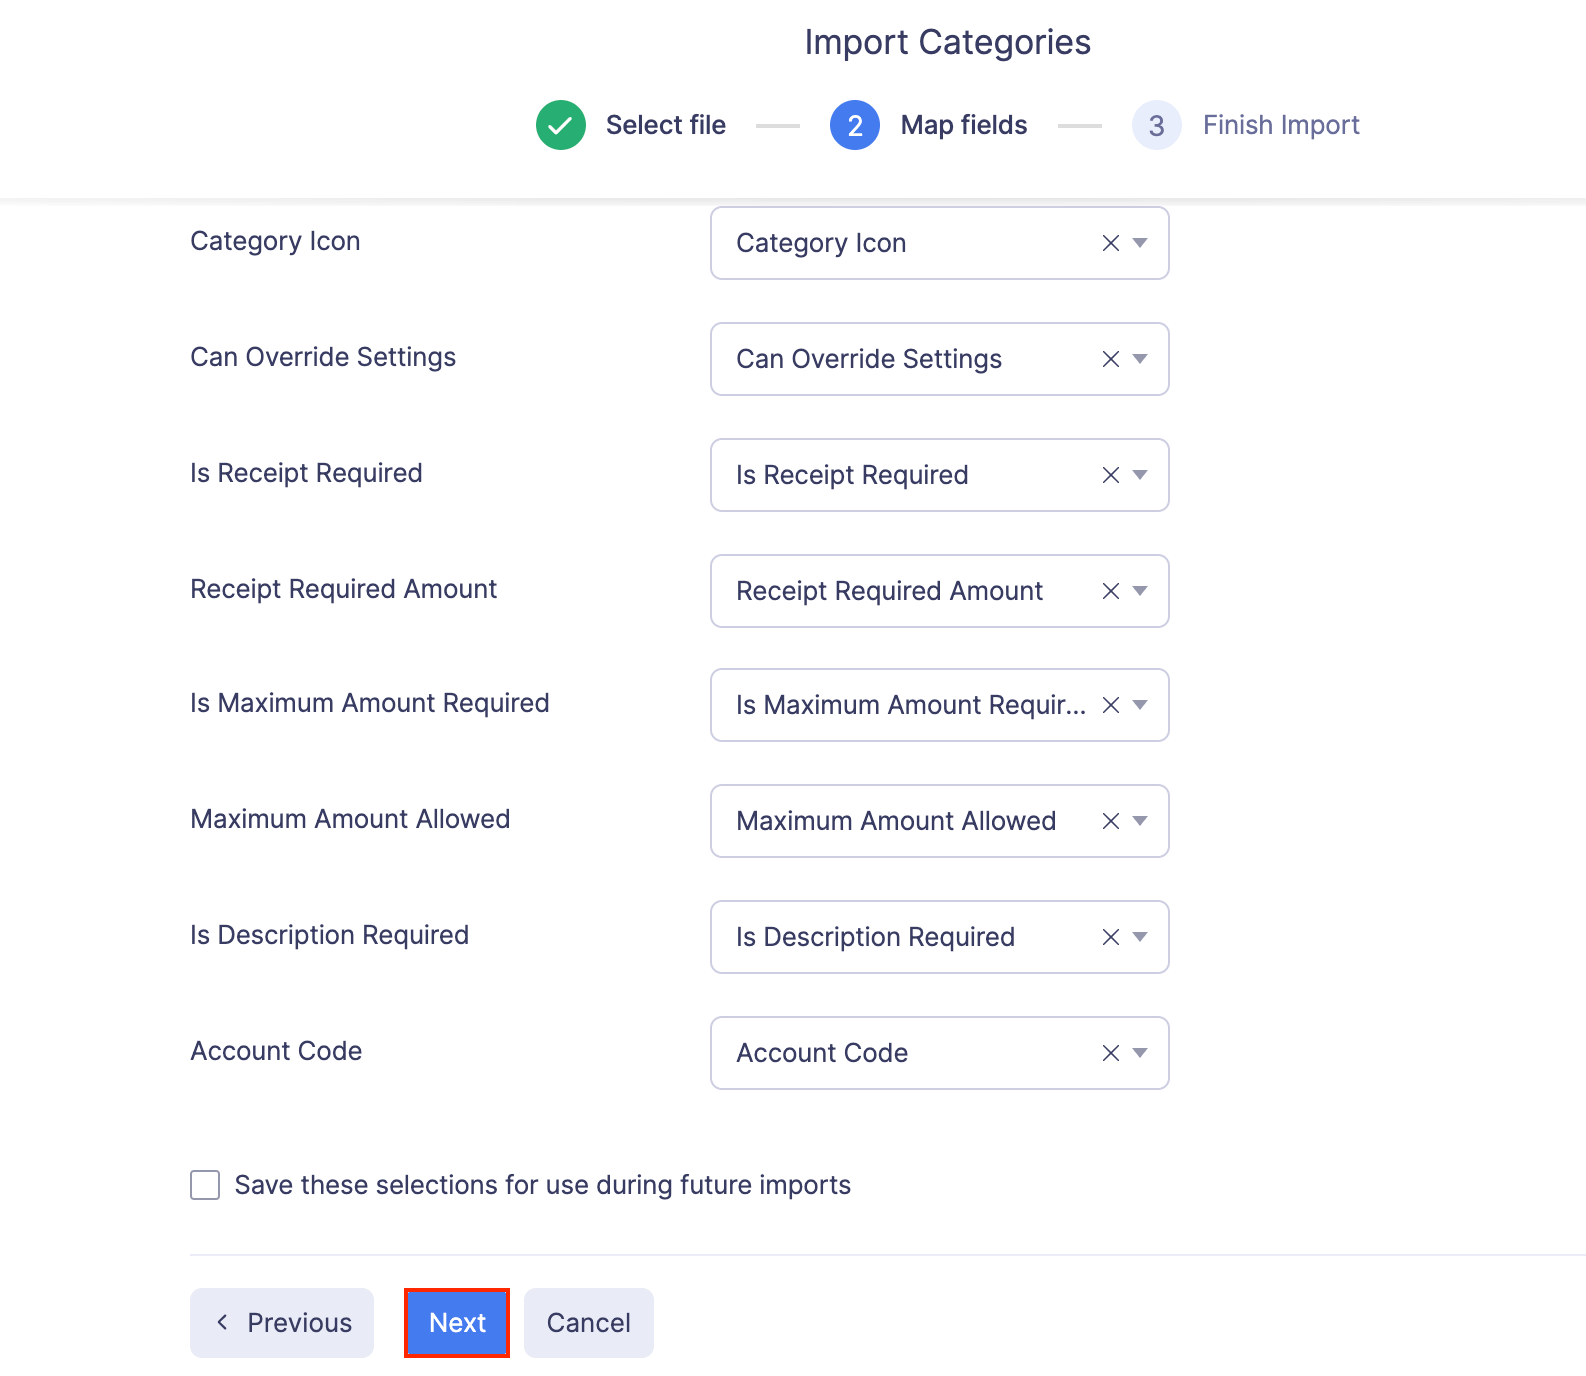
- The data in the unmapped fields will not be imported into Zoho Expense. If you want to map those fields, click Previous and map the unmapped fields.
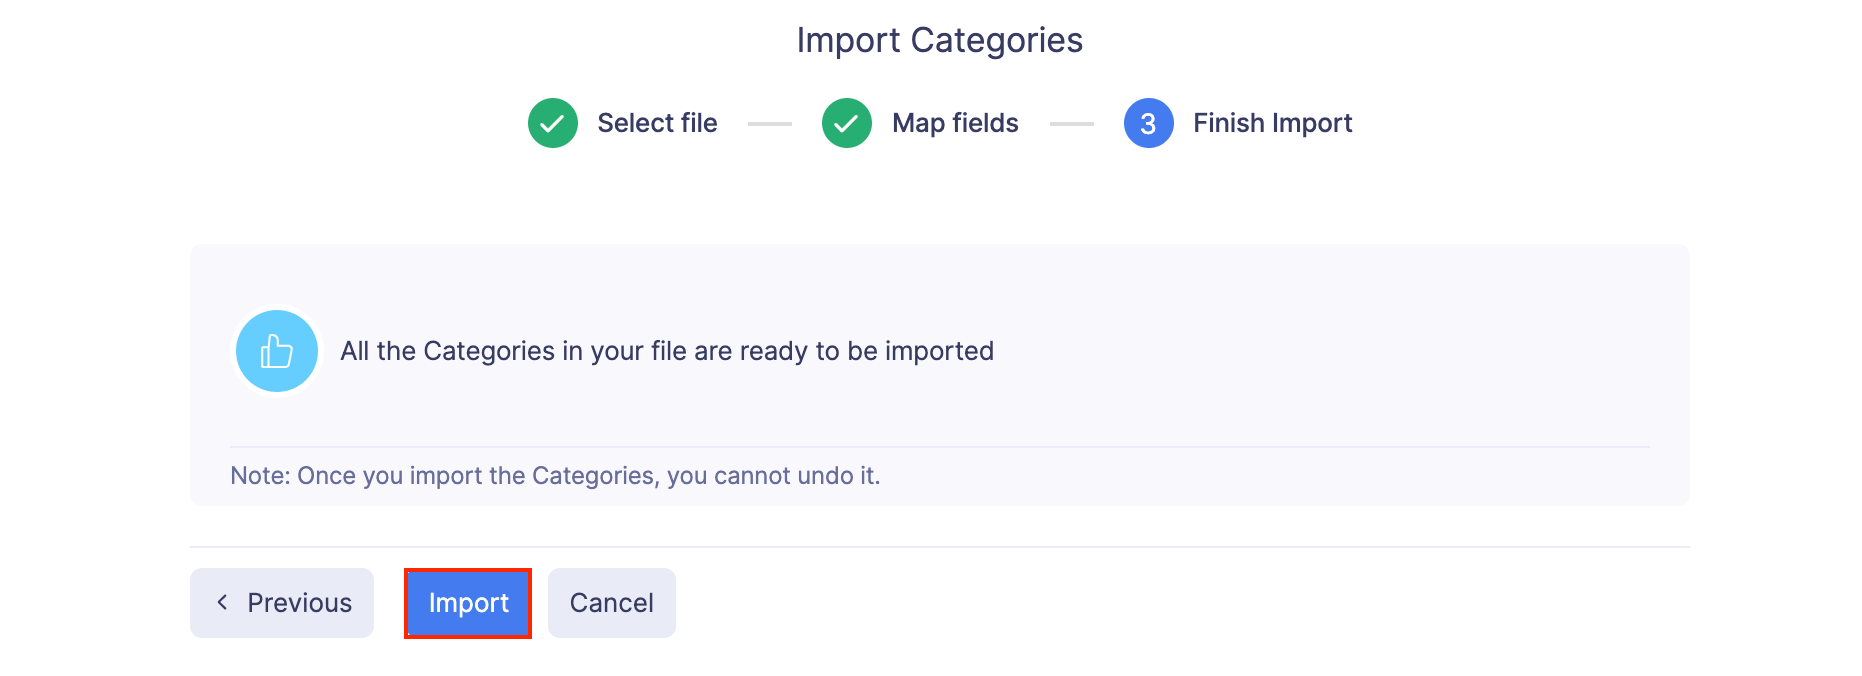
- Once you have mapped all the relevant fields, click Import to import categories to Zoho Expense. All the imported categories will be listed under the Categories module.
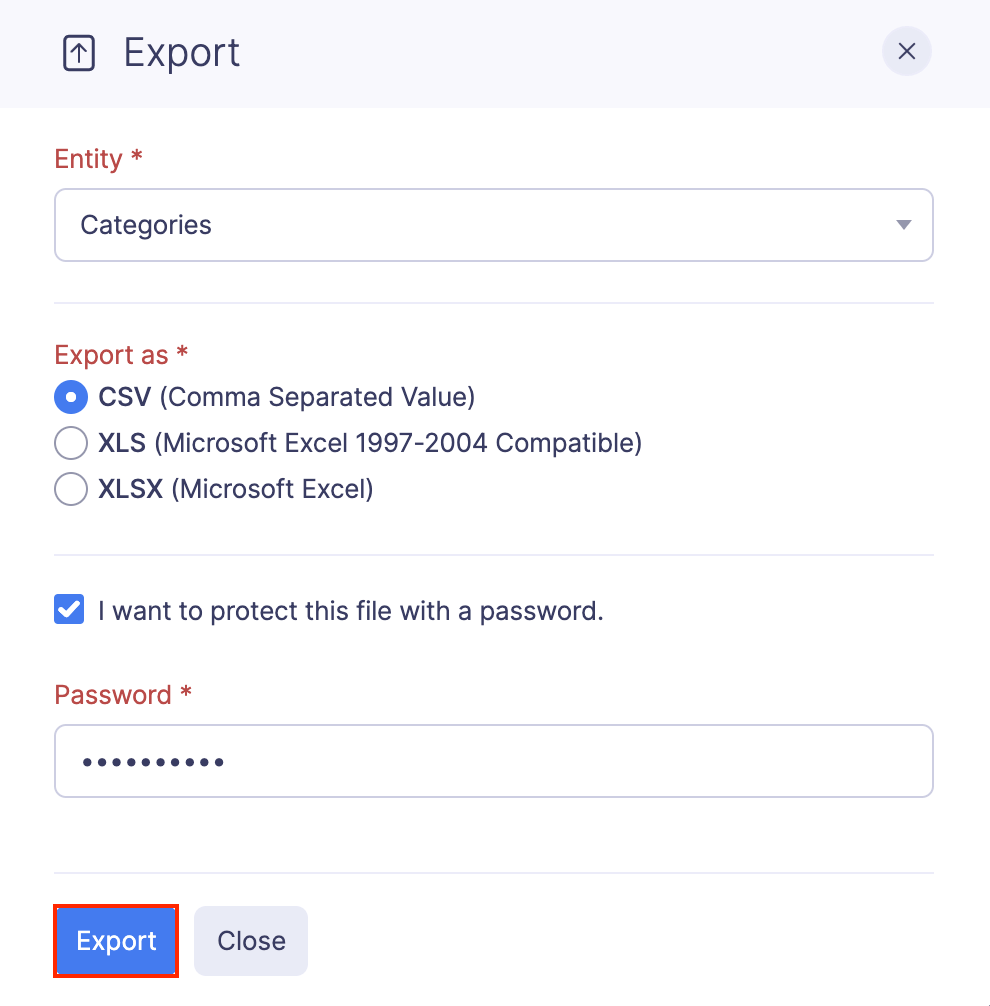
Export Categories
If you would like to send your expense categories details to your accounting software or any other application, you can export them.
To export expense categories:
- Click Admin View.
- Go to Settings on the left sidebar.
(OR)
Click the Settings icon at the top right side.
- Navigate to Module Settings.
- Click Categories under General.
- Click the More icon at the top right corner of the page.
- Select Export Categories.
- Select the format (CSV or XLS (XLSX)) in which you want to export your categories data.
- If you want to secure the file with a password, mark the I want to protect this file with a password option and provide a password in the Password field.
- Click Export to download the data to your computer.