
Online Reimbursements via ICICI Bank
Reimburse your employees' expense reports from within Zoho Expense, using the ICICI Bank integration. Reimburse your employees online and help them receive timely repayments for the business expenses they’ve incurred.
Note: Reimbursements via ICICI Bank can be done only in the Indian edition of Zoho Expense.
How Do Online Reimbursements via ICICI Bank Work
To reimburse your employees via ICICI Bank, set up your ICICI Bank account in Zoho Expense by entering your credentials such as Corp ID and User ID. Once you save these credentials in Zoho Expense, you can approve the integration request by logging in to the ICICI CIB portal. After this is done, employees can add their bank accounts to which they can receive their reimbursements.
Now, you are all set to make reimbursements via ICICI. The time taken for employees to receive their reimbursements depends on the type of transaction chosen. For example: If the Finance team has chosen IMPS, the employee will receive their reimbursement instantaneously. If they’ve chosen NEFT, the reimbursement will reflect in the employee’s account in the next 30 minutes.
Enable Integration
To enable the integration:
- Click Admin View.
- Go to Settings on the left sidebar.
(OR)
Click the Gear icon at the top right side. - Click Online Reimbursements under Integrations.
- Go to ICICI Bank and click Set up Now.
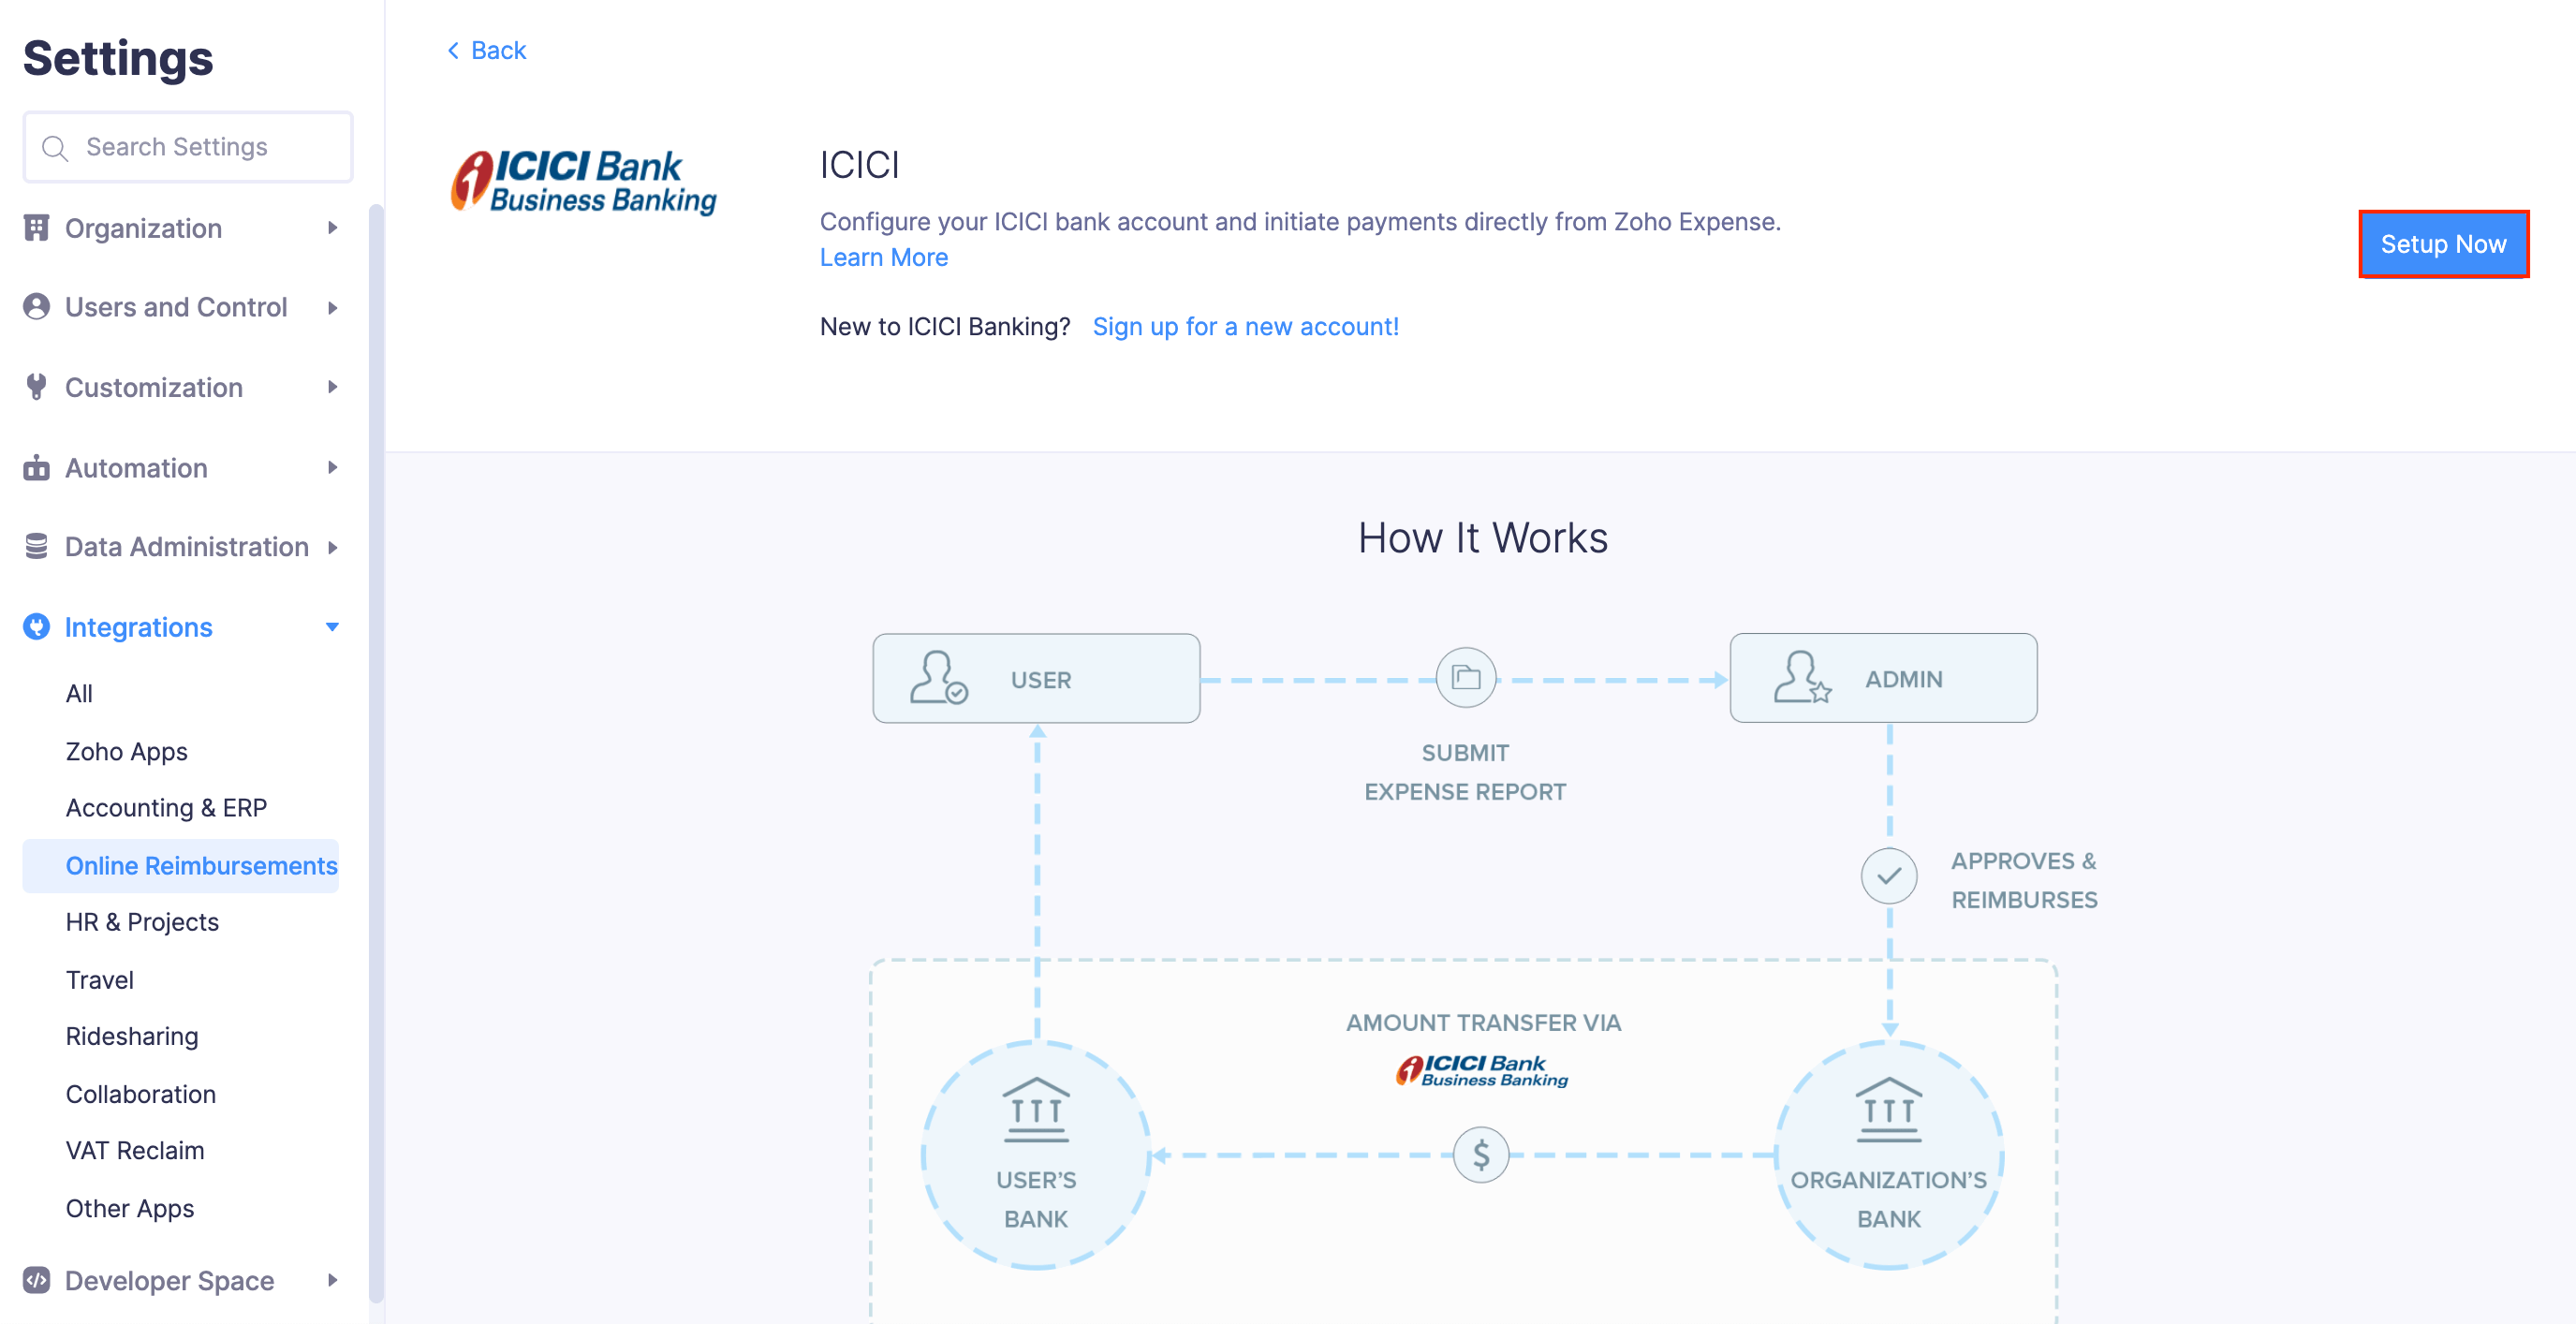
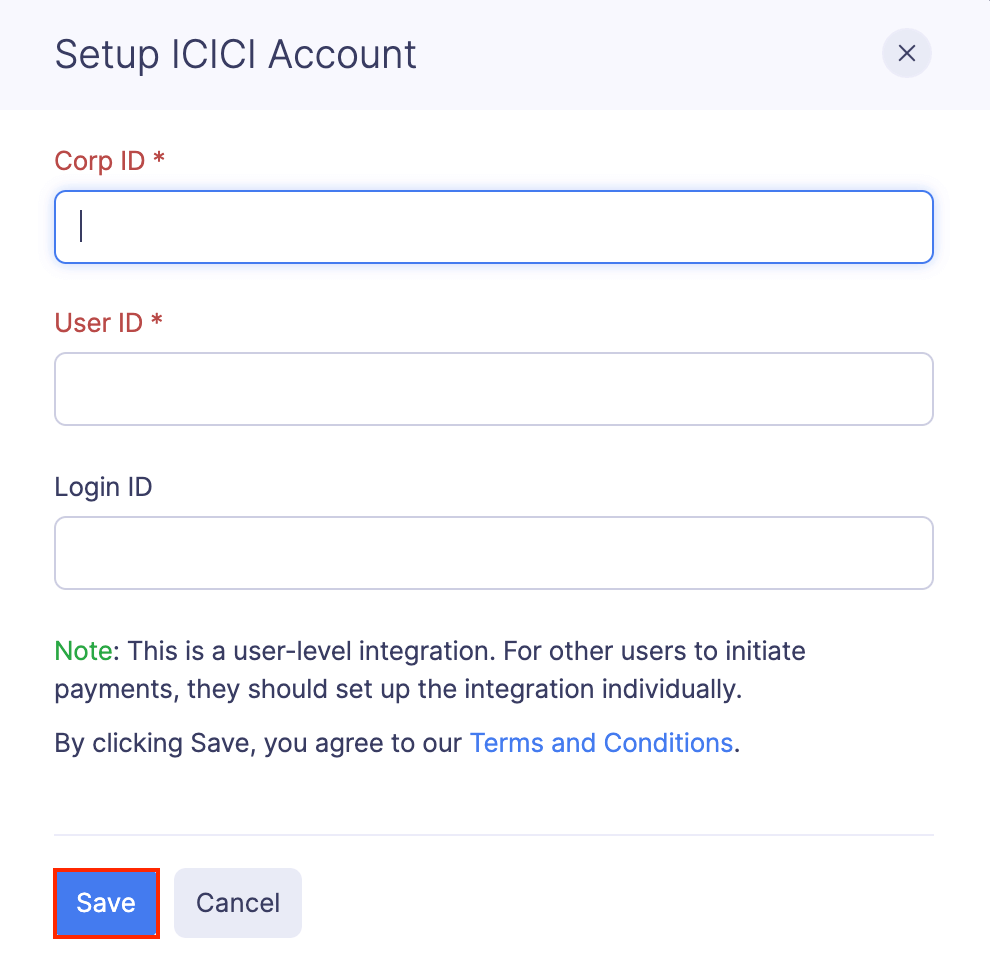
- In the pop-up that opens, enter the Corp ID and User ID of your organization’s ICICI account.
- Click Save. Once this is done, approve the integration request in your ICICI CIB portal under the Aggregator approval. Your integration will be enabled.
Note: Reimbursers who aren’t admins can also [set up their ICICI corporate account.] (/expense/kb/reimbursement/non-admin-icici-reimbursement-zoho-expense.html)
Add Employees’ Bank Accounts
Once the admin has enabled the integration, the employees can add their bank accounts. Here’s how:
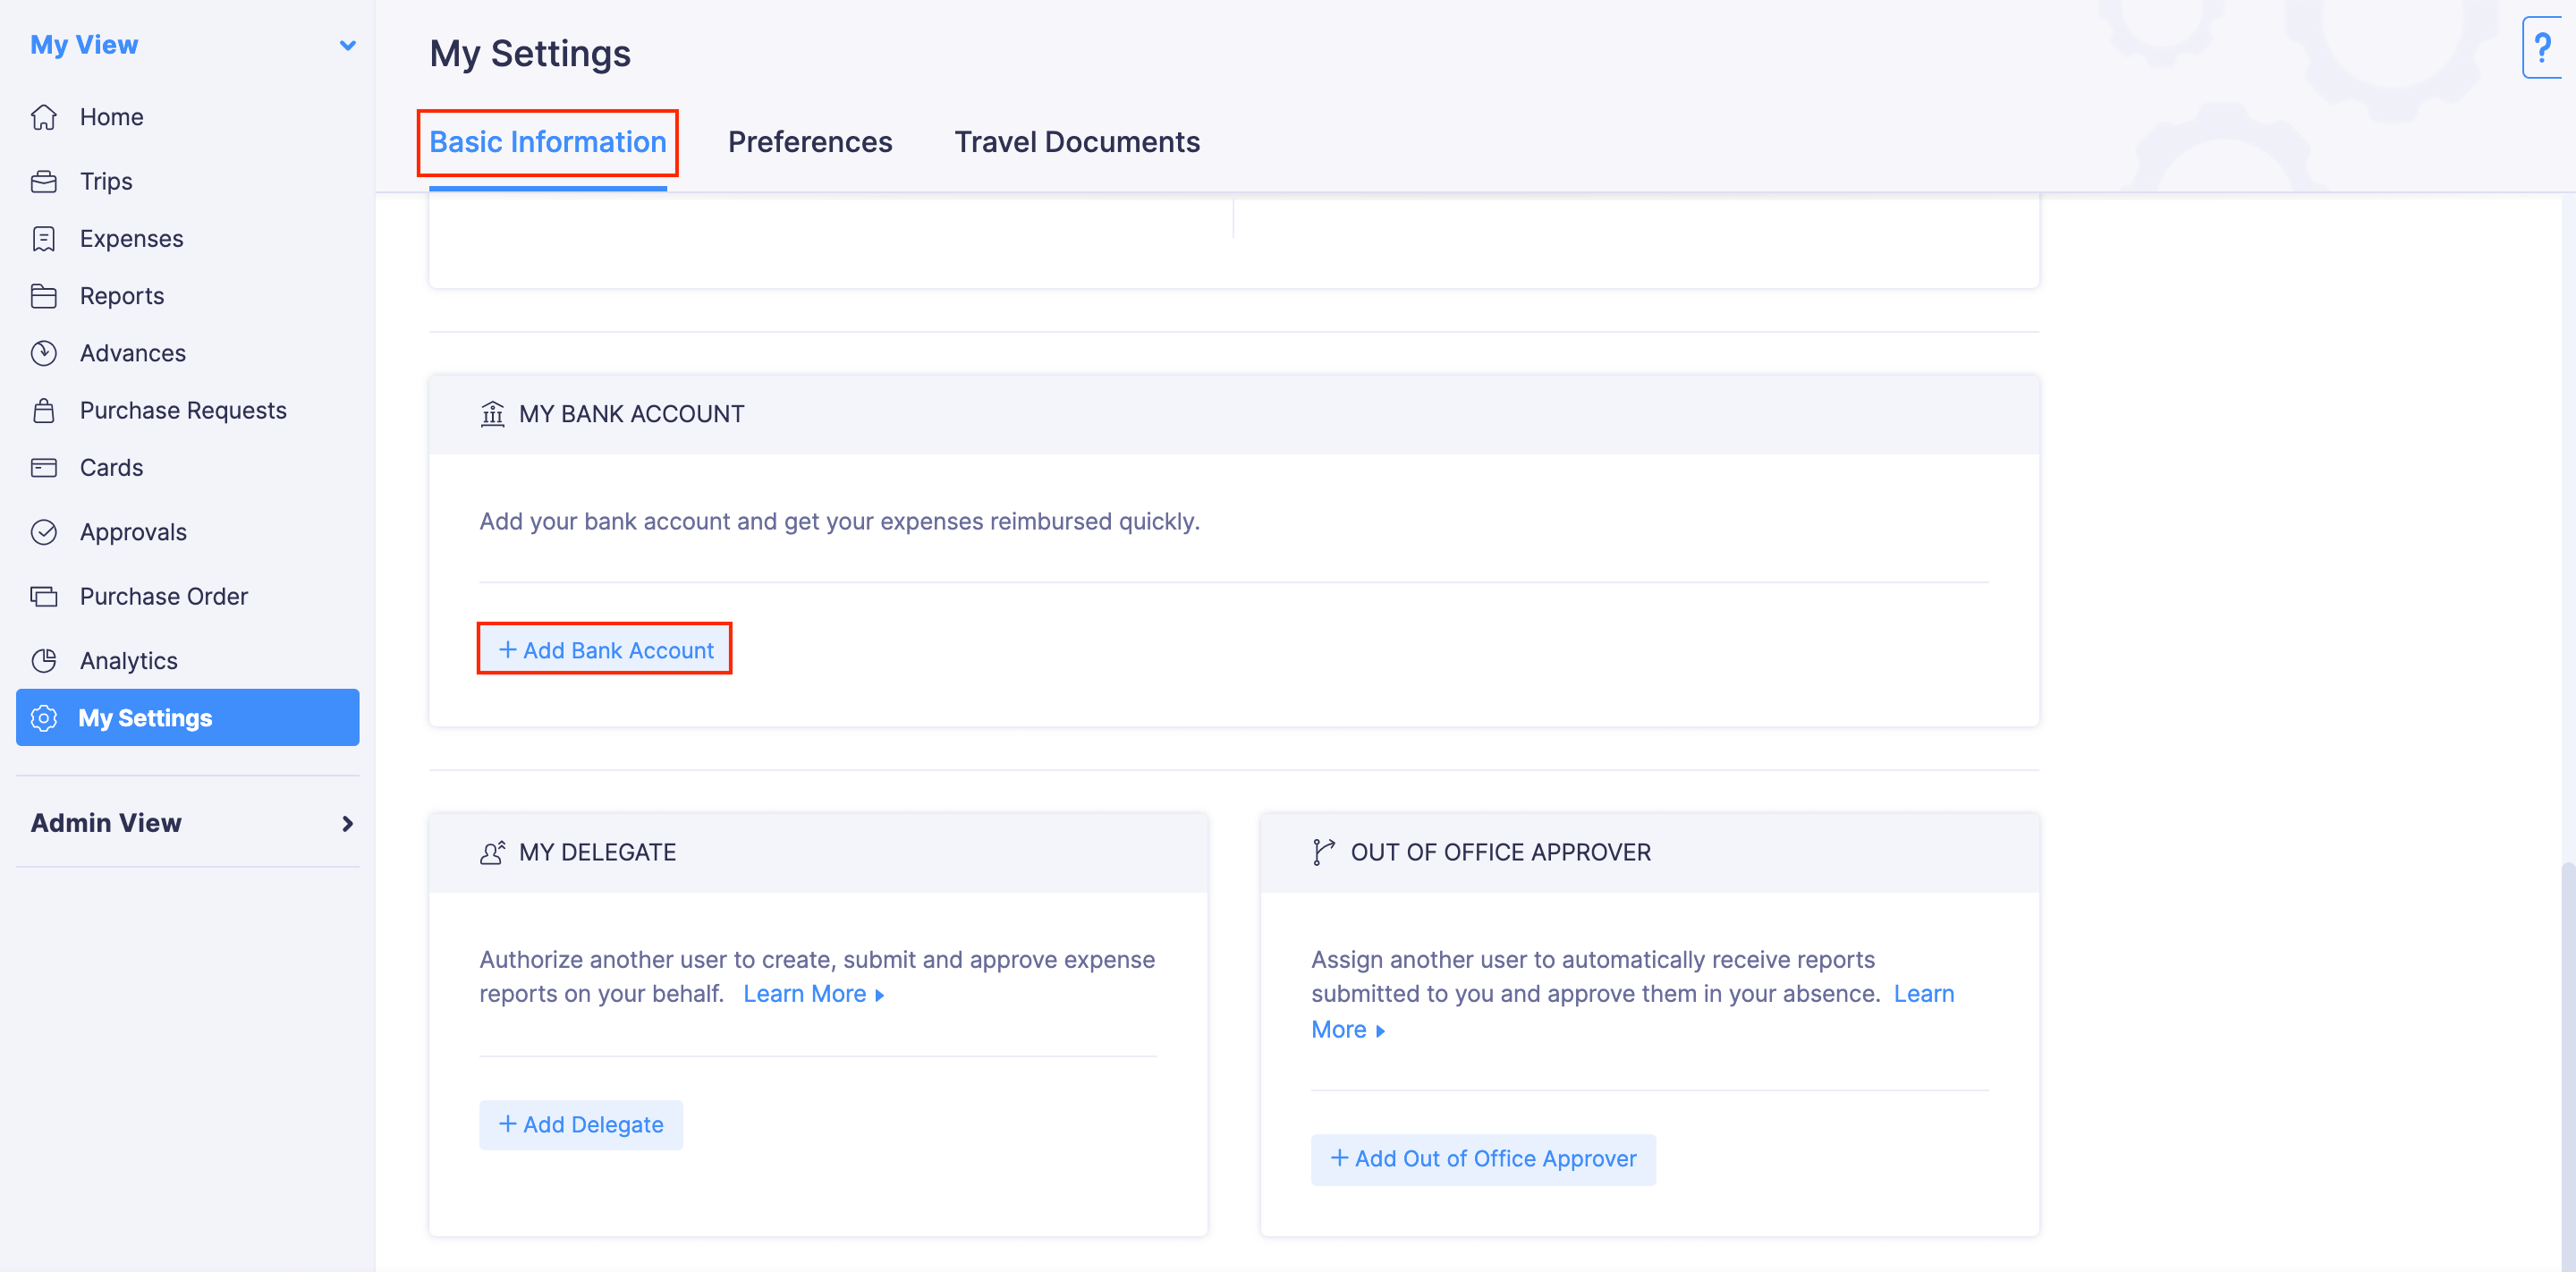
- Go to My Settings on the left sidebar under My View.
- Under the Basic Information tab, scroll down to the My Bank Account section.
- Click + Add Bank Account.
- Enter your bank details and click Save.
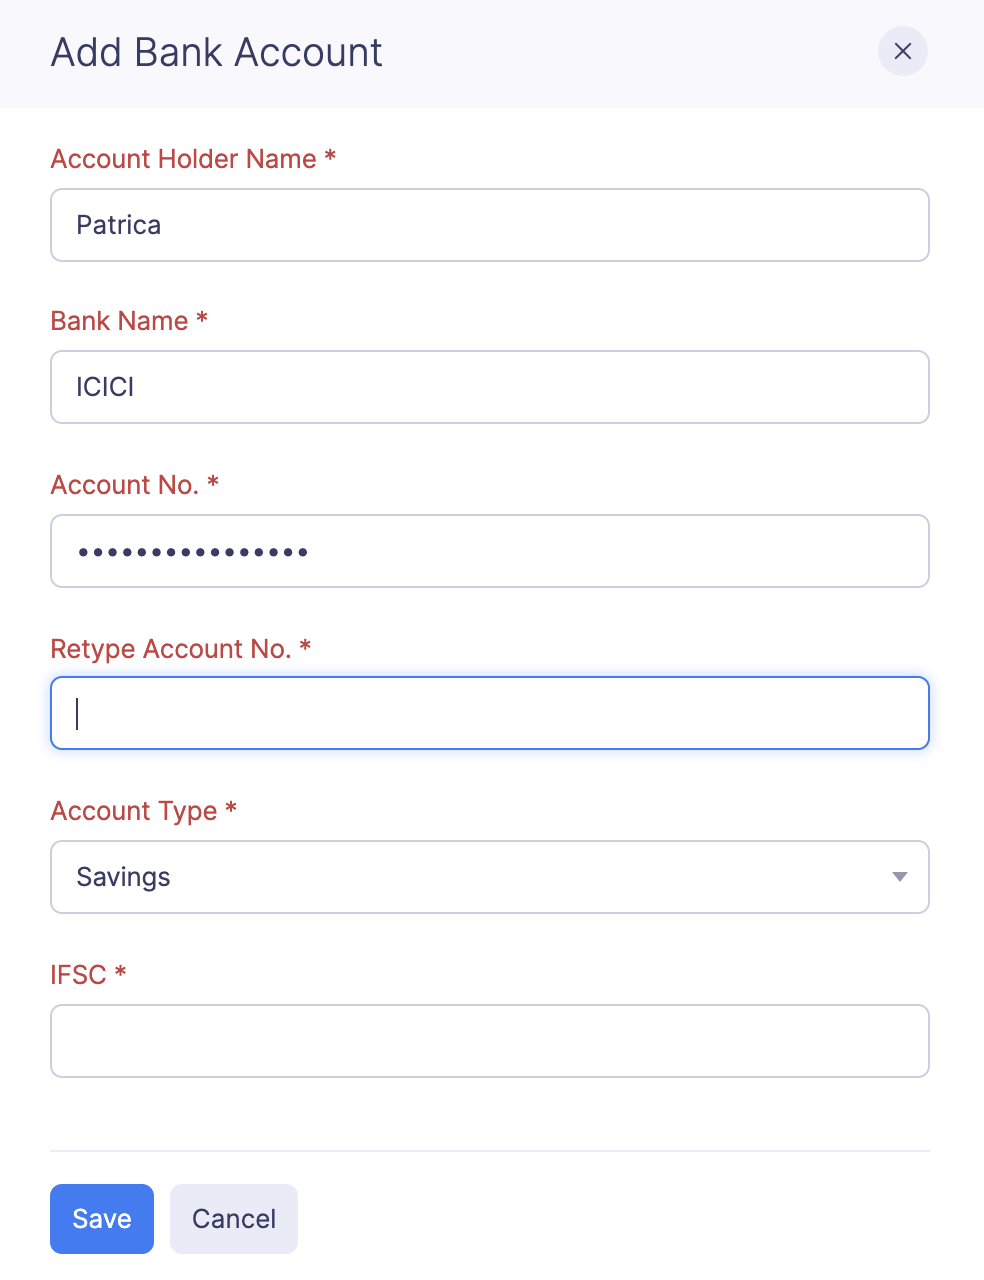
The bank account will be added and the employee will receive reimbursements to this account.
Reimburse Your Employees from Zoho Expense
After enabling the integration and adding the bank accounts, the admins will be able to reimburse the reports of the employees.
Warning:
Once you reimburse online via ICICI Bank, it cannot be undone.
To reimburse your employees:
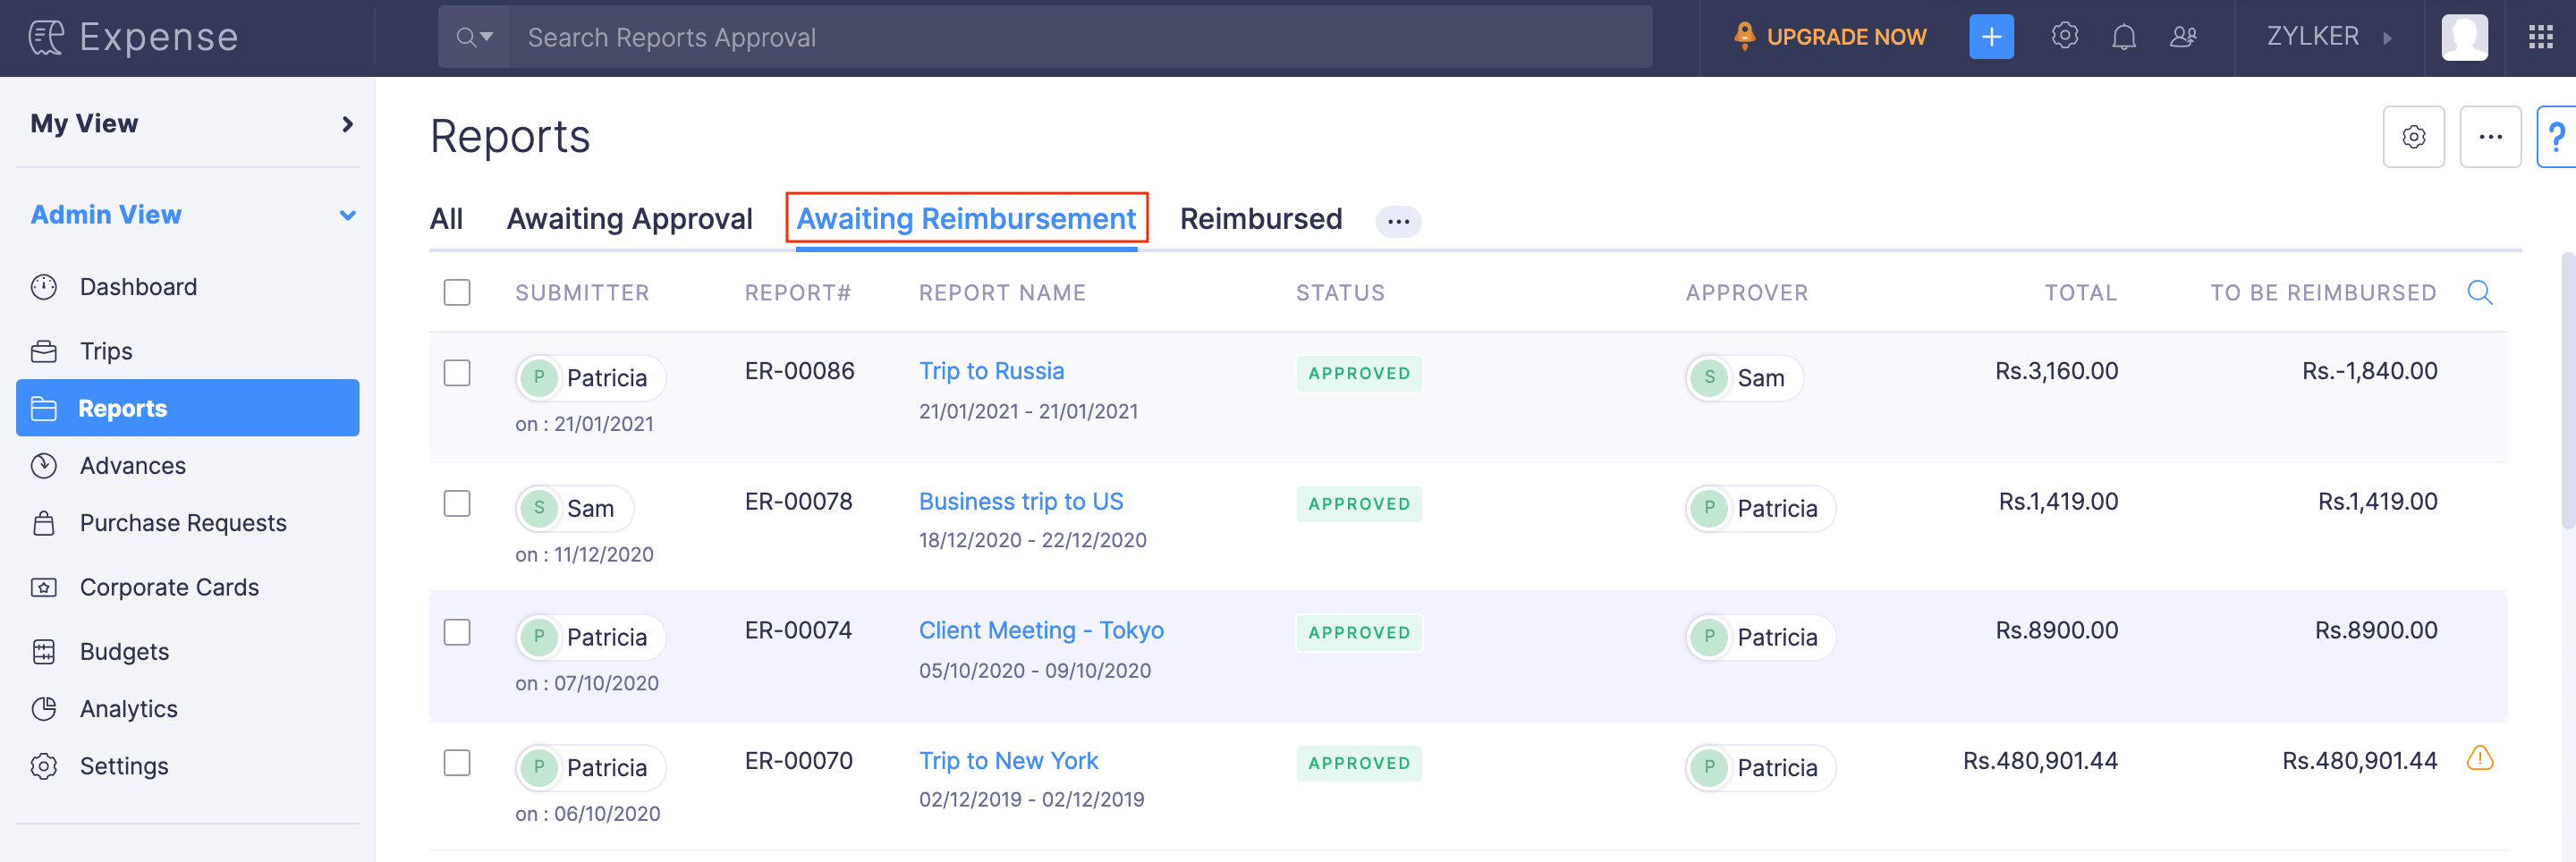
- Click Admin View.
- Go to Reports.
- Navigate to the Awaiting Reimbursement tab.
- Click the report you want to reimburse.
- Click the Reimburse dropdown and choose via ICICI.
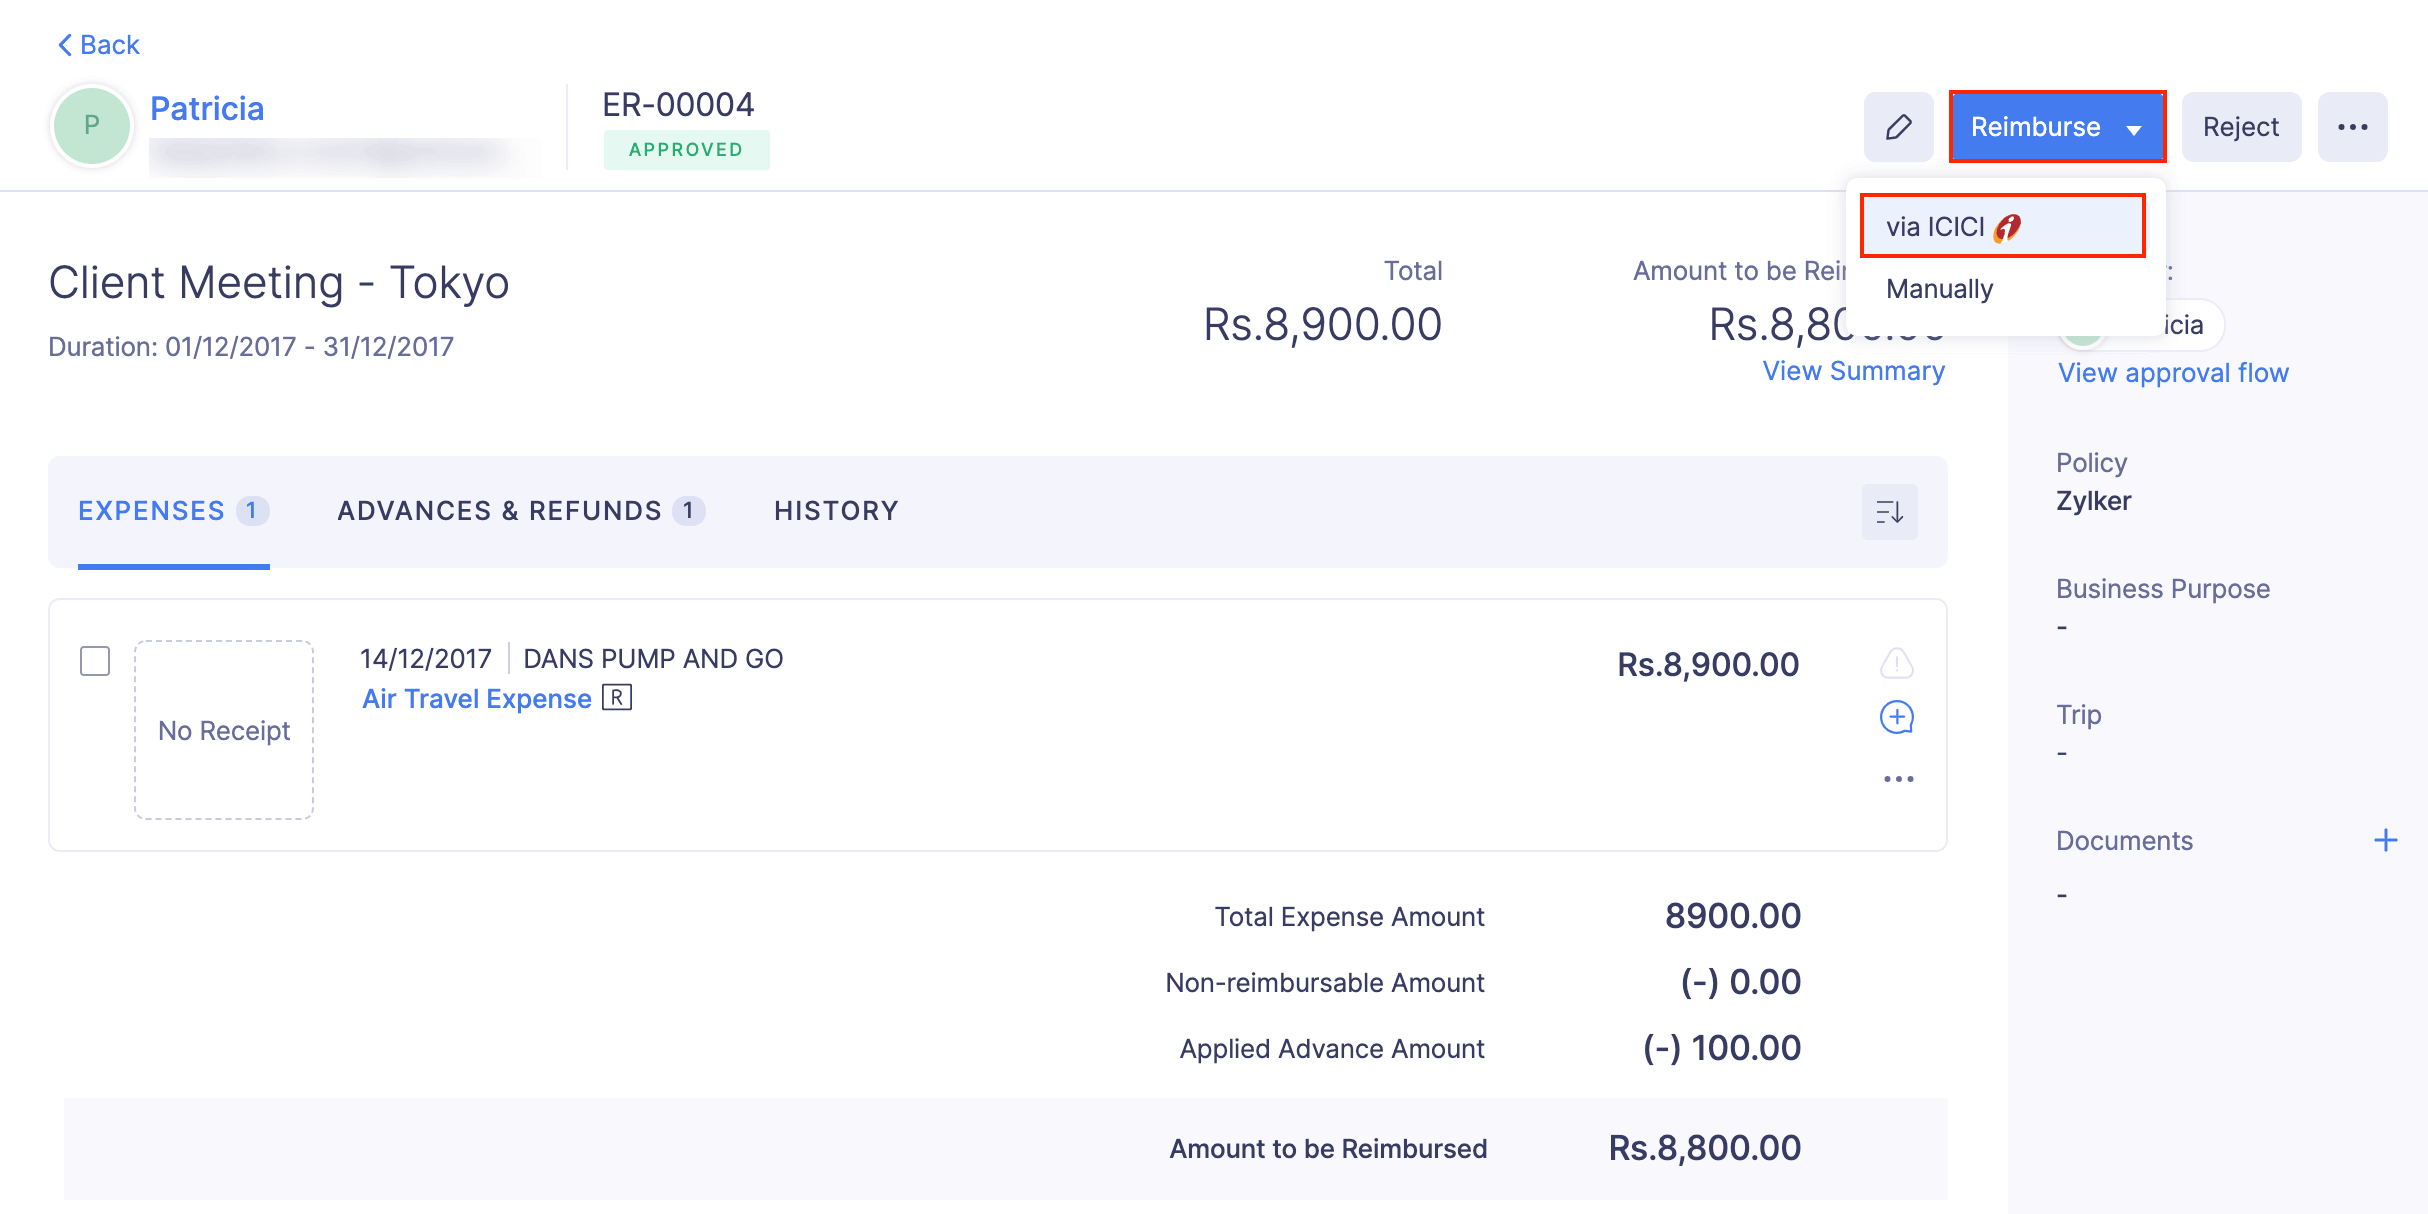
- Under the From Account dropdown, select the account from which you are reimbursing.
- Choose the Transaction Type (RTGS, NEFT, IMPS or ICICI Fund Transfer), and enter a note regarding the reimbursement, if required. If you’ve chosen NEFT, the amount will reflect in the employee’s account within the next 30 minutes. If you choose IMPS, ICICI Fund Transfer or RTGS, the funds will be transferred instantly. However, the reimbursements initiated via NEFT & RTGS during bank holidays and non-working hours of the bank have some limitations and may take longer than usual to reflect in the user’s account.
- Click Reimburse.
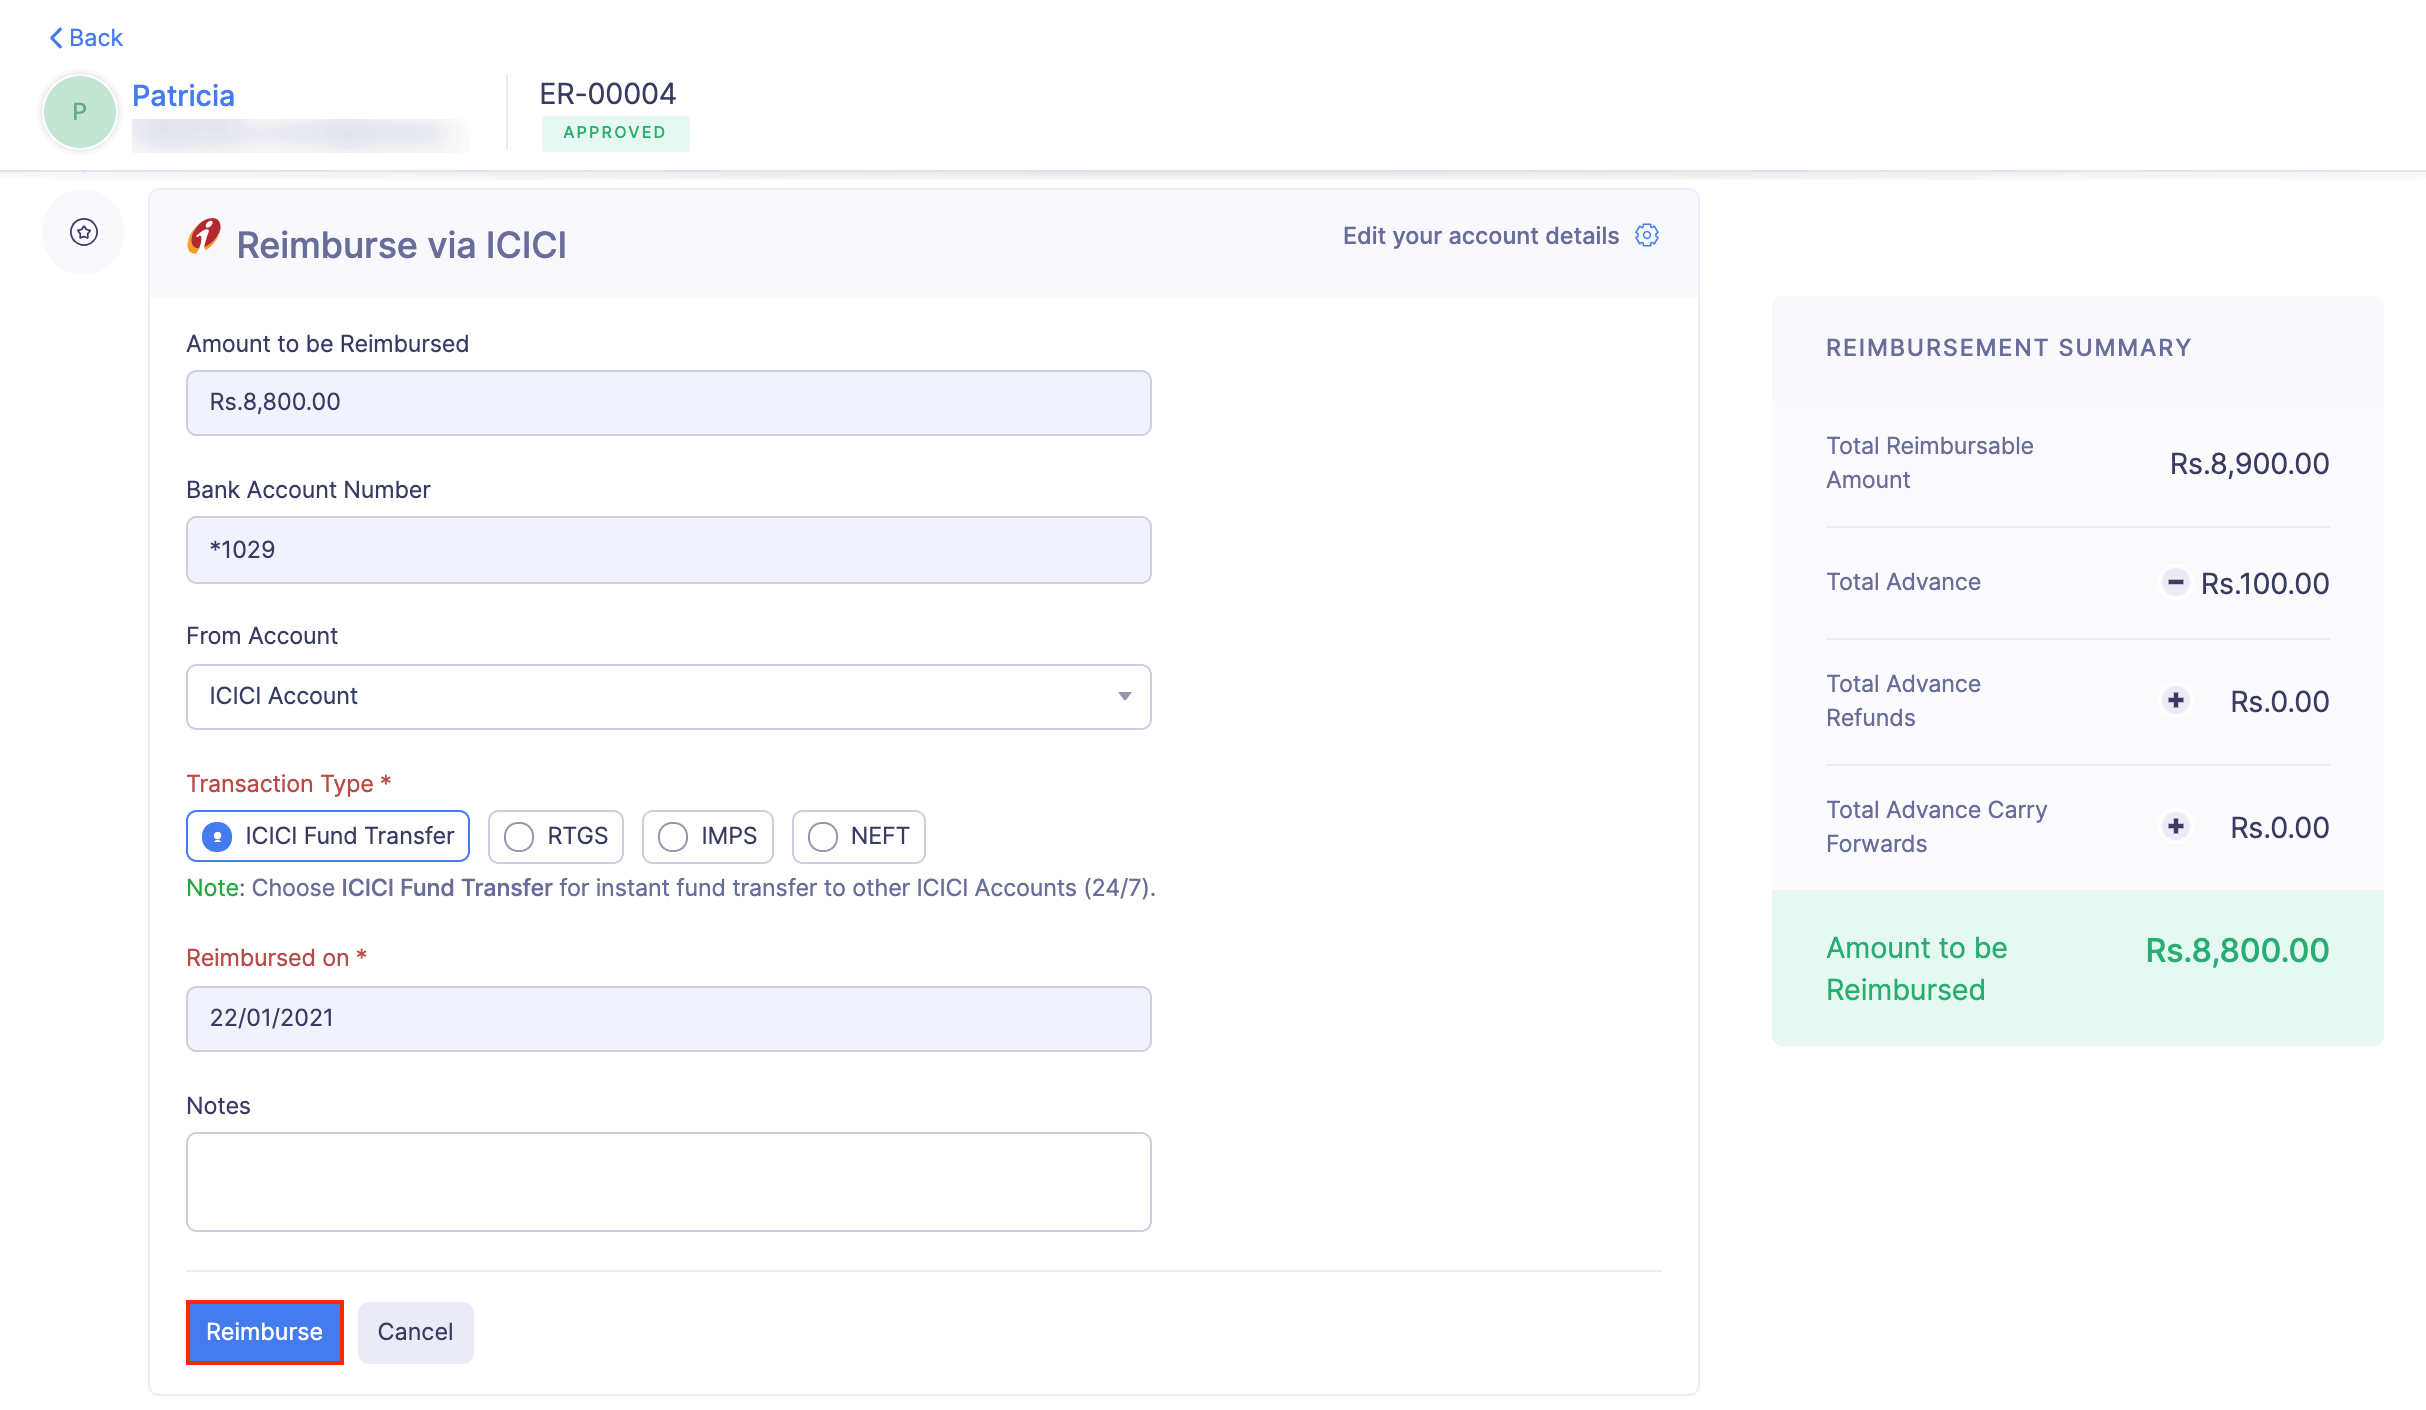
The reimbursement will be reflected in the employee’s account depending upon the type of transaction you’ve chosen.