
Documents in Zoho Payroll
The documents module in Zoho Payroll is your centralised hub for efficient document management. This module helps you to streamline the handling of essential documents and organize, upload, and access critical information related to your organisation and employees.
Why Use the Documents Module?
1) Organized Document Storage
Easily categorise and store documents in either Organization Folders or Employee Folders, tailored to your organizational structure and privacy requirements.
2) Enhanced Privacy and Security
Customize who can see and access documents, ensuring that private information stays safe and is only shared with authorized people.
3) Time-Efficient Document Retrieval
Use advanced filters and easy navigation to find documents quickly, saving time for HR, admin, and management teams.
4) Comprehensive Record Keeping
Keep a record of company policies, employee contracts, performance appraisals, and more.
Let’s see how you can go about using the Documents module in Zoho Payroll.
Note: Please keep in mind the storage limit, which is set at 1GB for every 100 employees.
Create Folders
In Zoho Payroll, you can organize your documents effectively by creating folders within both the Organization and Employee folders.
To determine the appropriate folder for your document, please refer to the table below.
| Aspect | Organisation Folders | Employee Folders |
| Purpose | Documents related to the entire organization (e.g., Policies, Handbooks). | Documents specific to individual employees (e.g., Contracts, Certifications). |
| Access Control | Can be set to display for all employees in the portal or kept for internal reference. | Can be set to display only for the associated employee or kept for internal reference. |
| Visibility in Portal | Can be visible to all employees or kept internal. | Can be visible only to the specific associated employee or kept internal. |
| Filtering Options | Can filter documents based on employee type (active or exited). | Can filter documents based on specific employees. |
| Examples | Employee Handbooks, Company Policies. | Employee Contracts, Performance Reviews, Certification Documents, payslips, Form 16, payslips, TDS, HRA forms. |
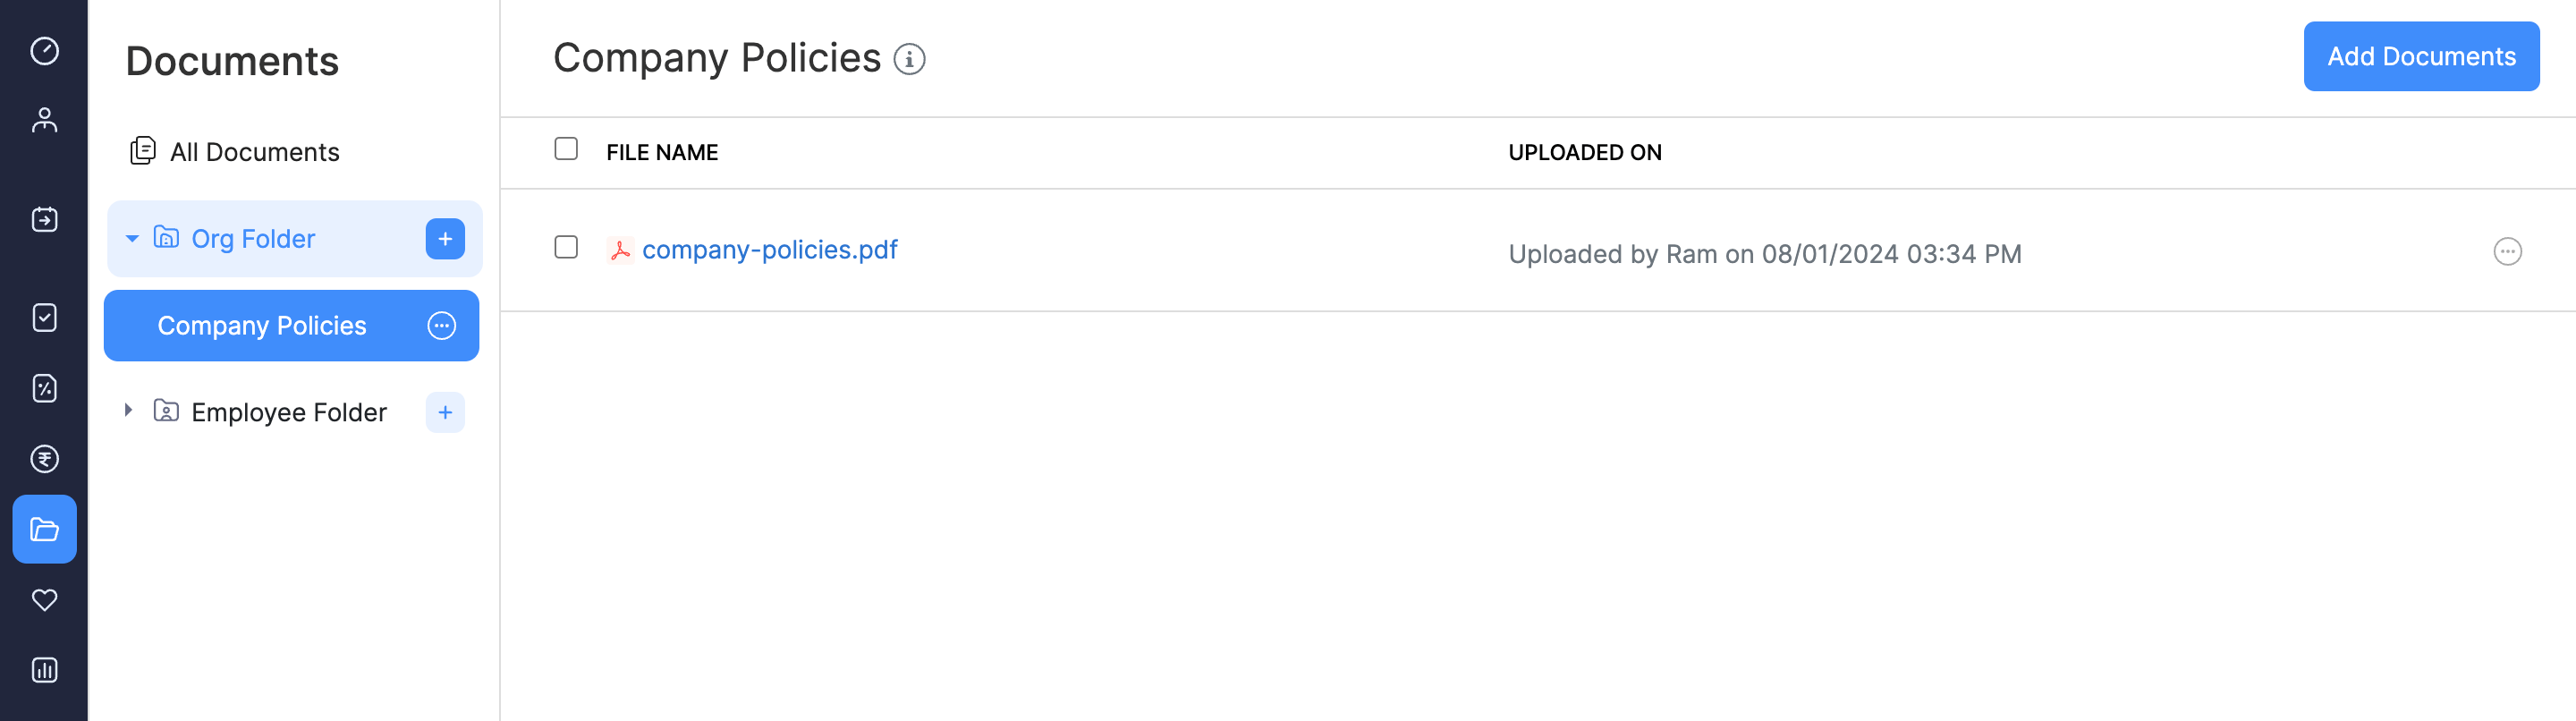
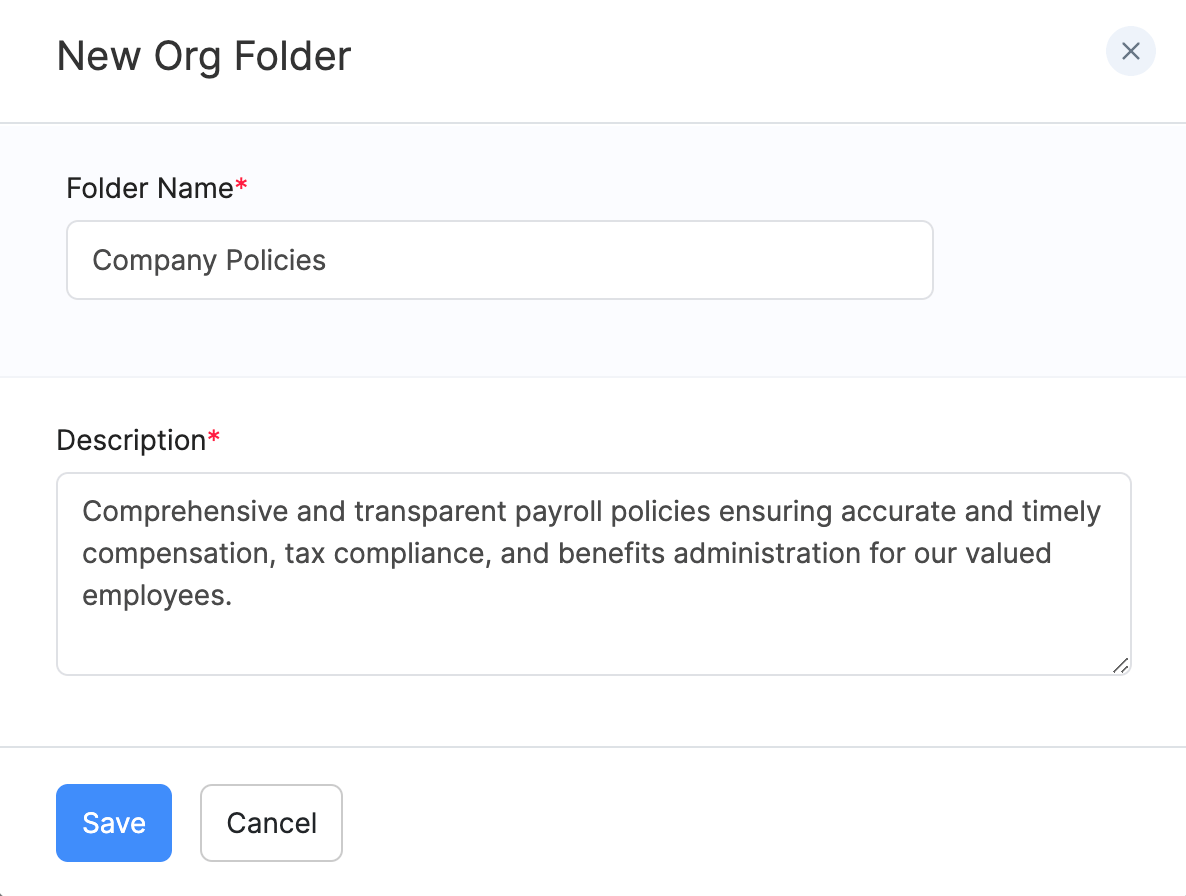
Create Organisation Folders
You will have to create an organisation folder to be able to upload your organisation documents.
- Go to Documents on the left sidebar.
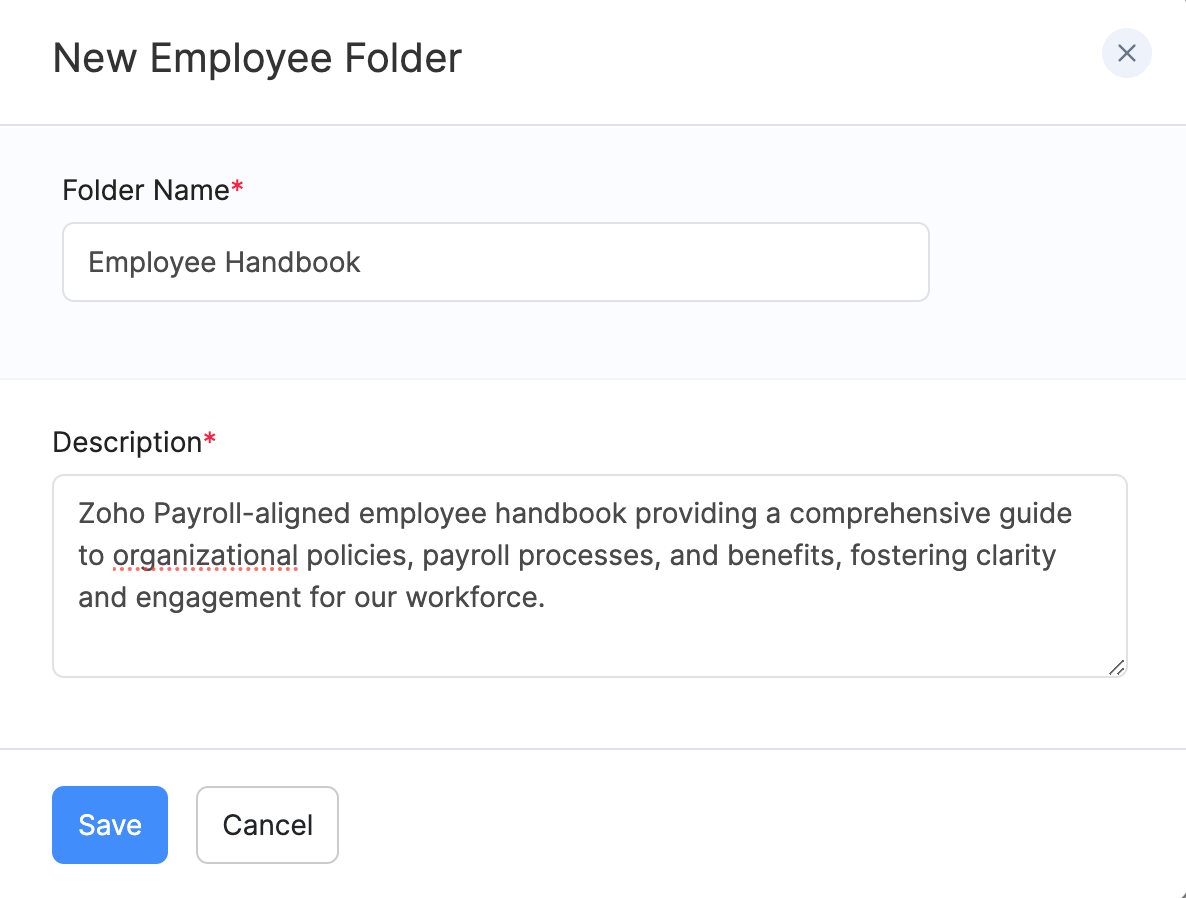
- Click the + icon next to the Org Folder in the left pane.
- Enter the folder name and the description.
- Click Save.
You can create multiple such organisation folders and add documents to them. You can edit and delete these folders by clicking the edit or trash icon.
Note: You cannot delete the folder before you delete the documents associated to them.
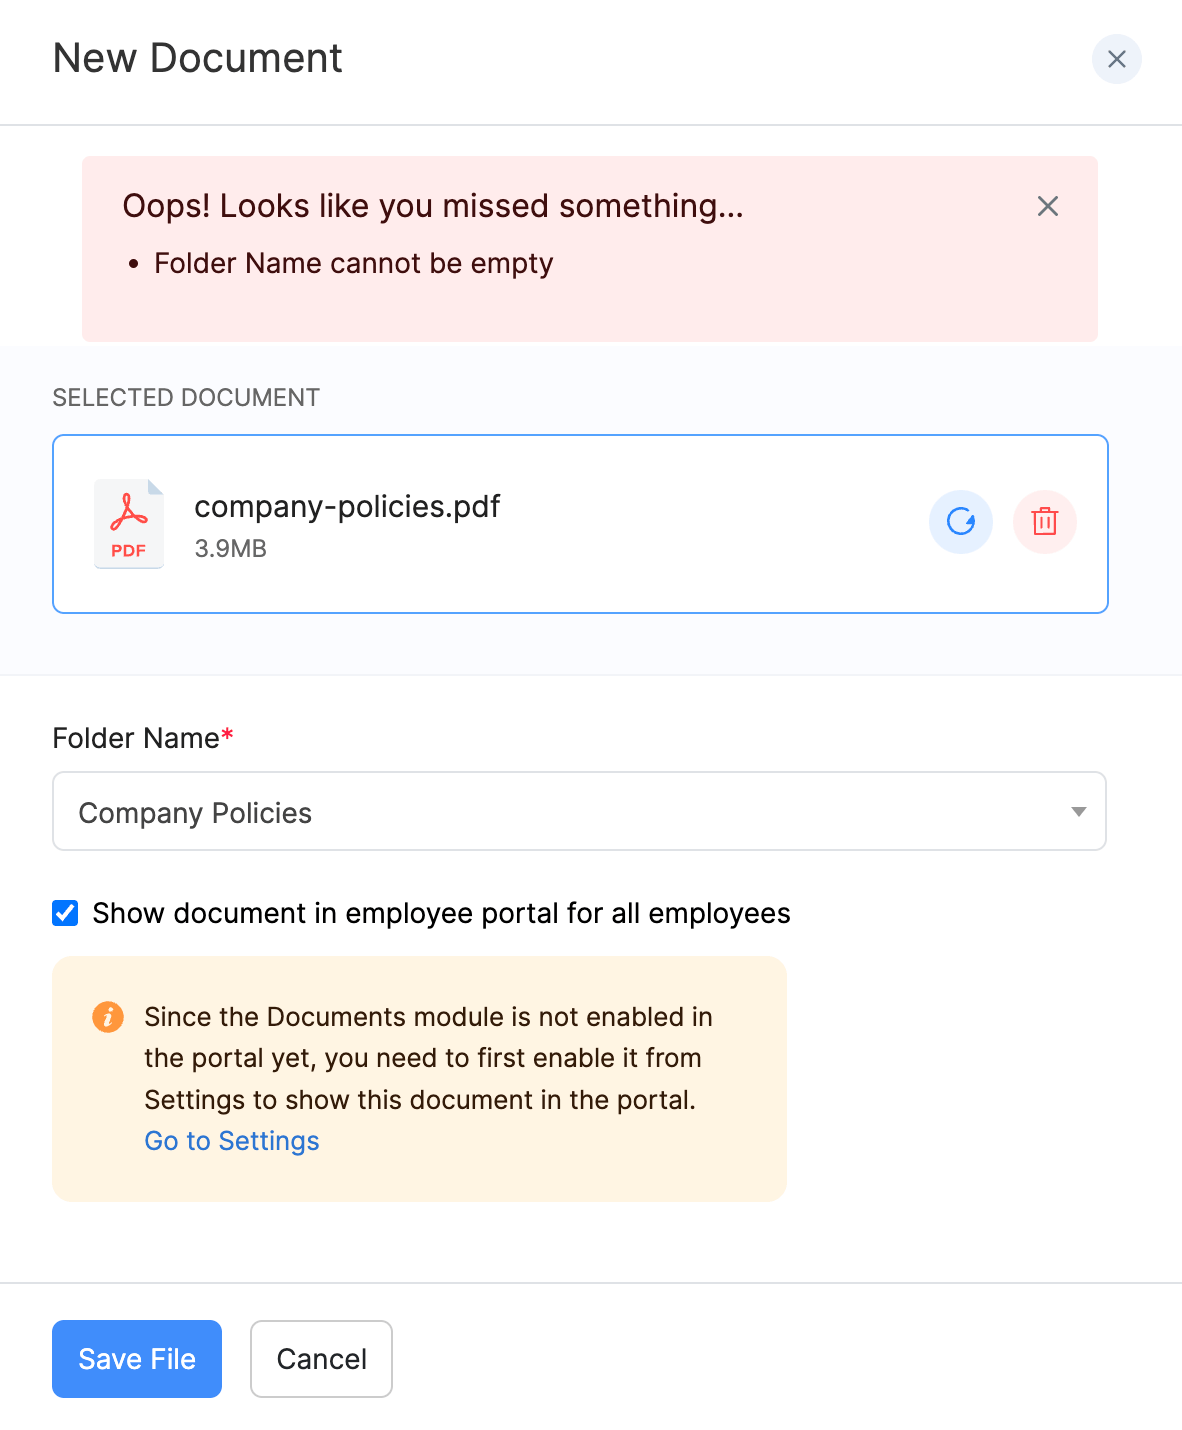
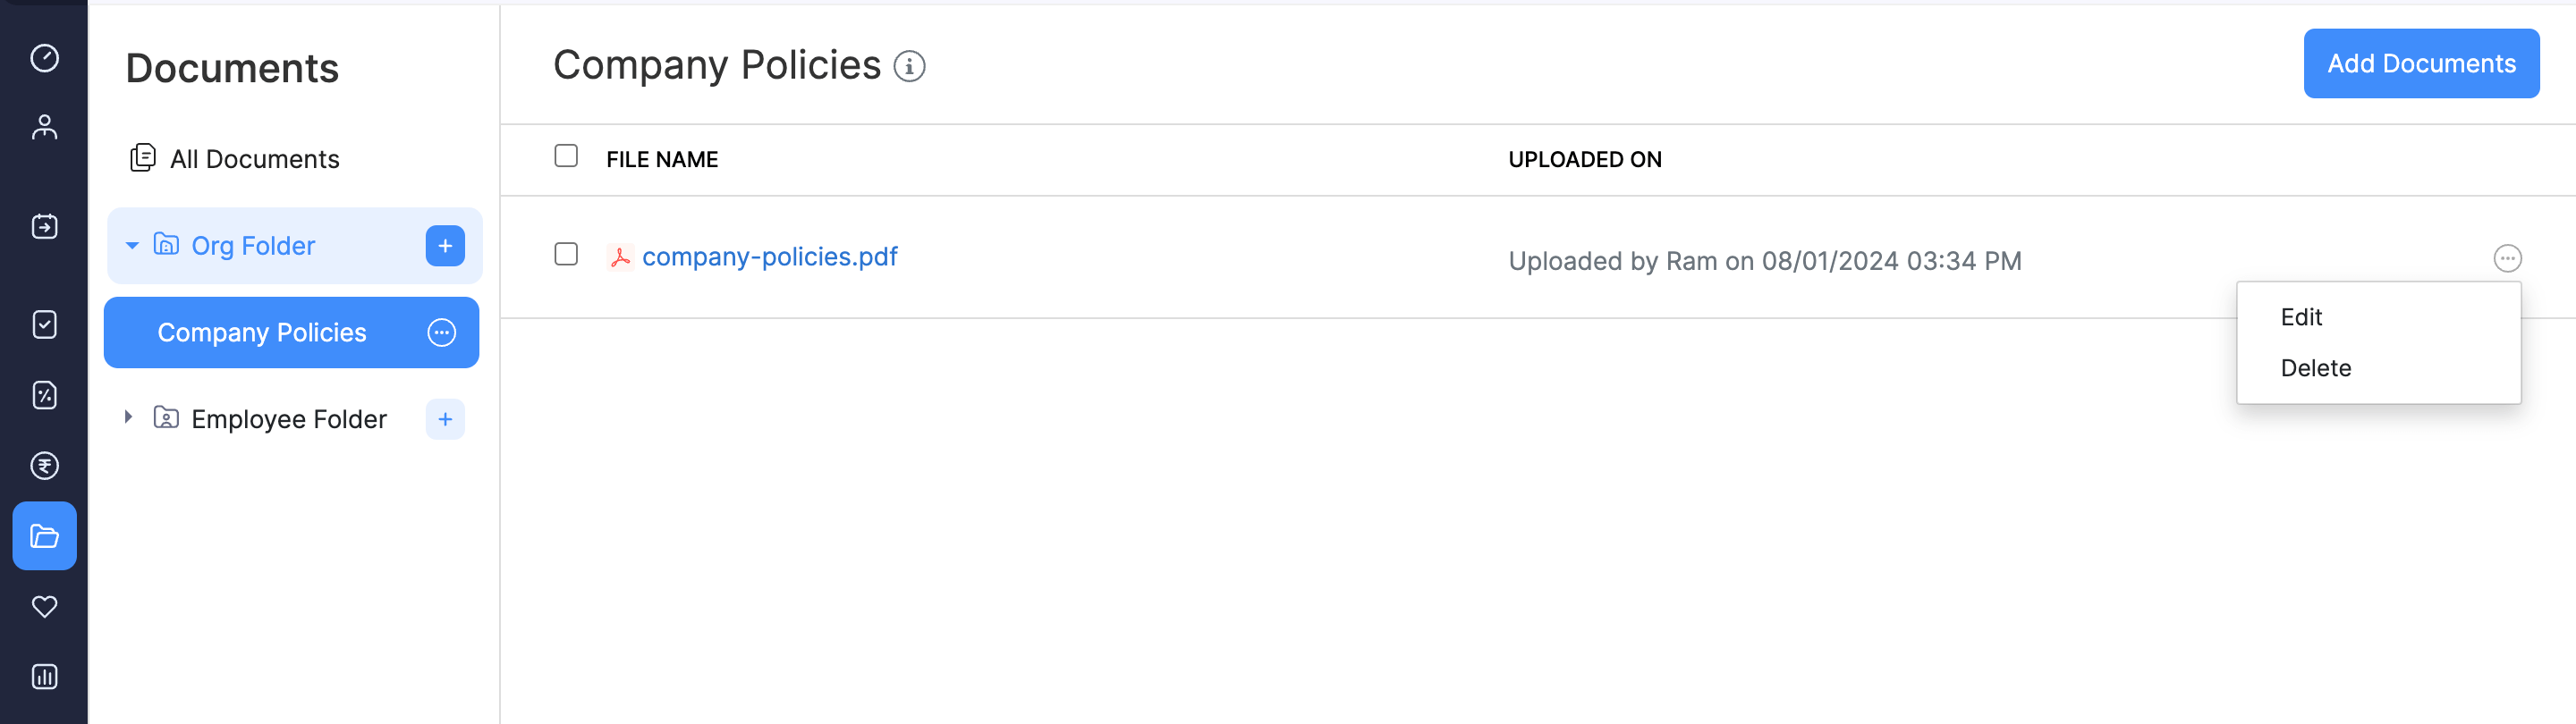
Upload Organisation Documents
Once you’ve created an organisation folder, you can add documents to them. Here’s how you can do it:
- Go to Documents on the left sidebar.
- Click Add Document on the top right corner.
- Upload or drag and drop the file you want to upload.
- Select the Folder.
Note: Ensure you’ve selected an organisation folder.
- Select if you want to show document in the employee portal for all employees.
- Click Save File.
You’ve now uploaded a file in the organisational folder of your choice. You can edit and delete these documents by clicking the edit or trash icon.
Note: Once you delete the documents, you can find them in the trash section in the lower left corner.
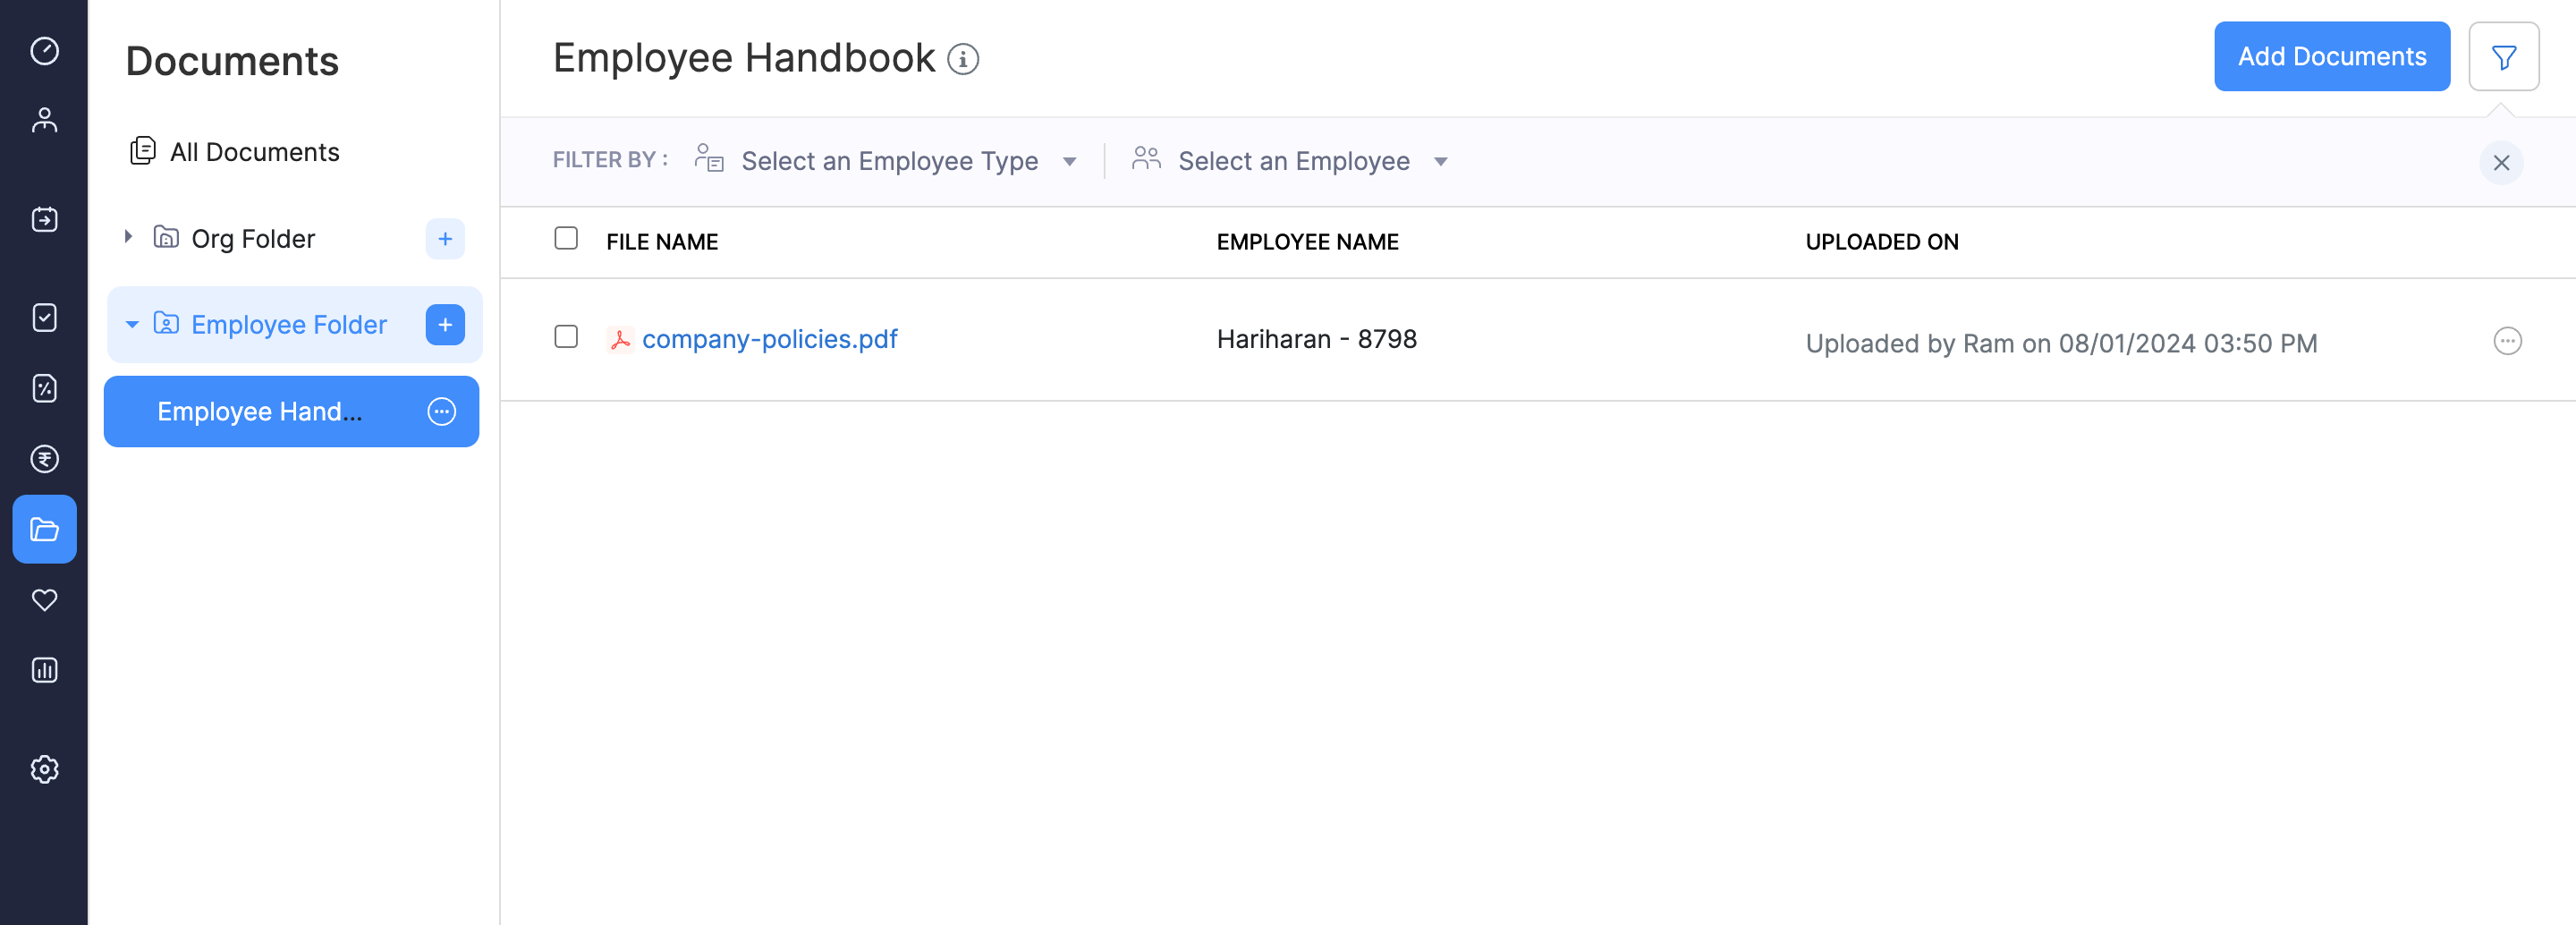
Create Employee Folders
To organize your employee-specific documents efficiently, follow these steps to create Employee Folders within Zoho Payroll.
- Go to Documents on the left sidebar.
- Click the + icon next to the Employee Folder in the left pane.
- Enter the folder name and the description.
- Click Save.
You can create multiple such employee folders and add documents to them. You can edit and delete these folders by clicking the edit or trash icon.
Note: You cannot delete the folder before you delete the documents associated to them.
Upload Employee Documents
Once you’ve created an employee folder, you can add documents to them. Here’s how you can do it:
- Go to Documents on the left sidebar.
- Click Add Document on the top right corner.
- Upload or drag and drop the file you want to upload.
Pro Tip: You can also upload a compressed folder containing employee documents to upload them in bulk. Ensure that it is a ZIP folder and that the file names of the documents match the employee IDs. Once uploaded, employees will be able to access their respective documents from the Documents tab in their Employee Portal.
- Select the Folder.
- Associate an employee to the document.
Note: Ensure you’ve selected an employee folder.
- Select if you want to show the document in the employee portal for the employee.
- Click Save File.
Note: The document will be accessible only to the employee with whom it is associated. This applies to payslips, Form 16s, bonus letters, and salary revisions.

You’ve now uploaded a file for the employee in the employee folder of your choice. You can edit and delete these documents by clicking the edit or trash icon.
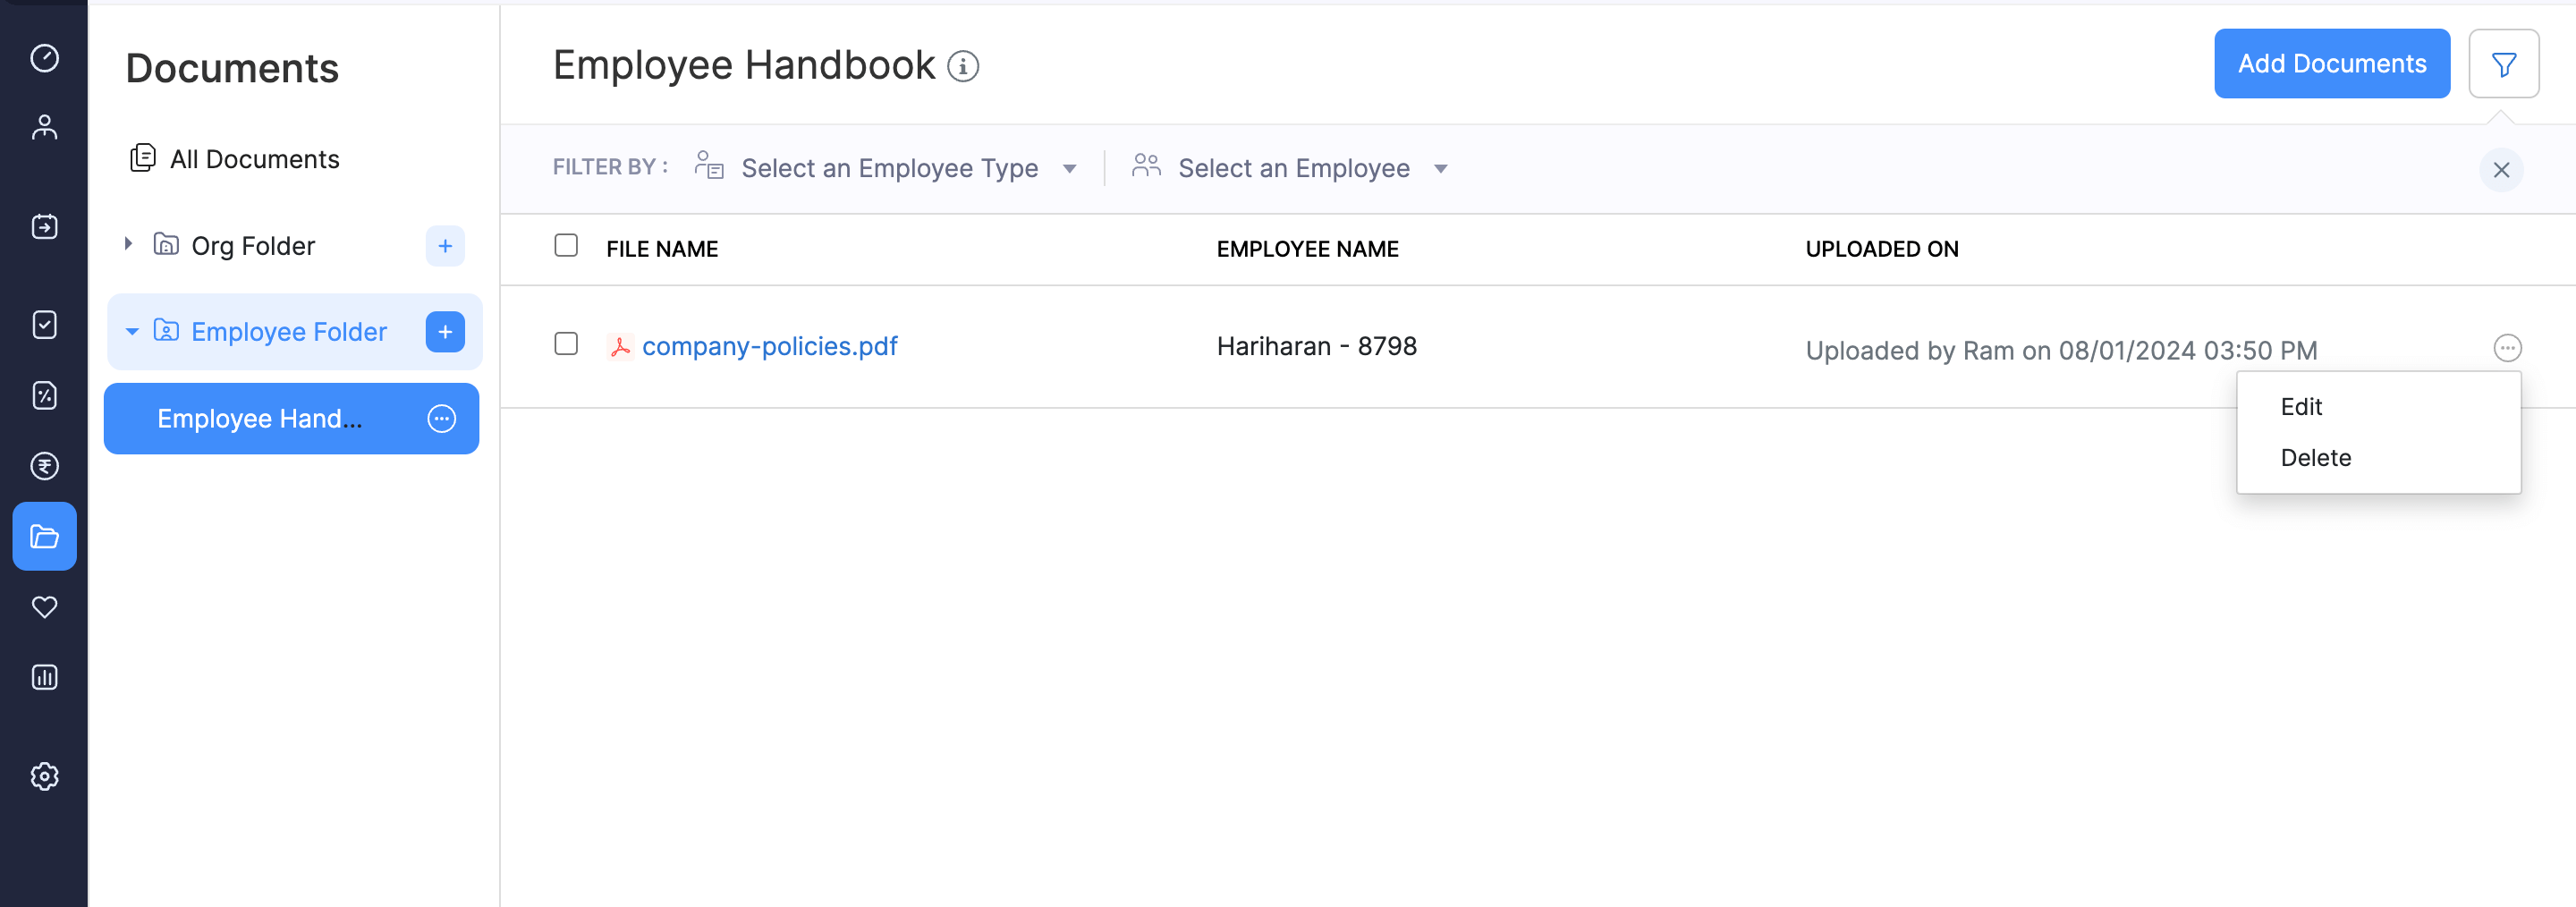
Note: Once you delete the documents, you can find them in the trash section in the lower left corner.
Filter Documents
You can filter documents based on the employee type (active or exited) for organisation documents and based on the employee for employee documents. Here’s how:
- Go to Documents on the left sidebar.
- Click the filter icon in the top right corner.
- Filter by employee type or employee.
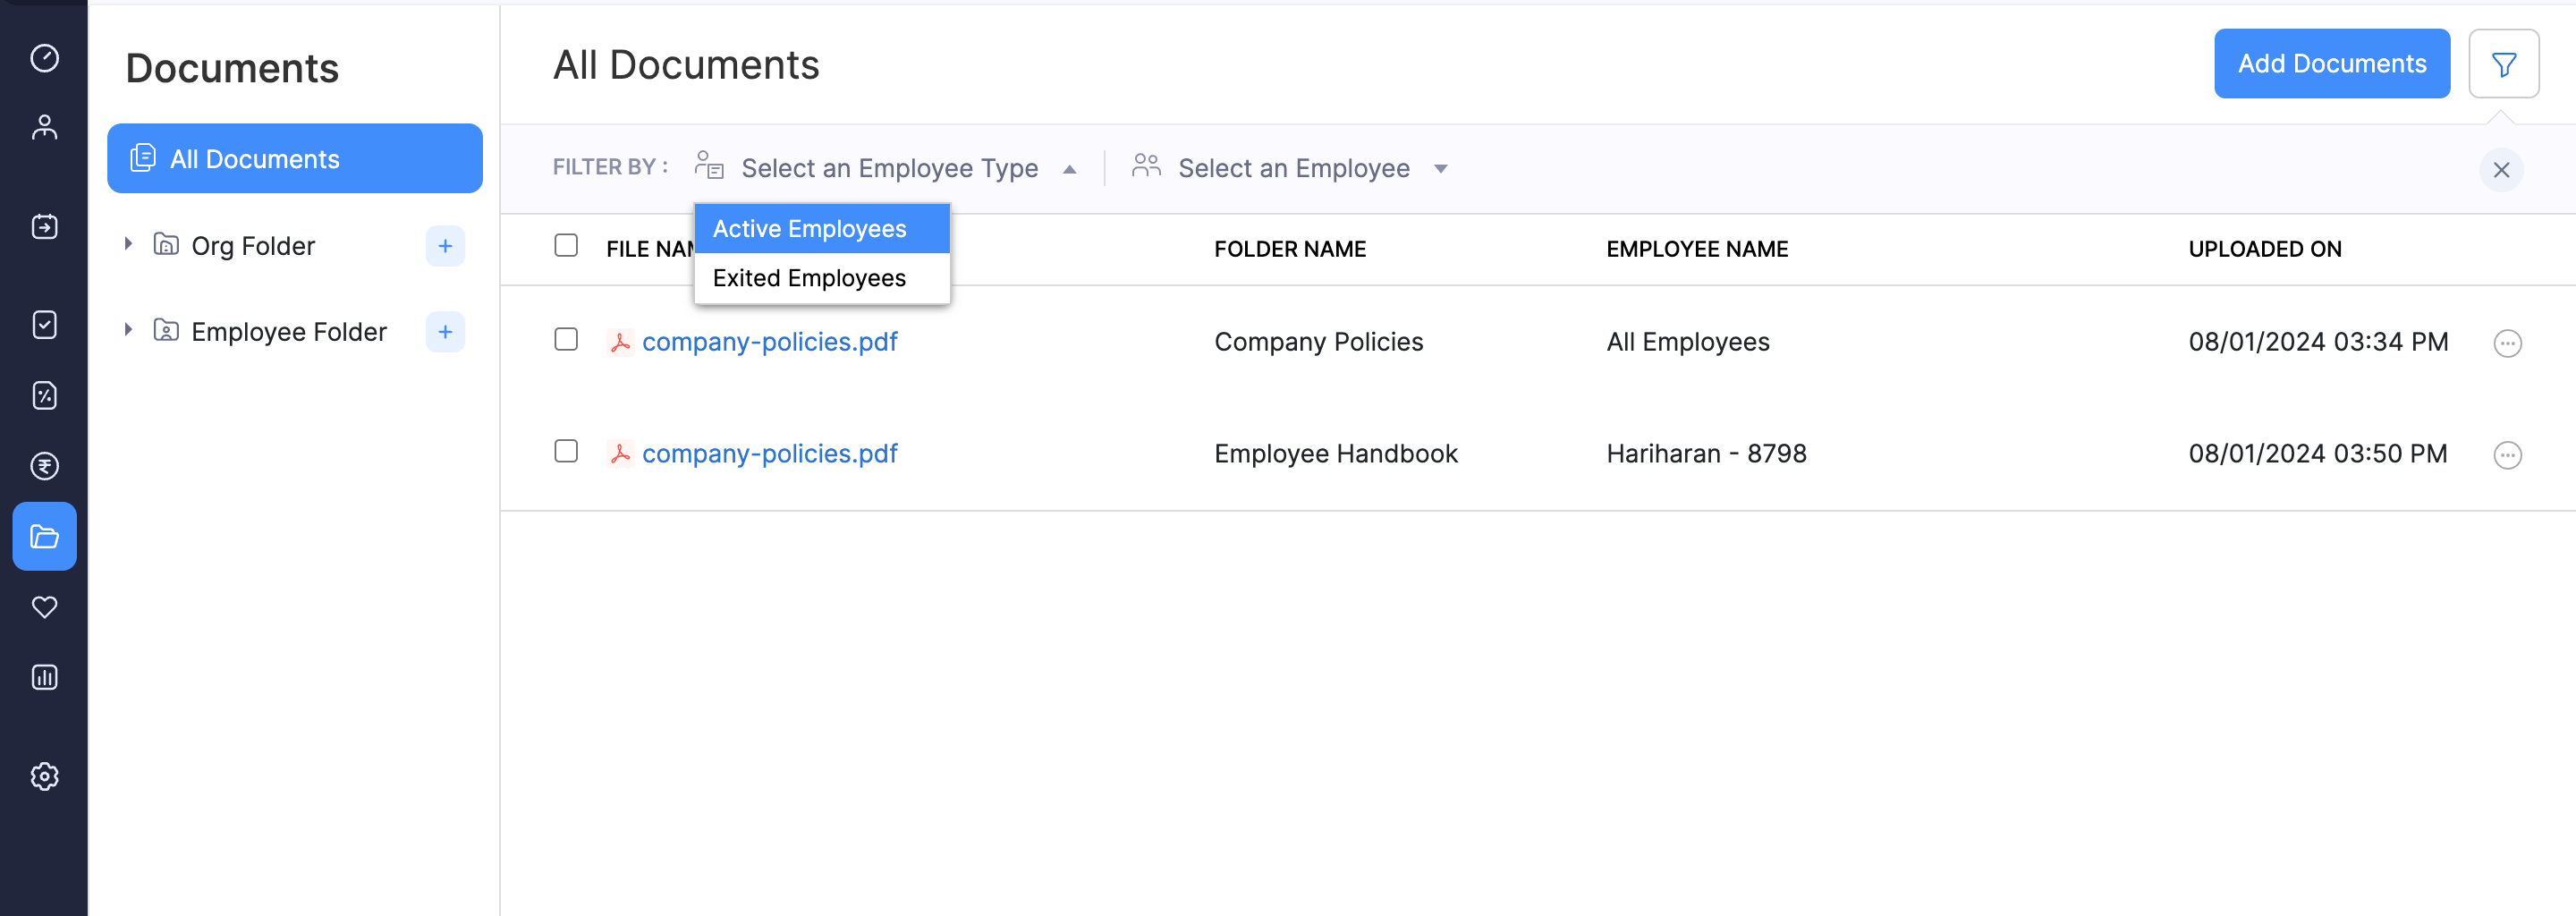
Your documents will be filtered based on your selection.
Retrieve Documents
The documents you’ve deleted can be retrieved provided you have not deleted the folder.
Here’s how:
- Go to Documents on the left sidebar.
- Click the trash section in the lower left corner.
- Select a document and click Restore.
- If you’d like to restore all documents, click Restore All.
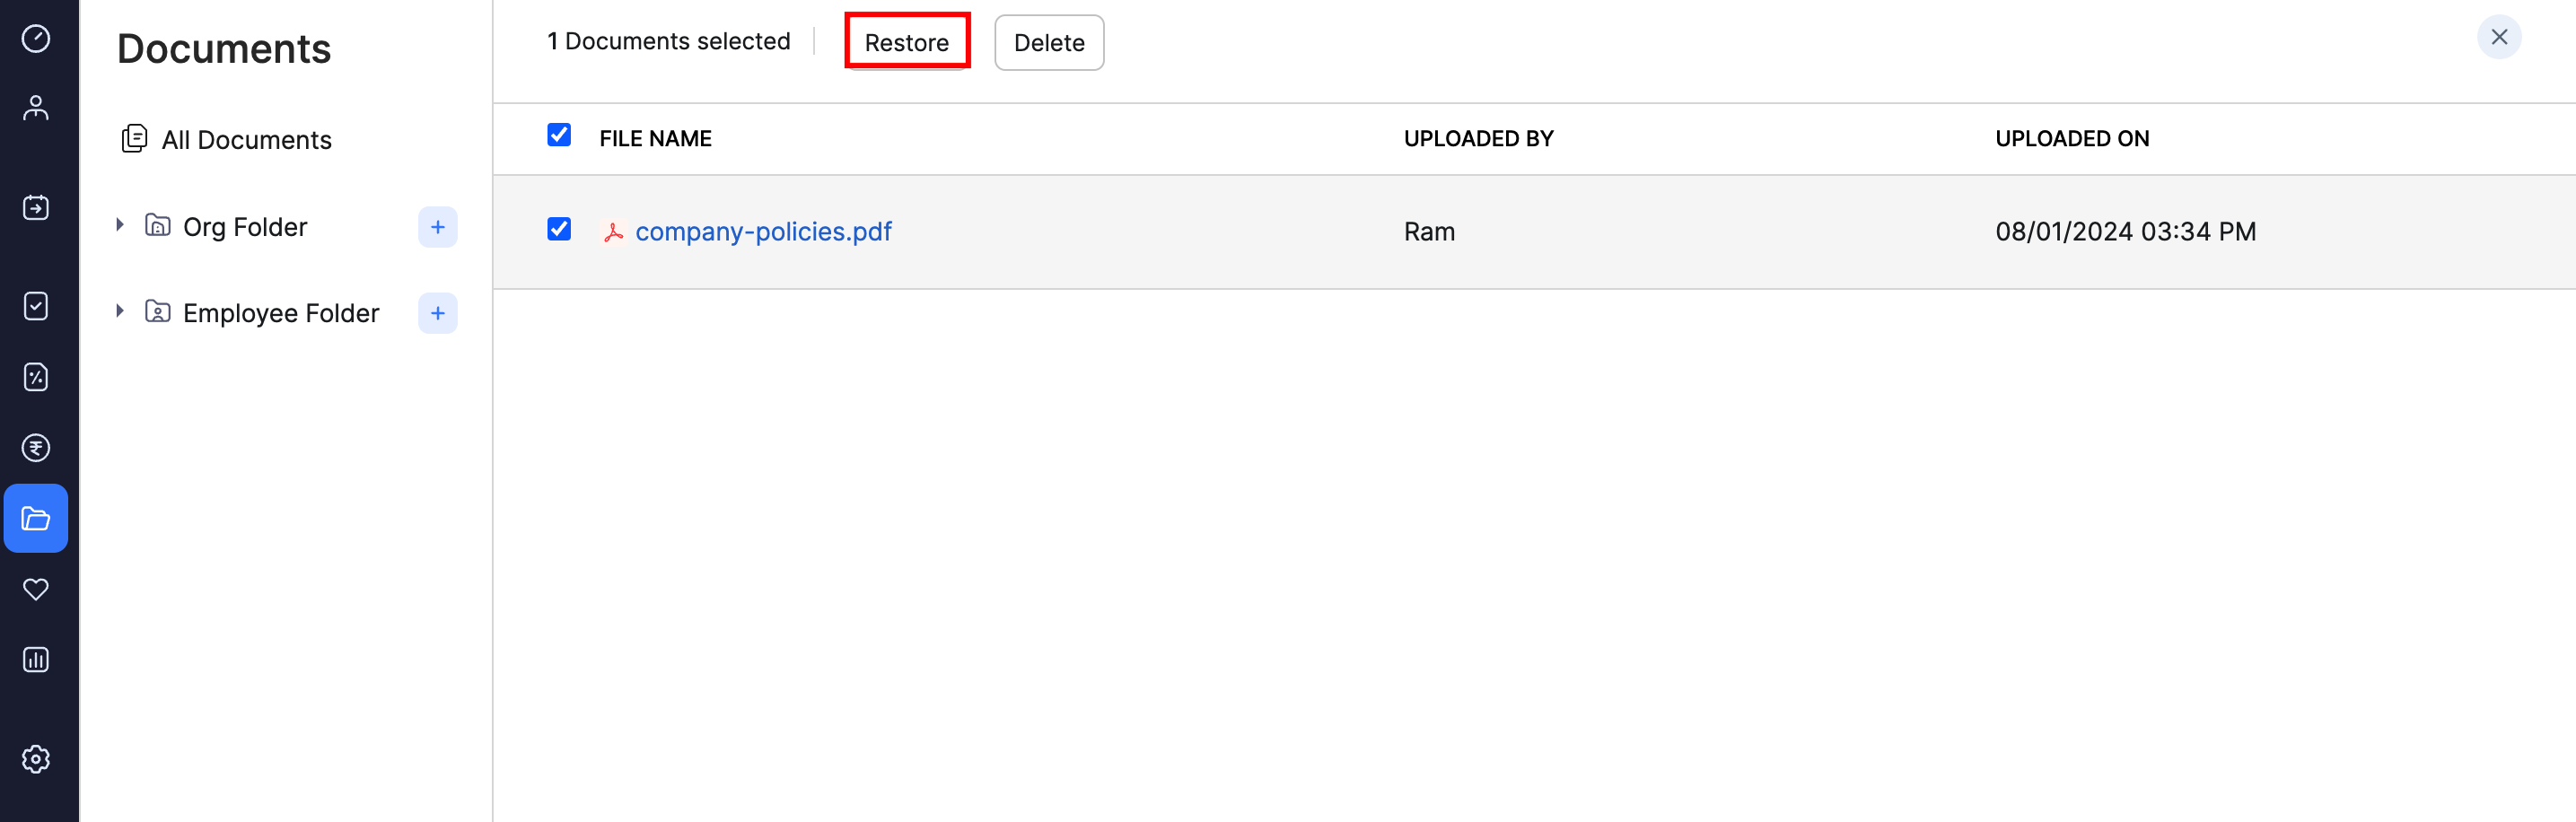
Your documents will now be available in the folder it was in earlier.
Pro-tip: However, if you’d like to delete these documents permanently, you can click Delete in the Trash section in the lower left corner.
