
Booking Options
Booking Options are the different options of flights, hotels, trains, or buses that are provided to you by Travel Desk for your business trip.
If you are going on a business trip, the Travel Desk provides you with options for booking your tickets based on your trip itinerary and mode of travel. You can select from the given options and the Travel Desk will make the bookings and upload them in Zoho Expense. The booking or ticket details can be downloaded for your future reference. Thus, Trip Options helps you with the entire booking process without any hassle. It also helps you track the booking status of your trip requests with ease.
Note: Travel Desk can add trip options only to the trip requests in Approved status.
Select a Booking Option for Your Trip Itinerary
You can select an option from the options provided by the Travel Desk. To select an option:
- Go to Trips on the left sidebar.
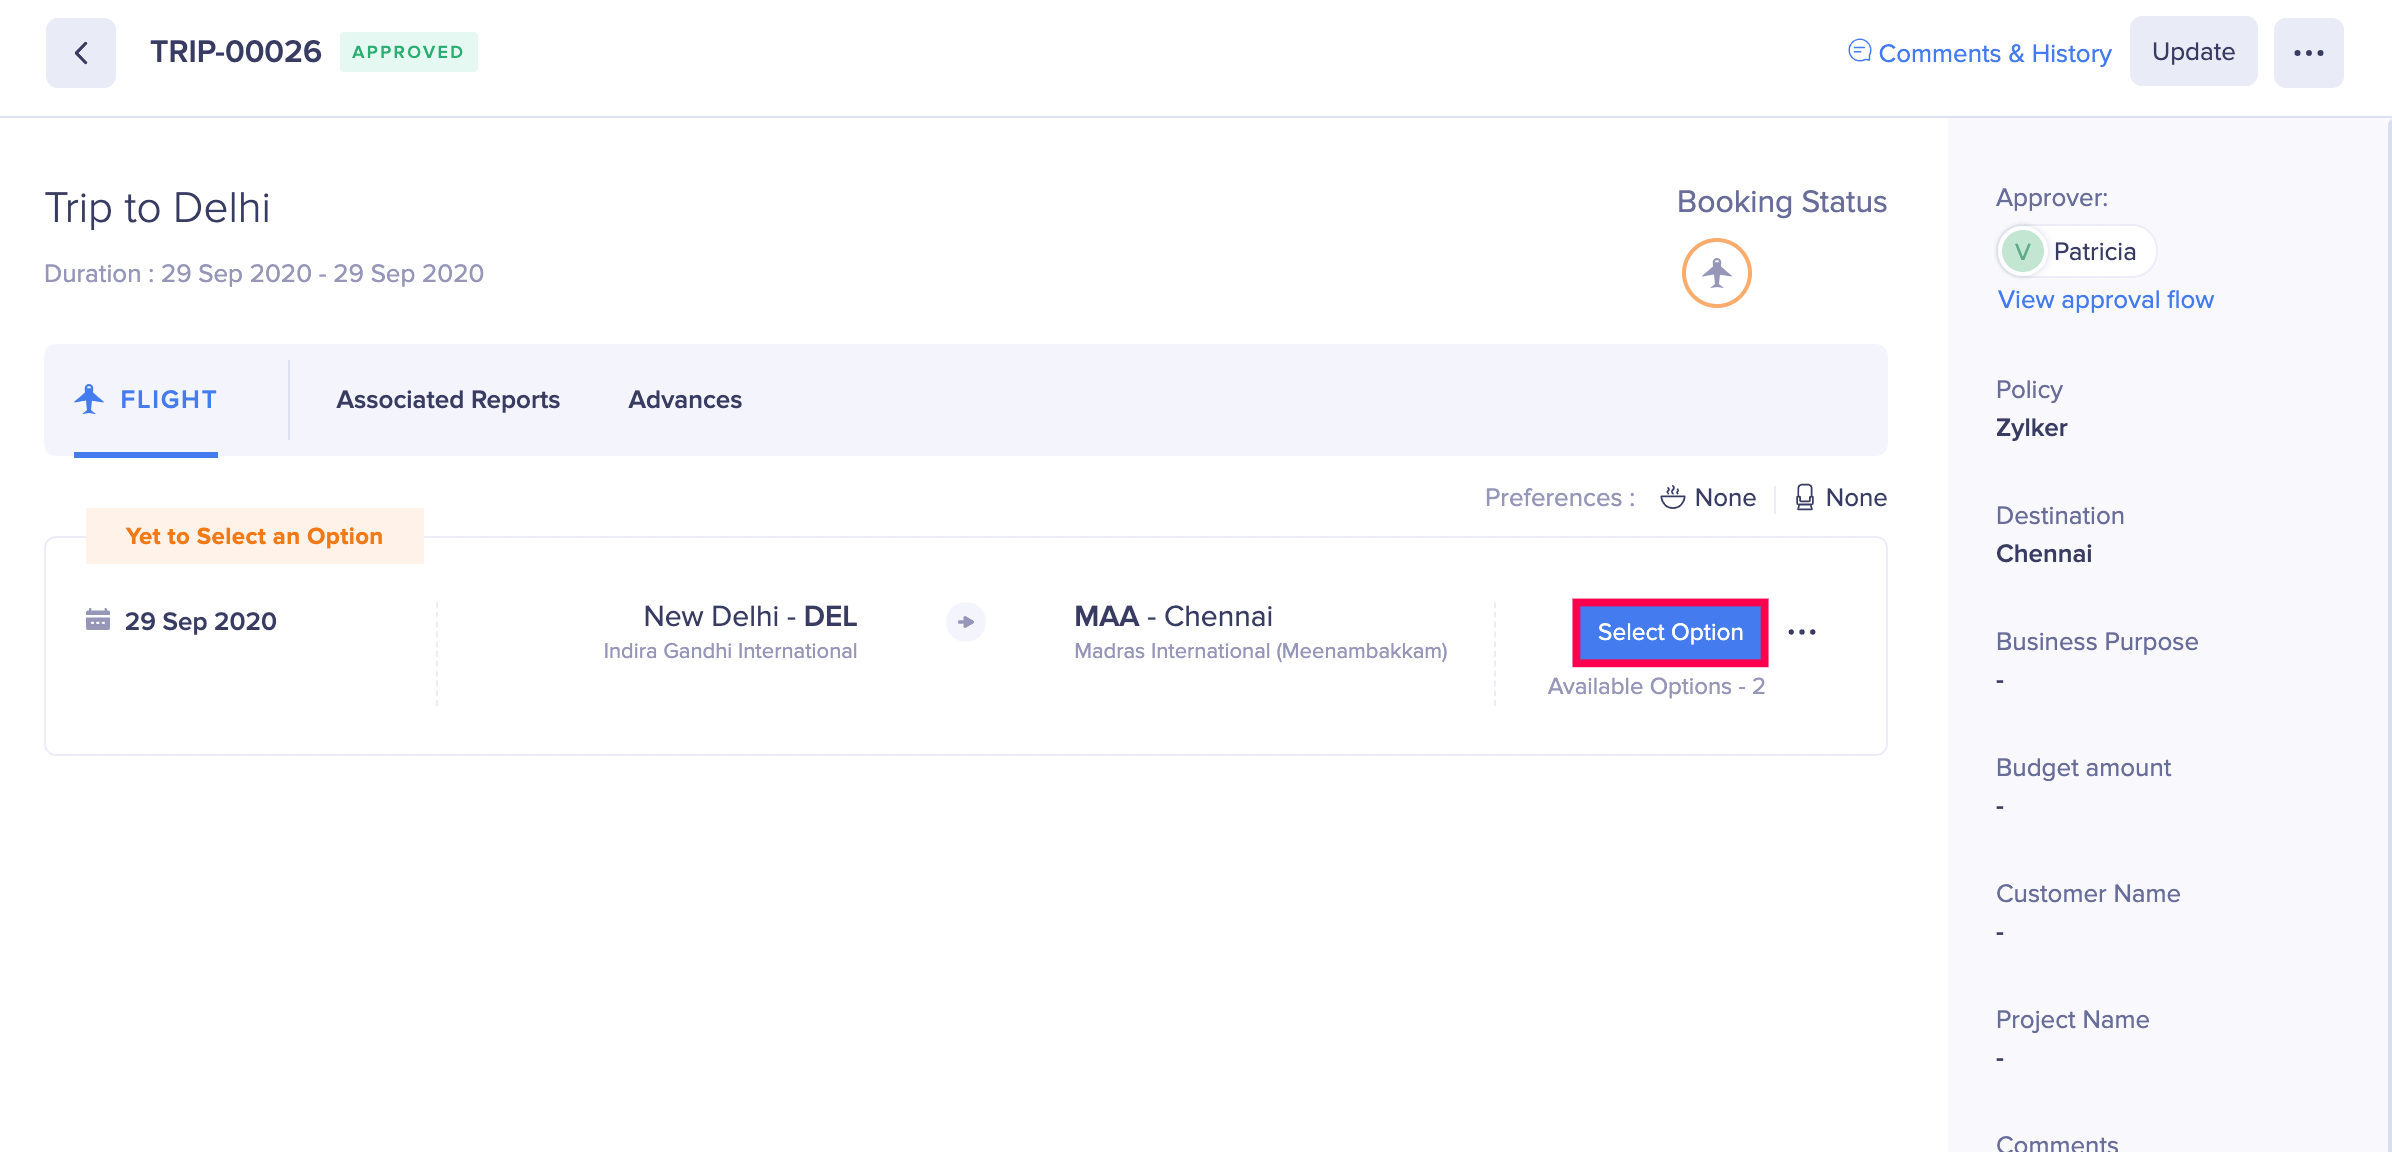
- Click the approved trip request for which your Travel Desk has added options.
- Click the Select Option button in the right corner of the option.
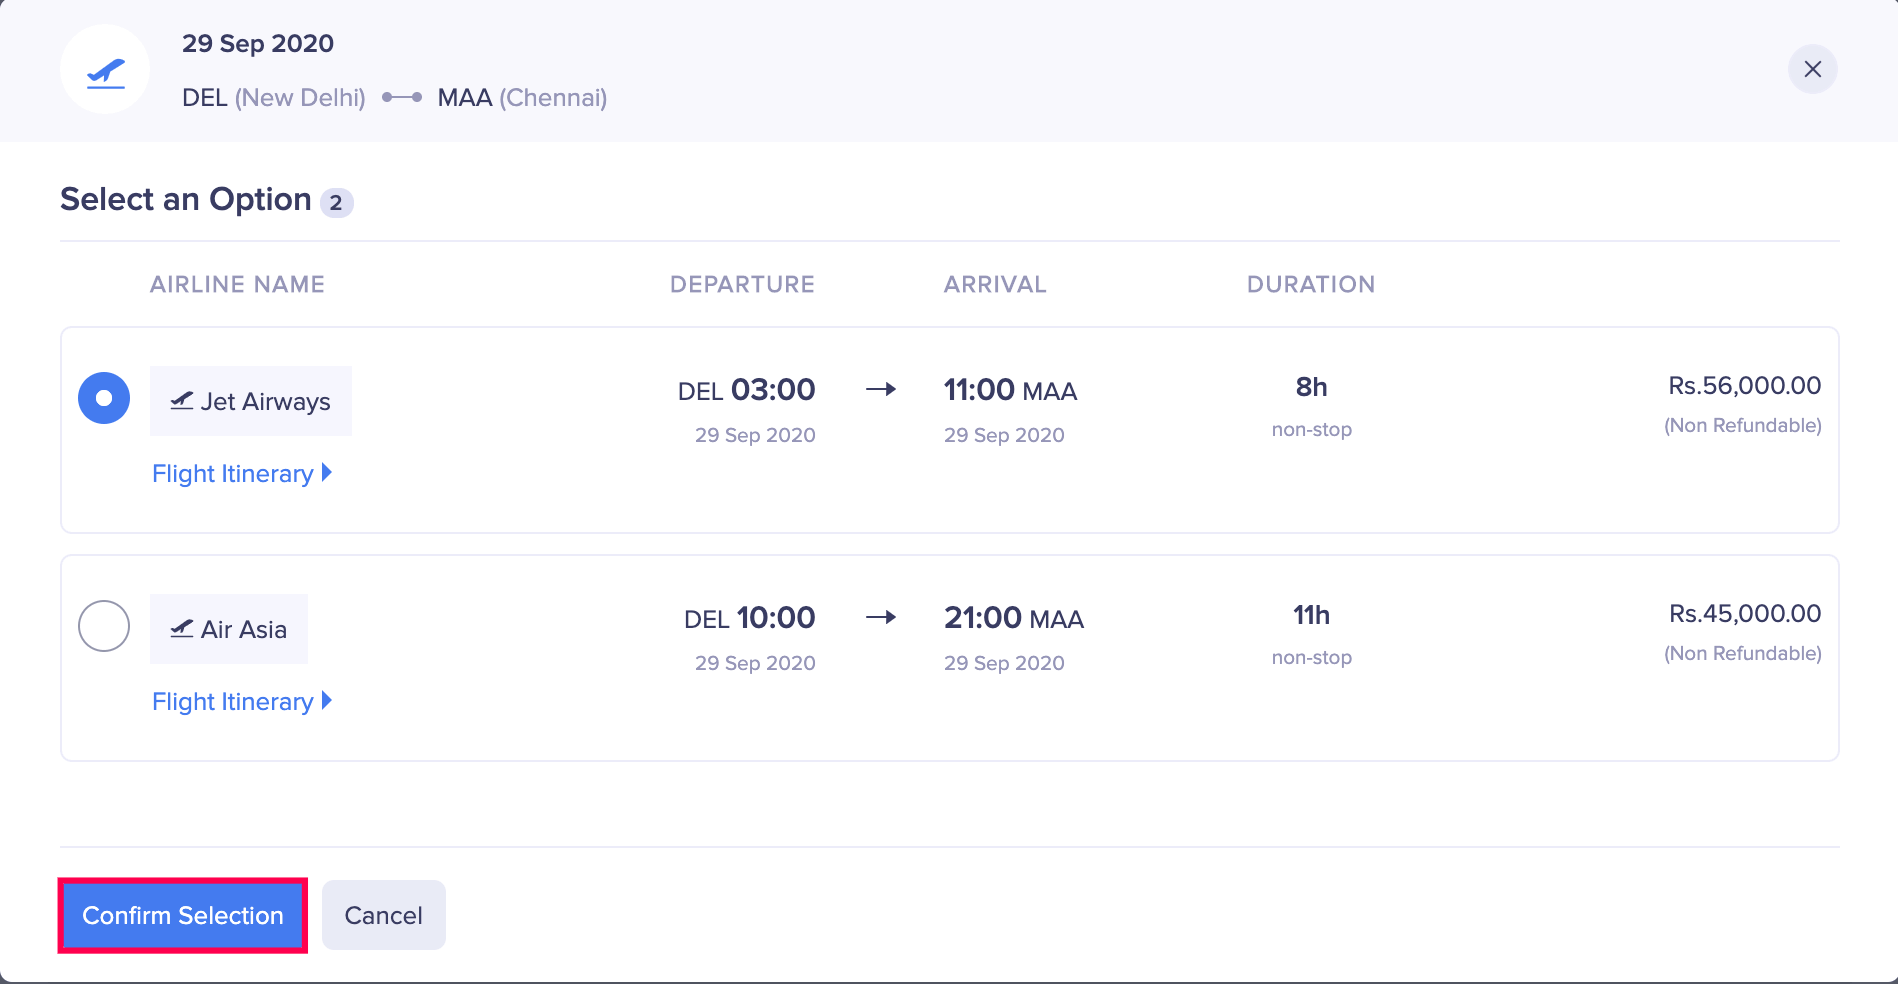
- You can view the options added by your Travel Desk. Select the preferred option.
- Click Confirm Selection.
Once you select an option, the Travel Desk will add the booking details. If cost approval is enabled by the admin, then the selected option will be sent for cost approval. If the option gets approved, the itinerary’s status will be updated to Booking Pending and the Travel Desk will make bookings for the trip. On the other hand, if the selected option gets rejected, you will receive an email notification and the trip options will be open for selection again.
Select Another Option
If you want to select another option instead of the one already selected, you can do so. To select another option:
- Go to Trips on the left sidebar.
- Click the trip for which you would like to select another option.
- Click Change Selection in the right corner of the option.

- Select your preferred option.
- Click Confirm Selection.
- Your new option will be selected and the trip itinerary will be automatically updated with the newly selected option.
Note: However, you cannot select another option after an option is Approved or Booked.
Request More Options
If the given options doesn’t suit your travel plans, you can also request for more options. To request for more options:
- Go to Trips.
- Click the trip for which you would like to request more options.
- Click the More icon at the right corner of the option and select Request More Options.
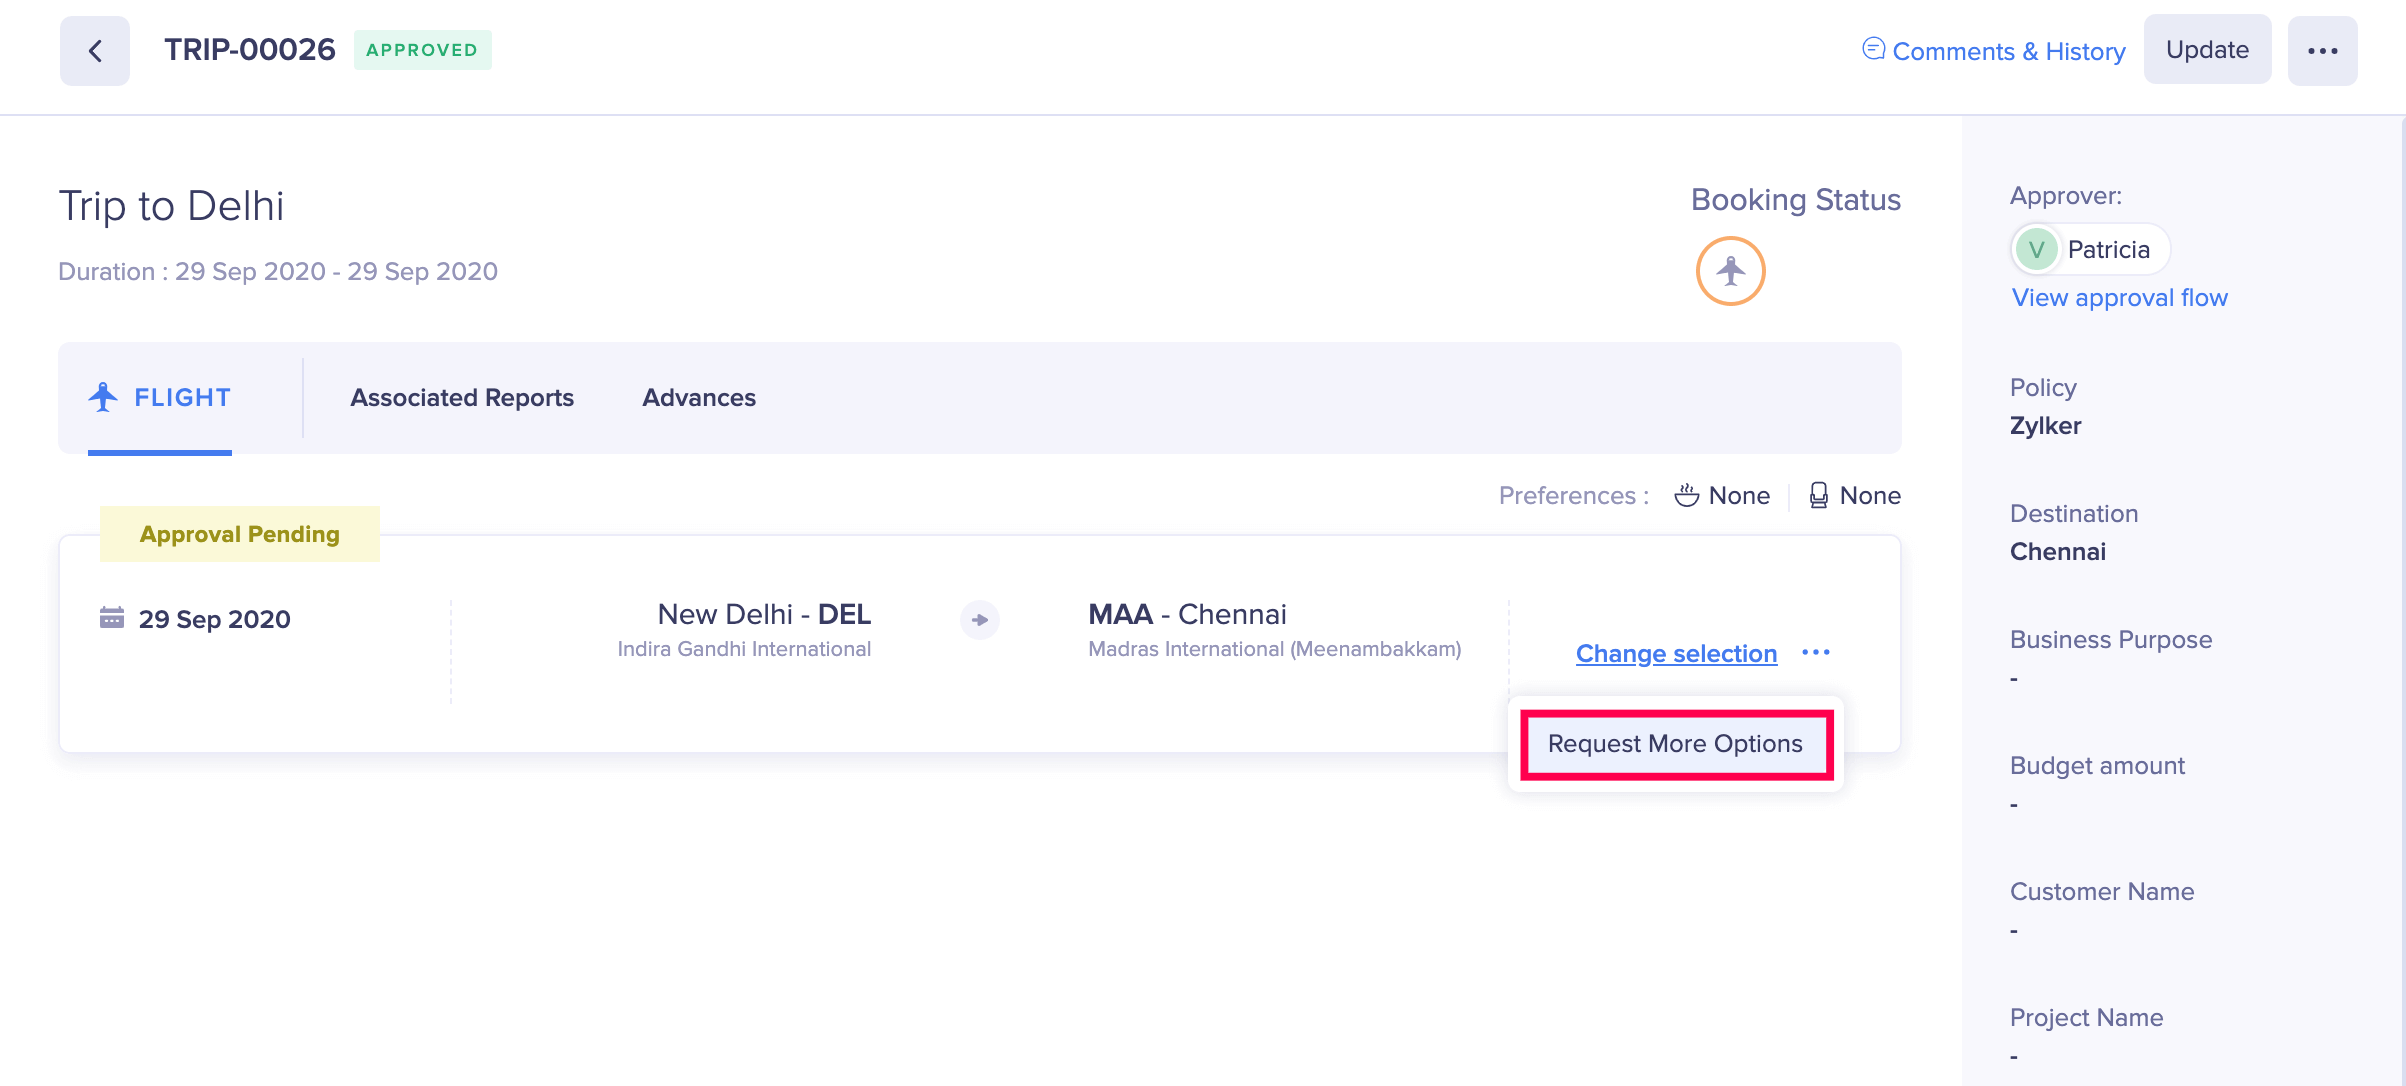
- Specify a reason for requesting more options and click Request.
Once this is done, the itinerary’s status will be updated to More Options Requested. You can wait for the Travel Desk to add options after which you can select an option and send it for approval.
Reschedule or Cancel Itinerary
Reschedule Itinerary
Let’s say John wants to take a round trip between Delhi and San Francisco. John is leaving Delhi on the 23rd of June to San Francisco. While creating the trip request he has entered the Departure date from San Francisco as 30th June. But due to a postponed meeting he has to extend his trip duration to 3rd of July. In this case, John can reschedule his trip itinerary from San Francisco to Delhi. Thus, if your travel schedule changes after the bookings are made, you can choose to reschedule the itinerary. To reschedule an itinerary:
- Go to Trips.
- Click the trip for which the travel schedule has changed.
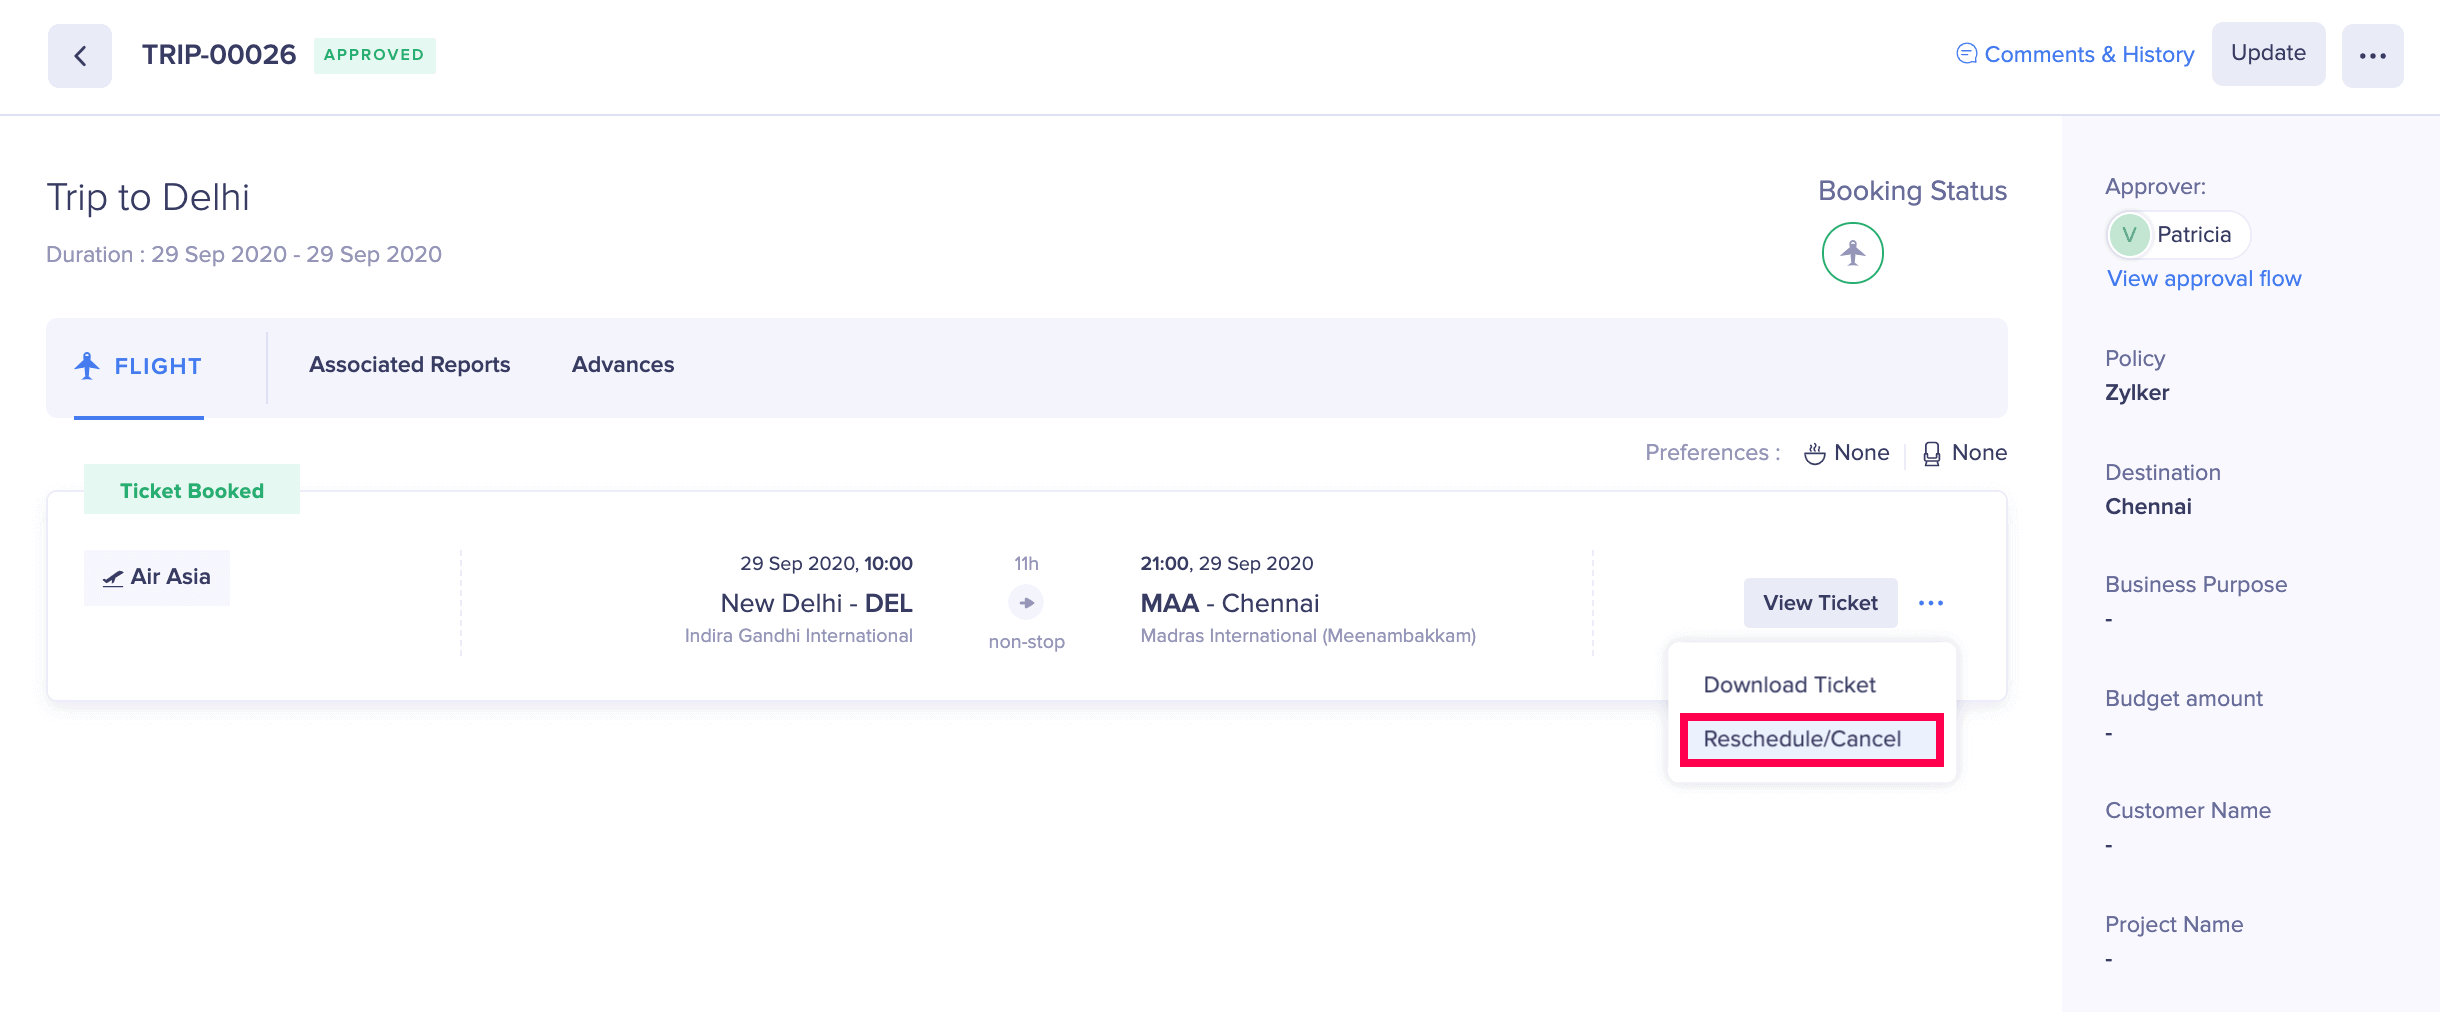
- Click the More icon at the right corner of the option and select Reschedule/Cancel.
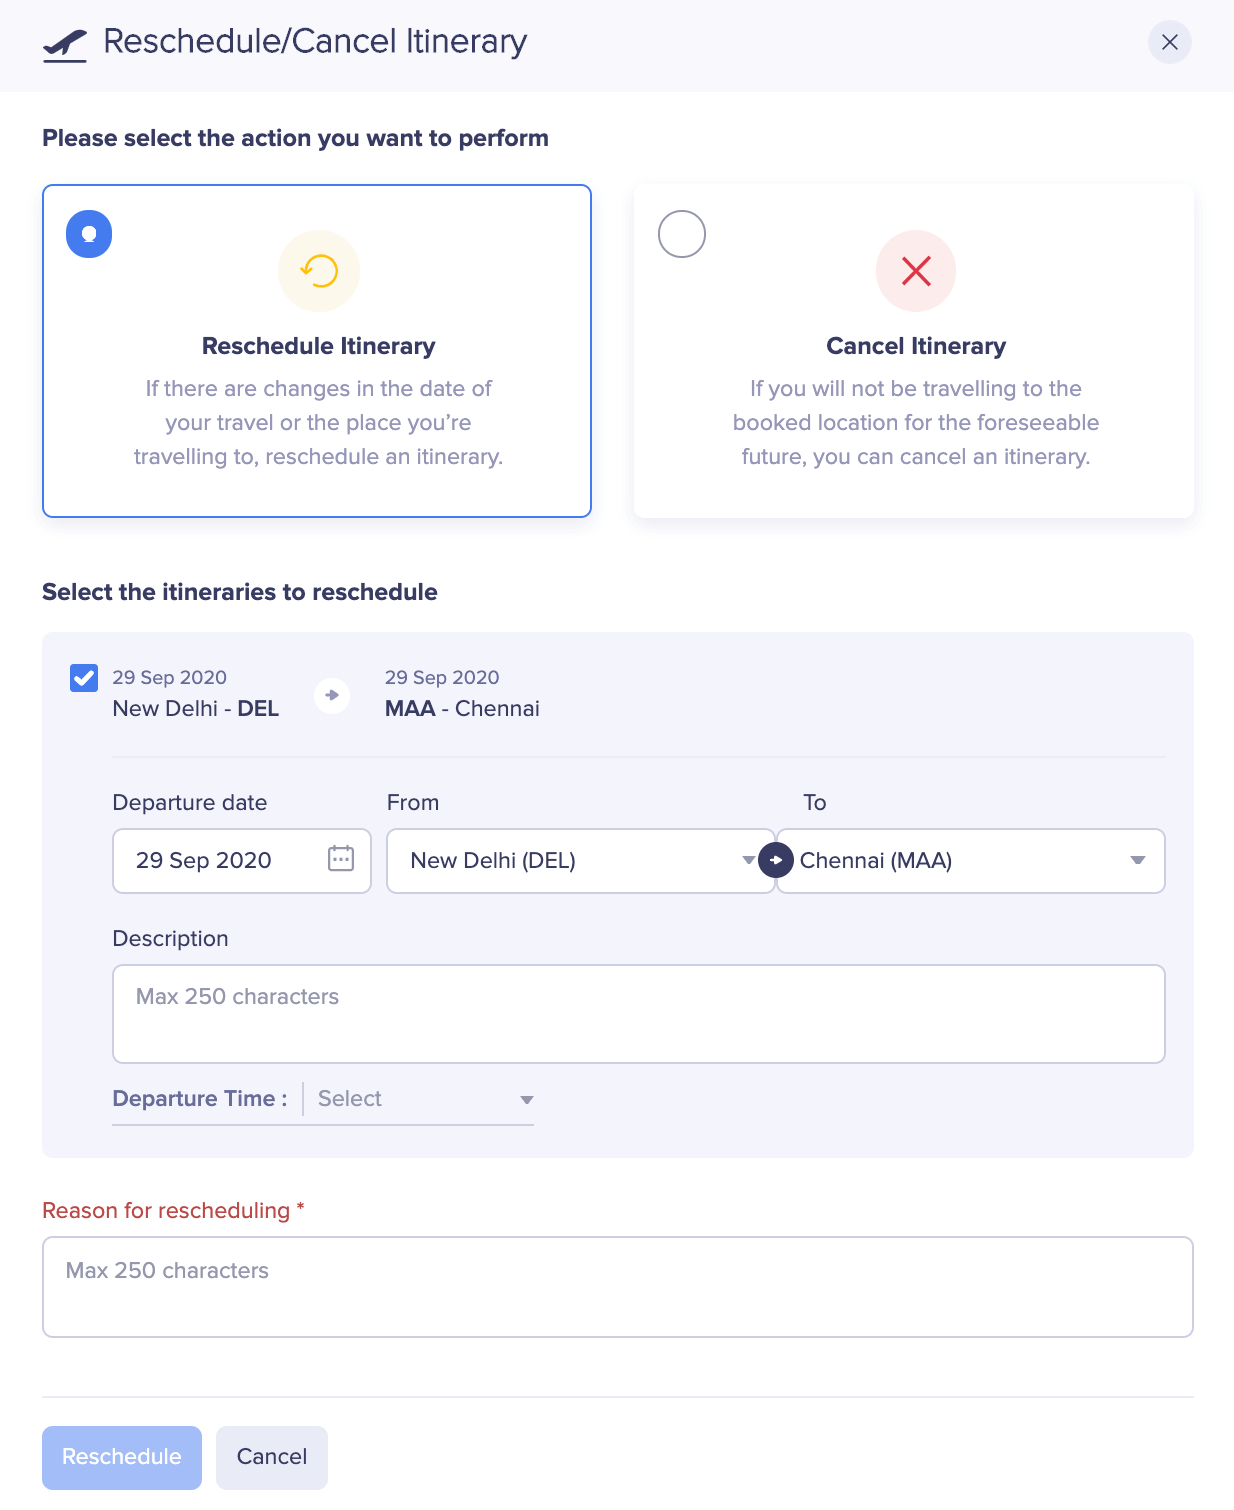
- Click Reschedule Itinerary and select the itineraries you want to reschedule.
- Make the required changes in the itinerary.
- Provide a reason for rescheduling your trip itinerary.
- Click Reschedule.
The itinerary will be marked as Rescheduled. You can wait for the travel desk to add new options and the reschedule cost.
Cancel Itinerary
Let’s say John has created a trip request to travel from Delhi to San Francisco and has also included a side trip to New York. However, John’s business meeting in New York has been cancelled. In this case, John can cancel the trip itineraries from San Francisco to New York and From New York to San Francisco. Thus, if you do not want to continue an itinerary in the future, you can cancel it. To cancel an itinerary:
- Go to Trips.
- Click the trip for which you would like to cancel the itinerary.
- Click the More icon at the right corner of the option and select Reschedule/Cancel.

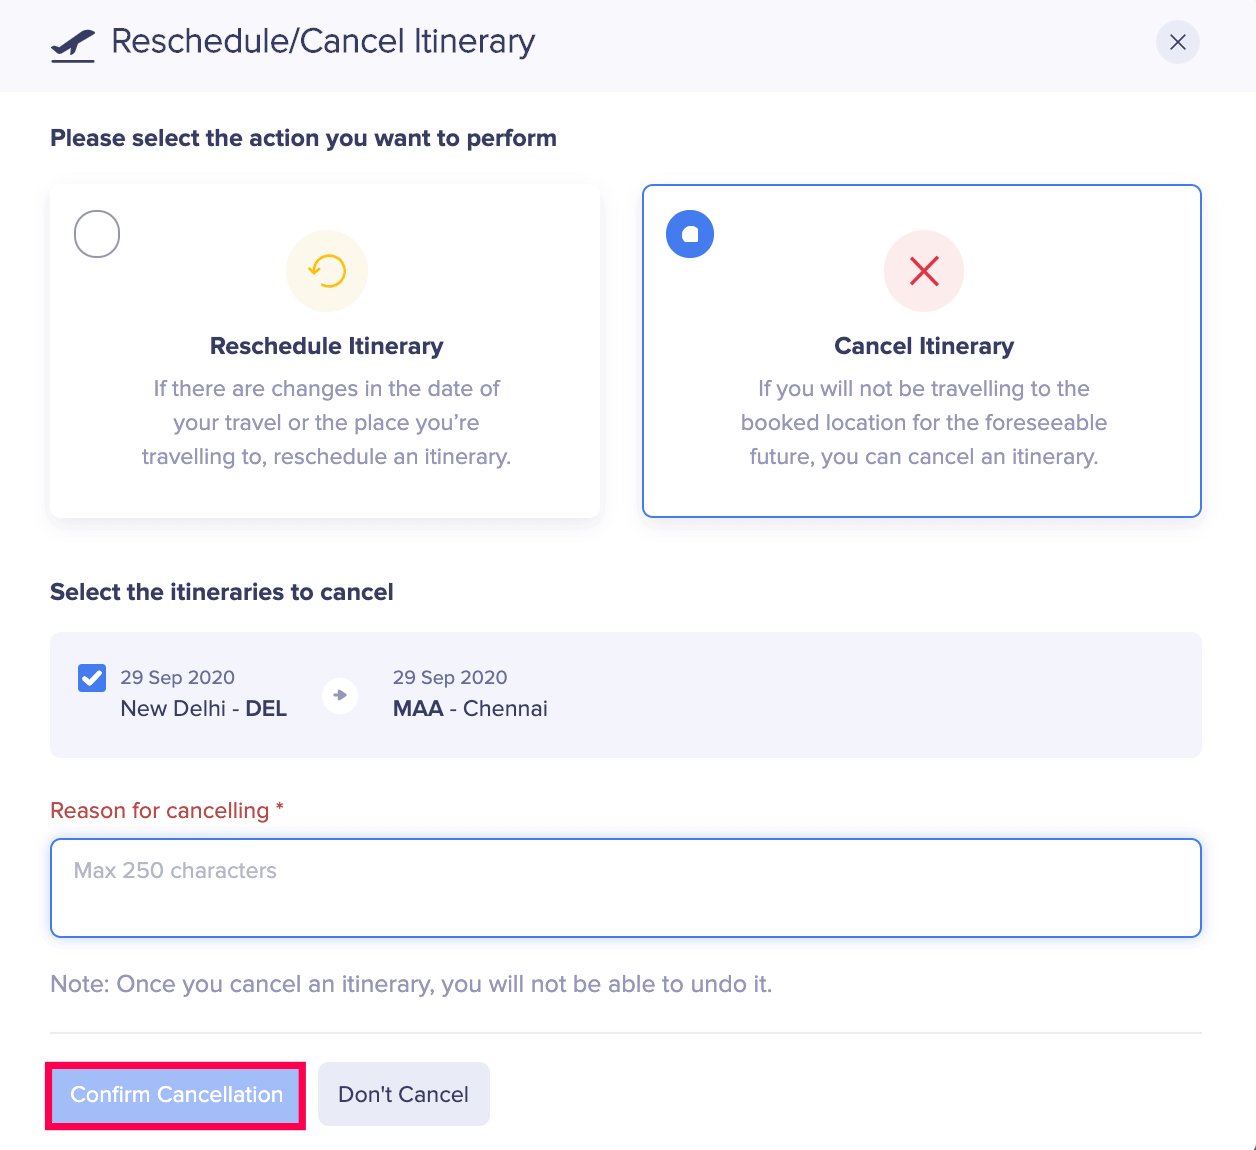
- Click Cancel Itinerary and select the itineraries you want to cancel.
- Provide a reason for canceling in the Reason for canceling box.
- Click Confirm Cancelation. The itinerary will be marked as Cancelled.
Download Ticket or Booking Confirmation
Once the option is selected, the Travel Desk makes the bookings and adds the booking details in Zoho Expense. Once the Travel Desk adds the booking details, the booking process will be over and you can download the ticket or booking confirmation. To do this:
- Go to Trips.
- Click the trip for which you would like to download the ticket or the booking confirmation.
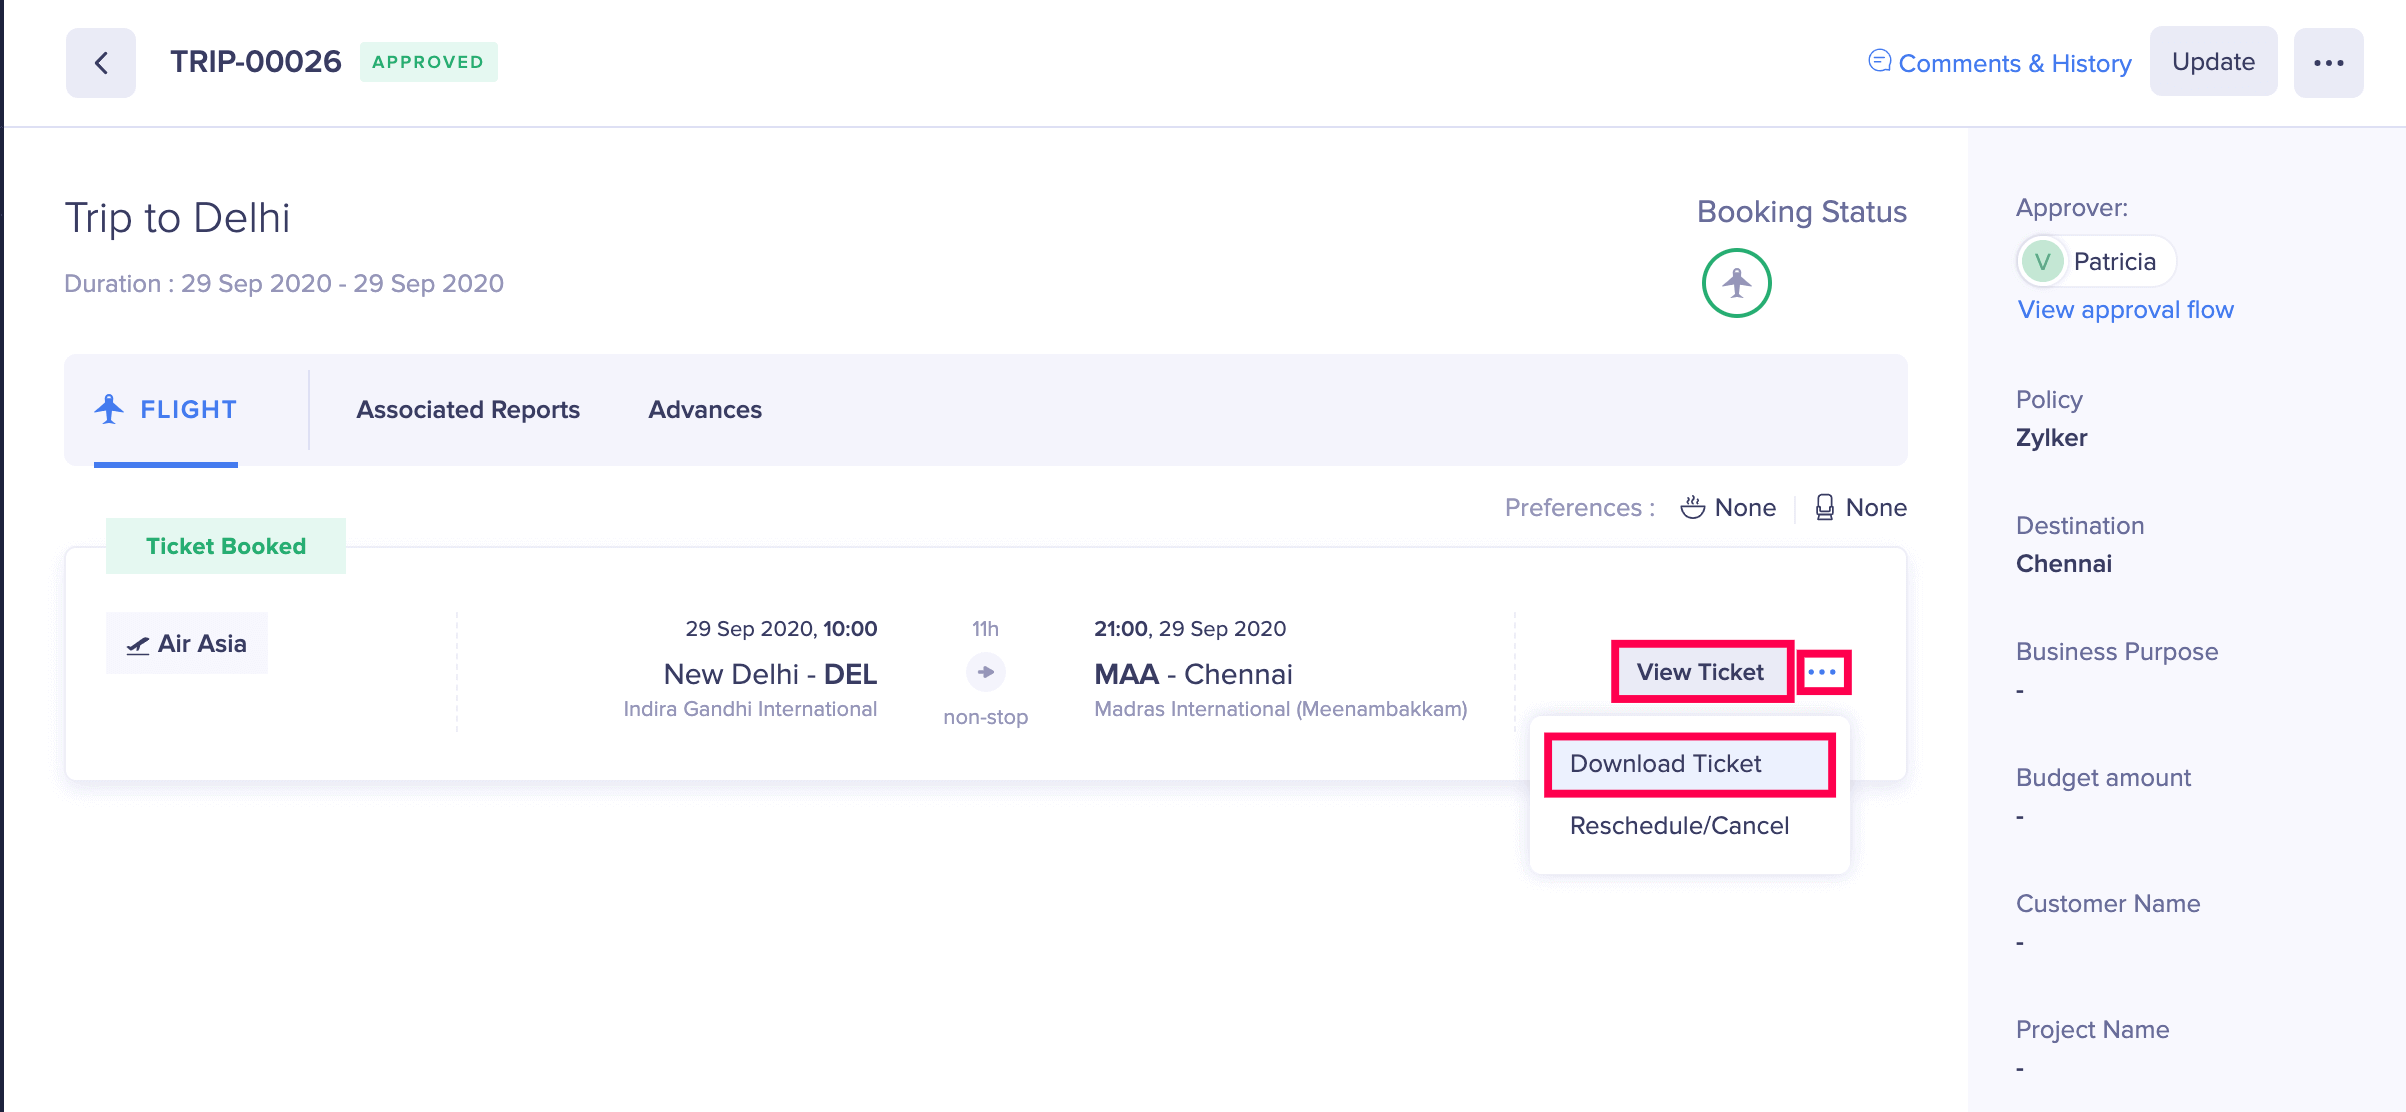
- If you want to view the ticket, click View Ticket.
- If you want to download the ticket, click the More icon at the right corner of the option and select Download Ticket. Your ticket or the booking confirmation will be downloaded.
Note: If cost approval is enabled, the selected option will be sent for approval. Only after the option is approved, the Travel Desk will be able to make the bookings and add the booking details.