
Filtering and Sorting Items
All the items that you create or import are listed in the Items module. You can filter them based on certain criteria and you can sort them based on Name, SKU or Rate.
IN THIS PAGE…
Filtering Items
Scenario: David has added all the products he sells and the services he provides to the items module in Zoho Billing and all of them are listed together. Now, he wants to view only the service items from the list. David can quickly view them by using the Filter option to view only the services.
Filtering items allows you to view a specific set of items based on a certain criteria. In the Items module, there is a list of default filters which you can use to filter the items. You can also create your own custom views based on the criteria of your choice. In this section, we’ll learn about using default filters and creating new custom views.
Default Item Filters
Default item filters will help you to quickly filter the items based on their criteria. The table below lists the default filters available in Zoho Billing.
| Filter Name | Description |
|---|---|
| All | All the items in Zoho Billing will be displayed. By default, the Items module displays the items using this filter. |
| Active | All the active items are listed when you use this filter. By default, all the items you create will be active unless you mark them as inactive. |
| Inactive | All the items that you’ve marked as inactive will be displayed when you use this filter. |
| Services | All the items where you’ve chosen the item type as Services will be displayed when you use this filter. |
To filter items:
- Go to Items module in the left sidebar.
- Click the All Items filter dropdown and select a filter.
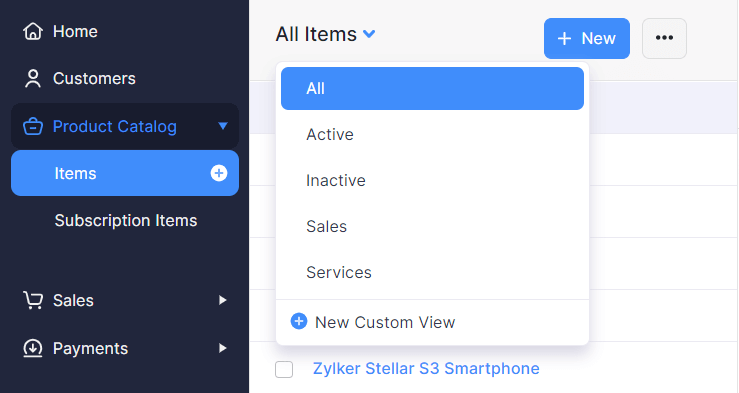
A list of items based on the applied filter is displayed.
Custom Views
Custom Views are your own customized filters that you create by specifying a criteria. When you apply a custom view to the items, a filtered list of items is displayed.
Scenario: David wants to see all the furnitures that he’s selling which costs more than 300 dollars. So, he creates a custom view specifying the criteria that it should filter all the items who’s rate is more than 300 dollars. He saves the custom view and the items are filtered and listed. Likewise, you can create your own customized filters based on your own criteria to filter the items.
To create a custom view:
- Go to Items module.
- Click the filter dropdown and select + New Custom View from the bottom of the list.
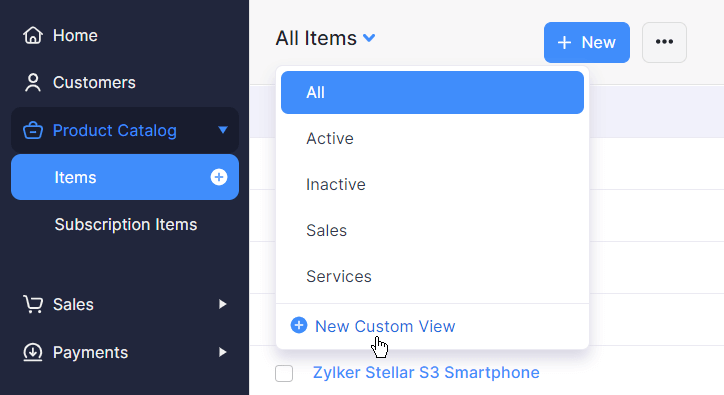
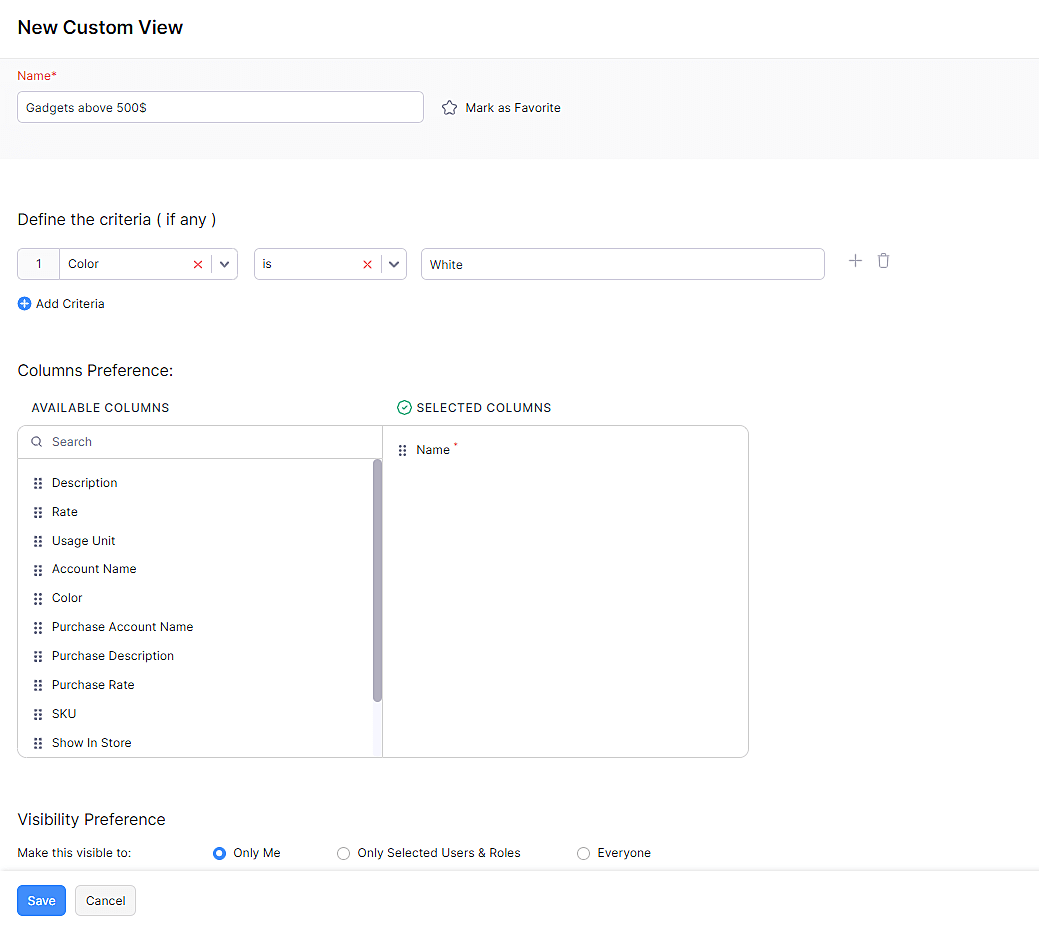
- Enter a Name for the custom view.
- Click the dropdown under Define the criteria section and select one of the fields from the dropdown.
- Click the next dropdown and select the appropriate condition.
- Enter an appropriate value in the next field.
- Click + Add Criteria to add another criterion and repeat the previous 3 steps.
- Click the + on each field that is listed under the Available Columns table to add them under the Selected Columns table.
Insight: The filtered items will be displayed with the fields that you’ve added to the Selected Columns table.
- Choose if you want this filter to be displayed to every user in your organization or only to you.
- Click Save.
Now, the filter will be displayed under the default filters and you can filter the contacts based on the new criteria.
Editing Custom Views
To edit the custom view that you’ve created:
- Go to Items module.
- Click the filter dropdown and select the filter you wish to edit.
- Hover your mouse cursor next to the filter name and click on the Edit icon.
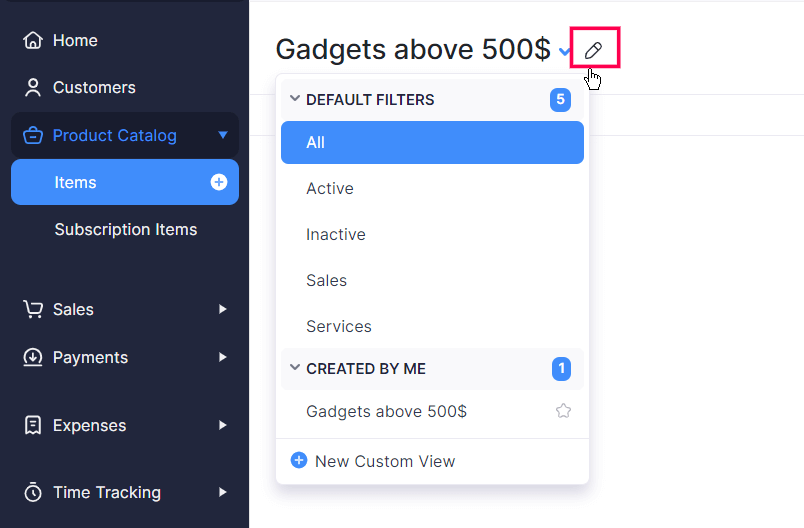
- Edit the custom view.
- Click Save.
Sorting Items
Sorting items allows you to view all the items in a particular order. You can sort any list of items based on the default sorting options that are available in the Items module. The table below gives you the list of the sorting options available.
Scenario: David wants to view the top 5 least expensive items of all the products he sells. In Zoho Billing, he easily does it by clicking the Hamburger icon in the Items module and selecting Sort By Rate. Immediately, all the items are re-ordered with the least expensive product listed at the top and the most expensive product listed at the bottom. Similarly, you can sort the items based on your need and view the items at your convenience.
| Sort By | Description |
|---|---|
| Name | Sorting by Name allows you to list the items in alphabetical order or in the reverse alphabetical order. By default, the items are listed in the alphabetical order. |
| SKU | Sorting by SKU allows you to list the items in the alphabetical order of the SKU or in the reverse alphabetical order of the SKU. |
| Rate | Sorting by Rate allows you to list the items in the ascending order of the rate or in the descending order of the rate. |
To sort the items:
- Go to Items module in the left sidebar.
- Click the Hamburger icon and select Name or SKU or Rate, depending on the field by which you want to sort the list of items.
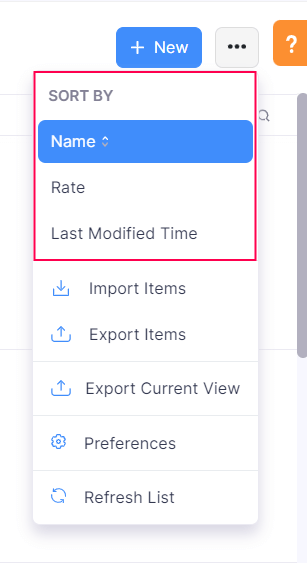
- Select the same option again to reverse the order in which the items are sorted. You can change the alphabetical to reverse alphabetical and ascending to descending.
Pro Tip: Alternatively, you can sort the items directly by clicking the field names. You can click them again to reverse the order.

 Thank you for your feedback!