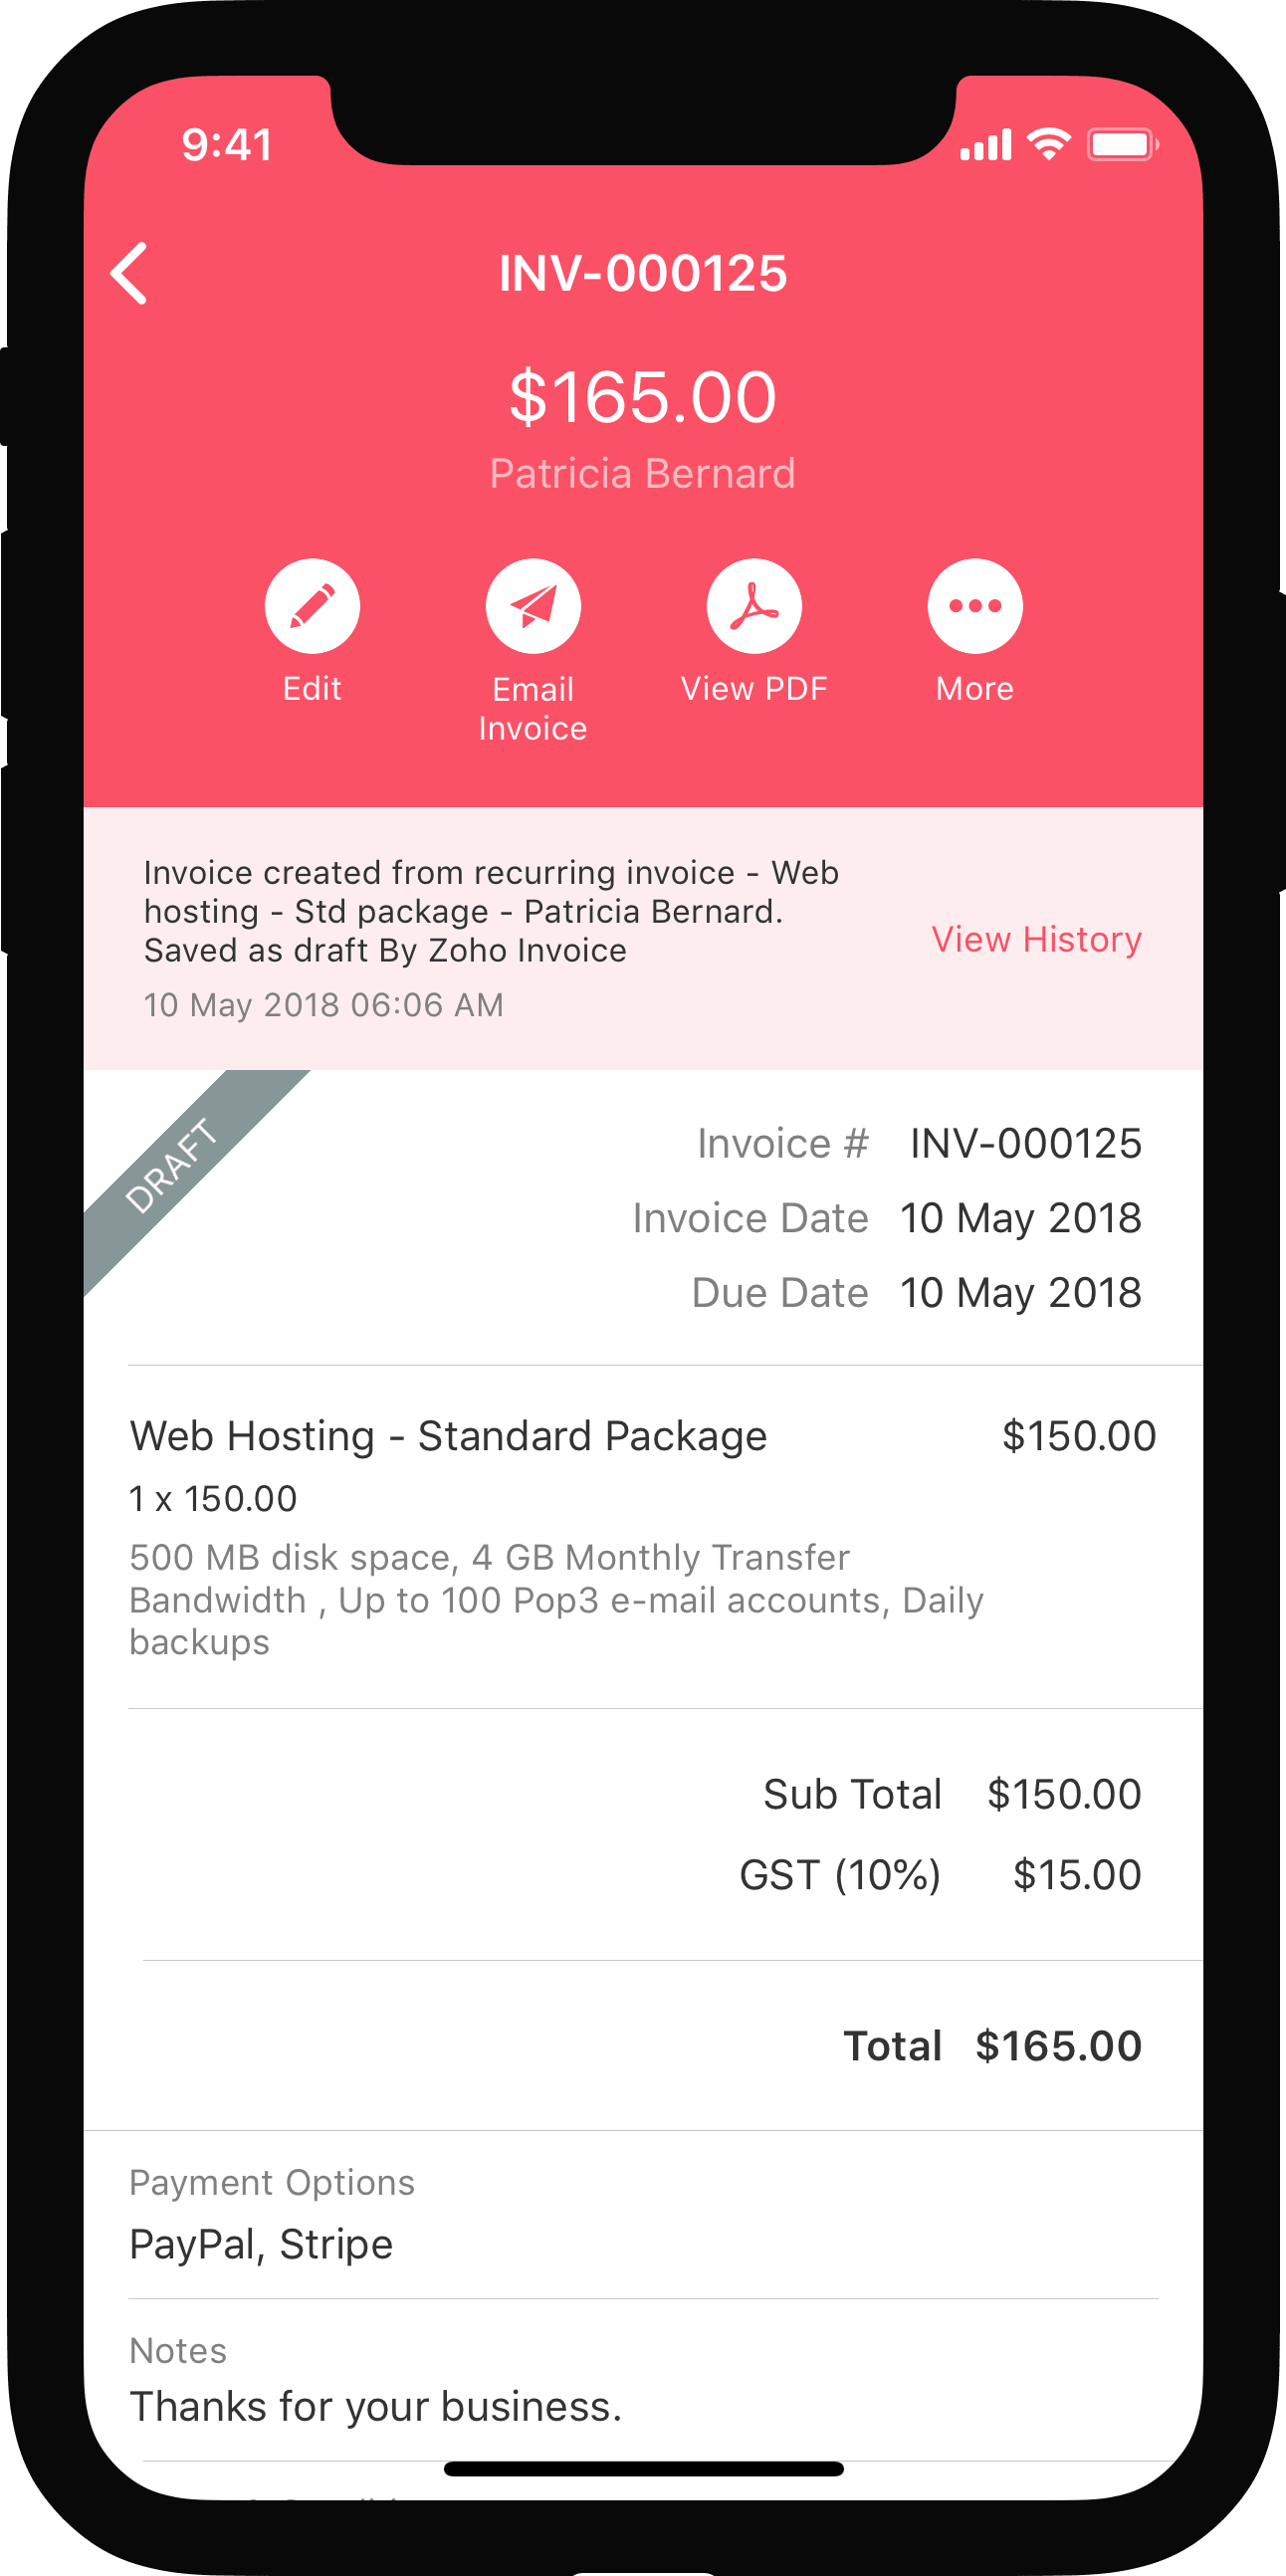
GST - Ready Features in Zoho Invoice
This section will give you a brief overview about the Goods and Services Tax (GST) and the GST features that are available in Zoho Invoice.
IN THIS PAGE…
GST - An Overview
GST or the Goods and Services Tax is an upcoming tax system that is expected to replace several currently levied indirect taxes with a single tax. This tax will be applicable across India and will be levied on all goods and services.
Components of GST
GST will follow a dual component structure: SGST (the state component of GST) and CGST (the central component of GST), both of which will be levied during intrastate movement of goods.
During interstate transfer of goods, a combined tax called the IGST - Integrated GST (SGST+CGST) will be applied by the central government.
Four-Tier GST Tax Structure
The new GST tax structure will have four slabs:
- Zero rate - 0%
- Lower rate - 5%
- Standard rates - 12% and 18%
- Higher rate - 28%
An additional tax called the Additional cess will be applied on tobacco, luxury cars, pan, and aerated drinks.
Transition to GST
The tax department is currently in the process of migrating all existing businesses to the new GST reform. Businesses that are already registered under State or Central Tax departments will be a provided a username and password for the GST registration portal where they can register their business for GST. The GST department will take a couple of months to process the application and issue the 15-digit GSTIN number.
Once migrated, businesses will have to file their GST returns and pay their taxes online.
According to the GST reform, a majority of businesses registered under GST should file three tax returns on a monthly basis:
GSTR1: Monthly return containing details of outward supplies (Sales transactions). Should be filed before the 10th of every month.
GSTR2: Monthly return containing details of inward supplies (Purchase transactions). Should be filed before the 15th of every month.
GSTR3: Monthly return containing finalized details of outward and inward supplies. Shoule be filed before the 20th of every month.
The above mentioned tax returns should be filed by uploading all sales and purchase transactions onto the GST portal.
Even though the GST poses several benefits, filing tax returns every month needs careful compilation of all the sales and purchase transactions happened over a month. Wouldn’t it be nice to have a system that compiles all your sales and purchase transactions into GST returns?
Zoho Books is now equipped with built in GST ready tools that allows you to prepare and file your GST returns directly to the government.
Configuring your Zoho Invoice account
- Enabling GST Settings
- Adding Your Taxes
- Adding Tax Exemptions
- Default Tax Preferences
- Adding GSTIN of your contacts
- Items
Enabling GST Settings
If you’re creating a new organization in Zoho Invoice with India as the country, you will be prompted to setup your Tax preferences during the initial stages of sign up. Here, you will be asked whether you have registered for GST, and if so, you will be prompted to enter your GSTIN (GST Identification Number).
If you already have a Zoho Invoice account, you can enable GST by sending an email to support@zohoinvoice.com.
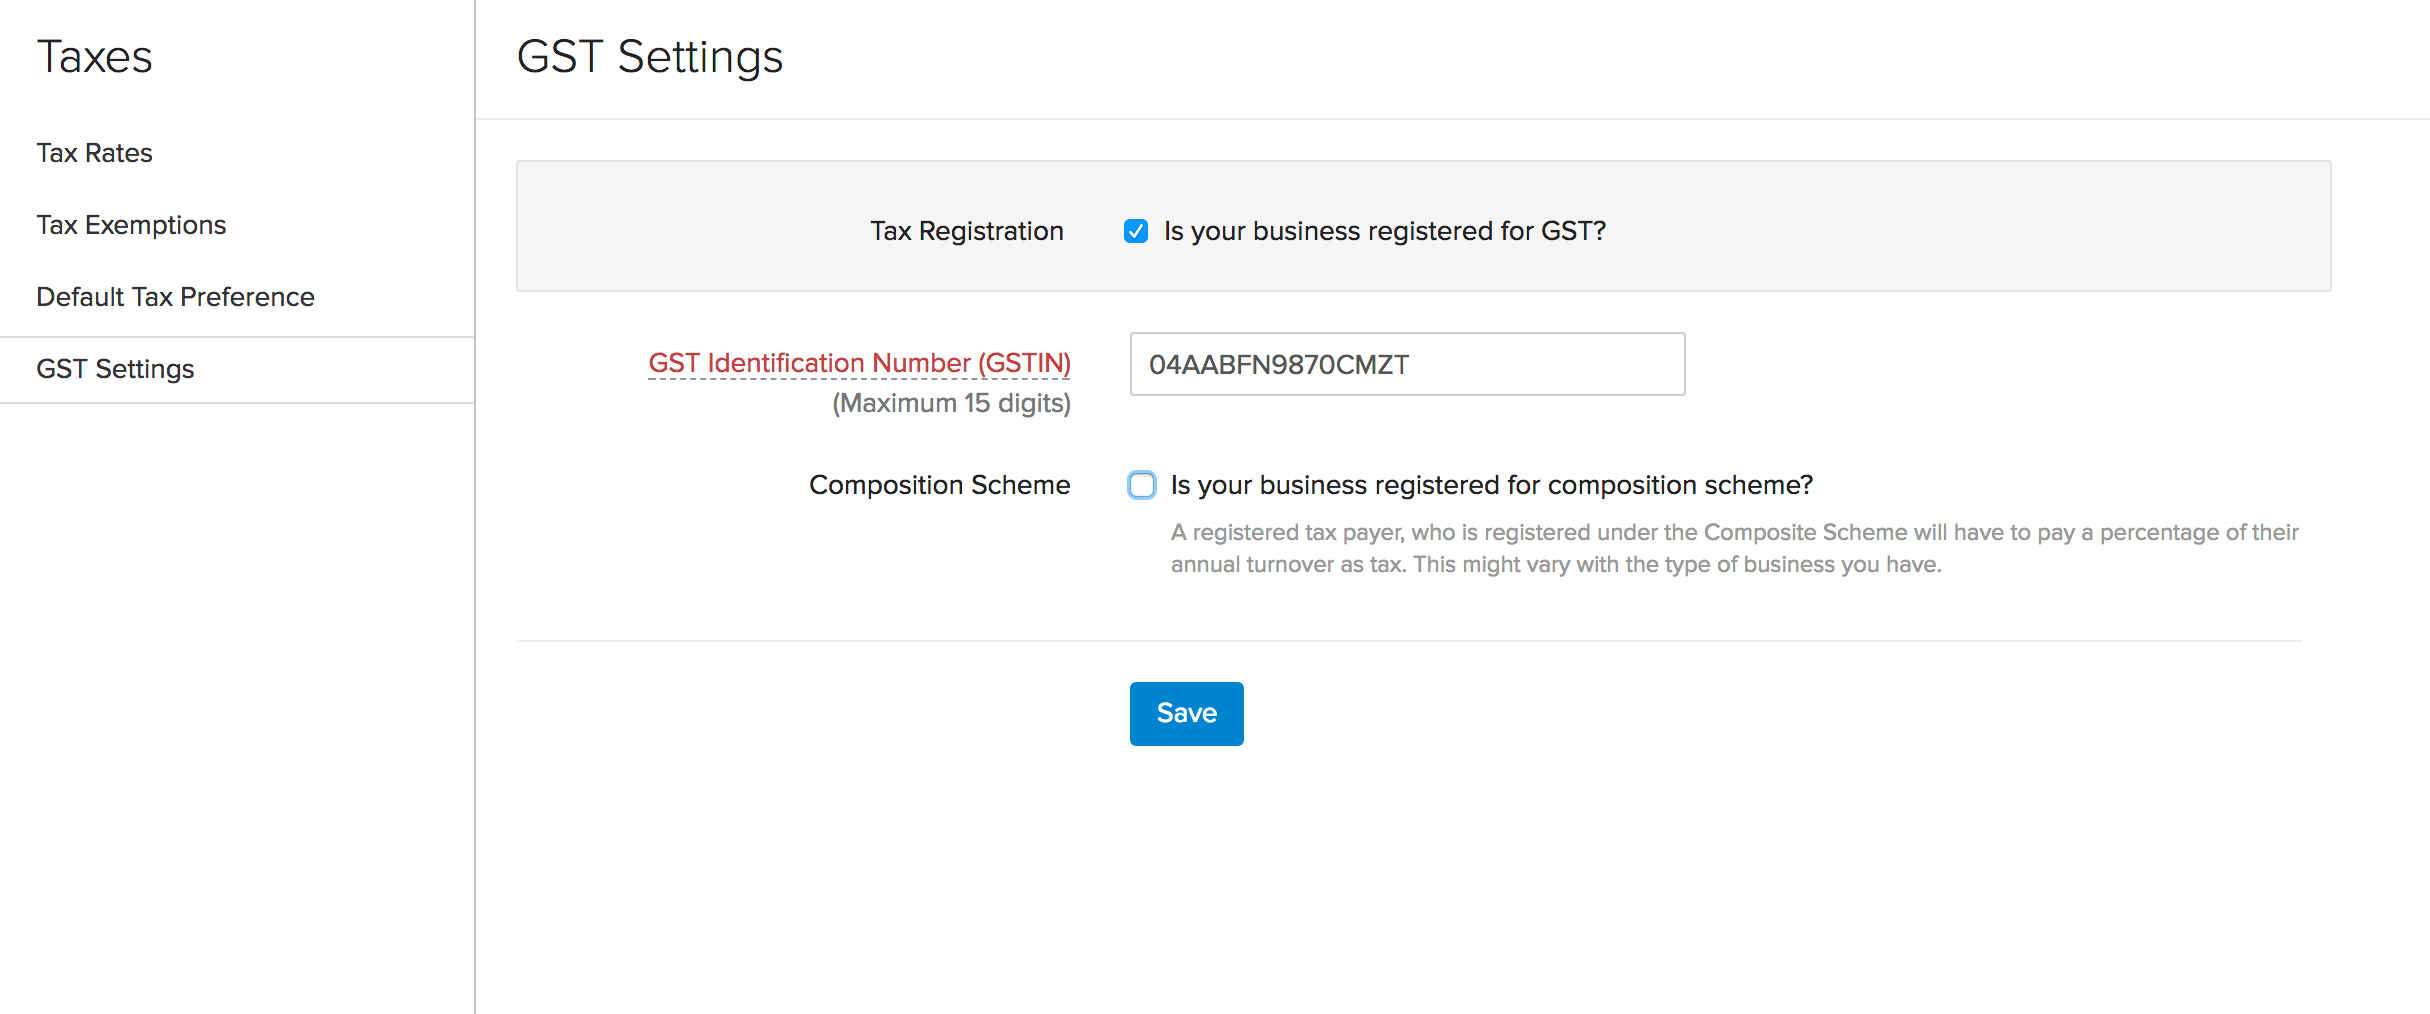
To enable GST:
-
Click the gear icon on the top right corner, and select Taxes.
-
Under Taxes, click GST Settings.
-
Check the option Are you registered for GST?
-
Enter your 15-digit GSTIN
-
Check the Composition Scheme option if you are

-
A small business owner with an annual turn over less that ₹ 75 lakh.
-
Composition Scheme Percentage is 1% for traders, 2% for manufactures and 5% for restaurants.
-
Composition scheme is only applicable to business that sell goods and not applicable for service providers.
-
Choose whether you wish to file your returns directly from Zoho Books or on your own.
-
Enter the username provided to you by the GSTN.
-
Click Save for the changes to take effect.
Adding your Taxes
Once you’re done with the GST Settings, the next step is to add your taxes. Even though the government had mentioned the four-slab tax structure, the tax rates might vary based on the type of businesses you run. It can be 5% if you sell products that comes under the lower tax bracket, or it could be 18% if you offer services.
The Tax Rates Form has been kept flexible so the business can enter the specific rates that have been assigned to them by the government.
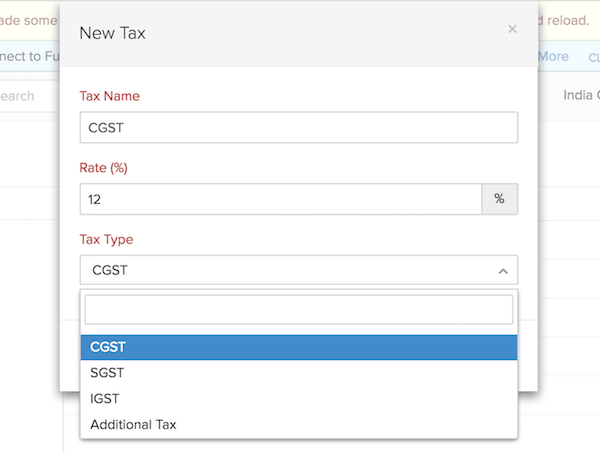
To add your taxes:
- Click the gear icon on the top right corner, and select Taxes.
- Go to the Tax Rates section and click + New Tax.
- Give your tax a name and enter the rate set by the government.
- Choose the Tax Type, say CGST.
- Click Save.
Similarly, add the tax rates for SGST and IGST. If you’re adding tax rates for taxes like Additional Cess, you can choose the Tax Type as Additional Tax.
Adding Tax Exemptions
The government has introduced zero rated tax as part of the four slab GST structure. As per the model GST law, 50% of the goods that belong to the Consumer Price Index (CPI) basket are eligible for zero rated tax. So, if you run an organization that sells zero rated or exempted goods, you can add the reason for tax exemption and choose the same while raising an invoice.
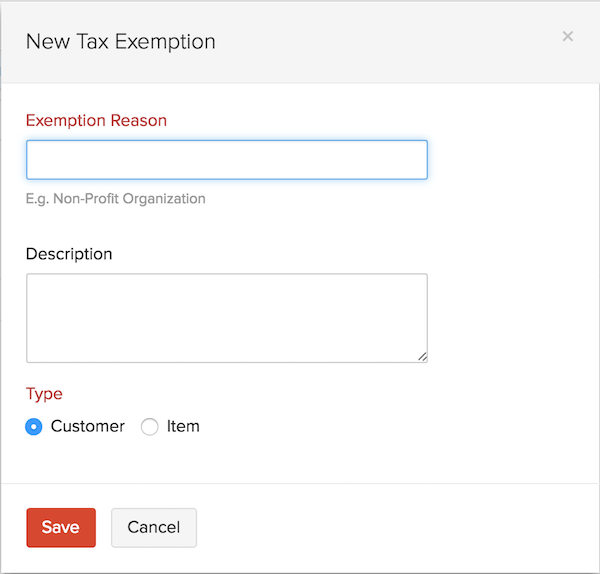
To add Tax Exemptions:
- Click the gear icon on the top right corner, and select Taxes.
- Go to the Tax Exemptions section and click + New Exemption.
- Enter the reason and description.
- Choose whether the exemption reason is applicable for an item or a customer.
- Click Save for the changes to take effect.
Default Tax Preferences
After having set up taxes under GST, you can set default tax groups in the Default Tax Preference section. This will pre populated the taxes from the default tax preference for your line items while creating transactions. If any of the line items fall under a different tax slab, you can change the tax rates while creating the transaction.
To set default tax preferences:
- Click the gear icon on the top right corner, and select Taxes.
- Go to the Default Tax Preference section.
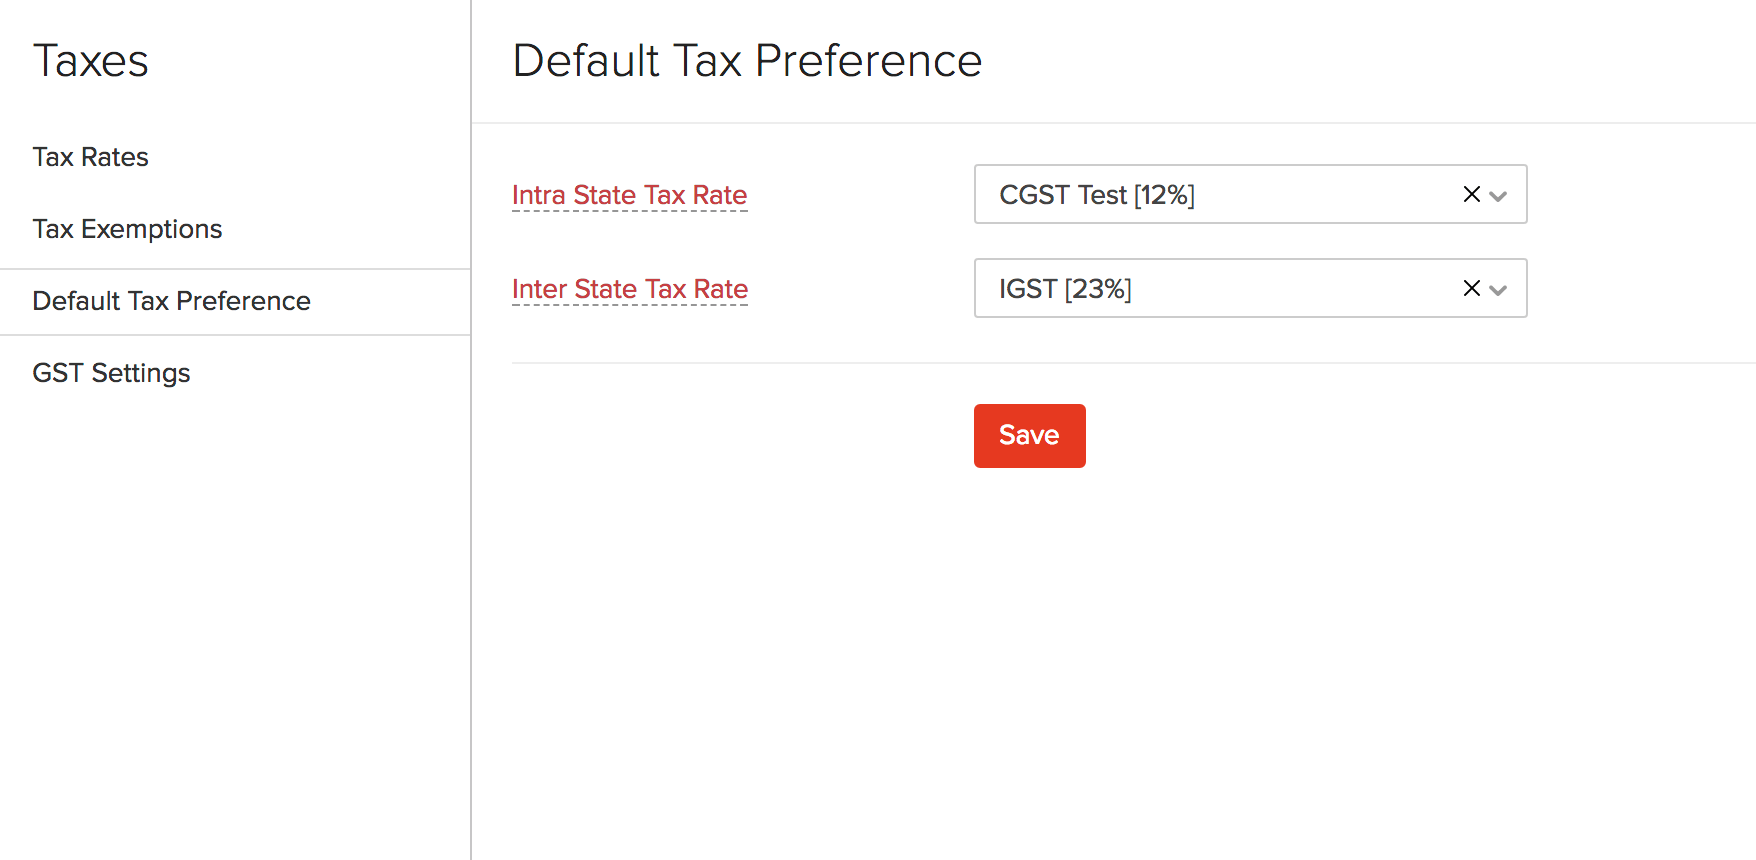
- Choose a tax group for Intra State Tax Rate and Inter State Tax Rate from the respective dropdowns.
- Click Save
Adding GSTIN of your contacts
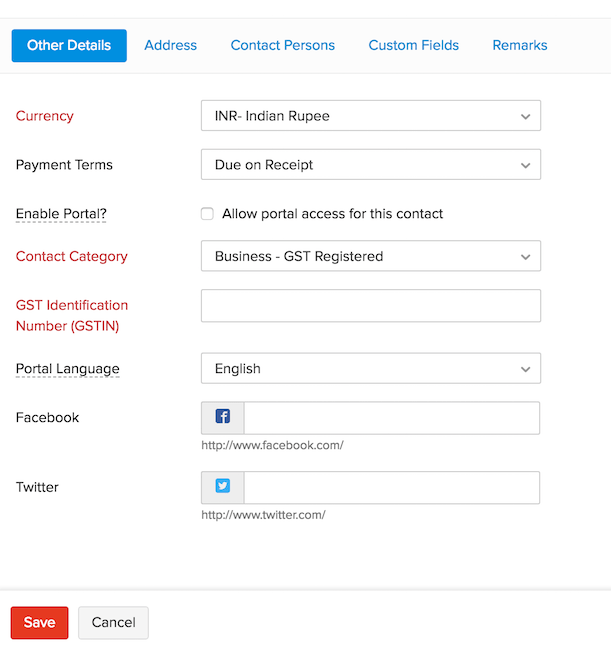
You can enter the GSTIN of your contacts in the contact creation page.
To add GSTIN to your contacts:
- Select the Contacts module and click the + New button present on the top right corner.
- In the creation page you will be able to see Contact Category under Other Details.
- You can choose from the following,
- Business - GST Registered: A business owner who is registered for GST.
- Business - GST Not Registered: A business owner has not registered for GST.
- Consumer: The person who is not associated to GSTN.
- If you have not entered a shipping address for a contact, billing address will be taken as the default state. If there’s no address associated to the contact, it will be considered as an intra state transaction(i.e transaction within the same state as your organisation).
Items
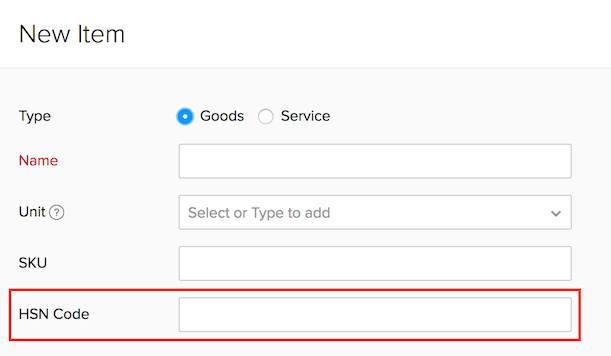
You will need to classify all your items as Goods or Services before entering the SAC and HSN code for those items.
To add SAC or HSN,
- Select the Items module on the sidebar and click the + New button on the top right corner of the window.
- Now in the item creation page, you can fill in the SAC code for services and HSN for goods.
Pro Tip: You can upgrade to Zoho Books and file your returns directly from there. Click here to know how to upgrade to Zoho Books.

