

Users & Roles
You can collaborate with your employees and accountants in your organization / team through Zoho Invoice, by inviting them as users, and providing role based access. Since Zoho Invoice is an online application, you can add users to your organization who can access it and work from any location.
Who Is a User?
A user is someone who has access to your Zoho Invoice organization. An organization in Zoho Invoice can have upto two users.
What Is a Role?
A role refers to the level of accessibility that a user can have in an organization. In Zoho Invoice, we have standard roles like:
Admin
An Admin in a Zoho Invoice organization has complete access to all modules, transactions, and settings. They can create and assign roles for other users in their organization.
Super Admin
In Zoho Invoice, the Super Admin is a privilege that is automatically assigned to the admin who creates an organization. In addition to the standard admin permissions, the Super Admin has authority over other admins within the organization. There can be only one Super Admin in an organization, and they’re same across all the Zoho Finance applications, including Zoho Books, Zoho Billing, Zoho Expense, Zoho Inventory, Zoho Payroll, Zoho Commerce, Zoho Checkout, Zakya, Zoho Practice, and Vikra of that organization.
Note:
The Super Admin feature may not be available in the Zoho Invoice organizations you had previously created.
Unique Privileges For a Super Admin
- Only the Super Admin can set up their organization in other Zoho Finance applications. For example, if you’re a Super Admin in Zoho Invoice, only you can set up that organization in Zoho Inventory, Zoho Expense, and so on.
- If any other admin wants to set up the organization, they must send a request, and the Super Admin must approve it.
- Once an admin requests access, the Super Admin will receive an email with the request link. The link will show the list of admins who have requested access. The Super Admin can either choose to accept or reject the request.
Note:
Once the request is approved, the admin can join the organization in the respective Zoho Finance application, and will continue to have the Admin role in that organization.
- Only the Super Admin can delete the organization.
Note:
If you no longer want to be the Super Admin of your organization, you must assign another active admin to be the new Super Admin. Learn more about making another admin the Super Admin.
Staff
The Staff role is assigned by the admin to other users who can access all modules except reports, settings, and accountant.
Timesheet Staff
The admin can assign the Timesheet Staff role to a user, who can access and log time entries within the Timesheet module.
Staff (Assigned Customers Only)
In Zoho Invoice, Staff (Assigned Customers Only) is a role that is given to users who are assigned to specific customers. They can access all modules, transactions, and data related to their assigned customers.
The default roles in Zoho Invoice cannot be edited or deleted.
Note: Creating custom roles is not supported in Zoho Invoice. However, you can upgrade to our billing platform, Zoho Billing to access this feature.
Inviting Users
Zoho Invoice allows you to add/invite users to help govern your organization’s invoicing process. To do this, follow the steps below:
- Go to Settings from the top-right corner.
- Select Users.
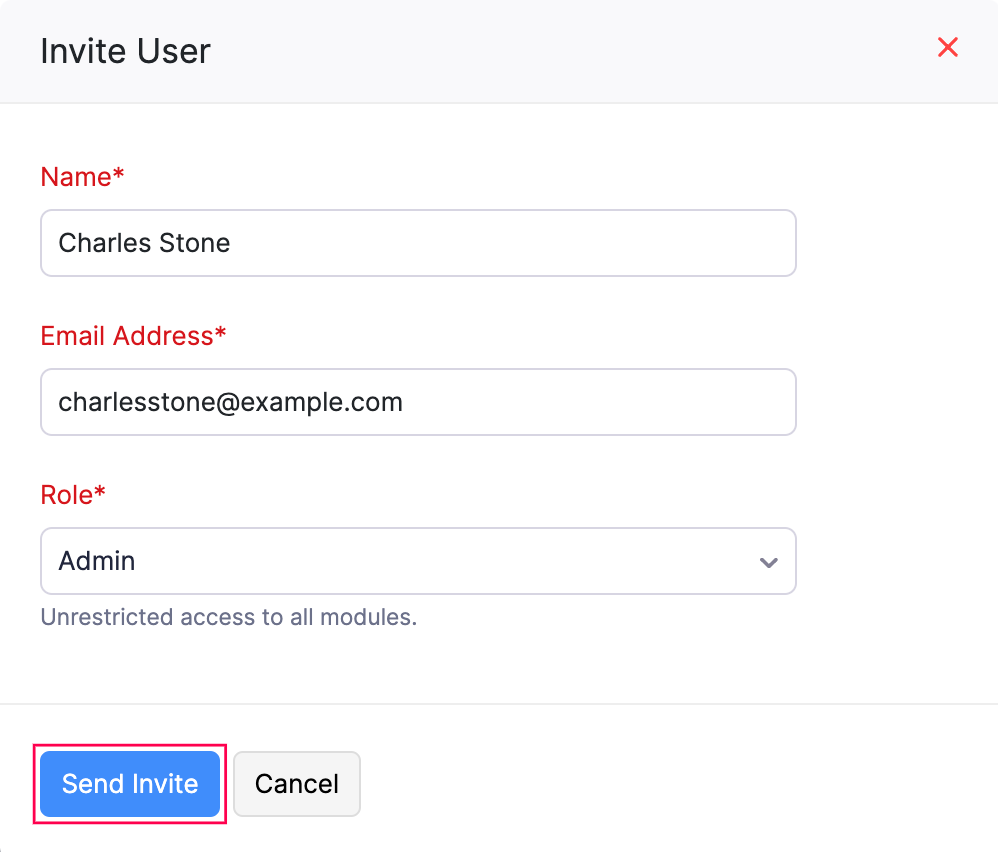
- Click Invite User at the top.
- Enter email address and name of the user.
- Choose a role from the dropdown.
- Click Send Invite to send the email invitation.
(a) The user needs to click on the Join Account link provided in the email to gain access to the organization he/she is invited to.
(b) The user can be a part of this organization by clicking on the Sign up today link provided.
(c) In case the user is already registered with Zoho Invoice, they can login straight away into the account using their credentials.
Make Another Admin the Super Admin
If you’re already the Super Admin of your organization and want to make another admin the Super Admin, you can do so at any time. Once done, you will be assigned the Admin role, and the new Super Admin will retain the Super Admin privileges across all Zoho Finance applications of that organization.
Scenario:
Charles is the Super Admin of his Zoho Invoice organization. As he plans to leave the organization, he decides to make Patricia, an active admin, the new Super Admin in the organization. With this, Charles ensures that the organization continues to operate smoothly even after he leaves.
To make another admin as the Super Admin of your organization:
- Go to Settings and select Users.
- Select the admin whom you want to mark as Super Admin.
- In the pane that appears, click the More icon in the top right corner, and select Make Super Admin from the dropdown.
- In the confirmation pop-up, click Make Super Admin again.
The selected admin will become the Super Admin for your organization, and you’ll be automatically assigned the Admin role.
Note:
- Only an admin who is active in all Zoho Finance applications can be marked as Super Admin.
- Only the existing Super Admin can mark another admin as Super Admin in an organization.
Deleting Users
To delete a user, kindly follow these steps:
- Go to Settings from the top-right corner.
- Select Users.
- Click the Gear icon next to the user you want to delete.
- Click More at the top and select Delete.
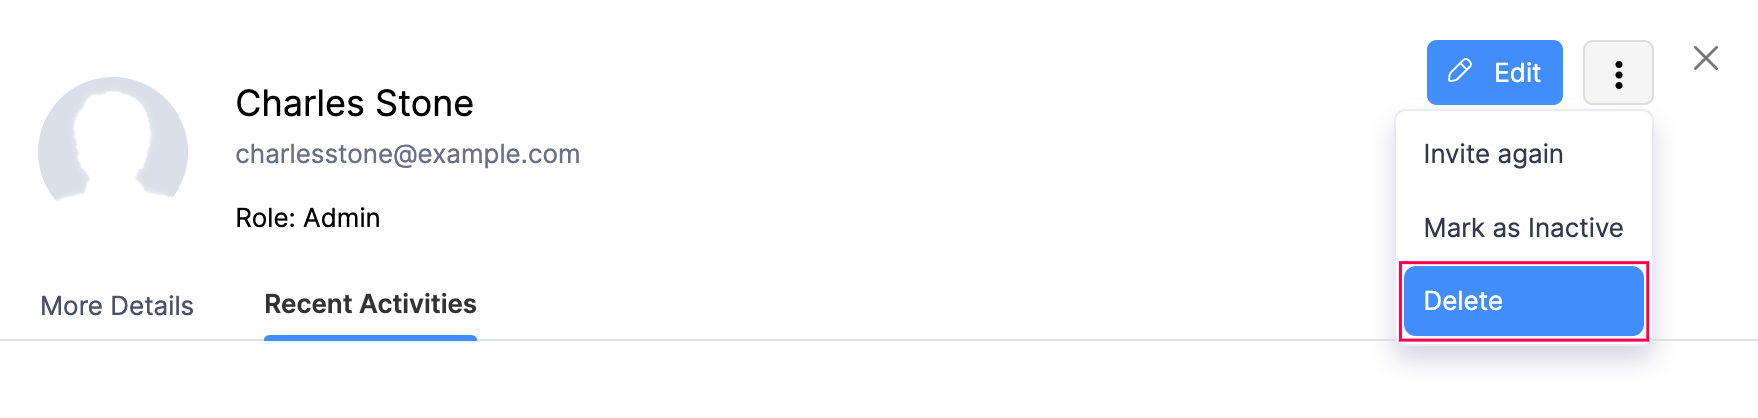
- A pop up window will appear to confirm if you wish to delete. Click Delete to confirm.
Please Note:
- Only an Admin can delete users.
- An admin cannot delete his or her own account.
- At any given point in time, there has to be one admin.
Changing User’s Status
In circumstances where you don’t want to permanently delete a user, but would like to prevent or restrict a user from accessing Zoho Invoice, you can change the user’s status to Inactive. This ensures that the person is no longer able to use Zoho Invoice, but remains listed as a user. You can also reactivate a user if you want them to use Zoho Invoice again.
To change the user’s status, follow these steps:
- Go to Settings from the top-right corner.
- Select Users.
- Click the Gear icon next to the user you want to restrict.
- Click More at the top.
- Select Mark as Inactive or Mark as Active.

 Yes
No
Yes
No
Thank you for your feedback!