Managing Invoices
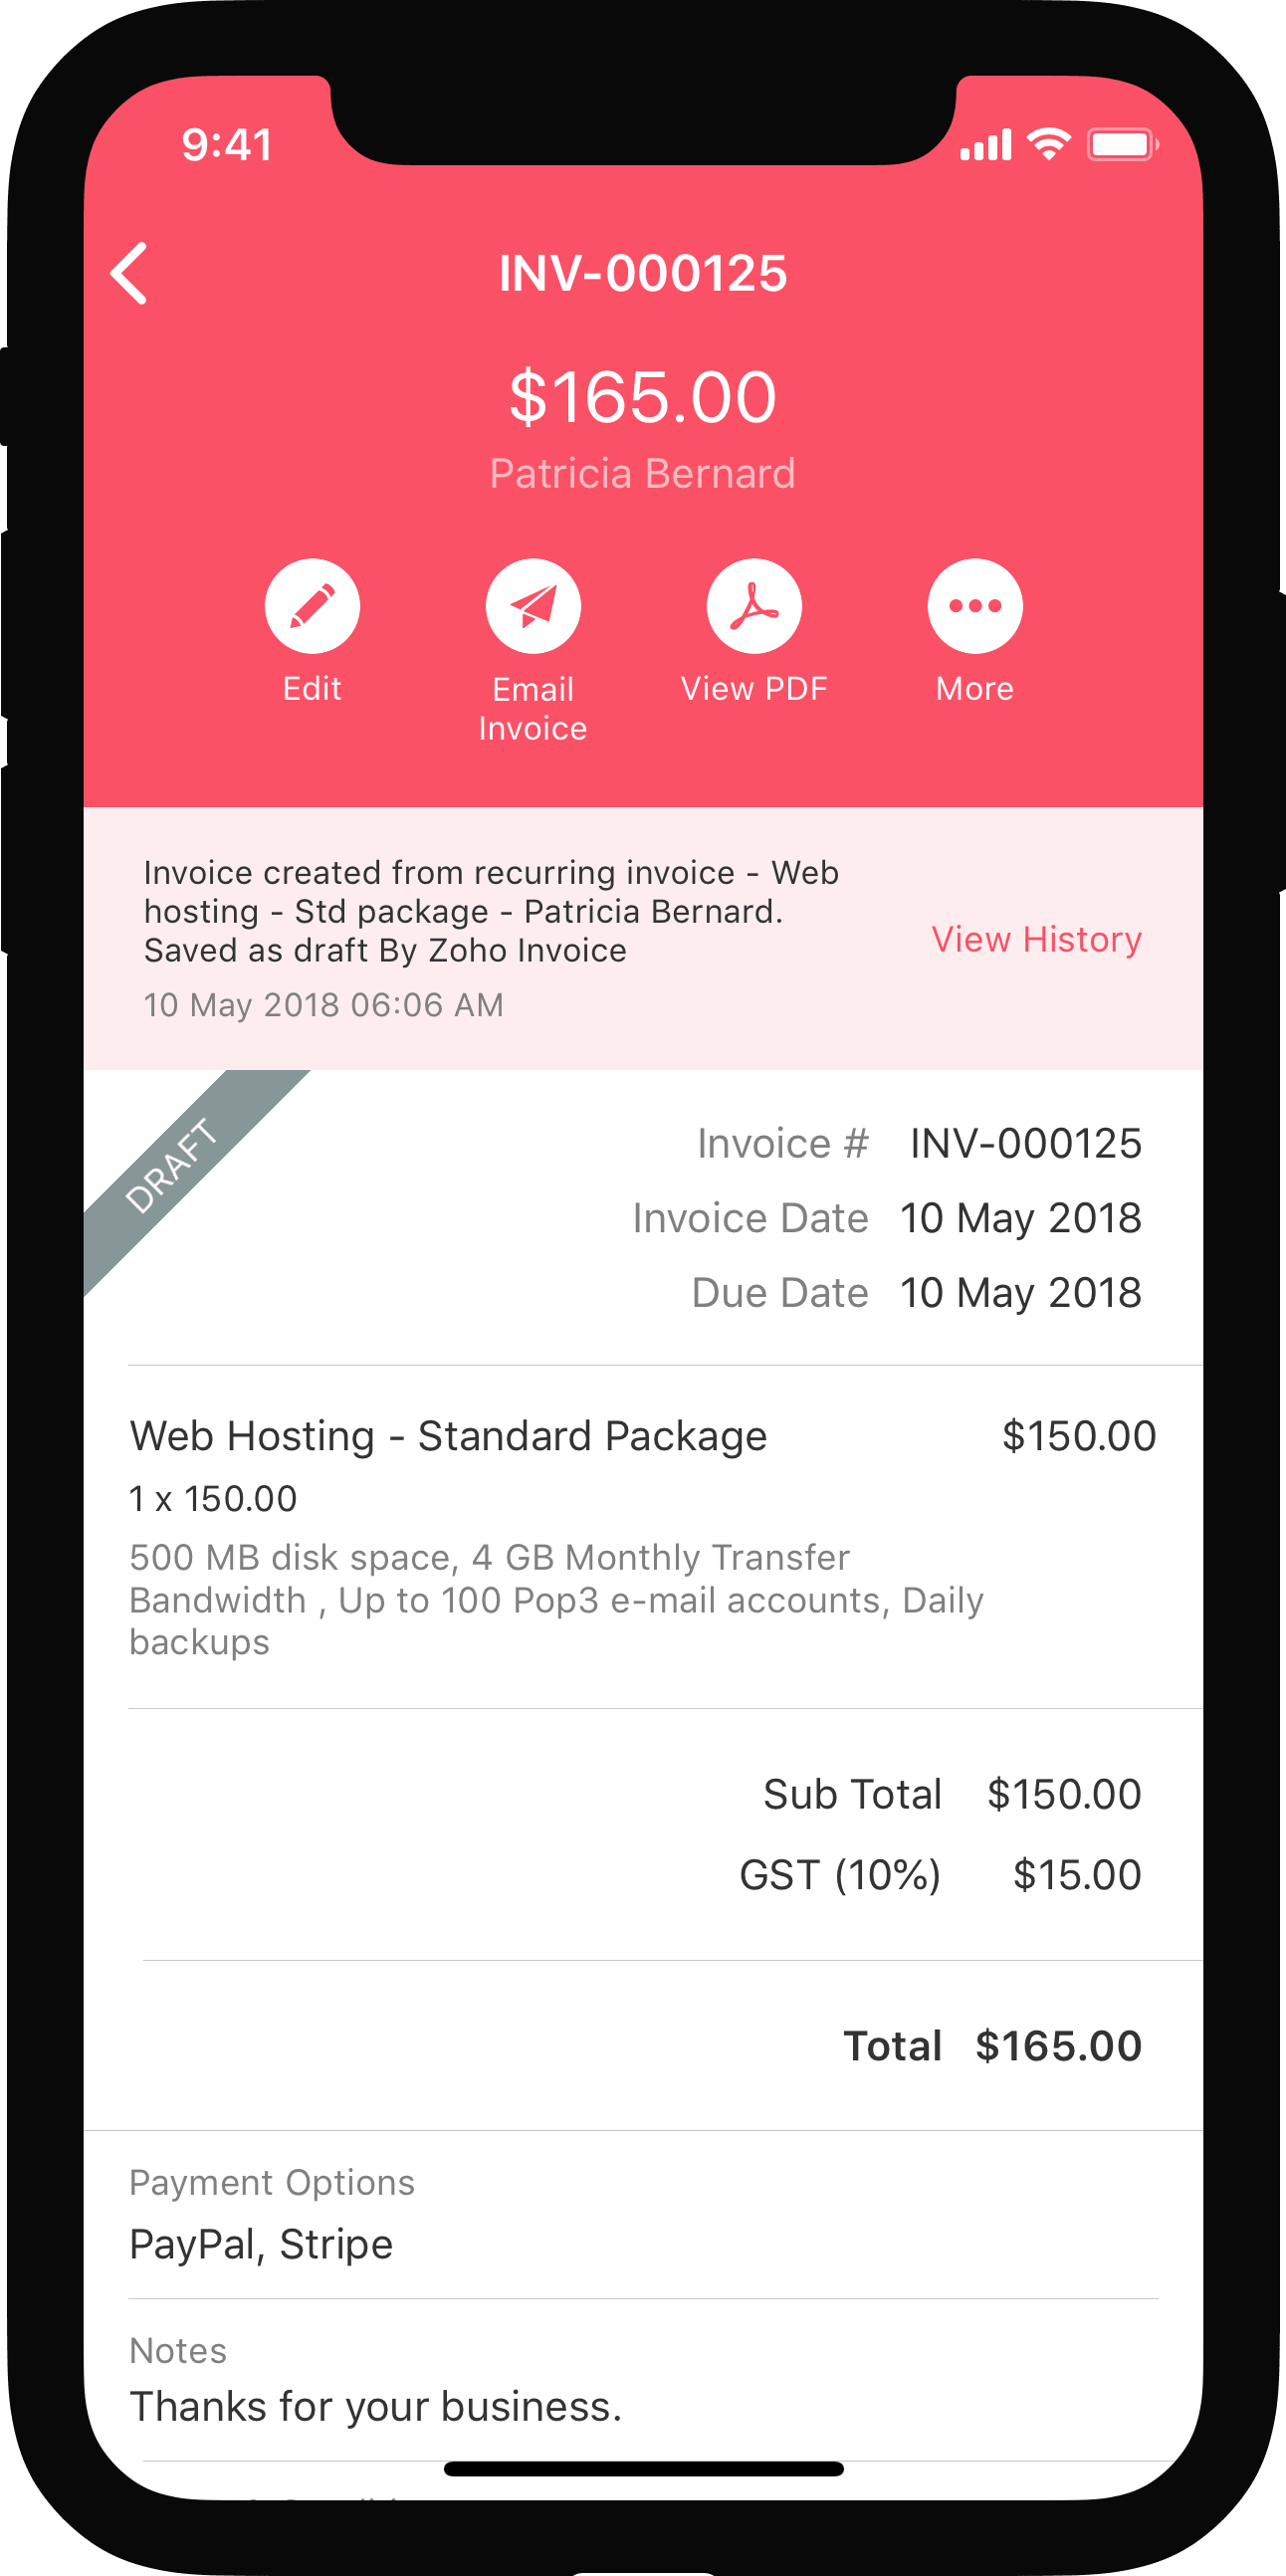
Manage invoices using the various features available in Zoho Invoice. You can view your invoice history and add comments, download invoices, print invoices, mail invoices, attach files to invoices and do a lot more. In this page, we’ll look at how to use these features.
IN THIS PAGE…
- History and Comments of an Invoice
- Downloading an Invoice as PDF
- Printing an Invoice
- Mailing an Invoice
- Attaching Files to an Invoice
- Sending an Invoice as a Snail Mail
- Sharing Invoice as a Link
- Marking an Invoice as Sent
- Sending Payment Reminder
- Setting Expected Payment Date
- Stopping Reminders
- Making an Invoice Recurring
- Creating a Credit Note
- Cloning an Invoice
- Writing Off an Invoice
- Voiding an Invoice
- Printing Delivery Note
- Printing Packing Slip
- Deleting an Invoice
- Exporting Invoices
- Bulk Actions
Common Invoice Actions
| Invoice Actions | Description |
|---|---|
| Edit invoice | You can edit the invoice and update the information. However, if the invoice has been sent already, you need to send a copy of the invoice to your customer again. |
| Downloading an Invoice as PDF | This option allows you to downlaod the invoice in PDF format. |
| Printing an Invoice | You can print your invoice to send or give a copy of the invoice to your customer. |
| Mailing an Invoice | Send the invoice as an email to your customer. |
| Attach Files to an Invoice | You can attach relevant files related to the sale to the respective invoice. |
| Send an Invoice as a Snail Mail | You can send a copy of an invoice as a snail mail through postal service using this feature. |
| Share Invoice as a Link | You can share the invoice as a link so that anybody with the link can access the invoice. |
| Making an Invoice Recurring | You can convert a normal invoice into a recurring invoice if the sale is going to be recurring over a specific period of time. |
| Create Credit Note | You can create a credit note if you owe your customer any money. |
| Clone an Invoice | If you want to create a new invoice with the exact copy of an already existing invoice, you can clone an invoice. |
| Void an Invoice | Void an invoice to maintain a record of the invoice while not allowing it to affect the accounts. |
| Print Delivery Note | Print a Delivery Note to send it along with the products to your customer. |
| Print Packing Slip | Print a Packing Slip to attach it with the product that you’re shipping to your customer. |
| Deleting an Invoice | Perform this action when you don’t want to have a record of the invoice in Zoho Invoice. |
| Export Invoices | You can export your invoices to download a copy of the invoices that you have in Zoho Invoice. |
Actions on Draft Invoices
| Invoice Actions | Description |
|---|---|
| Mark an Invoice as Sent | You can convert an invoice in the draft status to the open status without actually sending an invoice using this option. |
Actions on Open Invoices
| Invoice Actions | Description |
|---|---|
| Send Payment Reminder | When you have default payment, you can send a payment reminder to your customer asking them to make the payment immediately. |
| Set Expected Payment Date | You can record the expected payment date for an invoice if your customer had informed you regarding the payment date already. |
| Stop Reminders | You can stop all the payment reminders that are sent to a customer anytime using this feature. |
| Write Off an Invoice | You can write off an invoice when your customer might not the pay the due amount. |
History and Comments
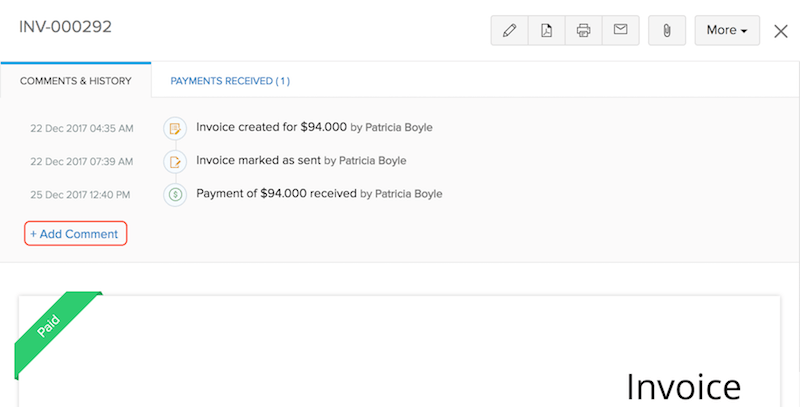
You can view a brief history of all the actions performed on an invoice in the History and Comments section, at the top in the invoice details section. This allows you to review all actions performed on an invoice and also identify who performed them. You can add your own comments whenever necessary to record any important information related to the invoice which might help you in the future. Let’s look at how you can add them.
Adding Comments to an Invoice
To add a comment:
- Go to the Invoices module in the left sidebar or press shift + i to instantly navigate to the Invoices module.
- Select the invoice to which you want to add a comment.
- Click the + Add Comment text above the invoice and type your comment.
- Check the Display in Customer Portal option, if you’ve enabled Customer Portal for your customer and want to display the comment in the Customer Portal.
- Click Add Comment.
Downloading an Invoice as PDF
At times, you would want to download an invoice as a PDF to keep a hard copy record for future references or to share it with someone else. Whatever your need may be, you can easily download the invoice as a PDF from Zoho Invoice.
To download an invoice as a PDF:
- Go to the Invoices module in the left sidebar or press shift + i to instantly navigate to the Invoices module.
- Select the invoice that you want to download as a PDF.
- Click the PDF icon in the top-right corner or press d to save it to your device.

Printing an Invoice
You can print an invoice directly from Zoho Invoice. To print an invoice:
- Go to the Invoices module in the left sidebar or press shift + i to instantly navigate to the Invoices module.
- Select the invoice that you want to print.
- Click the Print icon in the top-right corner or press p to print the invoice.
- Choose the appropriate settings and click Print.

Mailing an Invoice
You can share your invoices via email to the concerned people. To email the invoice:
- Go to the Invoices module in the left sidebar or press shift + i to instantly navigate to the Invoices module.
- Select the invoice that you want to email.
- Click the Email icon in the top-right corner of the window or press m to email the template. A template of the content that would be sent is shown as a preview where you can enter your message.
- Check the addressee’s email address and click Send.

Attaching Files to an Invoice
Zoho Invoice allows you to attach files to an invoice in Zoho Invoice. To attach files to an invoice:
- Go to the Invoices module in the left sidebar or press shift + i to instantly navigate to the Invoices module.
- Select the invoice to which you want to attach a file.
- Click the Attachment icon and a pop-up is visible.
- Select Cloud if you wish to upload the file from the cloud. Choose the file from the appropriate storage drive and click Attach.
OR - Select Drag & Drop to upload the file from a device or drag and drop the file into the pop-up.
- Select Cloud if you wish to upload the file from the cloud. Choose the file from the appropriate storage drive and click Attach.

Warning: You can attach a maximum of 5 files to an invoice with the file size limited to 5 MB each.
Sending an Invoice as a Snail Mail
At times, certain customers would prefer to receive a hard copy of the invoice. You can send a hard copy of the invoice easily by sending it as a Snail Mail directly from Zoho Invoice.
Snail mailing is the process of sending a hard copy of your invoice via postal service. Once you click Send Snail Mail, a copy of the corresponding invoice will be sent to the respective customer’s address through a postal service. However, before you can send a snail mail via Zoho Invoice, you need to buy a minimum of 5 credits at the Zoho Invoice Store.
To send an invoice as a snail mail:
- Go to the Invoices module in the left sidebar or press shift + i to instantly navigate to the Invoices module.
- Select the invoice you want to send as a snail mail.
- Click the More dropdown in the top-right corner of the window and select Send Snail Mail.
- Click Buy Credits if you haven’t bought credits earlier.
OR - Click Send Snail Mail. Snail Mails that are sent within the home country will be sent within 5 business days, and it will take 10 - 15 days to reach other countries.
- Click Buy Credits if you haven’t bought credits earlier.
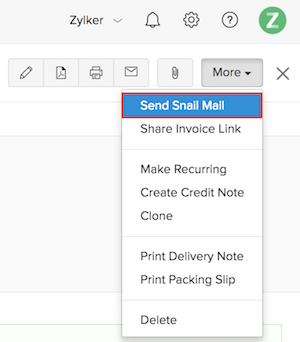
Warning: To use the snail mail feature, you would need to buy a minimum of 5 credits from the Zoho Invoice Store. To snail mail within the US, 1 credit will be used and 2 credits in other countries.
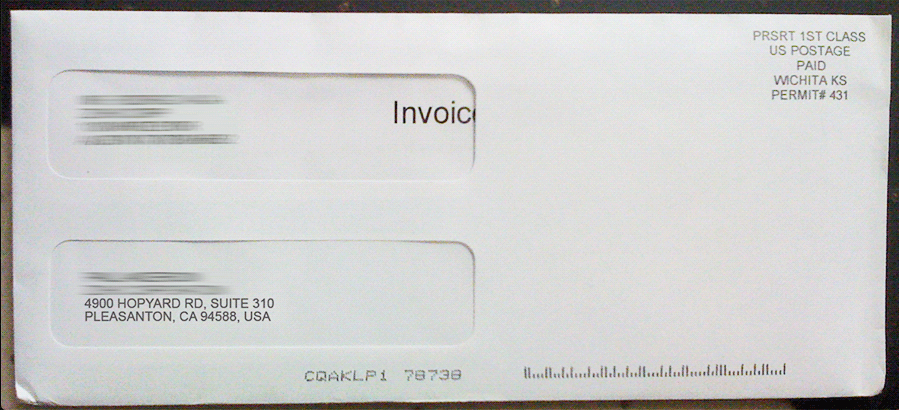
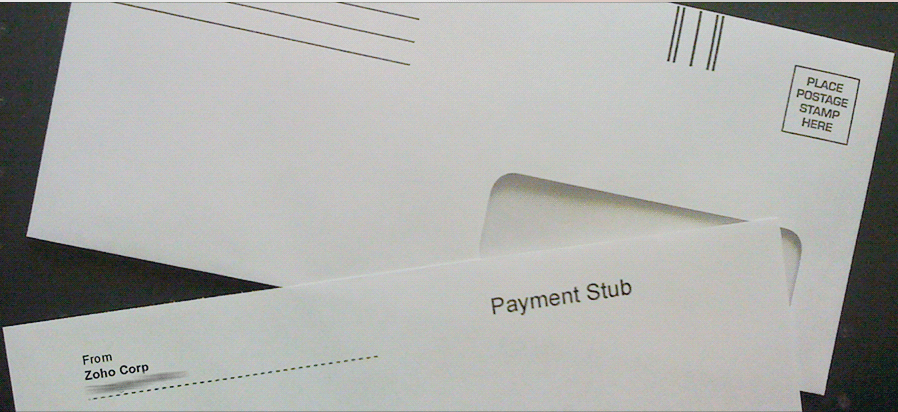
Sample Snail Mail Invoice
- Your customers will receive your invoices in our professionally printed and addressed envelopes.
- We also include a detachable payment stub so that it is easier for you to track the payment. It’ll include a return envelope as well.
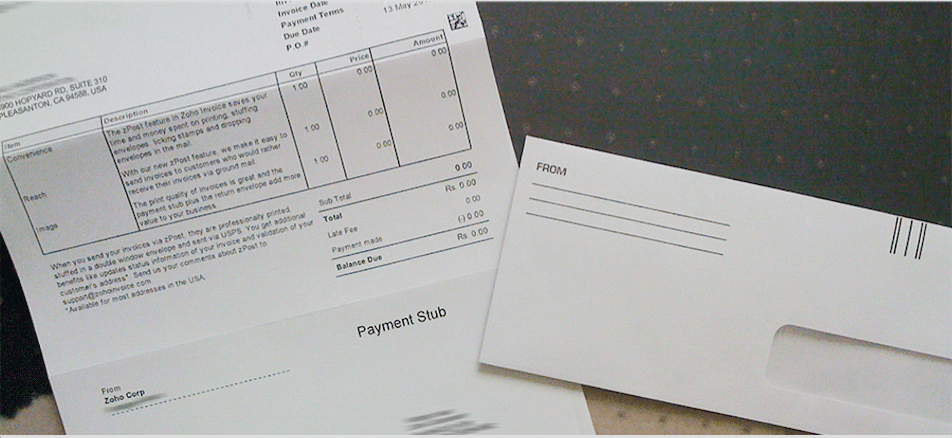
- Your customer can enter their payment information and return the payment stub back to you using the return envelope. The address is displayed neatly on the window.
Sharing an Invoice as a Link
Zoho Invoice enables you to share an invoice as an URL (link) to your customers. Your customers will be able to view the invoice by simple accessing the URL.
To share an invoice as a link:
- Go to the Invoices module in the left sidebar or press shift + i to instantly navigate to the Invoices module.
- Select the invoice you want to share using a link.
- Click the More dropdown in the top-right corner of the window and select Share Invoice Link.
- Click Copy Link to copy the link to your clipboard and sharing it to your customers.
OR - Click Share via mail to share the invoice link through an email.
- Click Copy Link to copy the link to your clipboard and sharing it to your customers.
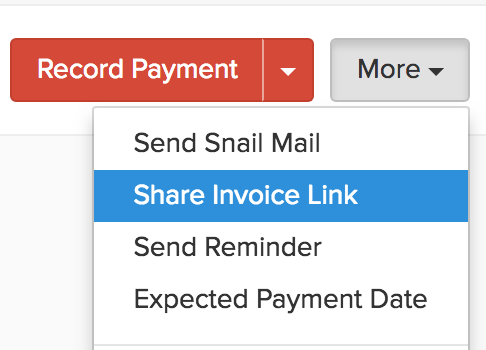
Now, whoever accesses the link that you’ve shared will be able to view the invoice.
Marking an Invoice as Sent
An invoice will be marked as sent, as soon as you send it to your customer. However, if haven’t sent the invoice as an email but would like to mark the invoice as sent, you can do so.
Insight: Only an invoice in Draft state can be marked as sent.
To mark an invoice as sent:
- Go to the Invoices module in the left sidebar or press shift + i to instantly navigate to the Invoices module.
- Select the draft invoice you want to mark as sent.
- Click the More dropdown in the top-right corner of the window and select Mark as Sent.
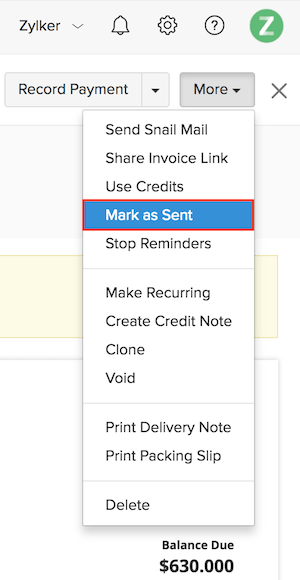
Immediately, the invoice will be marked as sent but the invoice won’t be sent as an email.
Send Payment Reminder
After you’ve sent your invoice to your customers and if they haven’t paid the invoice amount to you, you can send them a payment reminder email requesting them to pay the amount.
To send a payment reminder:
- Navigate to the Invoices module in the left sidebar or press shift + i to instantly navigate to the Invoices module.
- Select the invoice for which you want to send the payment reminder.
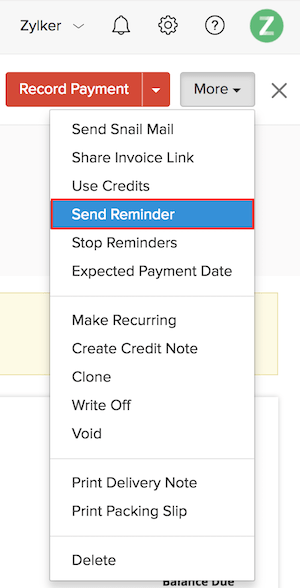
- Click the More dropdown menu and select Send Reminder.
- Edit the email content and click Send to send the remainder. The email will be sent to the customer’s email address.
Insight: If there are multiple invoices for which you want to remind your customers, you can send payment reminders in bulk. Learn more about sending payment reminders in bulk.
Instead of reminding your customers about payments manually, you can automate reminders for all invoices in Zoho Invoice.
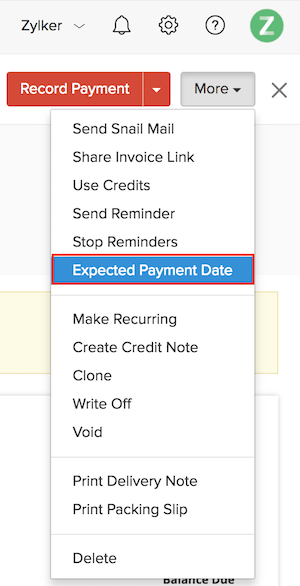
Set Expected Payment Date
When you invoice your customers, at times, they might inform you in prior that they will make the payment at a certain date. In such cases, you can record the expected payment date for the invoice and configure the reminder based on the expected payment date. We will remind you before or after the expected date based on your reminder configuration.
To set the expected payment date:
- Navigate to the Invoices module in the left sidebar or press shift + i to instantly navigate to the Invoices module.
- Select the invoice for which you want to set the expected payment date.
- Click the More dropdown menu and click Expected Payment Date.
- Choose a date and enter a description for setting the payment date.
- Click Save.
Stopping Reminders for an Invoice
Reminders are sent to your customers when they are yet to pay for the invoice, requesting them to make payments. If you want to stop the reminders that are yet to be sent to your customers, you can do so. To stop reminders:
- Navigate to the Invoices module in the left sidebar or press shift + i to instantly navigate to the Invoices module.
- Select the invoice for which you want to stop reminders.
- Click the More dropdown menu and click Stop Reminders.
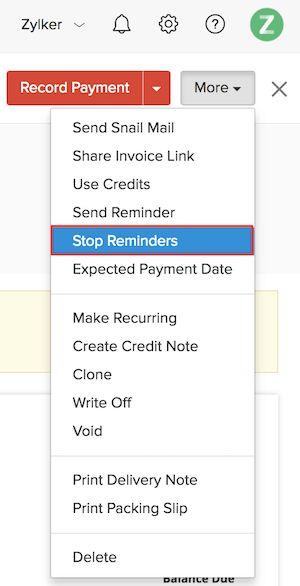
Immediately, all the reminders pertaining to the invoice will be stopped.
Making an Invoice Recurring
When your customer purchases the same items from you regularly every month or every week, you can convert their invoice to a recurring recurring.
To make an invoice recurring:
- Go to the Invoices module in the left sidebar or press shift + i to instantly navigate to the Invoices module.
- Select the invoice that you want to make it recurring.
- Click the More dropdown menu in the top-right corner.
- Select Make Recurring and a new recurring invoice creation page opens with information pre-populated from the invoice.
- Set the recurring frequency and click Save to create a recurring invoice.
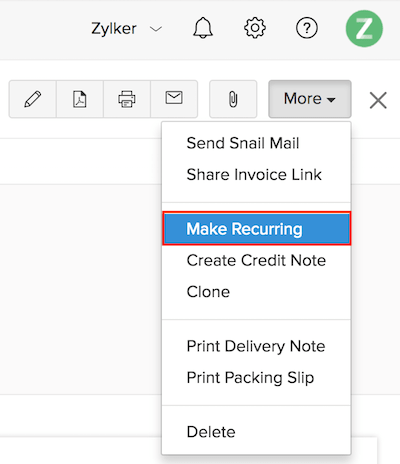
Once you’ve set up the recurring invoice, invoices will be raised at the set regular interval automatically based on your preferences. Learn more about Recurring Invoice.
Insight: When you make an invoice recurring, a recurring invoice is created with the details of the invoice. However, this invoice will not be included as part of the recurring profile. That means, only the invoices created in the future as part of the recurring invoice will be included in the recurring profile.
Creating a Credit Note
At times, your customers might return some of the goods that you’ve sold to them. In such cases, you would have to refund the amount for the returned items. Now, you can create a credit note for the amount to be returned and save it. You can apply this credit note to a future invoice or you can refund the amount to the customer.
To instantly create a credit note from an invoice:
- Go to the Invoices module in the left sidebar or press shift + i to instantly navigate to the Invoices module.
- Select the invoice for which you want to create a credit note.
- Click the More dropdown menu in the top-right corner.
- Select Create Credit Note to record the credit you owe to your customer and click OK in the pop-up. A new credit note creation page opens.
- Edit the details and click Save as Open.
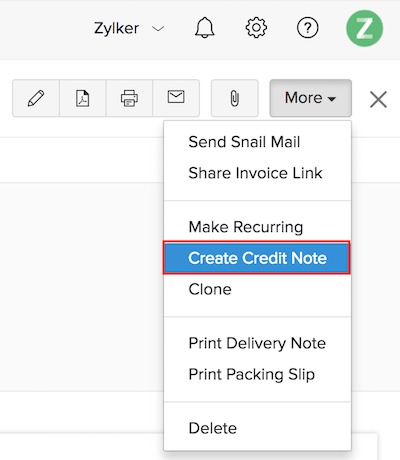
You can apply this credit note to an invoice of the same customer or refund it. Learn more about Credit Notes.
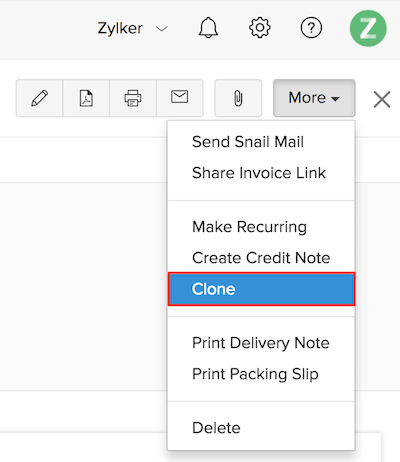
Cloning an Invoice
If you need to use the information in an invoice to create another invoice, you can clone it. This enables you to create a new similar invoice instantly and you can save it after making the necessary changes.
To clone an invoice:
- Go to the Invoices module in the left sidebar or press shift + i to instantly navigate to the Invoices module.
- Select the invoice that you want to clone.
- Click the More dropdown menu in the top-right corner.
- Select Clone to clone the invoice. A new invoice creation page opens with details pre-populated from the previous invoice.
- Make the necessary changes and click Save as Draft or Save and Send to create the invoice.
Writing-off an Invoice
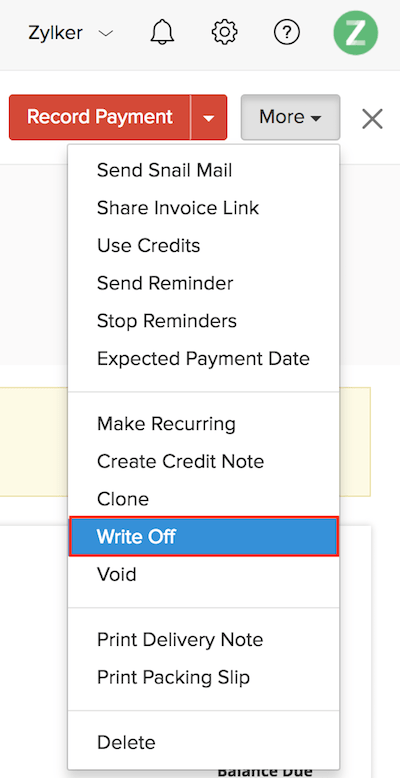
In doing business, there could be customers who default from making the payments or make partial payments for the invoice. Instead of the due remaining as it is, you can write-off the balance due and convert the status of the invoice to Paid.
To write-off an invoice:
- Go to the Invoices module in the left sidebar or press shift + i to instantly navigate to the Invoices module.
- Select the invoice that you want to write off.
- Click the More dropdown menu in the top-right corner.
- Select Write Off to write off the invoice amount that your customer owes you.
- Select a write-off date and enter a reason for writing off.
- Click Write it off.
Insight: The written-off amount will not reflect in the Payments Received report. You can view the Bad Debt report to know the details of the written off amount.
Voiding an Invoice
If an invoice is obsolete but you want the record to be stored, you can void the invoice. A voided invoice will not reflect in the reports.
To void an invoice:
- Go to the Invoices module in the left sidebar or press shift + i to instantly navigate to the Invoices module.
- Select the invoice that you want to void.
- Click the More dropdown menu in the top-right corner and select Void to void the invoice.
- Enter a reason for voiding the invoice for future reference.
- Click Void it to void the invoice.

Printing a Delivery Note
To print a deliver note for an invoice:
- Go to the Invoices module in the left sidebar or press shift + i to instantly navigate to the Invoices module.
- Select the invoice for which you want to print a delivery note.
- Click the More dropdown menu in the top-right corner and select Print Delivery Note. A preview of the delivery note is displayed in a pop-up.
- Click Print to print the delivery note.
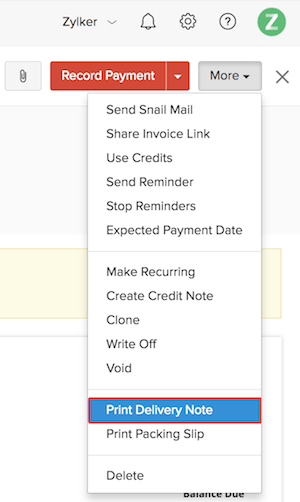
Pro Tip: You can show or hide the fields that are displayed in the delivery note. You can do that in Settings > Preferences > Delivery Note.
Printing a Packing Slip
To print a packing slip for an invoice:
- Go to the Invoices module in the left sidebar or press shift + i to instantly navigate to the Invoices module.
- Select the invoice for which you want to print a packing slip.
- Click the More dropdown menu in the top-right corner and select Print Packing Slip. A preview of the packing slip is displayed in a pop-up.
- Click Print to print the packing slip.
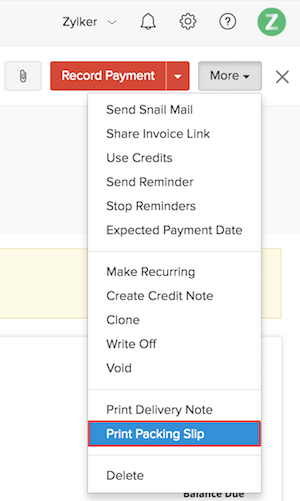
Pro Tip: You can show or hide the fields that are displayed in the packing slip. You can do that in Settings > Preferences > Packing Slip.
Deleting an Invoice
At times, you would want to delete invoices that you’ve created mistakenly or obsolete invoices. If it’s a paid invoice, you need to delete the recorded payment before deleting the invoice.
To delete an invoice:
- Go to the Invoices module in the left sidebar or press shift + i to instantly navigate to the Invoices module.
- Select the invoice that you want to delete.
- Click the More dropdown menu in the top-right corner.
- Select Delete to delete the invoice.
- Click Delete it to delete the invoice.
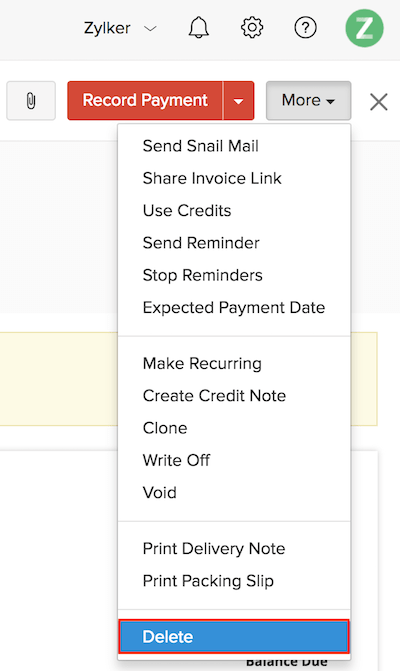
Warning: The invoice you delete cannot be recovered again once it is deleted.
Exporting Invoices
If you want to store a copy of all the invoices separately, you can do that easily by exporting the invoices. You can also export invoices belonging to a specific period. You can export them in either CSV (Comma Separated Values) or XLS (eXceL Spreadsheet) formats.
To export invoices:
- Go to the Invoices module in the left sidebar or press shift + i to instantly navigate to the Invoices module.
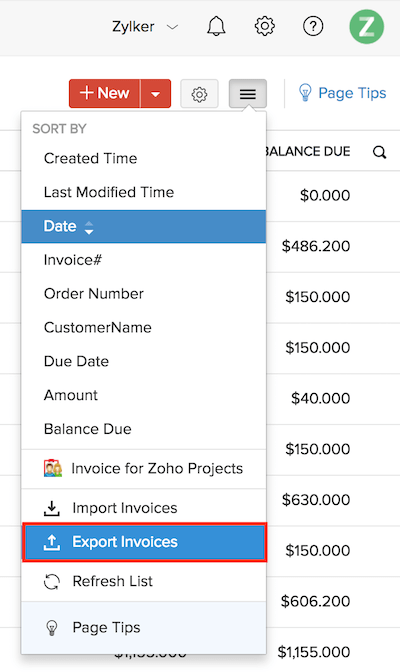
- Click the Hamburger icon and select Export Invoice or press alt + e to export them.
- Choose All Invoices if you want to export all the invoices or Specific Period to export invoices for a specific period by selecting a date range.
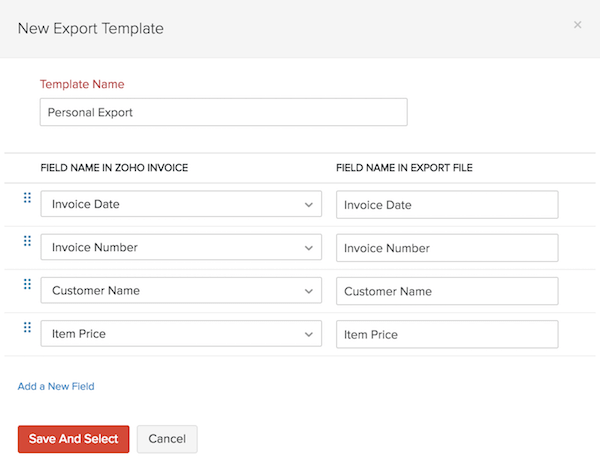
If you want only specific fields of the invoice to be exported, you can specify them by clicking the dropdown under Fields in Export File and selecting + Add New to create a new template.
- Enter a Template Name.
- Click Add a New Field to select the fields that you want in the export file.
- Also, you can edit the Field Name that will be displayed in the export file as you desire.
- Click Save and Select.
Select the format in which you want the invoices to be exported: CSV or XLS.
Click Export and save the file in your device.
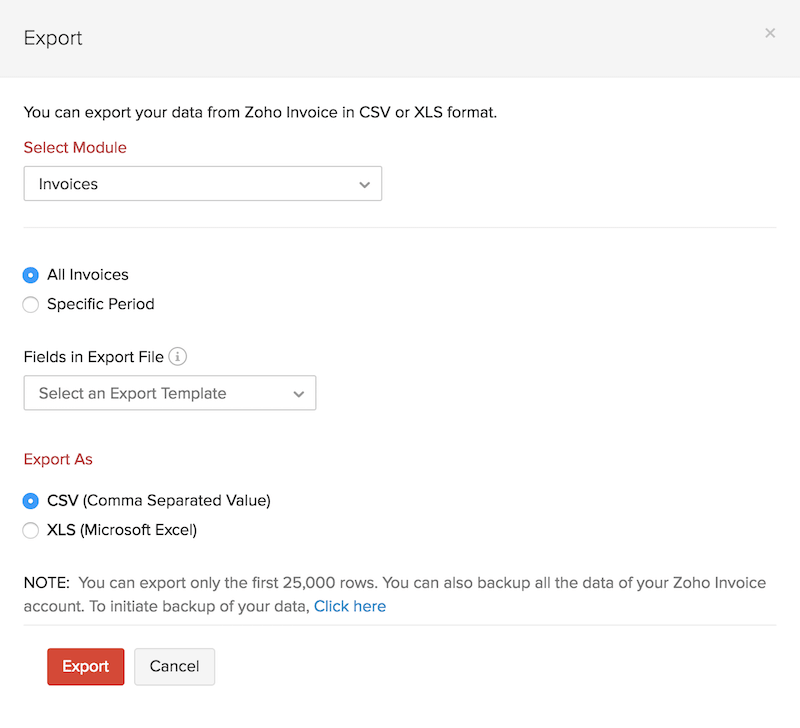
Insight: You can export a maximum of only 25,000 rows at a time. If there are more than 25,000 rows of invoices, you can export them with multiple attempts.
Bulk Actions
You can perform an action over a lot of invoices at a single attempt in Zoho Invoice. You can mark them as sent, download them as PDF, print them or delete them in bulk.
- Marking Invoices as Sent
- Email Invoices
- Downloading Invoices as PDF
- Printing Invoices
- Deleting Invoices
- Send Payment Reminders in Bulk
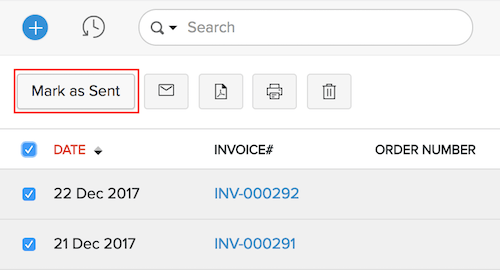
Marking Invoices as Sent
To mark invoices as sent:
- Go to the Invoices module in the left sidebar or press shift + i to instantly navigate to the Invoices module.
- Check the draft invoices that you want to mark as sent.
- Click the Mark as Sent button in the top bar to mark all the selected invoices as sent.
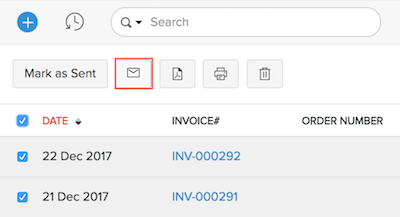
Email Invoices
To email invoices in bulk:
- Go to the Invoices module in the left sidebar or press shift + i to instantly navigate to the Invoices module.
- Check the invoices that you want email to your customers.
- Click the Email icon in the top bar to send those invoices as email in bulk.
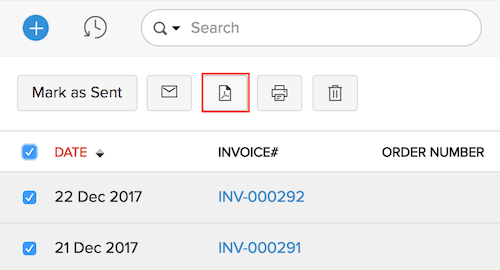
Downloading Invoices as PDF
To download invoices in PDF:
- Go to the Invoices module in the left sidebar or press shift + i to instantly navigate to the Invoices module.
- Check the invoices that you want to download as PDF.
- Click the PDF icon in the top bar or press alt + d to download the selected invoices.
- Choose an appropriate location and save them to your device.
Printing Invoices
To print invoices in bulk:
- Go to the Invoices module in the left sidebar or press shift + i to instantly navigate to the Invoices module.
- Check the invoices that you want to print.
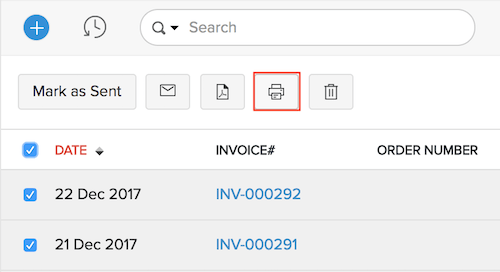
- Click the Print icon in the top bar or press alt + p to print the selected invoices.
- Configure the print settings and click Print.
Deleting Invoices
To delete invoices in bulk:
- Go to the Invoices module in the left sidebar or press shift + i to instantly navigate to the Invoices module.
- Check the invoices that you want to delete.
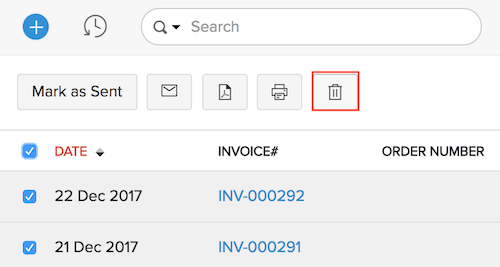
- Click the Trash icon in the top bar.
- Click OK to delete the invoices.
Warning: The invoices that you delete cannot be retrieved again.
Send Payment Reminders in Bulk
Zoho Invoice enables you to send payment reminders in bulk for all the invoices that are in the Overdue status to your customers in a single attempt.
To send payment reminder in bulk:
- Go to the Invoices module in the left sidebar or press shift + i to instantly navigate to the Invoices module.
- Click the All Invoices or filter dropdown and select Overdue.
- Check the invoices for which you want to send payment reminders.
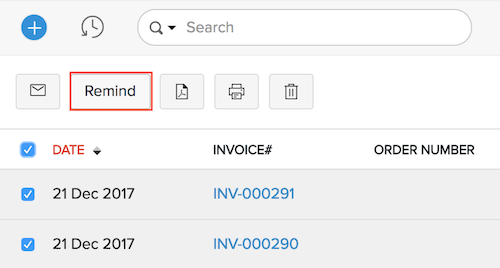
- Click the Remind button and edit the email that will be sent to the customer.
- Click Send to send a reminder email to all the defaulting customers for the overdue invoices.

 Yes
Yes
 Thank you for your feedback!