Transaction Approval
Transaction Approval allows you to verify and approve the transactions that your employees create in Zoho Invoice. So, only the transactions that are approved reflect in your accounts and reports.
Introducing an approval workflow will let you set additional validations while recording transactions in your Zoho Invoice organization. This helps to avoid situations where a wrong item or an incorrect quantity may be recorded while making a sale. Let’s look at a scenario to understand this better.
Scenario: Jason is a business owner and has multiple employees working for him. A newly appointed staff in the sales department accidentally sends out an estimate with the wrong price. Jason figures this out and wonders how he could have prevented this in the first place. Immediately, he sets up an approval workflow to ensure that all estimates his employees send has their managers' approval.
Similarly, you can enable Transaction Approval and the users in your organization can create and save transactions in the draft state and submit them for approval. Let’s see how you can set up transaction approval to prevent any possible mishap.
This document will help you learn about:
Setting-up Transaction Approval
Transaction Approval Setup is a three step process:
Enabling Transaction Approval
The first step in setting up the approval workflow is to enable the approval option to start approving transactions created by the users in the organization.
To enable transaction approval,
- Click the Gear icon in the top right corner and select Preferences.
- Head to the General tab and you will be able to find Transaction Approval.
- Enable the checkbox next to the option Sales Transactions to enable approval.

- Click Save.
Transaction Approval Preferences
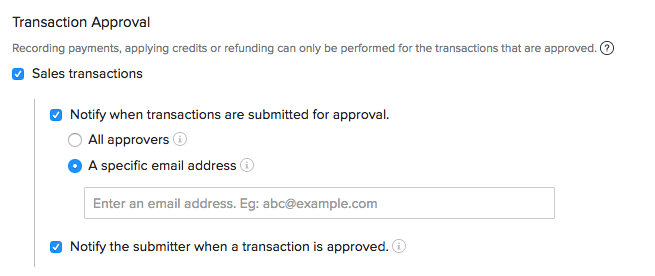
Once you have enabled transaction approval, you can set your approval preferences. This will help you to restrict and define the role you would like to offer your approvers. You will be able to find Approval Preferences below the Transaction Approval option. Check or uncheck the box if you would like to enable or disable a preference.
-
Notify when transactions are submitted for approval: Whenever a transaction is submitted for approval, an email notification shall be sent to the approvers. You can choose to send the notification for all approvers or only to one approver of your choice.
-
Notify the submitter when a transaction is approved: You can also choose to notify the submitter when a submitted transaction has been approved by checking the box.
Adding Approvers
The Admins of the organization have access to approve transactions. However, you can further extend this to your co-workers and add them as approvers. Approvers are users of the organization other than the Admins who have approval access. You can add users to your Zoho Invoice organization and enable approval permissions to add them as approvers.
To add approvers,
- Click the Gear icon from the top right corner and select Users and Roles.
- Navigate to the Roles tab and create a new role by clicking the New Role option. Alternatively, you can also duplicate an existing role by clicking the clone button.

- Enter a new name for the role created and select the modules you wish to give the user access to.
- Navigate to the Sales section.
- Check the box in the Approve column to provide approval permissions for sales transactions.
- You can also allow approvers to Edit and Delete Approved Transactions by clicking the More Permissions option.t

- Click Save.
Once you have enabled permissions, you can invite new users to the organization as approvers. To invite new users,
- Navigate to the All Users tab and click Invite User.
- Enter the details in the pop-up and select a Role you would like to assign to the user and click Send. Immediately, an email will be sent to the prospective user.
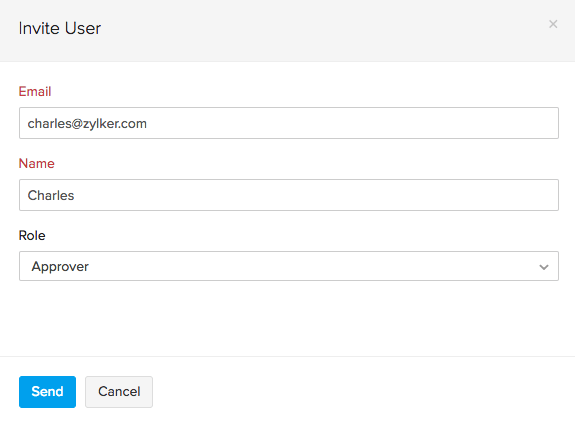
- The user needs to click the Join Account link sent to him via mail to start using Zoho Invoice.
You can learn more about Users and Roles in this Help Document.
Enabling Approval Permissions for Existing Users
The admins of an organization will be able to approve all transactions. However, there may be cases where the admin would like to permit other existing users to approve transactions. To enable approval permission to users:
- Click the Gear icon in the top right corner and select Users & Roles.
- Navigate to the Roles tab and click Edit.
- Navigate to the Purchases/Sales section and check the appropriate boxes in the Approve column to provide approval permissions.
Understanding Transaction Approval Workflow
Once you enable transaction approval for sales entities, it will be open for Invoices, Estimates, Credit Notes and Retainer Invoices. Only when a transaction is approved, the user will be able to do the following actions:
- Invoice: Mark Invoices as Sent, Record Payments, Apply Credits, Create Shipping Bill, Write Off, Use Retainer Invoice and Mail invoices.
- Estimates: Mark Estimates as Sent, Convert to Invoice and Mail estimates.
- Credit Note: Convert to Open, Record Refund, Apply Credits and Send Mails.
- Retainer Invoice: Mark Retainer Invoices as Sent, Record Refunds and Send Mails.
The transaction approval workflow involves two important steps:
Submitting for Approval
The first step in transaction approval is to create and submit transactions for approval. To create and submit a new sales transaction:
- Navigate to the sidebar of your Zoho Invoice homepage.
- Create a new Invoice/Estimate/Credit Note/Retainer Invoice.
- Click Save as Draft to save the transaction or click Save and Submit to save and submit the transaction for approval. You can also click Save and Print to print the transaction (In case of an Invoice).
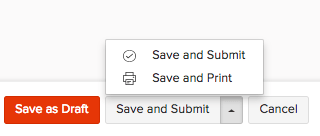
You will receive a notification once your transaction is approved.
Approving Sales Transactions
As soon as transactions are submitted, the respective approvers can approve them.
To approve the transactions, the approver/admin should:
- Navigate to the Sales module from your Zoho Invoice homepage.
- Select the respective Invoice/Estimate/Credit Note/Retainer Invoice.
- Click Approve.
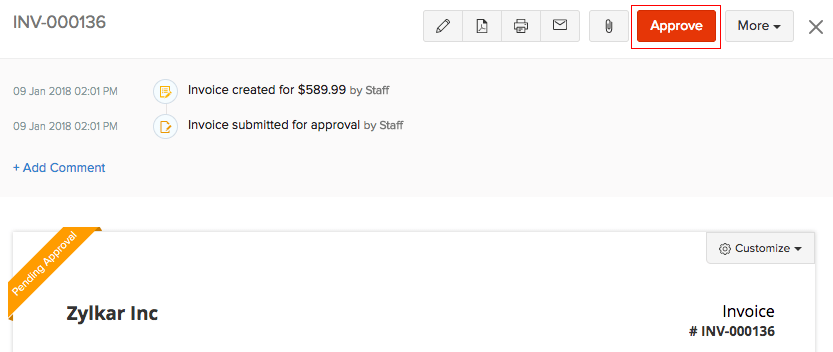
- The Approvers will be able to approve the transactions they create by selecting Save and Approve from the drop up.
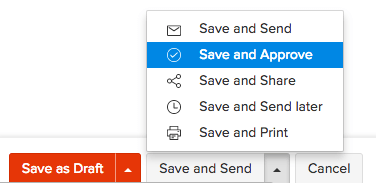
- The Approvers can click Save and Submit for further verification by other Approvers/Admins or choose any option they would like to perform on the transaction.
Once the transaction has been approved, the users of the organization will be able to perform all actions associated with the entity as mentioned above.
Custom Views
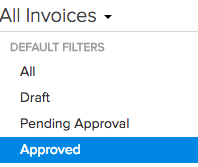
You can quickly view the transactions pending for approval or approved transactions by selecting the filter Pending Approval or Approved from the respective module.
Warning: Once you approve a transaction, you cannot undo this action. You can however mark the transaction as Void and later convert it to the Draft state.
