Workflow Rules
Using Automation, you can trigger actions like emails/SMS or automate functions whenever certain conditions are satisfied in the expense report. A good example would be the case where a notification e-mail is sent automatically to the finance head when an expense report exceeds the threshold limit.
In this section you will learn how to
- Setup a new workflow rule.
- Create Email alerts.
- Create Webhooks.
- Create Field Updates.
- Workflow Scenarios
To get started with workflows, navigate to Settings > Automation.
Setting up a new workflow rule
While setting up a workflow, you elaborate the conditions based on which the actions are triggered. You can associate more than one action with a workflow. To set up a workflow rule in Zoho Expense, navigate to Settings > Automation > Workflow Rules. In the next few steps, you will learn how to:
- Name your workflow
- Choose when to trigger a workflow
- Add additional triggers
- Editing criteria pattern
- Associate actions such as Email Alerts and Webhooks
- Edit/Delete a workflow rule
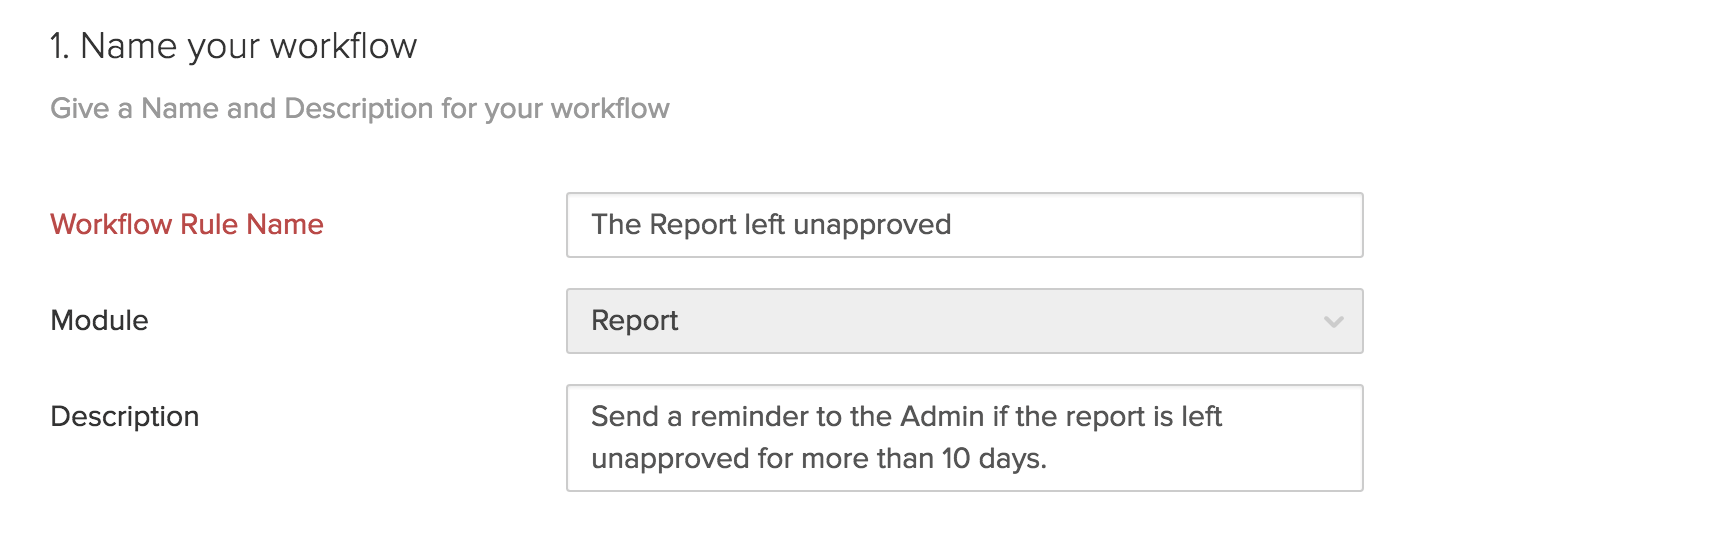
Name your workflow
- Workflow Rule Name: Give a unique name for the workflow rule.
- Description: Give a small description for your workflow rule.
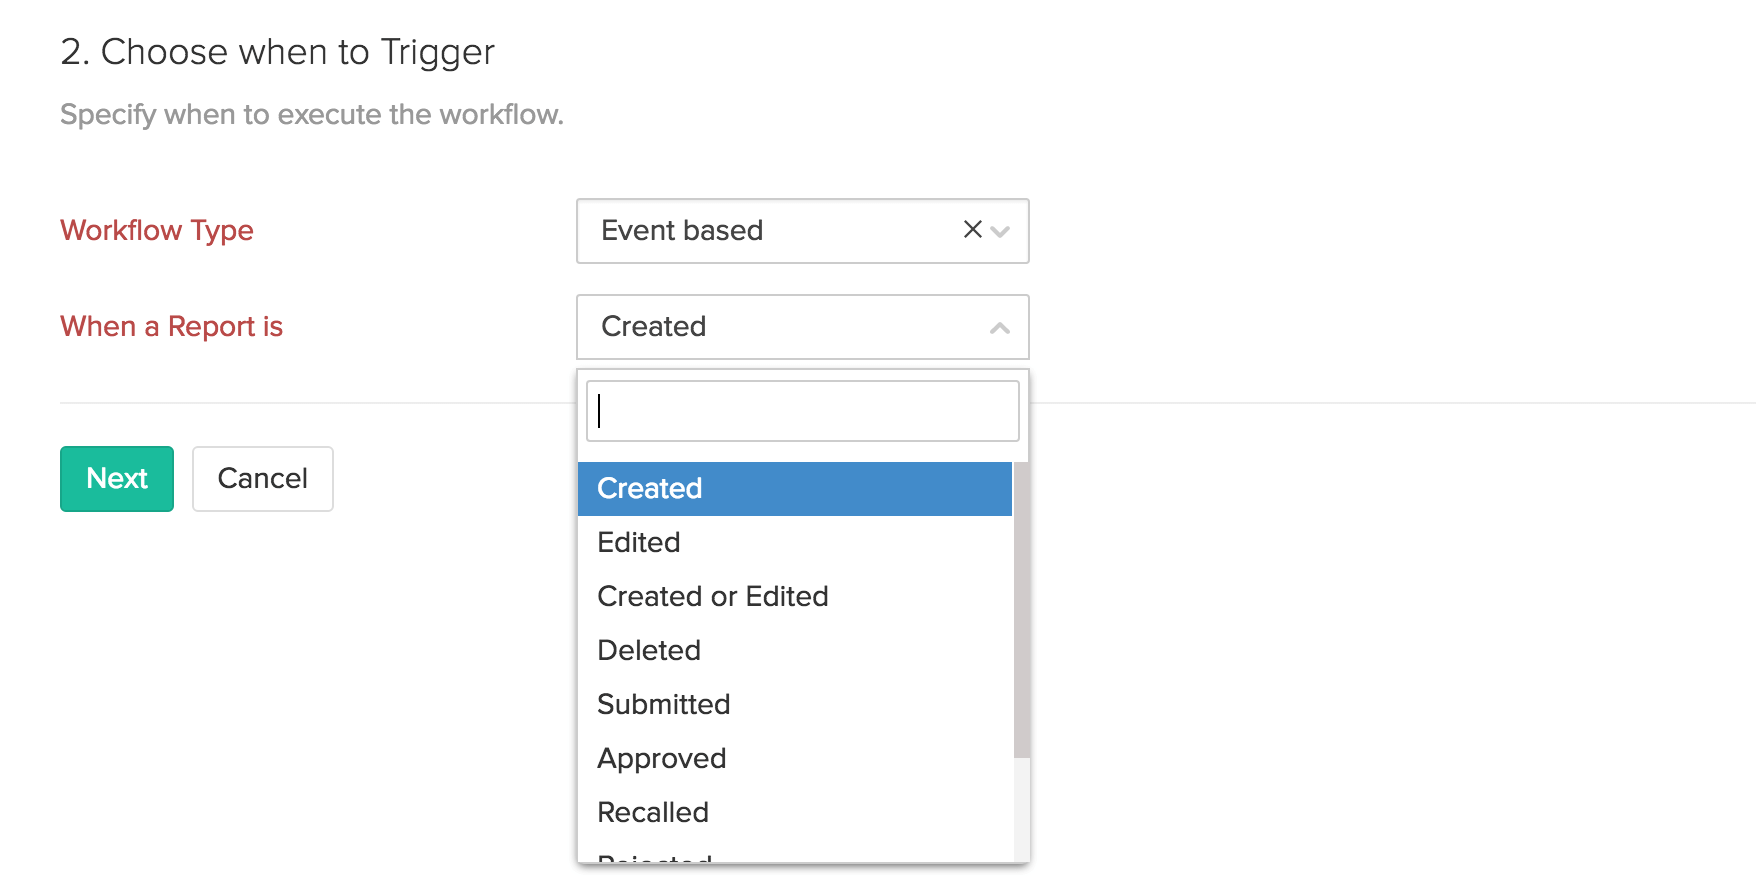
Choosing when to trigger a workflow
As the name suggests, here, you can choose to trigger the workflow when an event has occurred (Event-Based) or in a few days before/after a particular date (Date-based).
Workflows are mainly of two types:
- Event Based
- Date Based
Event based:
-
If you prefer an Event-Based workflow, the actions (Such as Email Alerts) will be triggered when the report is:
-
Created
-
Edited
-
Created or Edited
-
Deleted
-
Submitted
-
Approved
-
Recalled
-
Rejected
-
Reimbursed
-
Reimbursement Cancelled
-
On selecting Edited or Created/Edited, you will see additional fields:
| Field | Description |
|---|---|
| Exeute the workflow when |
|
- If you choose When any selected field is updated or When all selected fields are updated, you get an option to select a maximum of three fields.
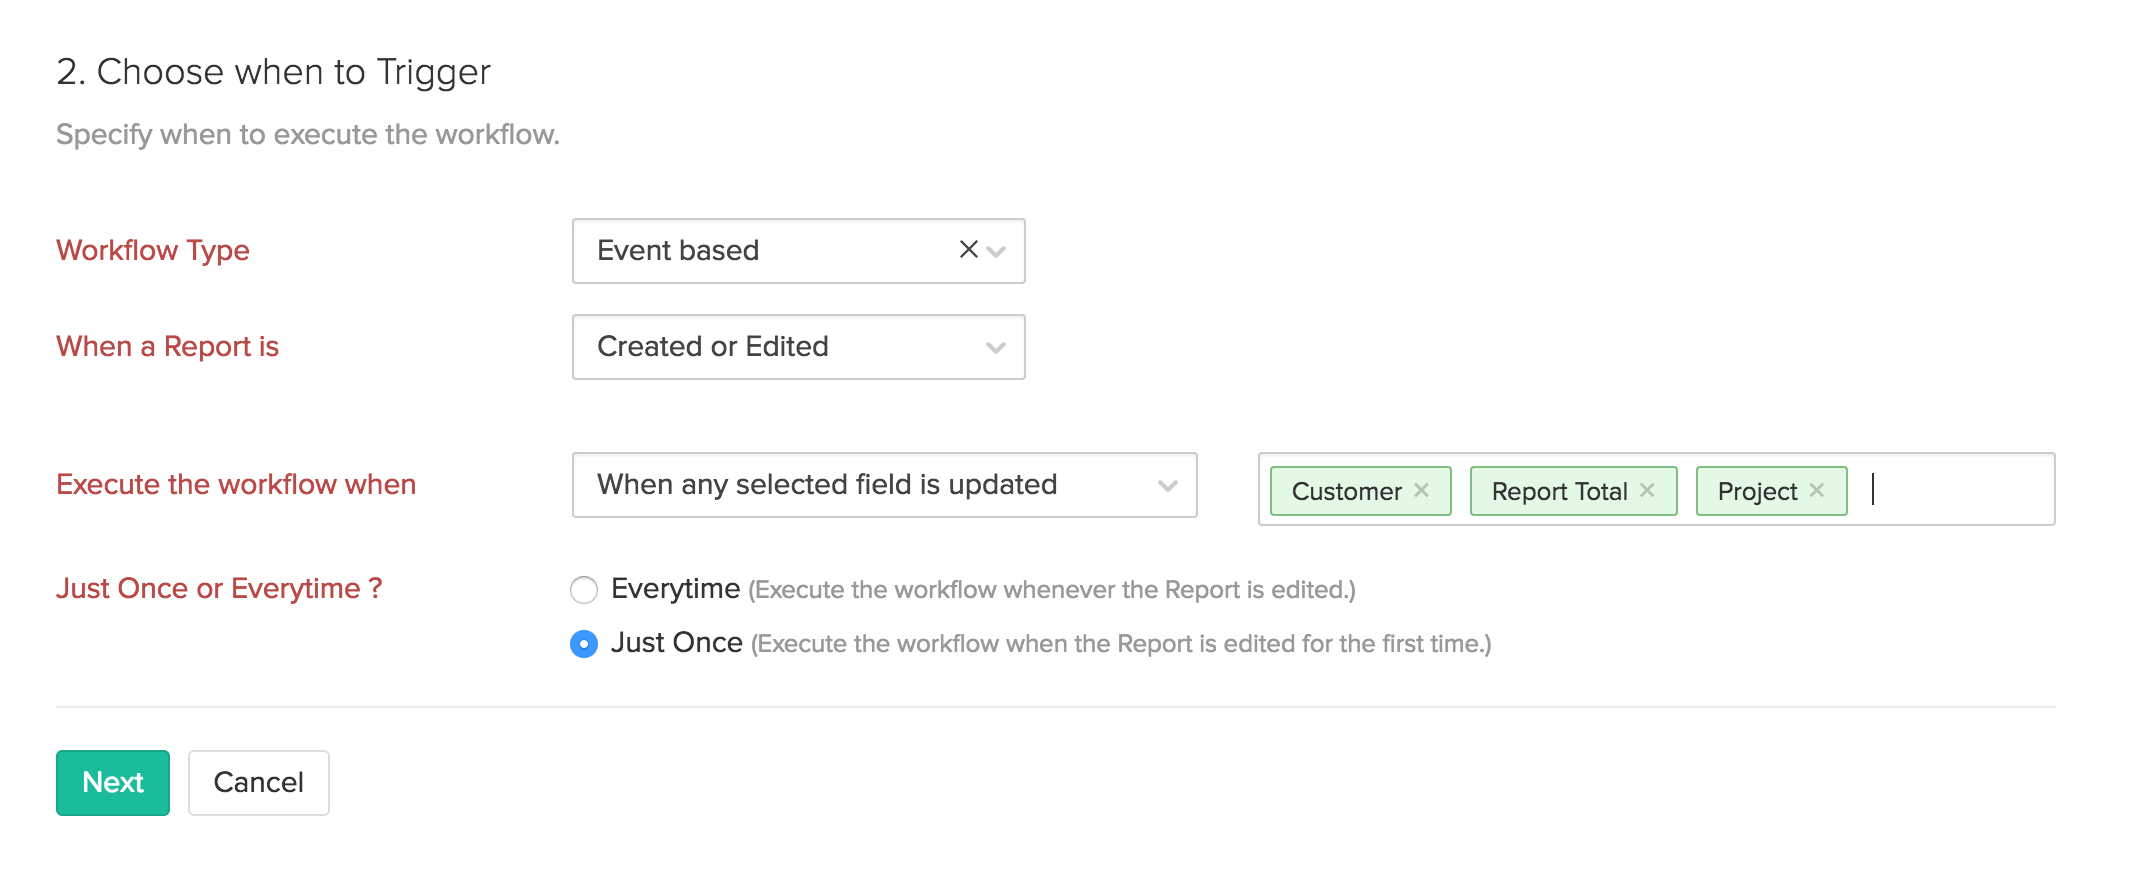
- The workflow will be triggered when the selected fields (all or one) are updated. You can also choose how often the workflow should be executed. It can either be once or every time the selected fields are updated.
Date based:

-
If you want your workflow to be Date-based, the workflow will be executed depending upon the
- Due Date
- Submitted Date
- Last Submitted Date
- Created time
-
You can specify the exact date, time and frequency of execution.
| Field | Description |
|---|---|
| Date of Execution: | Triggers the workflow on any number of days before or after the submitted date, Last submitted date and so on. |
| Execution Time: | Choose the exact time of execution by providing the hour (HH) and the minute(MM) |
| Execution cycle: | Choose the frequency of triggering a workflow. It can be Just Once, Once in a Month(Monthly) or Once in year(Yearly) |
Setting additional triggers
Aside from the primary Event and Date based triggers, you can further optimize the triggers by setting additional filters. These filters are optional and one or more conditions can be set in these filters based on which the action will be executed. Multiple conditions can be set by using ‘AND’ (or) ‘OR’ based on which we can specify whether both the conditions or at least one of the conditions should be satisfied.
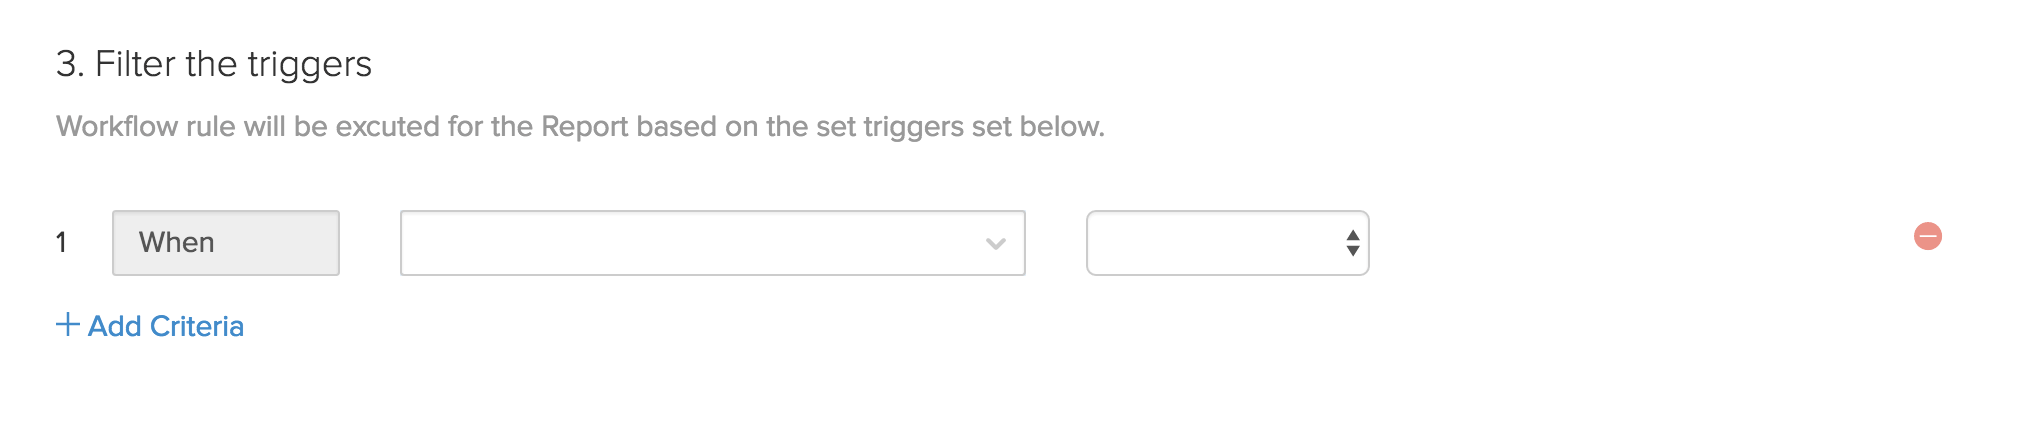
Perform the following steps to set additional triggers:
- Under Filter the triggers, select an Expense report field that can be used as a trigger.
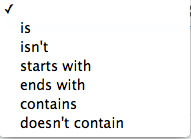
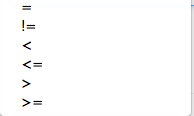
- Set rules for the selected field. The rules would be different for numeric and alphanumeric values:
For example, if you select alphanumeric field like ‘Projects’, it would look like this:
If you select numeric field like submitted date, these are your options:
Editing Criteria Pattern
For instance, you want to set up a workflow such that an email alert is sent to the Admin whenever Mark submits a report greater than $2000, or when he submits a report containing “Atrium Solutions' as a Customer.
In this case, you would set it up as follows:
- When the owner of the report is MARK.
- AND the report total > $2000.
- OR the customer is Atrium Solutions.
The criteria would look like this.
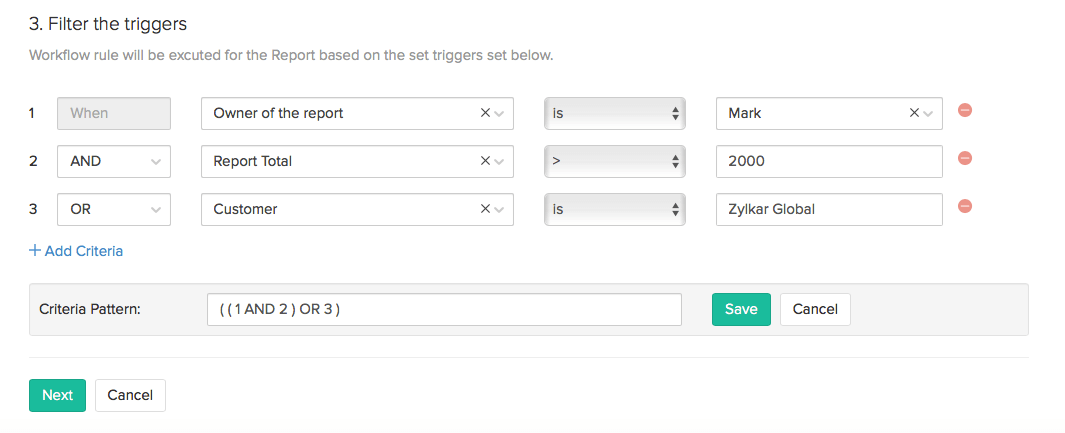
- According the criteria, the workflow will be triggered if the first two conditions are satisfied (or) when the third condition alone is satisfied.
i.e, the workflow will be triggered if the Owner of the report is Mark and the report total is greater that $2000. Or, it will be triggered when the customer is ‘Atrium Solutions’, irrespective of the owner of the report or the report total.
- Since, that is not what you were looking for, you can edit it to suit your requirement. Click on the Change Criteria option and change it as shown below:

- According to the edited criteria, the workflow will be triggered when the owner of the report is Mark AND when the report submitted either has total greater that $2000 or contains ‘Atrium Solutions’. (Just what we wanted!) . Once you set it up to your liking, click Save for the changes to take effect.
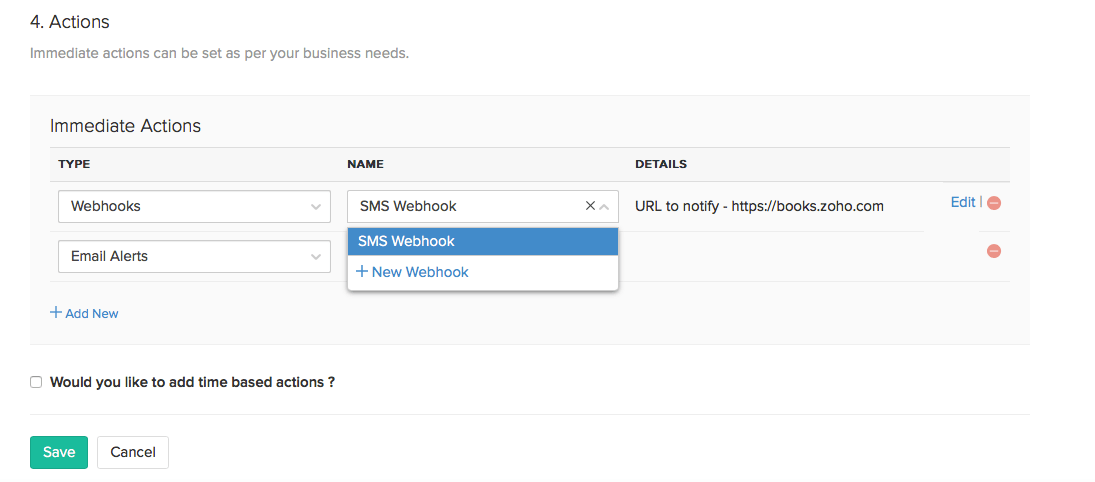
Associating actions with the workflow
Once you set up the triggers, the next step is to associate actions with the workflow. These include Email Alerts and Webhooks. You can customise the actions to suit your business needs and program it to act immediately (Immediate actions) or at a particular time (Time based actions).
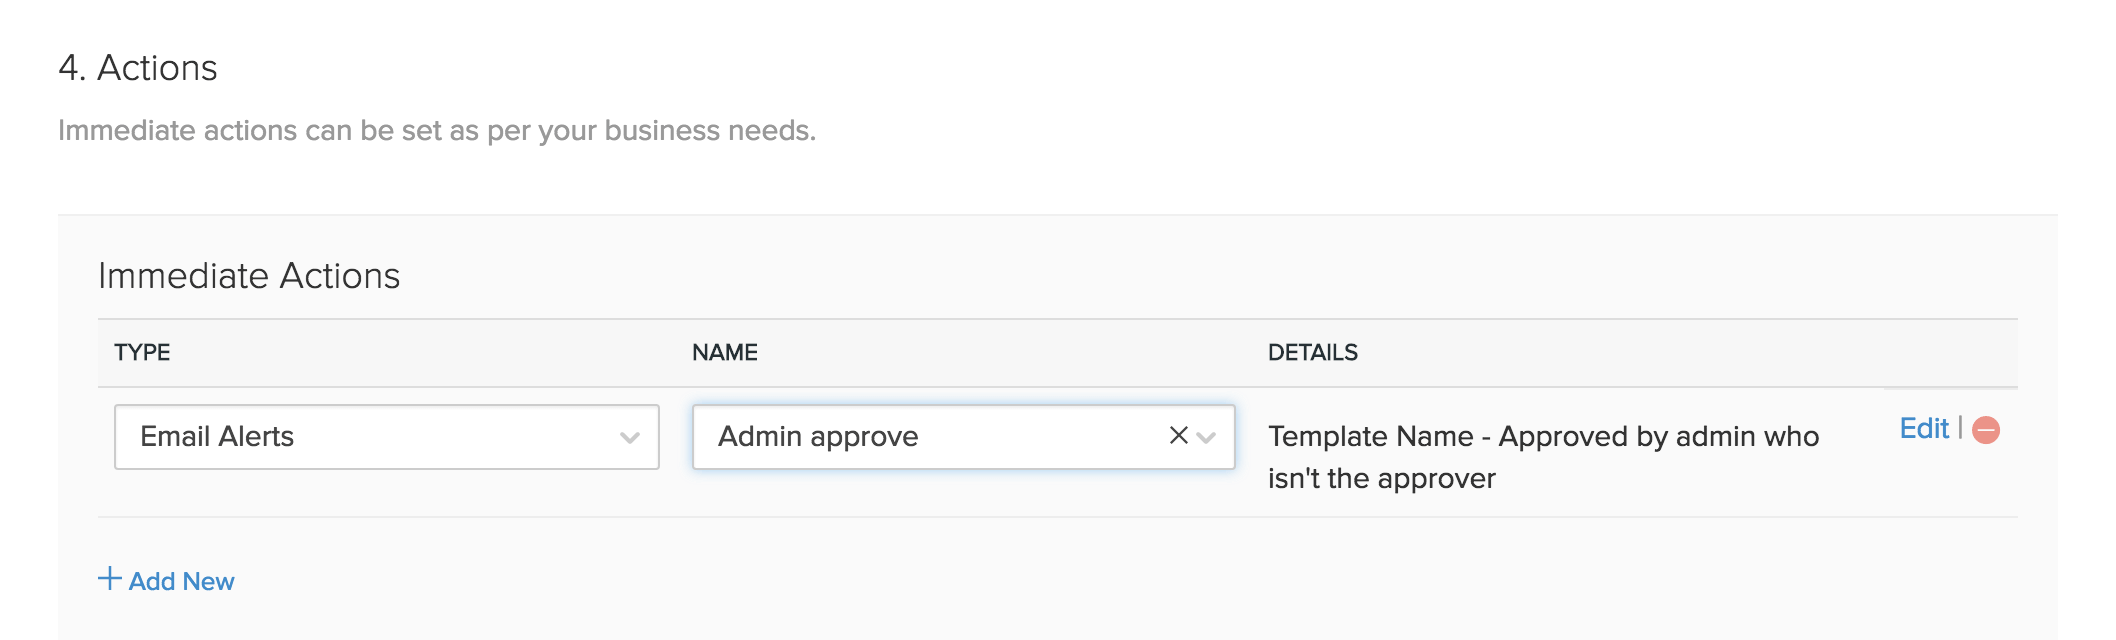
Immediate Actions: The actions would occur immediately when the report meets the criteria mentioned in the workflow.
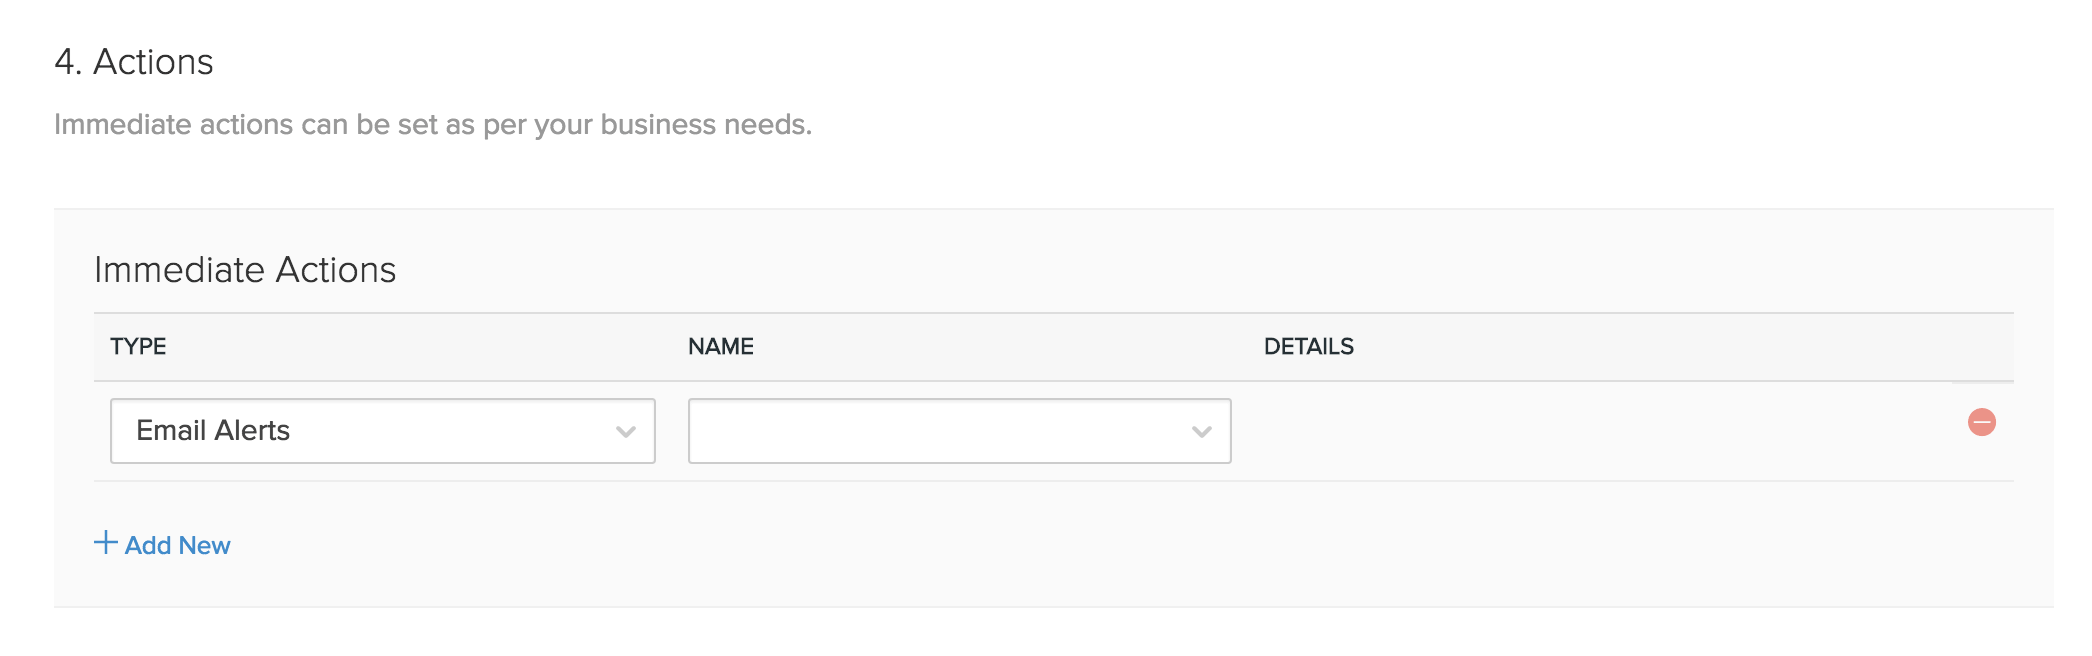
- Type: Choose the type of action you would like to associate with the workflow. It can be either an email alert, webhooks or field update. You can also add multiple actions by clicking on +Add New.
- Name: Select the email alert, webhook or field update from the existing list or create new ones right there by clicking the +New Email/+New Webhook/+New Field Update from the drop-down.
- Details: The details of the action is displayed here.
Time Based actions: If you wish to schedule actions for a particular time, select the check box next to Would you like to add time based actions?. This will display additional fields to enter the desired time.
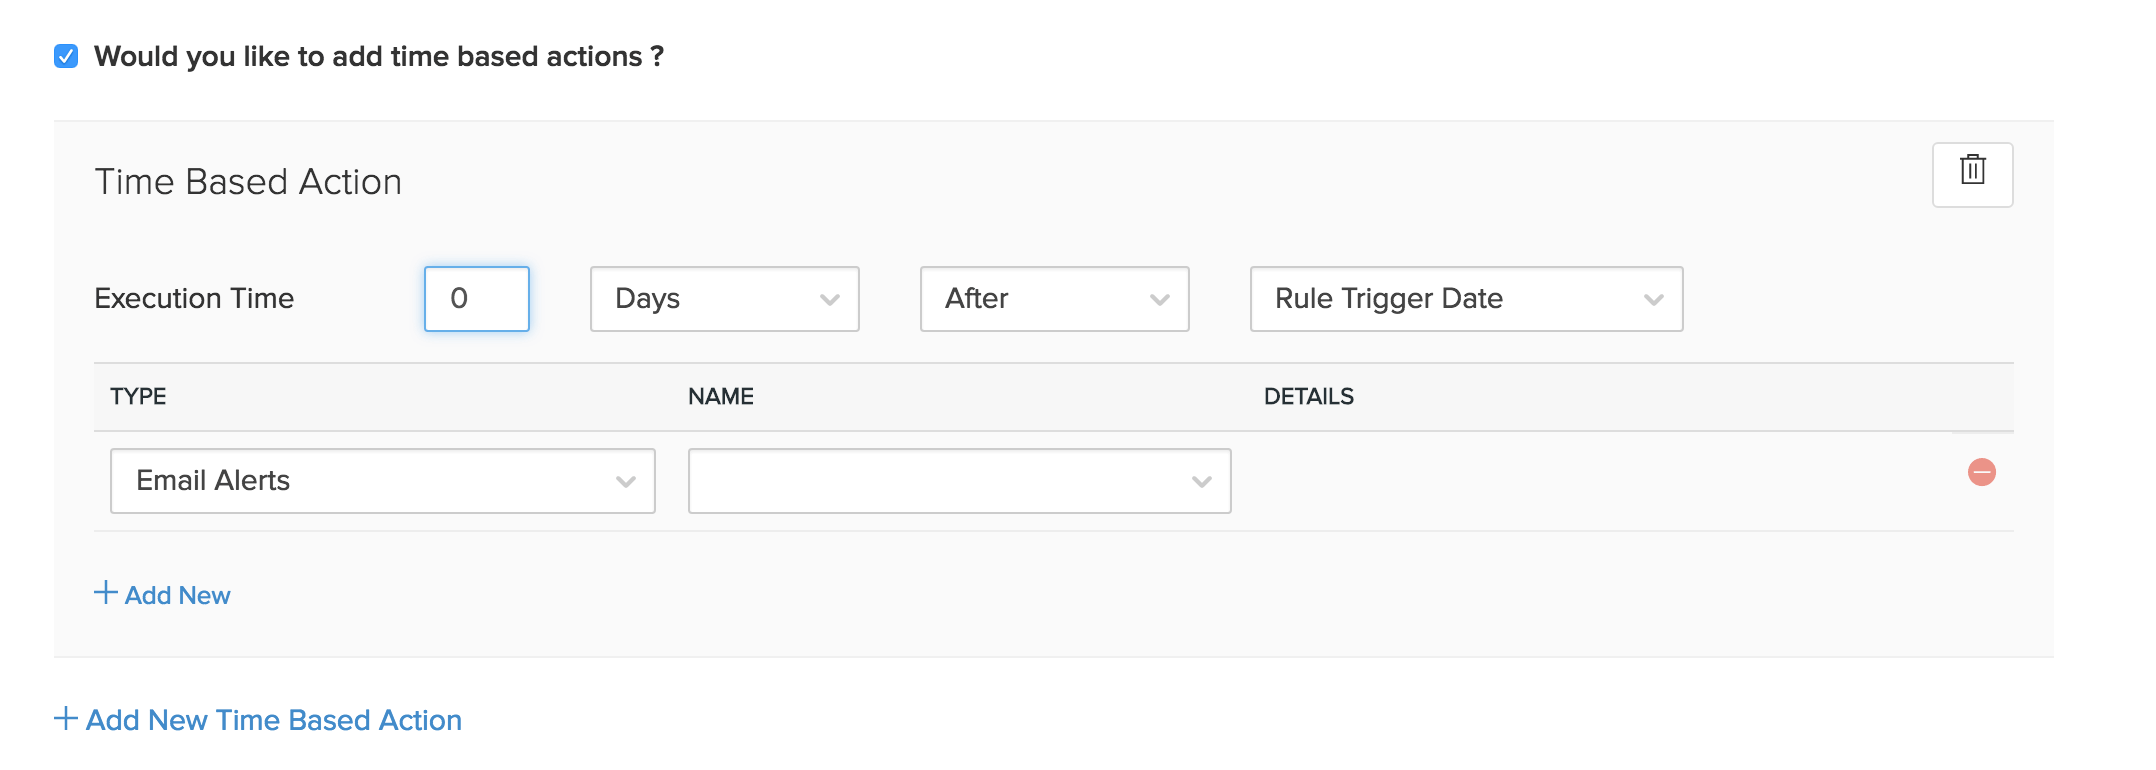
- Execution Time: Executes the action on any number of days before or after the due date, Rule Trigger Date, Submitted Date, Last Submitted Date, Created Time, Modified Time.
- Next, select the type of action that you wish to take. It can be an Email Alert or a Webhook. You can also add multiple time based actions by selecting +Add New Time Based Action.
Note : You can add a maximum of 5 time based actions. Also, each time based action can have a maximum of 5 actions.
- Finally, click Save to create the workflow rule to implement it for the reports in Zoho Expense.
Edit / Delete a workflow rule
You can edit or delete a workflow rule by simply clicking on one of the workflow rules from the list or by hovering over a workflow rule and select edit or delete.
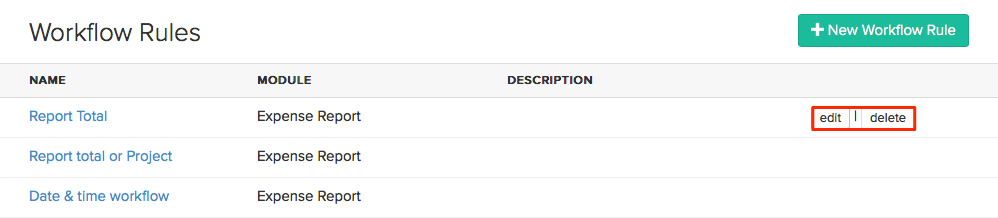
Note: You can create a maximum of 10 workflow rules.
Email Alerts
E-mails alerts that are triggered during the workflow can be customised corresponding to the respective scenario. For example, an e-mail template can be created to notify the finance head when the report total of a particular project had exceeded the specified limit. We can save this e-mail template under a relevant name and use it in a workflow as and when required.
The following steps will explain how to set up an email alert for any report in Zoho Expense.
- Set up an email alert, navigate to Settings > Automation > Email Alerts and click +New Email Alert.

| Field | Description |
|---|---|
| Name | Give a unique name for the email alert. |
| Email Template | You can pick a template from the drop down or click on +Add New Email Template if you wish to create a new one. |
| Email Recipients | Pick contacts from the drop down, to whom you wish to send the email alerts. |
| Additional Recipients | If you wish to send out email alerts to more people, enter their email addresses separated by a comma. Please not that you can add a maximum of 10 additional recipients. |
- Click Save to create a new email alert. You can now select one of the many email alerts created, from the drop down, to notify you when a workflow is triggered.
Other Actions :
Delete an email alert :
To delete an email alert, hover the cursor next to an email alert on the list and click on the Trash icon.

Note: You can create a maximum of 5 email alerts for each workflow rule. A maximum of 500 email alerts can be triggered per day.
Webhooks
Webhooks facilitates communication with third-party applications by sending instant web notifications every time an event occurs in Zoho Expense. With Webhooks, you can configure both HTTP & HTTPS URLs and associate them in workflow rules to automate the entire notification process.
For example, you can associate your Zoho Expense account with an SMS provider using Webhook, so that the manager is notified through a message automatically if the total expense amount for a report exceeds $1000. For general information about webhooks, please refer to webhooks.org.
To set up a webhook, navigate to Settings > Automation > Webhooks and click +New Webhook.
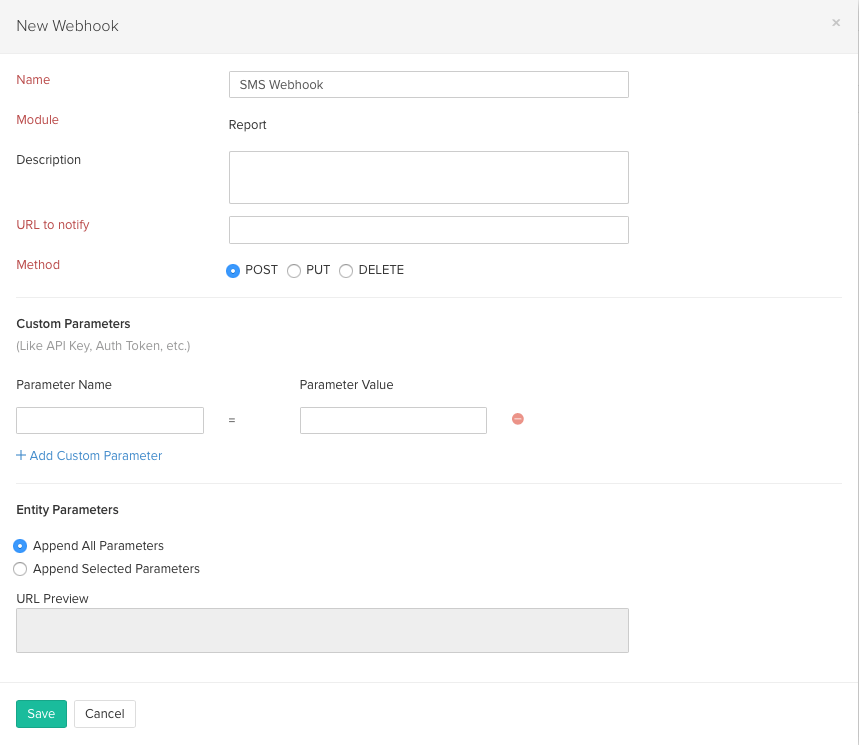
| Field | Description |
|---|---|
| Name | Give a unique name for the webhook. |
| Description | Give a small description for which you wish to create a webhook. |
| URL to notify | Enter the URL of the external service provider’s API. |
| Method | Specify the function you want to call at the external service
|
| Entity Parameters |
|
| Custom Parameters | You can add custom parameters. In the webhook such as API Key, Auth Token, etc. based on which the URL will be appended. Enter the required parameter under Parameter Name and the corresponding value under Parameter Value. If you wish to add multiple parameters, select +Add Custom Parameters. |
| URL Preview | The URL generated for this webhook will be displayed here. |
Other Actions :
Edit / Delete a webhook :
To edit or delete a webhook, hover the cursor next to the corresponding webhook on the list and click the edit or delete on the far right.

Note: A maximum of 500 webhooks can be triggered per day
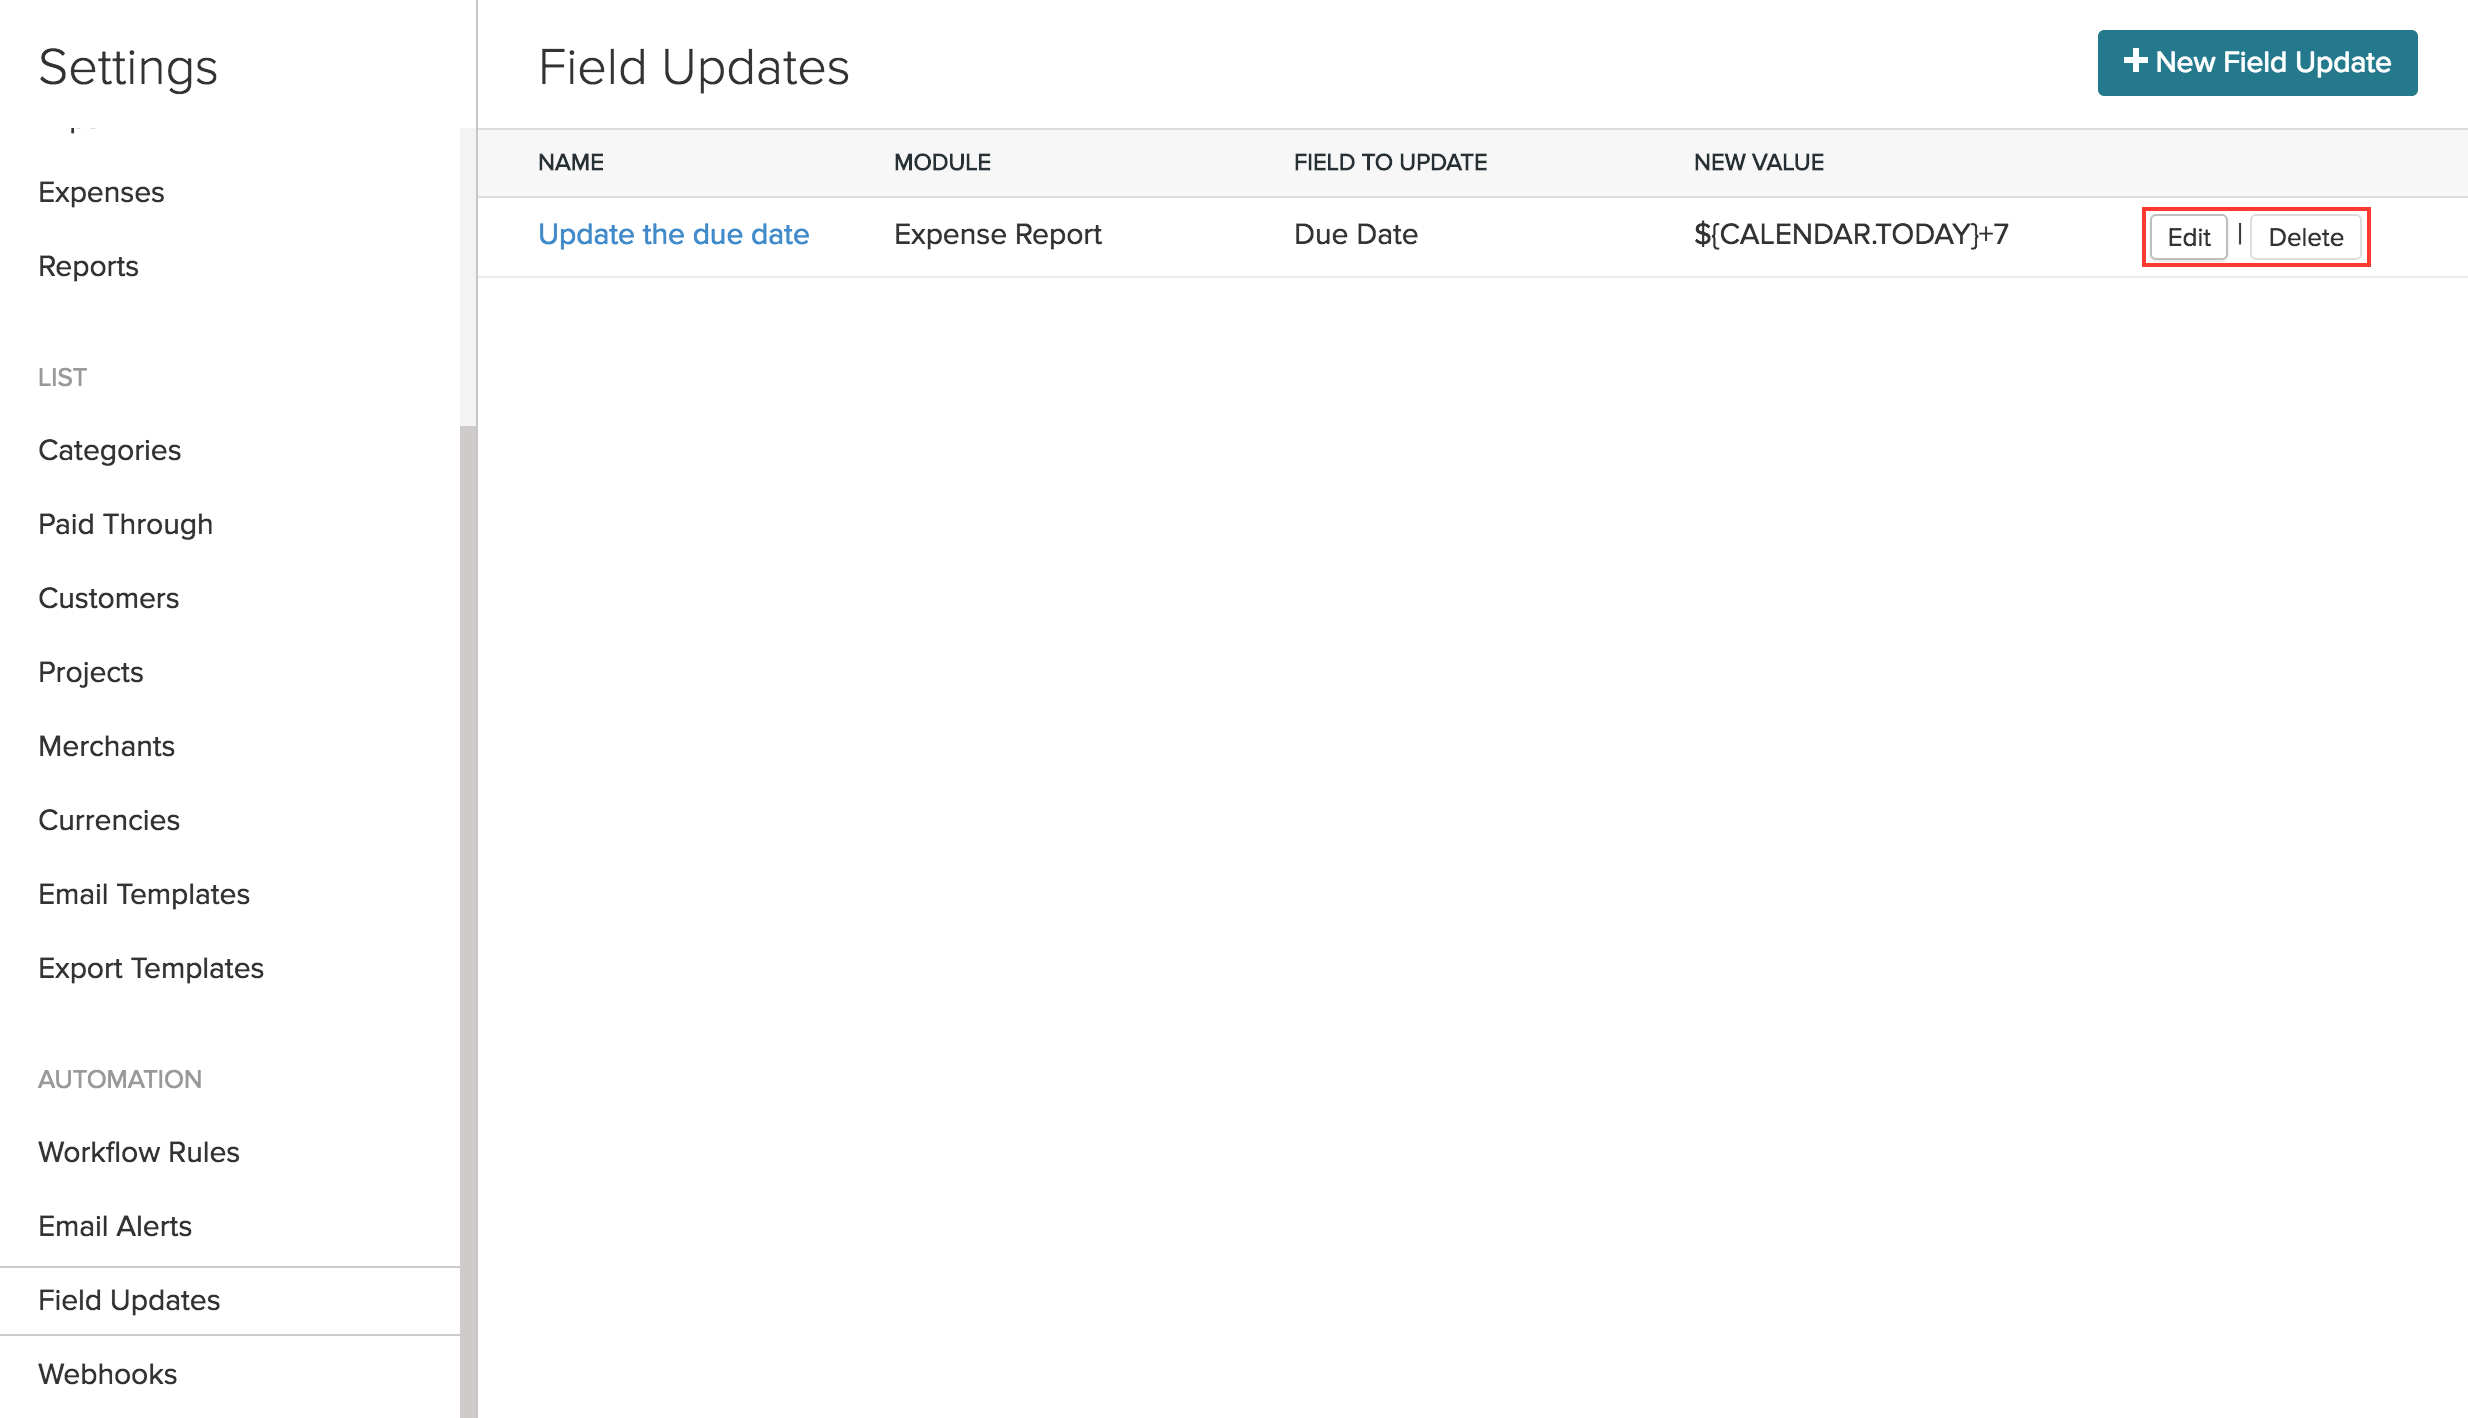
Field Updates
Using Field updates, you can automatically make changes to certain fields when the workflow criteria is fulfiled.
- Move to the Settings module on the left hand sidebar.
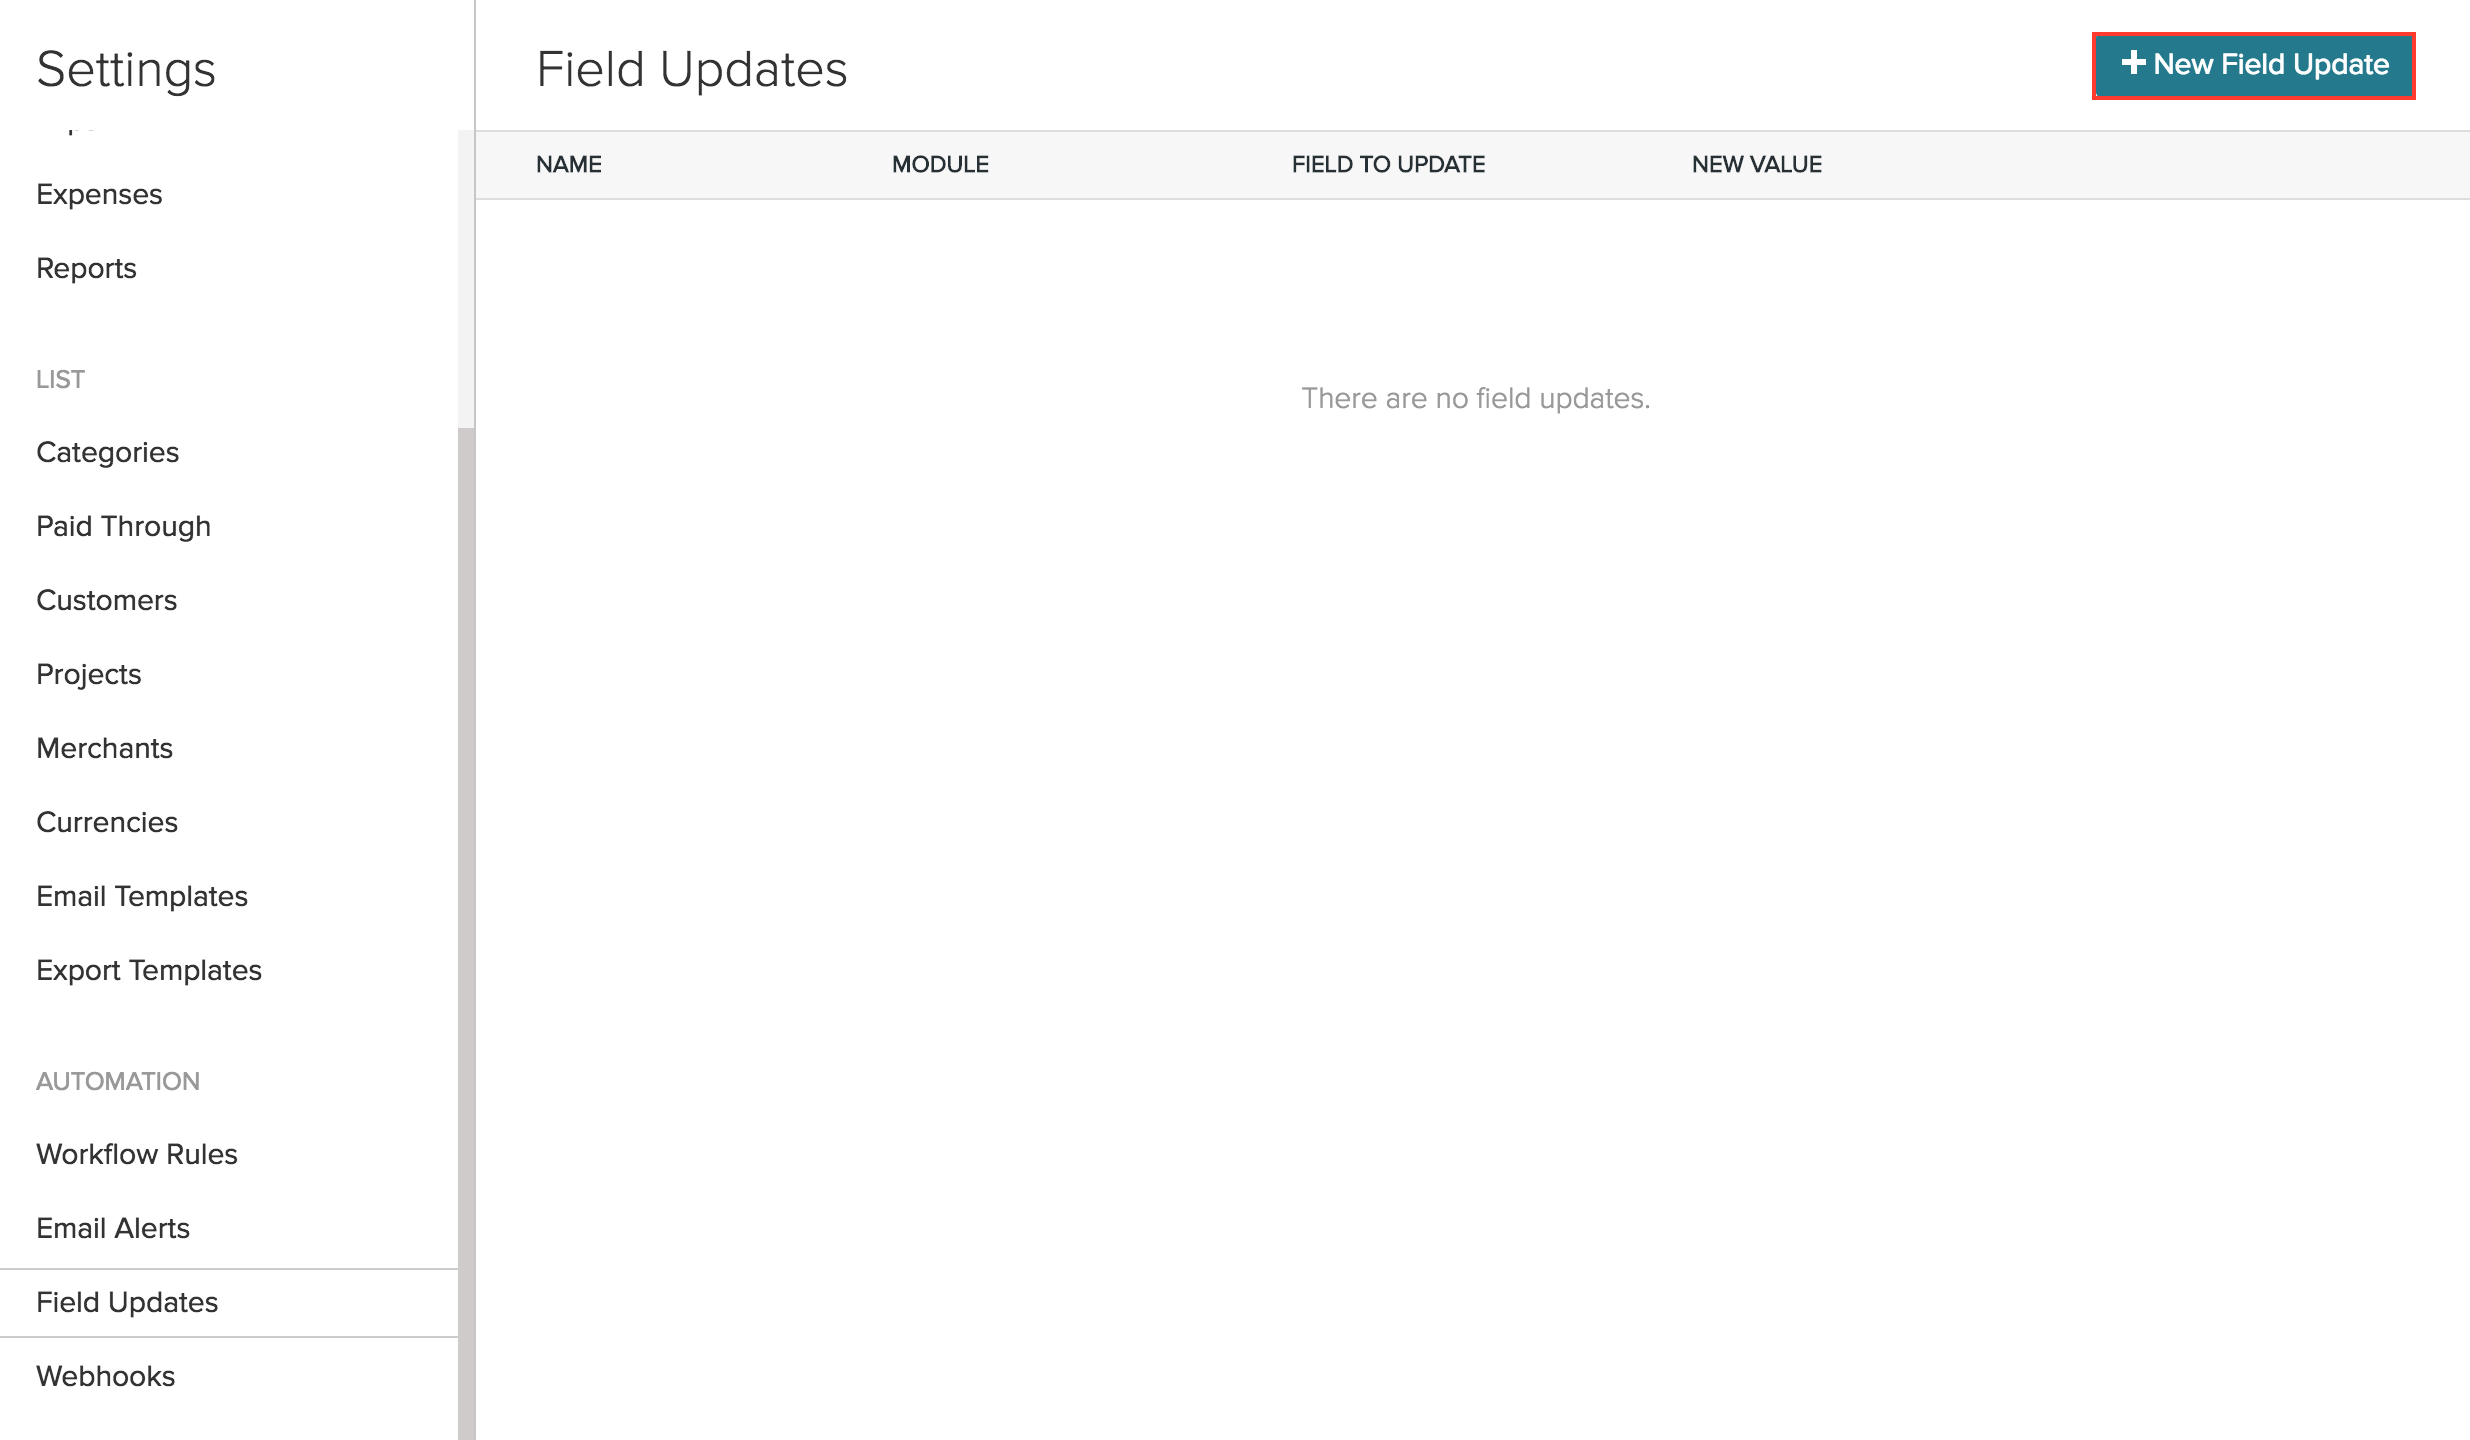
- Scroll down to the Automation section and go to Field Updates.
- Click on + New Field Update.
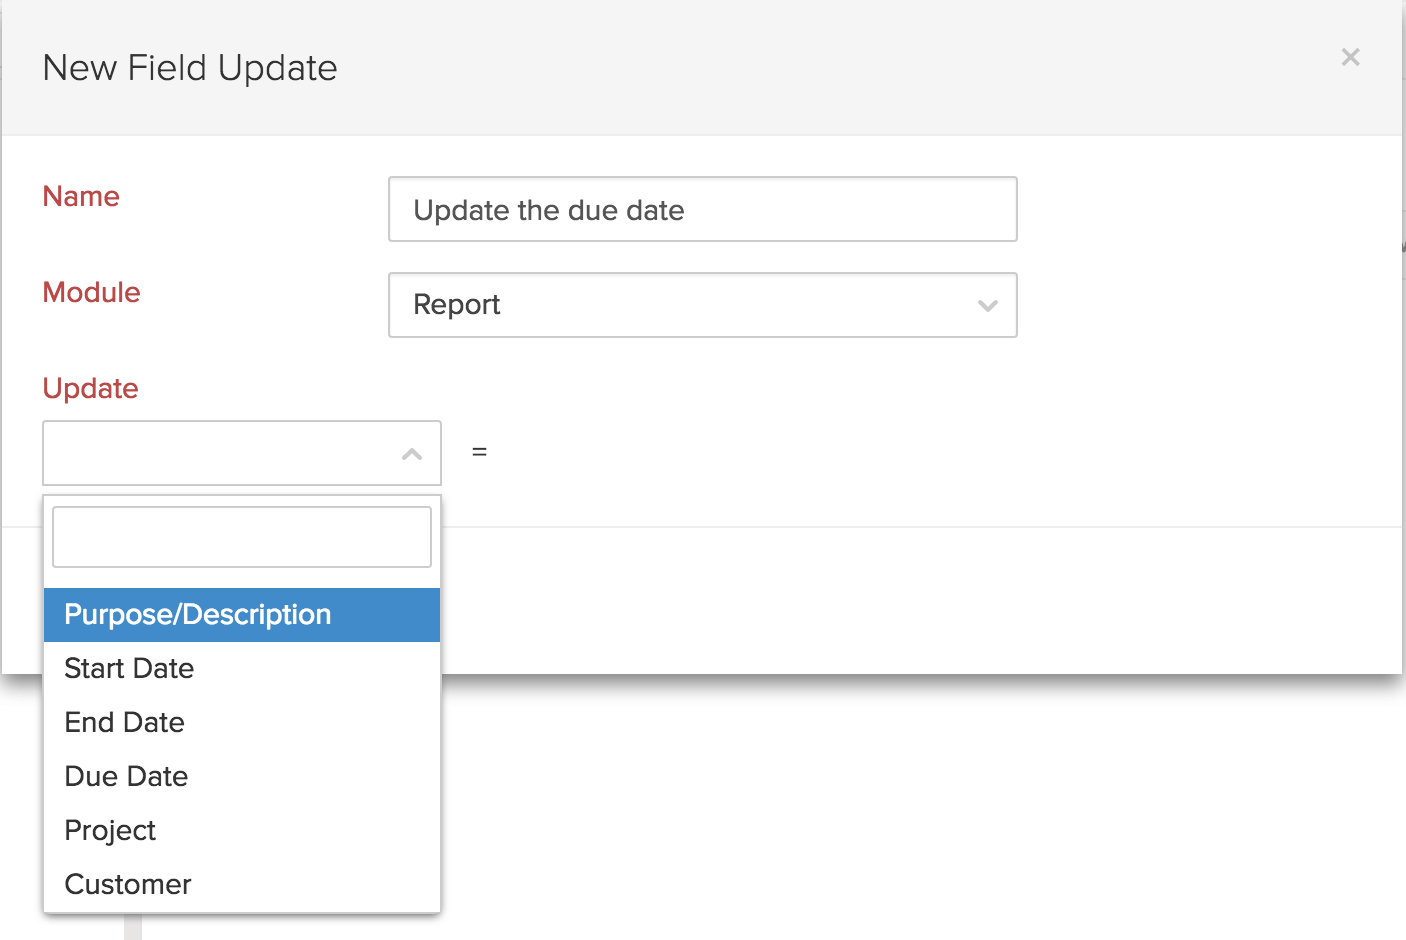
- Provide a Name and the module for which the field has to be updated.
- Select the field to be updated.
- Currently only the Start Date, End Date, Due Date, Business description, Project, Customer and the custom fields can be updated.
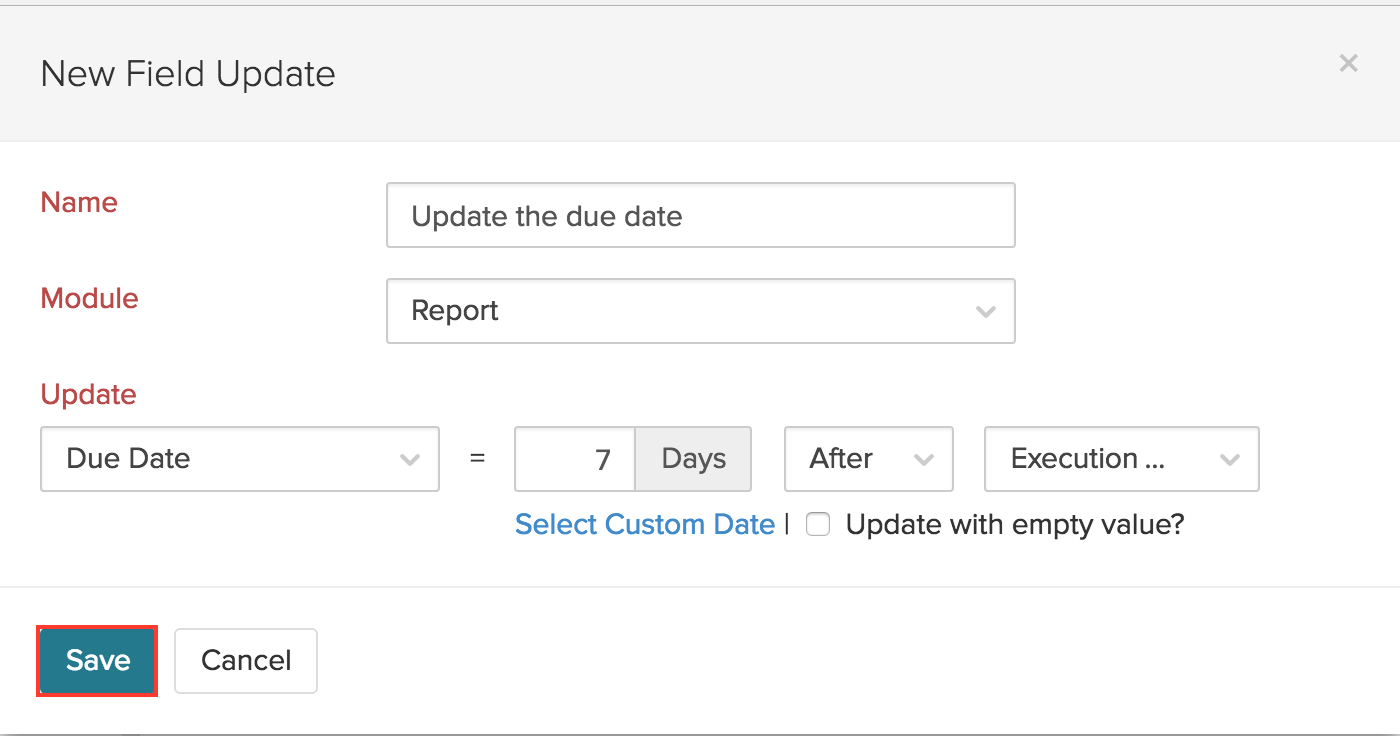
- Click Save.
Other Actions :
Edit / Delete a field update :
To edit or delete a field update, hover the cursor next to the corresponding field update on the list and click the edit or delete on the far right.