


Users & Roles

Zoho Payroll allows you to add users so that multiple members of your organisation can access Zoho Payroll and help you run your payroll activities. You can also create and assign roles to each user so that they have access only to the modules that they are to handle. Since Zoho Payroll is a cloud-based application, multiple users can work on it simultaneously from any location.
Users
Add a User
You can add a new user to your organisation by inviting them.
- Navigate to Settings and click Users & Roles.
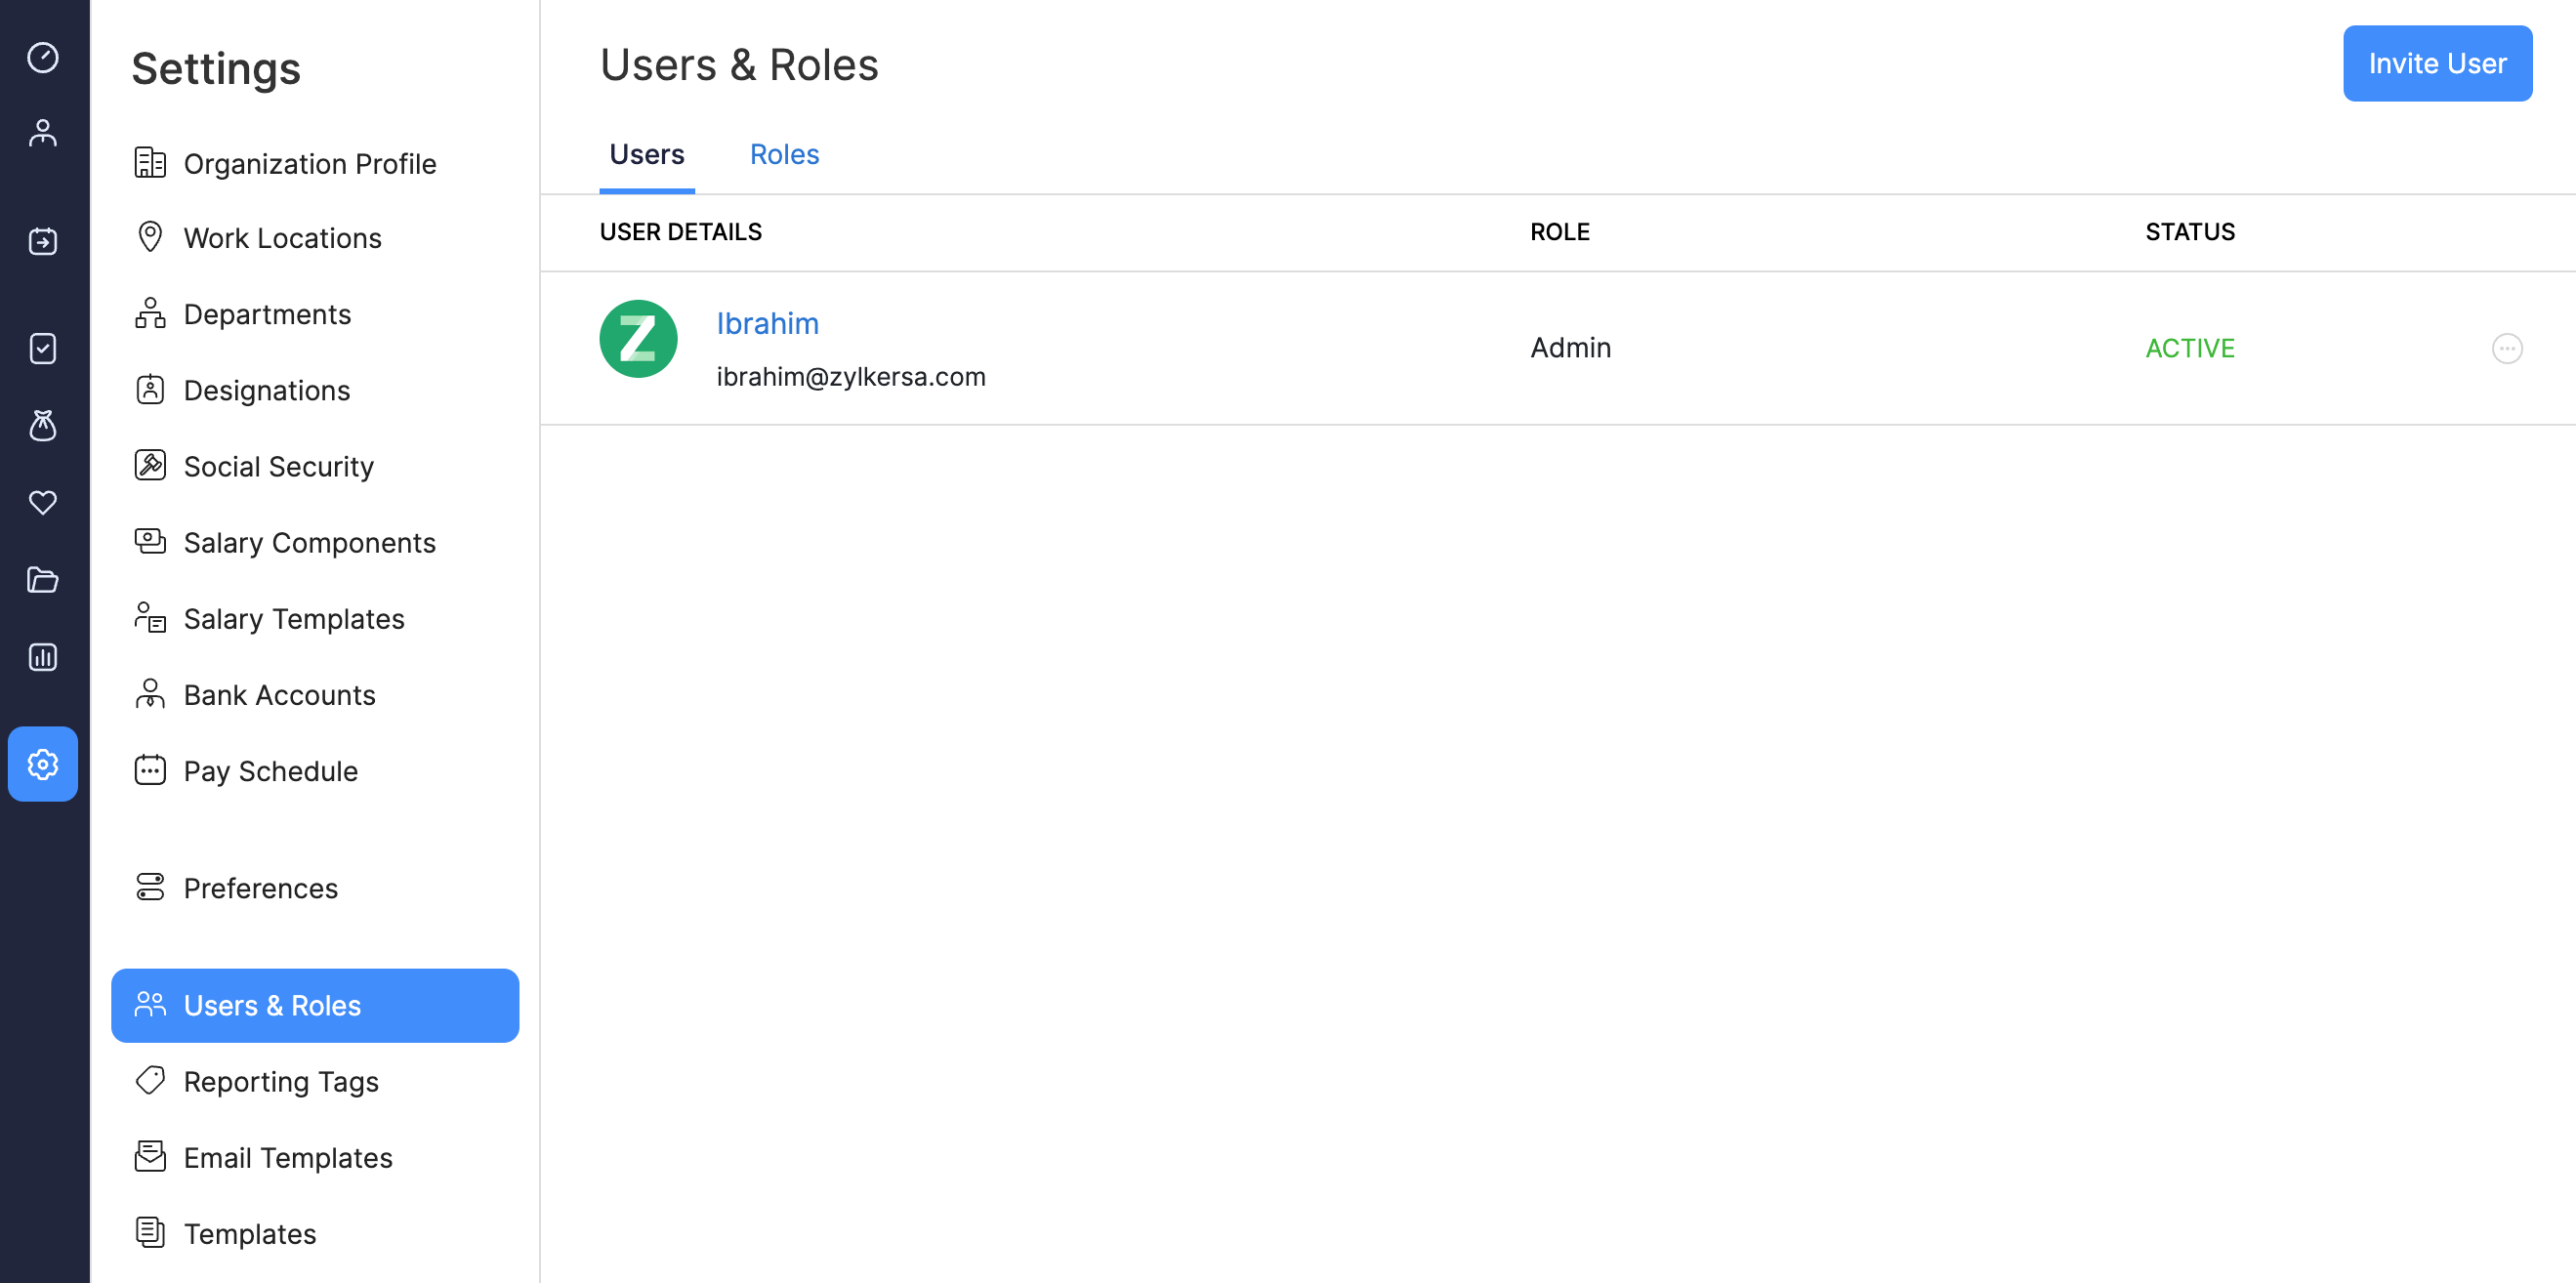
- Click Invite User on the top right corner.
- Enter the Name, Email, and Role of the user.
- Click Invite.
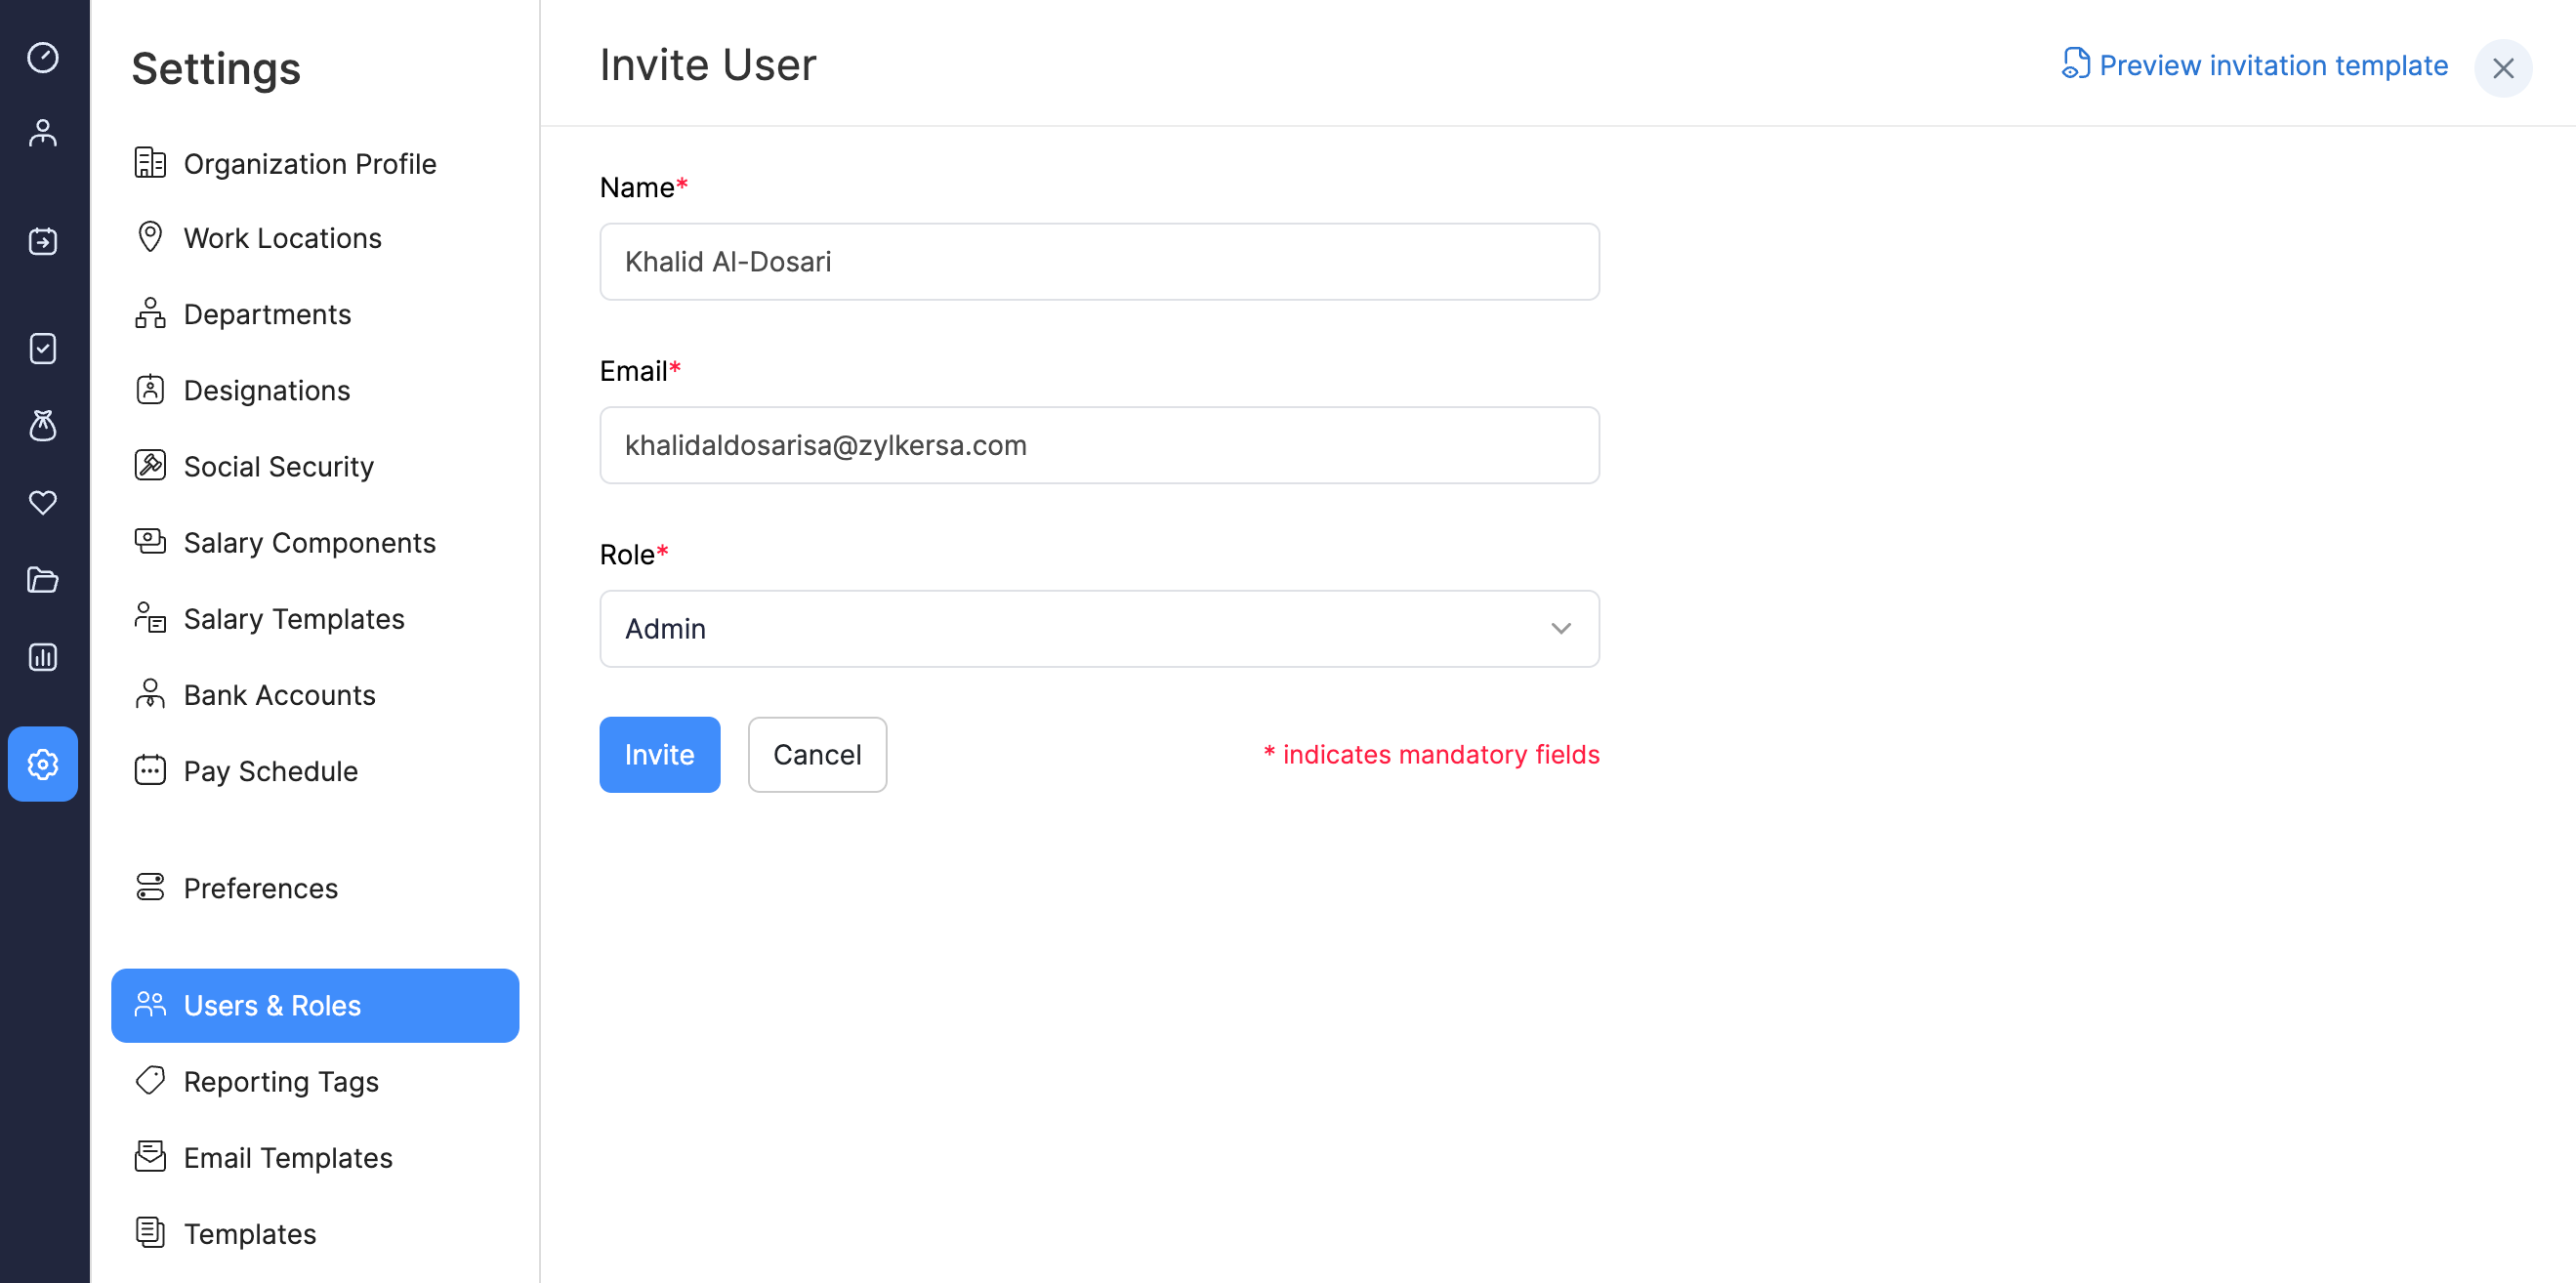
An invitation email will be sent to the email provided. The user can join the organization by clicking the URL in the email.
Edit User
To edit a user:
- Navigate to Settings and click Users & Roles.
- Click the More icon next to the user and select Edit.
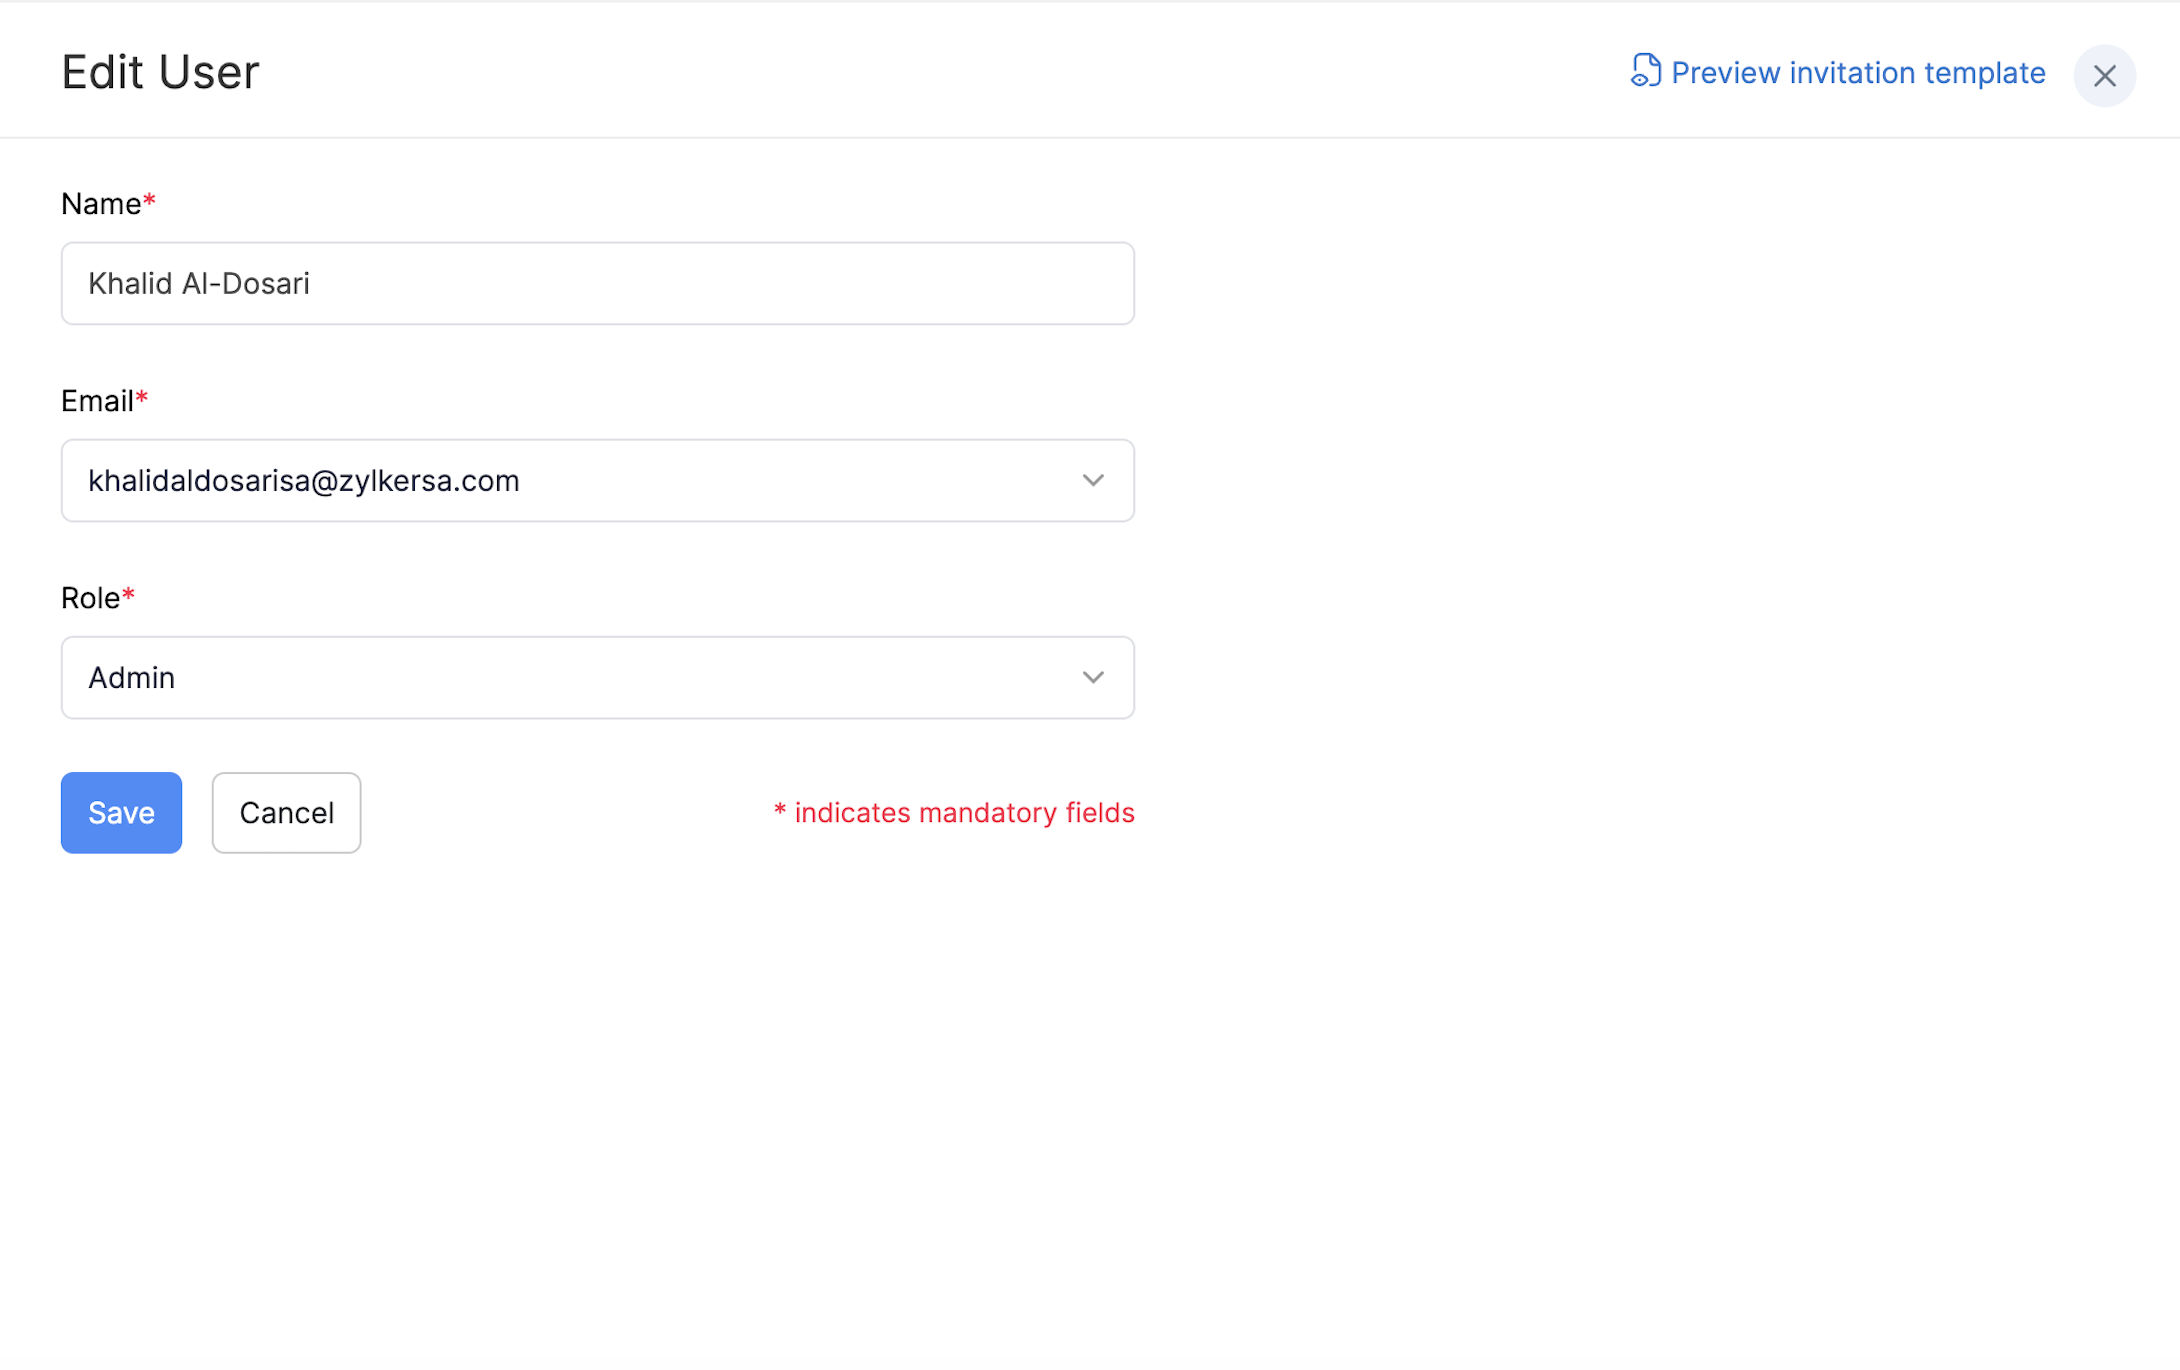
- Make the changes and click Save.
Delete User
To delete a user:
- Navigate to Settings and click Users & Roles.
- Click the More icon next to the user and select Delete.
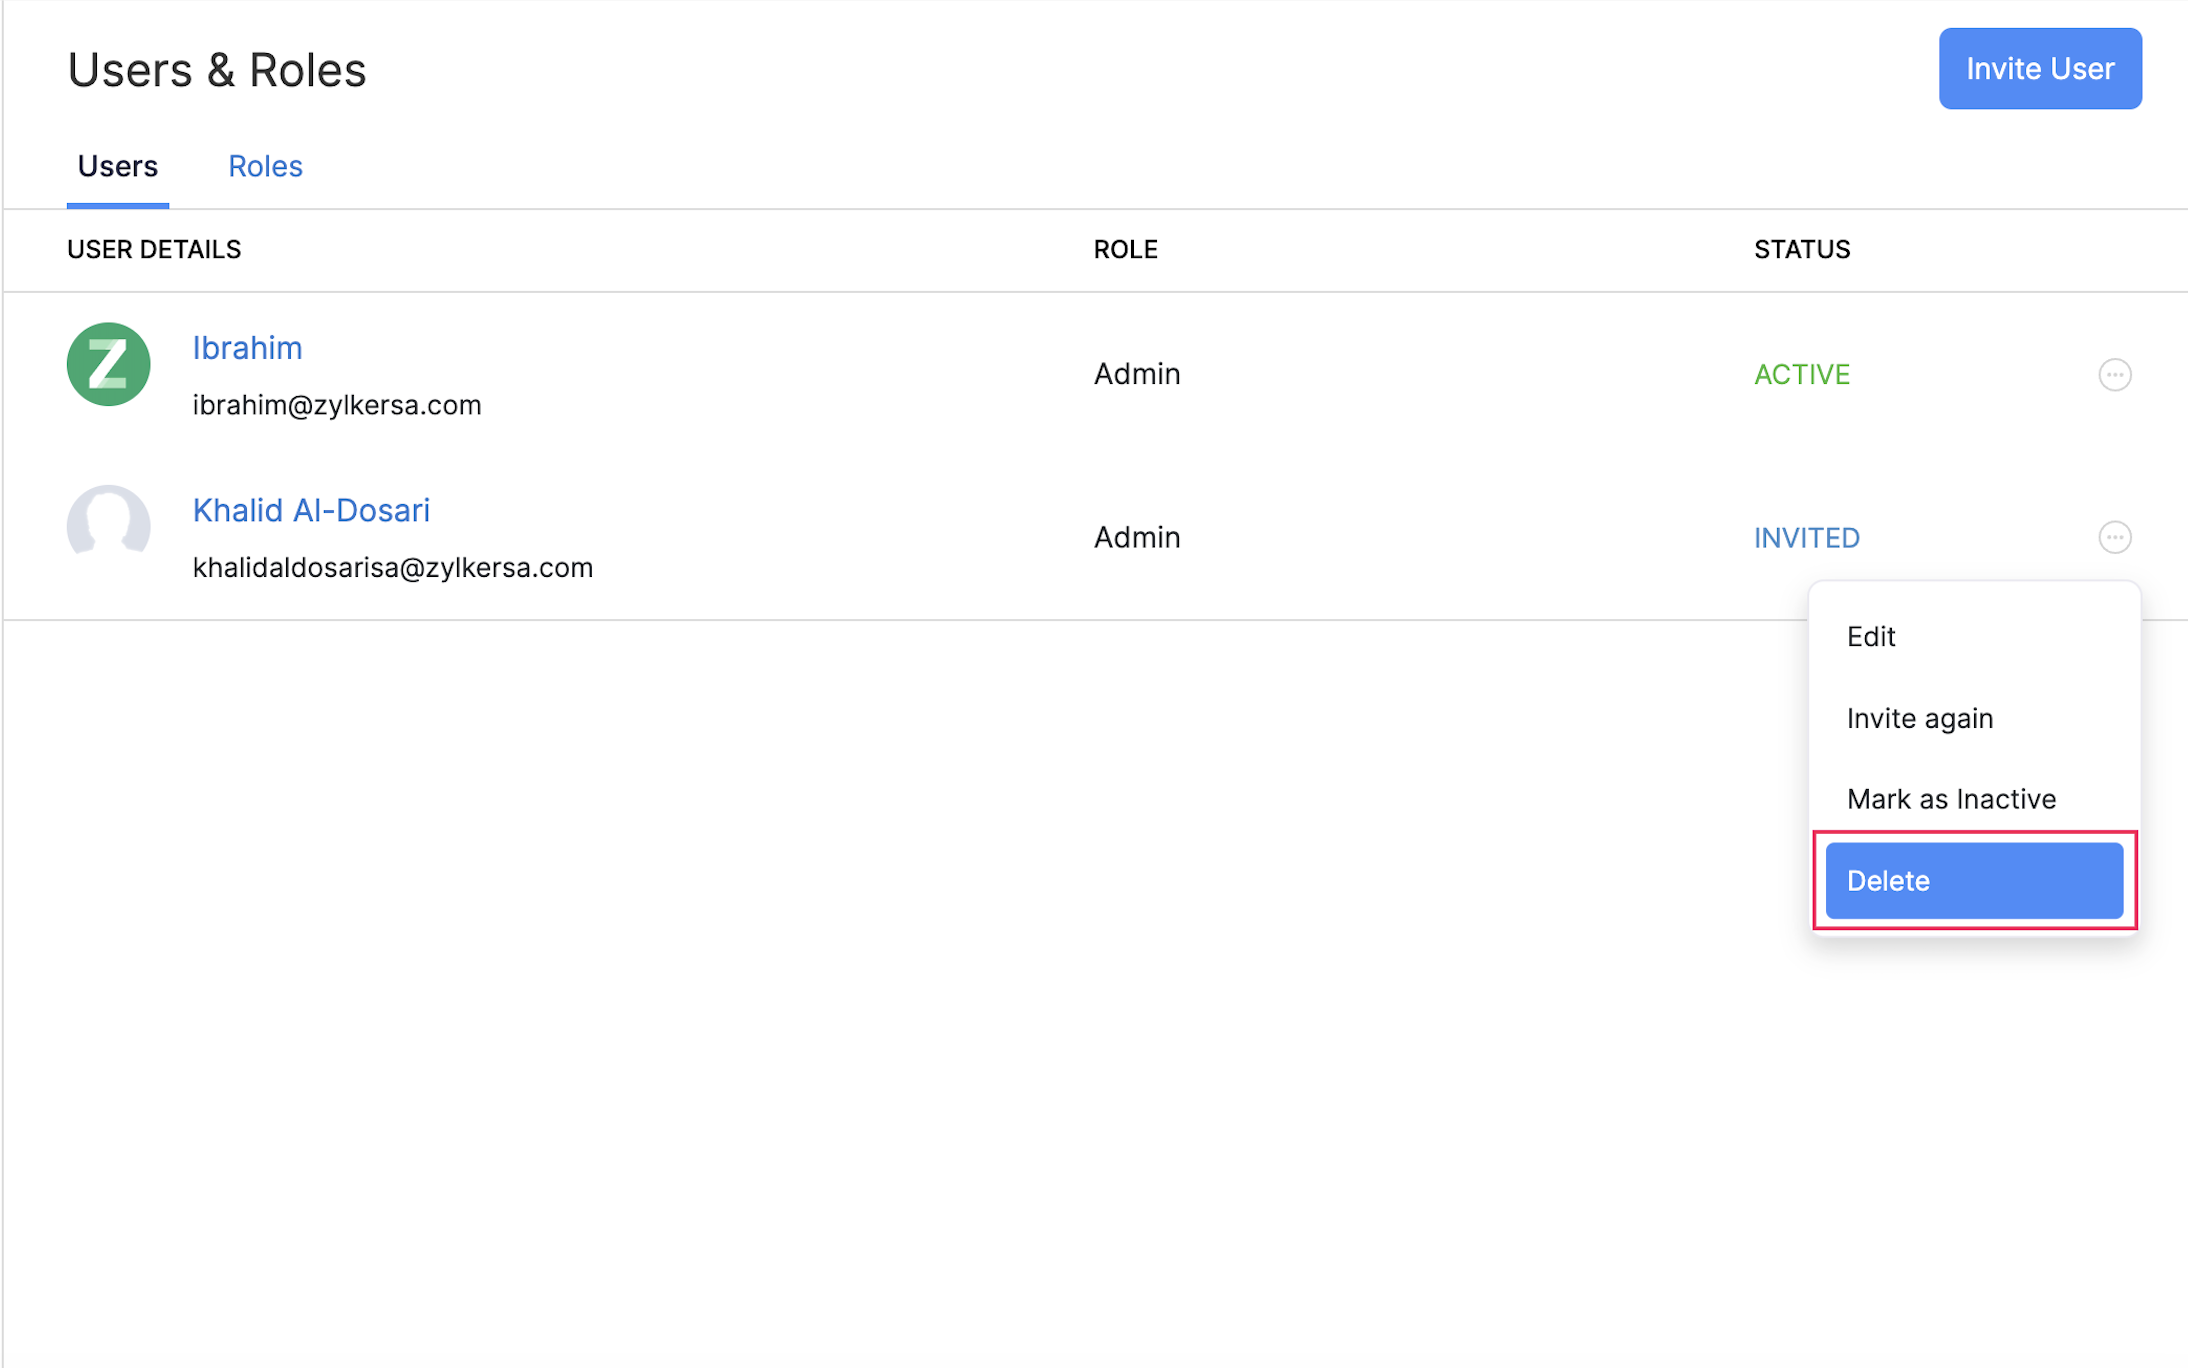
- Click Yes in the pop-up window which appears.
Re-invite User
To re-invite a user:
- Navigate to Settings and click Users & Roles.
- Click the More icon next to the user and select Invite Again.
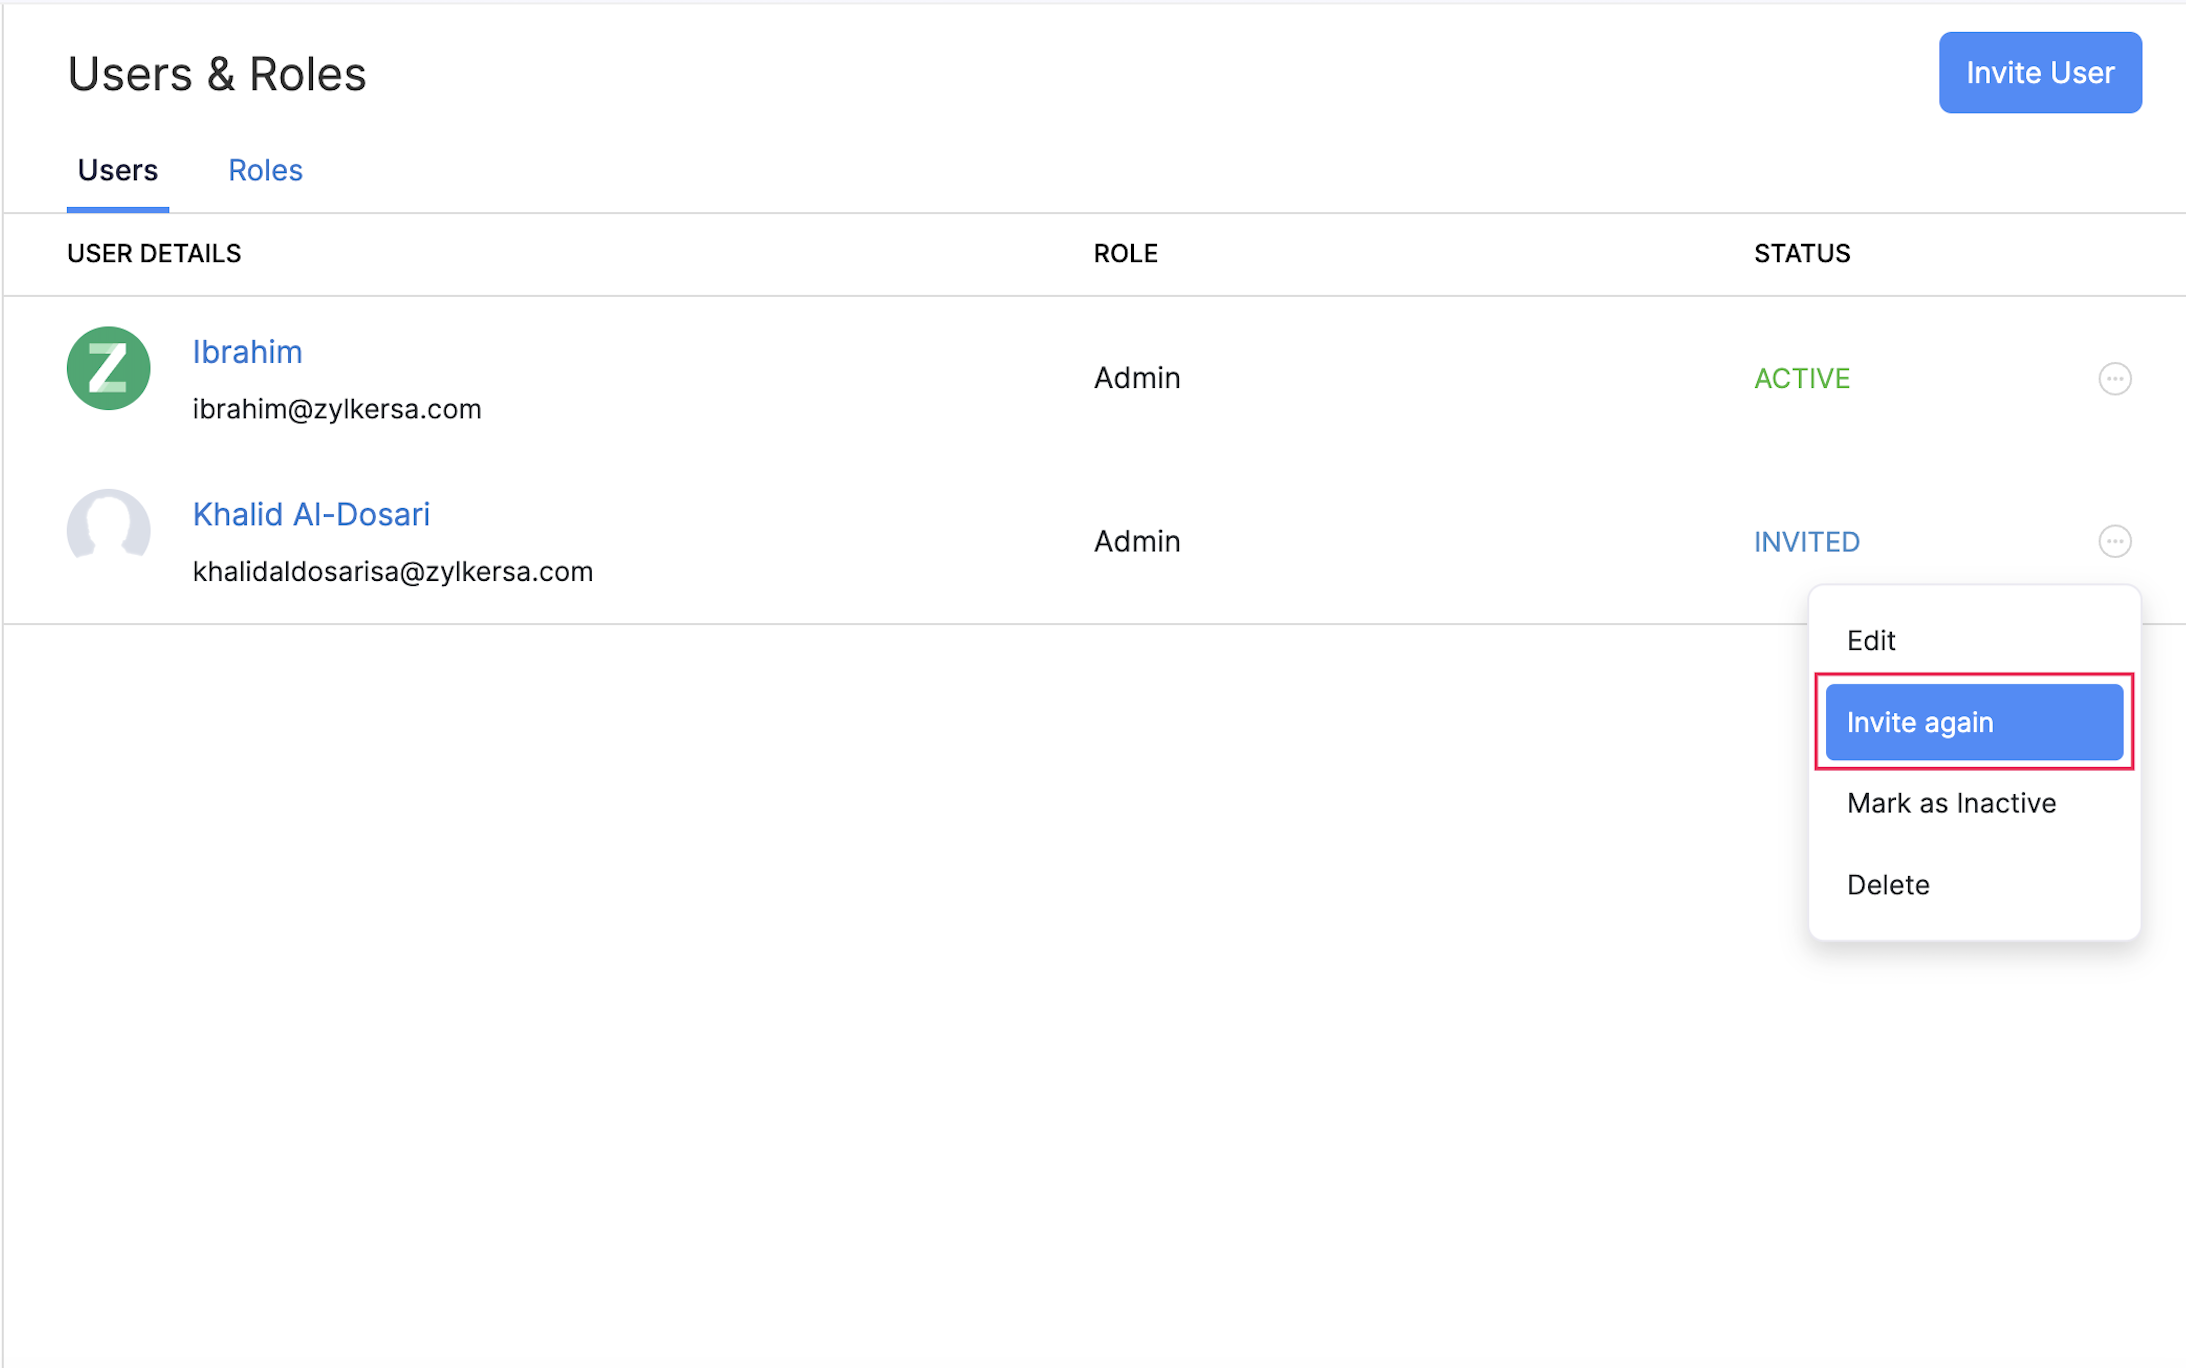
Mark a User as Inactive
If you want to temporarily restrict access for a user, you can do so by marking them as inactive.
- Navigate to Settings and click Users & Roles.
- Click the More icon next to the user and choose Mark as Inactive.
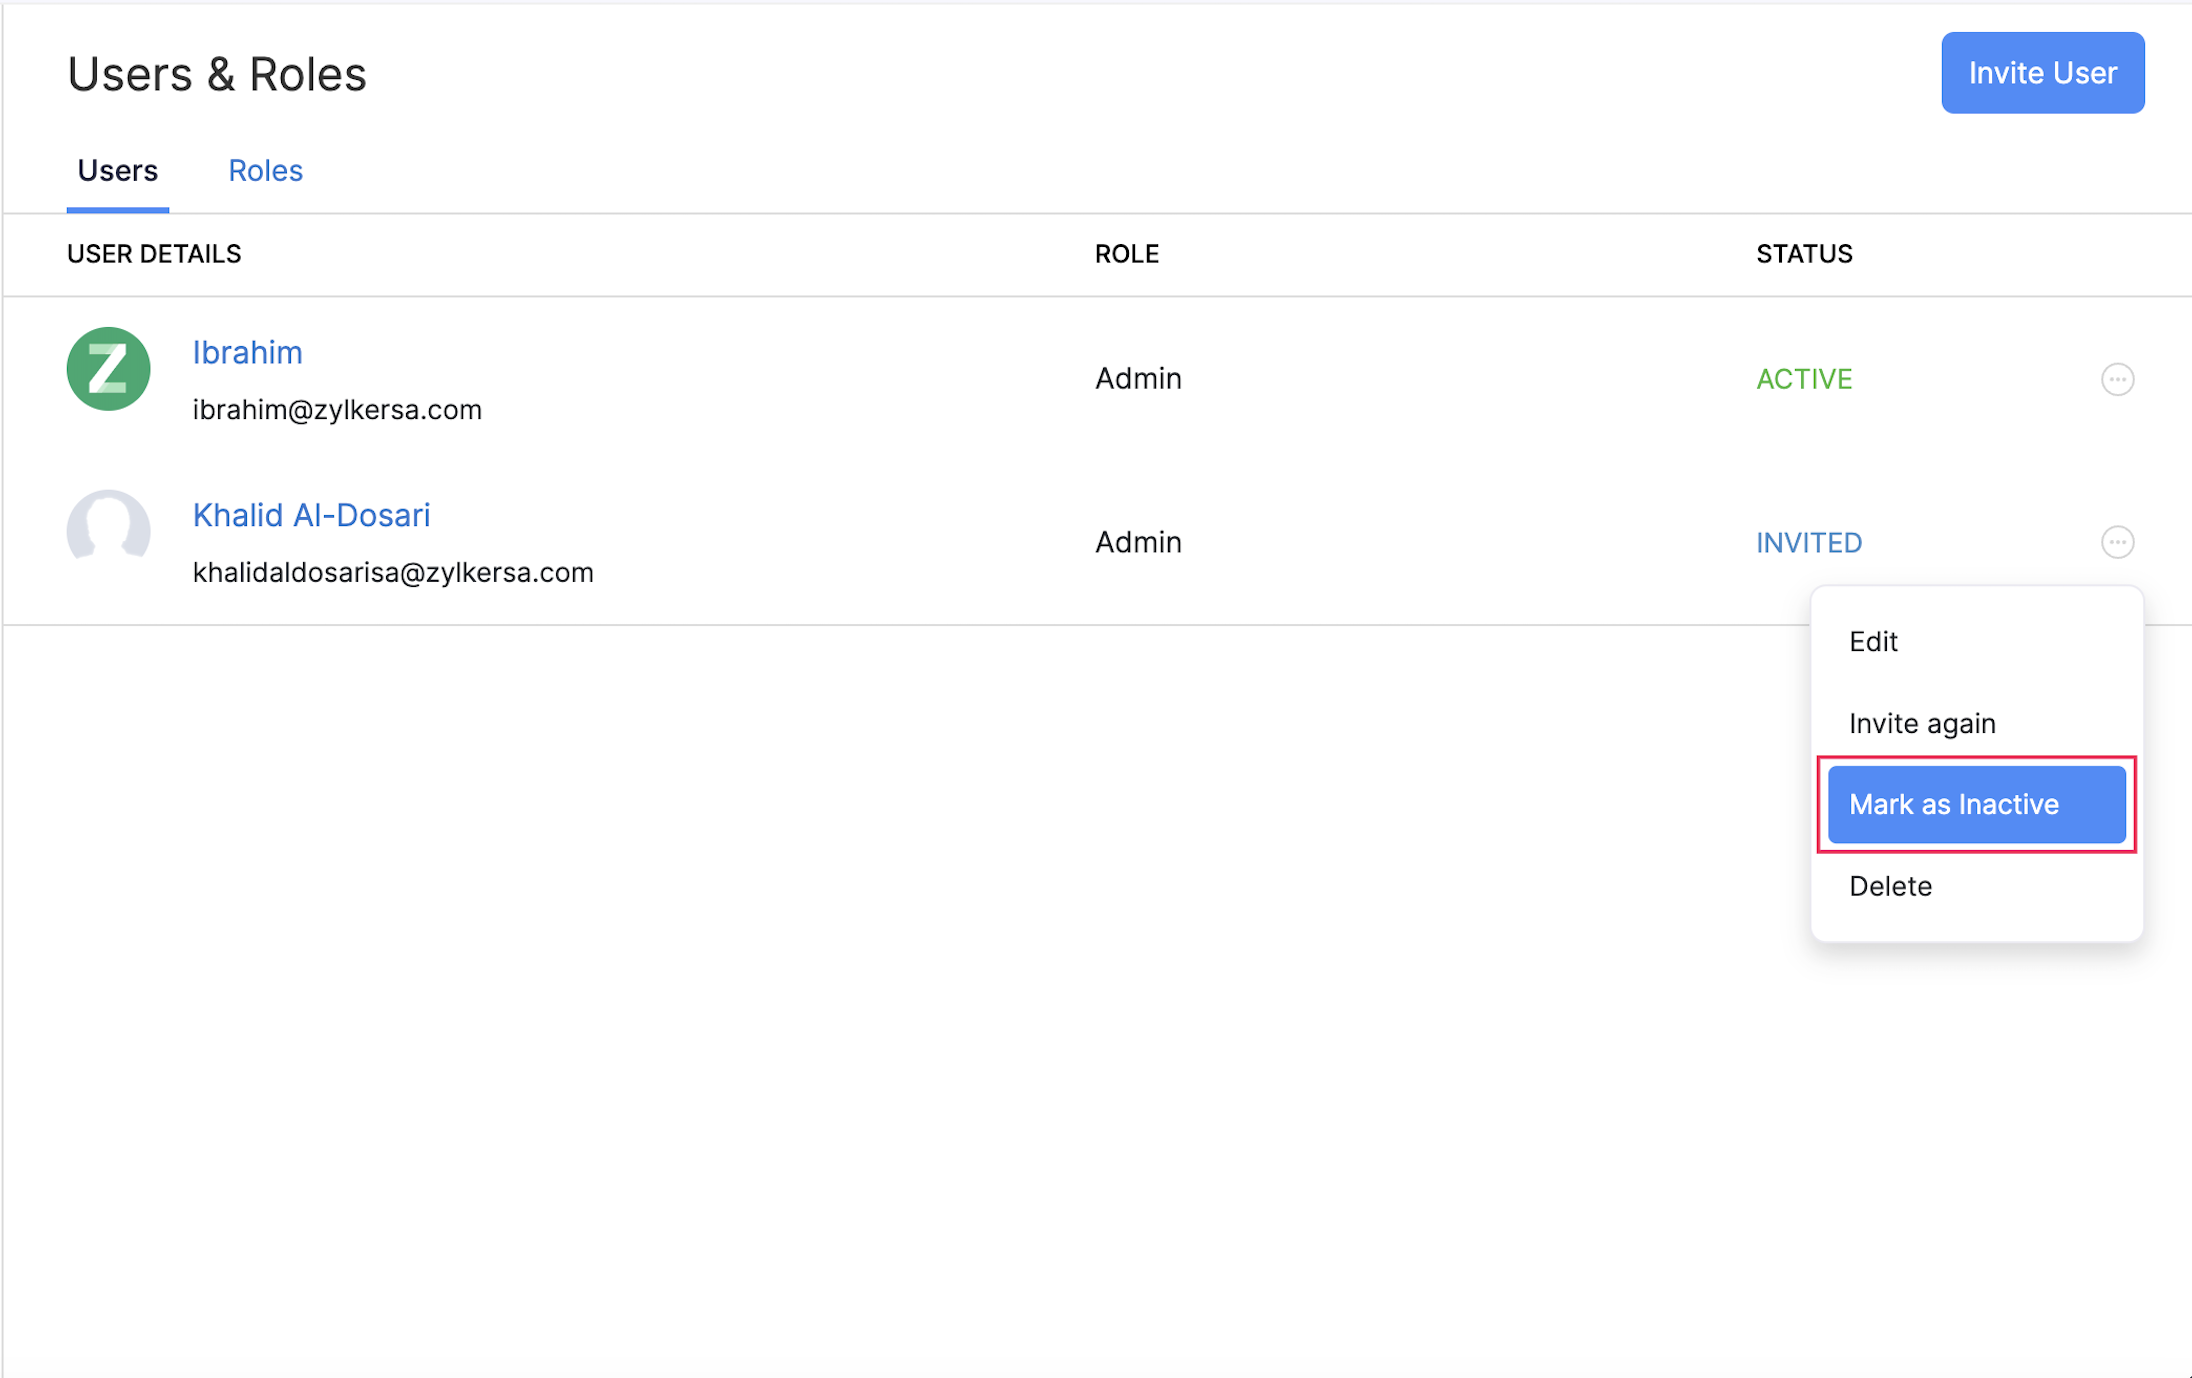
- Click Yes in the pop-up window which appears.
You can mark the same user as active again by following the same steps.
Super Admin
The Super Admin is a special privilege that gives one admin exclusive rights to set up and manage your organisation across all Zoho Finance applications. Only one admin can be the Super Admin at a time, and the role applies across Zoho Payroll, Zoho Books, Zoho Expense, and all other Zoho Finance apps in your organisation.
Assign a Super Admin
When no Super Admin has been assigned to your organisation, a banner appears at the top of the Users page. You can assign a Super Admin from this banner.
- Navigate to Settings and click Users & Roles.
- Click Assign Super Admin in the banner.
- Select an eligible admin from the Super Admin dropdown.
- Click Make Super Admin.
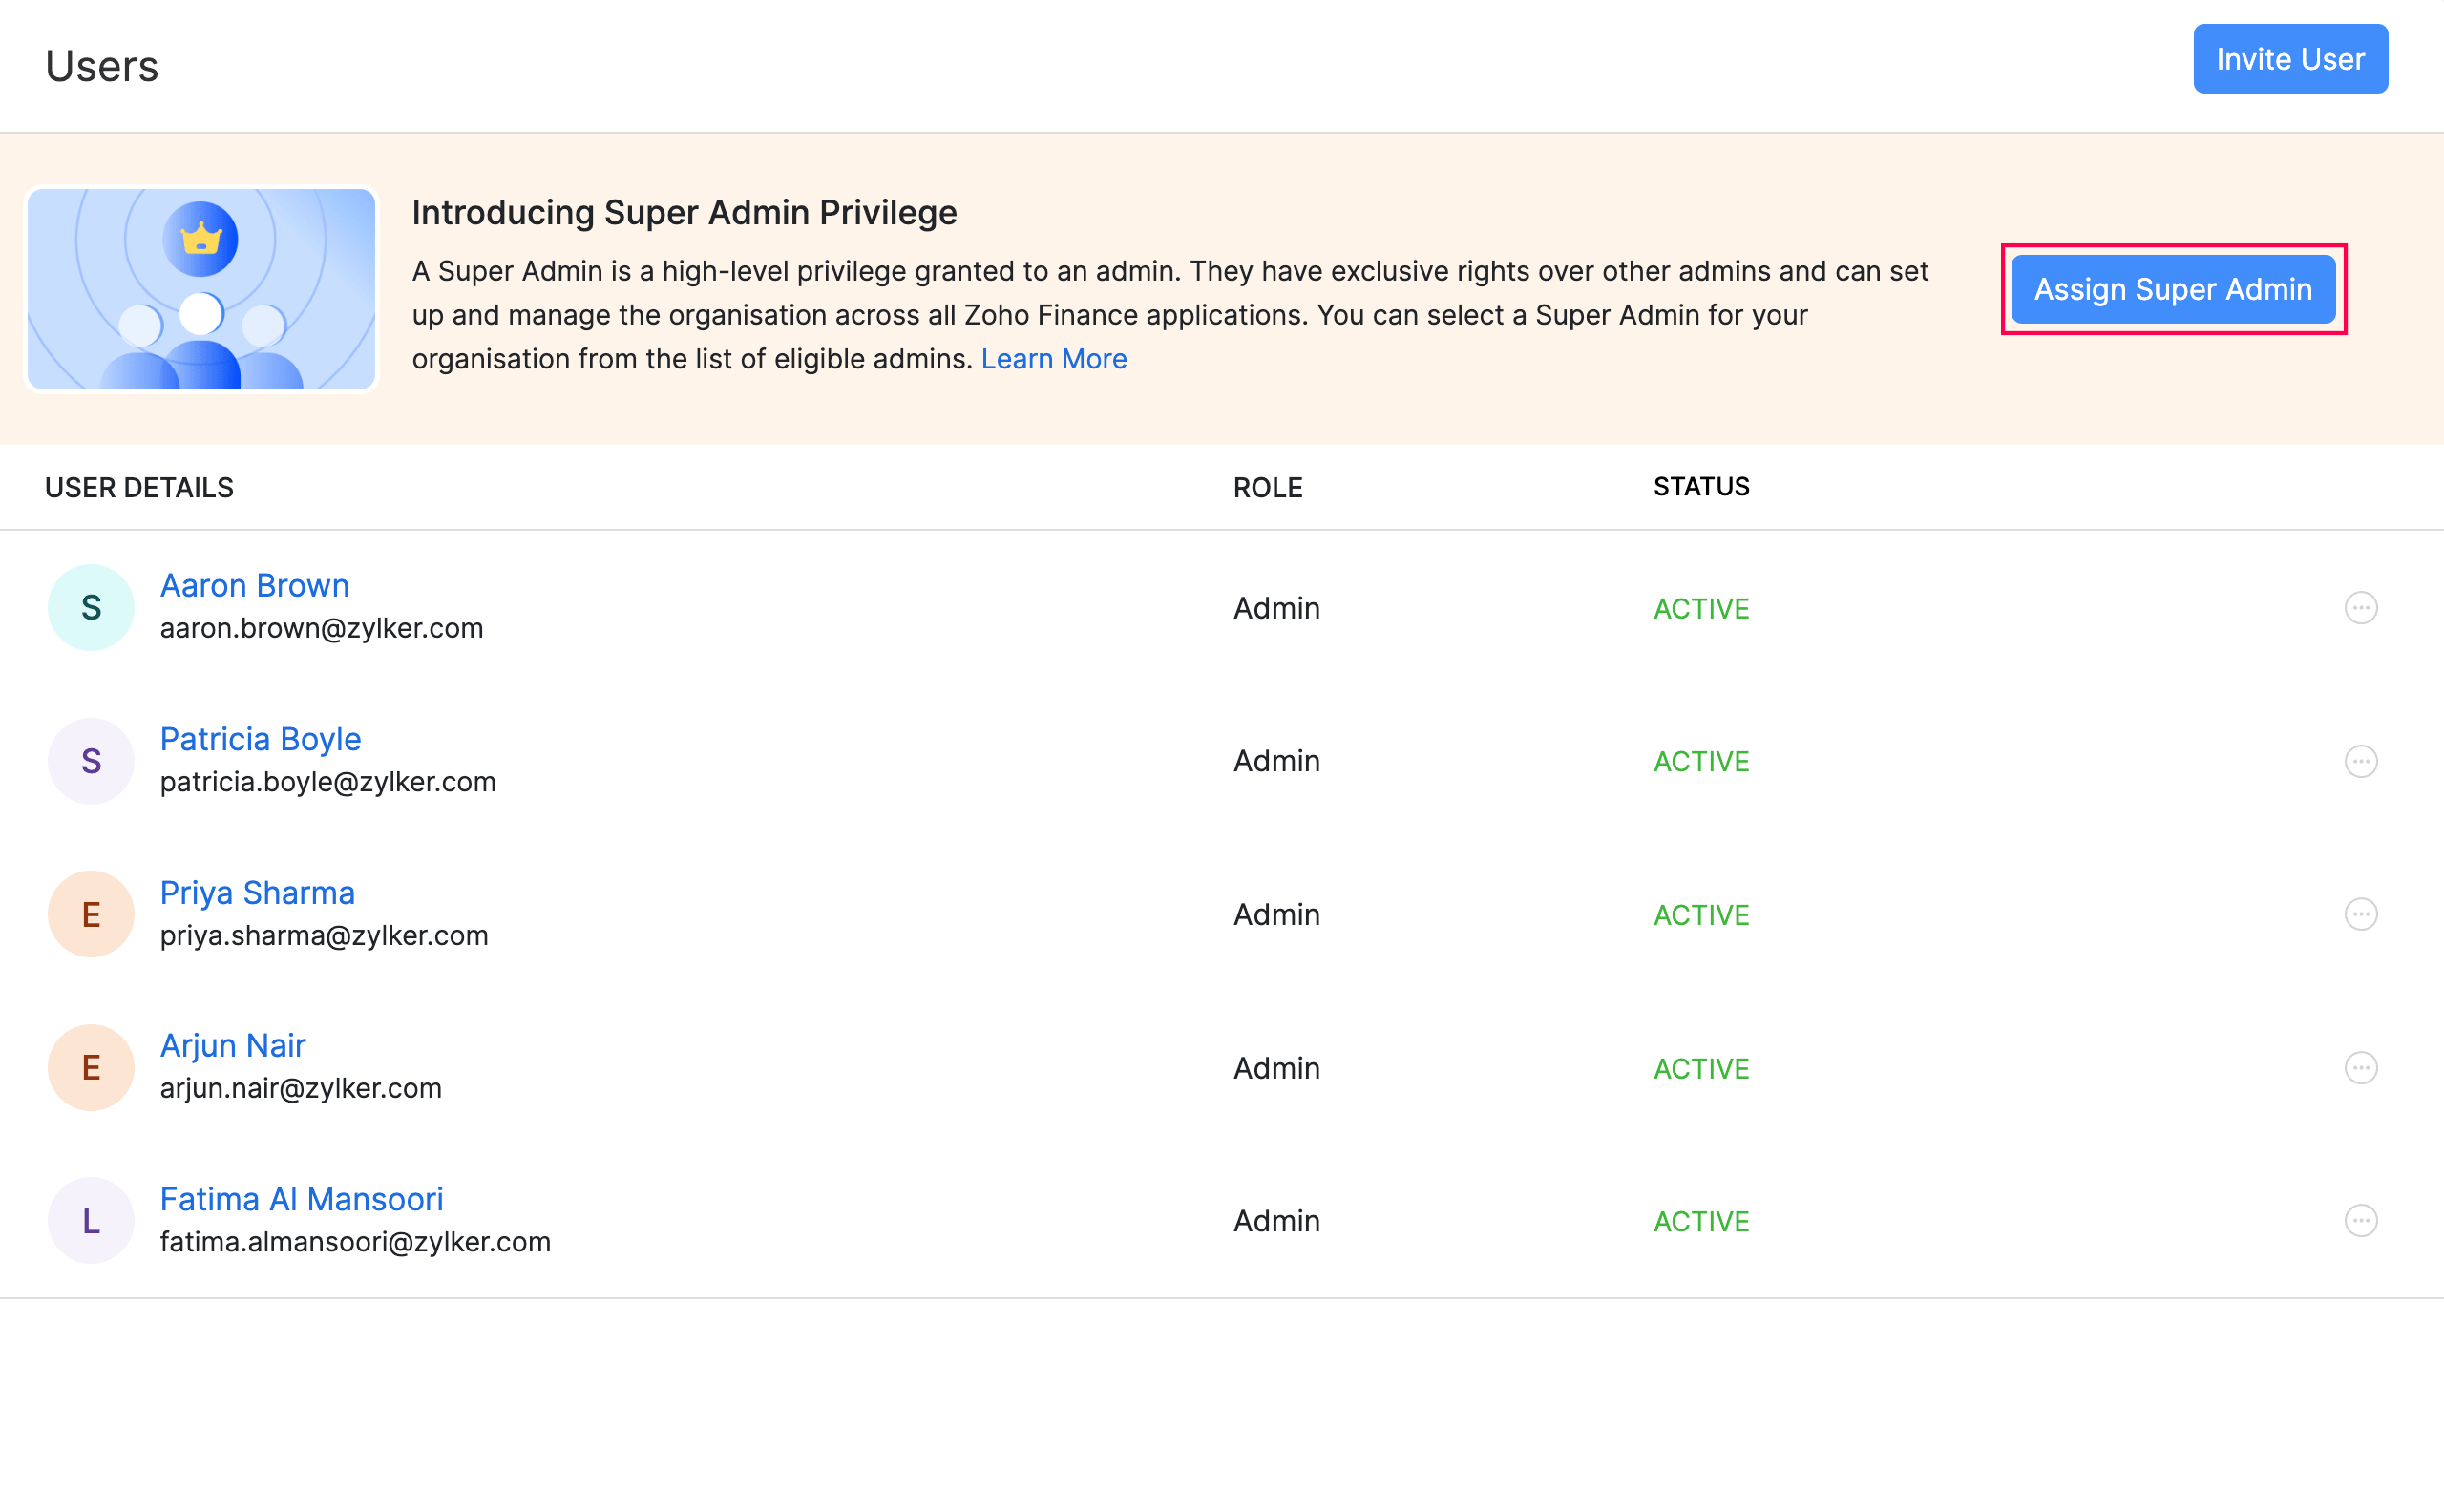
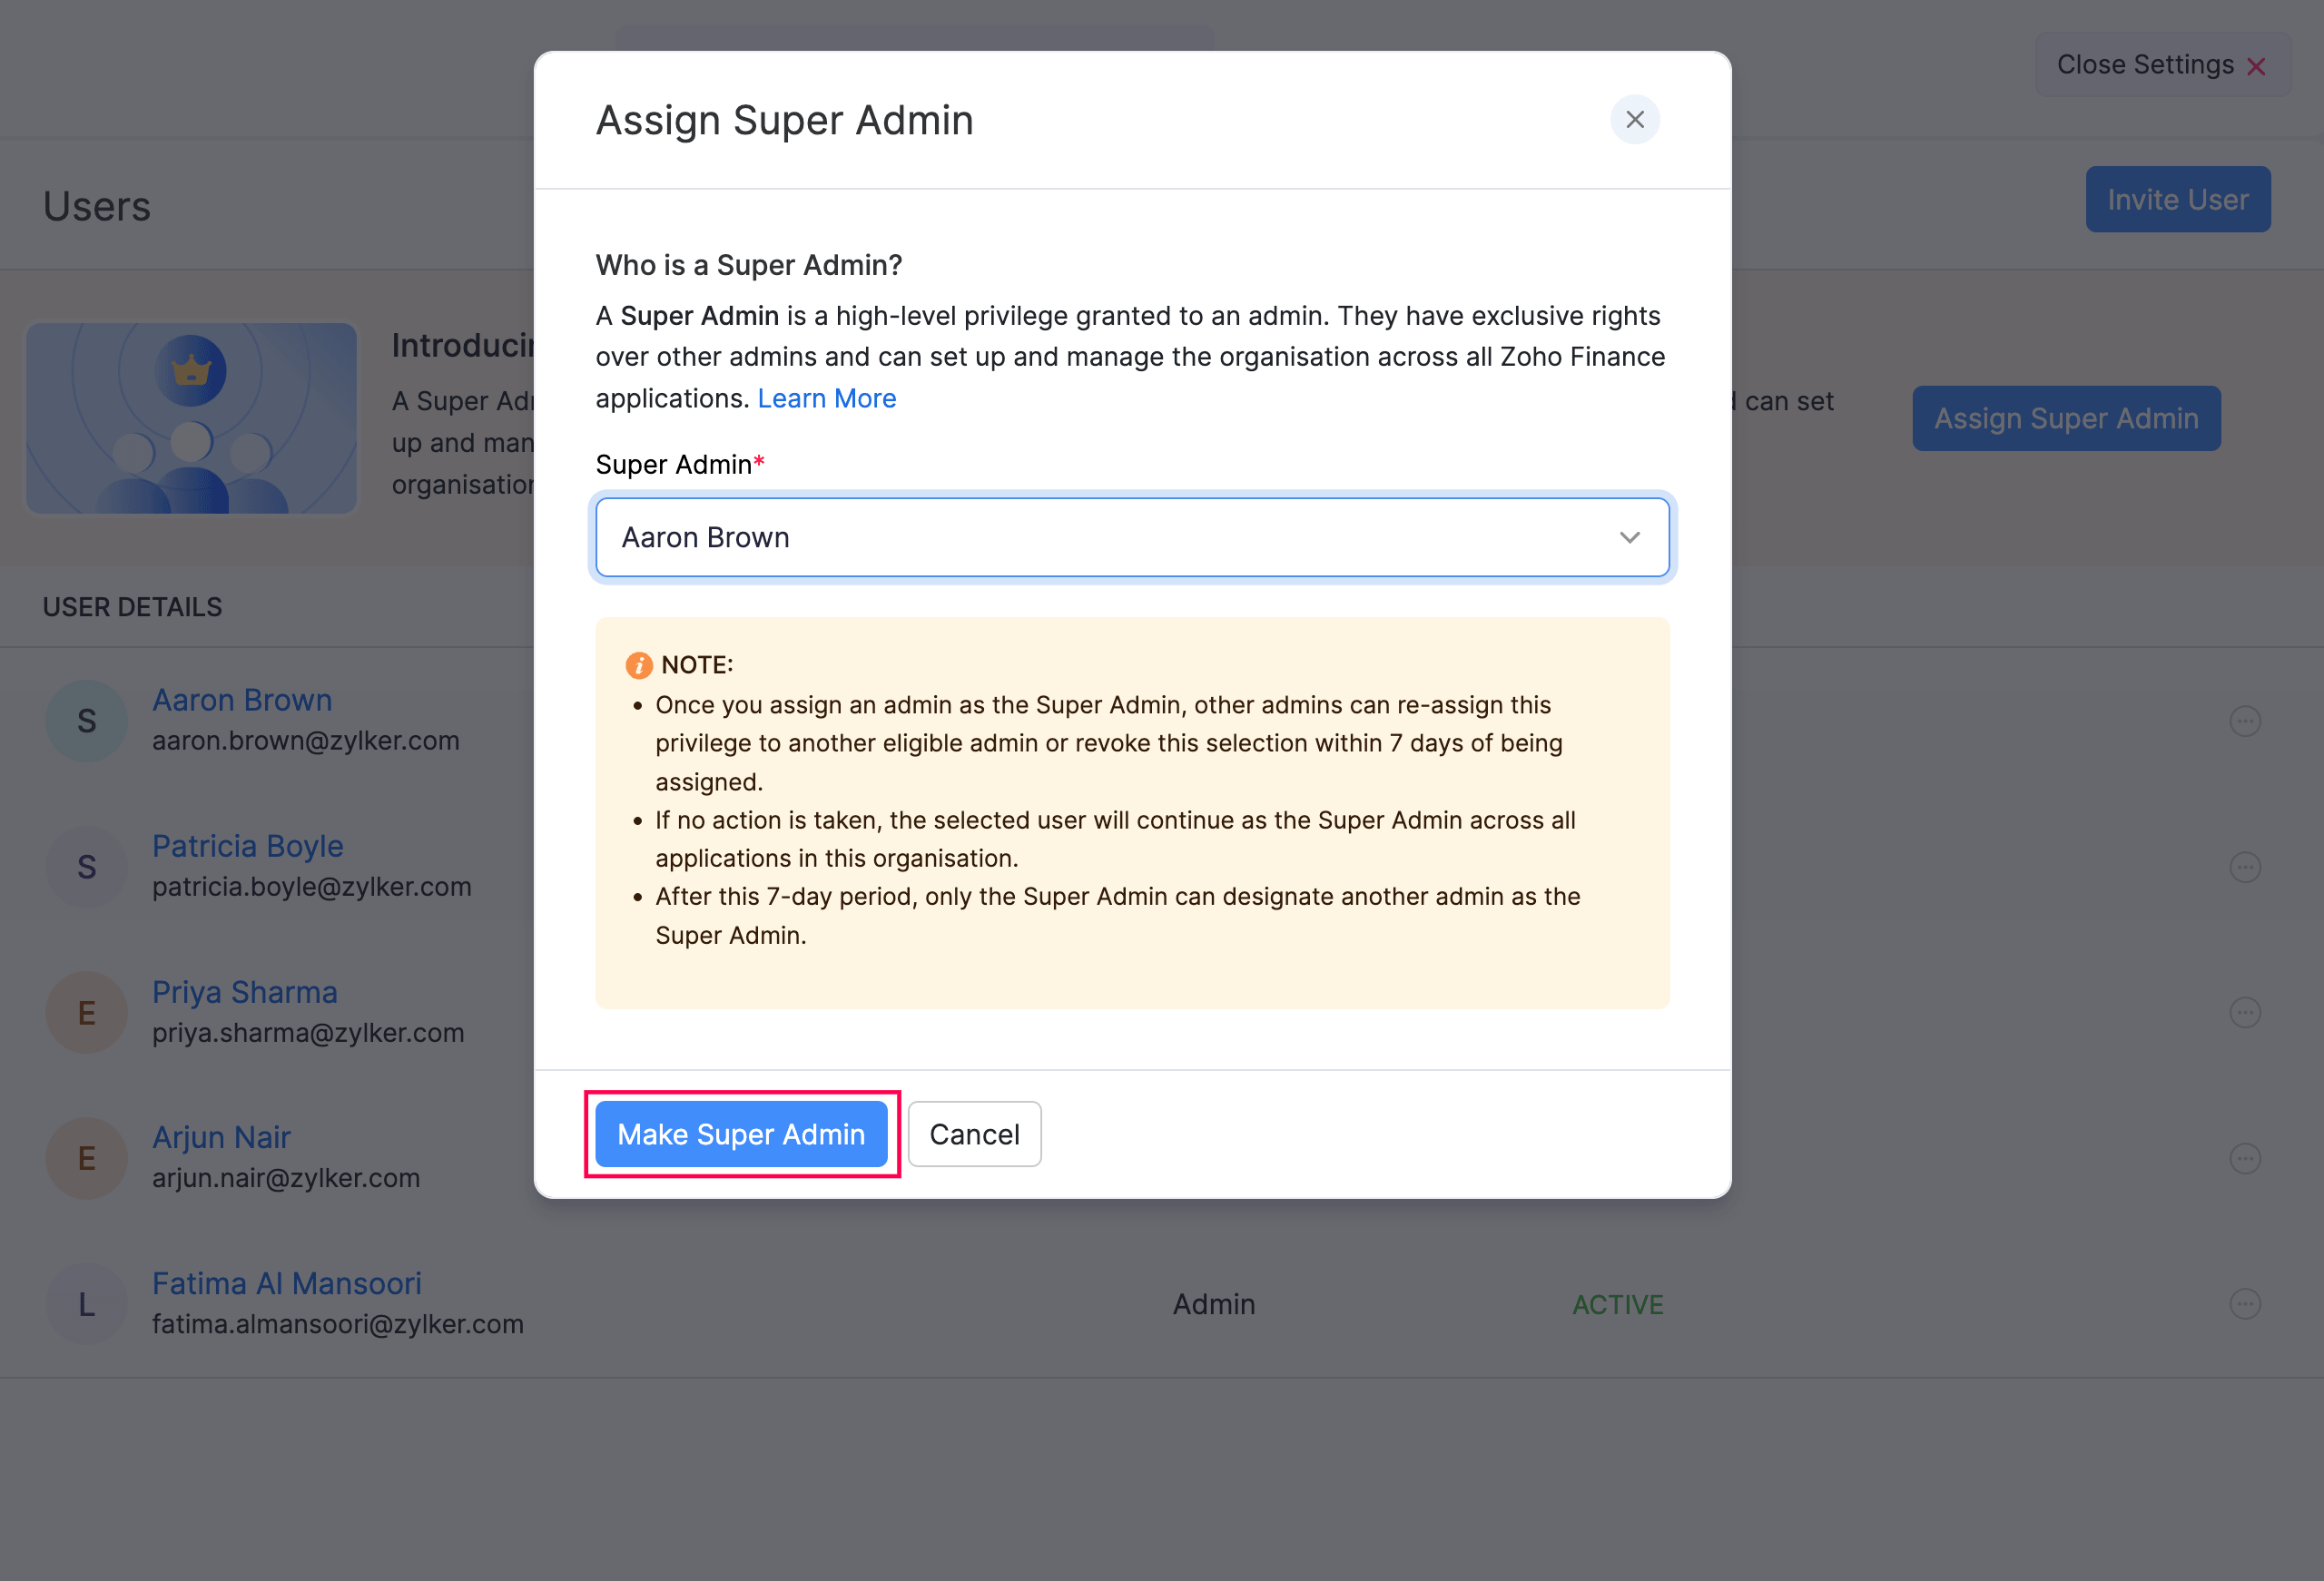
The selected admin will be marked as the Super Admin, and a Super Admin badge will appear next to their name on the Users page.
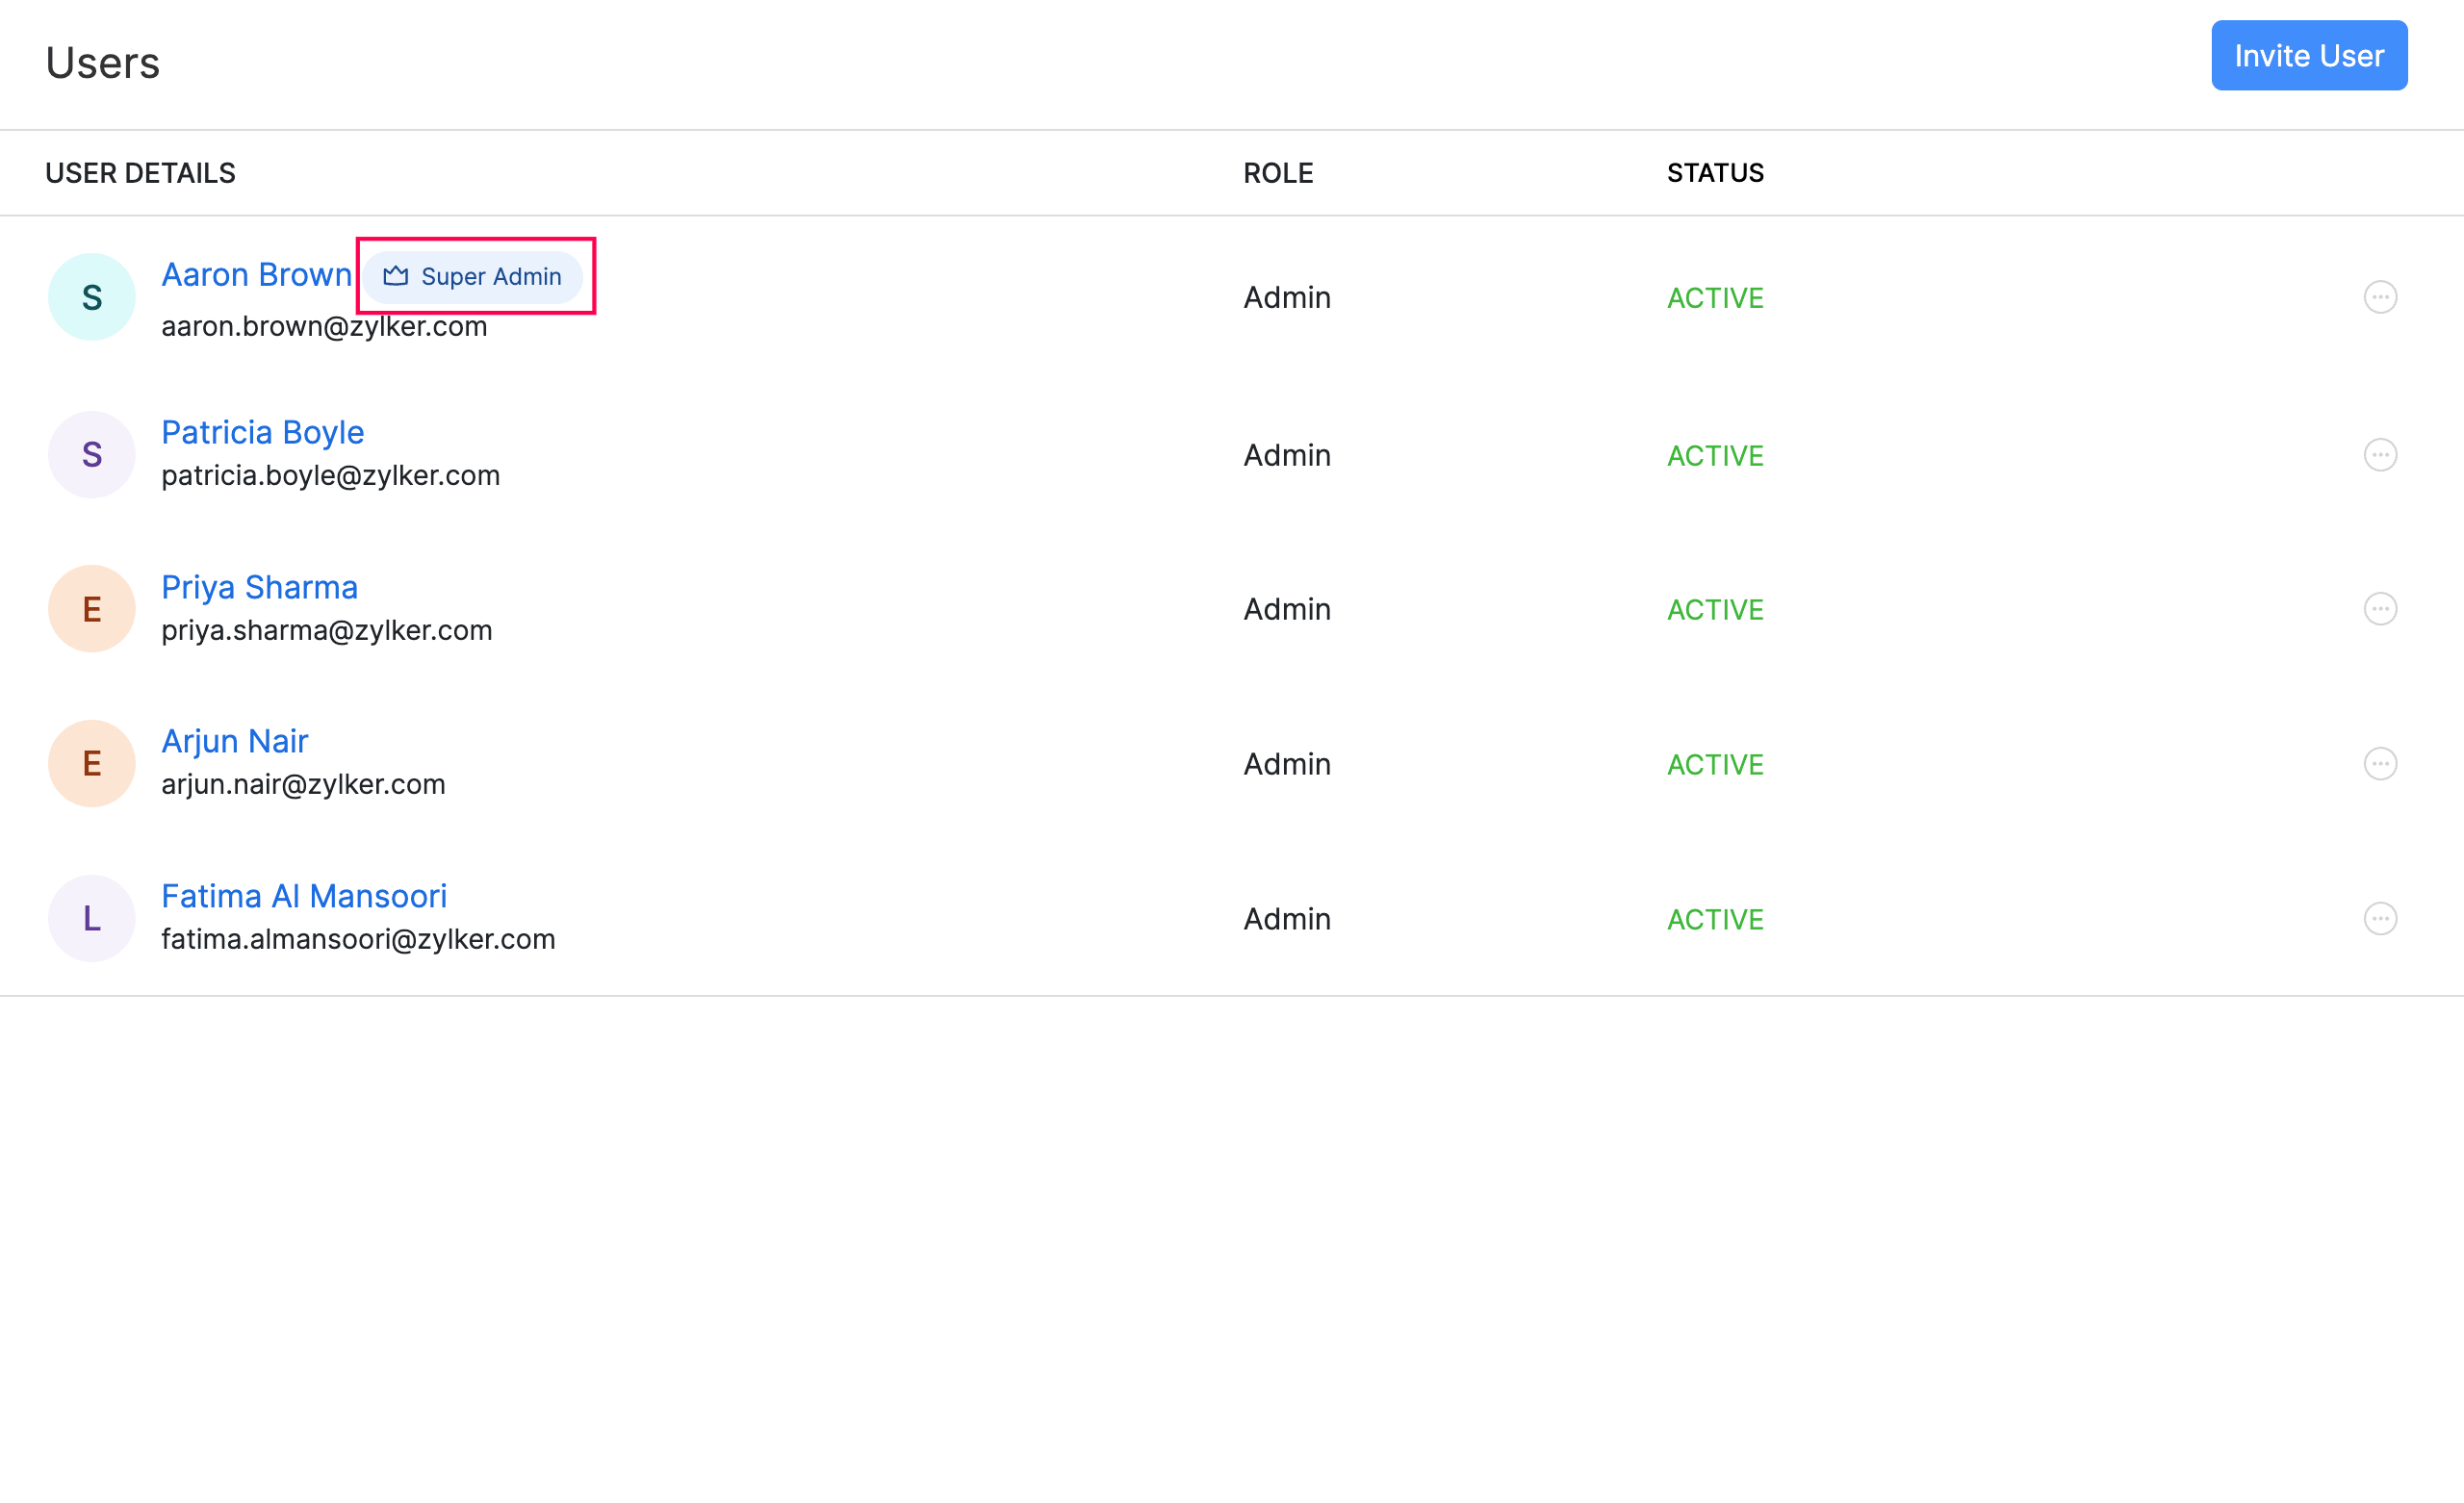
Note: After you assign a Super Admin, other admins in the organisation can reassign or revoke this selection within 7 days. After the 7-day period, only the current Super Admin can transfer the privilege to another admin.
Reassign or Revoke Super Admin Privilege
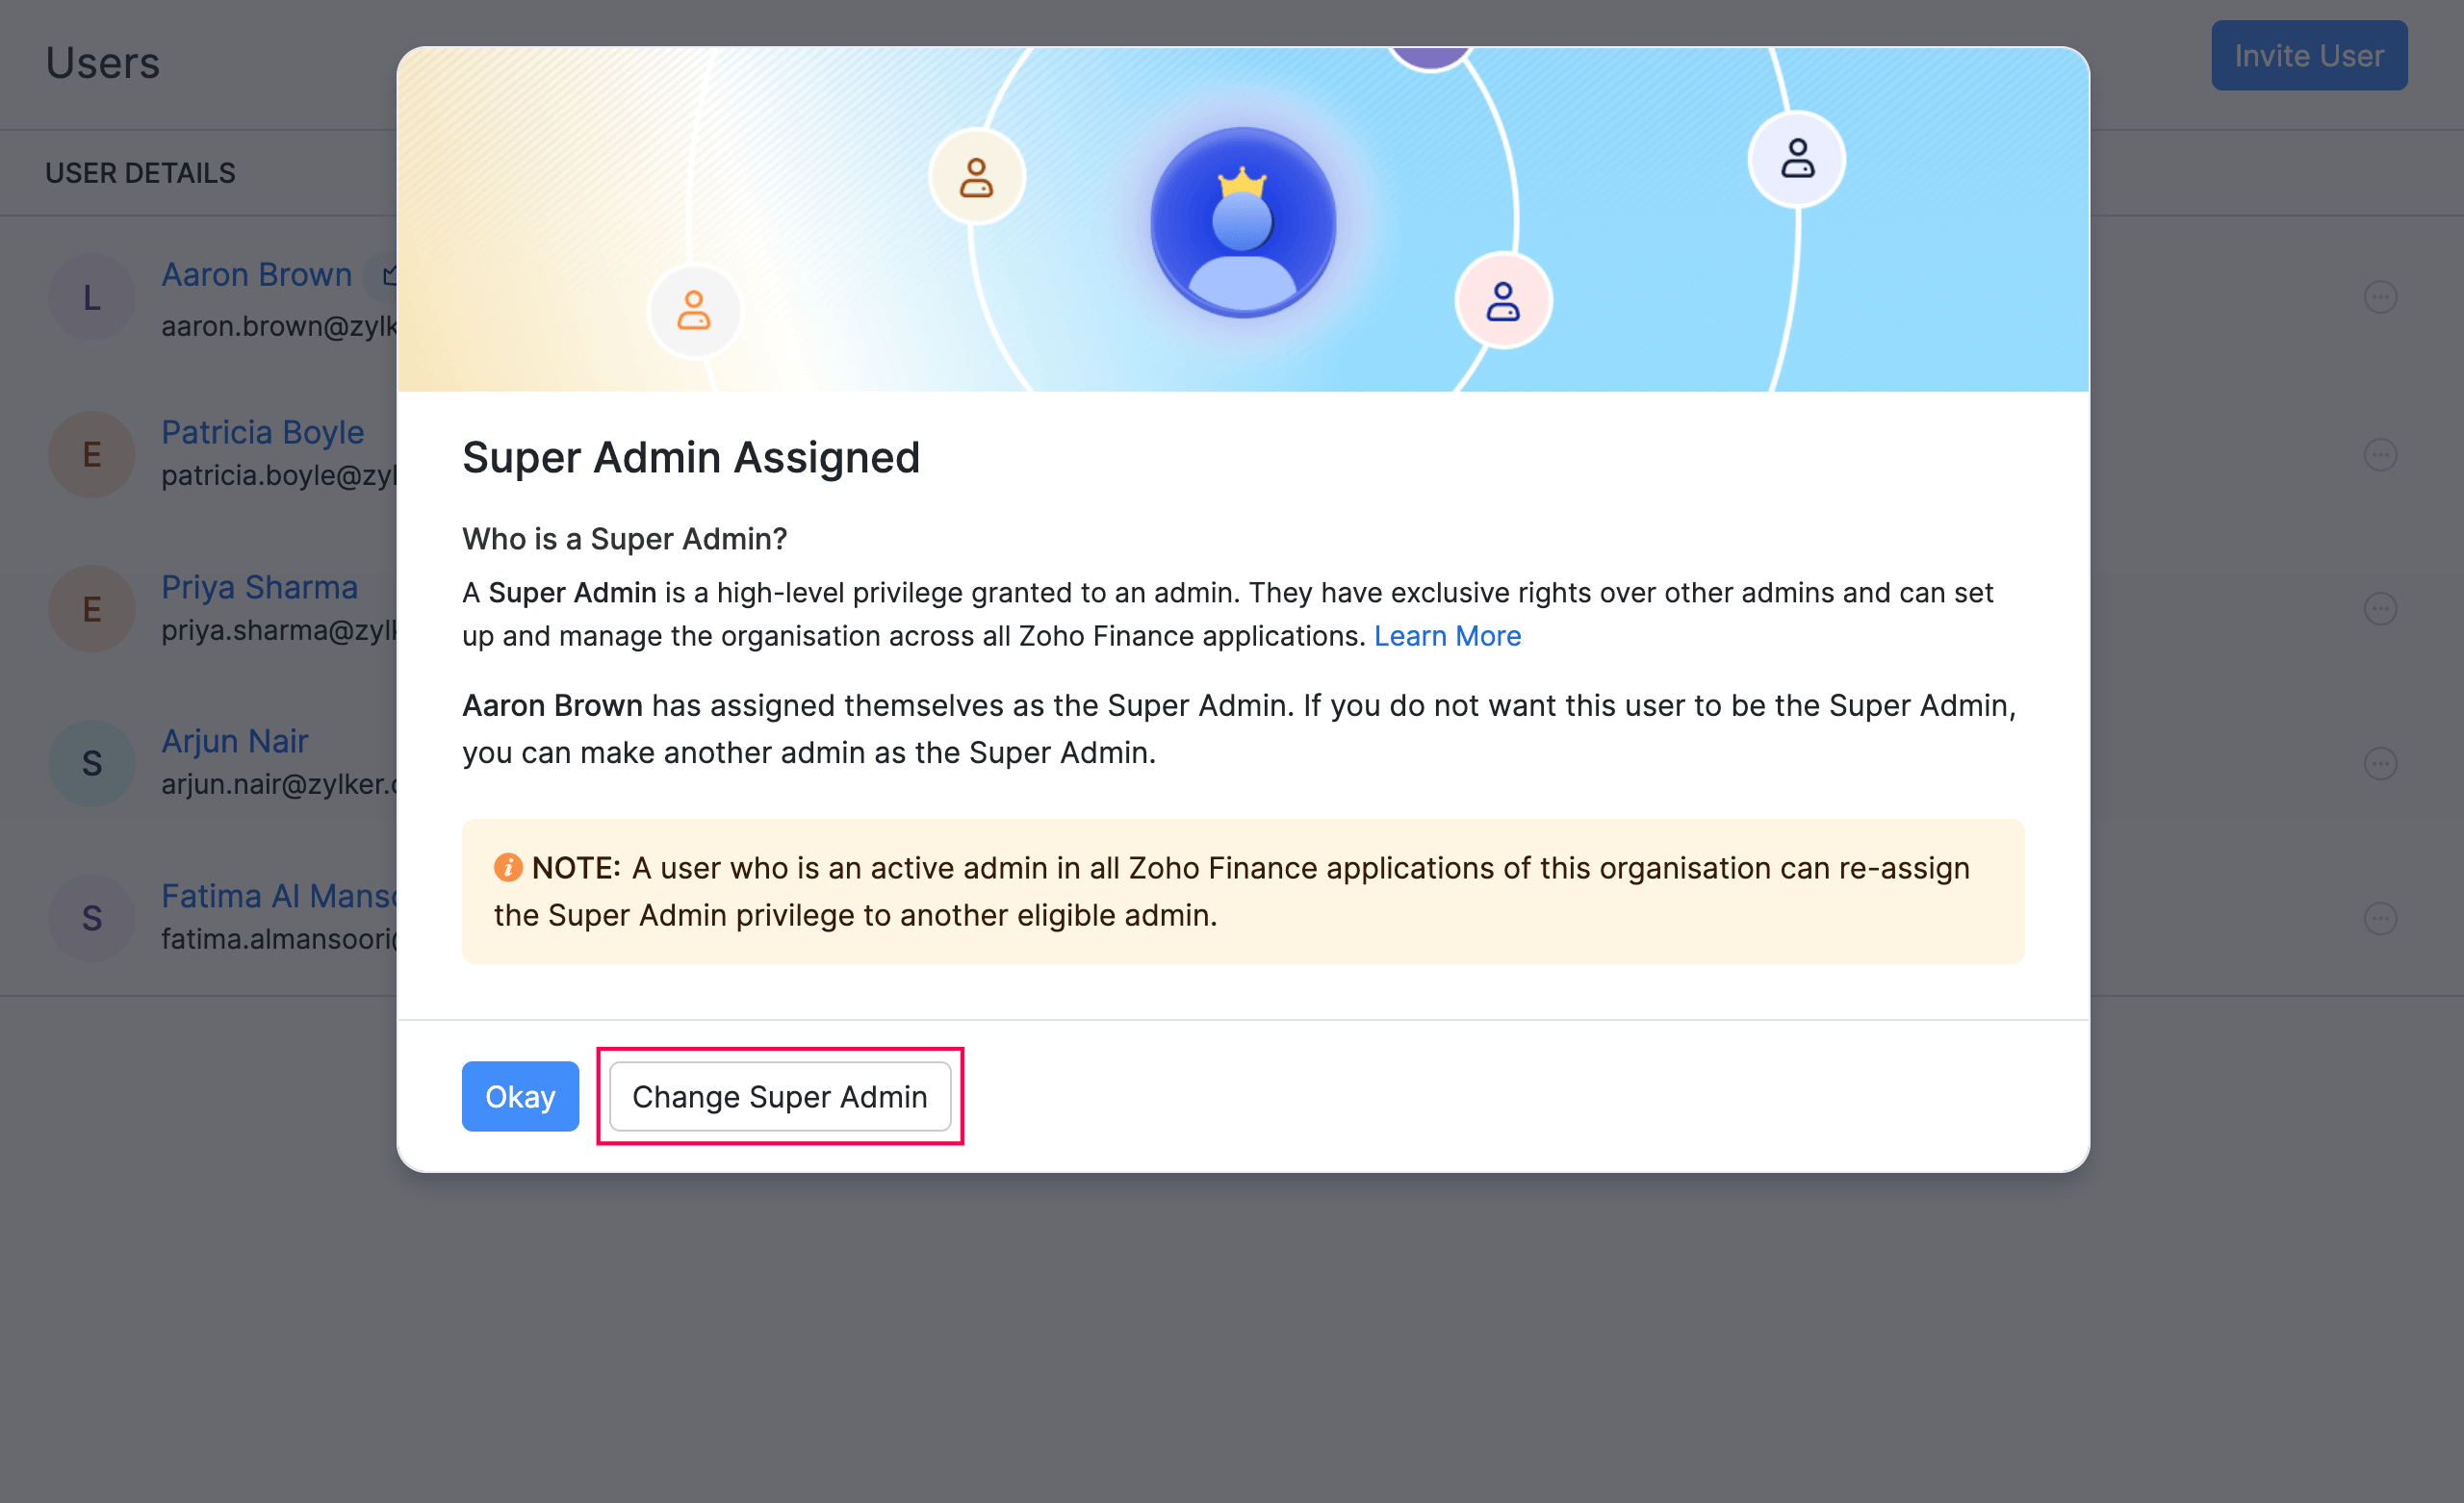
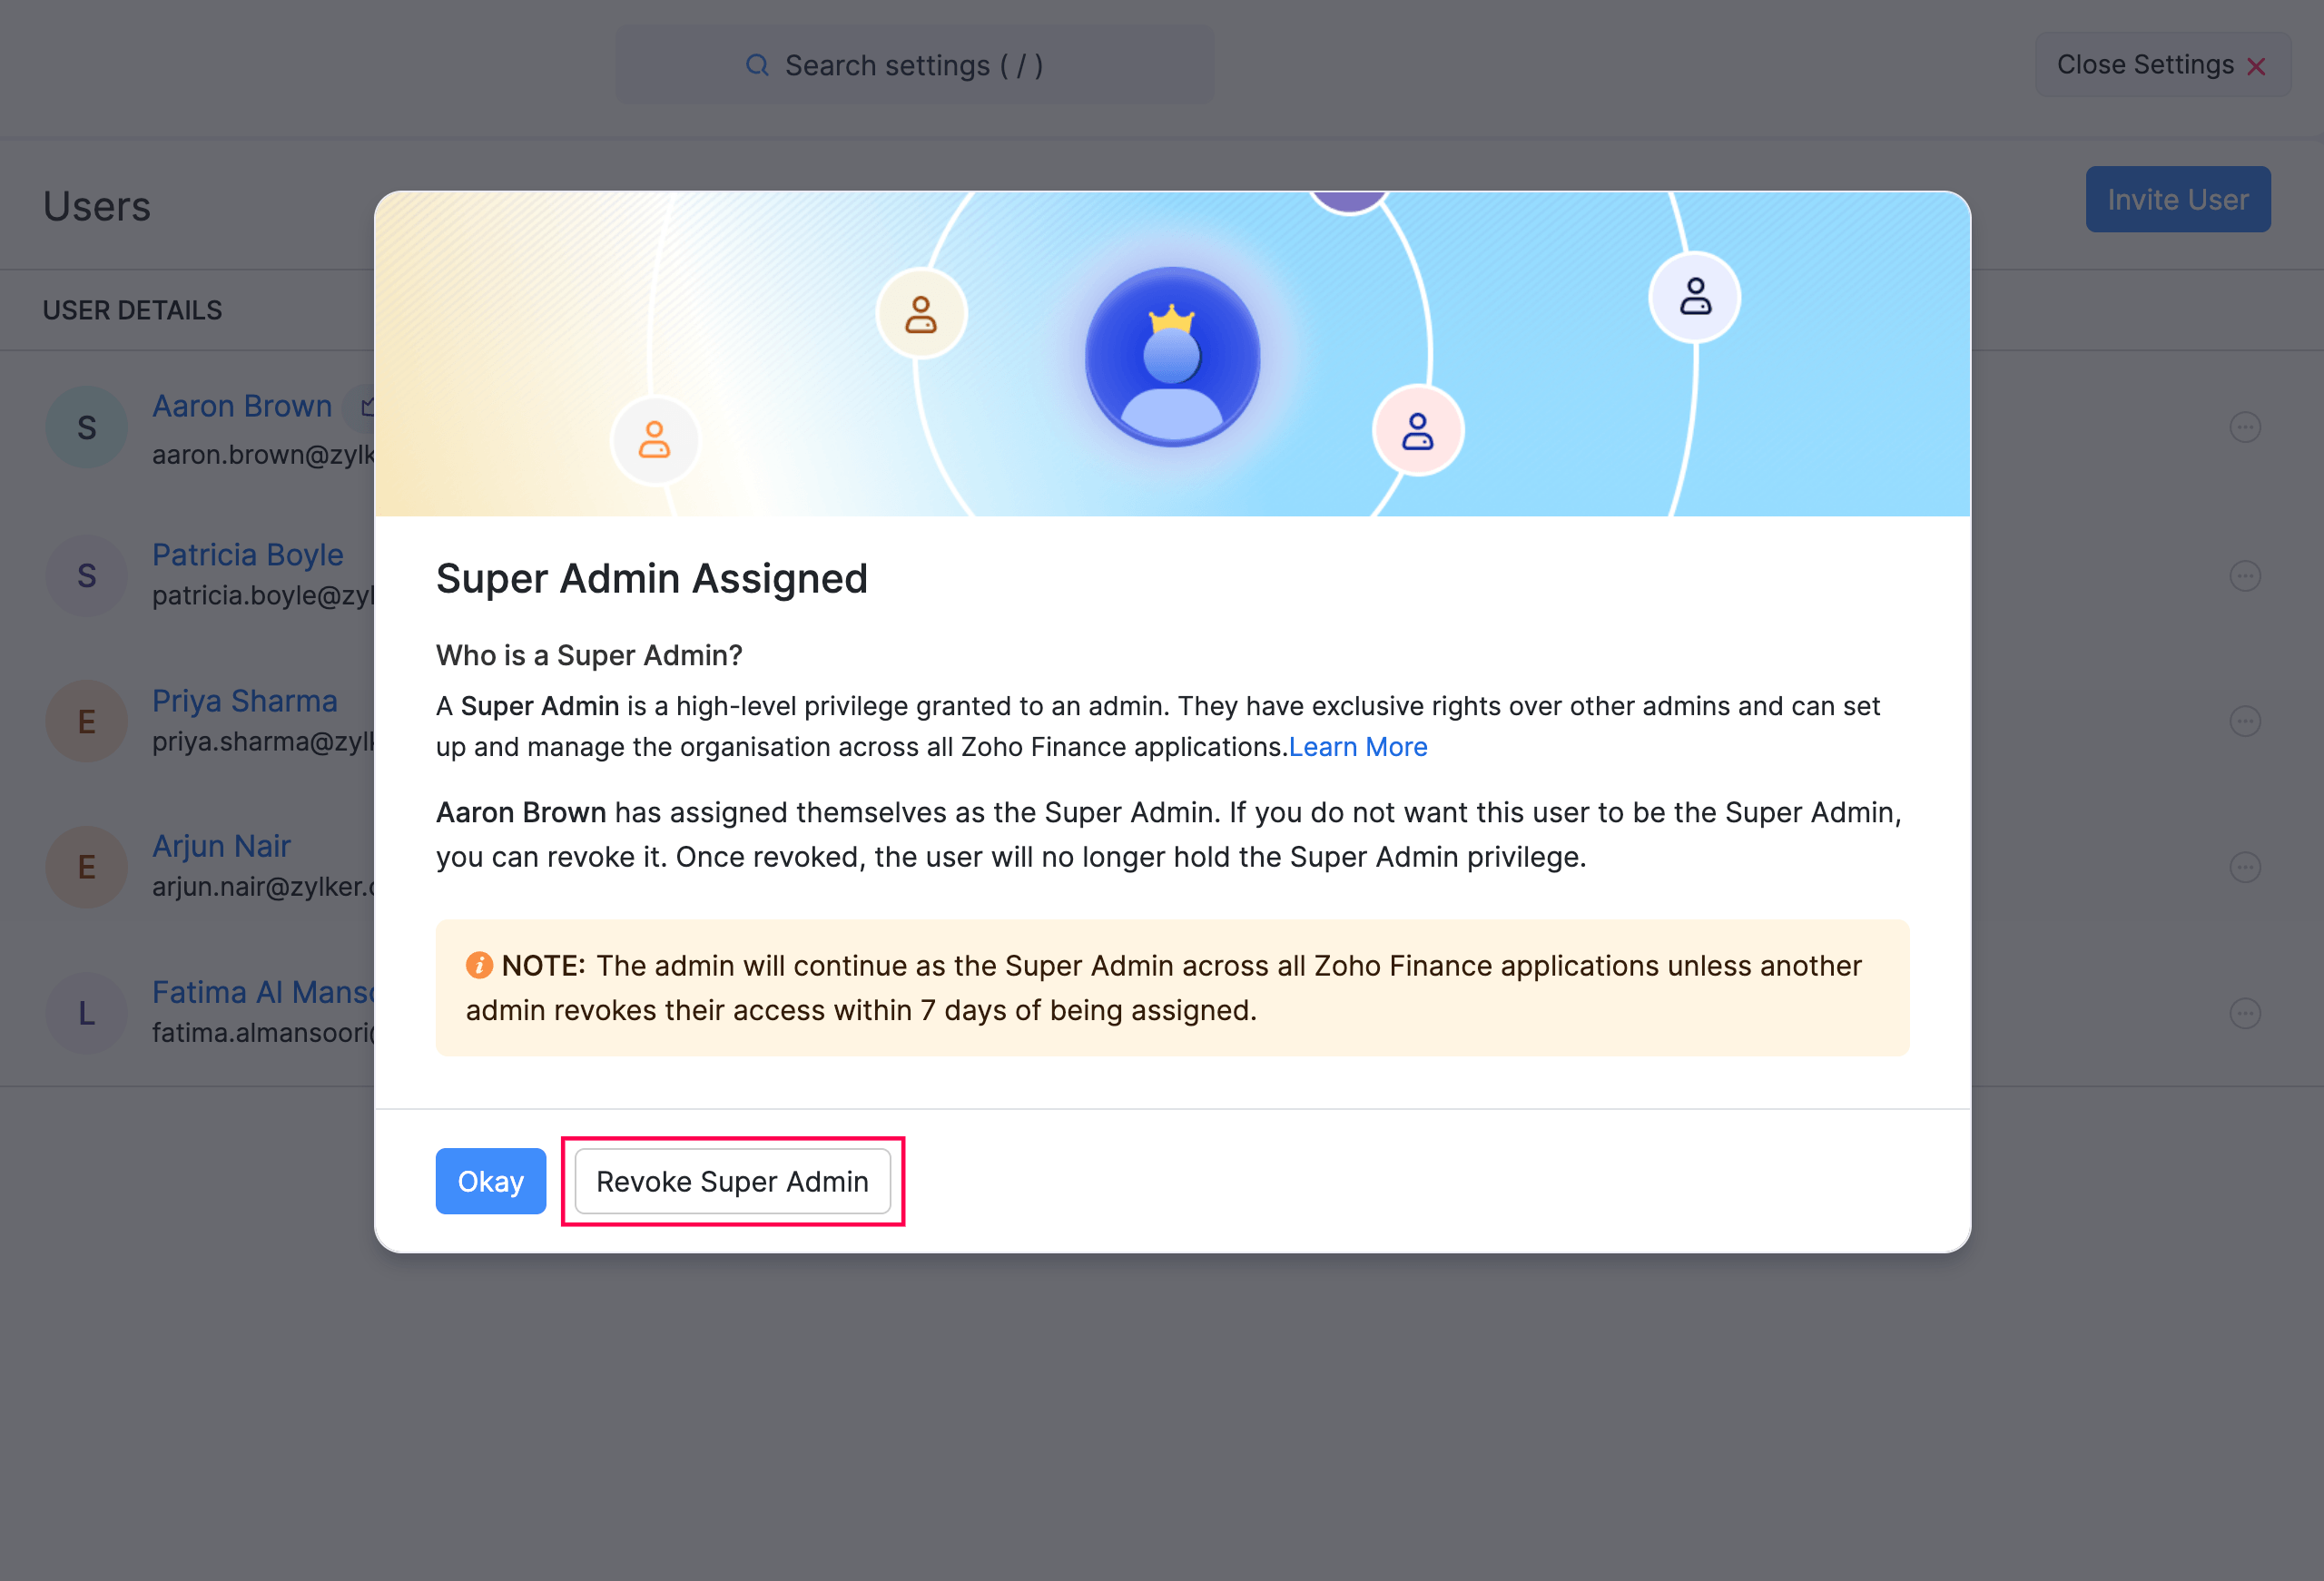
After a Super Admin is assigned, other admins in the organisation will see a notification the next time they visit the Users page during the 7-day grace period. The options available in this notification depend on the admin’s eligibility.
Admins who are active across all Zoho Finance applications in the organisation will see the option to reassign the privilege to a different eligible admin.
Admins who are not eligible to be a Super Admin will see the option to revoke the privilege entirely.
Change the Super Admin
You can transfer the Super Admin privilege to a different admin at any time.
- Navigate to Settings and click Users & Roles.
- Click the More icon next to the admin you want to make the new Super Admin.
- Select Mark As Super Admin.
- Click Make Super Admin in the confirmation pop-up.
The previous Super Admin will lose the privilege, and the newly selected admin will become the Super Admin across all Zoho Finance applications.
Roles
Add a New Role
You can create and assign roles to each user so that they have access to specific modules in Zoho Payroll. For example, you can set up roles in such a way that a portal admin has access only to Settings and an approver can access only the Approvals module.
- Navigate to Settings and click Users & Roles.
- Switch to the Roles tab.
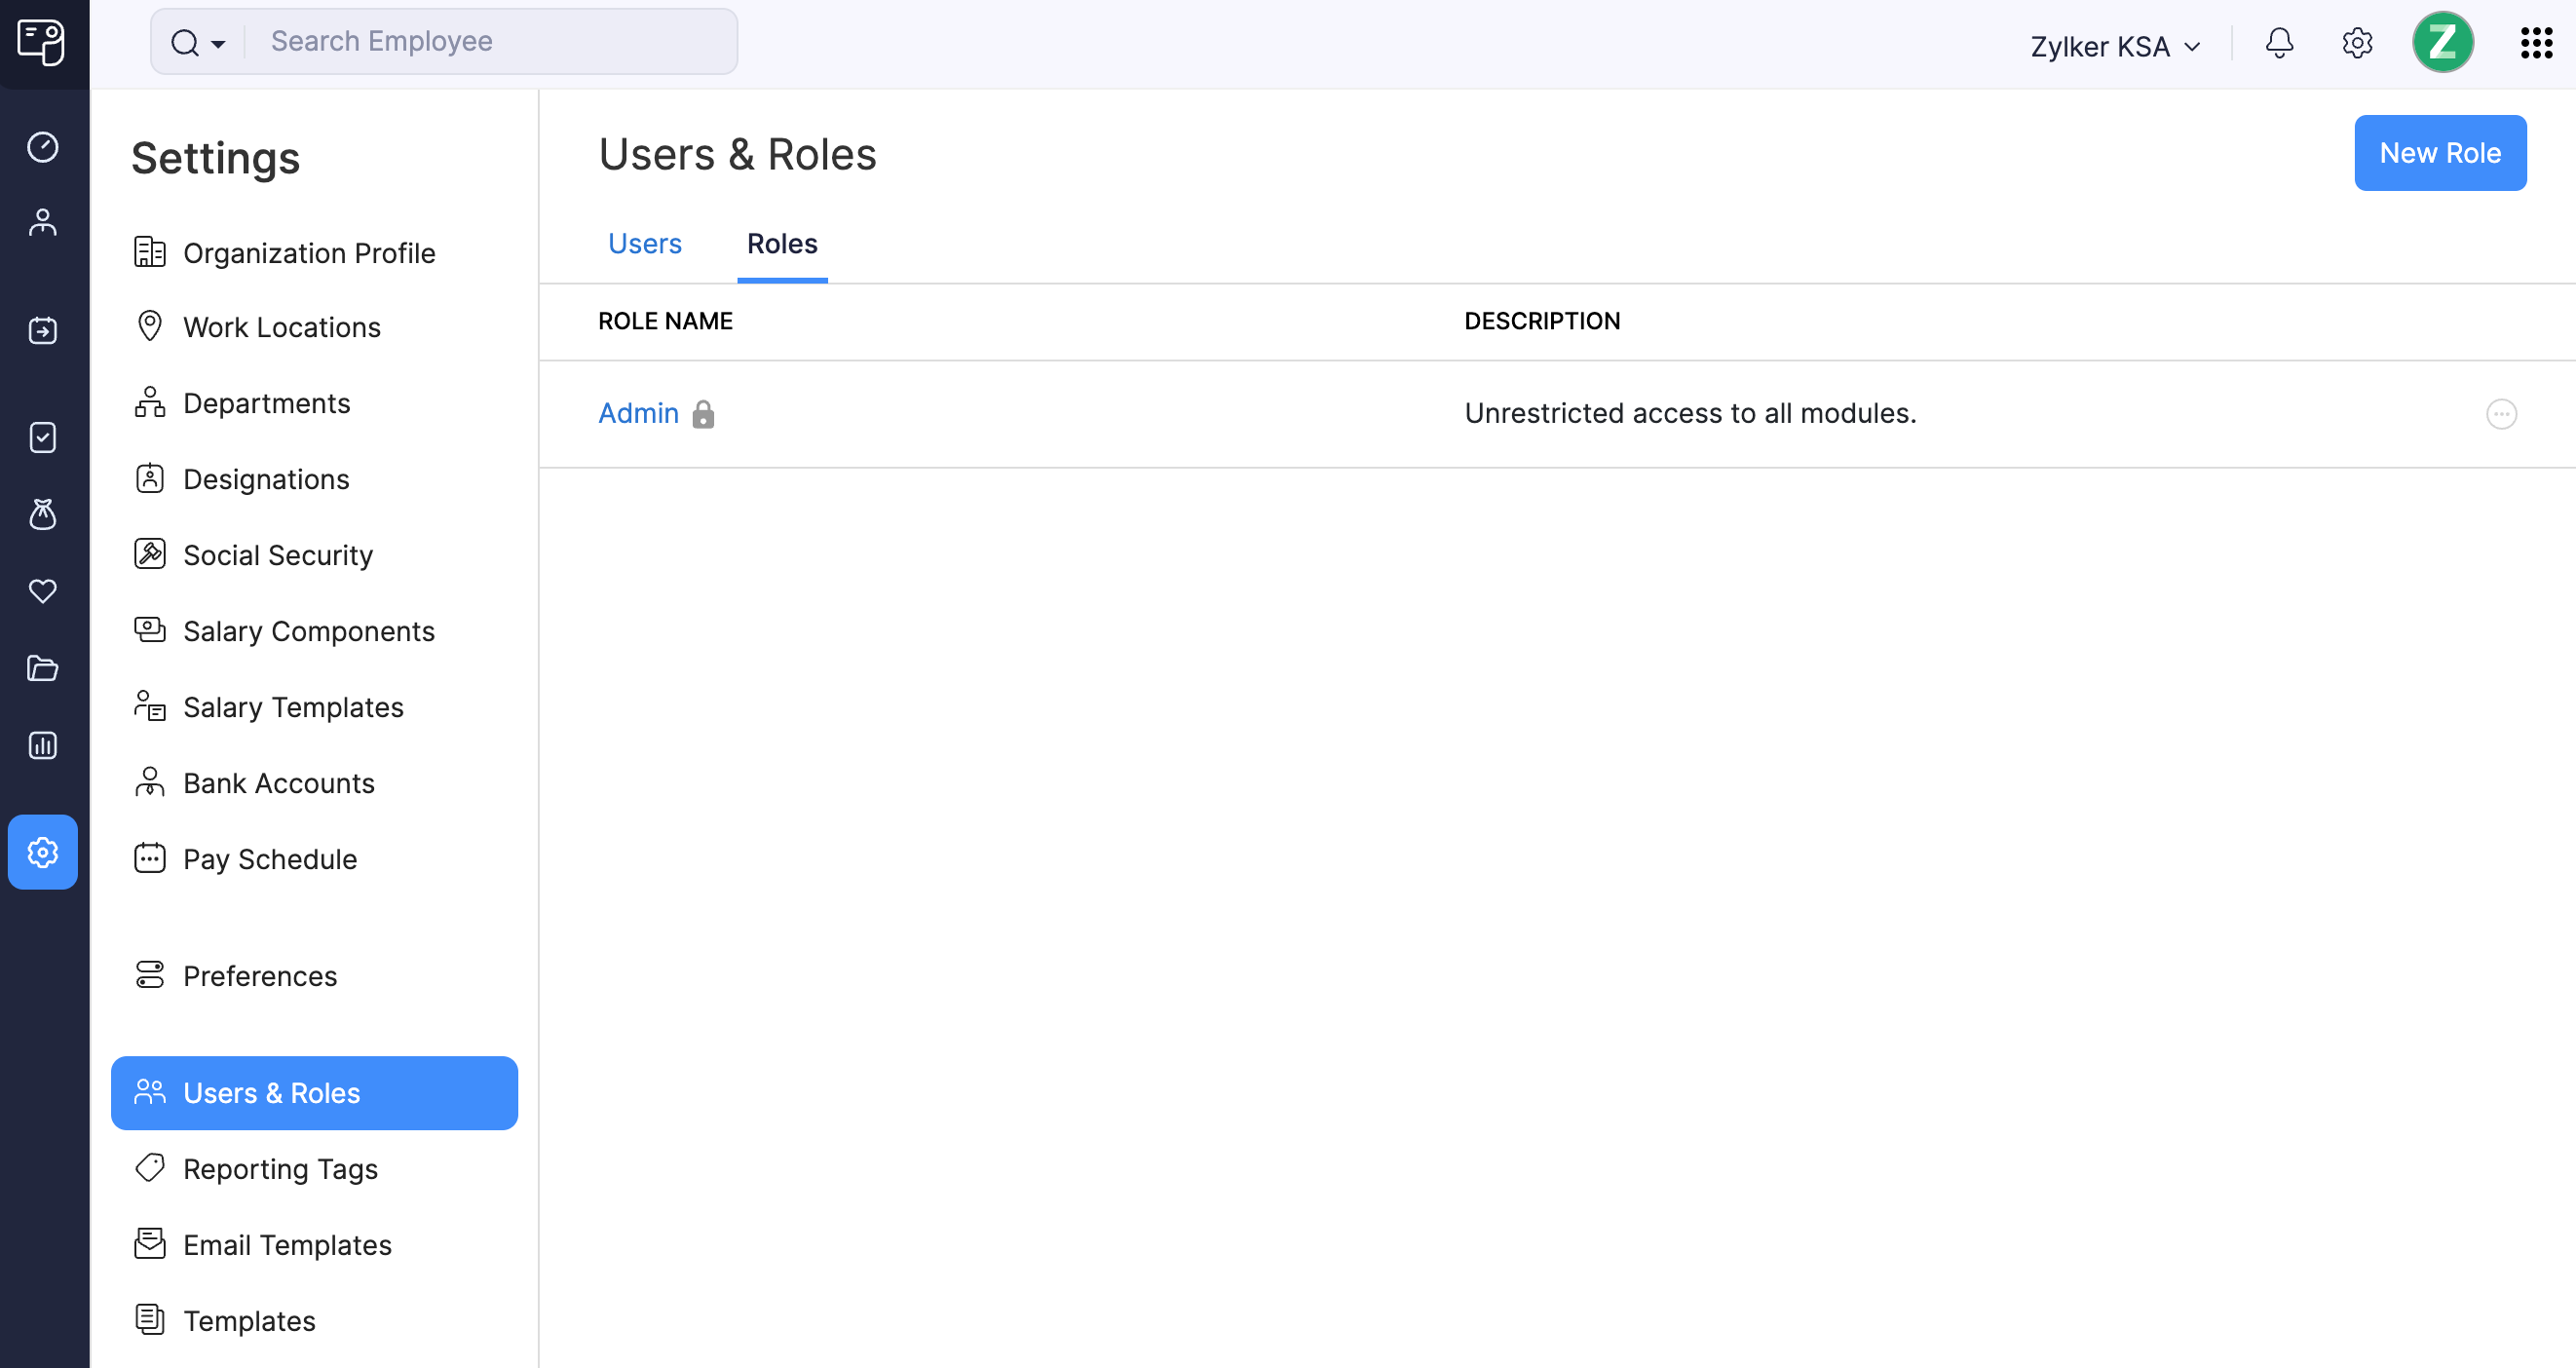
- Click New Role.
- Enter a name for the role and provide a description.
- Select the modules and the level of access you want to provide for the role.
- The modules you can customise are:
- Employees
- Pay Runs
- Approvals
- Settings
- Reports
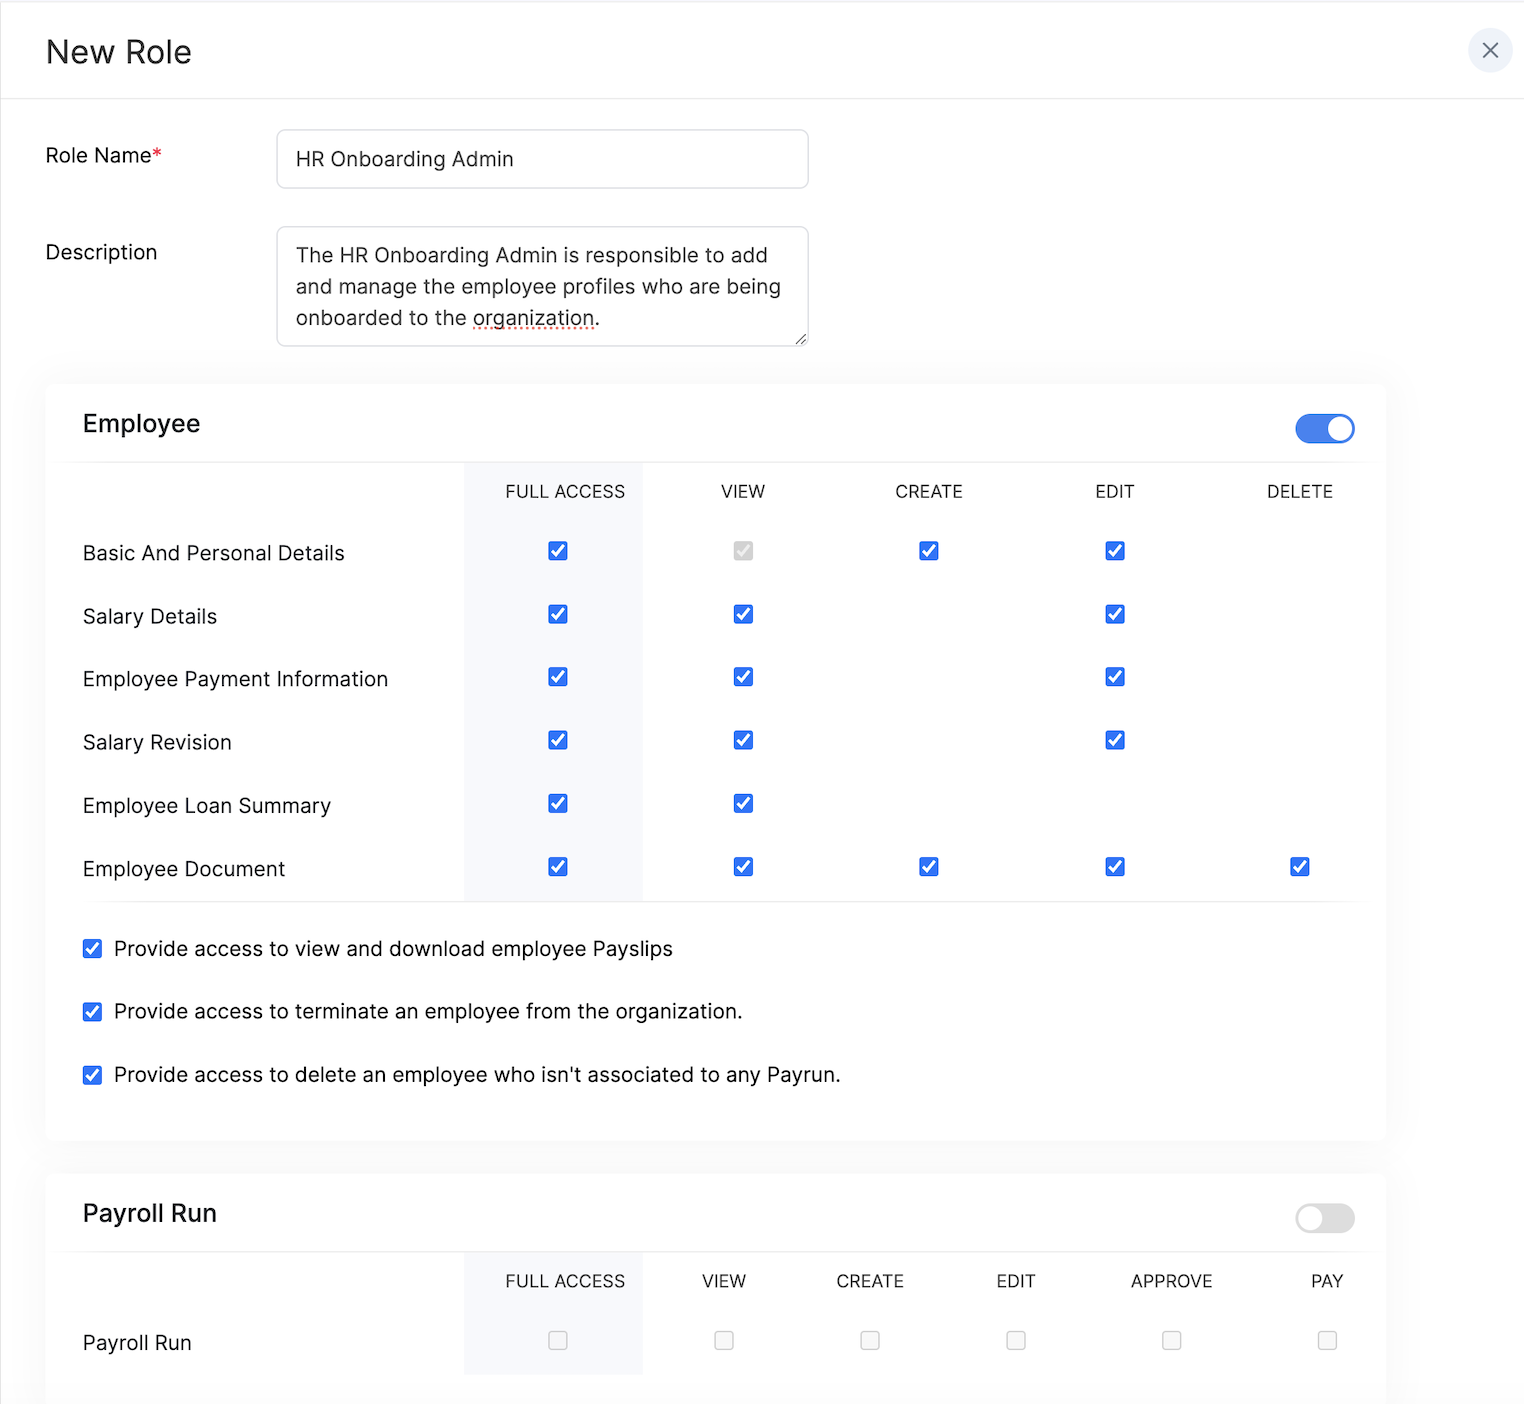
- Click Save.
Edit Role
To edit a role:
- Navigate to Settings and click Users & Roles.
- Switch to the Roles tab.
- Click the More icon next to the role and select Edit.
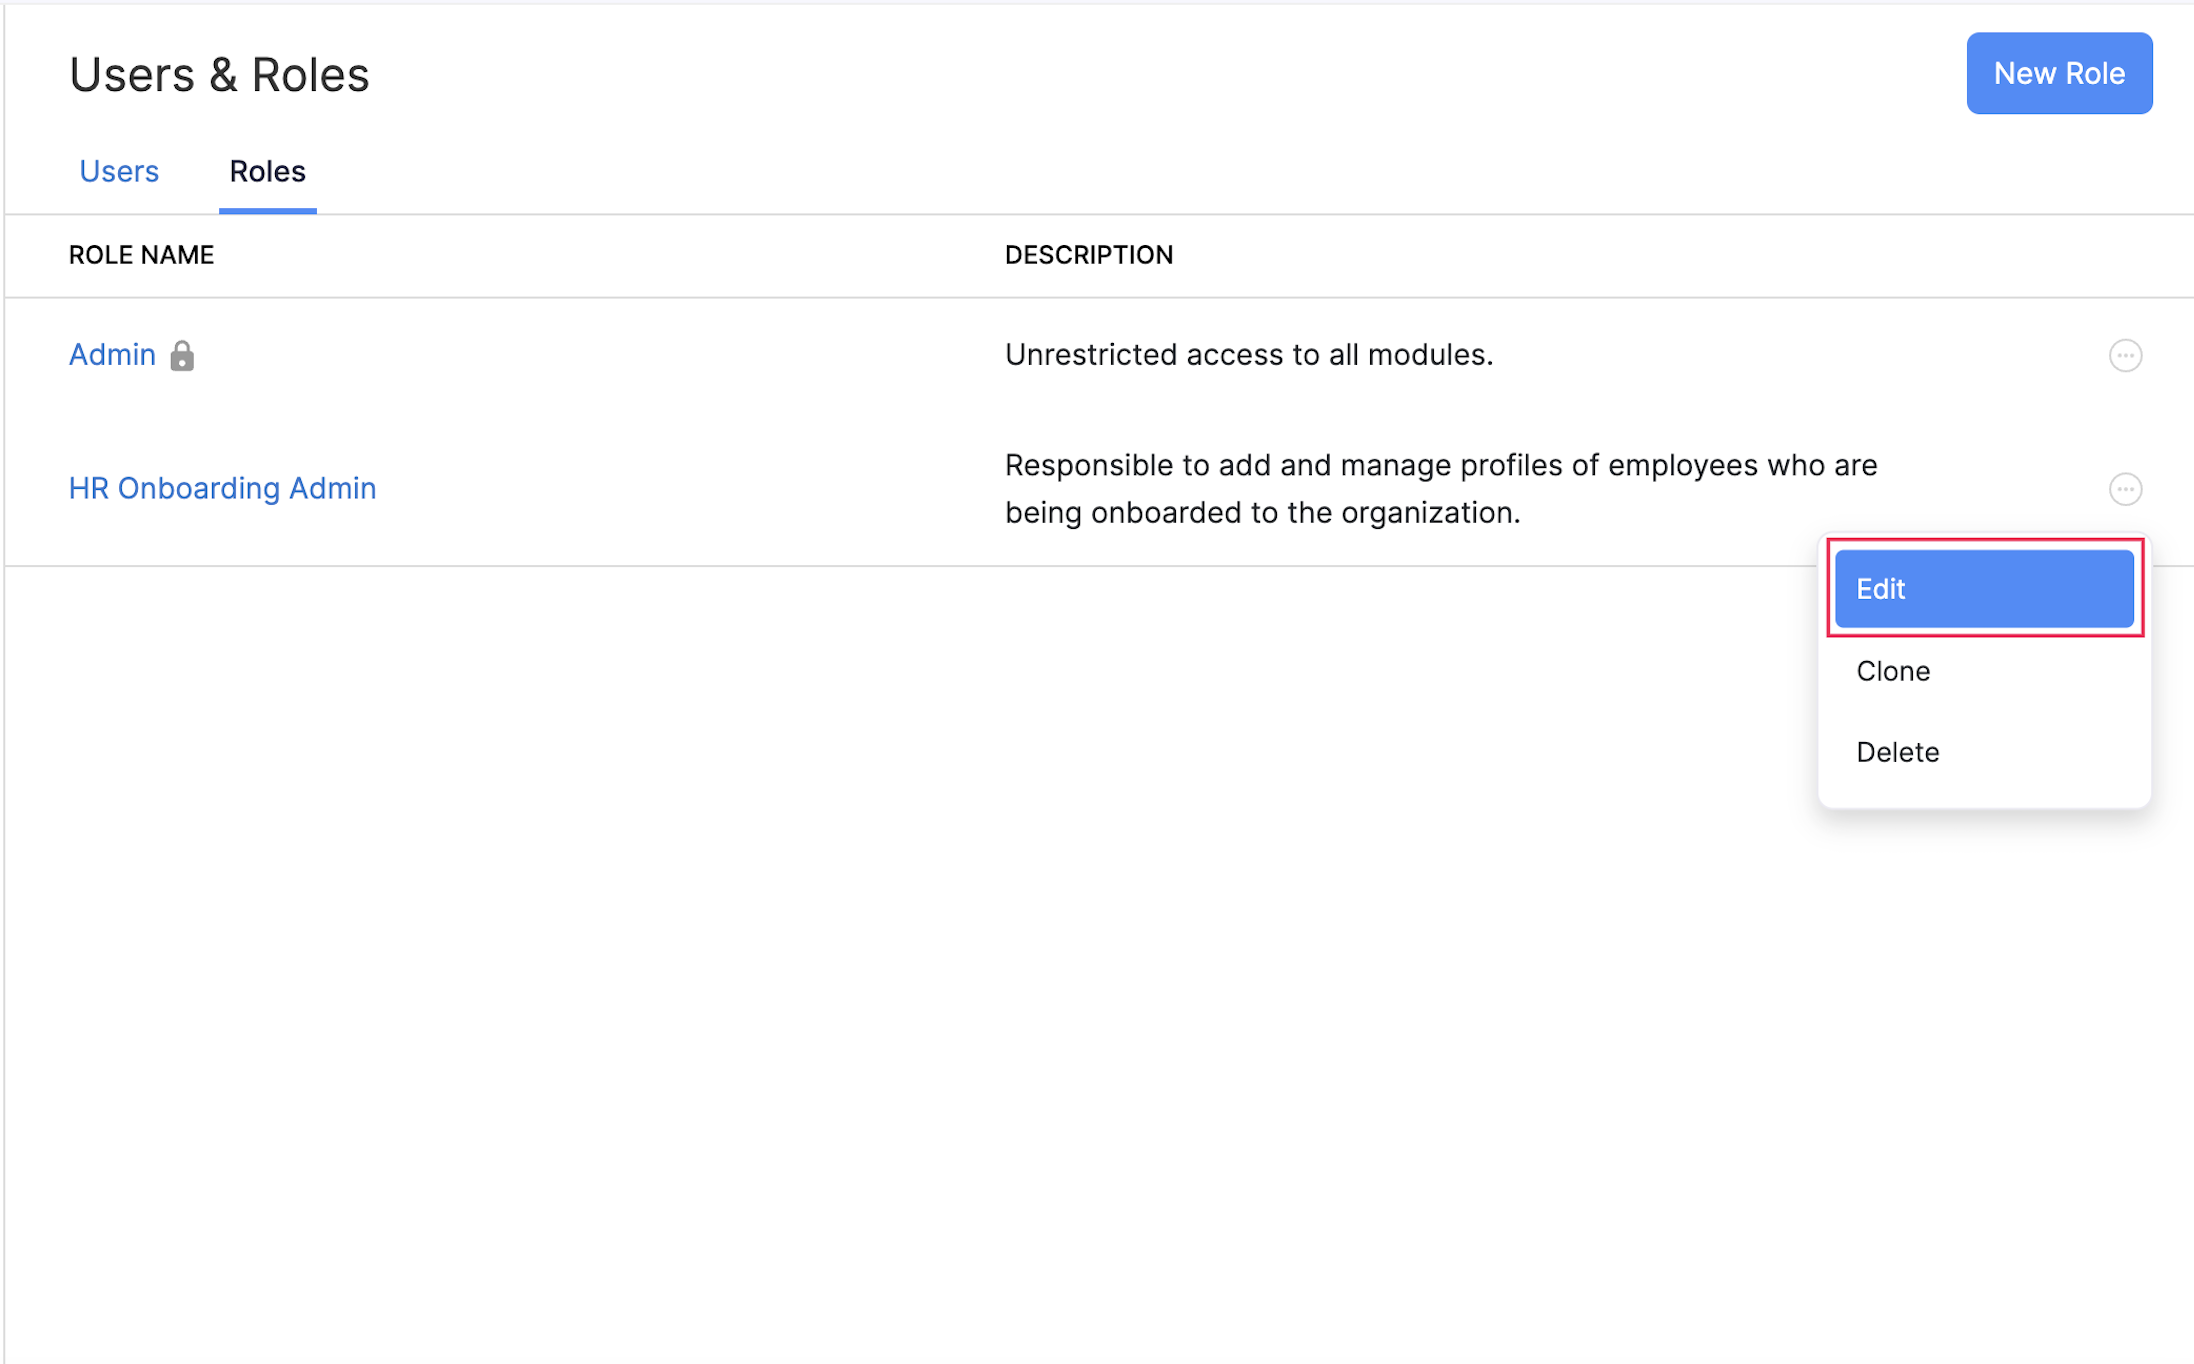
- Click Yes in the popup that appears.
Clone Role
To clone a role:
- Navigate to Settings and click Users & Roles.
- Switch to the Roles tab.
- Click the More icon next to the user and choose Clone.
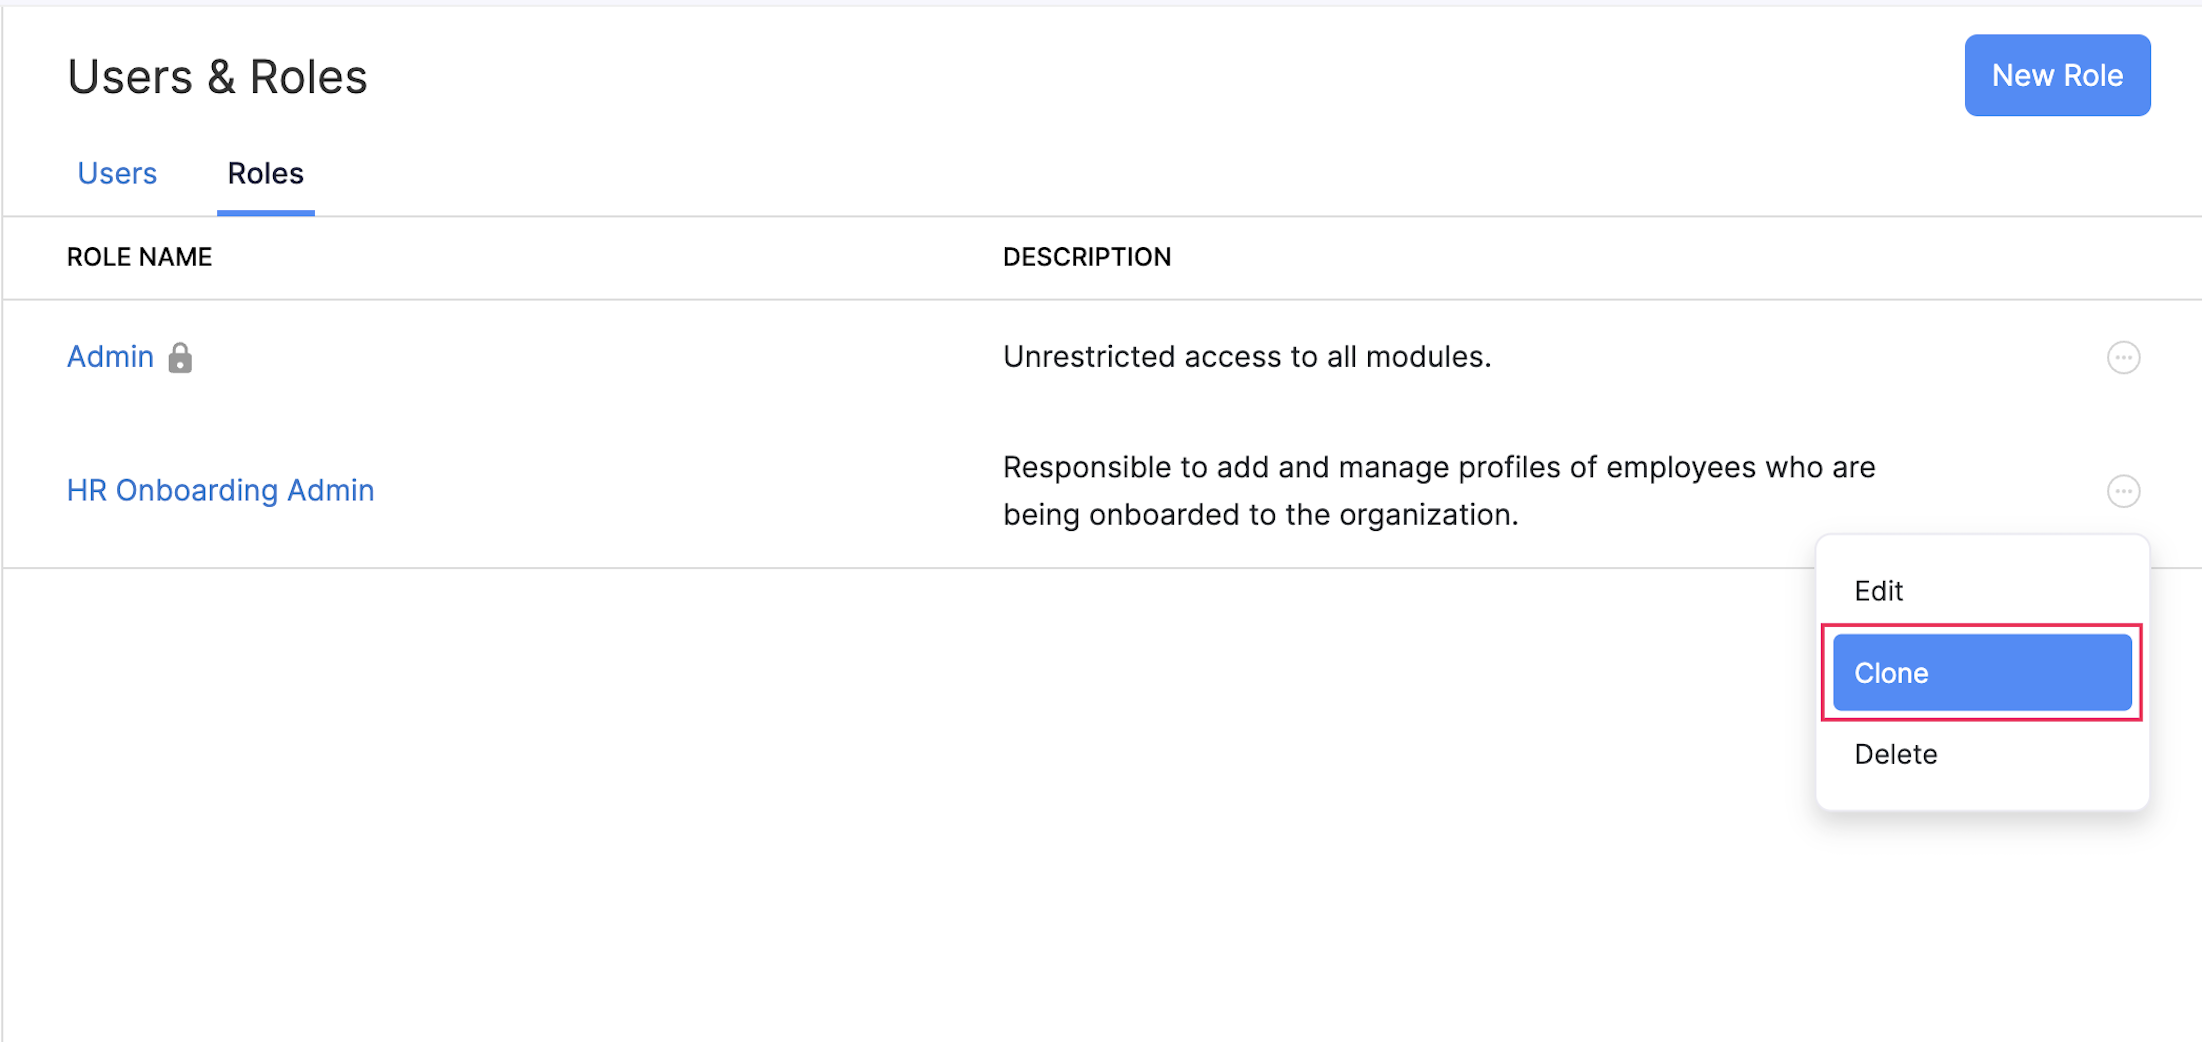
Delete Role
To delete a role:
- Navigate to Settings and click Users & Roles.
- Switch to the Roles tab.
- Click the More icon next to the role and select Delete.
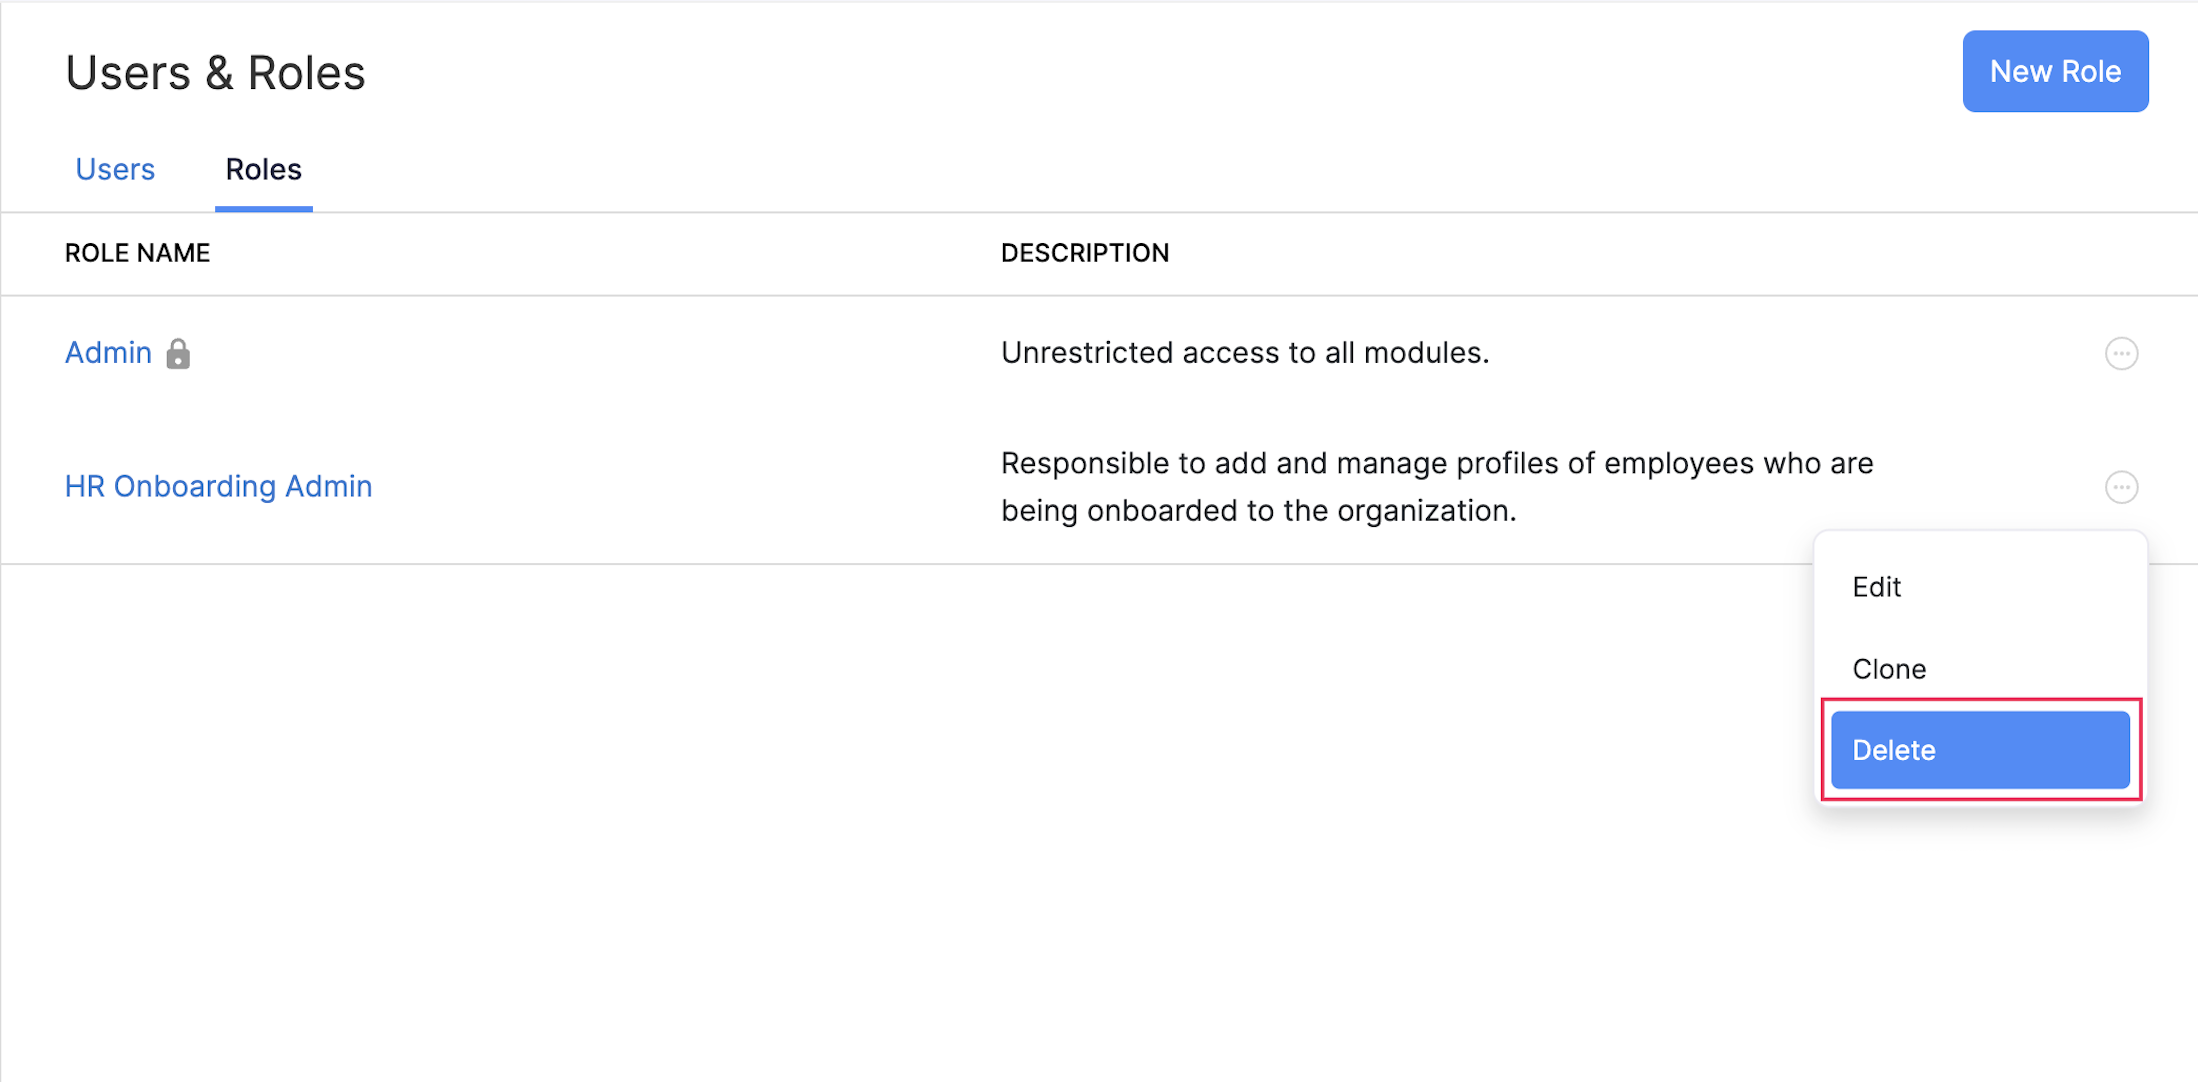
- Click Yes in the pop-up window which appears.